


We may receive a commission when you use our affiliate links. However, this does not impact our recommendations.
 The limited crosscut capacity of my cabinet saw made it a challenge to cut wider boards, so I designed an infeed table that hangs on a wall when not in use and quickly and securely attaches to the front rail of my saw with Universal Fence Clamps (Rockler #31373).
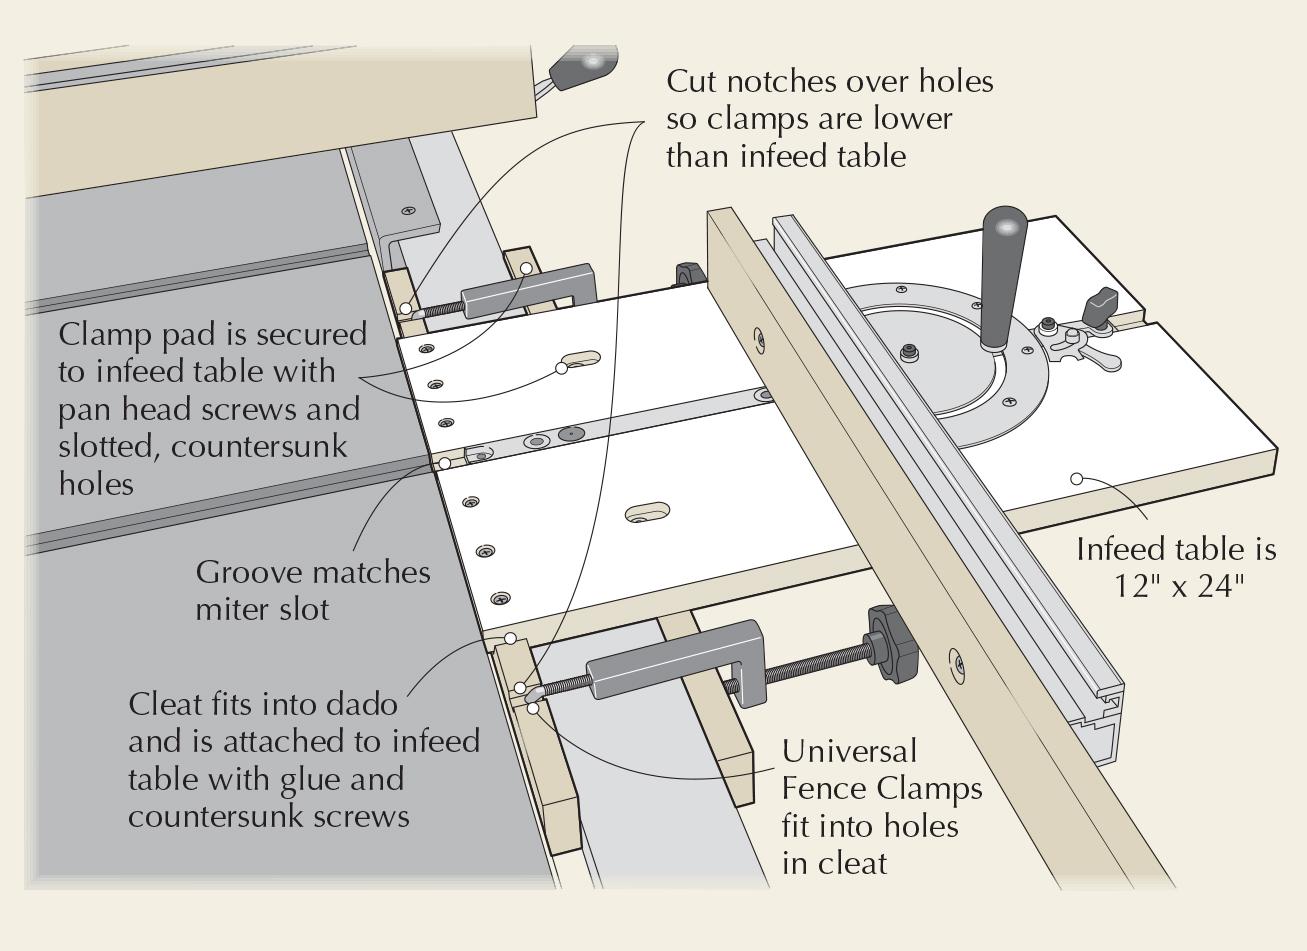
To make the infeed table, use a piece of melamine or other stable material that measures approximately 12″ wide x 24″ long. Cut a lengthwise groove in the center of the board that matches the miter slots on your saw.
Cut two pieces of 3⁄4” hardwood 2″ wide x 18″ long for the fixture’s front cleat and clamp pad. Beneath the front edge of the infeed table, cut a 1⁄8“-deep x 3⁄4“-wide dado that fits the hardwood cleat snugly. The location of the dado is determined by the gap between the front edge of the table saw and its guide rail.
Use glue and countersunk screws to secure the cleat into the dado. The infeed table’s surface needs to be flush with or slightly higher than the table saw’s surface, so you need to glue a hardwood shim beneath the portion of the infeed table that rests on the saw’s rip fence rail.
To attach the clamps, drill a hole about 11⁄2” from both ends of the fixture’s cleat. The clamps need to be lower than the infeed table’s surface, so cut a notch at both holes.
The clamp pad is secured to the infeed table with two pan head screws that slide in slotted, countersunk holes milled into the infeed table’s surface.
Align the fixture with the table saw’s miter slot and tighten the clamps. The miter gauge should slide easily between the infeed table and table saw. If the infeed table’s cleat isn’t perfectly square to the table saw and the slots are misaligned, you can shim either side of the infeed table’s fence with painter’s tape to adjust the angle.
The clamps and fence hold the table level with any board up to about 24″ wide. With a wider piece, you can add an outboard stand for more support. –Reed Robinson
Here are some supplies and tools we find essential in our everyday work around the shop. We may receive a commission from sales referred by our links; however, we have carefully selected these products for their usefulness and quality.


