


We may receive a commission when you use our affiliate links. However, this does not impact our recommendations.
A modern workbench system
Project #2109 • Skill Level: Beginner • Time: 1 Week • Cost: $400
The Maker Workstation Overview • Building The Top • Building The Base • Furniture & Accessories • CNC Instructions
Most workbenches come with a little history. This history is personal. My very first woodworking project was Tom Casper’s clever and simple, “Workbench in a Weekend” workbench article in the long-gone and revered Woodwork Magazine. It’s a great bench. It got me excited about woodworking. Later while editor at American Woodworker, Tom updated it and designed a clever box beam MDF workbench.
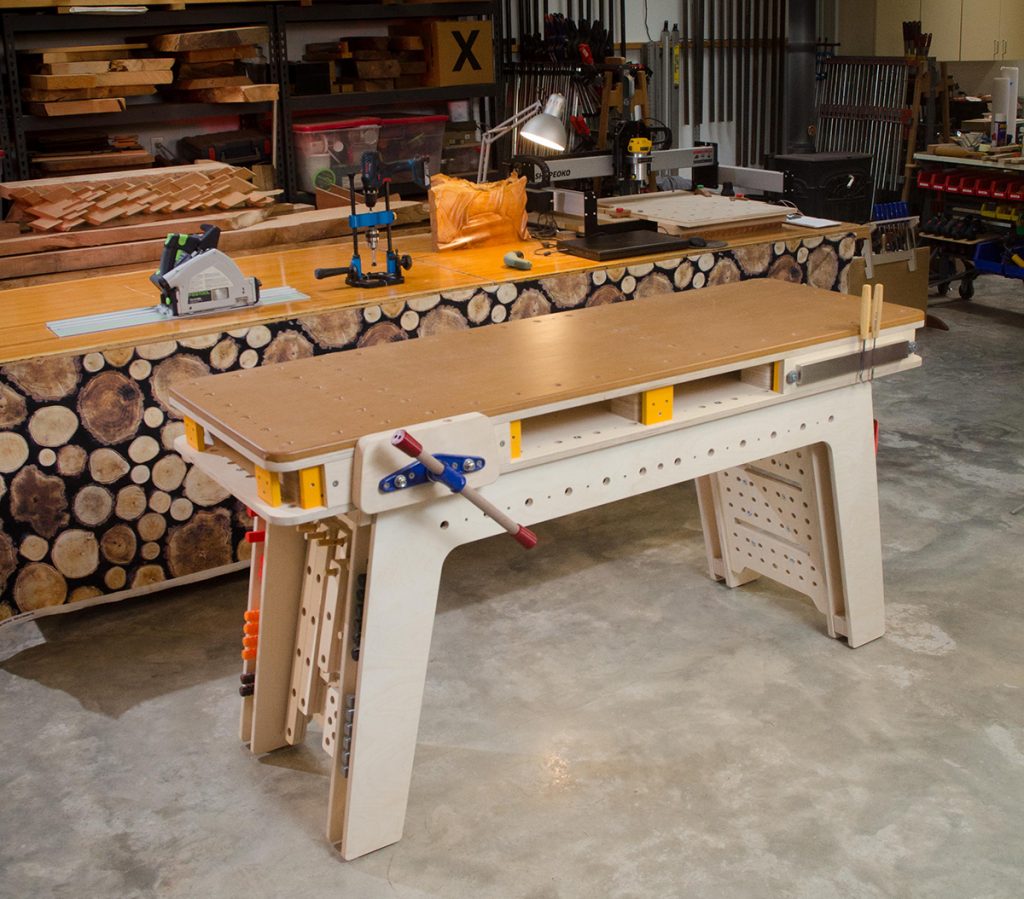
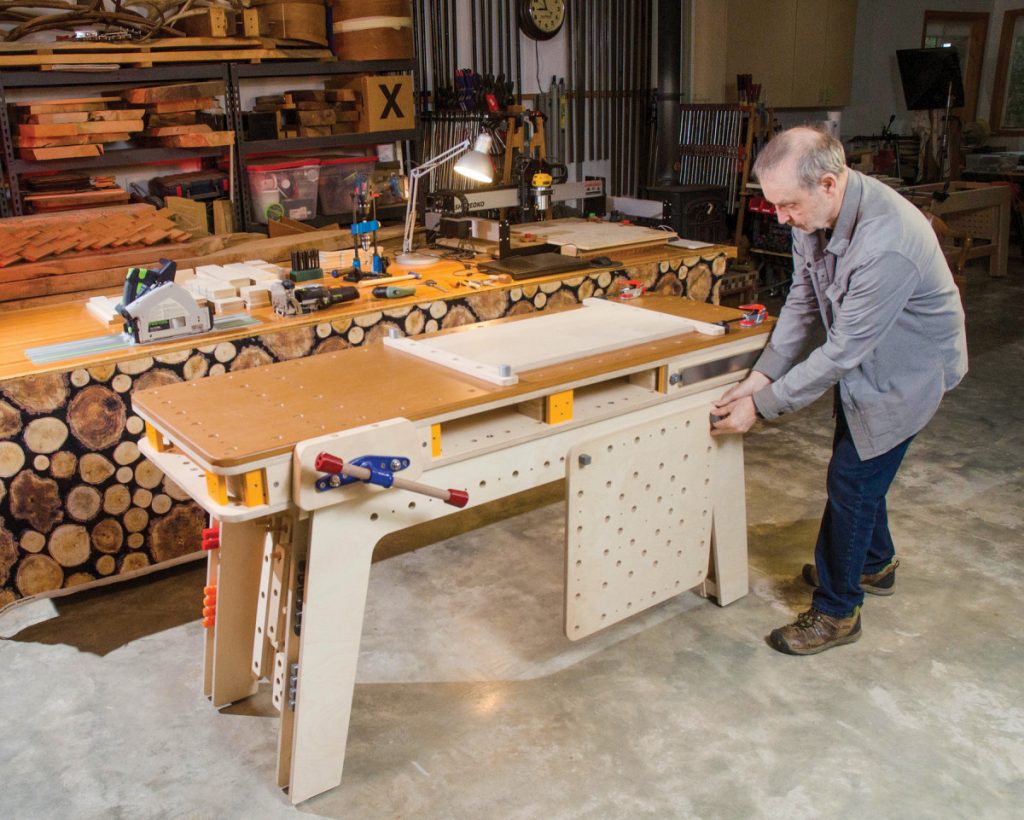
Several years later – over a few beers of course, Tom challenged me to create my own plywood workbench. Being a designer who likes a good challenge, I said I’d think about it. And, so I did. For several years, in fact. The result is a new kind of workbench designed for modern woodworkers and makers. The Maker Workstation. A modern workbench system.
What is a Maker Workstation?
What makes the maker workstation different than conventional workbenches is the various ways it can be modified and the different ways it holds workpieces. Its key feature is that it’s adaptable to different needs and is customizable. It’s a system that uses workstation “furniture” to position and hold work, customizable top and side plates, modules, fixtures, hardware, tool holding capability and accessories.
Unlike traditional workbenches, the Maker Workstation is made out of plywood with a MDF top. Instead of hardwoods and classic joinery, it takes advantage of the stability and strength of Baltic Birch plywood, stack lamination, torsion box and I-beam construction, and the flatness and surface hardness of MDF. Instead of joinery, it’s assembled with a handful of Festool Domino joints, glue, screws, and a lot of T-nuts.
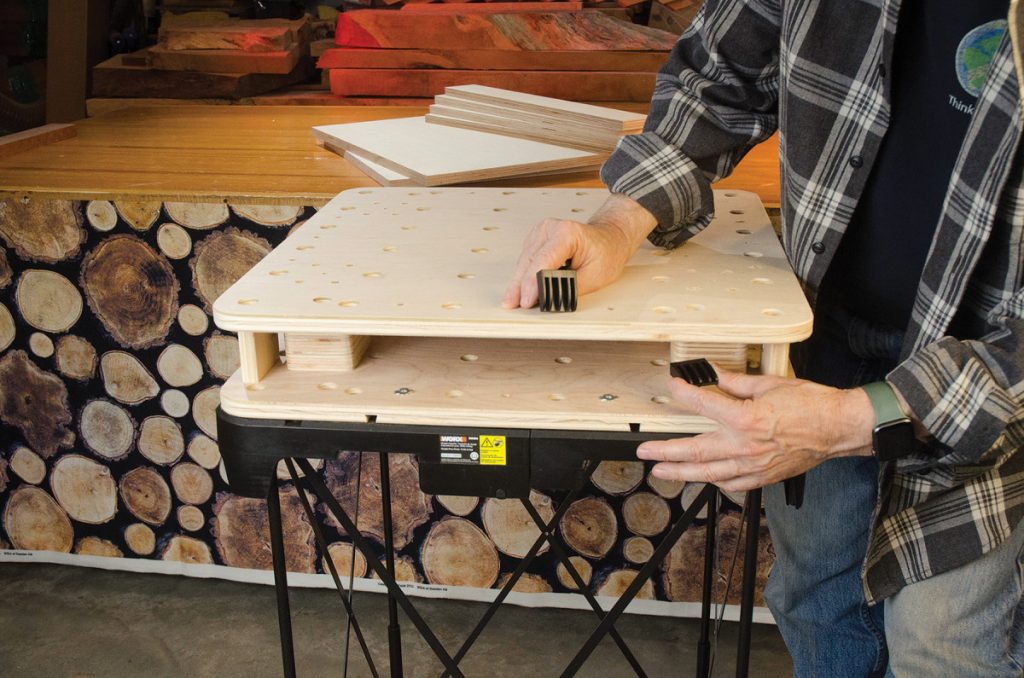
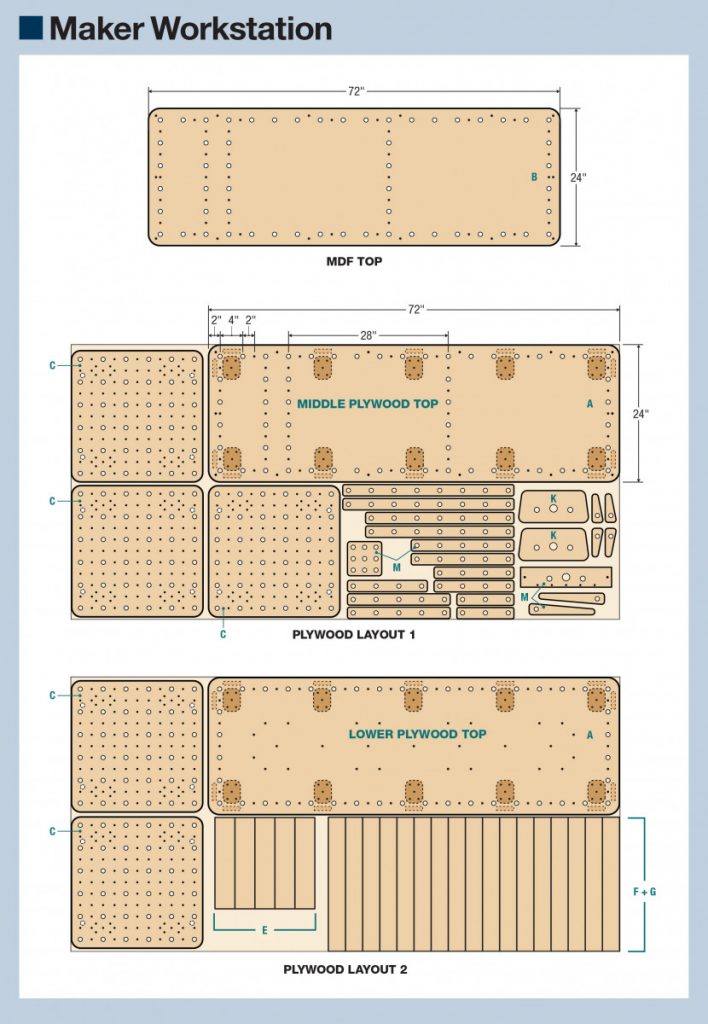
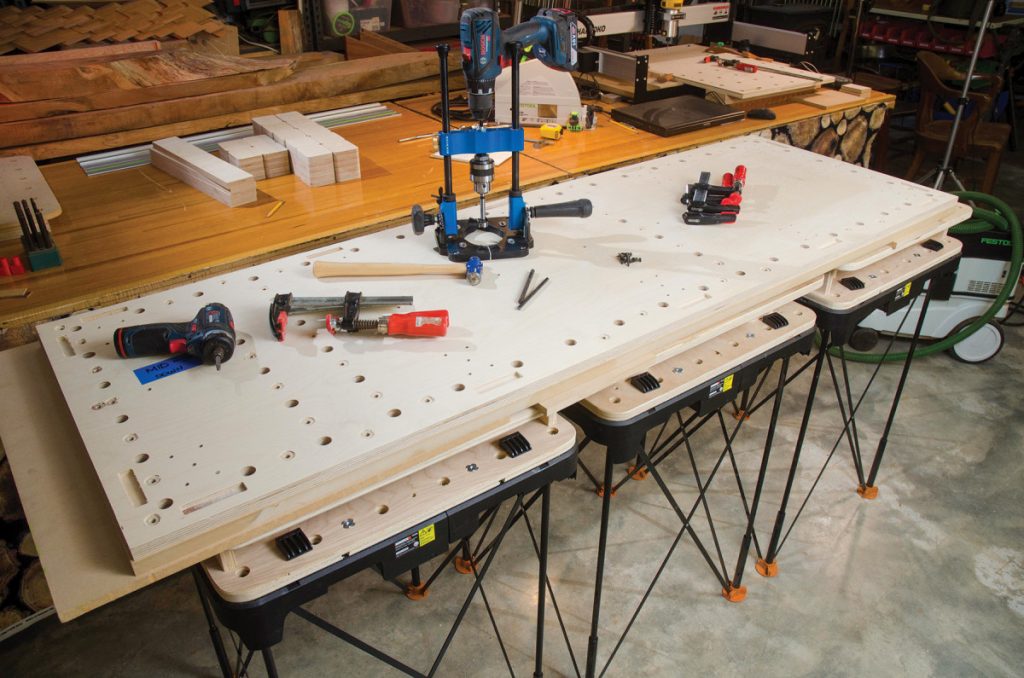
The top is a complete structural unit that performs like a heavy-duty torsion box. It’s heavy, flat and stiff. The middle and bottom layers are 3/4“ plywood separated by five-layer-thick, glue laminated risers. The replaceable work surface attaches to the middle layer with screws and T-nuts. The laminated plywood base utilizes the strength of the top unit, has no long stretchers, is stiff and stable and is completely open in the middle.
What can the Workstation do?
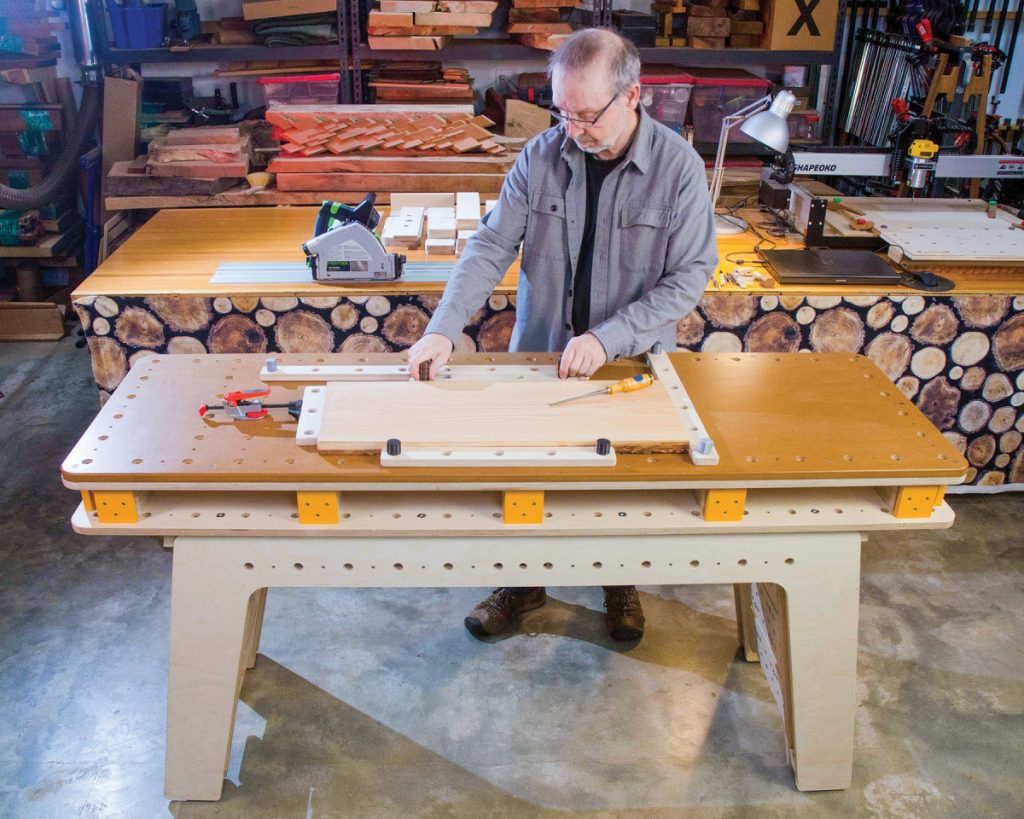
The maker workstation handles traditional woodworking tasks and adds new capabilities for modern power tool woodworkers. By combining a grid of dog holes and workstation furniture the user can hold a work piece of any shape and position it where it’s most comfortable to work with. With modules, plates, and tool sets it can adapt any woodworker or maker task or project.


The bench is versatile and adaptable, for assembly, workholding in all places and keeping yourself organized.
Traditional vs New Workbenches
Refined over centuries, traditional workbenches are a superb platform for hand tool woodworking tasks. They really work. I’ve used them for decades and built several. With heavy hardwood construction and a flat top, they handle the physics of chopping, cutting, and planning. Parts are held with vises, stops, holdfasts and clamps. As good as they are for working with hand tools, there are a few shortcomings when working with other tools. Work height, part positioning and holding and adaptability to task are top of the list.
What’s Different About the Maker Workstation?
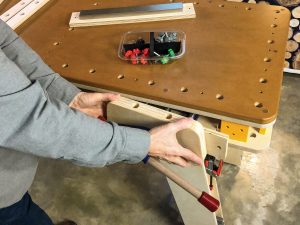
For improved power tool control and closer observation without bending over, the maker workstation is about 2“ taller than a traditional workbench. Unlike a classic bench where parts are held down to the top with holdfasts and clamps, the workstation uses dedicated furniture, hold downs and accessories to control parts both laterally and vertically.
A major design goal is the ability to position and secure any size or shape work piece for using modern power tools like Festool’s Domino joiner, track saws and tasks like carving or project assembly. “Position” is key here. Because the workstation grid requires CNC accuracy to build, that accuracy is available to the user as a tool.
All components are designed around a precision grid system. A grid system is a system of lines and intersections based on a set of standard dimensions designed to enhance a task. If the work surface and components are all accurate to the grid, they can interact. In the case of the maker workstation, the dogs, hold downs, furniture and plates can quickly be moved around to position and secure workpieces for various tasks.
Primary grid lines are spaced 4“ with 3/4“ dog holes. Sub-grids sit underneath. (NOTE: A 96mm/20mm metric version of the maker workstation will be available soon.) Combining known spacing, measurement and reliable 90° angles let the user position and square a workpiece anywhere on the bench for work and project assembly. From a designer’s perspective, a grid-based system opens up a lot of exciting possibilities. Yes, there’s a lot more to come.
Maker Workstation Online Articles
Among the challenges when writing an article like this are fitting a lot of information into a limited space. Being a new kind of workbench, significant print space needs to be dedicated to introducing the design and features of the workstation. New techniques, tools and methods, and a step-by-step building process also require a lot of room. With those limitations in mind, this initial article (same as it appears in the June 20201 issue of Popular Woodworking) is focused first on introducing the Maker Workstation. The article is supported with companion online articles that aren’t space limited and videos to help Popular Woodworking readers build a maker workstation. Included with the online series are DXF files for making workstation and side bench templates, suggestions for getting templates made, and PDF drawings of the workstation (see bottom of article.)
Upcoming companion articles:
• A Video Introduction to the Maker Workstation
• A Step-by-Step Guide to Building the Maker Workstation Top
• Building the Maker Workstation Base
• Maker Workstation Furniture, Components and Vise Module
• Using Large, Small and the Shaper Origin CNCs to Make the Maker Workstation
Workstation System Components
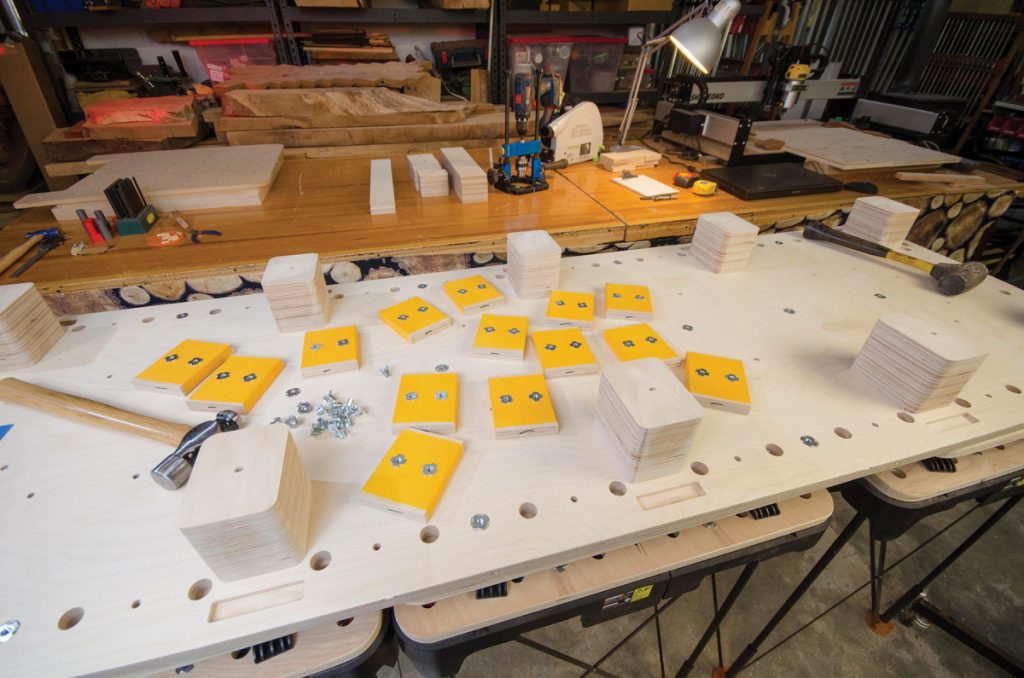
Workstation Furniture
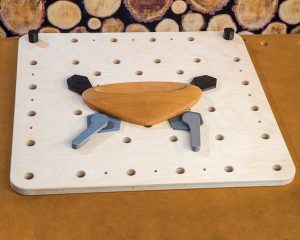
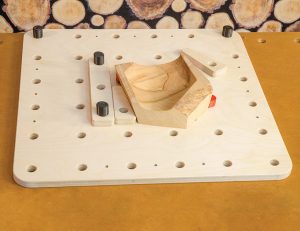
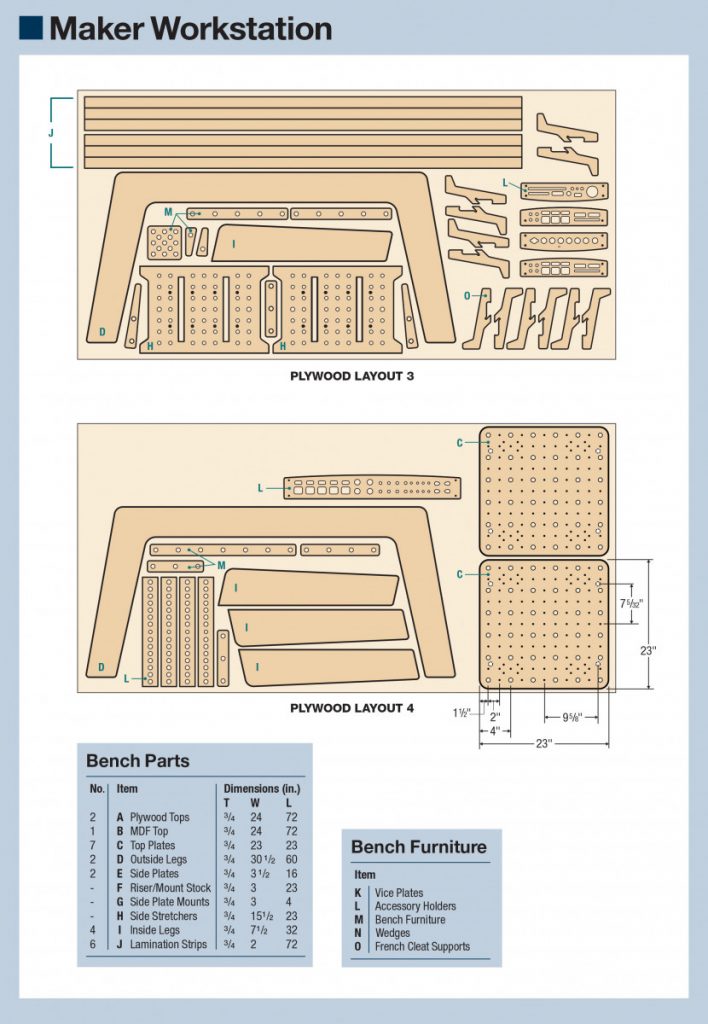
Most maker workstation furniture is 2“ wide and dog holes are spaced 4“ apart. This allows users to position and square workpieces in convenient and comfortable locations. Work can be secured with wedges, dog clamps or threaded hold downs.
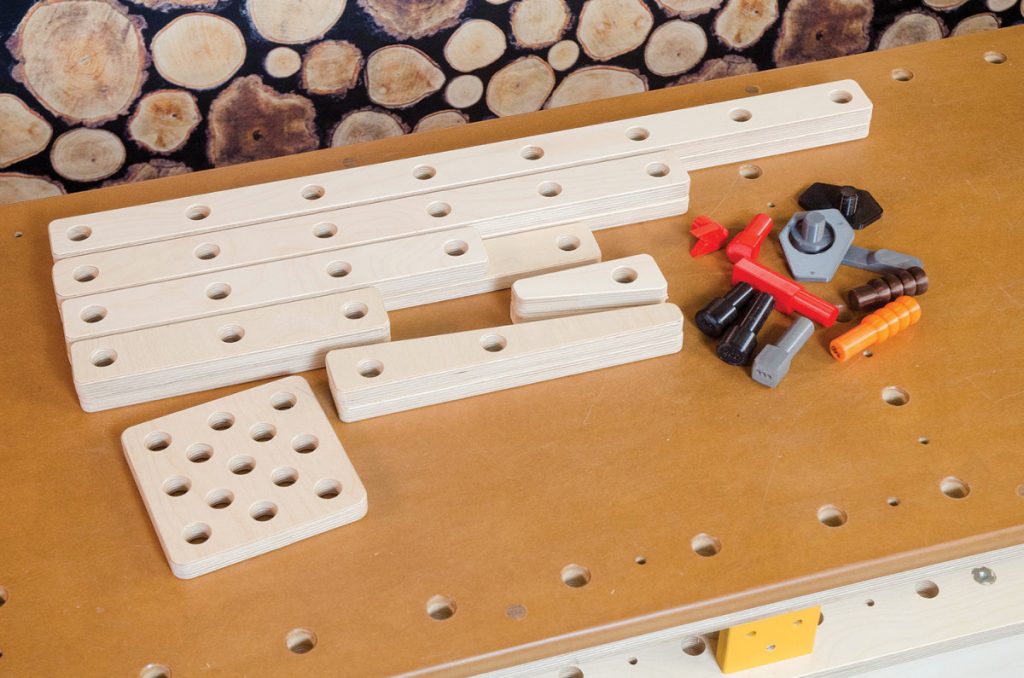
Dogs, furniture and a cheese plate. A workstation collection should include several sizes of stops and wedges for workholding.
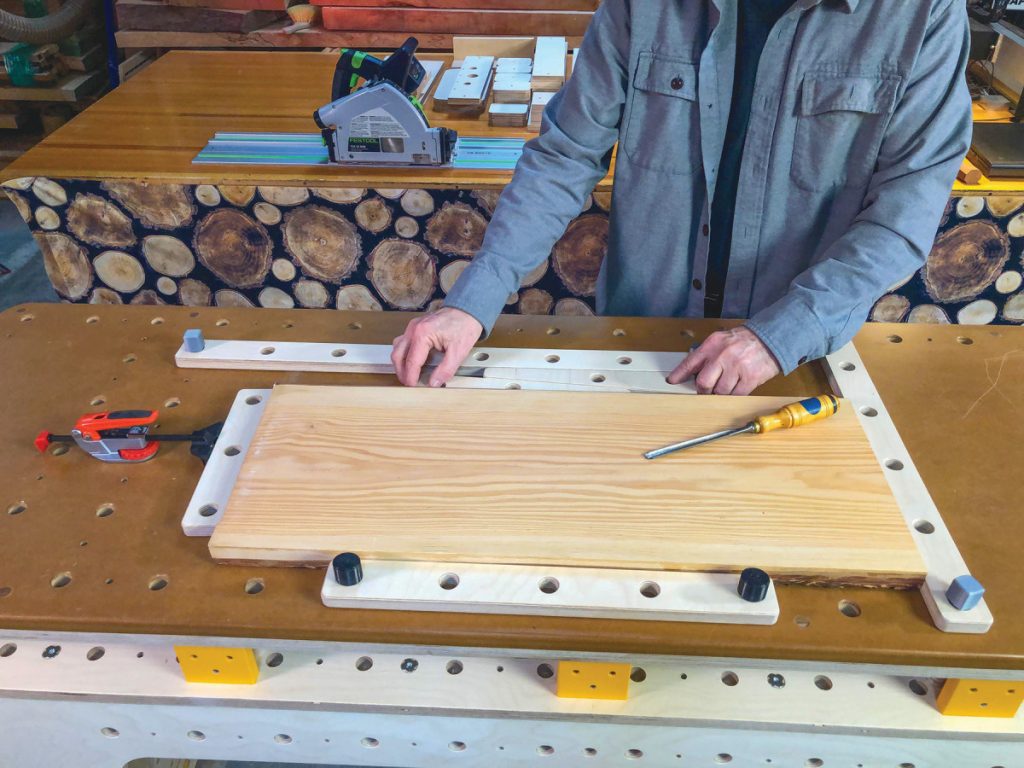
Stops are held in place with 3D-printed pins, and a quick-clamp and an a wedge secure this panel for some carving.
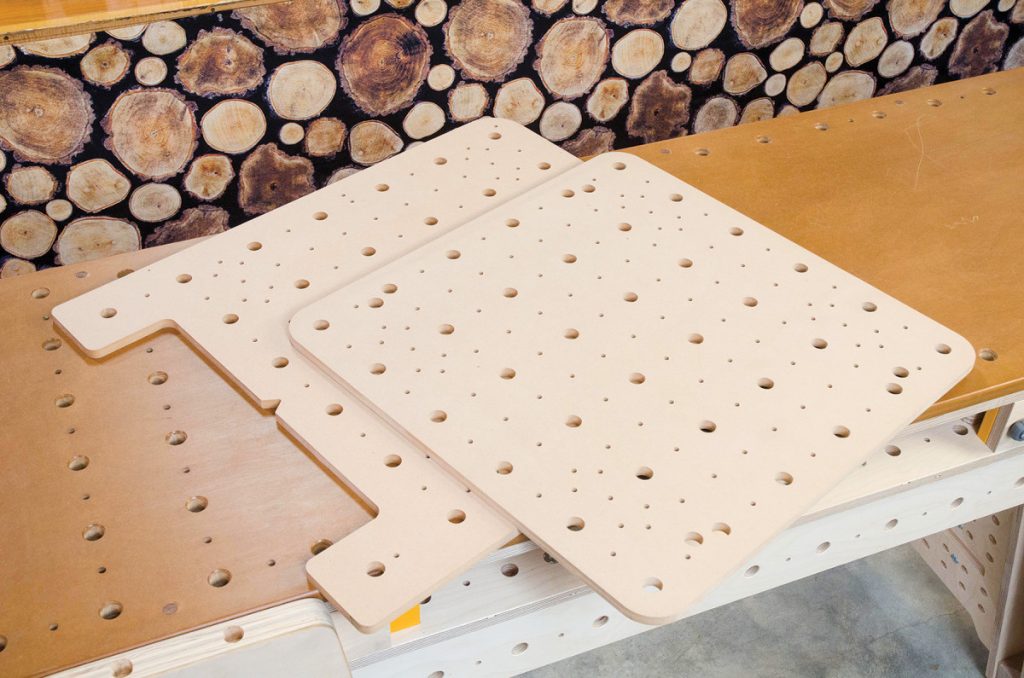
Top Plate System
Rather than a sea of holes interrupting the work surface, add-on top plates give users flexibility. A high density or custom arrangement of dog holes and hold downs can be added by mounting a top plate as needed. The plates register to the work station via dogs and can be attached via hold downs. The 72“ workstation is designed for three 23“ top plates. A great use of top plates is to add extra holding versatility as needed. Added dog hole density gives the user flexibility to hold smaller or odd-shaped work pieces. Custom arrangements, specialty fixtures and hold downs allow the maker station to adapt to the task.

The top plate is one of the most versatile accessories for clamp objects of any shape. A bonus is that the clamping surface is completely removable without having to unclamp the workpiece.
Top plates can also be created for specialty fixtures and jigs or as spoil boards that protect the top for track saws, drilling and routing

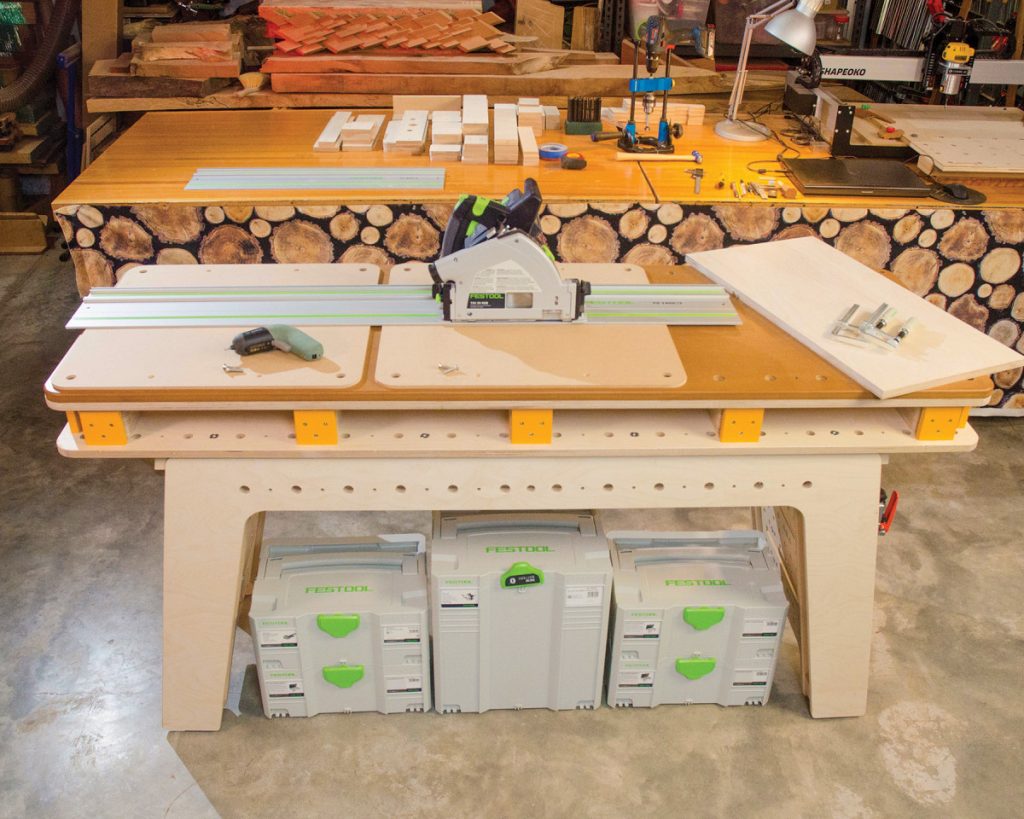
Stacks are units that turn a Worx Sidekick work table into a side bench that can extend the workstation’s work space. They can also be used as elevated, open-sided work surfaces for power tools, assembly and more.
Because the workstation and base use the same grid system, top plates can be used horizontally and vertically. When mounted to the base, the plates are flush to the edge of the workstation top. Dog holes and Microjig dovetail clamps can be combined to position and hold any work piece to the workstation base
Side Plate System
Side plates are 3 1/2“ x 16“ and mounted via 14 side plate mounts along the sides of the workstation. Side plates can be specialized and make it easy to add tool holders or modules to the workstation.

I used a plate with a magnetic strip on my right side to quickly stash hand tools or hold metal parts.
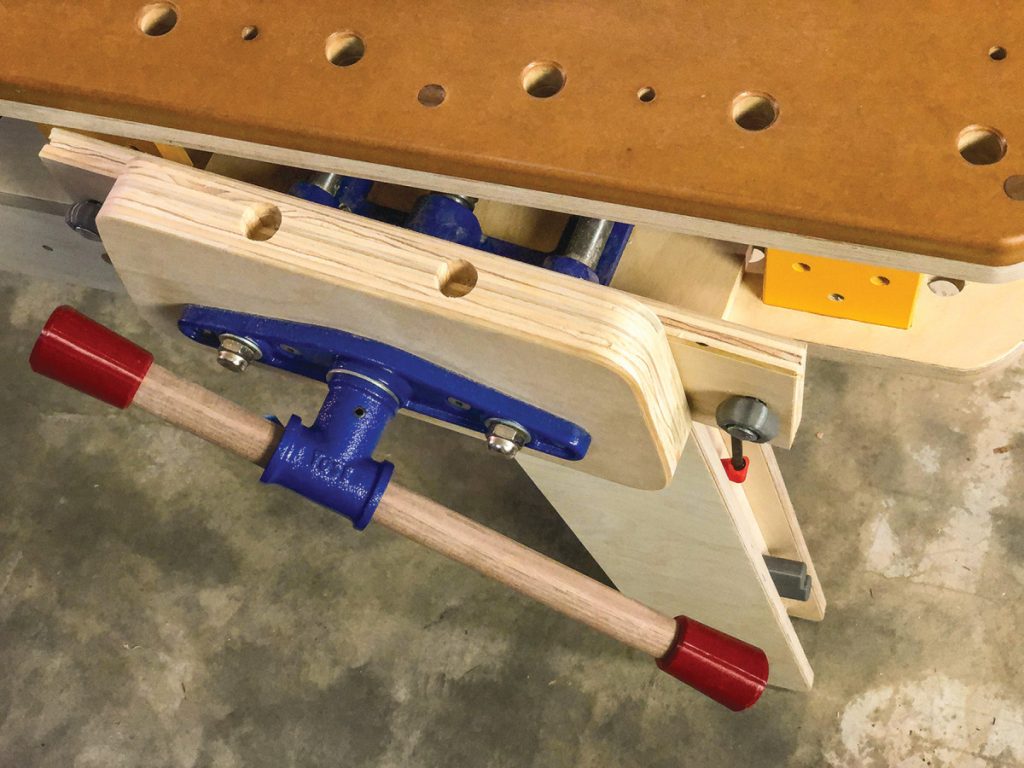
Side plates can also mount modules such as a vise module. Rather than permanently mounting a woodworking vise in a single location, instead the vise is mounted to a module that can be moved to your choice of 10 locations around the workstation. It’s attached with two knobs or screws to the side plate mounts.
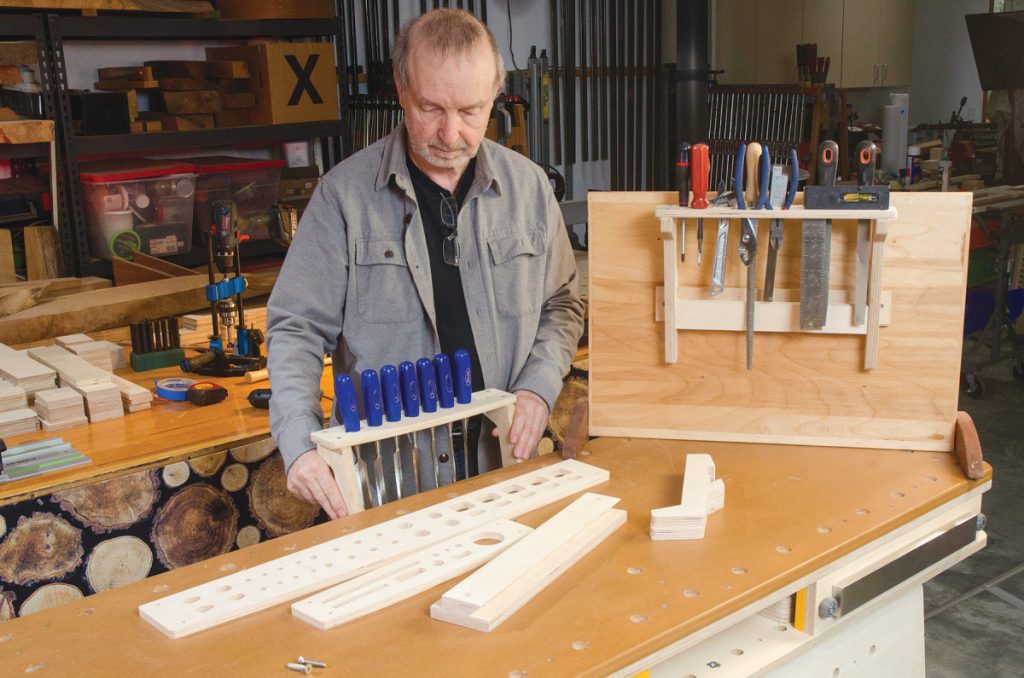
Side plates can be simple or specialized. For those that like to organize their tool sets on French cleat walls, cleat plates can be attached to the workstation. This makes it possible to swiftly move tool sets to the bench as you need them.
Dogs
The workstation uses commonly available round bench dogs and dog accessories that are typically 0.74“ in diameter for 3/4“ dog holes. I purchased several different kinds. The orange ones came with the Worx sidekick and the dark gray dogs have tabs on the end and cushioned tops. The black dogs are slightly smaller at 0.72“ for a looser fit. Every dog has its place. I recommend workstation builders acquire a couple of types and build a starter set of eight or more plastic dogs before beginning construction.
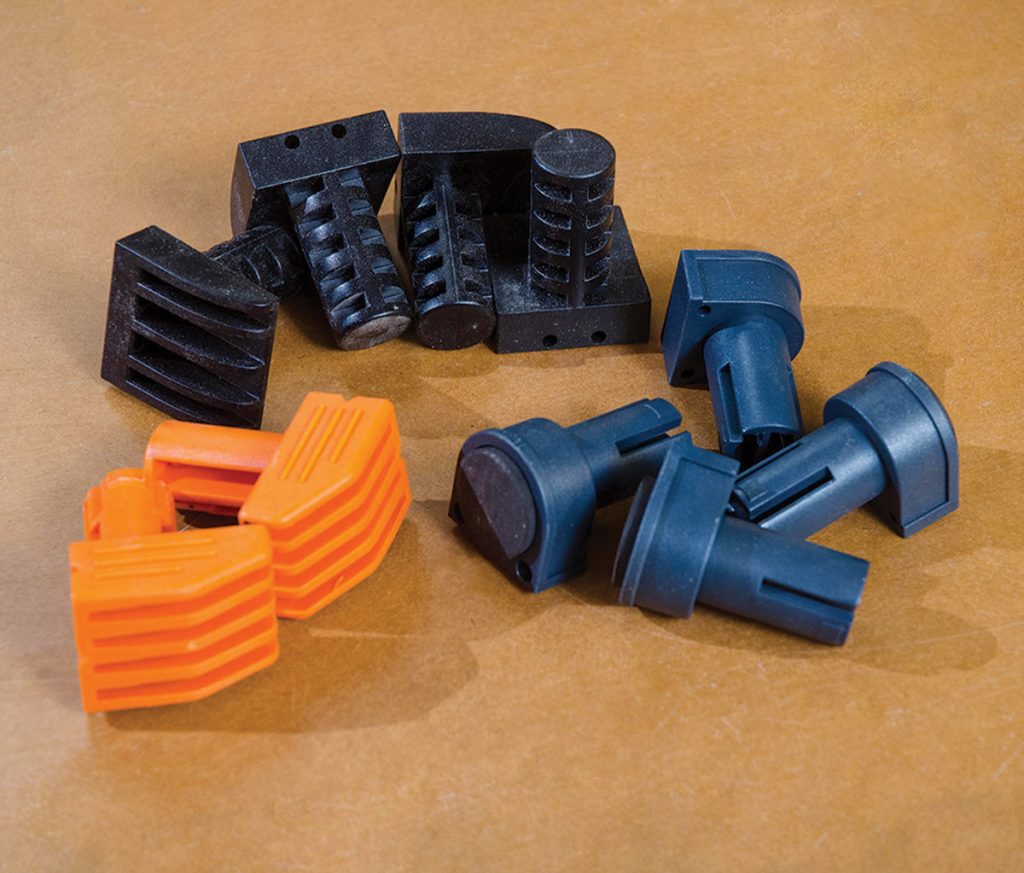
Off-the-shelf bench dogs from Worx and other manufacturers.
Not finding bench dog designs I liked, I created several new designs for specific workstation tasks. I 3D printed and tested dozens for the maker workstation. Though the dogs may be plastic, they’re tougher than they look. I have yet to break one. All the 3D models I created for the maker workstation are free and shared at www.thingiverse.com.
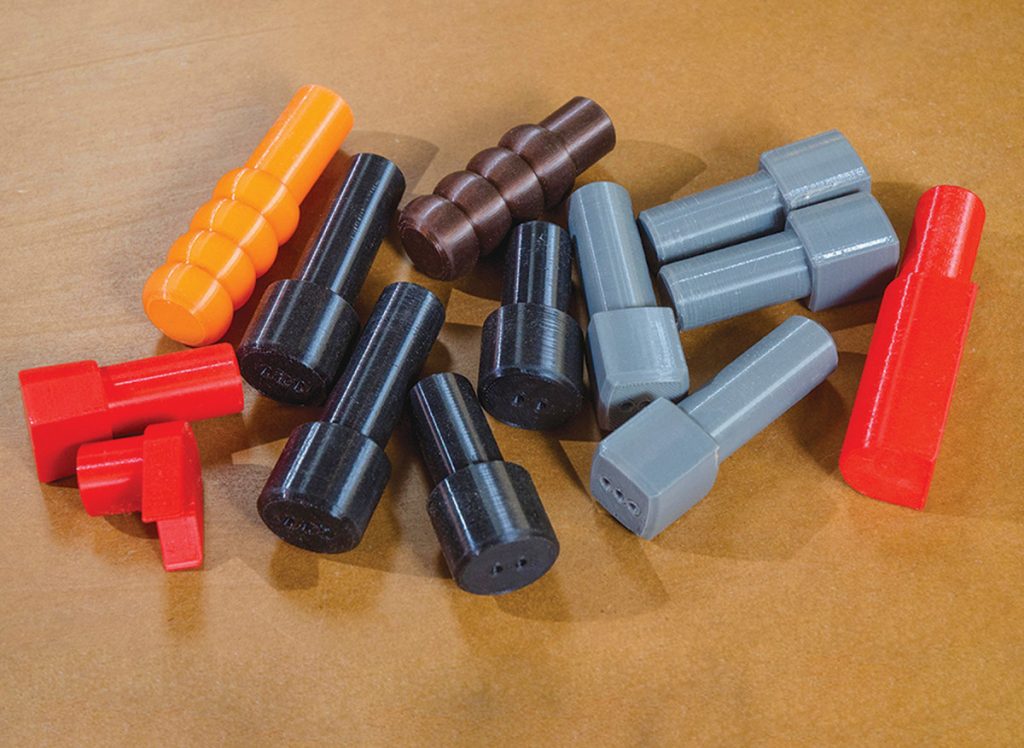
3D-printed bench dogs I created specifically for the maker workstation, including round, square and notched versions.
I print dogs in different colors to indicate function at a glance. Black and gray dogs are standard shapes and mostly used for workstation furniture registration and holding. Red dogs have different face shapes are used for bench stops. Dogs with ridged handles for grip are tight fitting for registering templates and layers during workstation construction. Indented dots, like those used on dice are imbedded into dog tops to indicate dog length so when stored on the workstation legs, I can grab the ones I need. One dot is one plywood layer high, two dots, two layers high, etc.
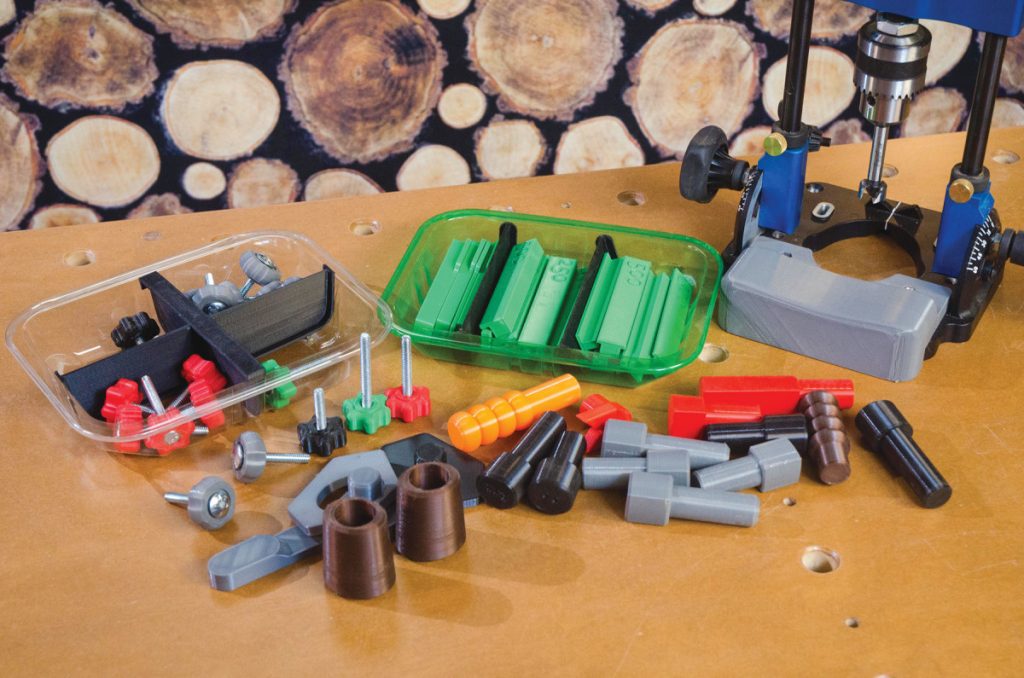
The full complement of bench dogs, threaded knobs and other accessories. I used Rockler’s portable drill guide to drill dog holes at a perfect 90° angle.
3D printers are great design tools and handy for creating jig parts, tool holders and other useful things around the workshop. I created a number of 3D printed parts for cam clamps, vise handles, prototypes of a hand rest that improves the Rockler Portable Drill Guide, soft plastic cushions to make the adjustable feet stickier and spacer sets for the upcoming workstation Festool track saw module that integrates the tool with the maker workstation.
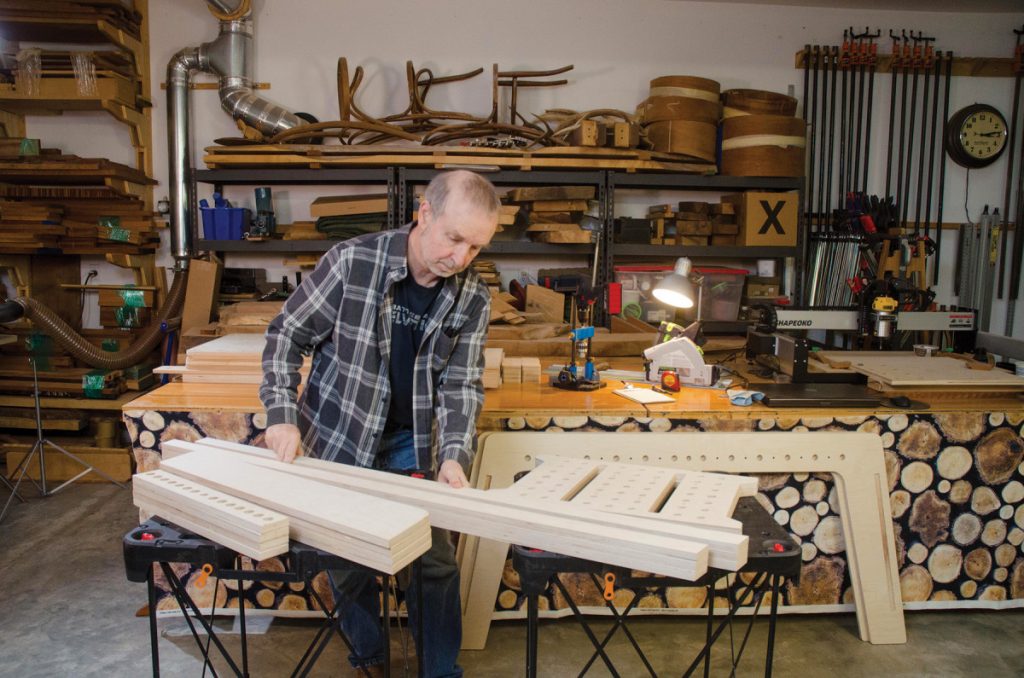
Building the Maker Workstation
The maker workstation is designed to be built by experienced beginners to advanced woodworkers as long as they’re comfortable with basic woodworking tools and tasks. Being primarily made of plywood, it costs around $300 or so to build.
Though plywood construction might imply casual, building the workstation demands a commitment to working at a high level of precision, CNC level precision. Since many woodworkers don’t yet have access to digital woodworking tools, I designed this project to be made with CNC-made templates and power tools. DXF template files and PDF drawings are available with the companion online articles. With that in mind, I’ll take you on a tour of how the templates work and a new woodworking tool I used to build the maker workstation.
First, I Built a Bench to Build a Bench On
Among the challenges building my first workbench were two classic woodworkers chicken and egg questions: How do you build a workbench without a workbench to build it on? How do you build it without a shop full of tools? I struggled with a rickety Workmate and too much time working on the floor using just an old Skillsaw and a drill for tools. It was a great bench but not fun to build. So, in honor of this being the 25th year since that first bench, I approached this project in much the same way—as a new woodworker without a bench to build on and minimal tools. This time I put together a modern toolset and used a Festool Tracksaw, a Rockler Portable Drill Guide, a router, and cordless drill.
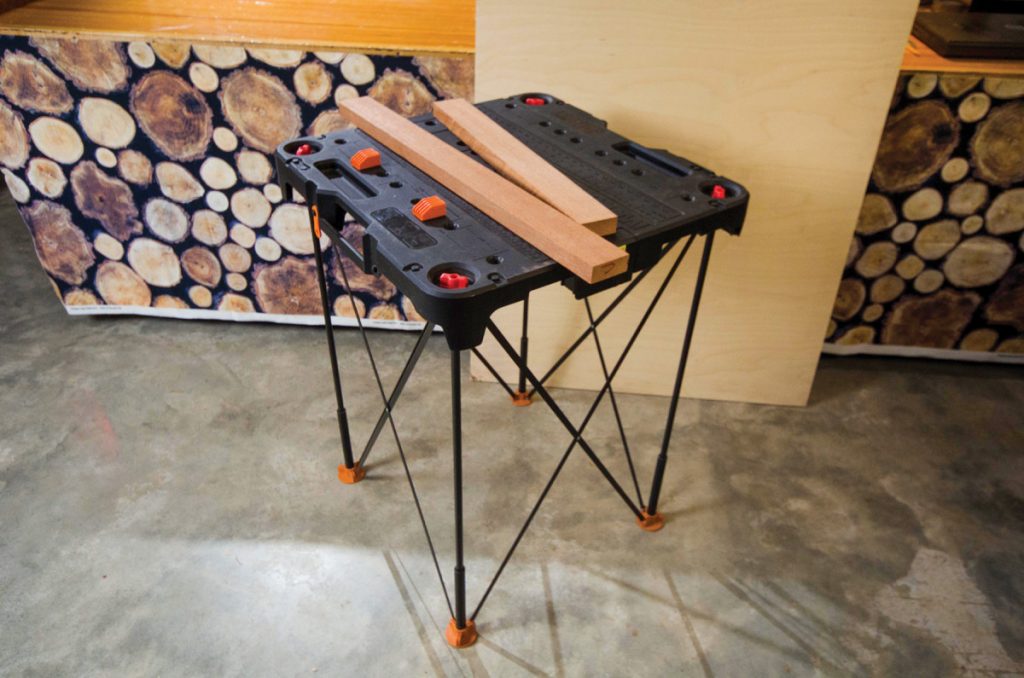
The bench build starts on an inexpensive worktable (that’s turned into a more versatile worktable once the bench is built).
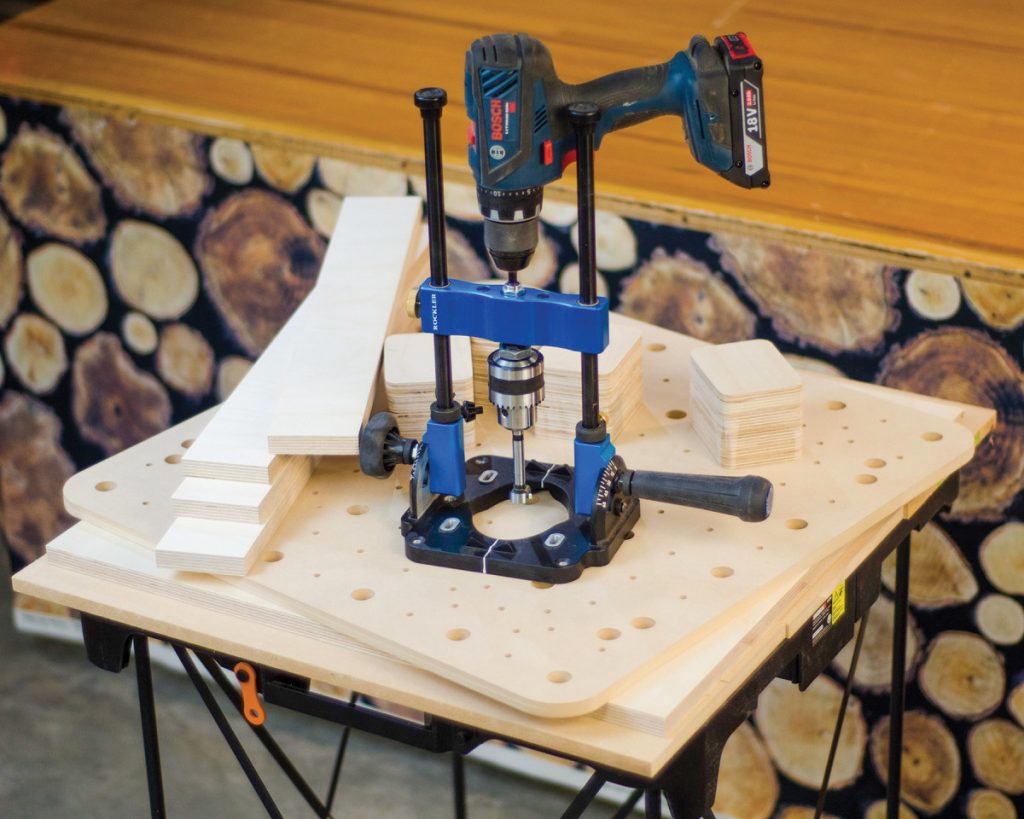
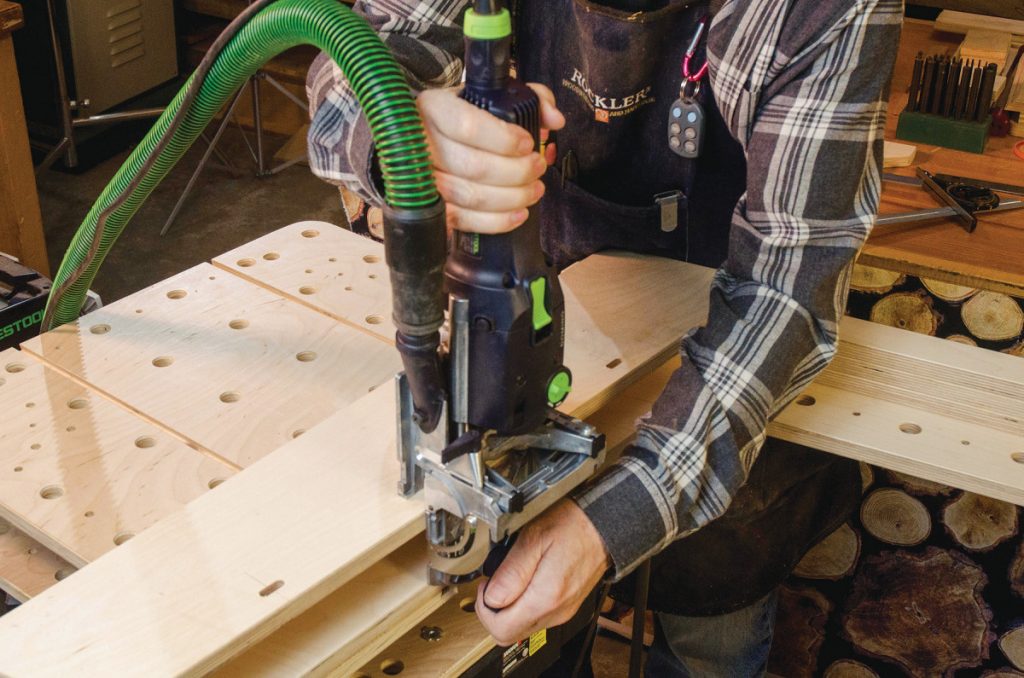
A portable drill guide is one highly recommended tool for this build. Rockler’s is one of the best out there.
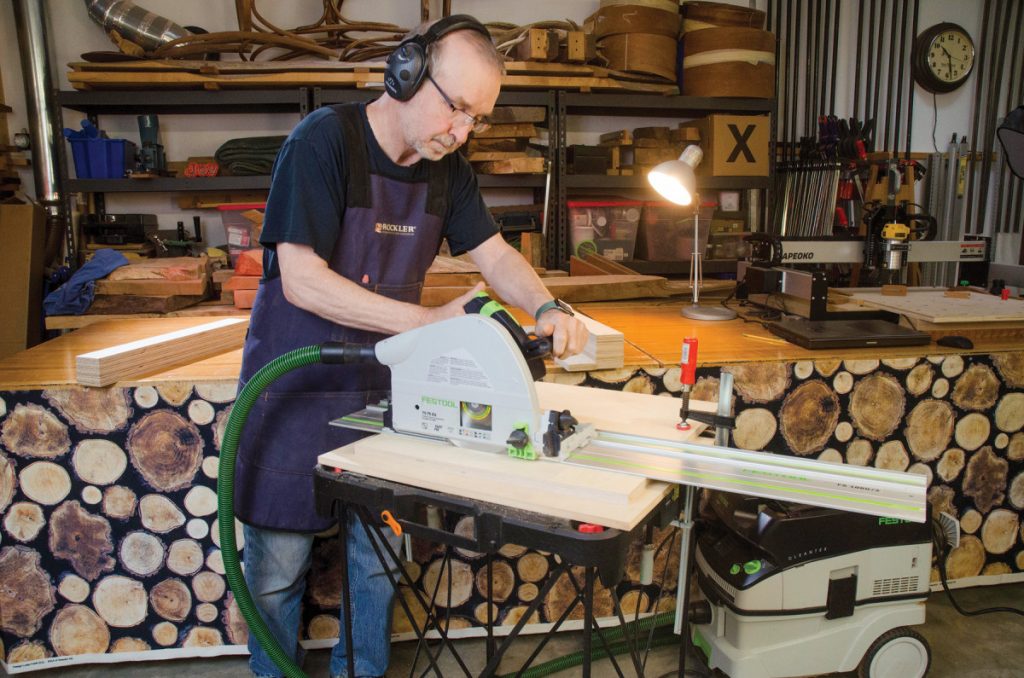
A track saw is also an indispensable tool for making this workbench. It’s easy to make precise, repeatable cuts, and it’s much easier to bring the saw to the plywood than try to cut full-size sheets on a table saw.
A dedicated offset block helps align the track saw track.
A series of holes drilled in the base of side bench starts the grid off and keeps the plates aligned during assembly
Riser blocks are made from the offcuts, five stacks of plywood thick, and elevate the working surface to match the Maker Workstation.
The dogs that come with the Worx worktable fit the dog holes on the completed side bench.
First, I built three small workbenches to build the 72“ workstation on. The Maker Side Bench is a smaller, simplified version of the Maker Workstation—same concept and construction with less parts, make it a great warm up for the main event. Plus, when you’re done, you have same height side benches that expand the physical boundary of the maker workstation.
I started off by using the excellent, 32″ tall Worx Sidekick portable work table as a foundation. Using a template, I built what I refer to as a “stack” that mounts onto the Sidekick, that turn it into a portable woodworking workbench with many of the features of the full-sized maker workstation.
Precision is Key to Maker Workstation
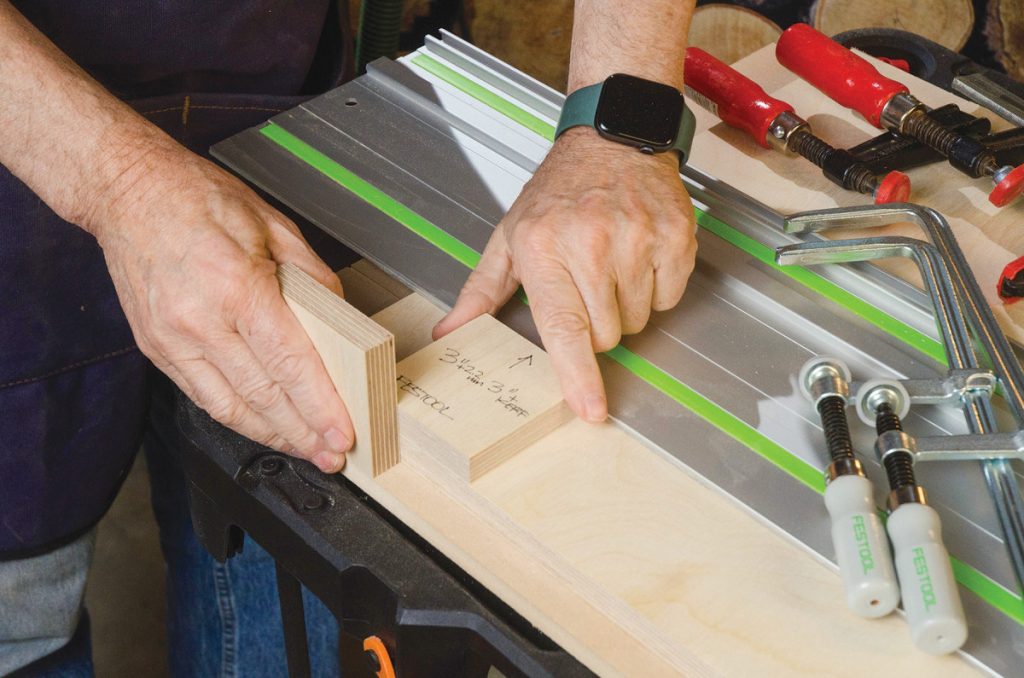
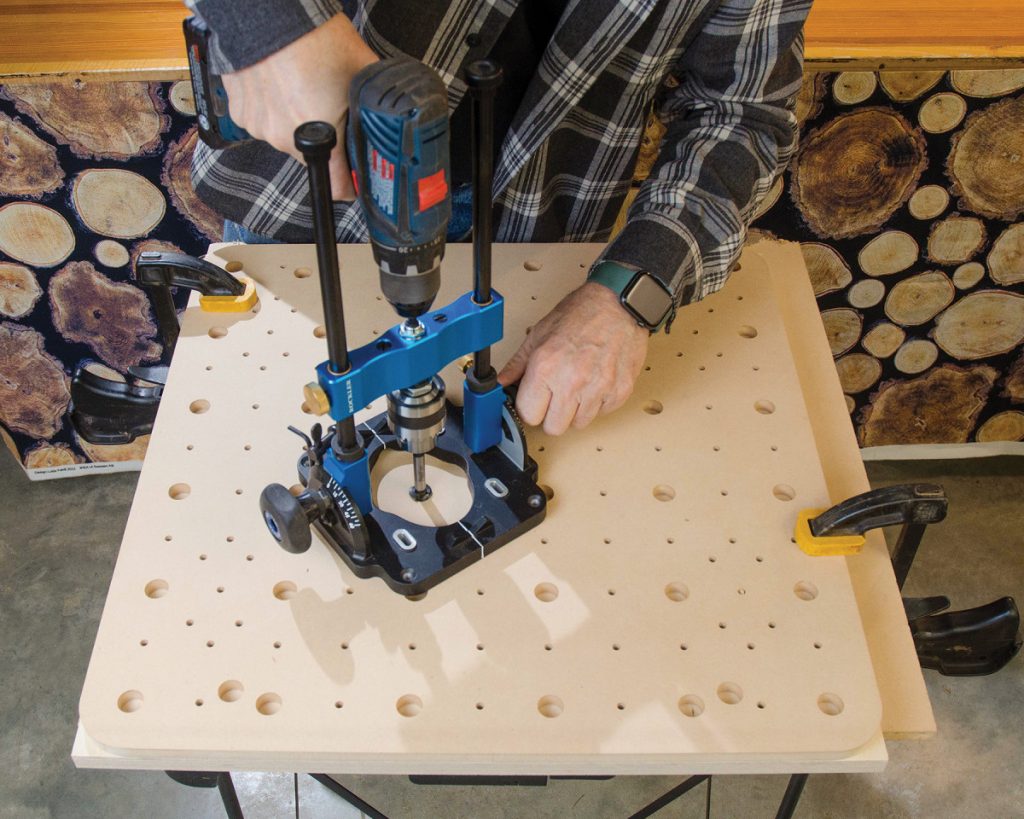
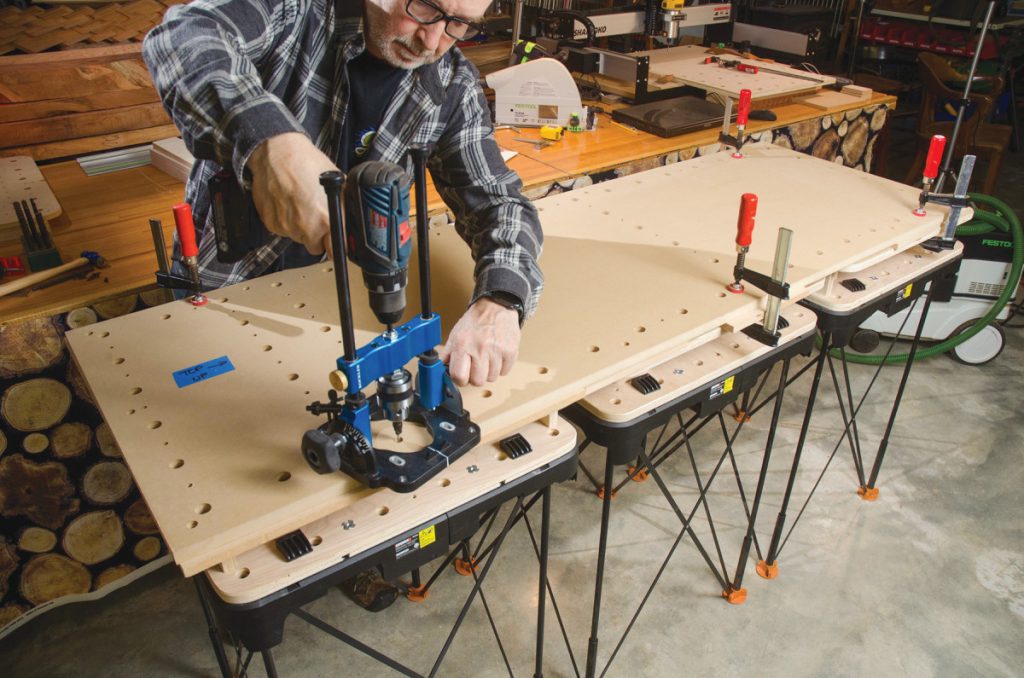
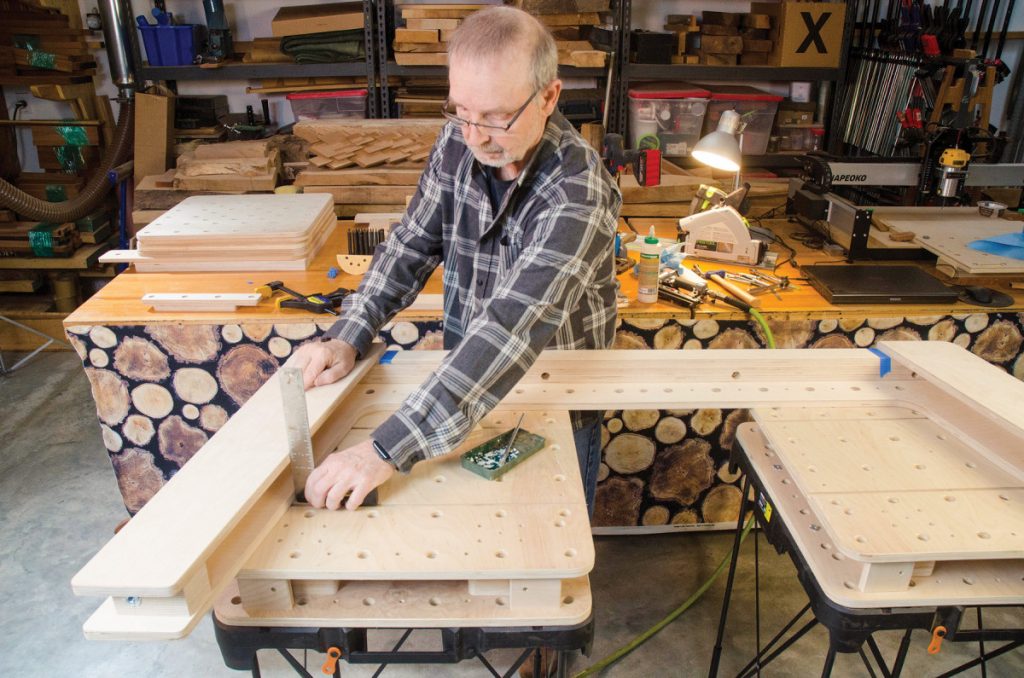
For the workstation grid system to work, every component has to be precise. Precision templates are the critical ingredient to making the workstation. Armed with a CNC-made template and a new tool, the Rockler Portable Drill guide, you can come close to CNC accuracy. The templates use dogs for registration to step along the 72“ workstation layers.
![]()
Construction
An MDF template ensures you’re able to accurately drill all of the grid holes.
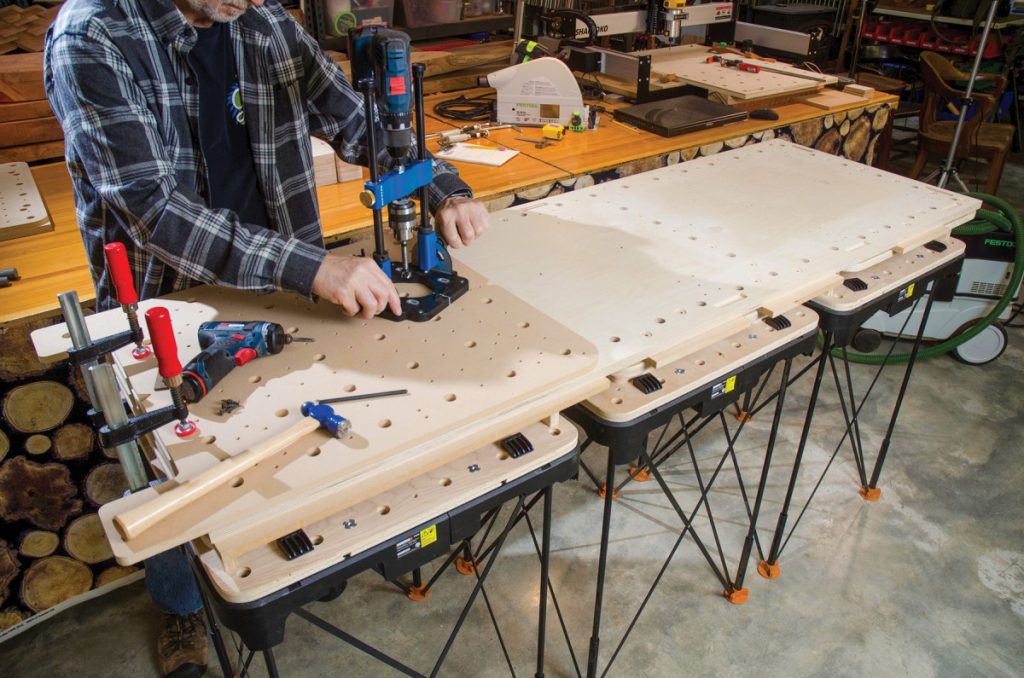
Align the template on one side of your top (start with the middle, plywood layer) and use the drill guide and a 3/4″ Forstner bit to create grid holes.
The template aligns with the holes you previously cut and is held in place with a pair of bench dogs.
The process is repeated for the last part of the top.
With the middle layer done, it becomes the template for the top and bottom layers.
Align the front edge of your
top to the the other top layers,
clamp in place, and drill.
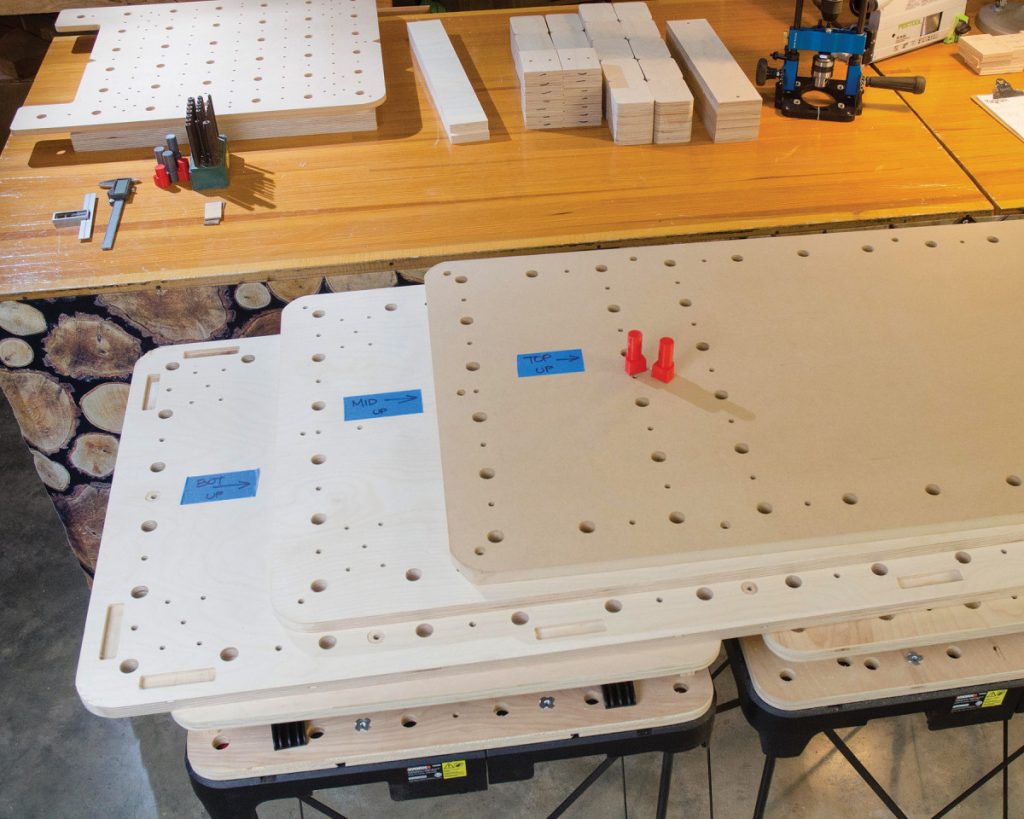
When you’re finished, you should have three identical pieces (though one is made of MDF).
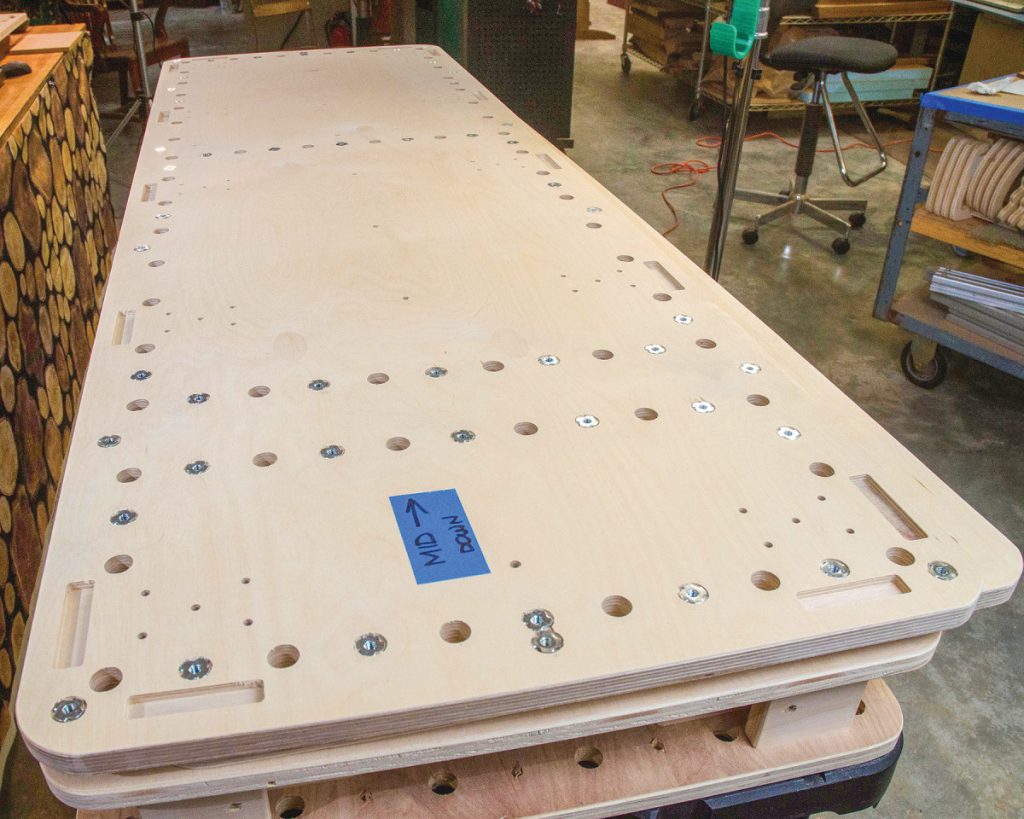
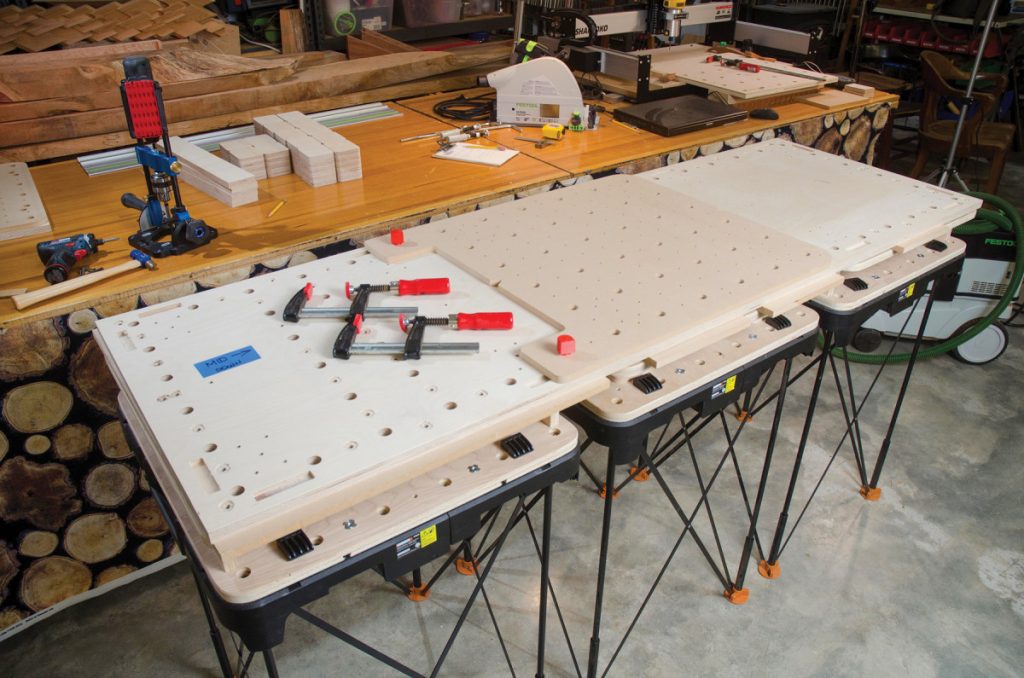
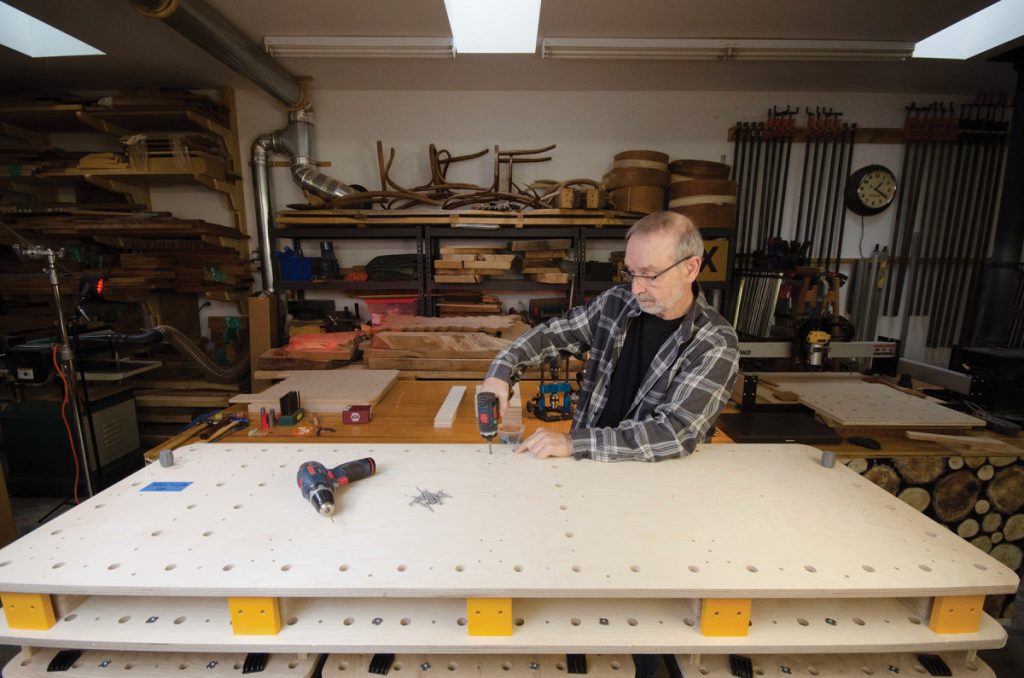
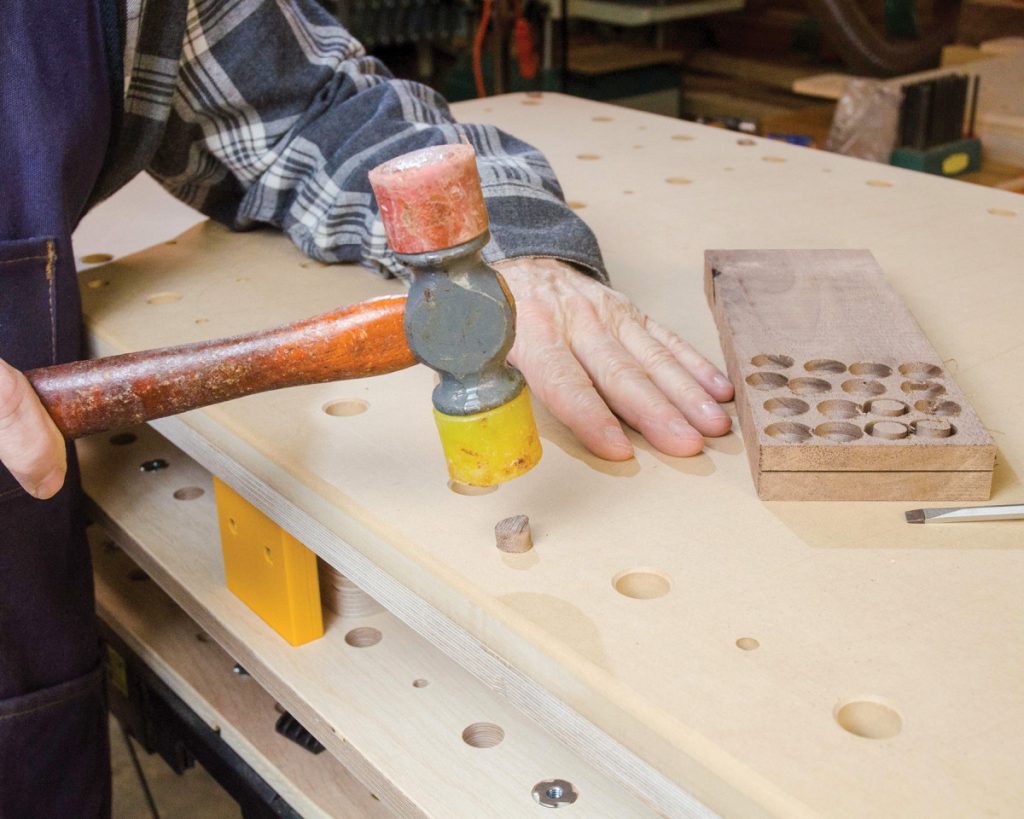
The holes between dog holes are for built-in hold downs. 1/4″-20 T-nuts are pounded into position. Buy a box of 100. The workstation uses a lot of then.
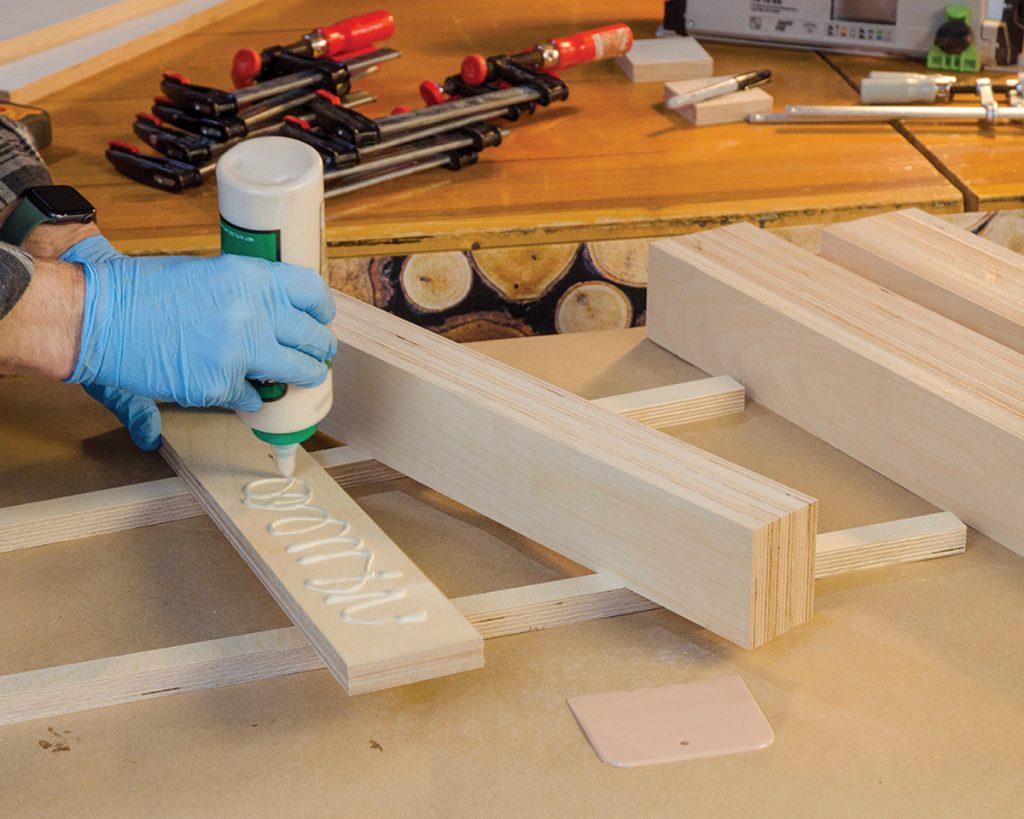
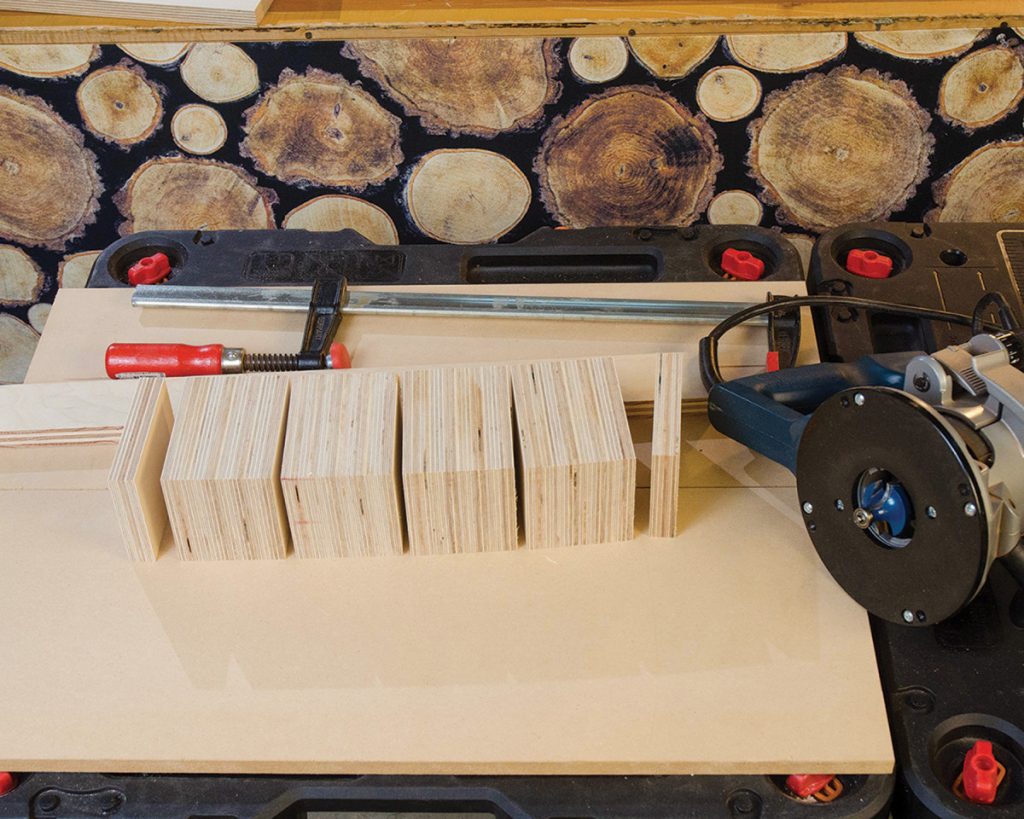
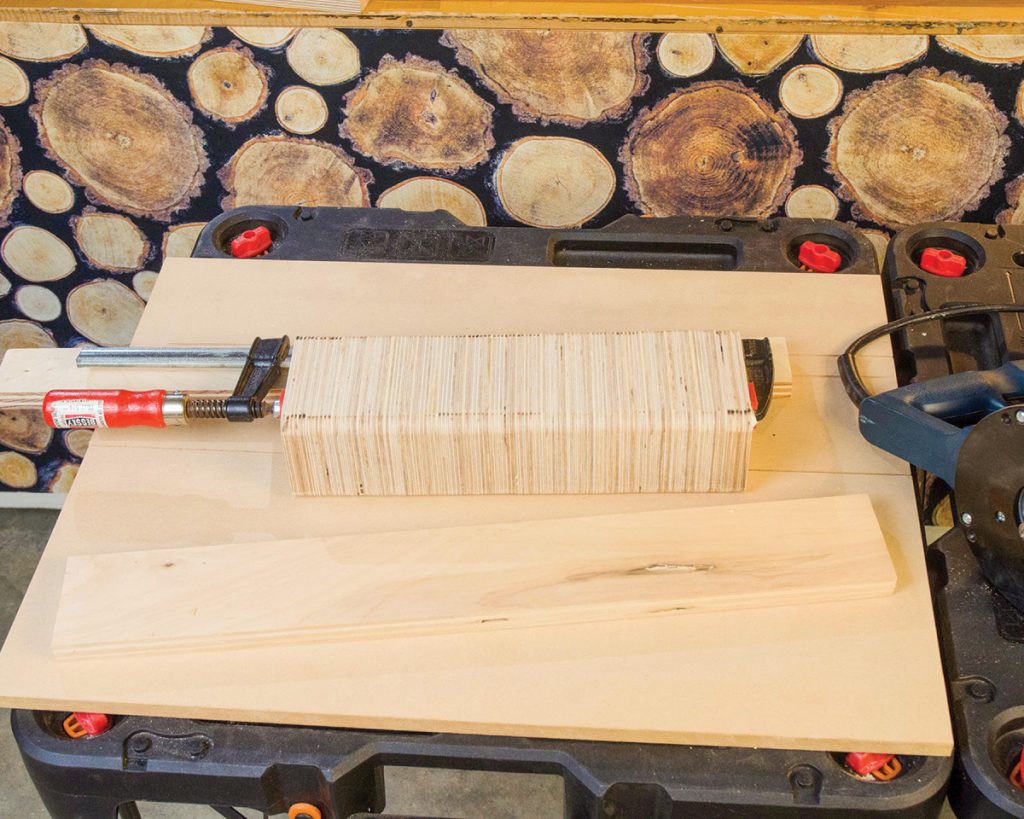
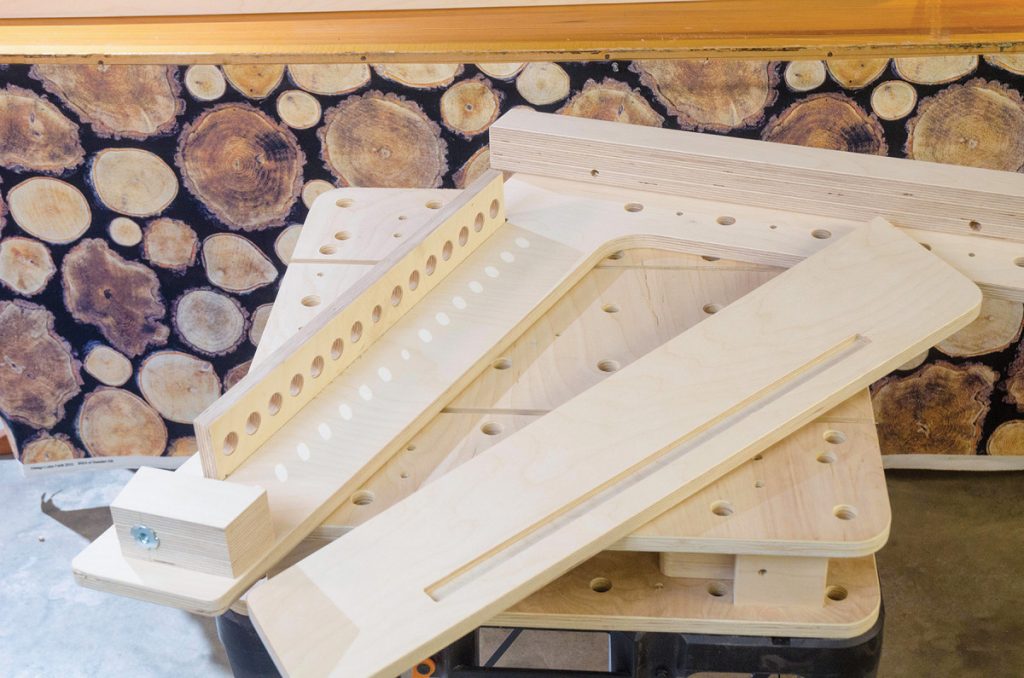
Risers are five-layer stacks of 3″ x 4″ laminated plywood. Build glued up strips first, then cut to size.
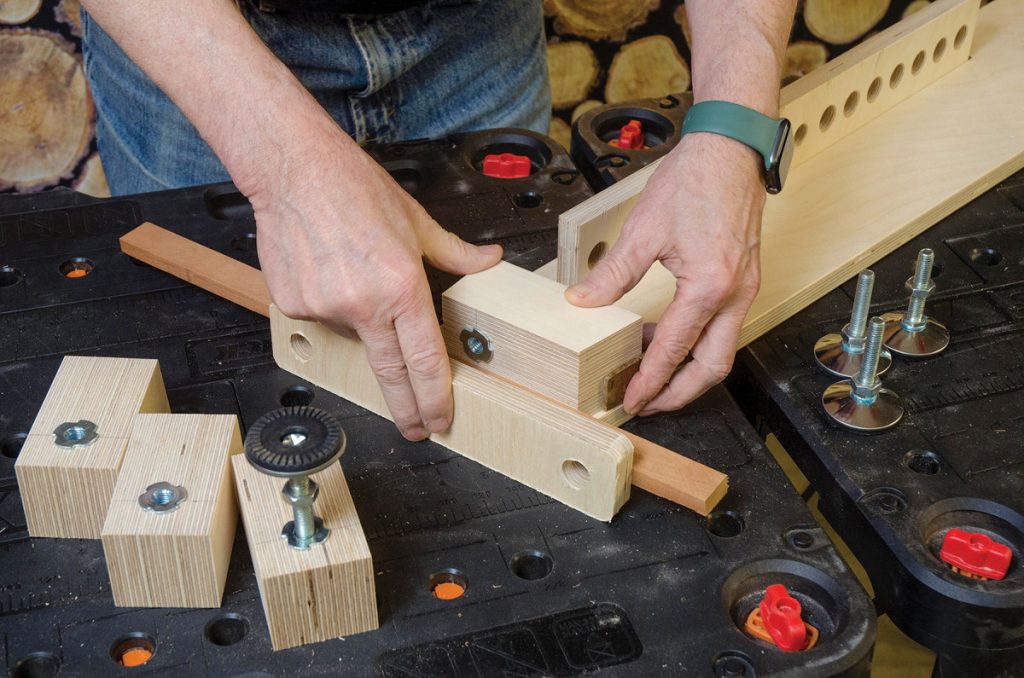
Plywood has sharp edges so round the corners of the risers. Small pieces of dowels register the risers into position on the workstation layers.
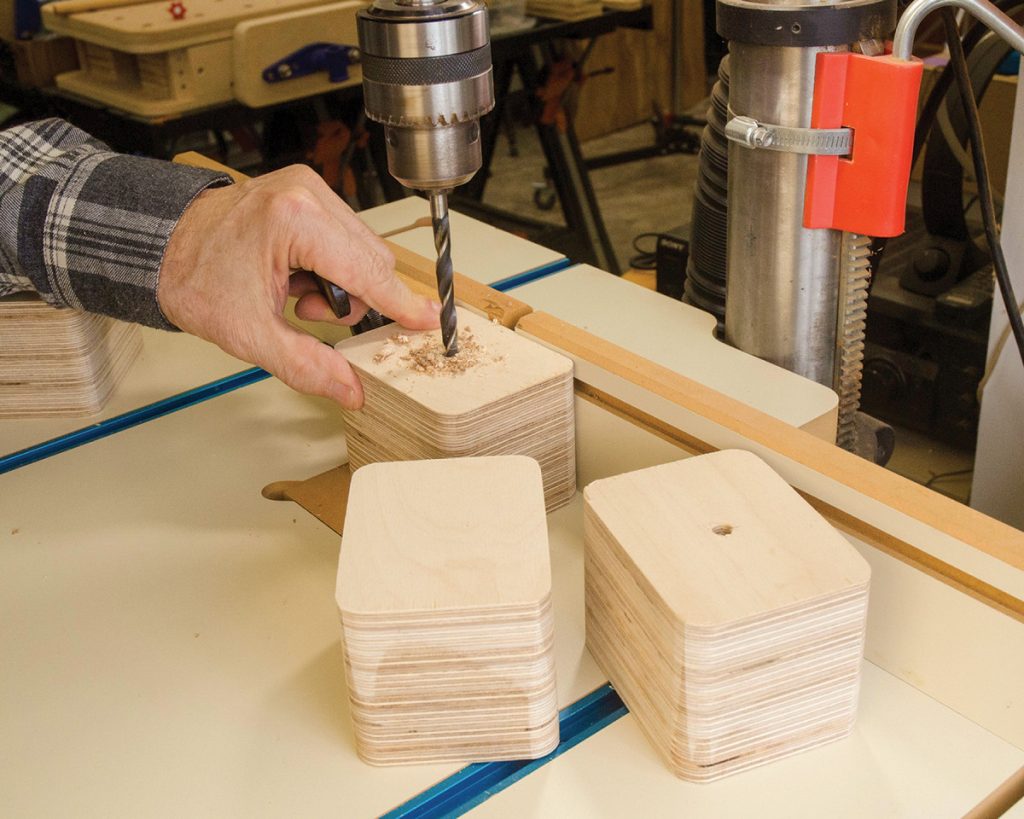
Drill a registration hole in the center of each block to keep things aligned.
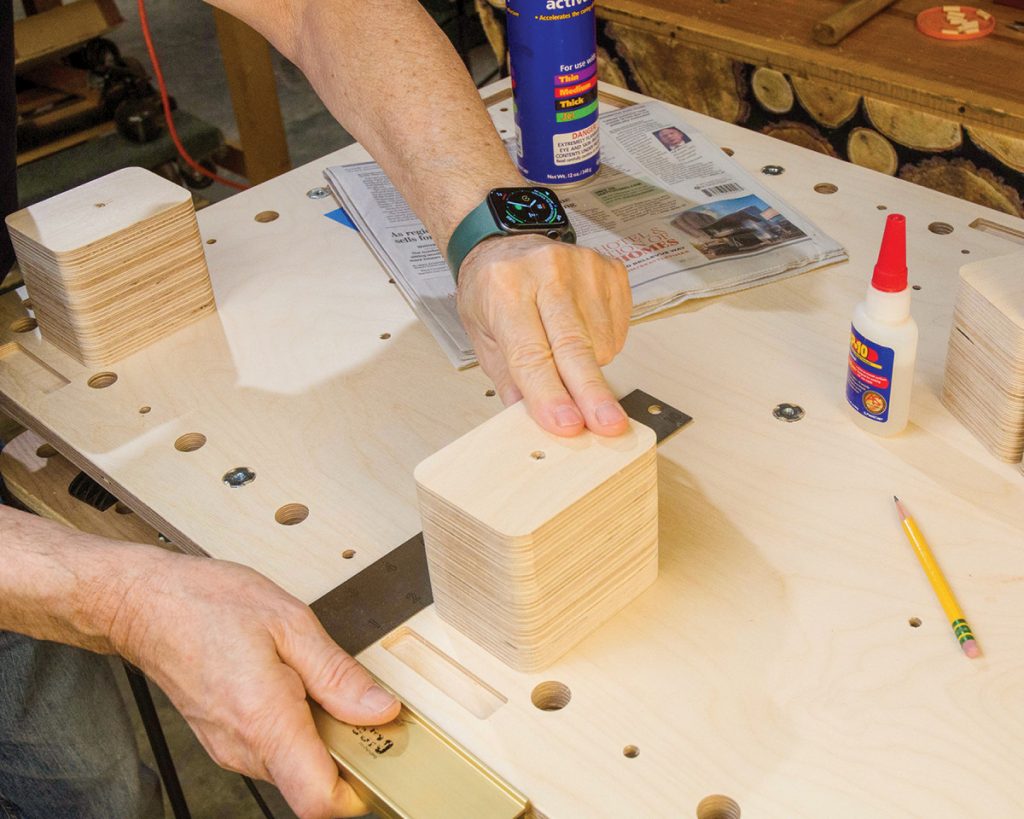
The riser blocks are positioned around the sides of the bench, creating an open space between the tops.
The side plate mounts are positioned along the open sides of the bench to hold side plates for workbench tools and modules.
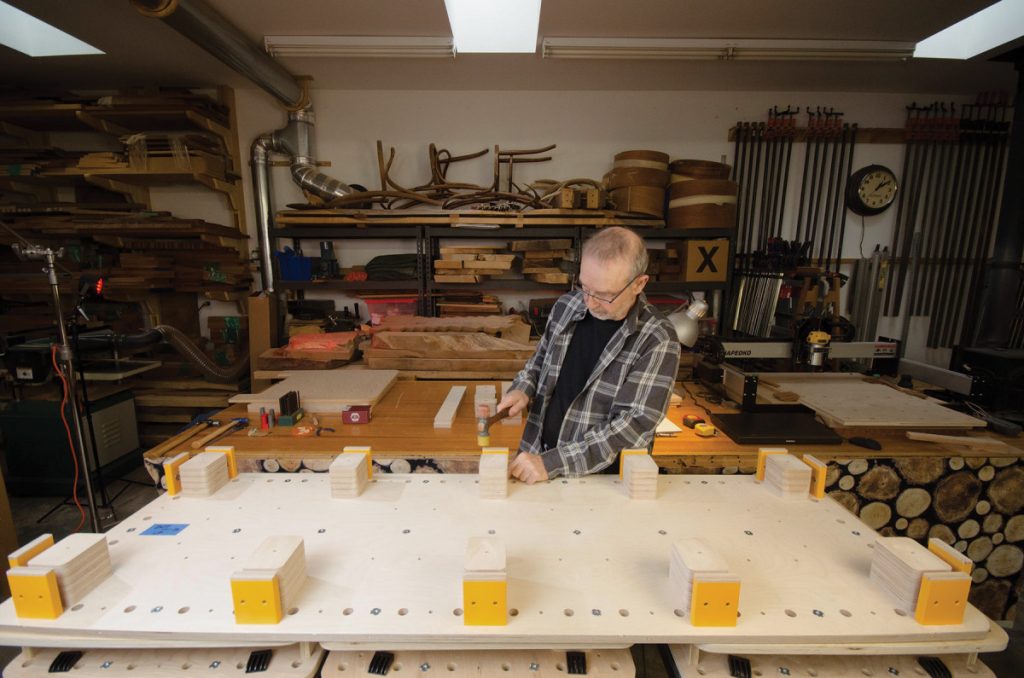
Assembly and squaring layers with 10 risers and 14 plate mounts is a little fiddly at first.
Thankfully, no glue is involved. Just a lot of 2″ screws.
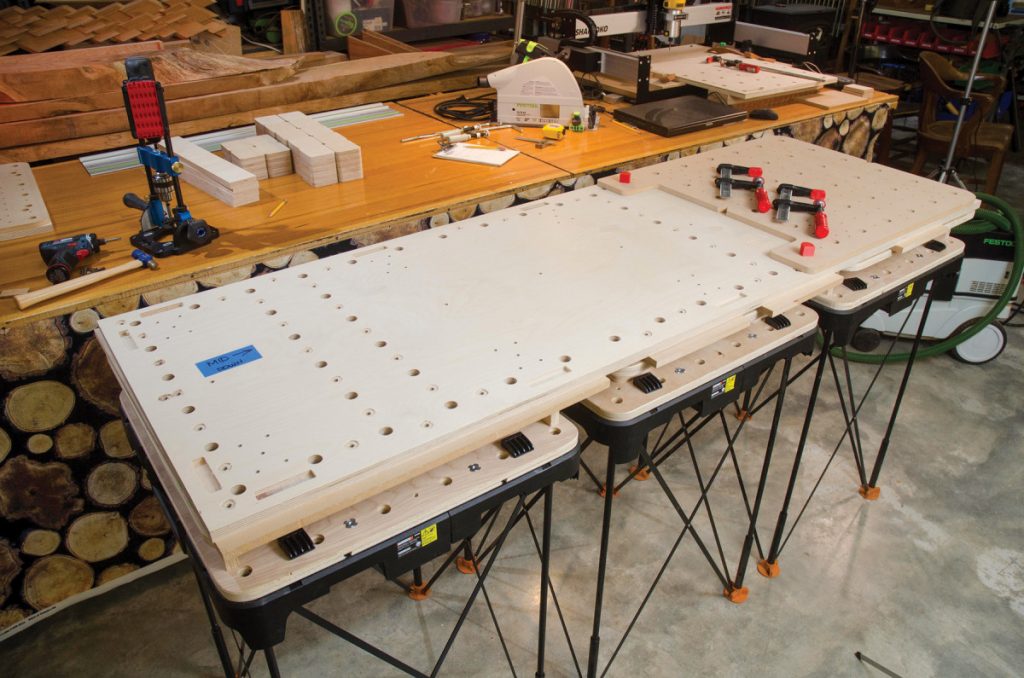
The top is attached to the middle layer with screws and T-nuts. Once attached, it’s flush trimmed and the top rounded over. Dry plugs hide the screw holes.
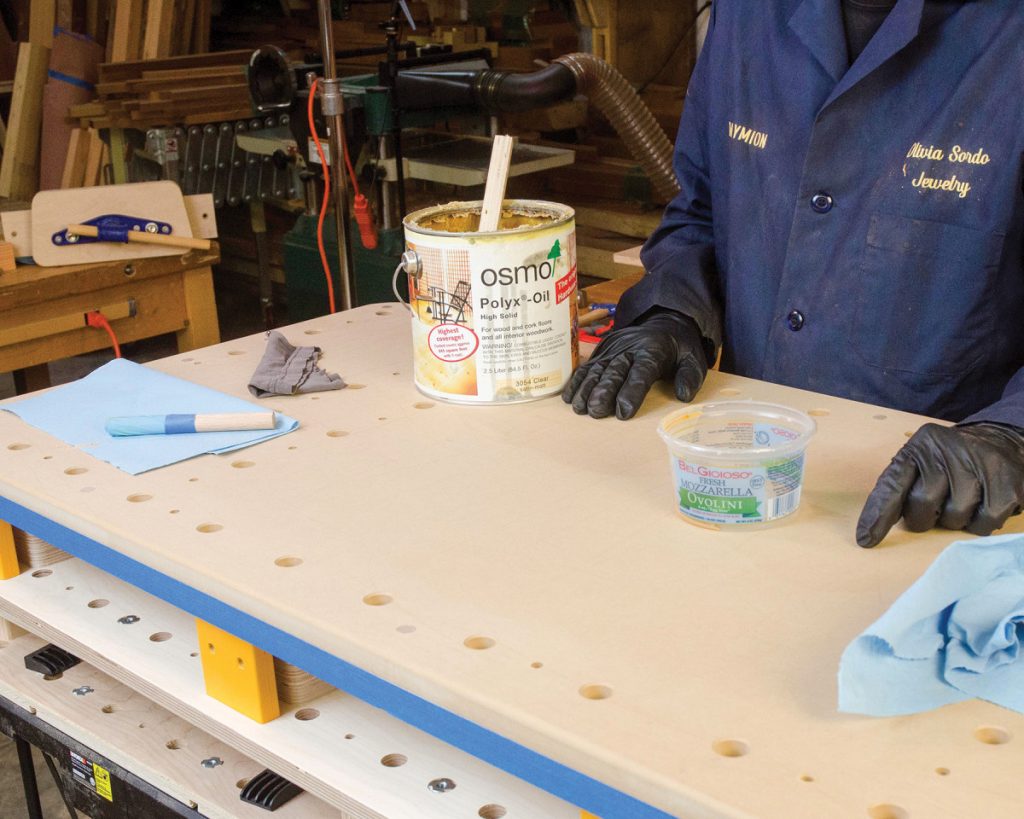
Finish is applied to protect the MDF top. The MDF top is also designed to be replaceable if needed (another reason it’s just attached with screws).
The base uses similar construction methods as the top unit.
Each leg is built by lamination and open box construction.

T-nuts in the foot of each leg let you add adjustable metal feet (for those uneven shop floors).

Squaring the base during glue is important.
The top attaches to the base with 8 bolts.

Side stretchers connect each half of the base with Dominos.
Alignment of the Domino mortises is critical to creating a square base.
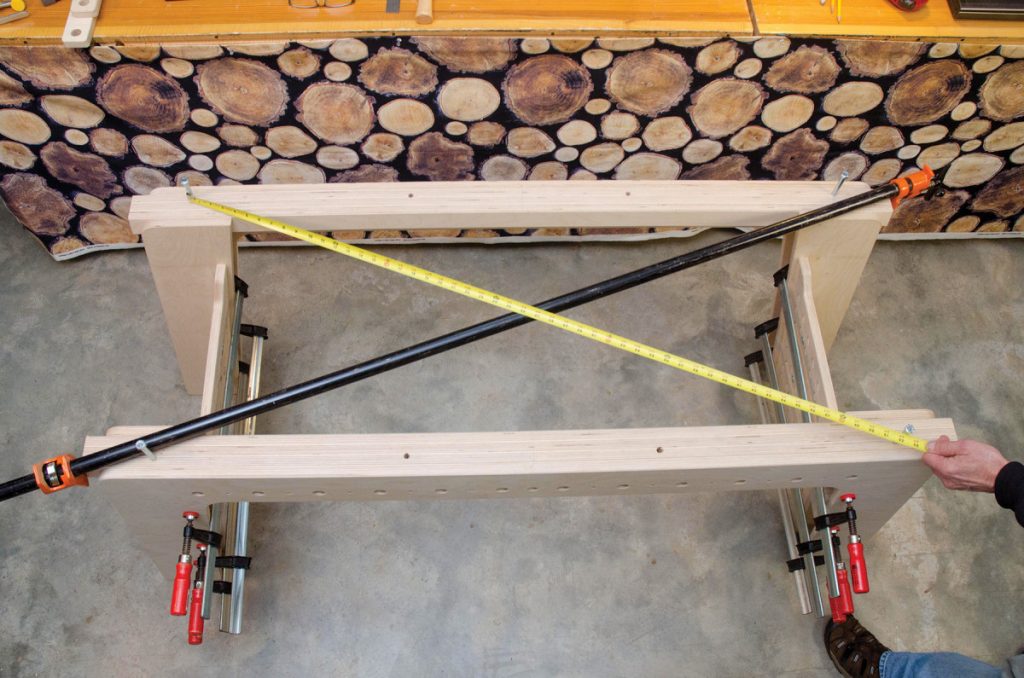
Glue the side stretchers in place and make sure the base is square by measuring the diagonals (and adjusting your clamps as necessary).
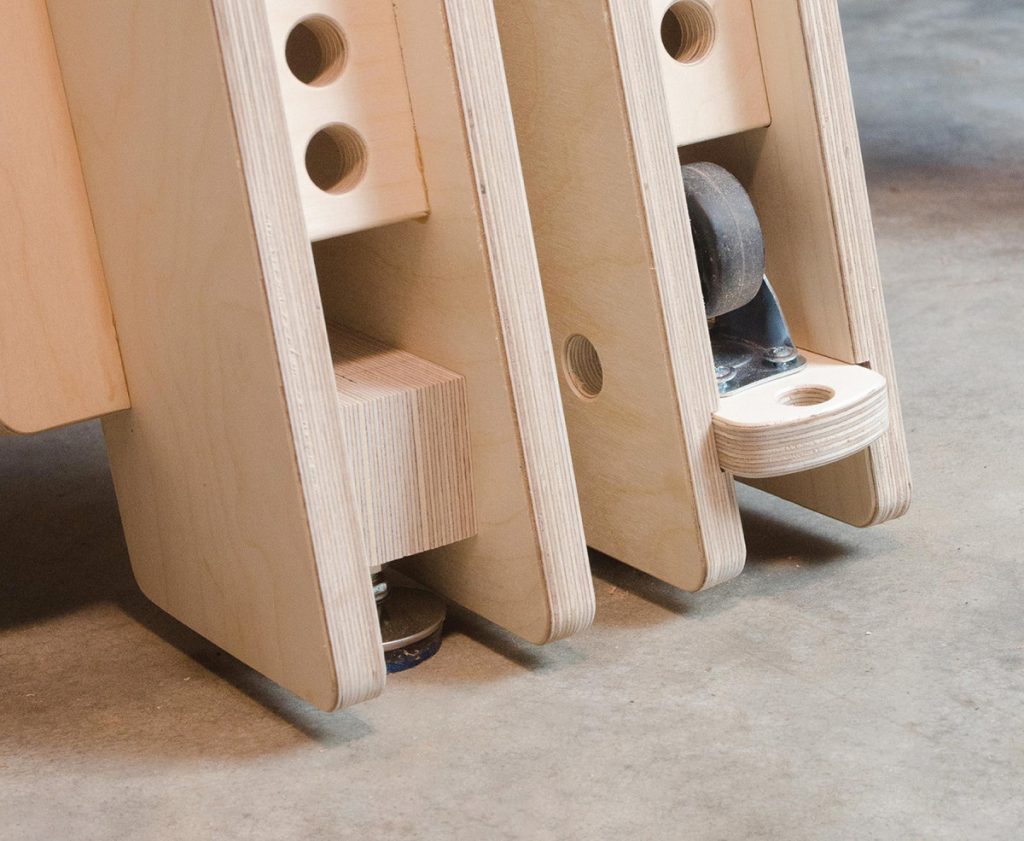
Base leg options: Either, but not both.
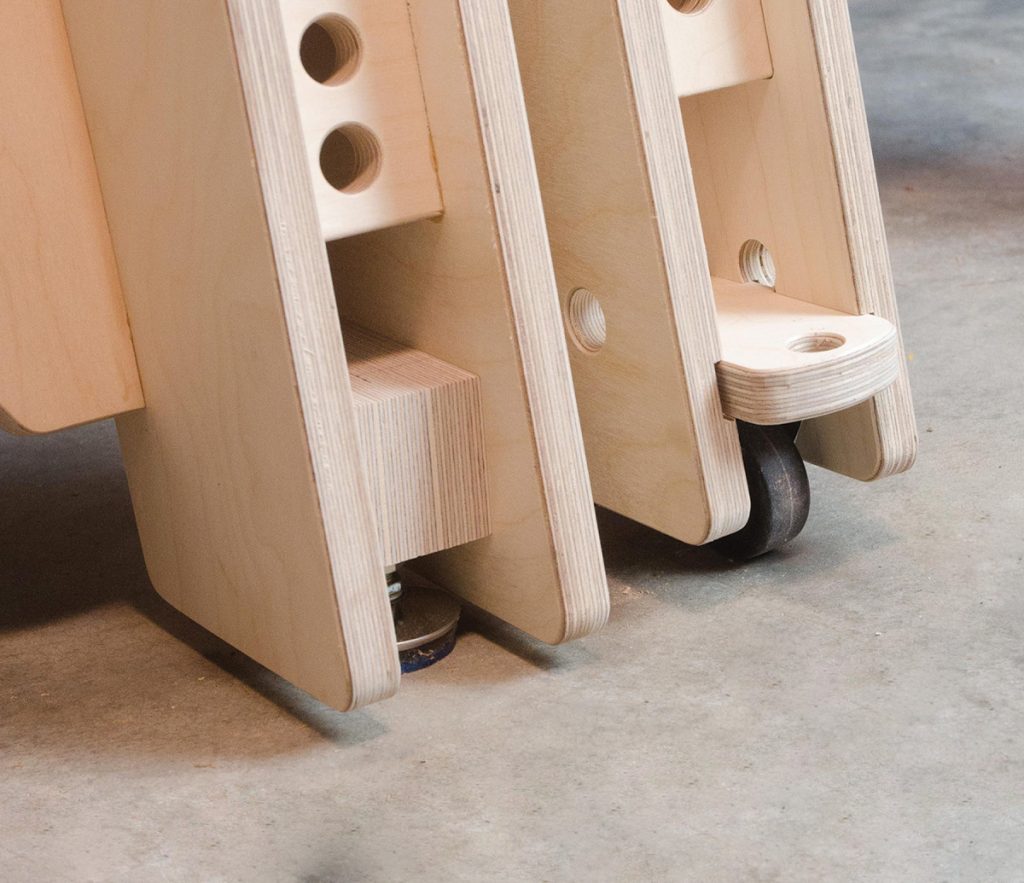
Instead of adjustable leveling feet, you can also use removable wheel plates (a caster mounted to a piece of plywood slides in a dado).
Conclusion
The workbench system will continue to grow and evolve. The maker workstation is just the first in a series of planned maker work surfaces.
Modules that integrate the Festool Track Saw into the workstation system, marker panels for the Shaper Origin CNC, a machinist vise module, a router table module, bench cookie plates, plates for metalworking and more are planned for the near future. New accessories and modules will be announced in the online companion articles.
Additional Resources
- Other articles about the Maker Workstation at Popular Woodworking.
- Free Maker Workstation Classic Base drawing in PDF format
- Free Maker Workstation Modern Base drawing in PDF format
- Maker Workstation 72″x 24″ Layer Guide
- Maker Workstation Vise Module Drawing
- Maker Workstation 48″x 24″, 48″x 48″, and other Layer Guides sizes will be available beginning 6/1/21
- Plywood cutting layouts for 72″x 24″ workstation
- Baltic Birch Maker Workstation CNC machined templates available for ordering online at woodworking.digital.
- Free DXF Template Files to make your own templates for using a drill guide for dog holes
- Free DXF Offset Template Files to make your own templates for using a router for dog holes
- Digital Woodworking on Instagram
- Digital Woodworking YouTube Channel
- Author’s website at woodworking.digital
- Personal Work on Instagram
Here are some supplies and tools we find essential in our everyday work around the shop. We may receive a commission from sales referred by our links; however, we have carefully selected these products for their usefulness and quality.


This is a great workbench. I haven’t built it but i would definitely like to or at least borrow some of the ideas. The flexibility of this is awesome and the way that the stacks and tops leverage dog holes for modularity is genius. I also have a sidekick table in my “shop” which is a great product on its own but i love the idea of upgrading it like you did. Thanks for sharing these builds.
Thanks Vincent. I hope you build one and find the workstation useful in your work.
To be clear, the top performs somewhat like a torsion box and but is not a true torsion box. Torsion boxes typically use thin skins top and bottom, the structure underneath, usually a grid sets up counterforces between the top and bottom skins. The workstation mostly relies on the flatness and strength of its thick plywood and final MDF surface. But structurally the 10 riser blocks do more than just separate. The blocks are exactly the same height and should be cut from the same sheet of plywood. They perform a function, like a torsion grid to help even out structural stresses running the length, width, and depth of the top unit. In effect, it’s a way of distributing the tension between the top and bottom layers and removing the bow common in some sheets of plywood.
As mentioned, torsion boxes typically use thin skins with a box inner structure to distribute tension. The workstation uses very thick skins that in themselves are very strong and have plenty of tension built-in. That tension can be a problem to solve if you want an absolutely flat top. The workstation’s hybrid structure is to tame those tensions by using some torsion box principles to force the top and bottom layers forces to counteract each other.
FWIW: I’ve built about a dozen classic workbenches with thick, solid wood tops. The stacked construction method I designed for the Maker Workstation seems to work as intended. It is, by far, flatter than any workbench I’ve either built or worked on. Flat from one end to the other with no twist and no movement. And, that won’t change with the weather. The design capitalizes on some of the key benefits of using 13-layer, solid core Baltic Birch plywood, a few new ideas, and it seems to work.
Finally, a flat top and stiff workbench were the primary goals for the Maker Workstation. Because this is a new design, just in case, I consulted with a structural engineer to verify my designs for the top unit, base unit and how they work together to produce an extremely stiff workbench.
That’s great! At first glance, I thought that if you built the top unit with two sheets of plywood with the same bow or twist then the finished top unit would have the bow or twist as well.
This looks like a fantastic workbench system. So many good ideas. Thank you for sharing it.
Thanks for your kind words, Paul. And thank you for highlighting the challenge of producing a flat top in a torsion box and reference surface. Usually torsion box skins are thin, the MWS skins are very thick. This is a hybrid design, of course, using some of the same concepts. Considering the strength and inherent flatness of 13-ply screwed to10 5-layer laminated risers, the top unit is flat with no twist that I can measure. Though the example was built on 3 equal-height side benches and a reference surface is always the best, it just seems to work in this case. All the strong plywood…
I don’t see the torsion-box approach applied to the benchtop. What am I missing? It seems like one would need to add some torsion-box braces to help produce a flat top.