We may receive a commission when you use our affiliate links. However, this does not impact our recommendations.

The Maker Workstation modern base is system compatible with the stacked top. This means that whatever you attach to the top can also be attached to the side of the workbench.
One Workstation. Two Bases to Choose From
The Maker Workstation Overview • Building The Top • Building The Base • Furniture & Accessories • CNC Instructions
When designing the maker workstation, a goal was to make sure the top would work on different kinds of bases, sawhorses, or other stable platforms. The workstation top is a unit in itself, portable and adaptable to different needs and situations. That’s why the workstation top is a structural unit of three layers stacked on 5-layer laminated risers. The result is a top that’s a stiff, free-standing hybrid structure that distributes tension and functions somewhat like a torsion box. It wants to stay flat, pretty much always if you use 13-ply. Unlike solid wood tops, the workstation stacked top doesn’t depend on a base for strength.
I offer two different bases for the workstation. The first, a classic, heavy, solid wood base made out of dimensional lumber. The other, a contemporary, laminated plywood structure that’s system compatible with the stacked top. The classic base is simple to make with lumber found at local home centers and basic instructions. You should be able to build your own working from the Classic Base Drawings.
Maker Workstation Classic Base is made out of standard 4″ x 4″ materials
The Classic Workbench Base
I’ve used this simple base design on several traditional workbenches, so I know it works. It’s minimal post and frame construction using legs made of laminated 4” x 4”s and stretchers made from the same material. Each joint intersection is held together with long Dominos or other floating tenons.
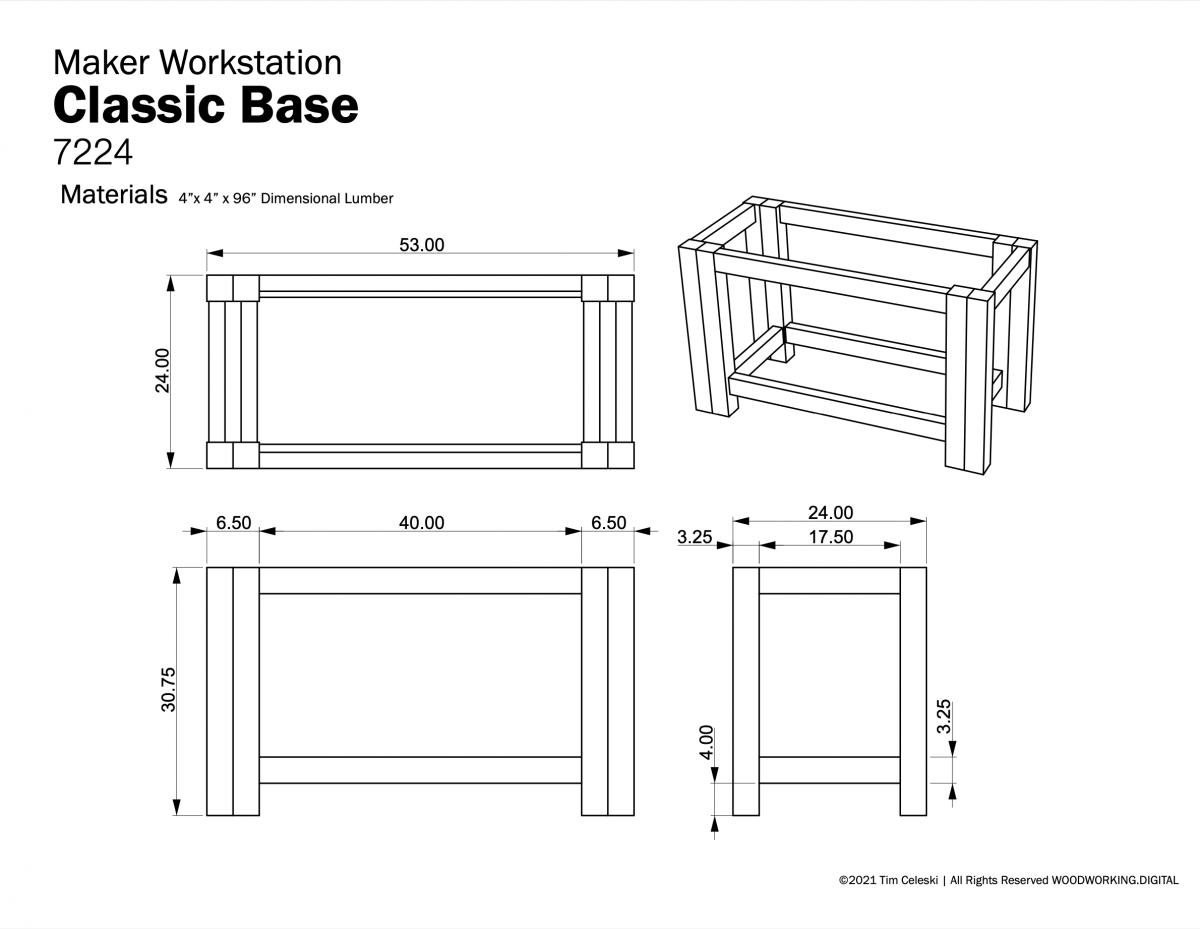
The PDF drawing of the Classic Base is free and available for download via the link at the end of this article
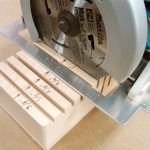
The first challenge is finding seven 4” x 4” x 96” boards from a nearby home improvement center or lumber yard. Take your time and pick out the straightest and cleanest boards you can find. If the selection is poor as the lumber manager what days they open a new unit. Because the wood is recently kiln-dried, it’s still quite wet and should be given time to acclimate to your shop. Separating boards with stickers, I suggest storing for 2-4 weeks or longer if possible before construction. Once you’re ready, cut eight 31-1/2” pieces from three 4” x 4”s, joint one side, clamp, and glue the jointed pairs to make four legs roughly 7” x 3.5″. Once the glue is dry, use a planer to machine the laminated legs down to a finished size of 6.5” x 3.25”. Try to keep the glue seam in the center. Trim the legs to 30-3/4”. That should result in a finished 36-3/8” workstation height with levelers ready to match the workstation side bench. If your goal for the bench is traditional, you might want a lower the workbench height for working with hand tools or if you want a taller bench, adjust leg lengths accordingly.
For stretchers, cut four 40.5” long pieces and four 17.75” pieces. Square and plane to 3.25” x 3.25”. Trim to 40” and 17.5”.
Designer tip: If you don’t mind a little more time at the planer in pursuit of ‘visual relief’, plane the stretchers down to 2” x 3.25”. The base will look a lot better for it. Note the positions of the 2″ narrow stretchers in the drawing. The long and short top stretchers are flush to the outside of the legs. The bottom stretchers are offset 1/2″ from the inside.
For joinery, I prefer a simple and strong solution: four, long Dominos at each joint intersection. Other loose tenon methods work. In any case, with the massive amount of joinery and glue area, the classic workbench base is very solid.
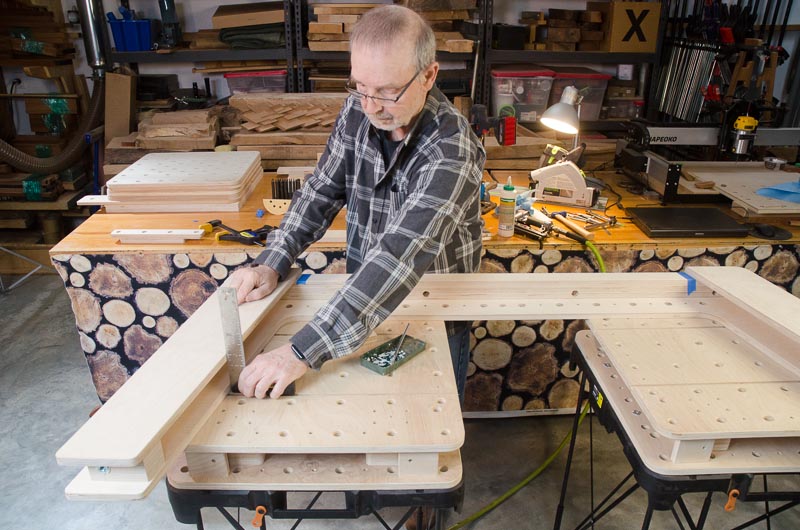
Mark the Long Stretchers
Using the bottom layer of the top unit, center the top on the base and transfer the four center T-nut base attachment location center points from the bottom layer of the top to the long stretchers. Next, wrap the lines around to the bottom side. Do the next step with the stretchers upside down because the base is bolted to the top from the bottom of the stretchers. Countersink with a 7/8” Forstner bit. Tune to the length of your bolt + depth of the T-Nut. I aim for 2″ bolts. This is to allow room for washers and 3/4″ socket. Drill through holes with a 3/8” regular bit. The through-holes are deliberately oversized so you can adjust the base to fit the top. Align top to the base and use a socket wrench and attach with four 1/4″ bolts and washers.
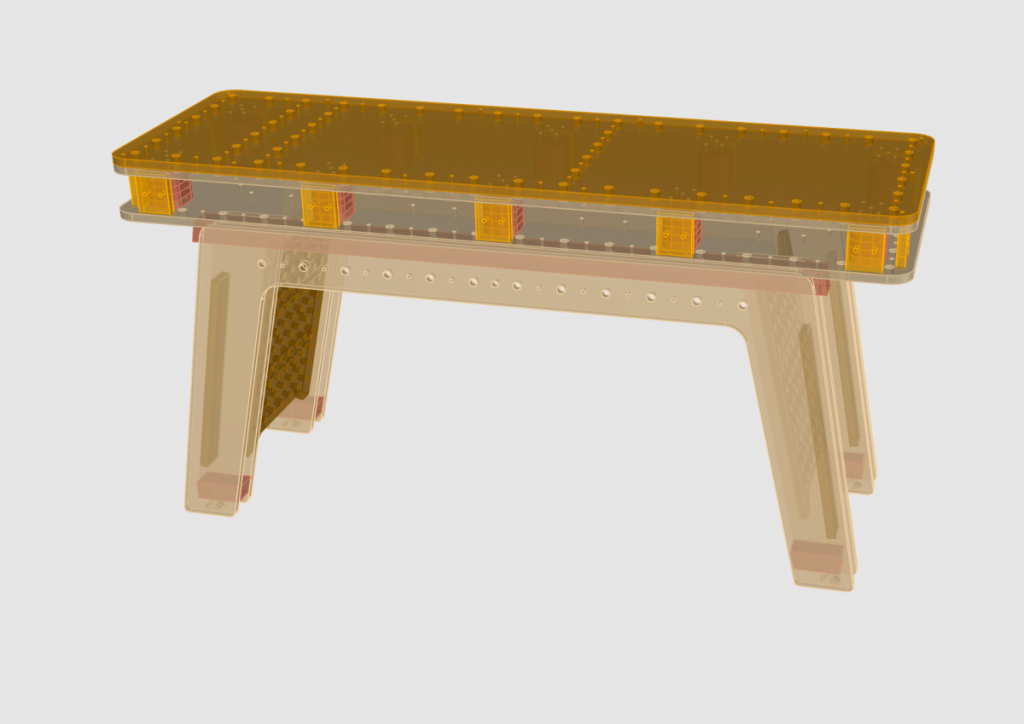
Maker Workstation Modern Base is made out of Baltic Birch plywood and is system compatible with the workstation top.
The Workstation System Base
The dedicated workstation base is modern, made out of plywood, and is grid and system compatible with the top. The base adds to the workstation’s functionality and capabilities. Top plates can also be mounted vertically to the base, flush to the workbench edge so you can hold and position boards and workpieces. You can even take on a whole project better done vertically using the same grid, hold-downs, and dog system as the top. Using a combination of 5-layer stack lamination, box, and I-beam construction and making use of the top unit as a structural component to contract twist, the workstation base is stiff, stable, and yet completely open in the middle. The open area leaves room for a desktop-class CNC on a cart, space for system tool storage stacks, workstation mag-carts, a top plate rack, flexible shelving, and whatever you need the space for. The open box-section laminated legs are strong and designed for convenient dog and dog tool storage, the stretcher “cheese plates” between the sides of the base are also home for you to store and arrange workstation furniture.

The PDF drawing of the Modern Base is free and available for download via the link at the end of this article
Base Parts
I think that headline triggered a flashback to my jazz musician past. Anyway, like the stacked top unit, the base is made out of 3/4” plywood and a little different. The base requires two 4’x8’ sheets of 13-layer Baltic Birch BB plywood. To make it, refer to the workstation drawings for the suggested base parts and workbench accessories layout.
If you’re making the base using traditional power tools there are several ways to make it. For better handling, I suggest you begin by drawing the large base outside legs and inside legs on the plywood sheets and rough-cutting oversized pieces out with a jigsaw or bandsaw for easier handling. For the outer legs, I found a Festool track saw works well for straight cuts on the outer perimeter and part of the inner perimeter. For the inside curves, stop your cuts short of the rounded inside corners and finish up with a jigsaw or band saw. Having no inside curves, the four inside legs are easier to make. Note that the inside leg angles are 12.5 degrees and outside legs are 10 degrees.
The side stretcher panels, leg I-beam blanks, and the other base parts are straight and easier to cut. A track saw or table saw will cut the basic shapes. Use a band saw or jigsaw for the outside details of the legs and side panels.
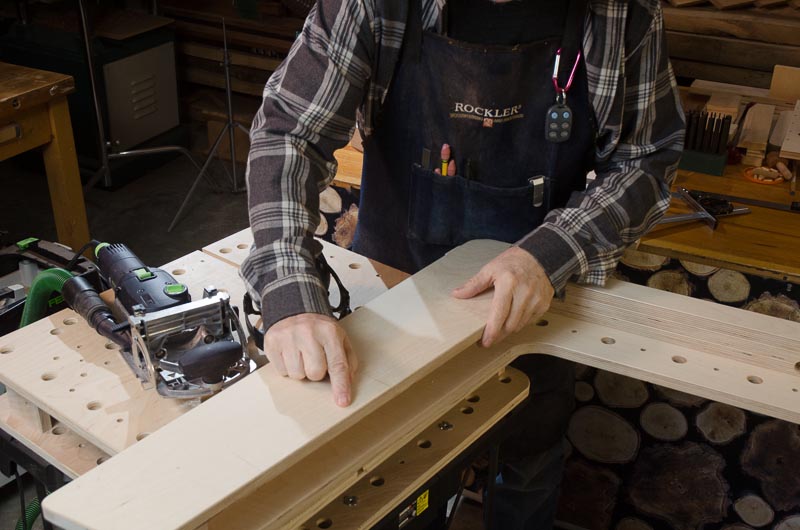
The next major parts to make are the two long laminated stretchers. These are three layers thick, 2” wide, and 78” long. Once glued and sanded trim to a finished length of 58” with a 10-degree angle on each end to match the outside leg profile. Mark a centerline on the long stretchers that you’ll use for alignment during leg assembly. The offcuts are used at the bottom of each leg as blocks for the adjustable feet units. Cut four to 4-5/8” long with one end cut at a 10-degree angle.

All the parts are almost ready to go. The next step is to trim the laminated long stretchers and countersink and drill the 3/8″ holes for attaching the top to the base.
Preparing the Long Stretchers
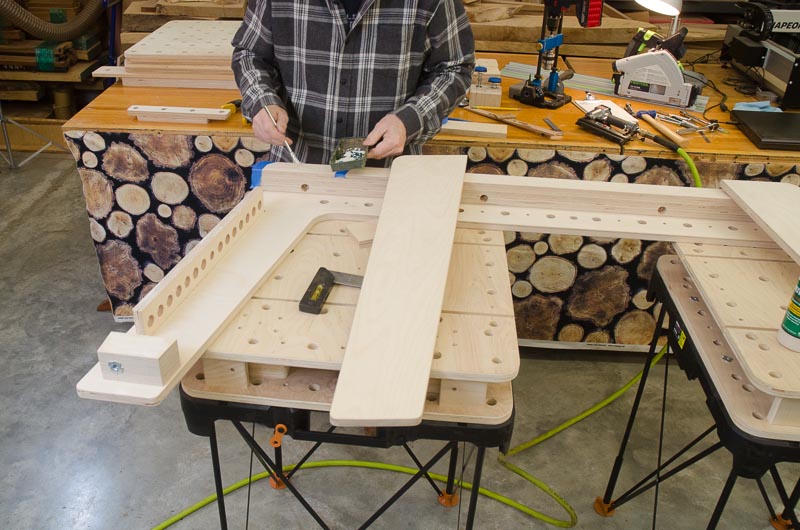
Before we leave the long stretchers, now is the time to mark and cut the countersunk through holes that are used to attach the base to the stacked top unit. This process should be done with the stretchers on a table. Position the upside-down bottom layer of the top or the completed top unit on top of the stretchers and center the length of the unit at the centerline of the long stretchers. Now, before you mark the holes you need to move the stretchers inward from the outer edge of the top unit. How far? Two 3/4″ thicknesses of plywood on each side. This is to allow space for the outside legs (3/4″) and the thickness of a top panel (3/4″) or other ply accessories or fixtures so that they can be mounted flush with the workbench edges. The math: The completed base is 22-1/2″ wide which leaves 3/4″ on each side to attach accessories flush to the edges of the 24″ top unit.
Transfer and mark the four-hole positions on each side of the top’s bottom layer to the base’s long stretchers. If the top is complete, the hole should have T-nuts in them. Once you remove the top, you’ll see that the hole positions are offset and not centered on the width of stretchers. This is how it should be. Before you commit, it’s a good time to double-check your work and make sure the hole positions align perfectly between the two long stretchers. They need to agree because thanks to the template construction method, the top unit mount holes are precisely positioned. Once verified, transfer the lines around to the bottom of the stretchers.
It’s time to countersink the mounting holes on the stretchers with a 7/8” Forstner bit. This is to allow for the washers and a socket. Check again to make sure you’re drilling from the bottom of the long stretchers. The bottom of the stretchers is the long end of the angled cut. Once you’ve cut a countersink hole then use a regular 3/8” drill bit to cut all the way through the base stretchers. Why 3/8” when the bench is assembled with 1/4” bolts? Because lining up the top unit to the base and attaching in eight positions is never going to be easy. The maker workstation may be all about precision, but it’s the last step where some slack during final assembly is welcome.
TheWorkstation Base is System Compatible
Once all these components are cut, then it’s time to add the grid of dog holes on base stretchers, the leg I-beams, and the outside legs. Start by laying out where the holes go on the outside legs. All hole positions are based on the maker workstation grid. To accurately place and bore the holes, use either the workstation or the side bench templates for positioning, alignment, and cutting using the same processes used for making the stacked top. Precision matters. Step one is to align the centerline of the template with the centerline of the outside plywood legs. Follow the drawing on the positions for the 3/4” dog holes and the hold-down positions for the 5/16” hole T-Nut locations you’ll drill after you remove the template.
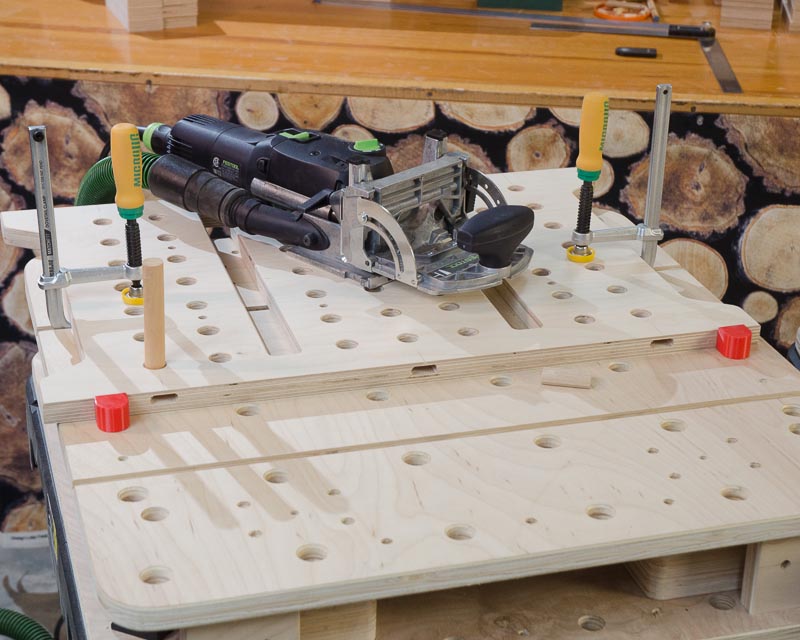
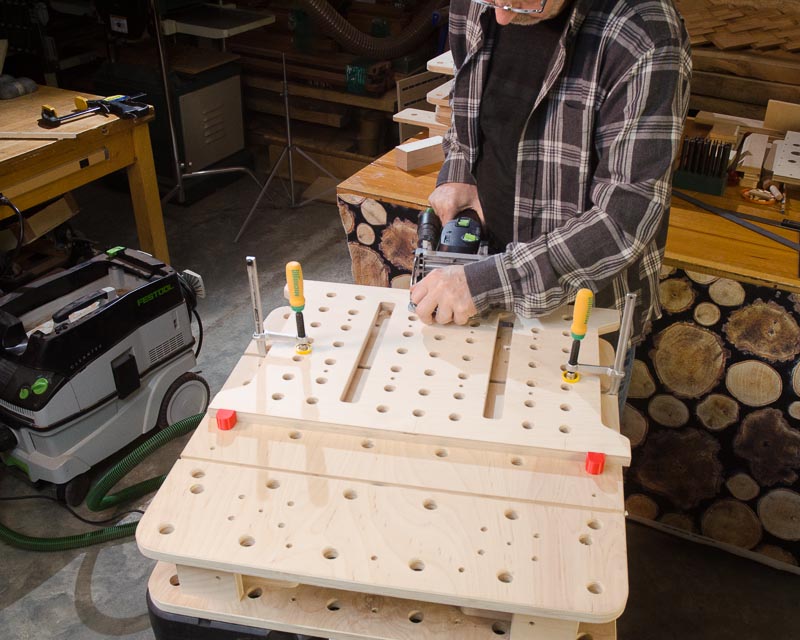
Dado cuts in the legs
The last thing before assembly is to cut 1/4” deep, 3/4” wide dados on the inside of the two outer leg units and the 4 inside legs. Use the base drawing for length and position reference. These pockets trap the I-beams between the inside and outside legs. For most woodworkers, the easiest way to do this is with a router, a 3/4” bit, a router fence, and stops at both ends of the cut. Once the pockets are cut, use a chisel to square up the ends.

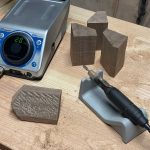
On my second build of the Maker Workstation base, I changed to adjustable levelers. These are the kind used for industrial machinery. With adjustment, I can both level the workstation and match the height of the maker workstation side benches. Since these levelers are designed to hold 1000 lbs or more, a very heavy-duty plastic is used for glides. With the workstation weighing around 200 lbs, I designed 3D printed glides out of flexible TPU plastic that glue onto the levelers to get a better grip to keep the bench from slipping on my slick concrete shop floor.
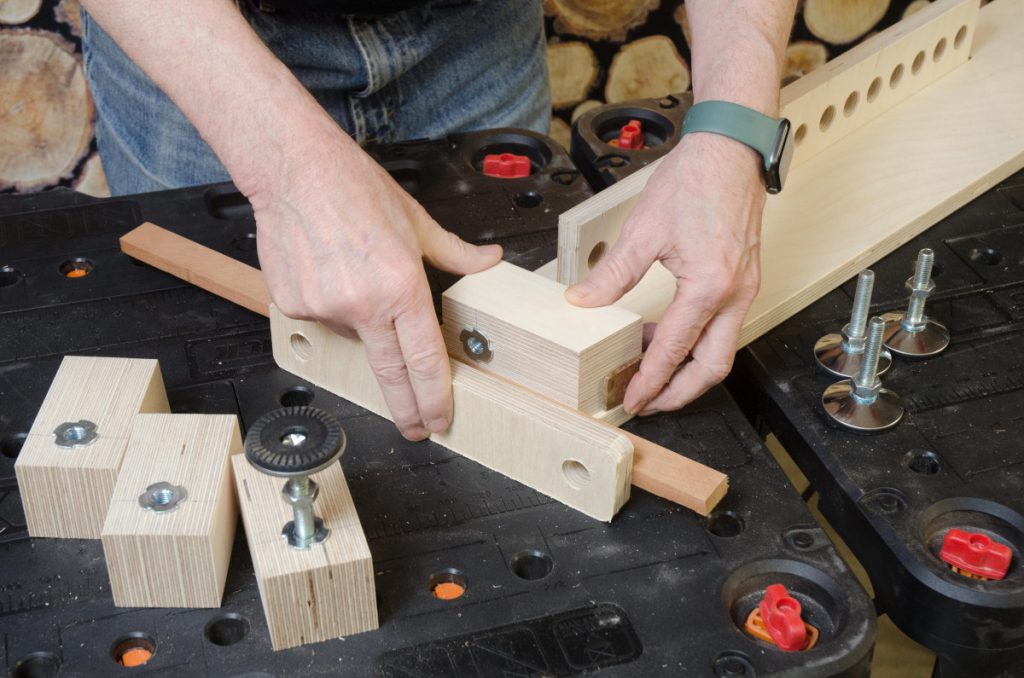
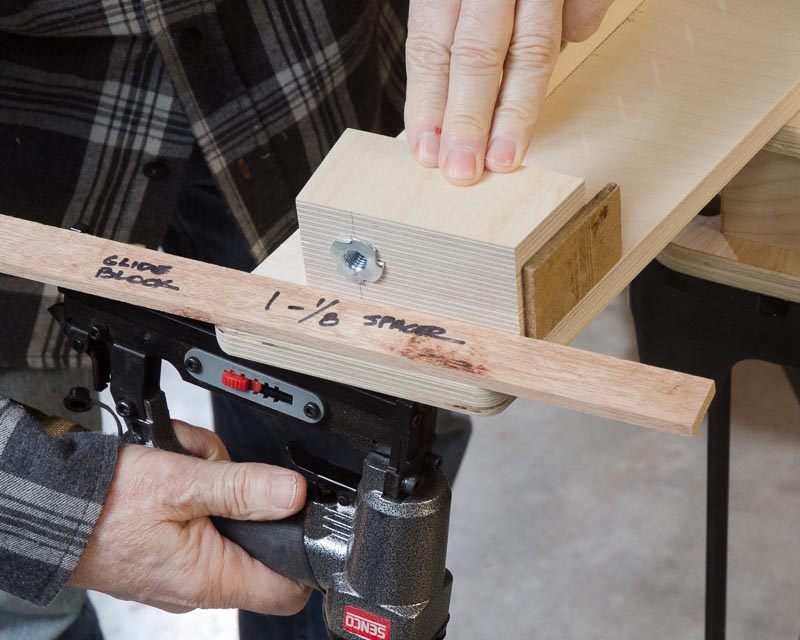
The glides T-nuts should be mounted into the lower leg blocks before assembly. To make assembly go quicker, I cut spacers that let me quickly position the blocks.
Adjustable Levelers vs Removable Wheels
After scraping my ankles on various steel removable/drop-down workbench feet/wheelsets, I was not satisfied with the choices available, so, I came up with my own solution. I spent several weeks designing, testing, and trying out ideas for adjustable feet and wheels for the maker workstation. In the end, I came up with two different solutions. Both are simple. If you’re building a workstation, now is the time to choose one.
One solution is for removable wheels, the other for adjustable glides. The removable wheels are just 2” straight wheels mounted on small pieces of plywood that slip into dadoed slots near the bottom of the legs. When the wheels are removed they store upside down in the slots. Refer to the Workstation base drawings for the position of the 3/4″ slots near the foot of the base. The bench drops down onto the laminated blocks with large rubber pads on the bottom. The second option is to use large industrial adjustable leveling feet. These are 2” in diameter levelers designed for heavy industrial machinery.
Both solutions work, but it’s an either/or choice for workstation builders. Removable wheels or adjustable heavy-duty leveling feet. I’ve built both but for my bench, I prefer the latter with the added stability, leveling feature, and fine adjustments so I can match the Worx Sidekick Stack side bench height. For moving the bench I designed a set of new magnetic carts that also store Festool Systainers underneath the workstation.
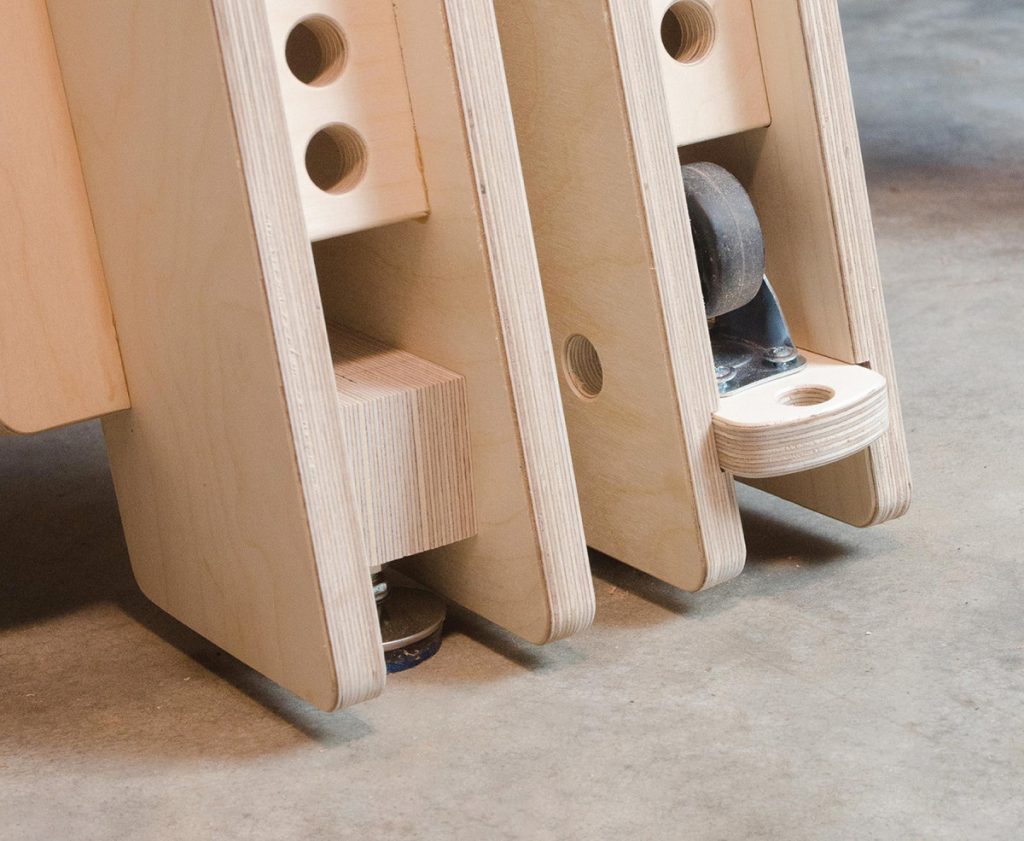
Base leg options: Either, but not both.
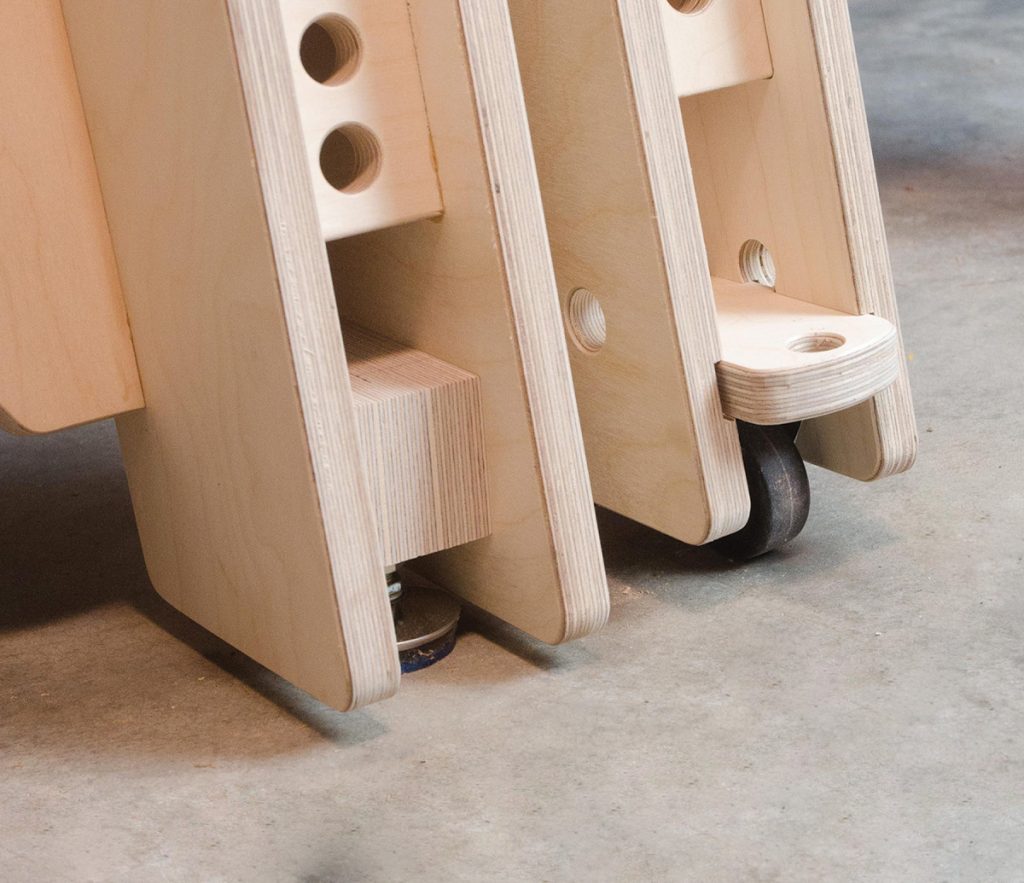
Instead of adjustable leveling feet, you can use removable wheel plates (a caster mounted to a piece of plywood that slides in a dado).
If you decide to use the adjustable level levelers, pre-drill and install the large T-nuts that come with the levelers into the small laminate blocks before assembly.
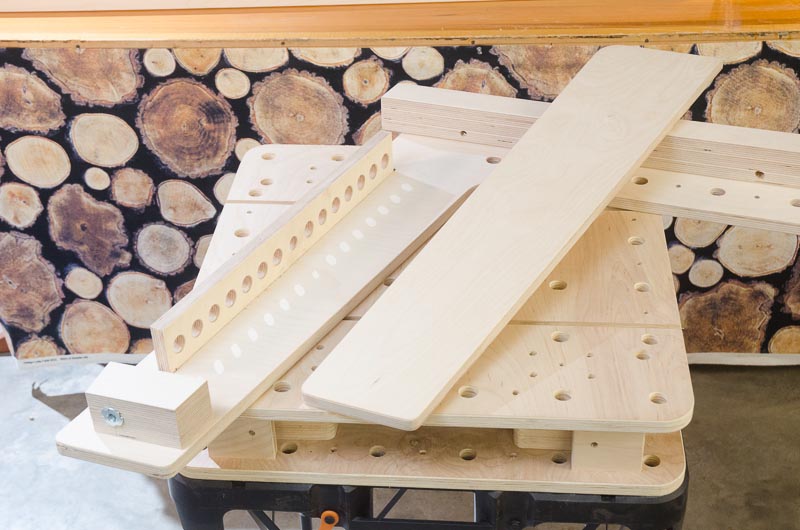
The Maker Workstation modern base parts all ready for assembly.
Just like a woodworker can never have too many clamps, you can never do enough dry fitting before glue up. Test, test, test!
Remember what I said about dry-fitting? Before glue-up I used my last test to mark off the glued areas with blue tape. This way I know where to apply glue and the tape helps contain glue squeeze-out, too.
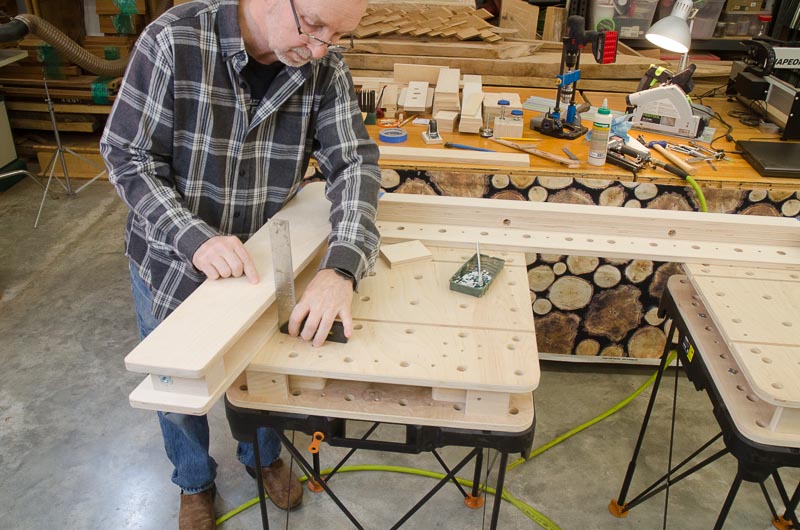
With a high-precision workbench top, this base has to be square. Once parts have glue applied go around to ALL edges with a square to insure that everything is flush. Clamp and recheck again.
Checking for square again.
Assembling the Workstation Base
The base is assembled in two halves and later combined. Each half consists of an outside leg unit, two inside legs, a long stretcher, two small laminate blocks for the feet, and two leg I-beams. I find it easiest to assemble with the outside leg unit upside down and the other parts dropped into position.
This is the time to do a couple of dry runs before you add glue. With the outside legs facing down and the dado pockets right side up, position the long stretcher at the center point of the leg unit, drop in the I-Beams that live between the inside and outside legs and the blocks that hold the adjustable feet. Finally, drop on the inside legs. Once you get everything sitting completely flat and squared up then you’re almost ready for glue-up.
The final step is to make sure everything is where it should be and squared, sanded, and lightly chamfer all the plywood pieces. Once you’re sure, then use masking tape to mark where the inside legs will sit on the long stretchers. The tape has three purposes: the first is to mask off any excess glue, the second to indicate where you need to apply glue, and the last is to position the parts where they need to be during glue-up. I also mask off the spot where the laminated leg leveler blocks will sit at the bottom of the legs. Taking these steps ahead of time makes a fairly large glue go smoothly.
I like to use precut spacers to position parts during assembly. No measuring means no mistakes during glue-up. Let you in on a little secret… I really like to use a micro-pinner when assembling plywood projects. Though the pins are only 25 mm (1″) long, they help glue slathered parts from slipping during clamping. And, being headless and tiny, you never see them.
You can assemble the two outside leg units in two steps or one step if you’ve got an extra tool: A micro pin nail gun that uses headless pins. It’s easiest to assemble the base in two steps.
The two-step approach is to glue the blocks, I-beams, and small leveler blocks to the outside leg unit, let dry and come back later and add the inside legs. The process goes like this: Once you’re ready, then apply glue to the outside leg areas you masked off and the laminated stretcher, the blocks at the bottom of each leg for the adjustable feet, and the I-beams that sit between the outside and inside legs. To be clear, we’re just gluing all the blocks, the stretcher, and I-beams that attach to the outside leg units. Once positioned, square, clamp, and let dry.
Step two is to add glue to the mating parts of the blocks, stretcher, and I-beam and the inside leg’s matching positions.
If you’re impatient like me and happen to have a pneumatic micro pin nail gun then you can do it all in one step. After adding glue and positioning the parts that sit on the outside leg unit, I use the pinner with 1” pins to attach the side stretcher and leg blocks by taking them from underneath. This is just to keep them from slipping. And, with all the glue and glue surfaces involved, slip they will. Once tacked, add glue to the top of contact points and add the inside leg areas. The glue does all the work. The pins are just for positioning. BTW: The pins are very small, headless, and don’t show when you’re done.
In either method, it’s important to square up the outside and inside legs before you clamp. I use a square to check every side so that everything is square and matches up. Clamp and check everything one last time to make sure nothing has moved.
The side panel stretchers have a grid of 5/8″ holes that take short dowels used for hanging 3/4″ workstation furniture. To attach them to the large side assemblies you need to use Domino joints. Though I used 3, I recommend 5 joints on each side.
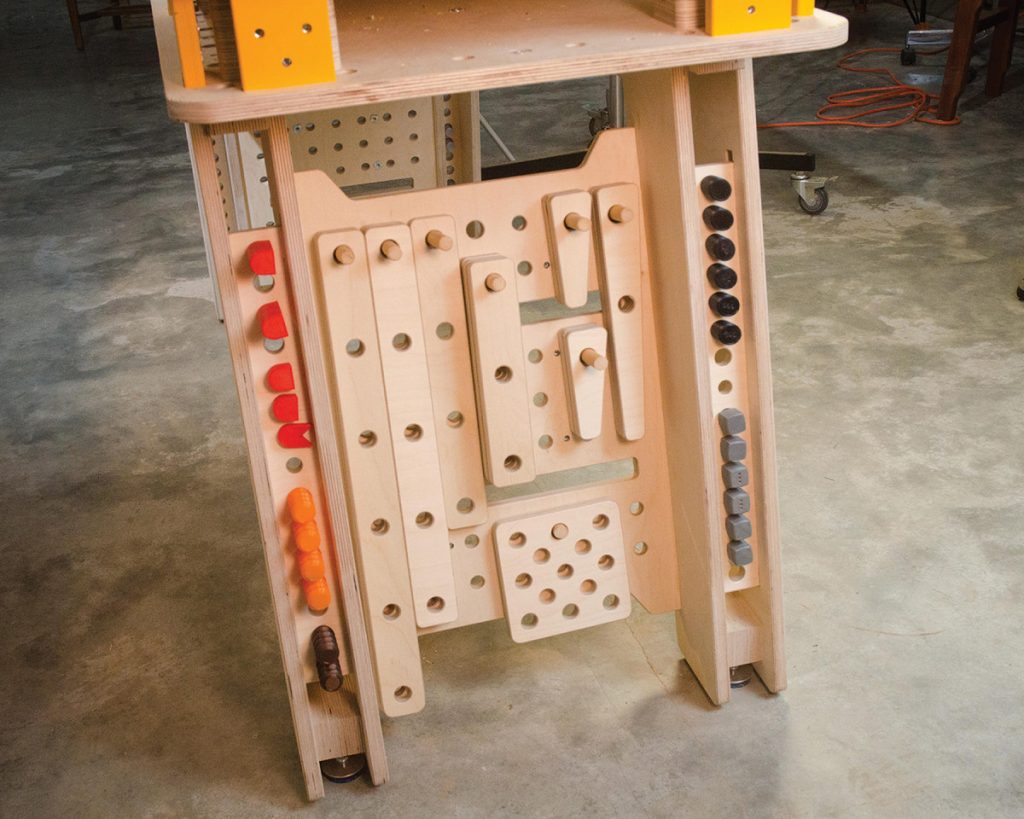
It’s worth the extra time it takes to drill the grid on the side stretcher panels and leg I-beams. All that flexible storage for furniture, dogs, and accessories.
Side Stretcher Panels
The 15-1/2” wide panels that sit between the leg units have an important structural role to play. They make the base very stiff and eliminate the possibility of racking. Racking is a very important consideration in a top-heavy design like a workbench.
To make the side stretchers, follow the dimensions on the drawing. It’s not necessary to cut out the little ears as I did but they do have a purpose. The notch at the top is so you can rest a piece of plywood for a shelf that sits just underneath the top. It’s a good place to store extra-long workstation furniture or long clamps.
Time to add holes on the panels for furniture storage. Note that the holes in the large base stretchers are 5/8” not the 3/4” as is standard throughout the rest of the workstation. This is so short lengths of 5/8” dowels can be used for hanging workstation furniture that have 3/4” holes. Since only the positions and not accuracy that counts, simply mark the 5/8” hole positions with the template, remove them and use a 5/8” Forstner bit to cut the holes.
Options: I’ve added a couple of extra features to the side plate stretchers. You may not need them now, but they offer options for workbench mods you might want later. There are hole positions for eight T-nuts on each end panel and slots for shelving and other workstation accessories I’ll add in the future.
The T-nut holes are as before: 5/16” holes. Using these as mount points, you can mount short, 10-degree angle shelving on the outside of the side panels. Also, note that there are two, 1” wide slots in the side panels for slipping removable 12”- wide, 3/4” shelves that run the length of the base. Note that these slots are different widths on each panel. One is 12-1/2” wide, the other side panel is 11-1/2” wide This is so with a stop cut into the ends of shelves, the shelves can lock into place once slid in all the way and be flush to the outside of the side panels and won’t slide out.

Carrying the line along the bottom of the long leg side forward, I lay out positions for the side stretcher Domino holes on the inside legs.
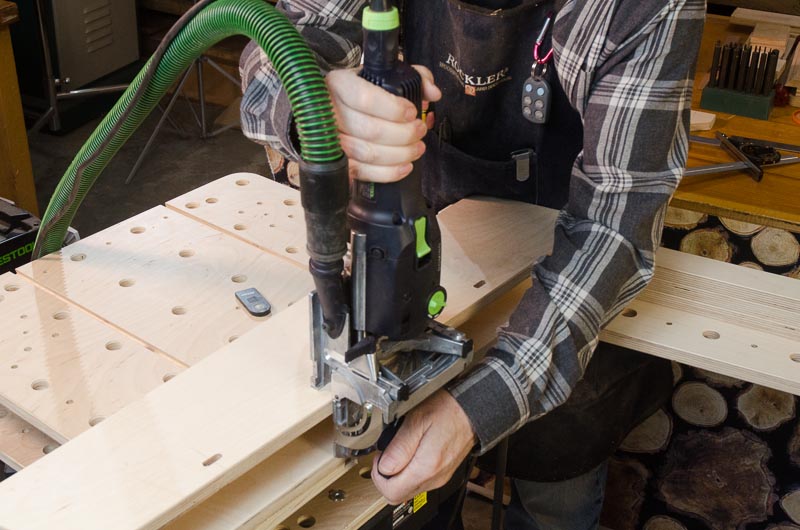
Now you see why I laid out my Domino positions first. Everything has the done on the inside of the legs and clear of the outer legs, otherwise, the fence on the Domino won’t clear.
Workstation Base Joinery
The two halves of the workbench base are connected with the side panels. The panels are connected to the workbench sides with Festool Domino or other loose tenon joints. The trick here is to line up the side panels with the legs with no variation between each end of the base. Measure your joint positions very carefully. You don’t want the base to twist. I used 3 Domino joints on each panel but I recommend 5. Mark and position your connection points on the panels and transfer to the inside legs. I recommend positioning the panels as far in on the inside legs as possible. I just use the highest setting on my Domino 500 and go with that.
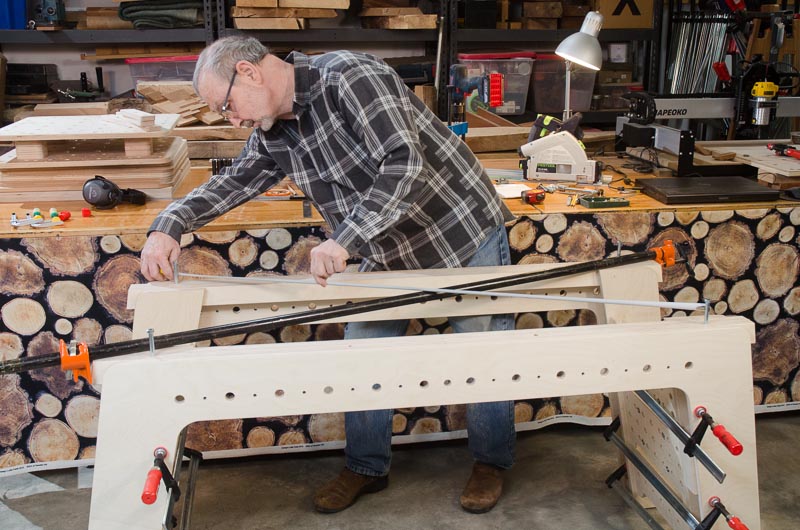
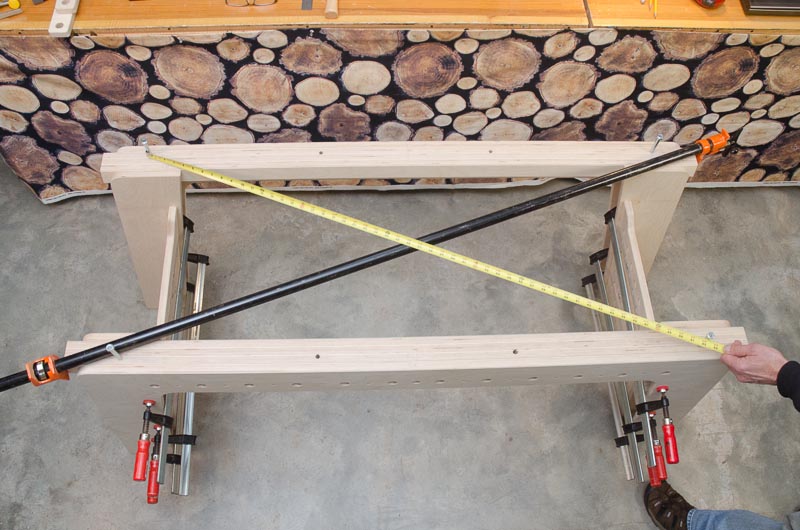
Square is absolutely critical with this base. The base holes on both base side stretchers have to agree. Using the outside mounting holes, I insert 4 long 3/8″ bolts so I can use those positons for diagonal measurements with an accurate tape measure.
Check and double-check when clamping the base together. Precision really counts, here.
Final Base Glue Up
Find a place on the floor of your shop that’s level and flat for final base assembly. The next steps are obvious: apply glue to the two sides, the end panels, and Dominos, bring them together. It’s a big assembly and so now is a good time to ask for help. Being that the side panels are on the open inside area between each leg I put in extra leg thick block material at the point I’m clamping to keep the leg from flexing once you apply pressure. The most important thing during clamping is to square up the bench base. Those four holes on the outside of each side long stretcher need to line up their holes across from each other. The easy way to do this is to use long 3/8” bolts in the outermost holes and measure diagonals with an accurate tape measure. Correct as needed with a long clamp. Really try to get this square because the top unit is absolutely square and unforgiving. You’ll be very glad you squared it up when it comes time to attach the top to the base.
Attach the Stacked Top to the Base
A straightforward operation. Make sure the base sits inside 3/4” in (plywood thickness) from the side edges of the top unit by using pieces of 3/4″ plywood scrap. This way, 3/4” accessories, and panels will be flush with the edge when you mount them on the Maker Workstation. Now, you have a workbench that works vertically as well as horizontally.
Good news: The Maker Workstation top and base are done.
Next week: Time to make bench furniture, side plates, accessories, and that front vice module.
Additional Resources
- Other articles about the Maker Workstation at Popular Woodworking.
- Free Maker Workstation Classic Base drawing in PDF format
- Free Maker Workstation Modern Base drawing in PDF format
- Maker Workstation 72″x 24″ Layer Guide
- Maker Workstation Vise Module Drawing
- Maker Workstation 48″x 24″, 48″x 48″, and other Layer Guides sizes will be available beginning 6/1/21
- Plywood cutting layouts for 72″x 24″ workstation
- Baltic Birch Maker Workstation CNC machined templates available for ordering online at woodworking.digital.
- Free DXF Template Files to make your own templates for using a drill guide for dog holes
- Free DXF Offset Template Files to make your own templates for using a router for dog holes
- Digital Woodworking on Instagram
- Digital Woodworking YouTube Channel
- Author’s website at woodworking.digital
- Personal Work on Instagram
Here are some supplies and tools we find essential in our everyday work around the shop. We may receive a commission from sales referred by our links; however, we have carefully selected these products for their usefulness and quality.