We may receive a commission when you use our affiliate links. However, this does not impact our recommendations.
 These simple shop storage solutions are quick to build, but will make a big impact in your shop.
 These simple shop storage solutions are quick to build, but will make a big impact in your shop.
Project #2408 • Skill Level: Beginner • Time: 1 Day • Cost: $10-40
Sometimes, it’s the simplest things that can make your life better. That holds true in the shop as well. Often times, taking a bit of time to build a simple storage project or shop fixture exponentially increases the “quality of life” in the shop. When I was considering what projects I wanted to work on for this issue, I figured I would take the chance to show you three of my favorite shop storage solutions that are easy to make. The first is the clamp rack you see above. It not only holds twenty of your clamps (which of course, you have many more clamps than that, right?) but also offers a bit of storage on top in the form of a shelf.
The next project is out of left field—a turned drill bit index. Using some fancy wood and the lathe, you can create a great way to house a quality set of drill bits.
Finally, there is a basic utility shelf. If you have ever been in my shop, you will recognize these little shelves that are scattered all over. Some hold lathe accessories, others push pads, and one even holds my coffee cup at the bench. You will find uses allover for them.
 Clamp Storage
 Clamp Storage
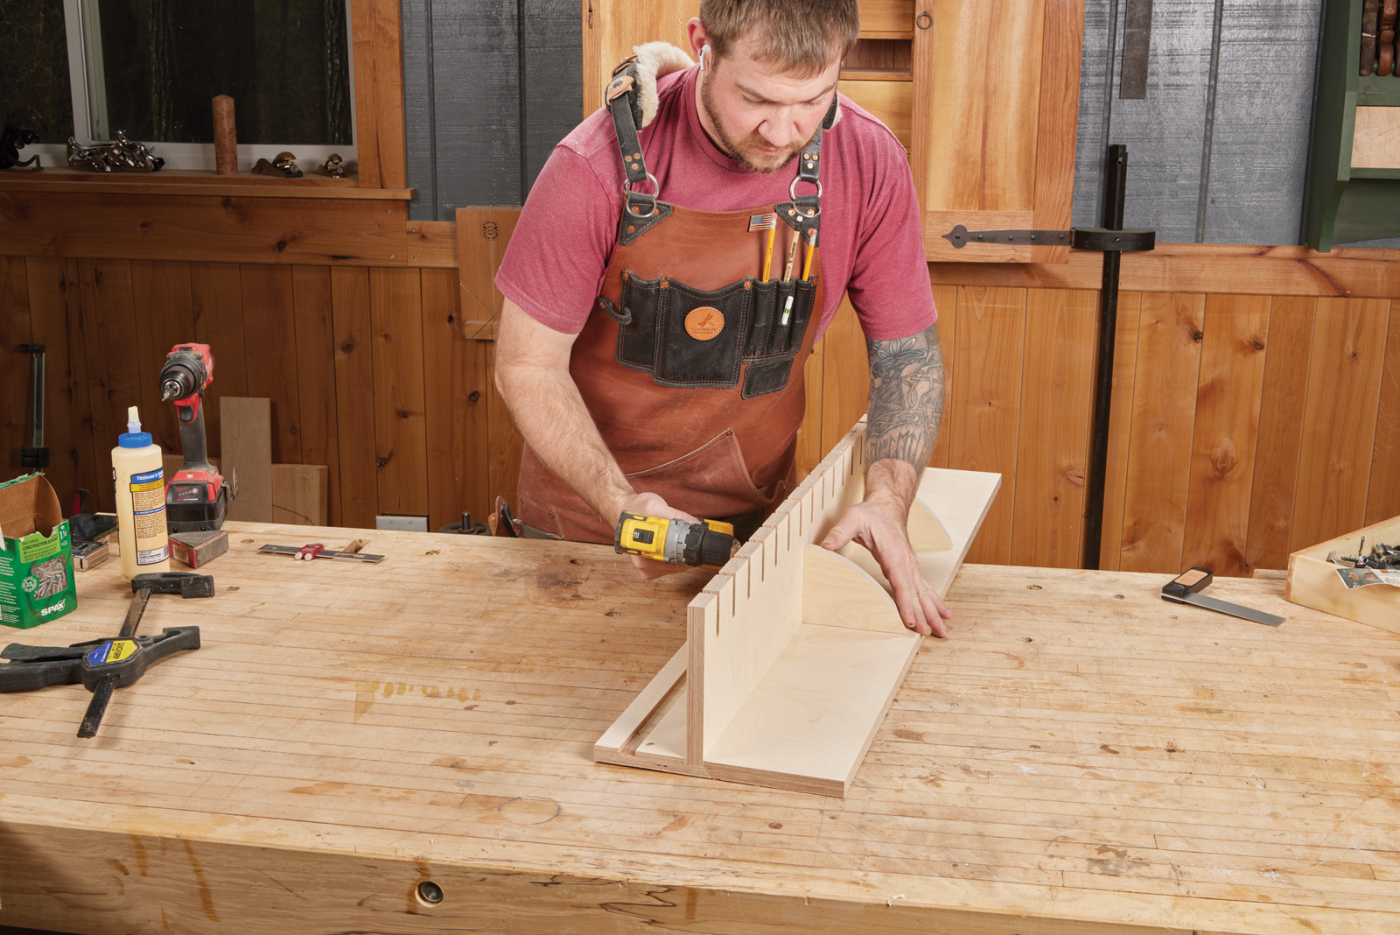
The first of these three projects is one that I’m sure you’ll need to build multiple of—it’s the clamp storage rack that you see on the previous page. This rack is designed to hold either F-style or parallel clamps. To be completely transparent—I usually load all of my parallel clamps on one and my F-styles on the other. I just combined them for the photo.
 The things we need to contend with for a clamp rack are weight capacity and clamp accessibility. I think this design does both well. Slots hold the clamp bars allowing for easy retrieval, and plywood and stout joinery means that it will take as much weight as you can stack on it. Having a bit of extra storage on top for the “miscellaneous clamps and accessories” is nice as well.
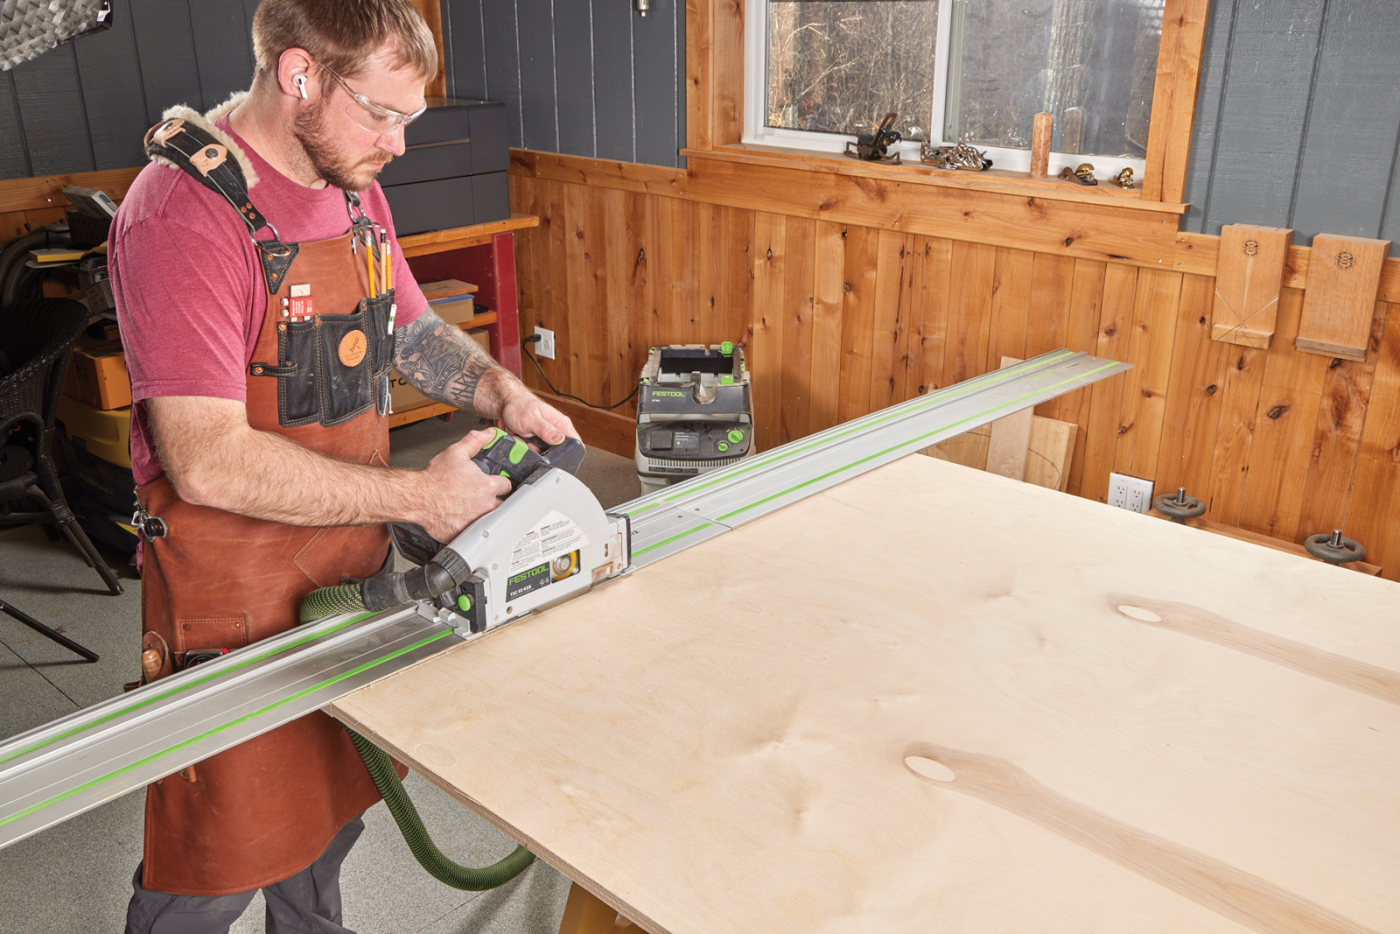
1 I use a track saw to break down the full-sized sheet of plywood. It allows me to make straight, accurate cuts, but not to worry too much about precise measurements.
The approach to breaking down the plywood is a personal choice. For smaller pieces, I use the table saw. However, for full sheets, I will break out the track saw. Even though you can get finish-quality, accurate cuts with a track saw, I still cut stuff a little oversized before moving to the table saw for sizing parts.
The first parts to break down are the side panels. As you can see in the photo on the left page, and the illustration on the next, the sides have a set of dadoes and rabbet in them. The top dado will capture the shelf, while the bottom dado holds the clamp rack. The rabbet along the back edge will be for the back piece.
2 A dado blade buried in an auxiliary rip fence makes forming the rabbet along the back edge of the sides easy.
After breaking down the sheet, I trimmed the side panels to the final size at the table saw. Then, swapping out for a dado blade, I tackled the joinery. I took my time to make sure that the dado blade was set up the proper size for the Baltic birch plywood that I was using. Then, attaching an auxiliary fence on the rip fence (Photo 2), I cut the rabbet along the back edge.
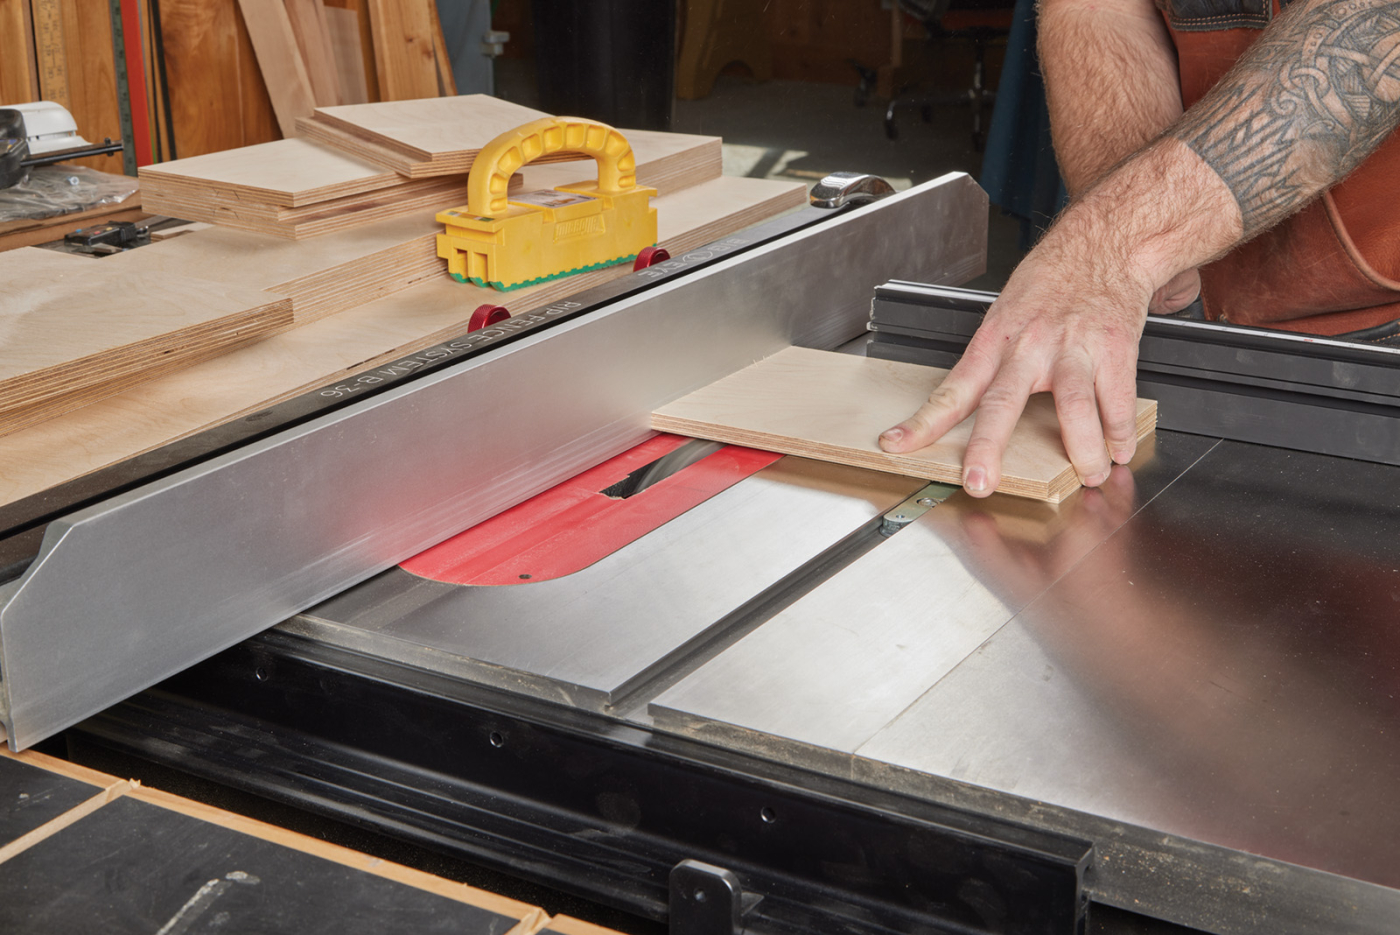
3 Use the fence to position the part to form the dadoes. Guide the workpiece with the miter gauge.
After the rabbets are cut, remove the auxiliary fence, and cut the dadoes in the sides. I use the miter gauge to guide the workpiece through the blade here. After cutting the first dadoes on each side, don’t change the setup. First, you’ll want to use this same fence setting to cut a groove along the back panel (Photo 4). Now, you can change the fence and finish out the final dado, as well as the groove on the back. To add a little shape to the sides, I roughed in an arc with a pencil and cut it out at the bandsaw. As you can see in Photo 5, I taped both sides together before cutting these at once. Keep the off cuts, as you’ll use these for braces in a bit.
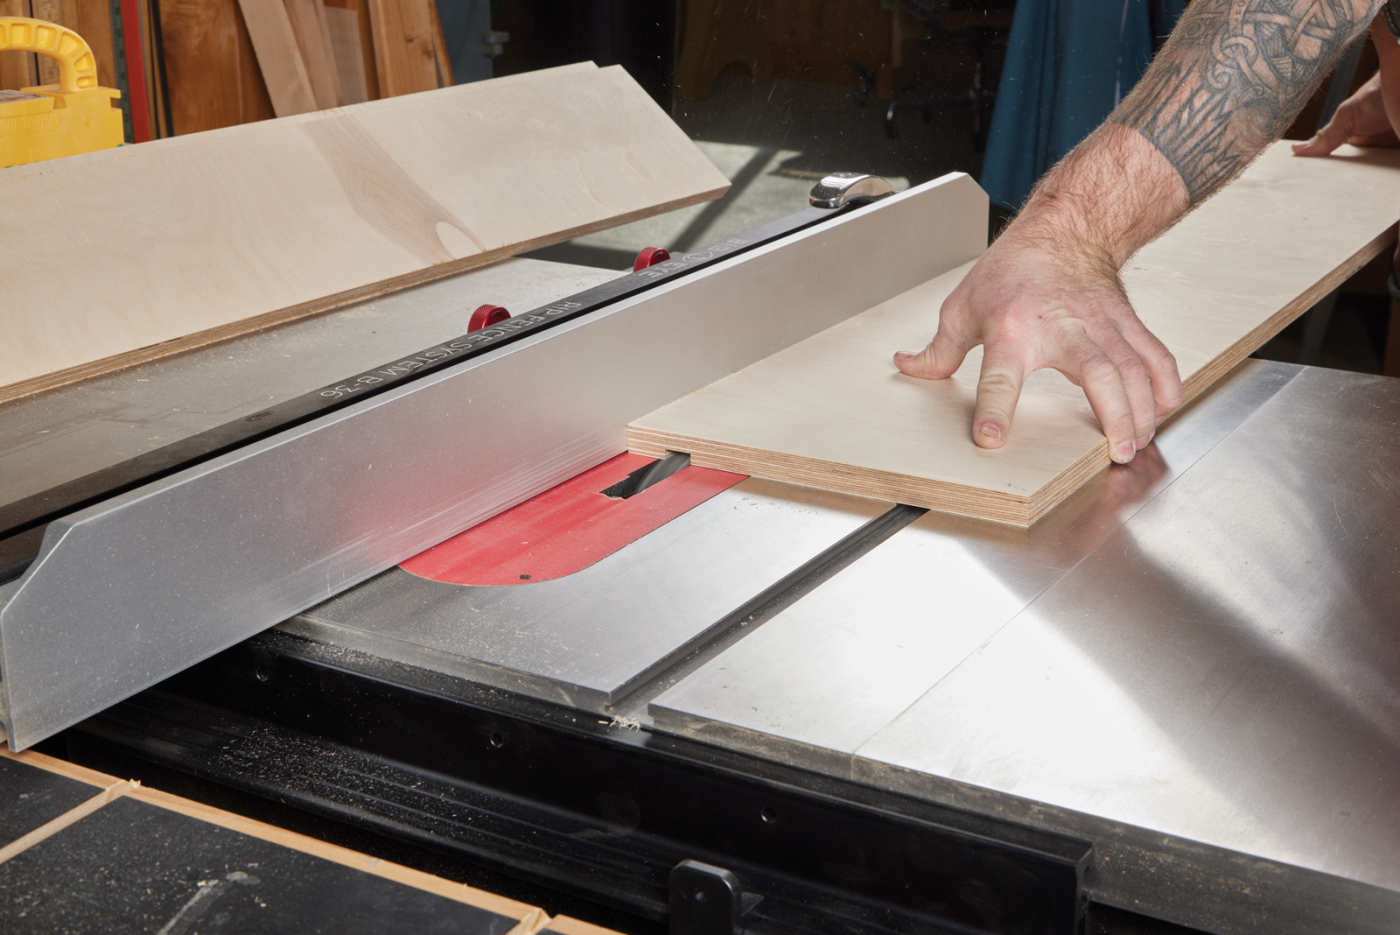
4 After cutting one dado in the side, cut the matching groove in the back before adjusting the fence settings.
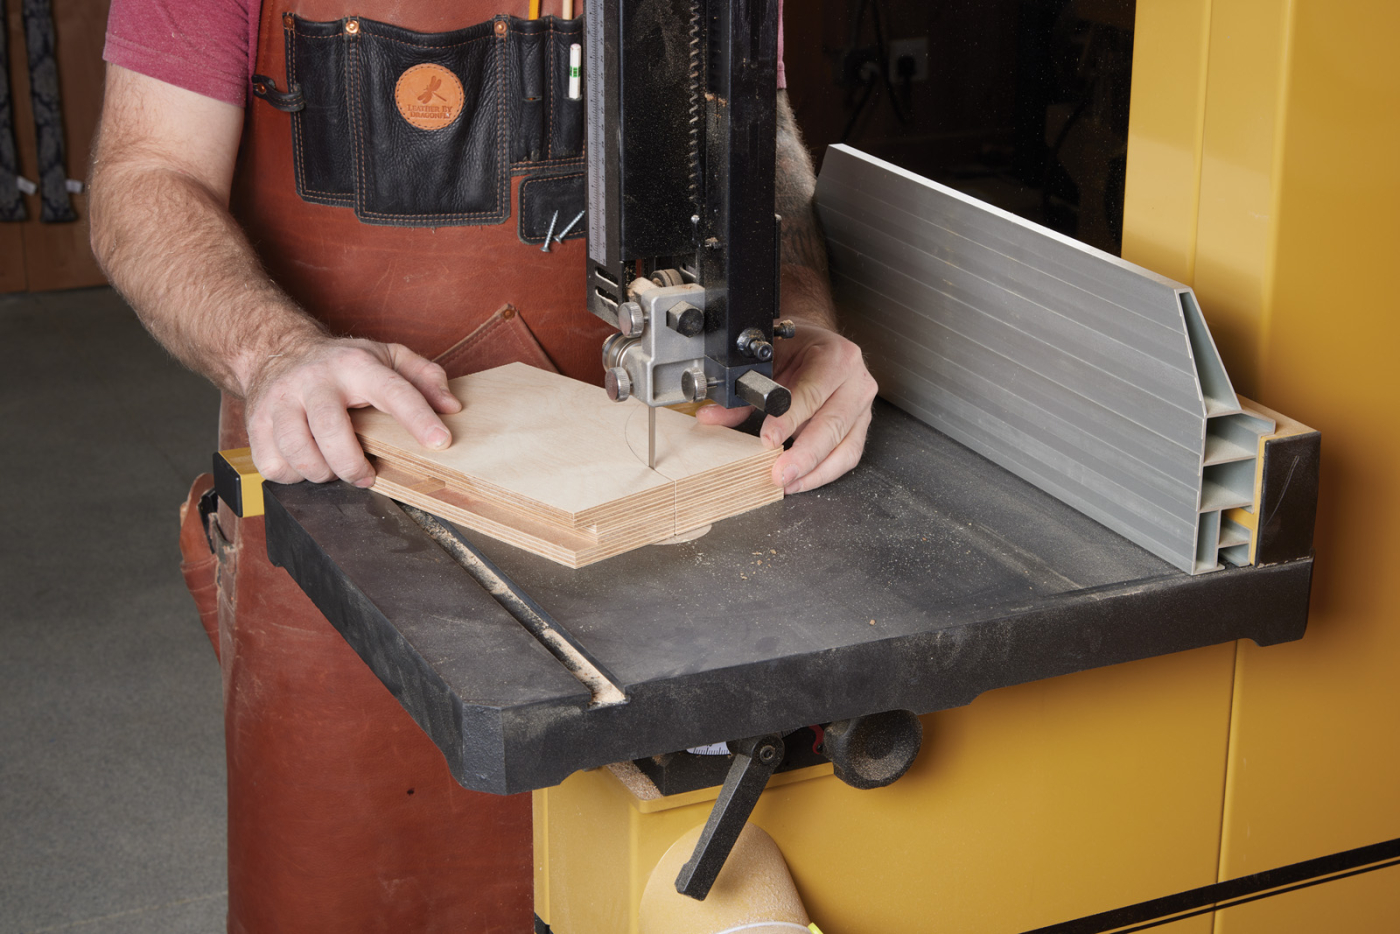
5 Use double-sided tape to stick the sides together and gang cut them at the bandsaw.
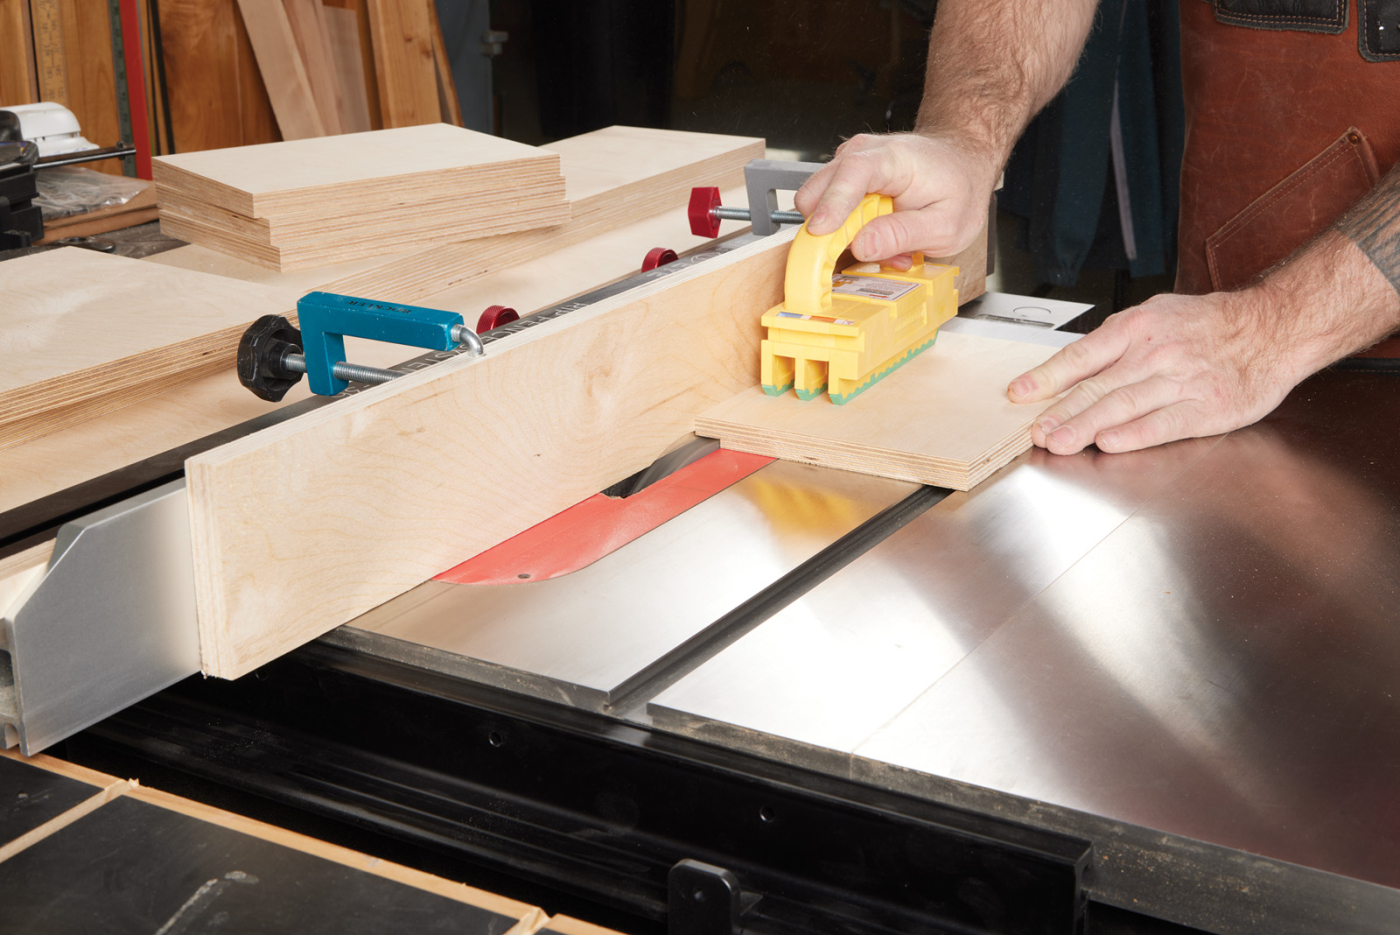
Before any assembly can happen, you need to take a moment to create the clamp holder. As you can see in Photo 6, I did this at the table saw. Setting up a dado blade to match my clamp bars (3/8“ in this case), I raised the blade as far as possible before making my cuts. I spaced out the clamp holder kerfs to give a little bit of room between the clamp heads. The spacing shown here works well for parallel or F-style clamps.
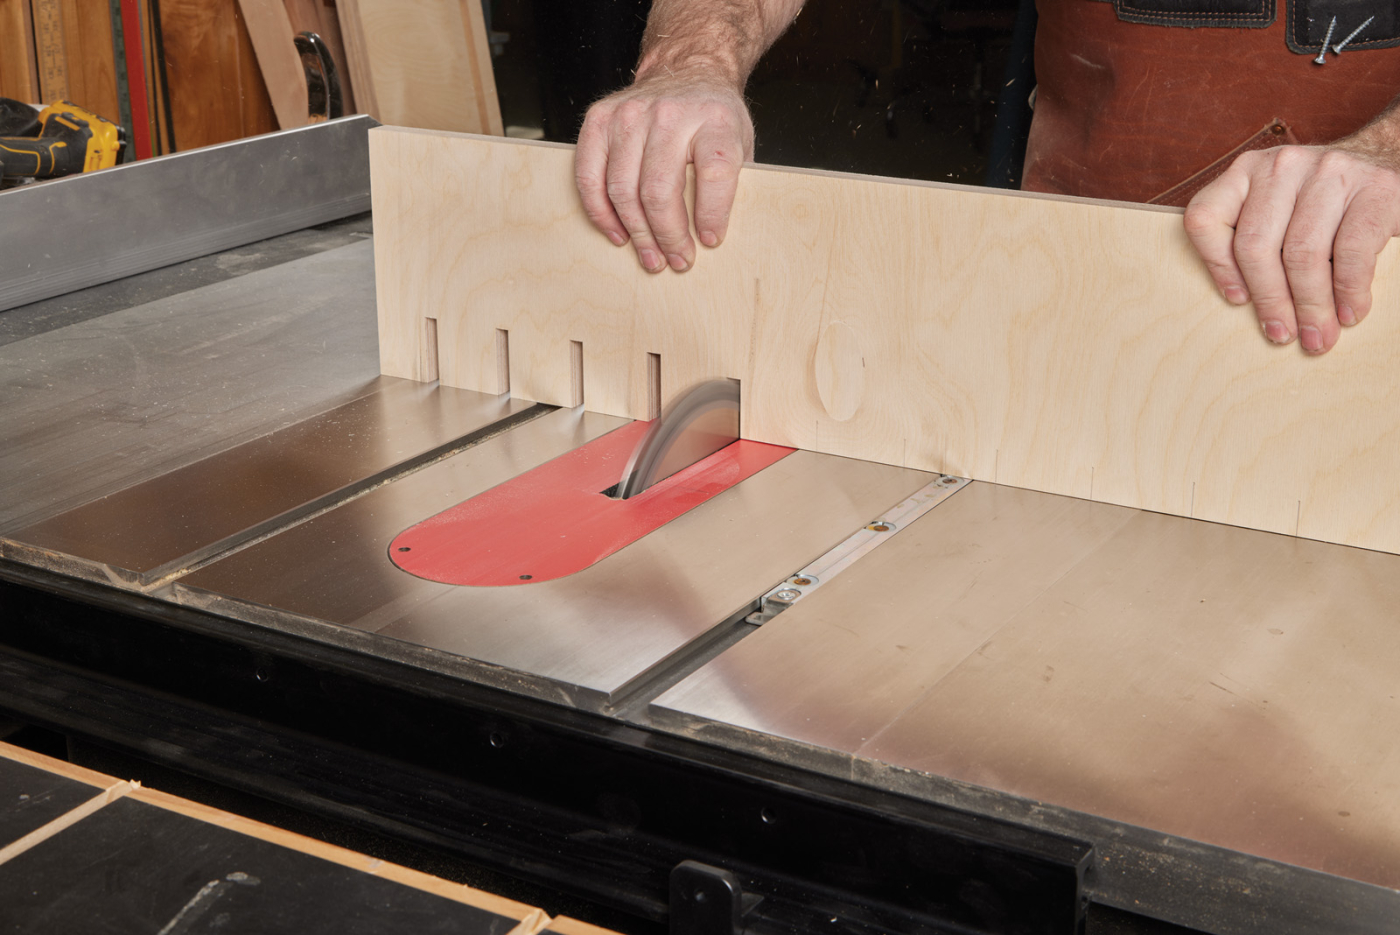
6 Raise the dado blade as high as possible and cut the clamp notches.
Now, the clamp rack can be assembled. Start by gluing in the clamp holder into the lower dado. Countersunk screws from the back will hold it in place. Remember the offcuts from the sides? Those get used as some support under the clamp holder, as you see in Photo 7. These get glued and screwed in place.
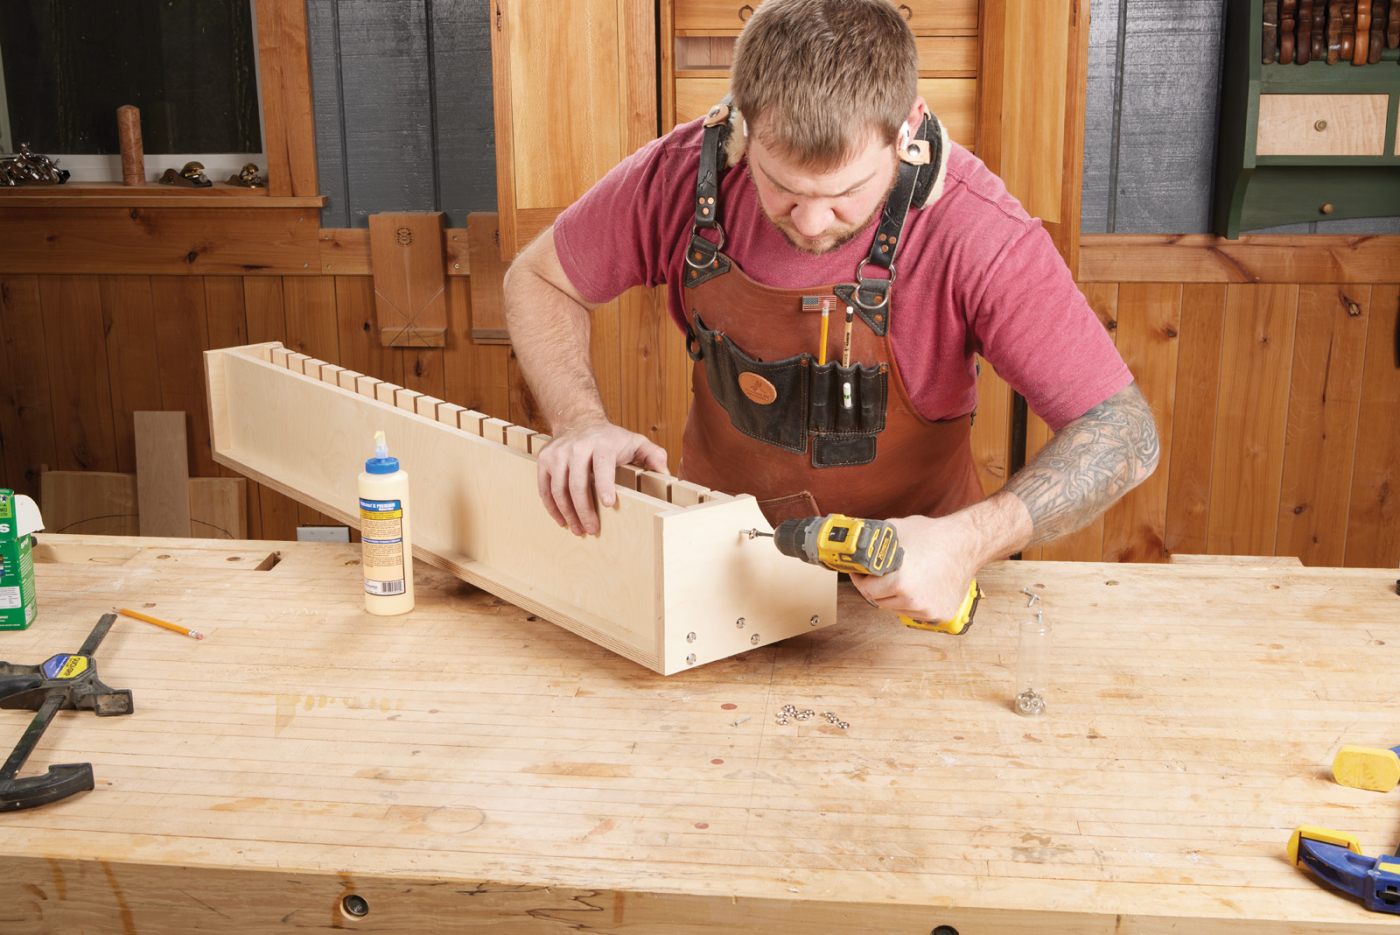
8 Finish washers on the outside give a clean look.
The top/shelf of the rack gets glued in next, as well as screwed in place. The sides get glued and popped into place. As you can see in the main photo and Photo 8, I decided to drive screws through the sides to hold everything together. Instead of countersinking these, I opted for some trim-washers on the screw heads. These are little metal rings that cradle the screw head and add a finished look. Now, the clamp can get sprayed with a couple of coats of lacquer before mounting it to studs in the wall.
 Drill Bit Index
 Drill Bit Index
I mentioned at the beginning of this article that this project was out of left field. But there’s a back story—let me explain. I received a nice set of drill bits for Christmas. Fisch brand… by far the nicest I’ve had. However, they came in a disposable plastic package. So, I set out to buy a metal drill bit index. To my dismay, I couldn’t find one to fit this 7-piece set. So, I took inspiration from some of the old wooden, shop-made indexes I’ve found in flea markets and turned this one.
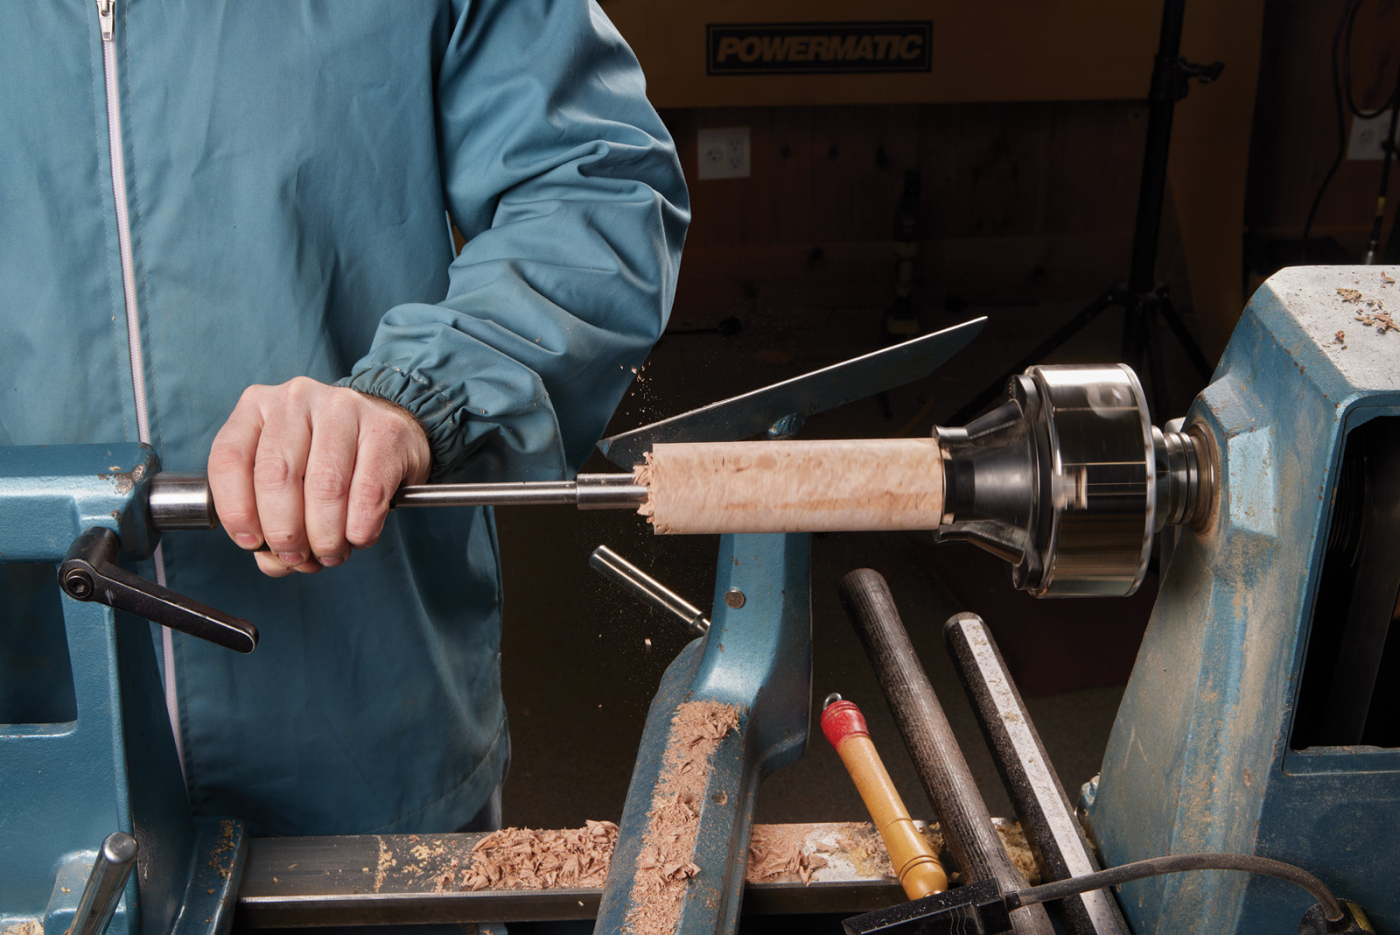
 This index starts with a blank—maple burl in this case. It’s held between centers and turned round. A tenon is cut on each end to fit in the chuck and the base is parted off of the lid (see Photo 9). To hollow out the base and lid, I used a Forstner bit held in a Jacob’s chuck in the tailstock. A bit extension will let you drill to the complete depth—no extra hollowing necessary.

9 A blank is held between centers. A spindle roughing gouge will work well for the heavy material removal. I switched over to a skew chisel to making planing cuts—this leaves a very smooth surface that can be sanded starting with 240-grit.
10 The easiest way to hollow a box like this is with a Forstner bit and a Jacob’s chuck. The chuck turns the part, and the tailstock feeds in the drill bit.
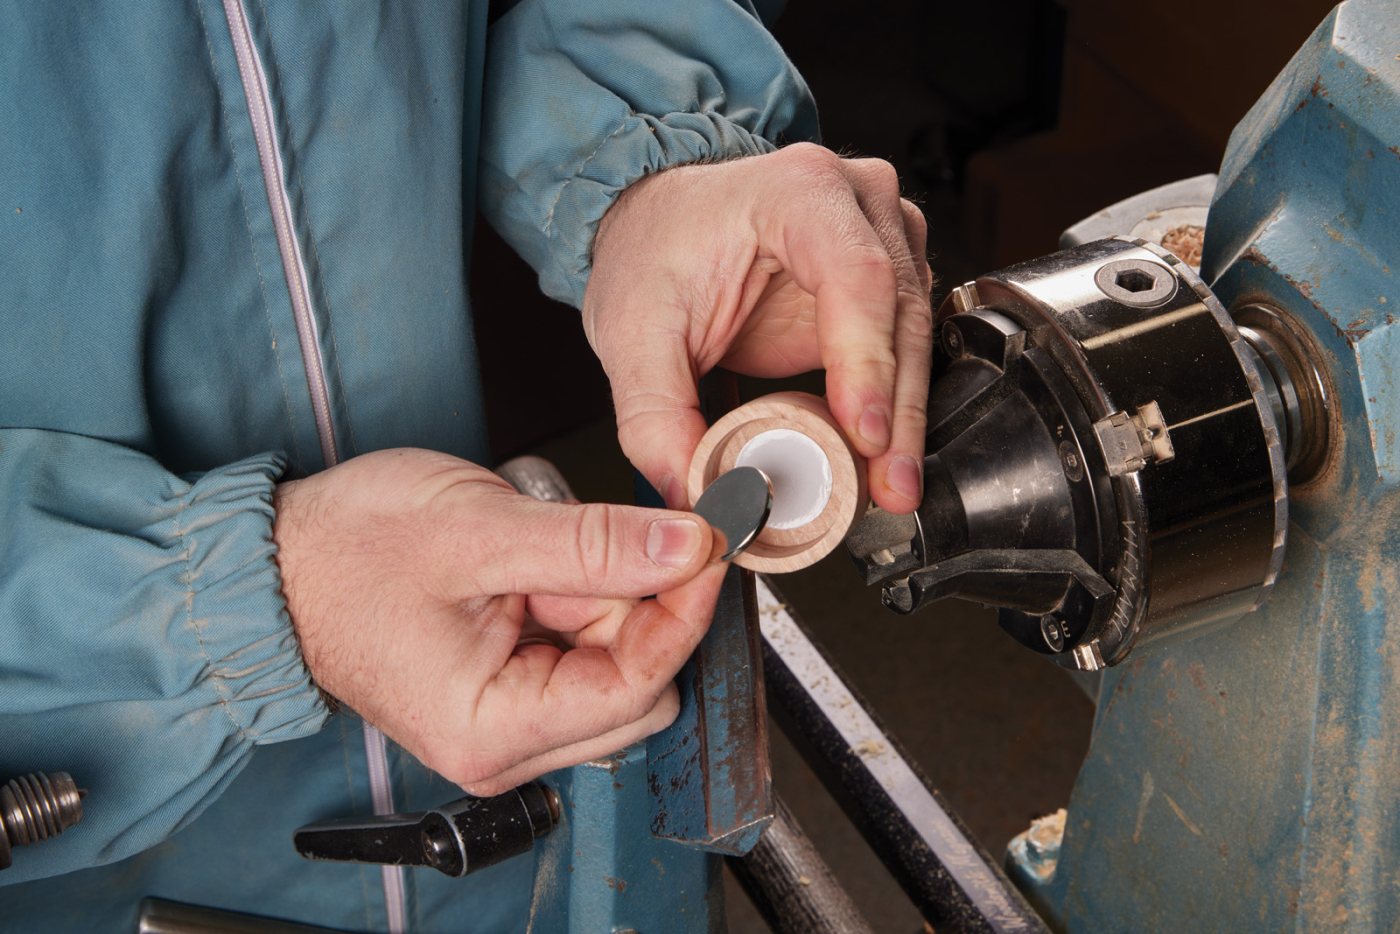
The insert is what holds the drill bit shanks. I turned this from a separate piece of boxwood so that I could hide a magnet under it to “snap” the shanks in place. Turn it round, so that it fits into the base. You’re looking for a friction fit. Make sure to leave a shoulder on the insert, as you see in Photo 14). This shoulder will get turned down in a little bit to fit into the lid for a nice, “pop” fit. Drill the holes for the shanks at the drill press (hold the insert in a hand screw clamp). Note that often times, larger bits have a smaller shank (my 3/8– 1/2“ bits all have the same shank).

11 Check the fit of the insert inside the base. You’re looking for a good, friction fit so that the shoulder seats on the edge of the base.
12 A rare-earth magnet is held in the bottom with a round of double-sided tape.
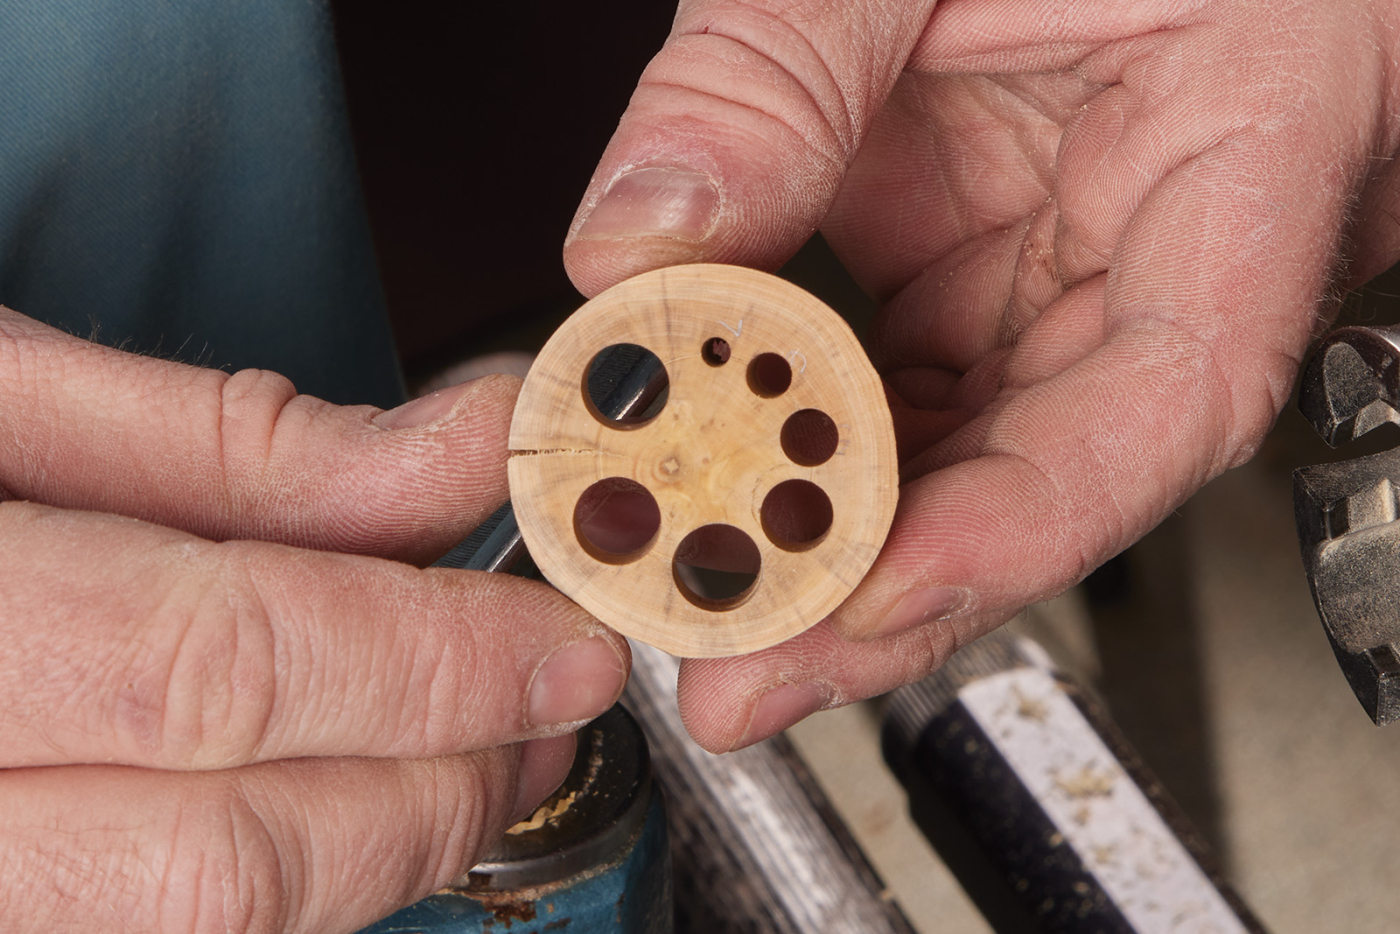
13 It’s a bit of an experiment with the positioning to get spacing to look correct on the drill bits. I like the “Fibonacci Spiral” that the graduated shank holes create.
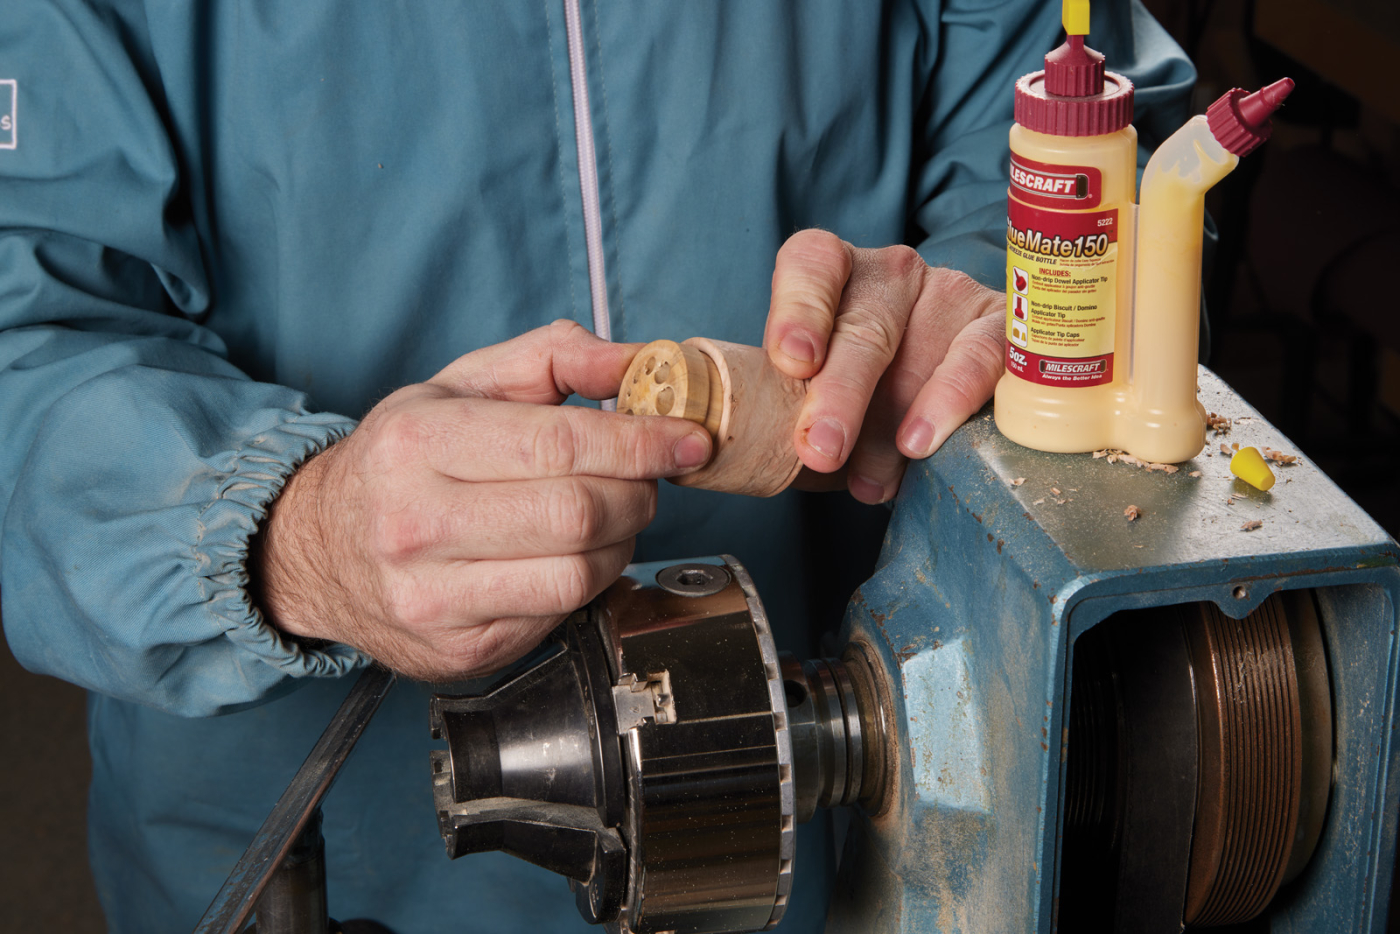
14 The insert is glued in place. It’s a bit oversized on the top, allowing for it to be turned to final diameter. You’re looking for a firm pop fit in the lid. Remember that sanding will loosen it slightly.
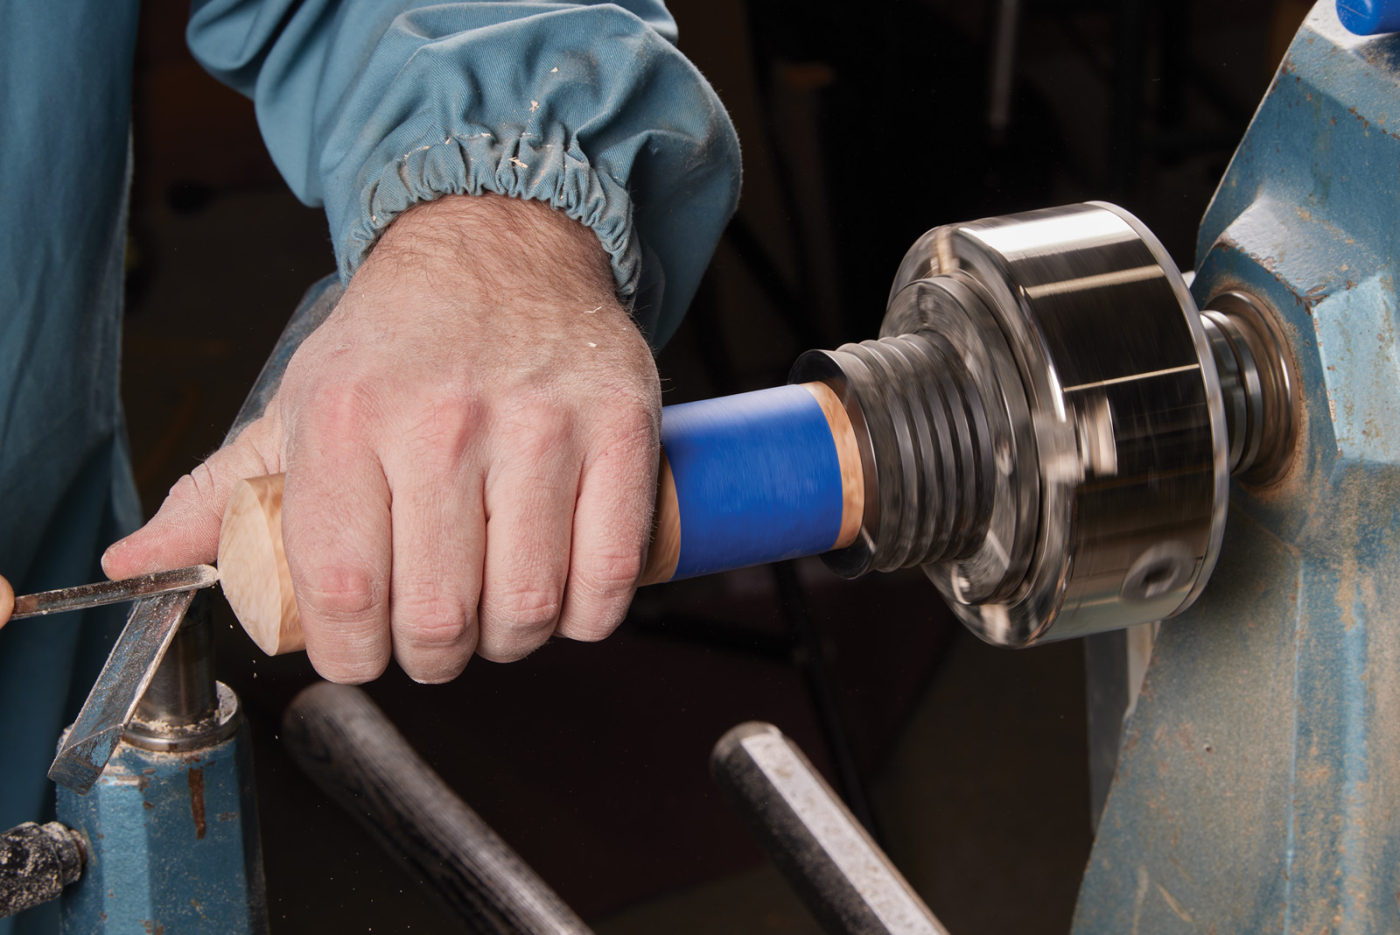
15 Dome over the top of the lid. Blue painter’s tape holds the two halves together as you make this cut.
With the insert glued in place, turn it down to fit snugly inside the lid. You’re just concentrating on the shoulder here — leave the base material untouched. Once it fits, give everything a sanding and apply a coat of finish. I used shellac and Danish oil. After the finish has dried, put the top in place and wrap a couple of wraps of tape around the joint of the index. This acts like a jam chuck and will allow you to do some final shaping on the end of the index. As you see in Photo 15, I use my hand for a little extra support while making this cut. Once the tip is done, you can part the base away from the tenon. I slightly dish out the base with some hand sanding, allowing the index to sit flat on the workbench without tipping over.
Utility Shelves
Finally, arguably the most useful little shop project are these little utility shelves. I use them all over my shop, and the basic design for each one is the same, but they all serve their own purpose.
 There’s no fancy joinery here. The back support is attached to the platform with glue and screws—that’s right, a simple butt joint. This is the foundation of these shelves — a place to rest things, and a way to mount it. Now, what treatment you add to the shelf will dictate how it’s used.
16 A shelf with a magnetic back can mount directly to a machine.
Starting at Photo 16, you can see a push pad holder. With this shelf, I flipped it upside down. The platform is on the bottom, and the back support has a few embedded magnets on the back to mount it to a machine. This shelf is the home for one of my push blocks at my jointer. (To be fair, this is stuck on the side of my planer, which is next to my jointer.) The platform here is two layers—I cut an opening in one to match the shape of the push pad, then glued it to the other layer. The push pad slips right in place and doesn’t fall off.
17 Scale the shelf to fit as many items on it as you’d like.
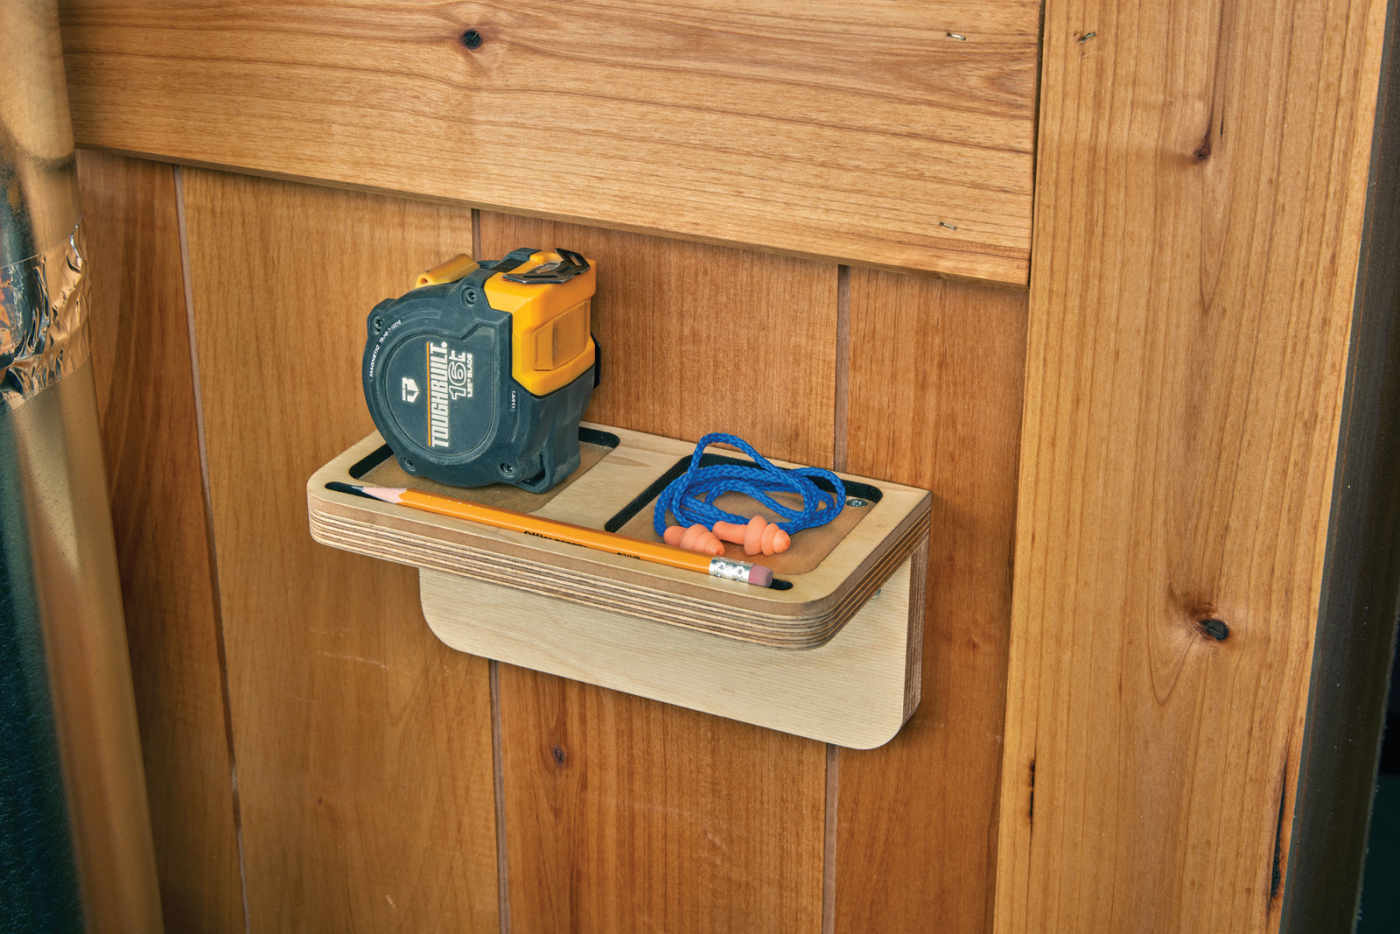
The next shelf is my little “valet” (photo 17). It is next to my table saw. This orientation has the platform on top, with another two-layer construction. Cutouts create a pencil groove and two dishes— one usually has a tape measure and the other earplugs. Both are things I use at the table saw where this shelf is. You’ll notice the inside edges of the trays are black — I cut this out on the laser cutter, however you could do it by hand with a scroll saw. If you have several of these to make, you could also use a template, and rout out dishes with a bowl and tray bit and a handheld router.
18 Simple dishes and pencil holders are a handy shop caddy near common workstations.
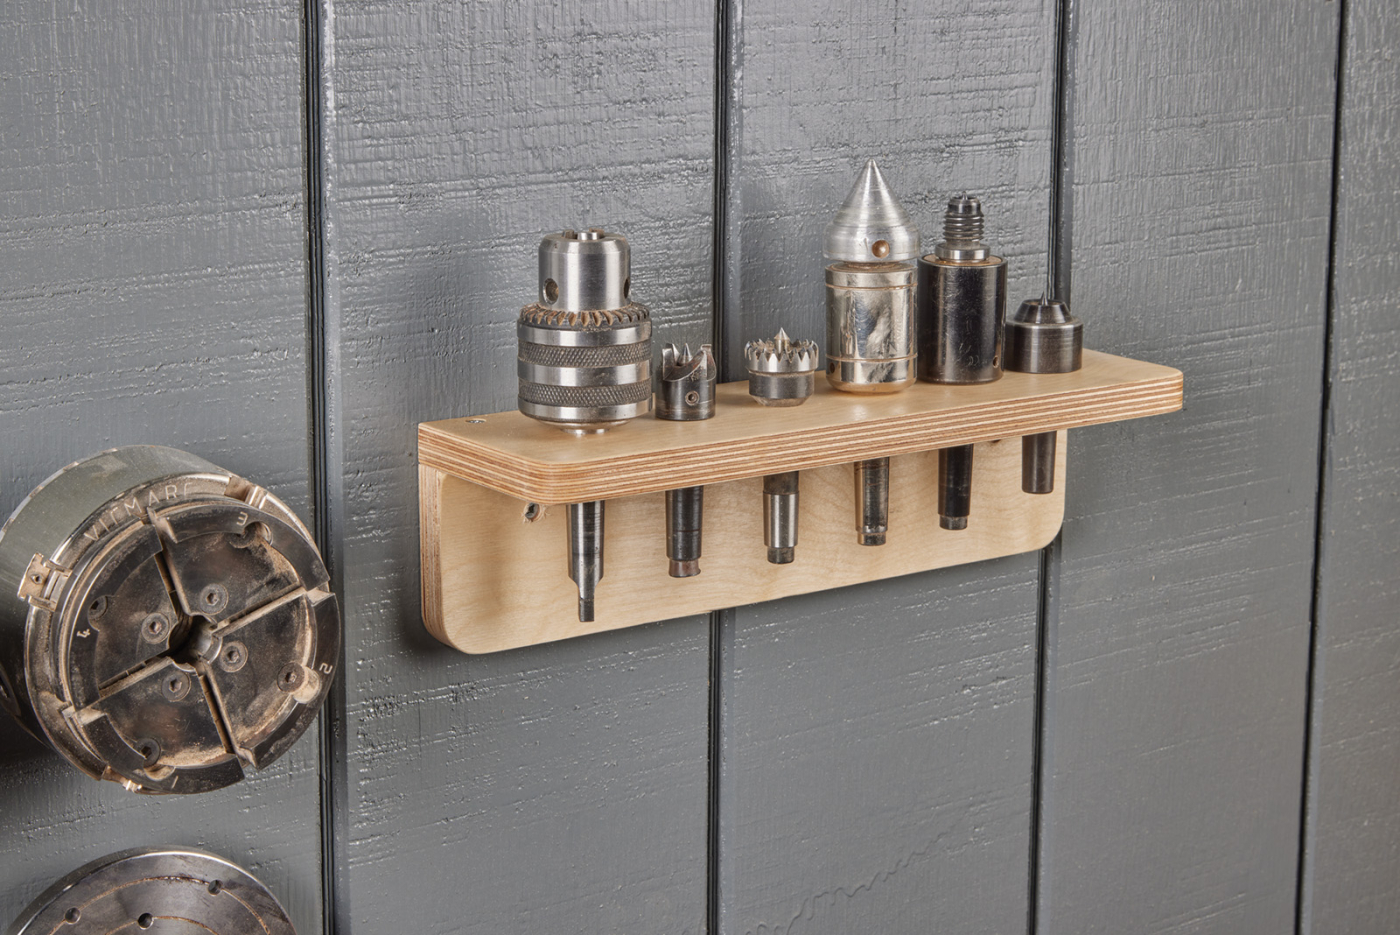
Finally, Photo 18 shows my holder at the lathe. This shelf is a little bit longer and is adorned with 6 holes to hold various centers for turning. Drive spurs, cup centers, etc all live here. Now, the beauty of these are that you can make them any size you want, to hold whatever you want. You’ll see my dimensions above, but just treat these as starting points — build them to fit your needs.
Here are some supplies and tools we find essential in our everyday work around the shop. We may receive a commission from sales referred by our links; however, we have carefully selected these products for their usefulness and quality.