We may receive a commission when you use our affiliate links. However, this does not impact our recommendations.
 Sometimes it’s fun to build a gadget just because it’s a neat idea. There are many ways to draw a centerline, for example, but this method is very clever. It doesn’t require any measuring or trial-and-error adjustments.
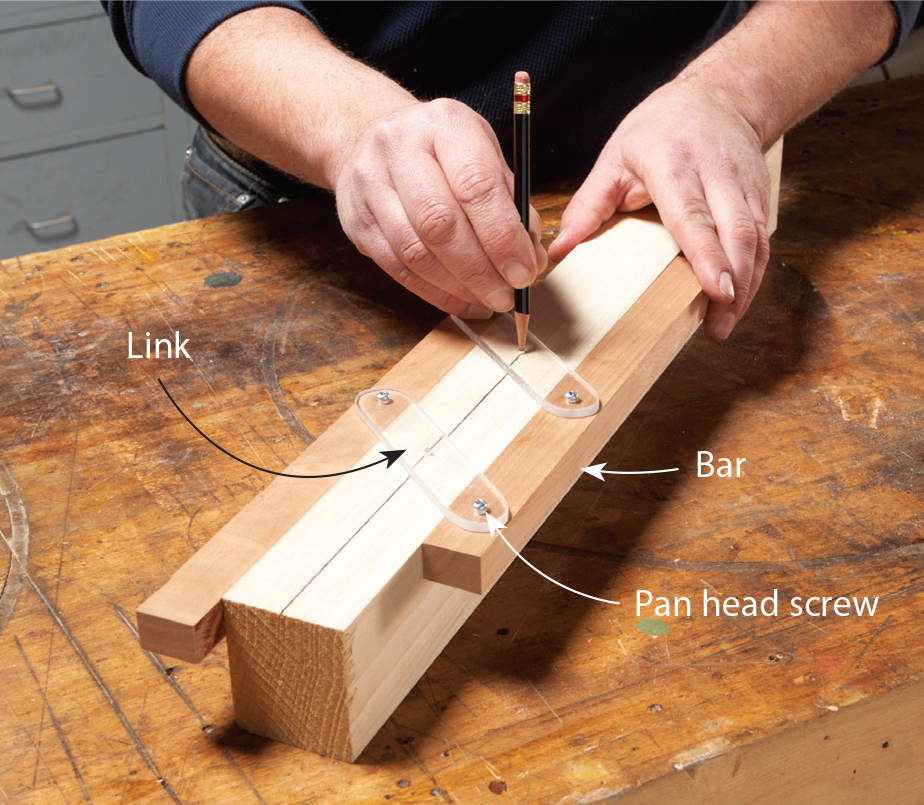
To build the marker, you’ll need two hardwood bars 3/4″ x 1″ x 12″, two Plexiglas links 1/4″ x 3/4″ x 4-1/2″ and four #6 pan head screws 3/4″ long. Start by making the links. Scribe a line down the exact center of one link and mark two holes with an awl, 1/2″ in from each end. Stack the two links together and drill the holes using a drill press. (The holes should be just barely large enough in diameter to let the screws slip through.)
Mark centerlines along both wood bars. Drill pilot holes for the screws that are 1″ and 5″ from the end of each piece. Fasten the links to the bars. Leave the screws a little loose so the links can pivot. Close the bars together and mark holes in each link directly above the line formed by the bar’s inner edges—this is the precise center of the links, end-to-end. Drill holes on these marks just large enough to admit the point of a sharpened pencil. Countersink the holes if you wish.
To mark a centerline, snug the bars up to your stock. The marker works for boards up to 4″ wide. –Bill Wells
Here are some supplies and tools we find essential in our everyday work around the shop. We may receive a commission from sales referred by our links; however, we have carefully selected these products for their usefulness and quality.