We may receive a commission when you use our affiliate links. However, this does not impact our recommendations.
 I use lots of wedges in my shop, sometimes as disposable clamp pads for tricky glue-ups or for general shimming chores. Sometimes they’re incorporated into a project, as when making wedged mortise-and-tenon joints. I used to cut wedges on the band saw but the rough surfaces often proved to be a hindrance. I decided to make an adjustable wedge-cutting jig to fit my table saw’s miter gauge, and now I’m able to quickly produce consistently tapered wedges with straight, smooth faces.
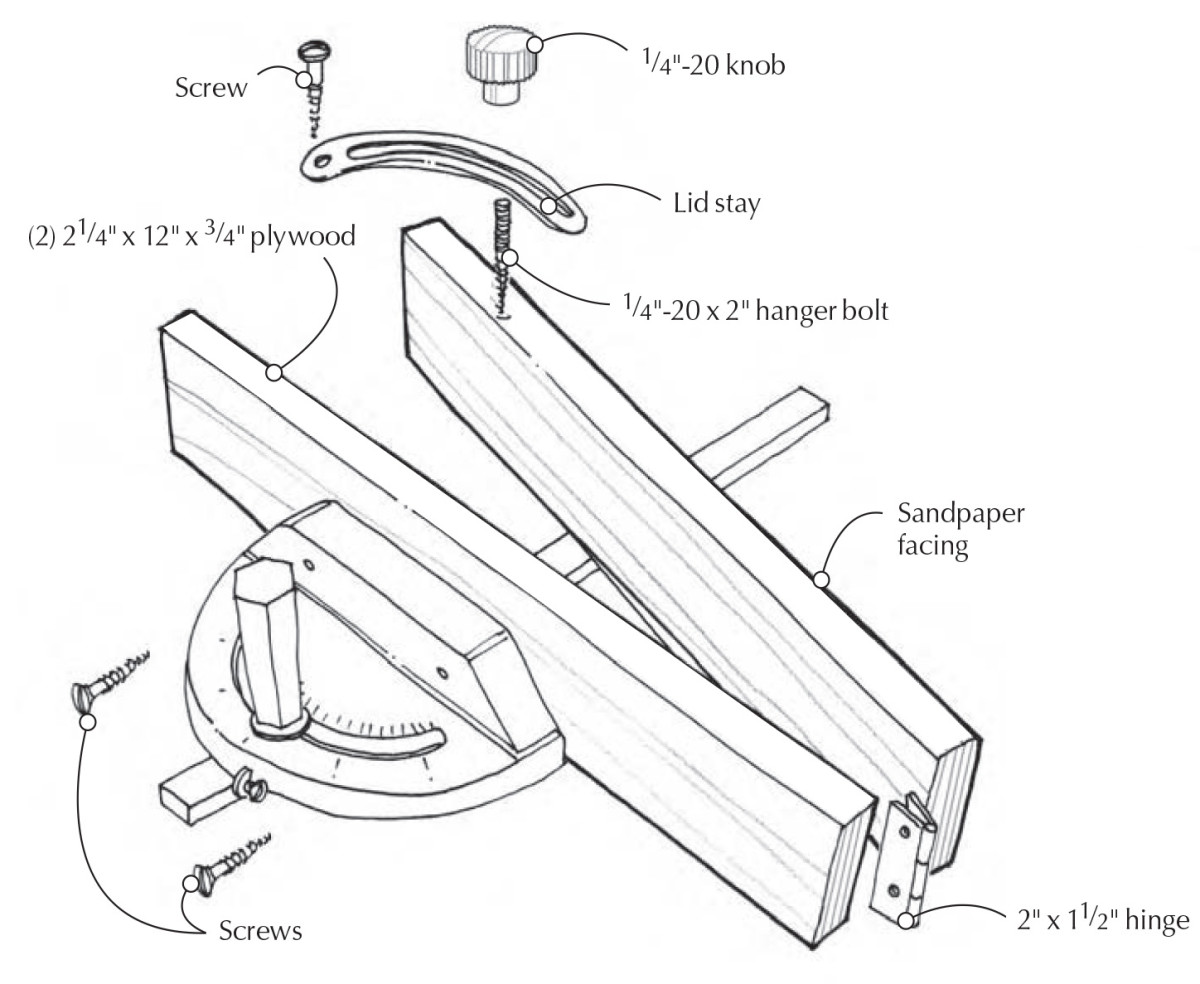
 The jig consists of just two pieces of 3⁄4“-thick plywood, 21⁄4” wide x 12″ long. I hinged the right side and attached a piece of self-stick sandpaper to the face to prevent stock slippage. I installed a quadrant-type lid stay and locking knob on top, and attached the whole assembly to my miter gauge with roundhead woodscrews through existing holes in the miter-gauge head.
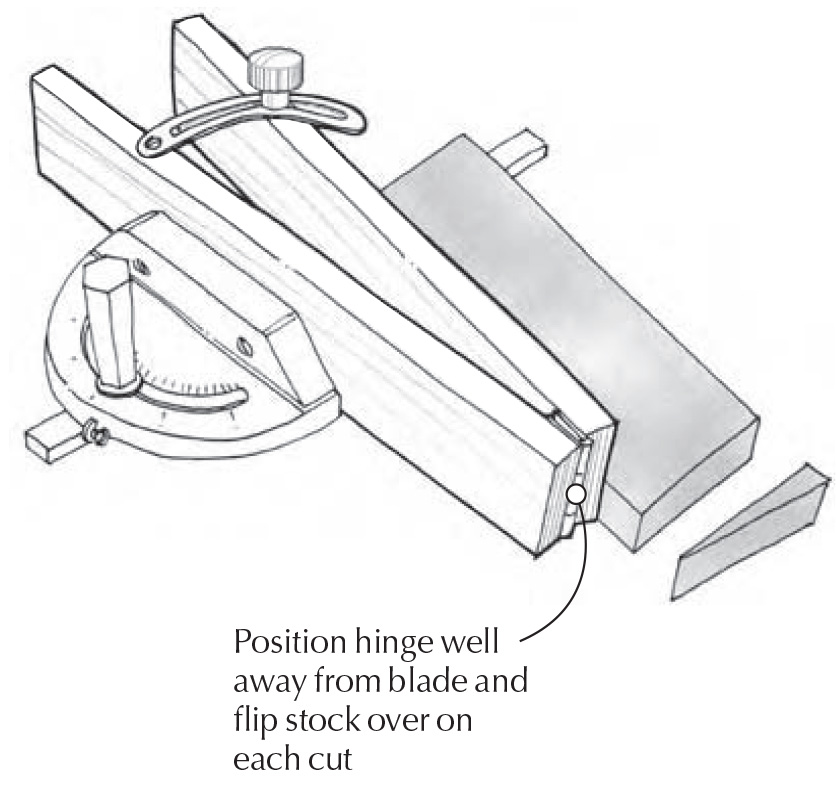
To use the jig, first draw a reference line on your table saw top extending forward from the offcut side of the blade.
Adjust the fence angle as desired, and saw the wedges to your desired thickness, referencing the line on the table. — Craig Bentzley
Here are some supplies and tools we find essential in our everyday work around the shop. We may receive a commission from sales referred by our links; however, we have carefully selected these products for their usefulness and quality.