We may receive a commission when you use our affiliate links. However, this does not impact our recommendations.
Three ways to achieve different types of textures with your CNC router.
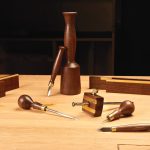
CNC Routers open up lots of new ways to create textures in wood. Here are my three favorite ways of creating textures using a CNC. The first method uses the repetition of shapes to create a design that is routed using one or more bits. If you enjoy doodling patterns, this is a technique that you will enjoy. The second method uses programming built into the design software to generate a textured design that simulates a hand-carved pattern. The third texturing method starts with a photograph and converts the light and dark areas into the routing paths. Each method has a few basic rules to follow, but add some imagination and the variations you can achieve are virtually limitless. I used Vectric Aspire CNC design software to create the textures for this article, but other software packages such as ArtCAM and EnRoute can also be used to create textures.
Shape-Based Textures
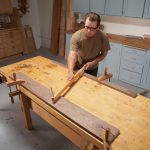
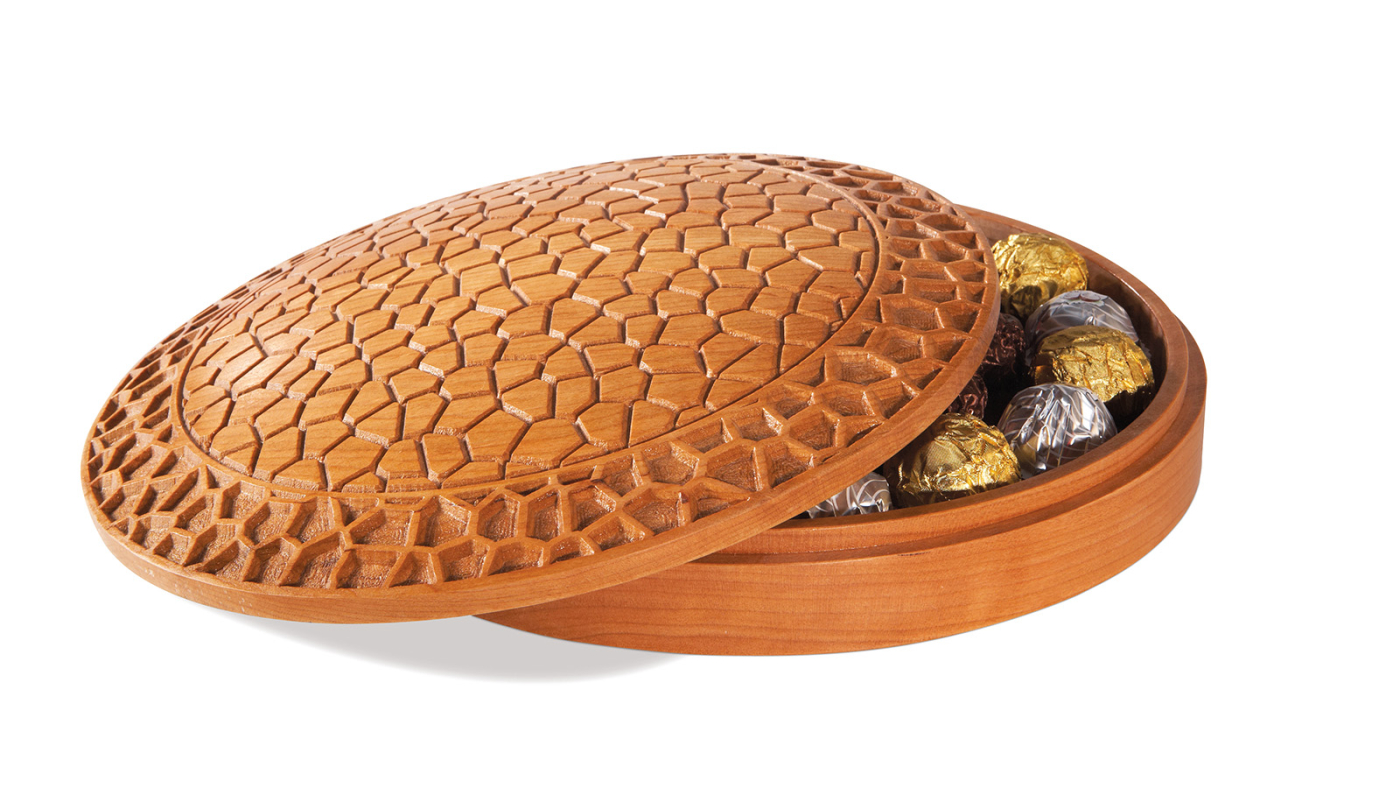
 Shape-based textures are created by repeating a pattern of either asymmetrical or symmetrical shapes. Patterns can be hand-drawn or drafted with a CAD program such as Google SketchUp. Hand-drawn designs need to be scanned or digitally photographed so they can be imported into the CNC design program. CNC design programs are also capable of creating shape-based patterns. One creative aspect of this type of texturing is that you can rout on the lines or between them to achieve different effects. I routed the crackle texture shown below using a 1/4″ dia. 60° v-bit. It took about 60 minutes to carve the design into the 10″ cherry lid at the top of this article. The dome shape of the lid was created first using a 1/4″ dia. ball nose bit.
Software-Based Textures
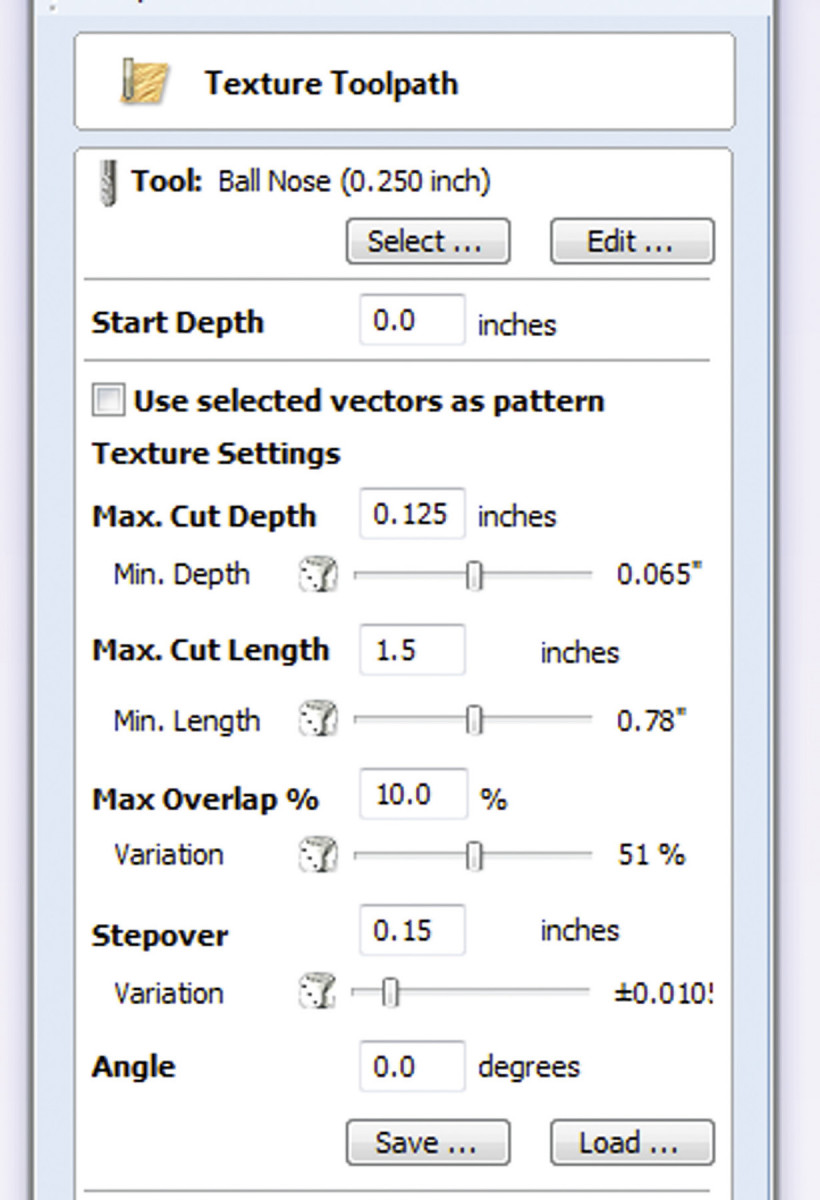
Using the built-in texturing program that comes with most CNC design software packages is an easy way to create a simulated hand-carved texture. As shown in the program window, there are several options to choose from when designing this type of texture.
 Adjusting these variables enables you to create a wide variety of simulated hand-carved textures, ranging from those with long, closely spaced cuts, to those with short, widely spaced cuts—and anything in between. Once the options are selected, the program creates a semi-random pattern of lines (above) for the router bit to follow.
I used the settings shown here to create texture on the walnut lid shown below. I used a 1/4″ ball nose bit to create the texture, but other profiles such as straight bits or v-bits can also be used, expanding your options even further. It took about 60 minutes to carve the texture shown below.
 Photo-Based Textures
 Photo-Based Textures
 Another way to create a CNC texture is to start with a photo. Not all photos work equally well, however. That’s because the CNC design software reads the light areas as high points and the dark areas as low points and tells the CNC router to carve accordingly. A good photo image is one that is evenly lit without long shadows, but yet has good contrast. As you can see in the alligator skin photograph above, the highlights accent similar areas, while the dark areas are consistent in the rest of the photo. This type of photo will create a texture that closely resembles the contours of the original. Carving a photo-based texture requires the use of a small ball nose bit to attain the details. For the design below, I first roughed out the texture and dome shape of the lid with a 1/4″ ball nose bit and then carved the final shape and details using a 1/8″ ball nose bit. It took about two hours to do the final routing and about the same amount of time for the roughing passes.
Texture Variations
 Texture Variations
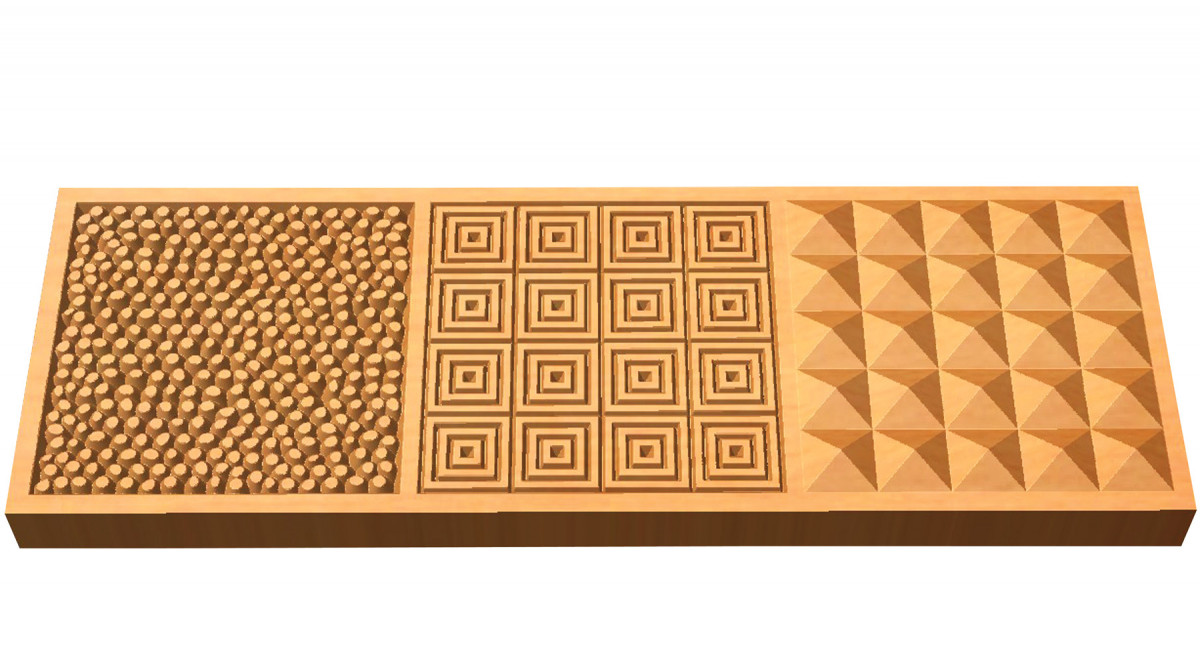
Shape-based textures can take many forms, from low relief to high relief, and from subtle to bold. The three textures above are just a sampling of options that are possible with this approach to designing textures for the CNC. The one on the left was created using a collection of small circles that were then routed around with a 60° v-bit. The middle design is simply an array of concentric squares, while the one on the right uses a grid pattern made with a 120° v-bit.
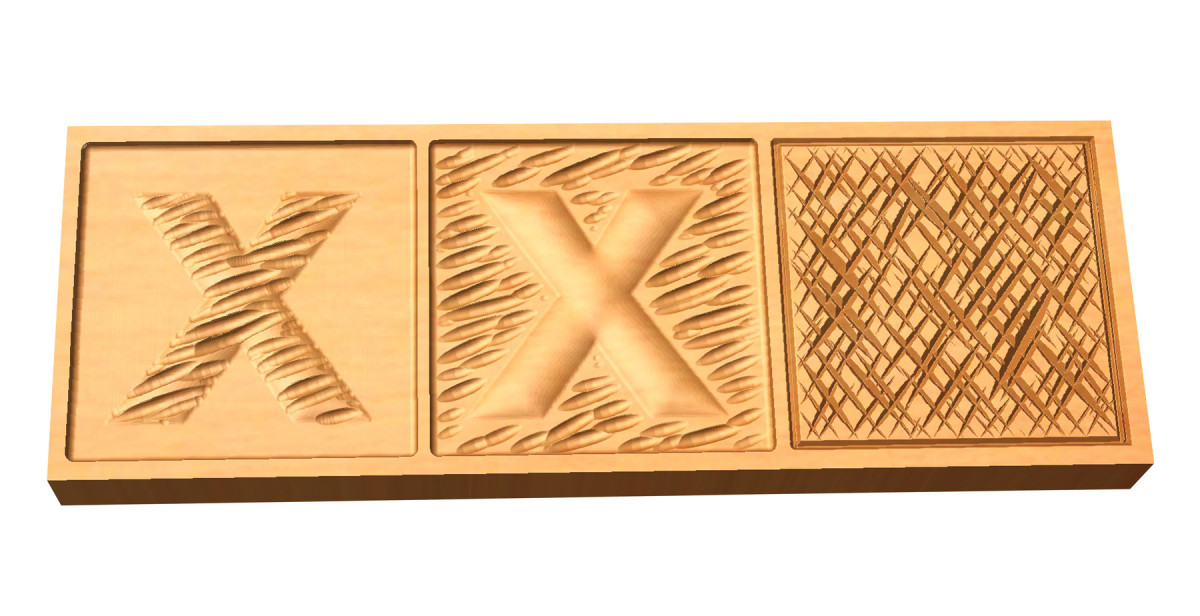
Software-based textures are the easiest—and often the fastest—to create, and can be run on top of a shape (left), around a shape (middle), or overlapping in different directions (right). These options allow you to be selective and creative in where and how the texture is applied. Using different bits will also expand the variations you can create with this method of texturing.
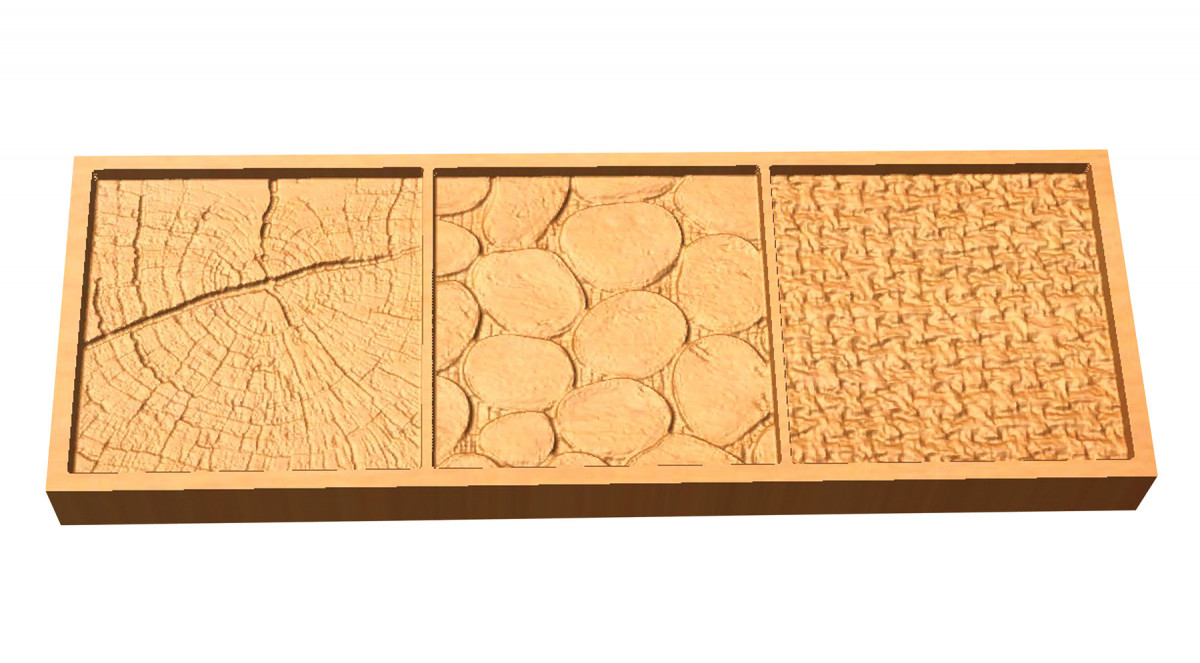
Photo-based textures are an easy way to simulate existing textures—as seen in these three examples. The weathered end grain (left) shows a surprising amount of detail, as does the cloth texture (right). The stones (middle) create an interesting pattern, although they are rendered quite flat. Additional depth can be added to the stones through the use of other modeling tools, if so desired. The thing to remember about creating textures from photos is to always start with a photo that has even contrast.
Here are some supplies and tools we find essential in our everyday work around the shop. We may receive a commission from sales referred by our links; however, we have carefully selected these products for their usefulness and quality.