


We may receive a commission when you use our affiliate links. However, this does not impact our recommendations.
1. Paraffin Lube
When you rout a dovetail joint, your sense of feel is important. Your router should slide easily around the jig’s fingers, without hesitating, so you can tell which direction to push the router. To eliminate drag, rub a piece of canning wax (paraffin) on top of the comb. You won’t need much, but it sure helps!

2. Climb Cut First
To eliminate tearout inside a dovetail joint, make this your first step: Rout a shallow pass from right to left, all the way across the pin board.
This scoring pass is a climb cut (routing in the direction of the bit’s rotation), which is the opposite direction that you would normally move a router. The hazard of a climb cut is that the bit can grab, suddenly pulling the router ahead. When you take a very shallow cut, though, that’s usually not a problem.
When you’ve completed the scoring pass, rout the rest of the dovetail from left to right—the opposite, and normal, direction.
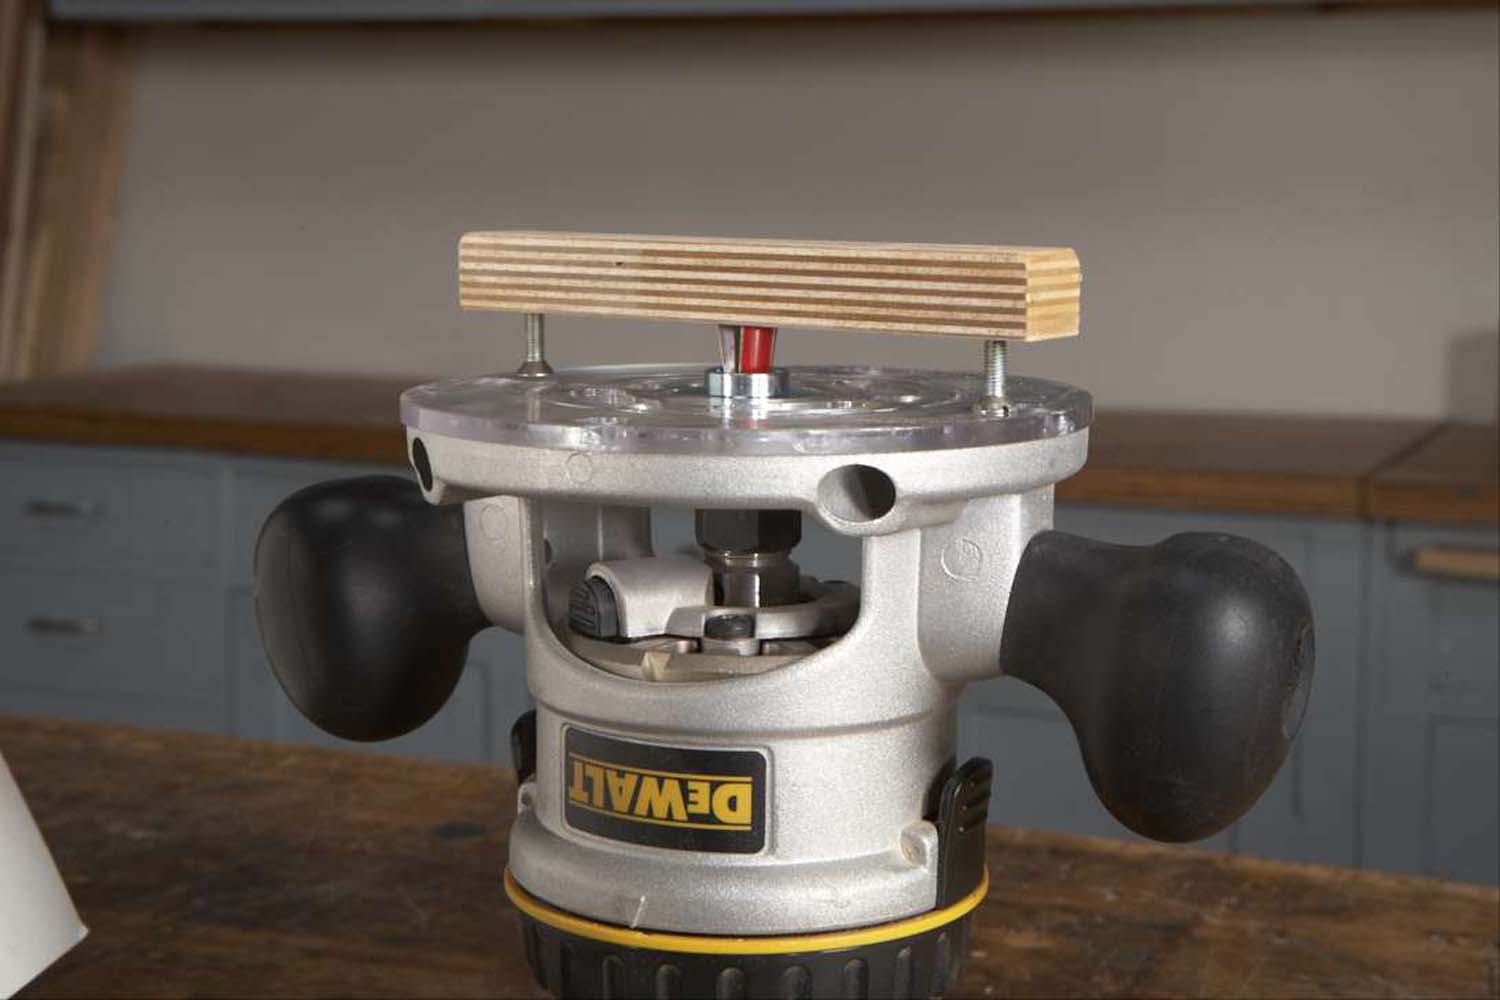
3. Make A Router Nest
When you’re constantly picking up and putting down a router with an exposed bit, it’s convenient to park the router on a safe platform. There are many ways to make one, but the main idea is that once you’ve put the router down, the bit has no chance of catching anything.
This platform is just a 1-1/2″ thick block, the same size as the router’s base, with 1/4″ X 1-3/4″ sides nailed on all around. The hole in the center is 1-3/8″ dia. Once the router is perched, it stays put. Of course, you still have to turn it off, first!
4. Add Bumpers
Accidentally routing right into your dovetail jig is pretty discouraging, and will ruin your bit. The brackets that support the jig’s comb are directly in harm’s way—if you’re not sure of the router’s position, you can chew right into them.
The solution is to add blocks that prevent the router from getting to close to the brackets. On this jig, you can clamp bumpers directly to the comb; for models without extra-long combs, clamp tall blocks to the workbench.
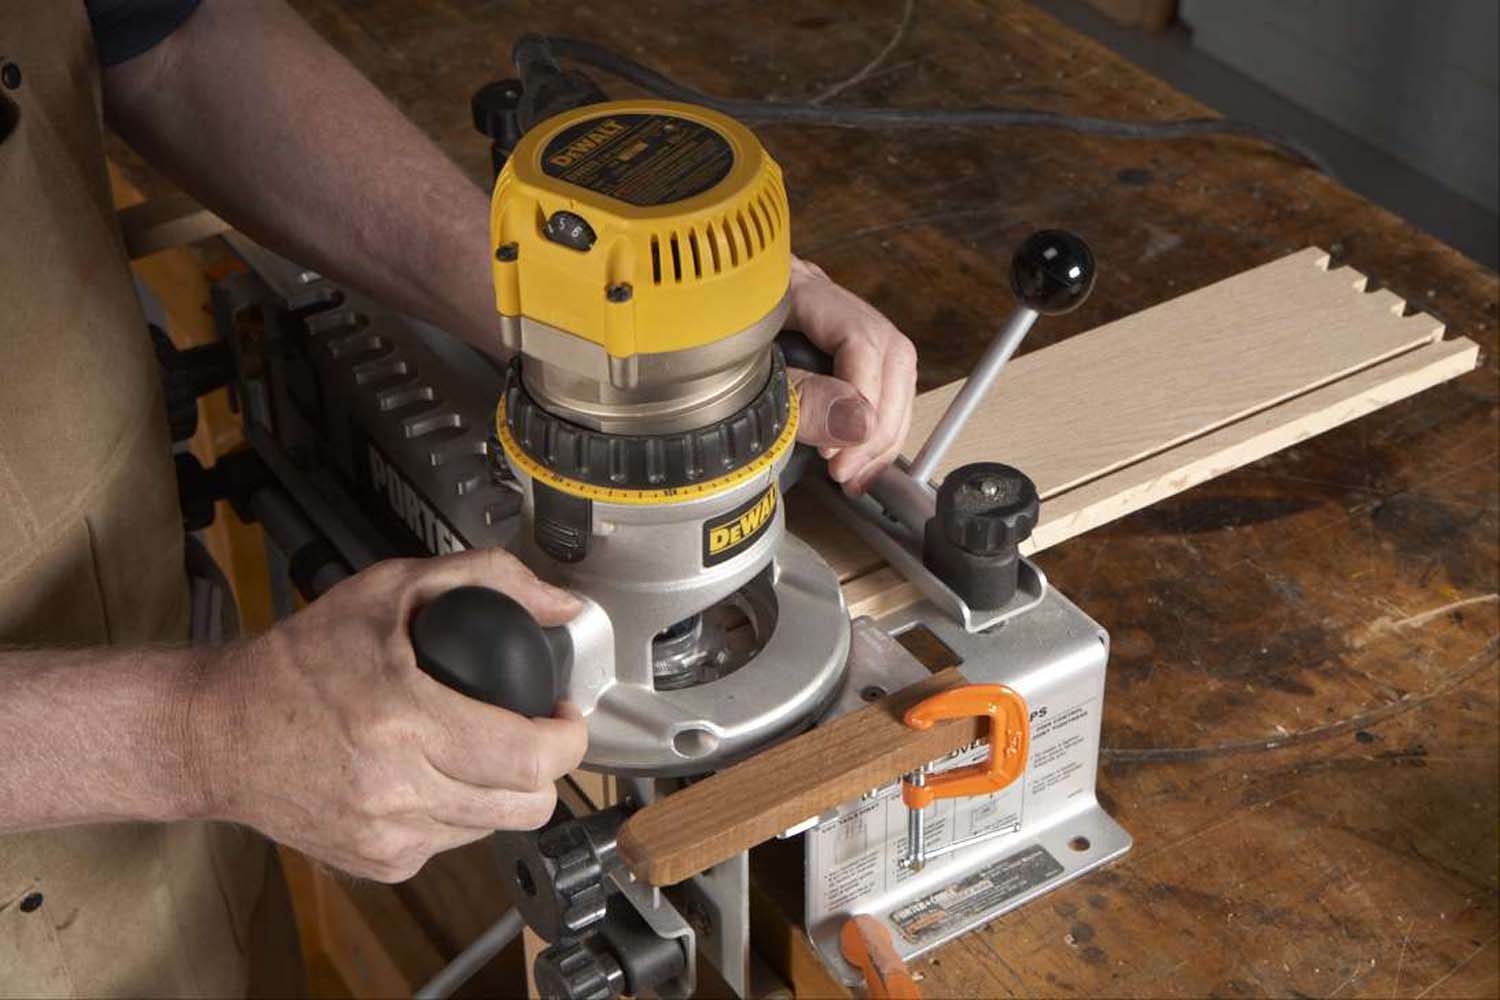
5. Make A Height Block
One of the most frustrating parts of setting up a dovetail jig is getting the bit set to the correct depth of cut. Using a ruler can be very awkward—it’s much easier using a height block.
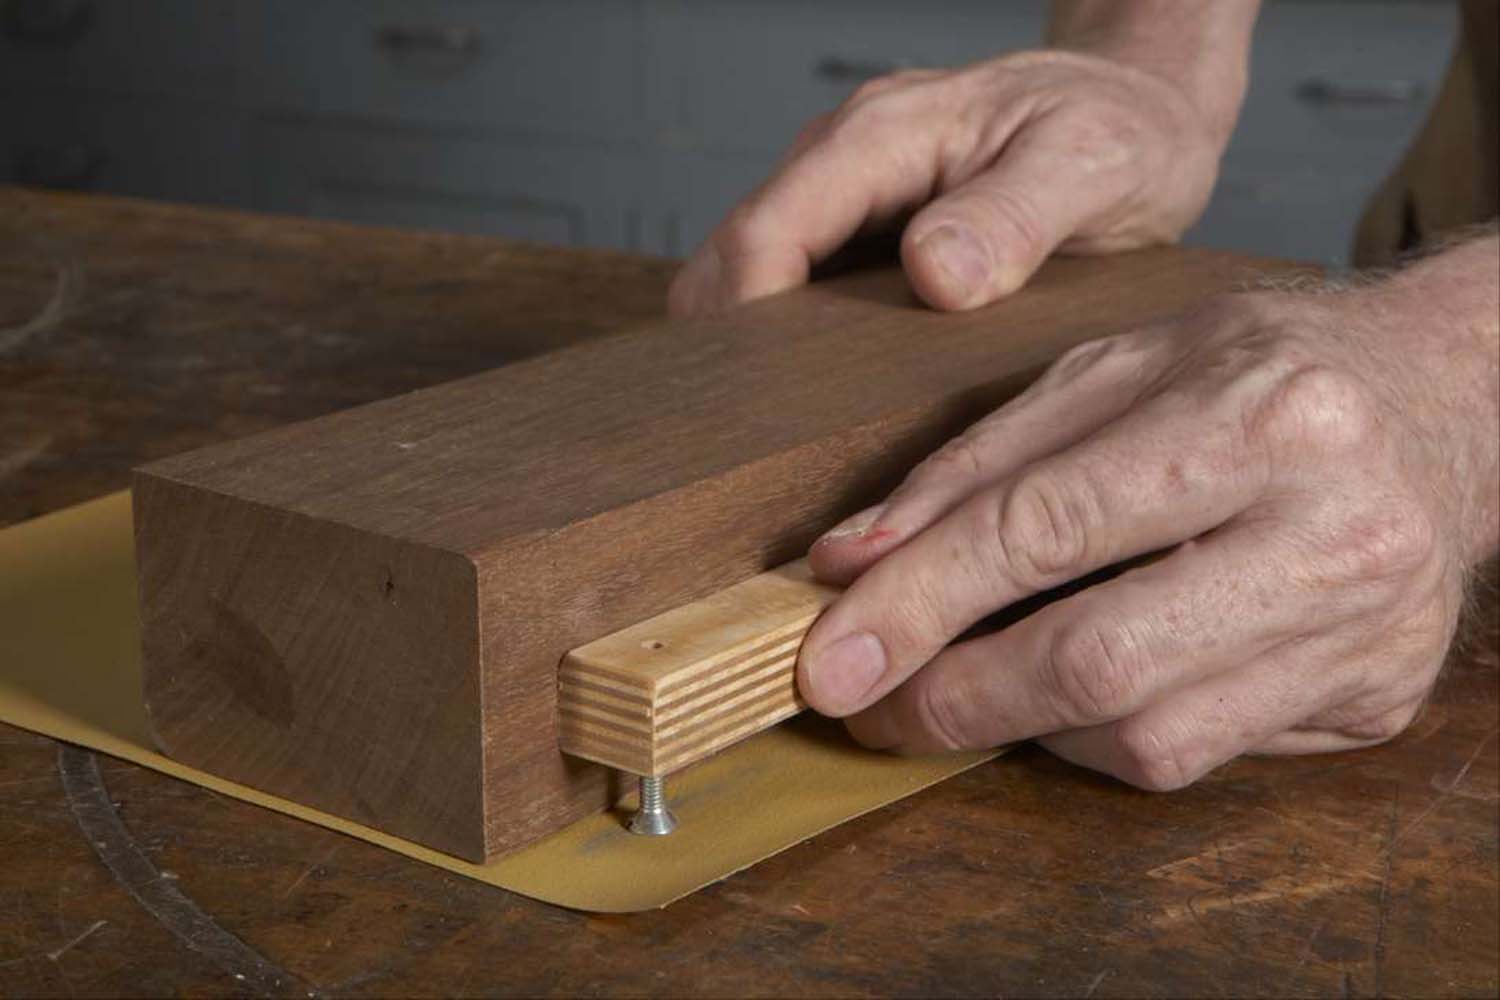 To make the block, drill two 5/32″ holes all the way through a piece of plywood, using a drill press (the holes must be precisely vertical). Turn a machine screw into each hole, then carefully adjust the height of each screw to match the correct depth of cut (usually 5/8″). To ensure that the block sits flat, sand the heads of the screws while butting the block up against a larger chunk of wood, to keep the block square.
Once you’ve made the block, and adjusted its screws until you get a tight-fitting joint, store it with your jig. The next time around, setting up the router will be a cinch.

6. Add An Extra Board
A dovetail joint should have a neat appearance, right? When you rout the joint, you sure don’t want any tearout. It’s good practice to place an extra board in the jig, next to the part that receives the sockets, to prevent tearout on the end of the pin board.
Make a few backup boards when you mill the rest of the parts—they must be exactly the same thickness as the socket boards. You can use all four corners of the backup board, then cut off its ends and keep on going.

7. Cushion the Blow
Here’s a tip from the furniture-repair world—when you’re knocking apart an unglued dovetail joint, stand the pieces on a towel, blanket or router mat.
You don’t have to hold the parts up in the air—the material will compress when you strike the wood, allowing the joint to slowly open up. This trick prevents damage to the wood and the joint.
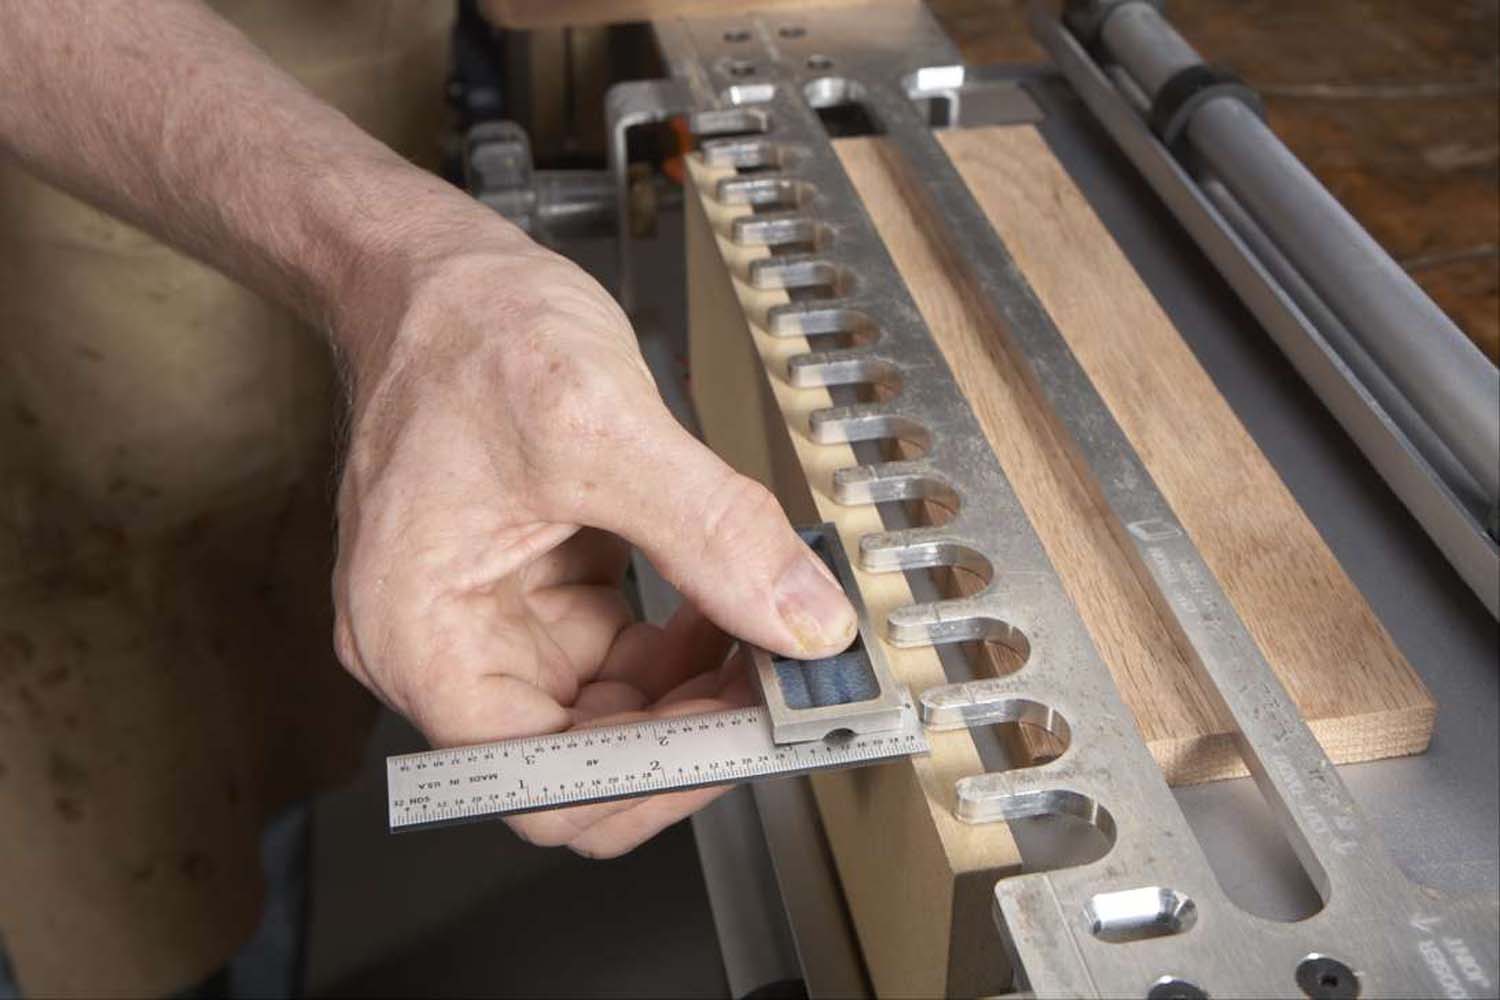
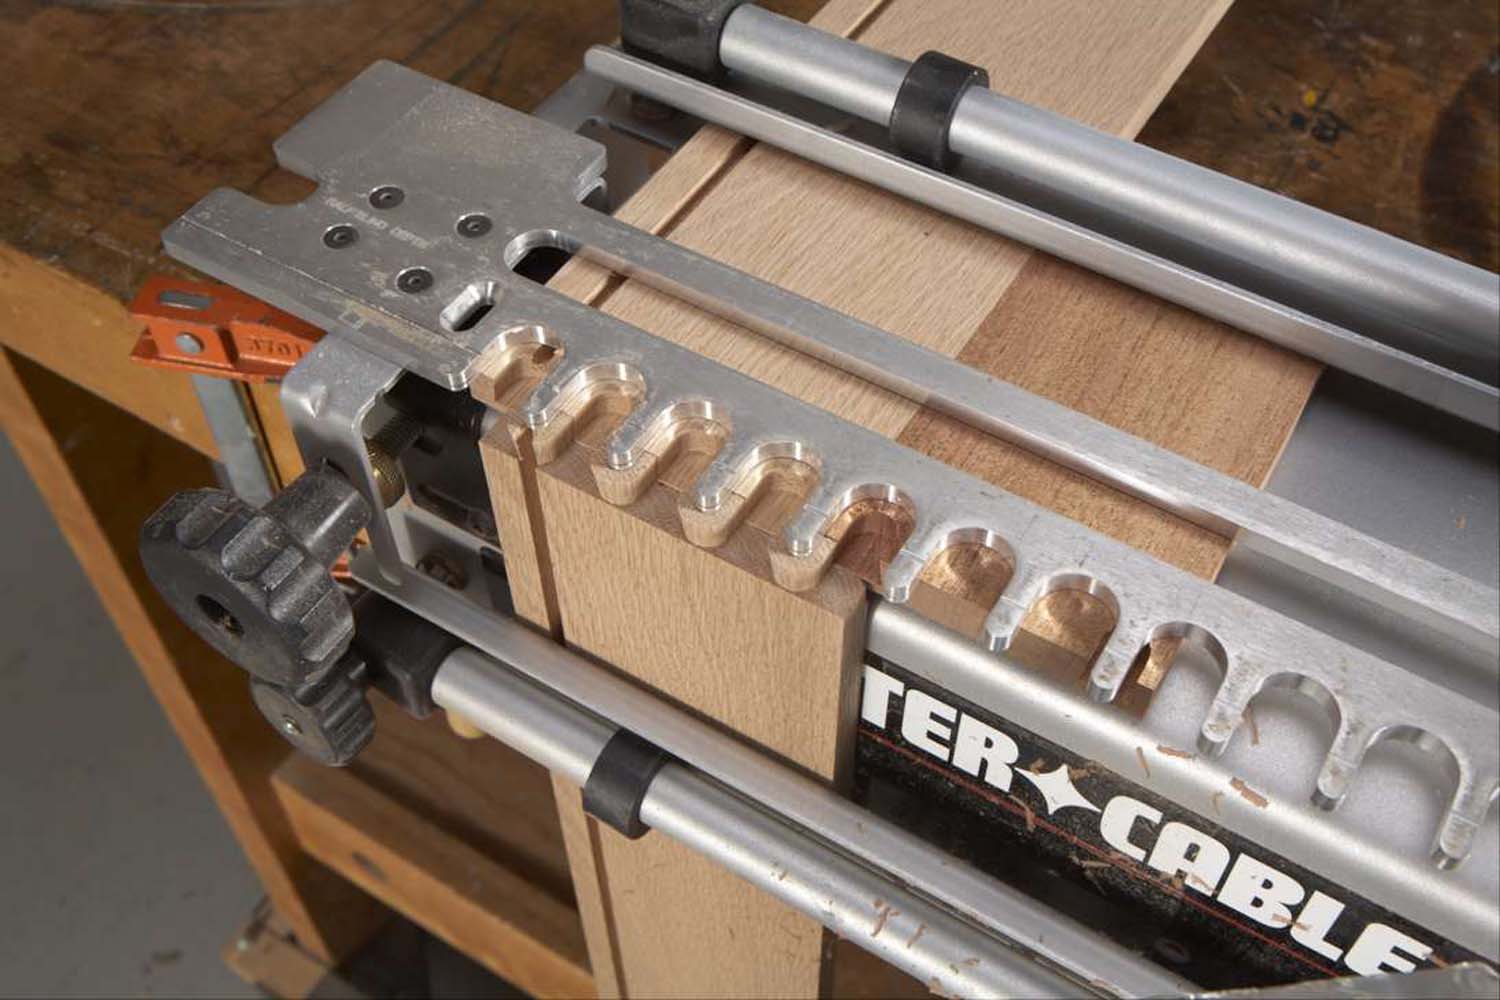
8. Register with a Wide Board
To control the depth of a dovetail joint, you move the comb in or out. The comb must be perfectly parallel to the front of the jig, as measured by a board clamped upright in the jig. If you’re making a drawer, you’d use one of the drawer parts, but you have to move it back and forth a number of times to measure the comb’s setback on both sides of the jig.
Here’s an easier method. Clamp a 12″ wide piece of MDF in the jig, as shown above. Position the comb so it’s approximately in the correct position according to the jig’s manual. Use a combination square to check both sides. Remove the MDF and clamp two scrap boards in the left side of the jig. Make trial cuts and fine-tune the comb’s position on the left side until the dovetails are exactly the correct depth. Put the MDF piece back in the jig and use the square to adjust the comb’s position on the right side.
Step 1. Left side of jig.
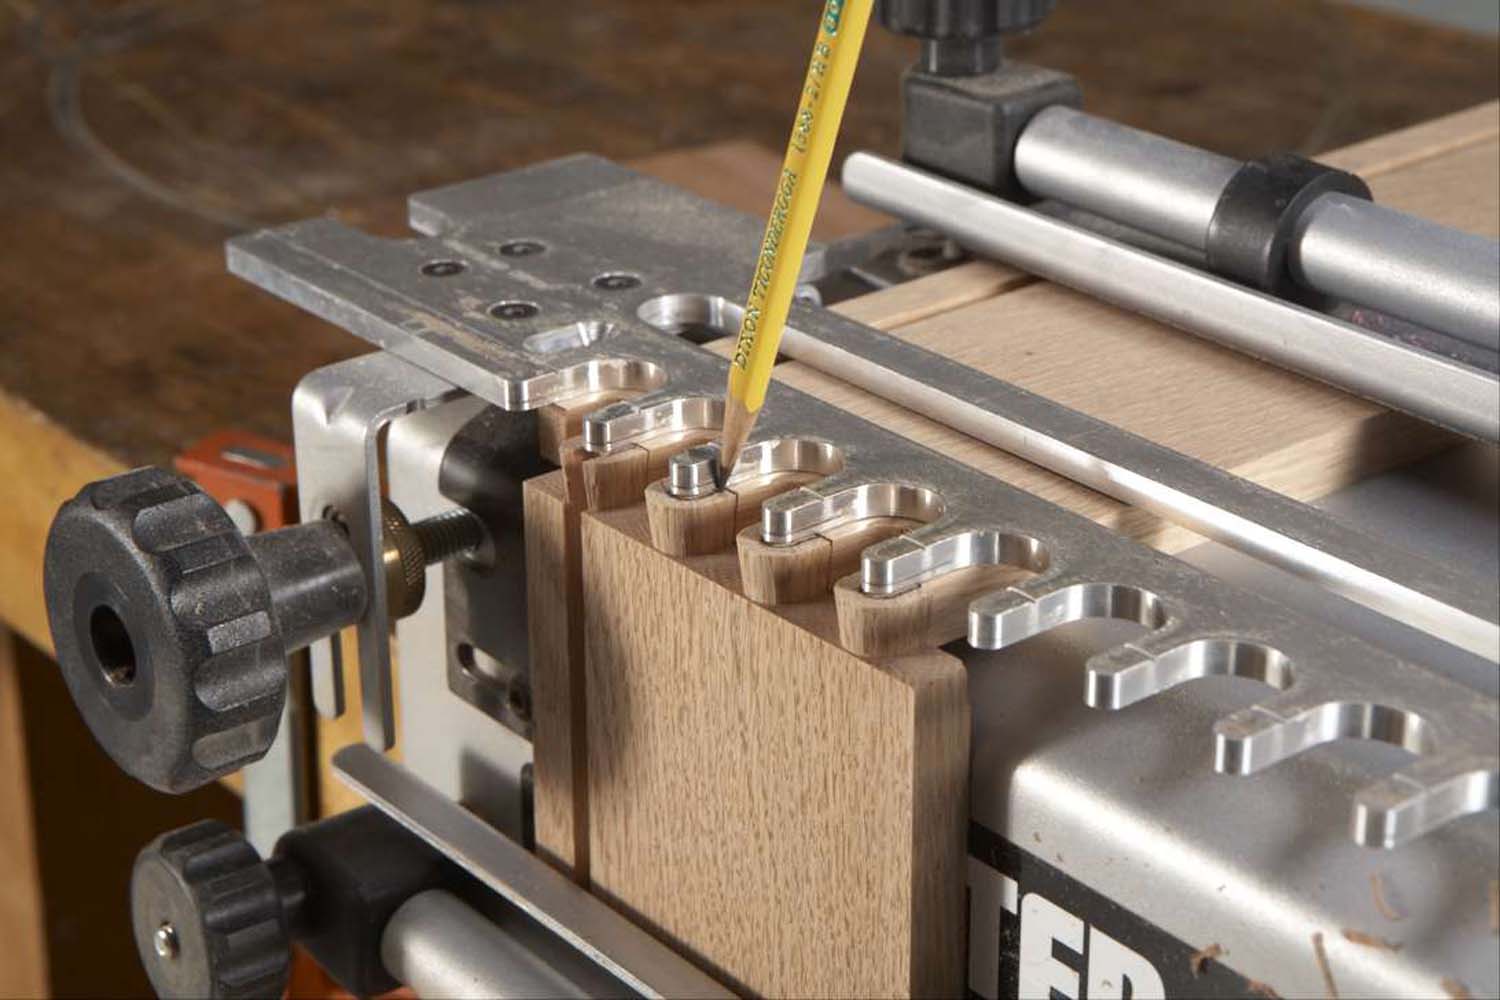
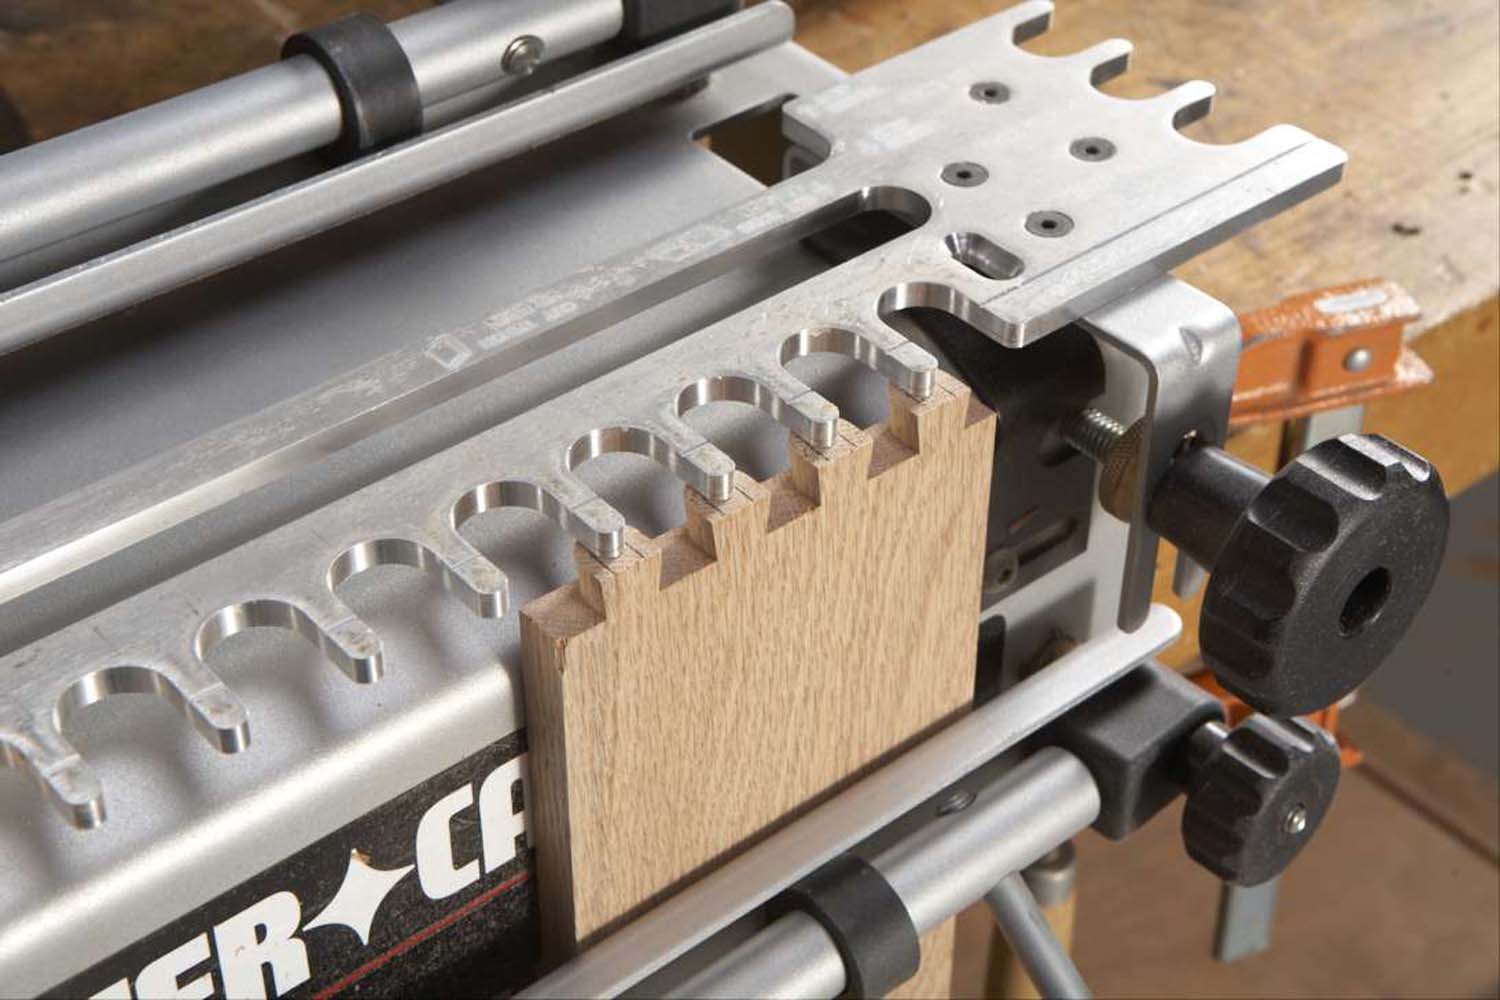
9. Same Spacing, Left and Right
Every dovetail jig has adjustable stops that set the distance between the first pin and the bottom edge of a workpiece. One stop is on the left side of the jig, for routing “left” corners; the other stop is on the right side, for routing “right” corners. The stops have to be in the same position, relative to the comb’s fingers, for the spacing on both corners to match.
Step 2. Right side of jig.
Here’s an easy way to set the stops. First, make a test joint on the left side of the jig and adjust the left stop where you want it. Trace around the fingers of the comb (Step 1). Remove the board from the jig and flip it around, so the opposite side faces out. Clamp the board in the right side of the jig so the tracings line up with the comb’s fingers (Step 2). Butt the right stop up to the board.
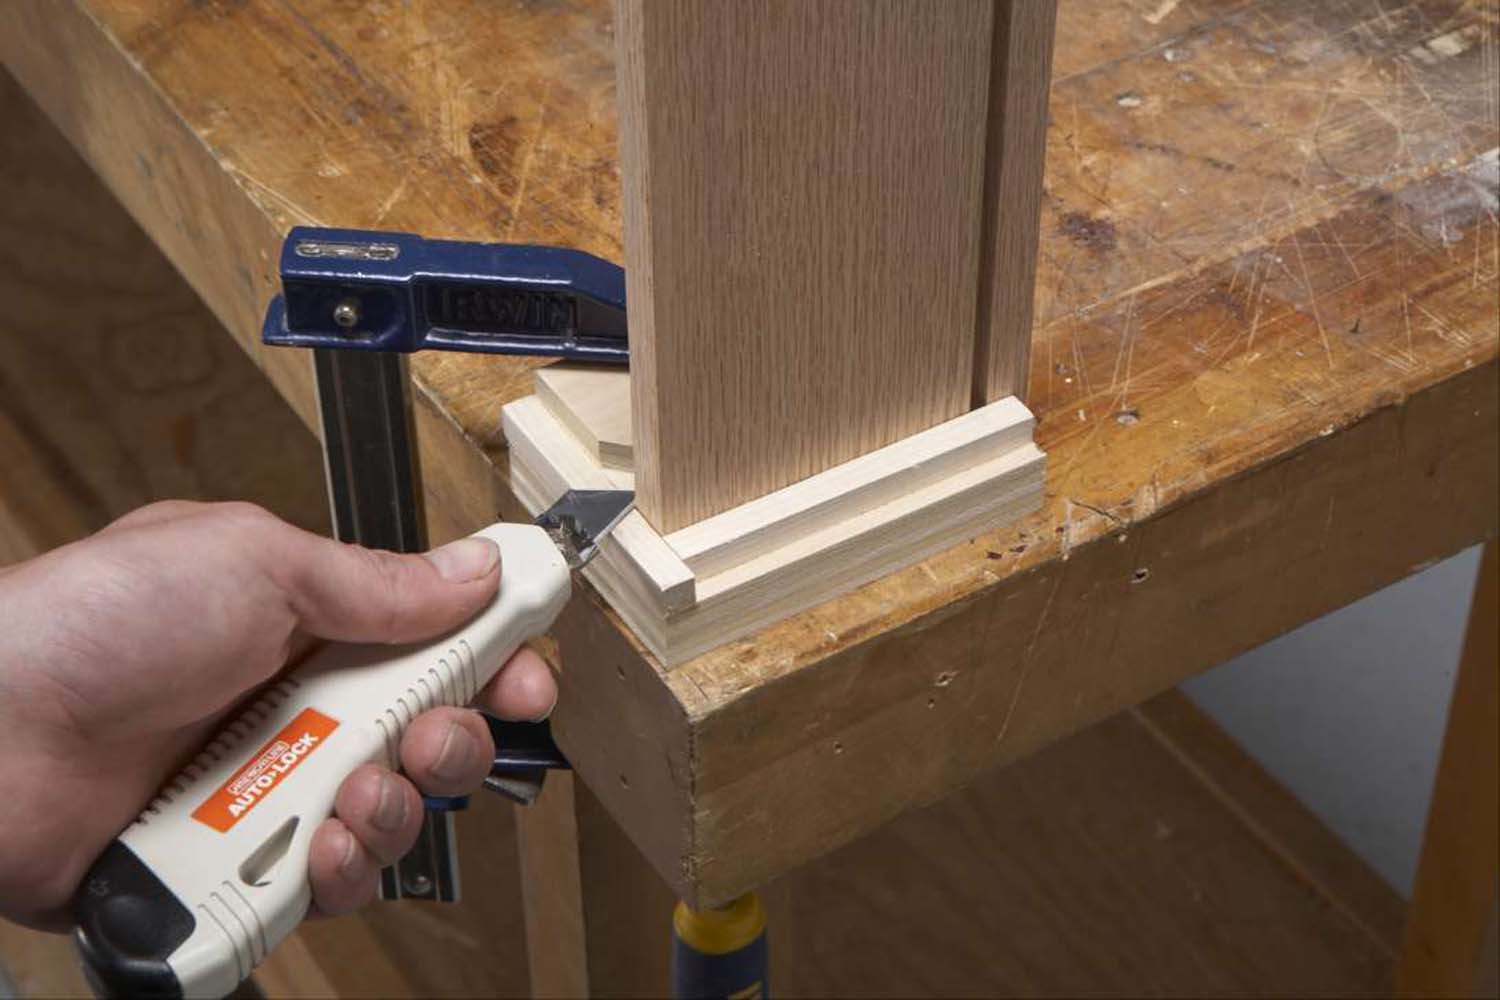
10. Score Vulnerable Corners
Tearout looks nasty on a well-made dovetail joint, doesn’t it? Backing up the piece mounted upright in the jig can help (Tip 6), but it’s not enough. The outside corner of the piece can still chip out (see inset). A “left” corner is shown here; chip out occurs on a “right” corner, too, on the far right corner of the upright board.
 The best solution is to score this vulnerable area first, before routing. You could use a marking gauge, but if you don’t have one, this little jig will do the trick. It works for boards mounted on either side of the jig—you just have to keep straight which corner to nick.
Here are some supplies and tools we find essential in our everyday work around the shop. We may receive a commission from sales referred by our links; however, we have carefully selected these products for their usefulness and quality.


