We may receive a commission when you use our affiliate links. However, this does not impact our recommendations.
Make your own light-duty one-handed workholding wonders.
Like most workshops, mine is well-populated with spring clamps, the ubiquitous tool for applying localized pressure with one hand while holding the workpiece (or workpieces) with the other. But one of the most intractable problems is the need for either gentle holding pressure or a much greater throat depth than the spring clamp provides.
Yes, spring clamps come in large sizes with deeper throats, but using them is hardly what I would call a one-handed operation. Many times all I need is for the clamp to gently keep things in contact or alignment, sometimes over a comparatively long distance; that requires a significant throat depth.
I recently built a set of clamps that performs this function wonderfully. They can be made from a variety of materials to an almost infinite set of variations.
These simple tools are built on the long-standing principles employed in a wide variety of clamping devices old and new. In the case of the ancient holdfast, the arm and the shaft are united, and the binding occurs when the shaft is driven down into a hole in the workbench. On (the much newer) F-style clamps, the movable jaws bind against the shaft, with the force augmented by contact pads that are moved by screws or cam levers.
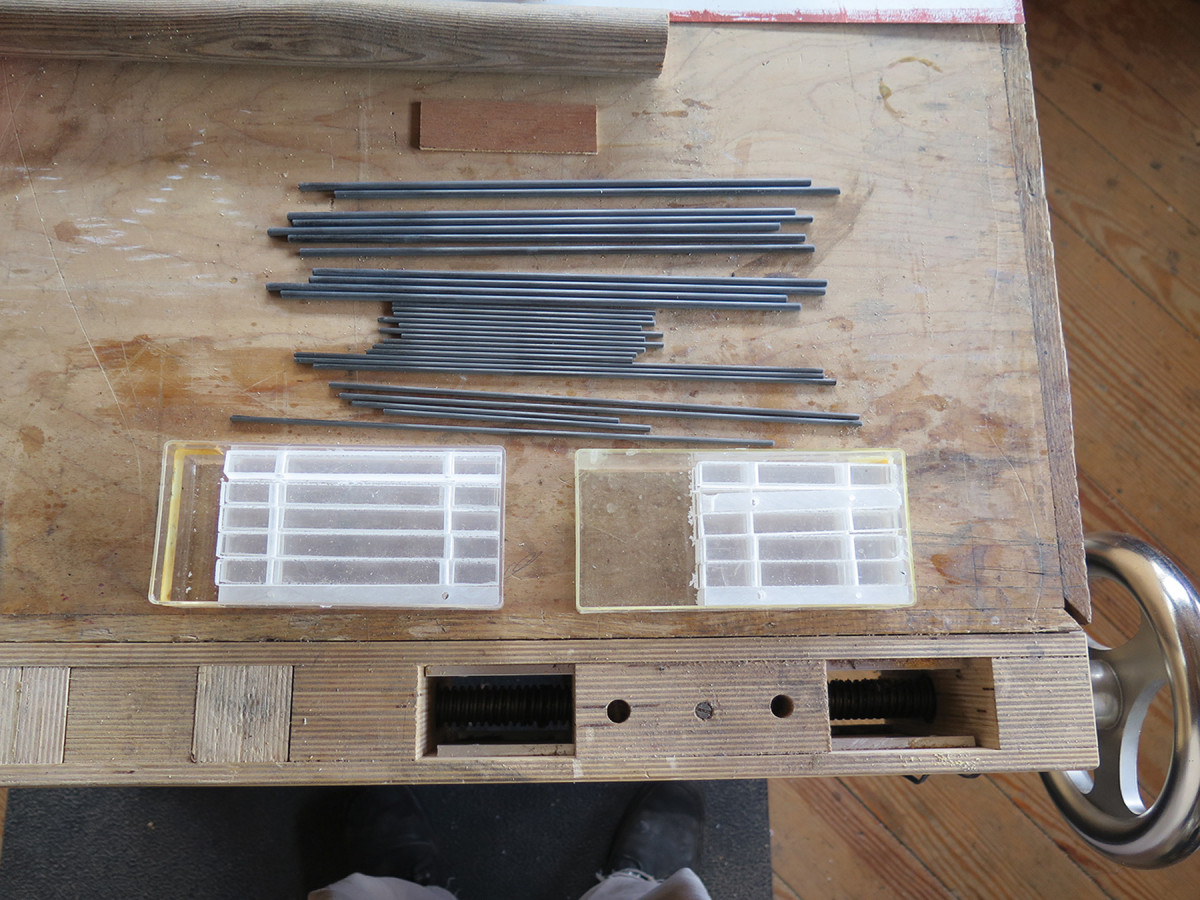
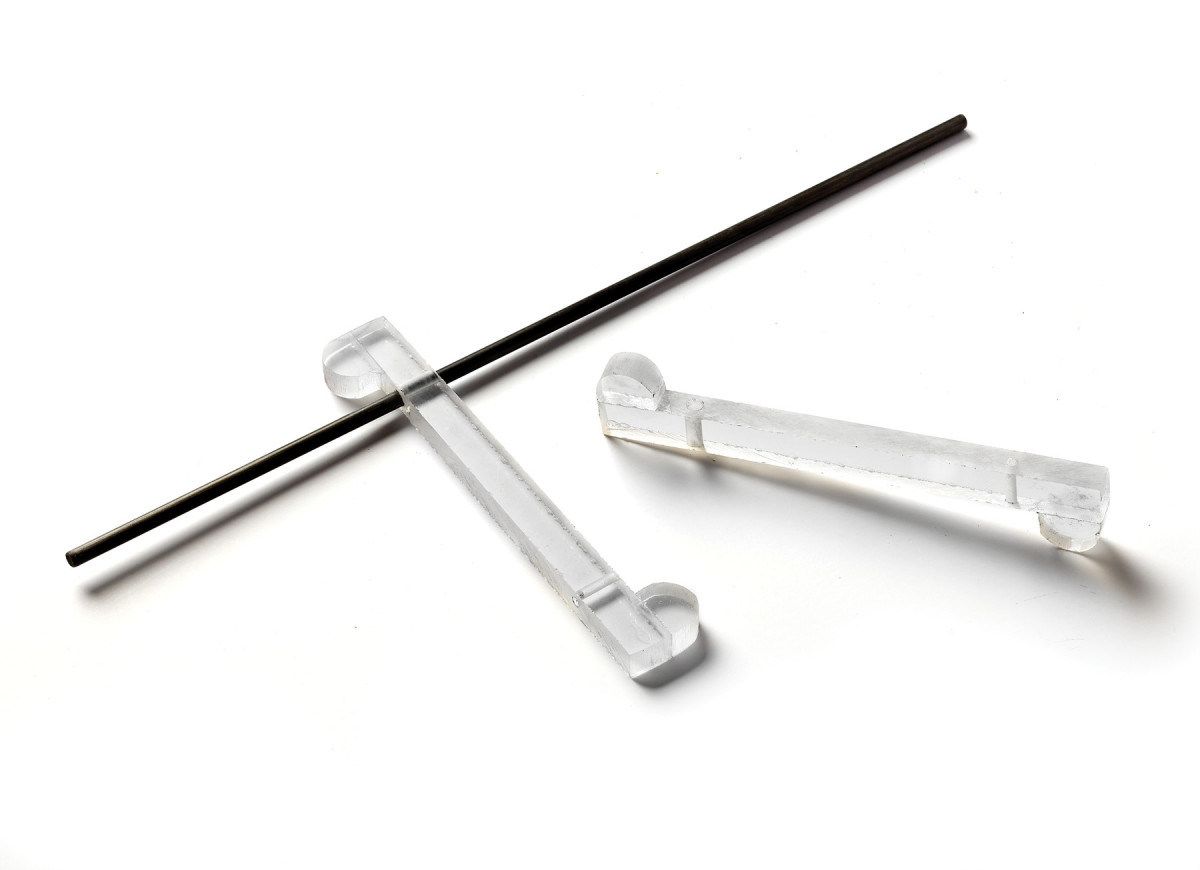
Rods & arms. Graphite rods of various lengths and diameters, and a couple sizes of clamp arms, allow you to customize these light-duty clamps to a variety of needs.
With my clamps, the clamping force for the contact points is accomplished by pinching the arms together, usually between thumb and forefinger, which causes them to bind on the flexible shaft; that flex exerts a spring force of its own.
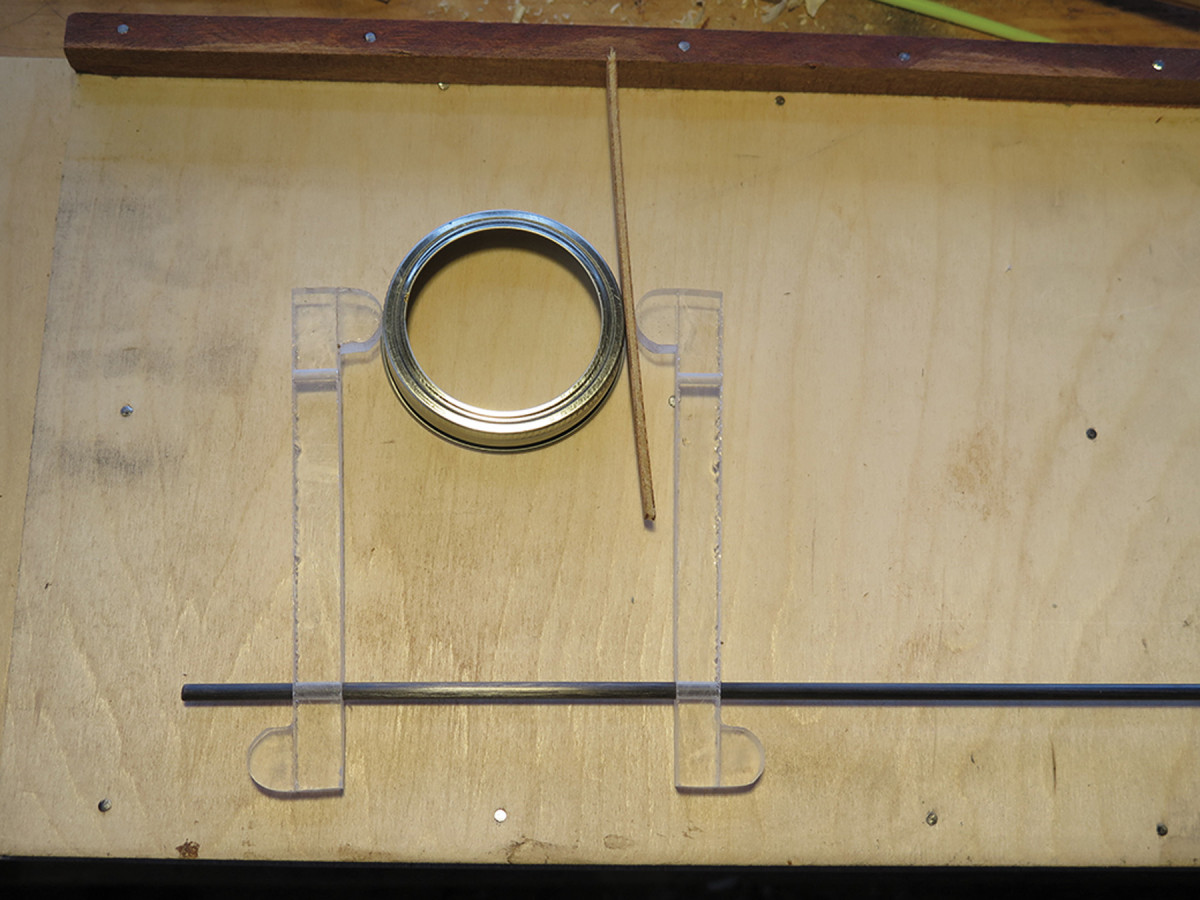
These clamps require only two components: a pair of clamp arms that can be made from almost any scrap (I used 3⁄8“-thick Plexiglas sheet), and a shaft along which the clamp arms slide and bind. I chose round graphite rod for my shafts because it is modestly priced but very high performance. Both of the materials are good choices because, unlike wood, they are unaffected by humidity swings.
I was uncertain how much the graphite rod would flex in use so I ordered several sizes (1⁄8“, 3⁄16” and 1⁄4“) online. I found that for my needs it was a Goldilocks thing; the 1⁄8” rod was a little too flexible for all but the most delicate clamping operations (though highly valued when needed) and the 1⁄4” was a little too stout, but the 3⁄16” rod worked well in most cases.
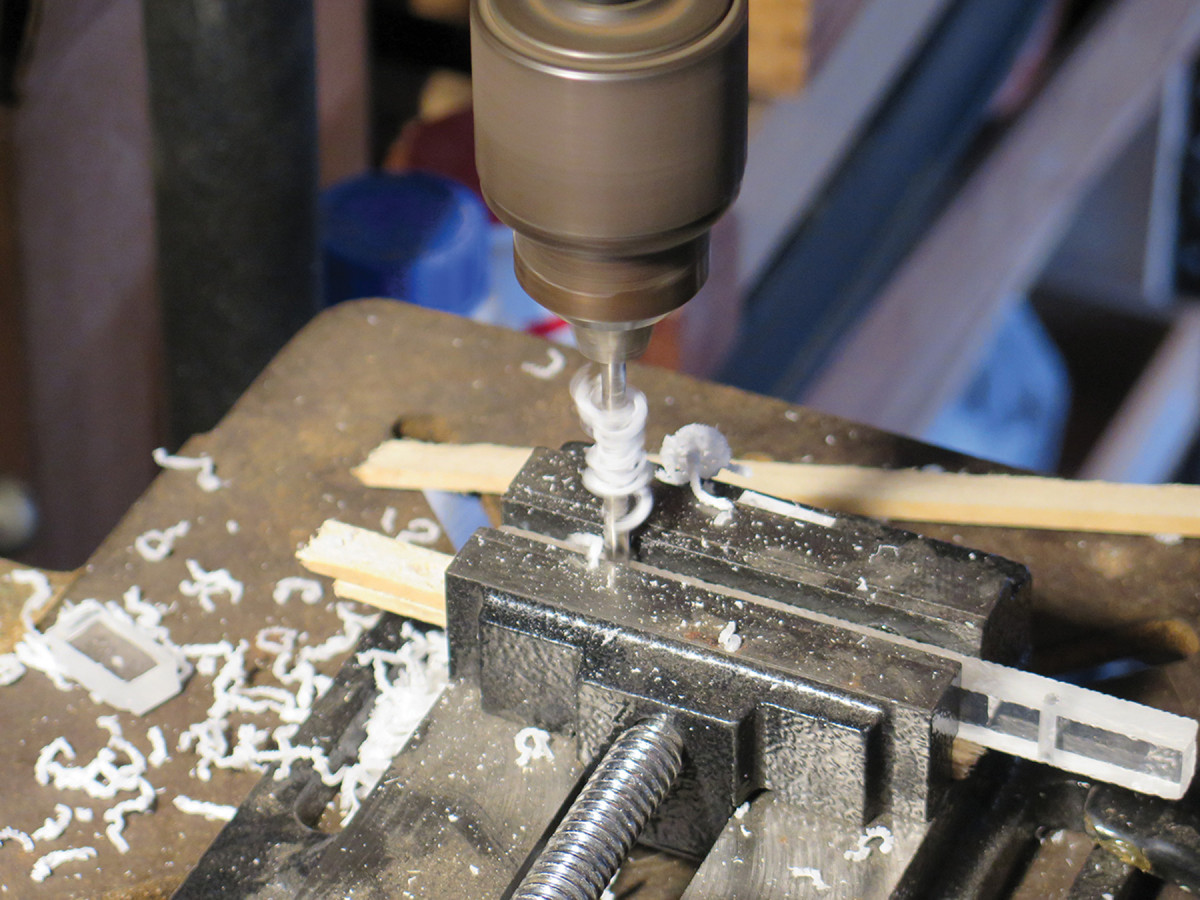
Nothing wasted. On most of the arms, I drilled two sets of holes – one end accommodates an 1⁄8″ shaft, the other a 3⁄16″ shaft. As you drill, save the waste. (See “Make Your Own Plexiglas Cement” below.)
I cut the rods to a variety of lengths because all the parts can be interchanged. When cutting graphite rod with a fine saw, in my case a jeweler’s saw, it is helpful to wrap the rod with some tape to keep the glass fibers from shredding.
Pressure points. The clamps on have no pads; the gentle force of the arms is spread across the face where it contacts the work.
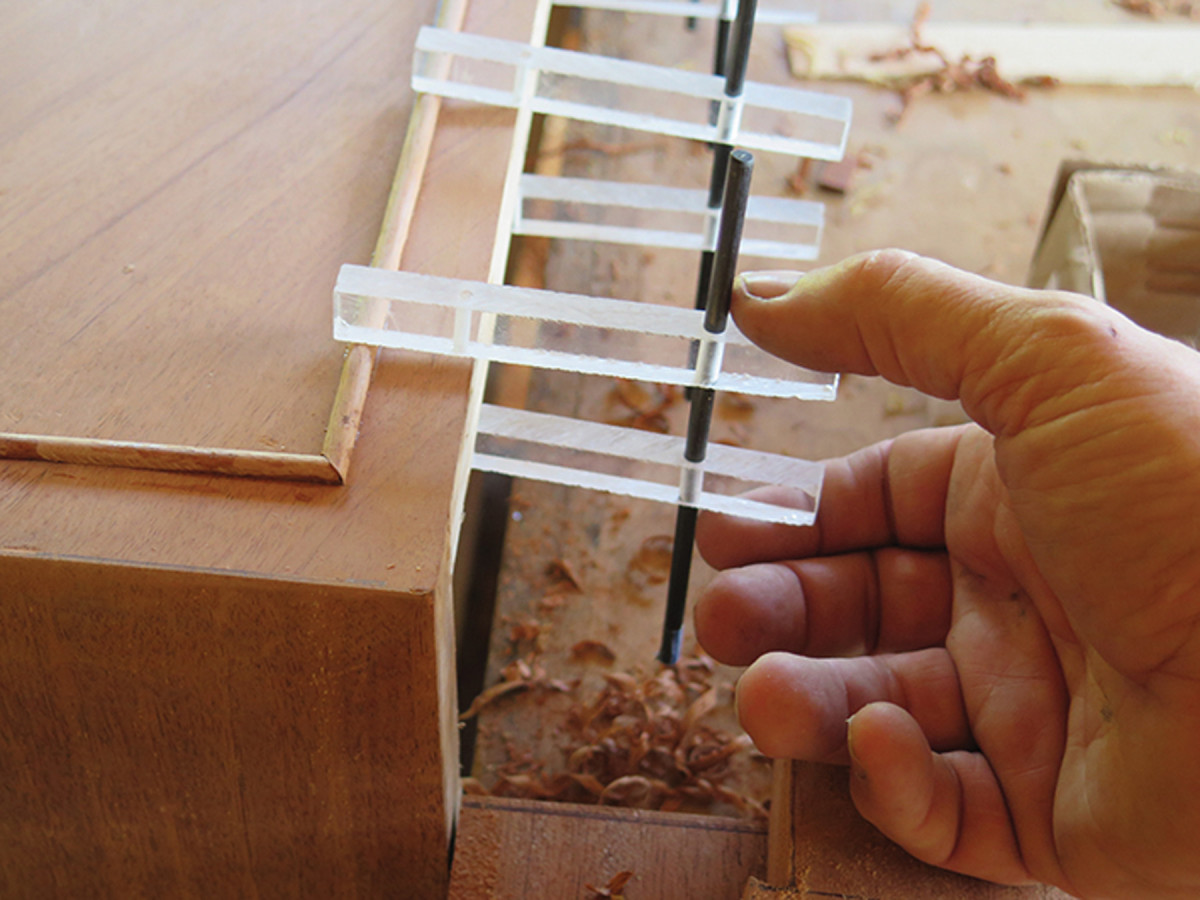
Then I cut the Plexiglas pieces into arms of varying lengths, and because many of my clamping needs involve convoluted shapes or orientations, I was prompted to make some customized acrylic contact pads for some of the clamping arms.

Pads put the pressure precisely where needed.
(One particular need, shown below, was for holding pressure to be applied in specific places to hold some split tortoiseshell in alignment while the backing adhesive being used to repair them hardened.)
Using my drill press, I bored holes in the arms 1⁄64“-diameter larger than the rods that pass through them. This provides just enough room for the unstressed arms to slide smoothly, but with a little applied stress they lock in place instantly.
I even made most of the arms with two sets of holes, 9⁄64” diameter at one end and 13⁄64” diameter at the other, so they can accommodate the 1⁄8” shaft for really delicate operations, and the 3⁄16” rod for more typical use, thus getting twice as many clamps for the same effort and materials.
In the end, for a few hours and a few dollars, I made an excellent kit of several dozen clamps.
Make Your Own Plexiglas Cement
Glue press. Pressure exerted by the clamps themselves keeps the pads in place as the Plexiglas glue dries.
When you are drilling the holes in the clamping arms, save some of the shavings. If you put them in a glass container with some methyl-ethyl ketone (MEK), the MEK will dissolve the acrylic shavings and turn the entire mass into a viscous solution that is near-perfect for welding Plexiglas pieces to each other. Just apply the cement to each face of the glue line, press them together and let them sit overnight. In the morning they will be rock-solid
Here are some supplies and tools we find essential in our everyday work around the shop. We may receive a commission from sales referred by our links; however, we have carefully selected these products for their usefulness and quality.