We may receive a commission when you use our affiliate links. However, this does not impact our recommendations.
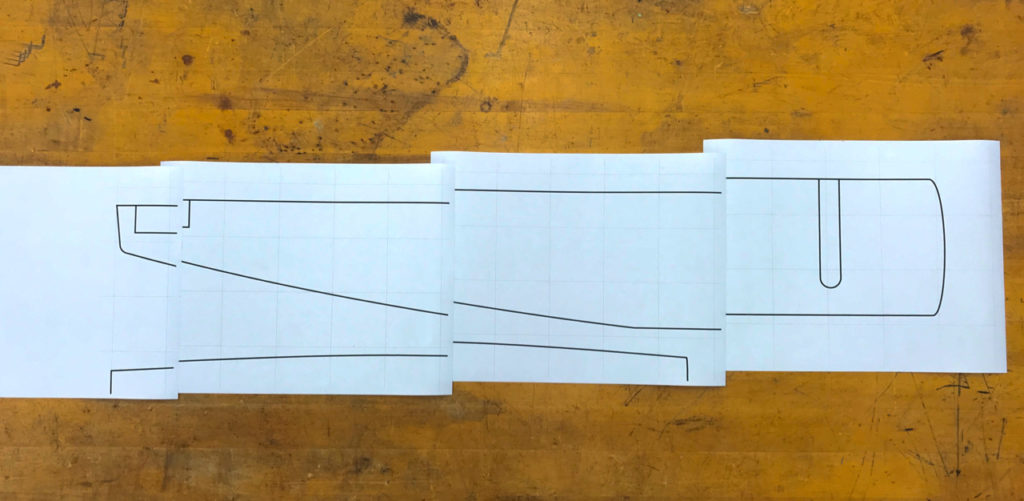
Paper patterns are a simple, no or low-cost method any woodworker can use. Using a drawing program makes it easy to do. I “tile” standard sized pages and splice them together using a faint grid underneath the drawing to line everything up as shown in this Morris chair arm.
It always starts with a design
Digital woodworking uses digitally controlled tools in your workshop as an addition to hybrid and handtools. Most often this means owning and operating a CNC and learning to use CAD programs. For many, committing to a CNC is a big step financially, so here are some thoughts on how to get started with digital woodworking.
Here’s the thing, you can mine a nice chunk of the benefits of digital tools at little or no cost; with no long-term commitment and with very little fear of technology on your part by using a technique I used for many years.
It doesn’t matter how you approach woodworking; power tools, hybrid or hand tools, you can immediately benefit from digital woodworking – I’ll show you how in this three-part series.
Start with paper patterns
The trick: If you have a computer, and if you’re reading this blog, likely you’ve got one — then you can make a computer-generated drawing. Armed with a drawing, you can make patterns. With accurate patterns, you can make accurate parts. Wherever the direction of your woodworking path is taking you, I’m sure we all can agree that accurate parts are important. Patterns are the trick.
From the time I started woodworking as a hobby in the mid-1990’s, I created all my designs for my projects on a computer using graphic design drawing software. In the beginning, I used the same vector-based drawing tools I was already familiar with as a graphic designer. Most of the time it was Freehand and Adobe Illustrator. Both are similar, with Freehand — a long gone, favorite program that was a bit better at precision CAD control — I loved that program. Using either one, I would draw my furniture parts, full size. Once you have a full-size drawing, you can make a pattern.
If you already have Adobe Illustrator, it’s a good place to start it has worked very well for me. But, for a lot of people, the software cost of Adobe software is prohibitive and the time to learn is limiting — after all, it is a professional drawing tool. There are alternative drawing programs that are simpler to learn, cheaper and sometimes, free. But, no matter your choice, it does need to be a certain kind of software – drawing software.
A computer drawing is all you need to make patterns. It needs to be vector-based drawing software like Illustrator, Inkscape or Corel Draw. Better yet, use CAD software.
Use Vector Drawing or CAD Software
Some background. When I say drawing programs, I’m referring to vector-based drawing programs. Vector drawing programs are different than painting programs. When you draw something in a drawing program, it is not composed of individual pixels, but paths. Vector graphics are based on vectors which lead through locations called control points or nodes. Each of these points has a definite position on the X and Y axes. These points determine the path, that say a curved line goes through. If you’ve ever used a plastic French curve and maneuvered it around tangent points to smooth out a curve, the idea is the same.
Rest assured that you don’t have to understand the details on what’s going underneath the surface, as all the detail is stored internally in the drawing file. You just draw the shapes or curves or lines you need. What makes drawing with vector based tools special is that no matter how the components of the drawing are scaled, the precision is held all the way through. If a drawing is enlarged or shrunk, it’s all executed, printed or machined on a CNC or other digitally based machines like a laser cutter, the results are perfect. Whether it’s a detail on a cufflink, a sign the size of a semi-truck, or a furniture part cut on a CNC, it doesn’t matter. Perfection is there. It’s not just vector-based drawing software that does this, CAD software works the same way.
Note that you cannot create patterns using painting or raster based programs like Adobe Photoshop or Microsoft Paint or the painting mode in Corel Draw. This kind of software creates pixels that are subject to scale. You can see this as you zoom all the way in, your drawing gets more and more “jaggy” as the pixels get bigger. Not so with vector based line drawing or CAD software. Some kind of vector-based drawing software is what you need to make paper or CNC cut patterns.
Examples of graphic design drawing software
- CAD software is always the first choice.
- Adobe Illustrator — Part of the Adobe’s Creative Cloud. It’s a professional tool, so learning is required and expensive. PCs and Macs.
- Inkscape — An open source (free) drawing program similar to Illustrator. Runs on PCs and Macs
- Autodesk Graphic — Low cost but pretty powerful for Macs and PCs
- Corel Draw — Moderate cost for Mac or PC
Start with CAD if you Can
In the world of digital woodworking, a vector-based graphics drawing program should be considered a temporary stop. It’ll get you started, it will work, as I proved for many years, but in the long run, you’re far better off using CAD software. All CAD software is vector based and therefore precise. The fact that it’s designed from the start for precision drawing tasks and has lots of extra tools to make working with it easier for woodworkers, makes it the better starting point. There are free CAD programs, low-cost programs, middle priced and expensive programs. Down the road, I’ll get into more details on what to look for and review different software but for a place to start making patterns, any CAD program will work.
Making paper patterns
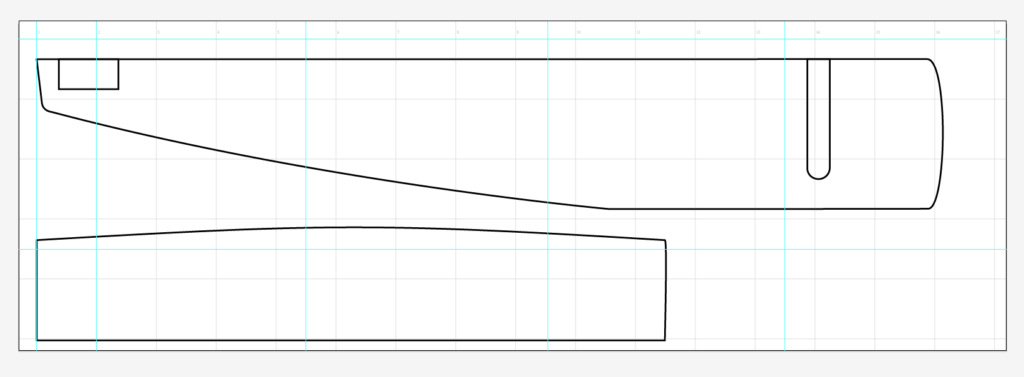
Step one is to draw the pattern you want to make, full size. By that I mean if you’re drawing an arm of a chair that will be 35″ long, make sure your drawing of it is 35″ long. Use the tools in your drawing software that provide the information on the size and dimensions of a drawing to help you. Also, makes sure you are accurate in every way. Lines intended to be straight must be drawn straight. Critical dimensions are exact. This is where CAD software excels. You can do it with graphic design drawing software as I have done, but it’s trickier.
My first patterns were output onto paper via standard home/office printers. When larger than standard paper sizes were needed, I printed segments of a design using the automatic “tiling” printing feature that divides a large drawing into pieces that overlap that can be printed on smaller pages. To make it easier to splice them together, I would add targets or a grid to align segments and splice and tape the different pieces together until I had a full-size drawing of a part. Another method is to go to your local office supply or print service stores that offer larger scale output.
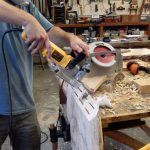
Next, I spray glue the paper pattern onto a piece of plywood or MDF, bandsaw to the line, smooth and blend with rasps until the everything is just right, then peel the paper off. This all worked quite well for me, but it became time-consuming as I needed more patterns and more complicated as I needed larger patterns. So, it was time to find a better way. It was time to skip the paper and go from directly from drawing straight to pattern making.
More about that in Part Two
Here are some supplies and tools we find essential in our everyday work around the shop. We may receive a commission from sales referred by our links; however, we have carefully selected these products for their usefulness and quality.