We may receive a commission when you use our affiliate links. However, this does not impact our recommendations.
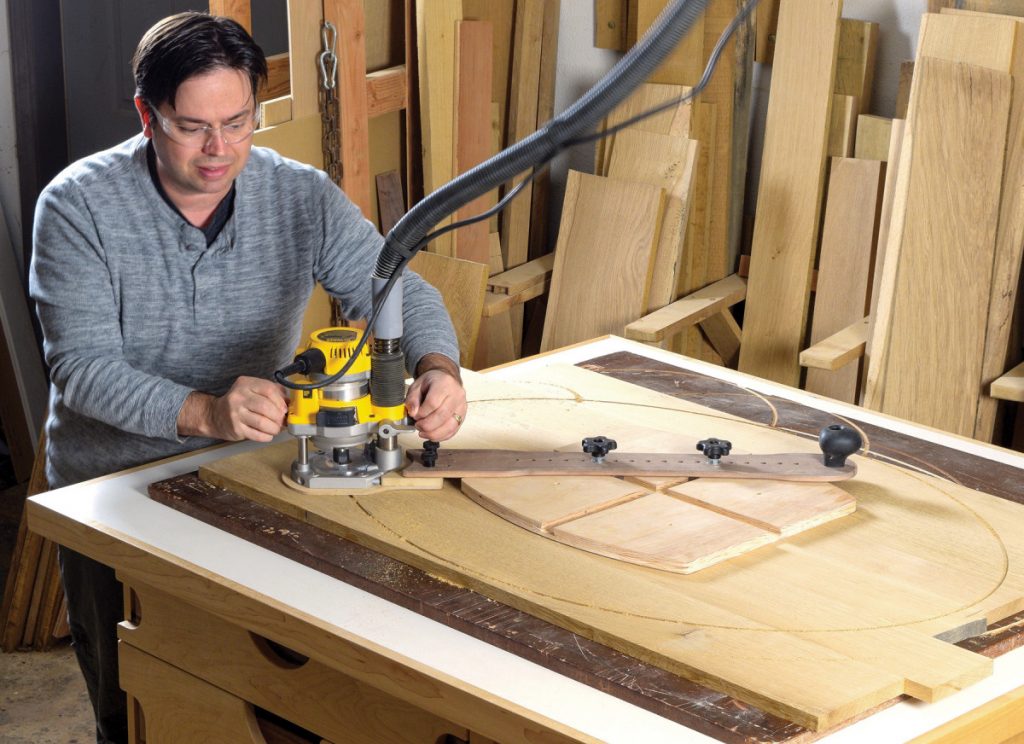
I developed this jig to make the oval top for the Limbert library table but its adjustability means it’s useful for more than just that.
One jig opens up a whole world of useful shapes
If you’ve ever wanted to venture beyond the world of squares and circles, consider incorporating elliptical shapes into your next design. Cutting an oval by hand can be tricky, and usually involves lots of sanding to smooth and fair the curve. Luckily there’s an easier way.
Make the Base
A shop-made jig is pretty easy to make with a few scraps and a handful of jig hardware. You’ll need a piece of 3/4″ plywood that measures 18″ square to get started. Set up a router table with a 1/2″ straight bit, and mill two centered grooves in the plywood. The grooves interest at a 90° angle so they look like a big “plus sign.” I made these initial passes with the straight bit a little less than the finished depth of 1/2″. Then swap the straight bit for a dovetail bit and set the cutter depth to a full 1/2″. Widen the centered dovetail groove in multiple passes. The finished width of the dovetail channel is about one inch at the widest part. The dovetail bit I used has a 14° slope, but the angle isn’t critical. As long as the dovetail bit has a cutting length of 9/16″ or better, it should work fine.
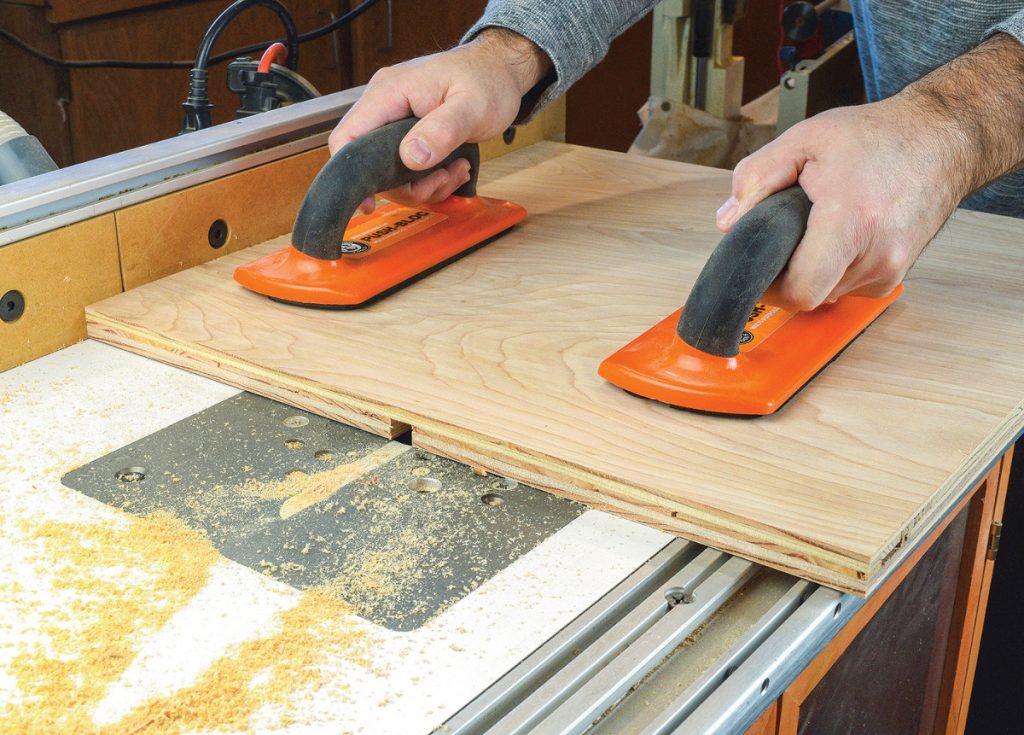
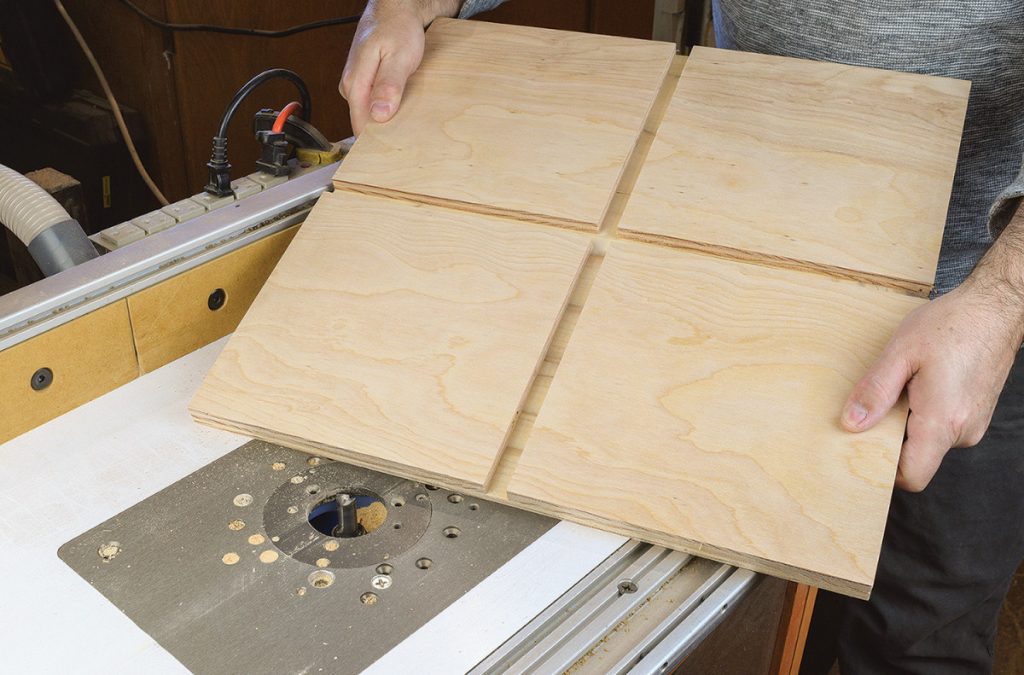
Take passes from both edges of the board for a centered groove. The result looks like a large “plus sign” on the plywood base.
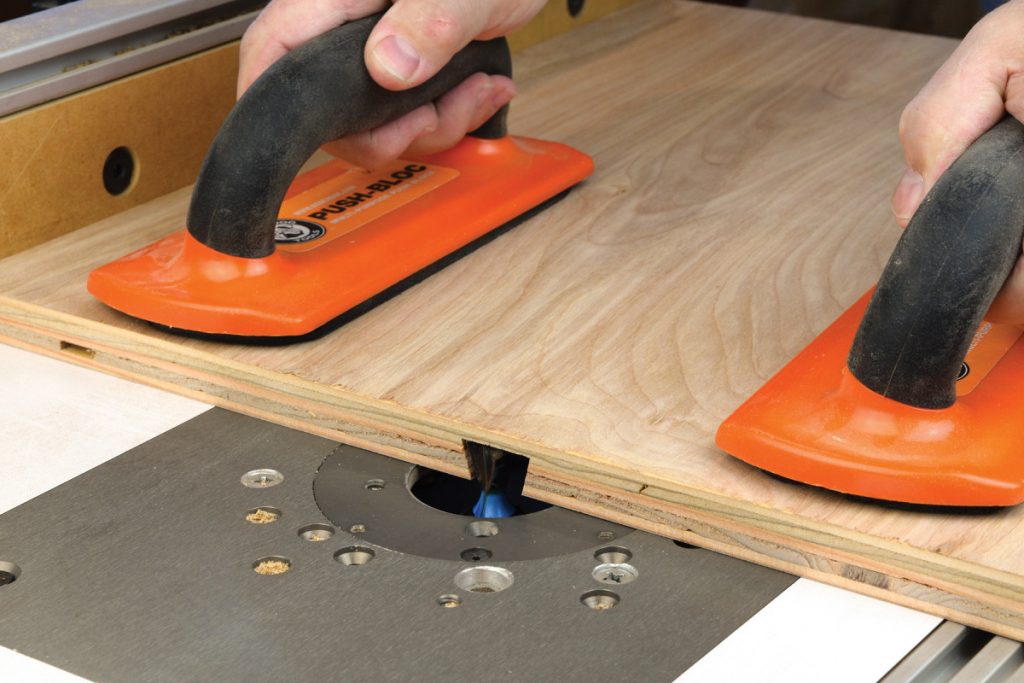
Switch to a dovetail cutter and complete the centered channel. Take multiple passes, and adjust the router table fence until you achieve the desired width.
Dovetail Sliders
Now make the dovetail sliders to fit the grooves. The stock used to make the sliders should be 9/16″ thick, and extra-long for safe milling. Make a few of these strips, and rip them to various widths. I made three, ranging in size from 1″ to 11/8″ wide. This way, I can run them all past the dovetail bit at one time. Once the sliders are beveled, test the fit in your plywood base. Choose the slider with the best fit, and sand the angled edges until it moves easily in the channel.
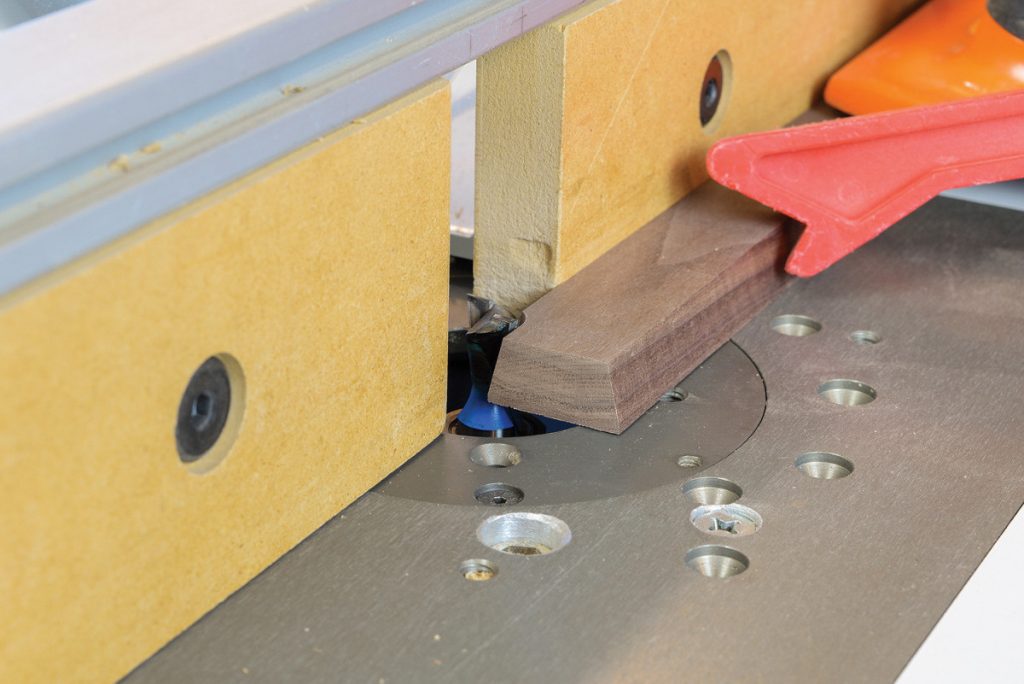
With the same dovetail bit still in the router table, bevel both sides of the dovetail sliders. Leave them extra-long for now.
With the sliders still extra-long, mill slots and holes to accept T-bolts. A 1/2″ straight bit at the router table forms a shallow slot for the head of the T-bolt. Form two or three of these shallow grooves along the dovetail slider blank. Then head to the drill press and drill 5/16″ holes through the blank, centered in the shallow recess.
Once all the milling operations for the dovetail sliders are complete, they can be cut to final length. The dovetail sliders need to be about 3″ long, with the T-bolt roughly centered. A dab of paste wax helps create a smooth sliding action.
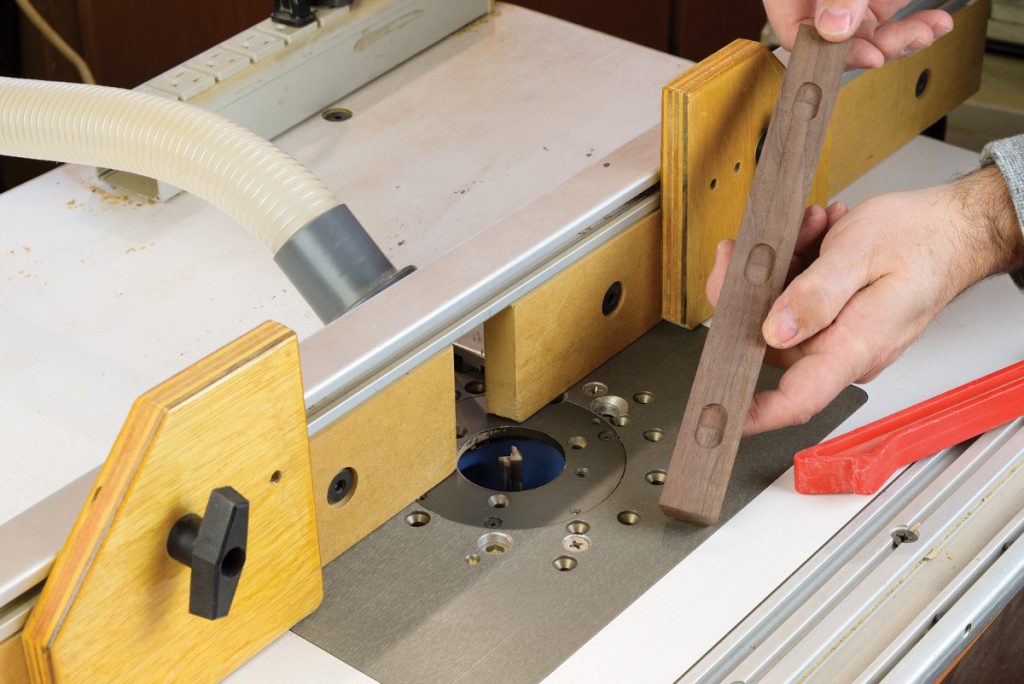
Router and drill for T-bolts. With a 1/2″ diameter bit at the router table, mill shallow slots in the dovetail sliders to accept T-bolts.
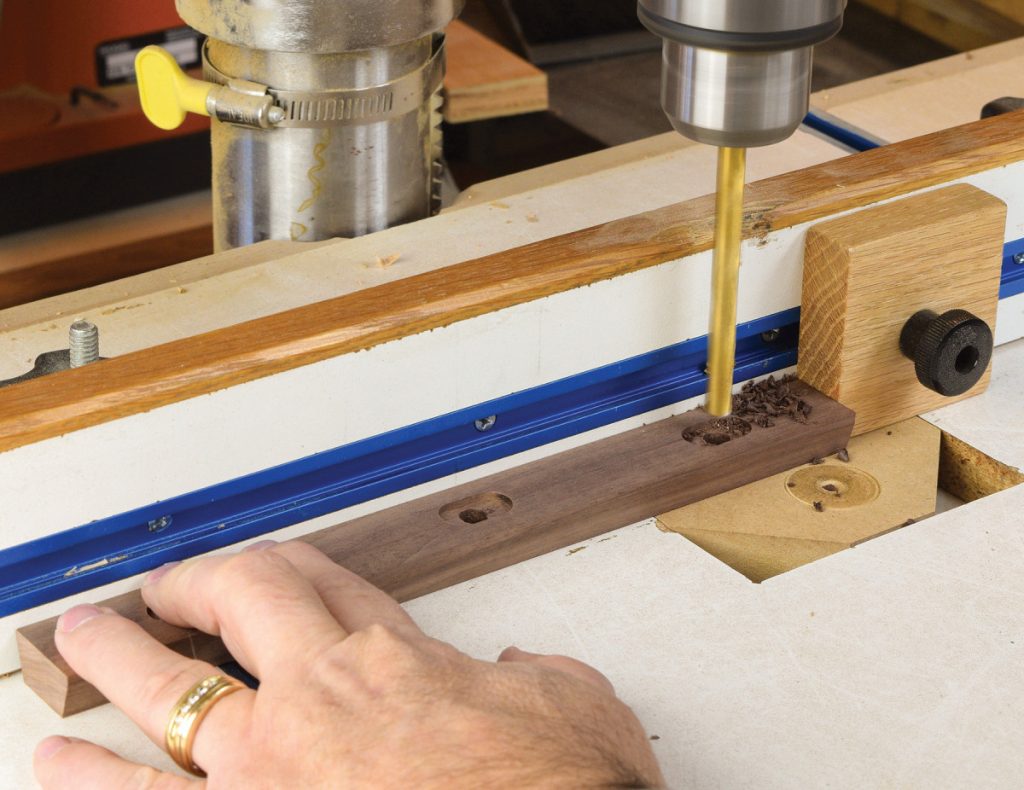
Then drill 5/16″ diameter holes while the dovetail slider blanks are still extra-long.
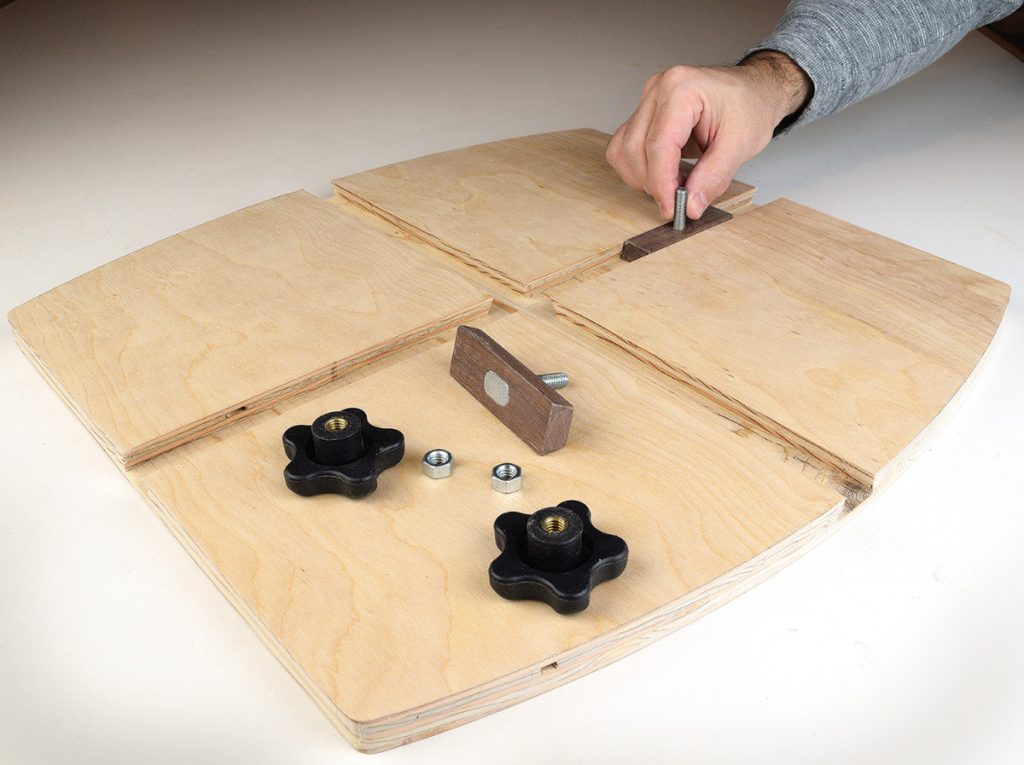
Fit the dovetail sliders with T-bolt hardware. The heads of the T-bolts should be flush with the bottom of the sliders.
Make the Swing Arm
Now that the base and sliders are complete, move on to building the swing arm component. The arm starts as a rectangular blank 27″ long x 4″ wide. While it’s tempting to make this component from thick stock, I’ve found that a 3/8″ thick hardwood blank is sufficient. Start by routing a pair of slots on one end of the swing arm. These slots will allow additional adjustment of the ellipse diameters, without removing the dovetail sliders. This feature is particularly helpful for setting a final trimming pass when cutting out the elliptical shape. Next, take the swing arm to the drill press and drill a series of 5/16″ diameter holes with consistent spacing. I spaced the holes 7/8″ apart center-to-center. For a greater range of size possibilities, you could space the holes even closer together. The last hole on the swing arm will mount an optional handle with a 5/16″ T-bolt. Rout a 1/2″ wide x 7/8″ long slot to receive the T-bolt head (just as you did with the dovetail sliders previously). I repurposed a handle off a spare router, which offers a comfortable and secure grip when using the jig. Finally, shape the swing arm as required for your particular router. I cut a concave shape on the router end of the swing arm, and rounded the corners.
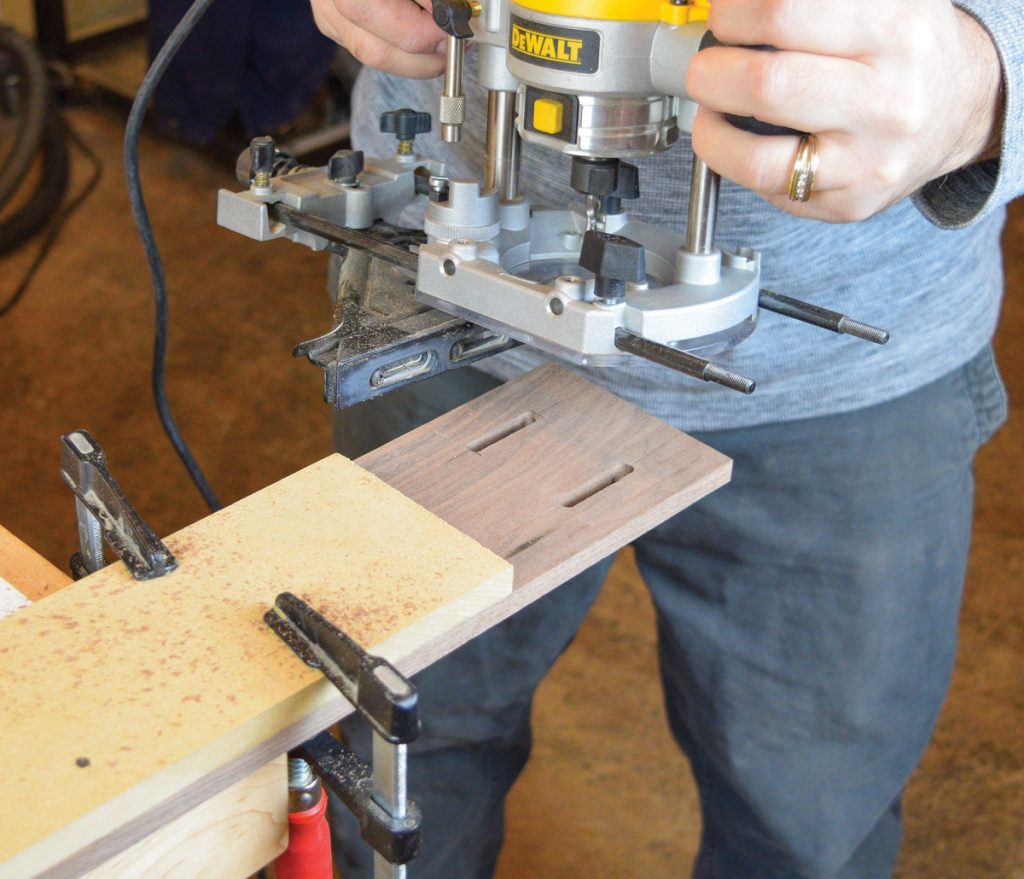
Rout slots in one end of the swing arm with a plunge router and edge guide. A scrap of MDF is clamped to the swing arm to act as a stop for the router.
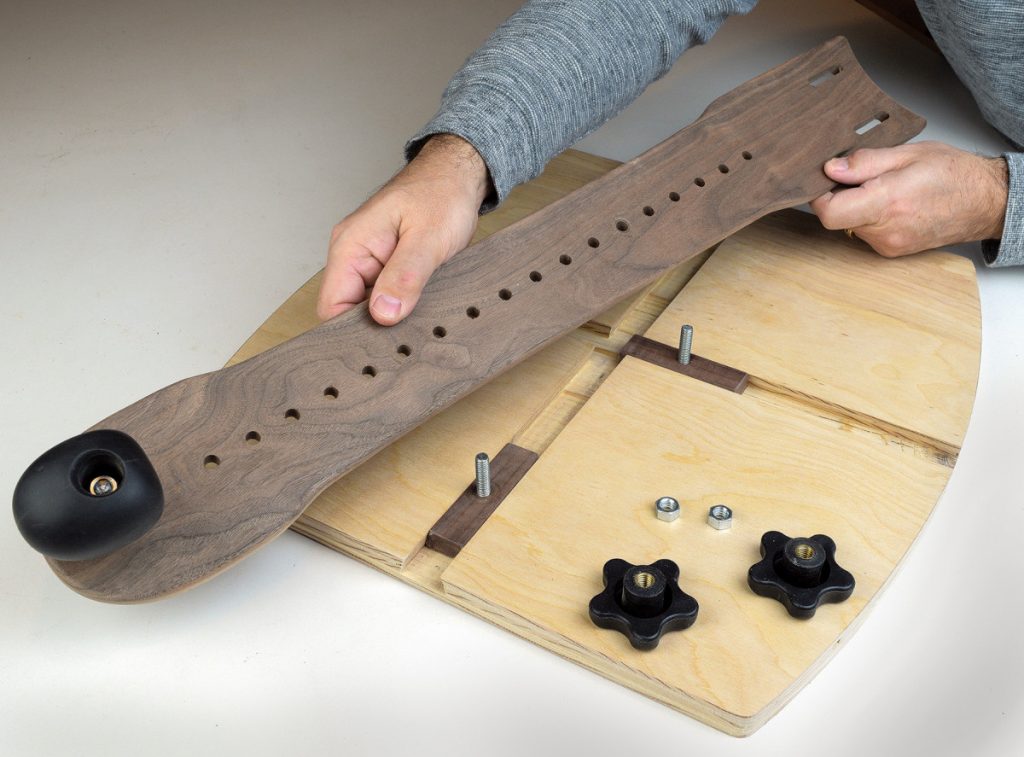
Drill a row of 5/16″ diameter holes in the swing arm, and shape it as desired. Mount a handle on the far end of the swing arm for extra control.
Simple Router Base Plate
My goal was to make a base plate that sits low to the workpiece so I could use standard length router bits. This simple step-down router base accomplishes that goal, with the router sitting no higher than it normally would. Start with a piece of 1/4″ plywood or MDF, and trace the shape of your router. Transfer the mounting hole locations using the router sub base as a template. Now add the step-down block, which is a piece of 9/16″ thick stock sized to fit your new base place. A scrap of 1/2″ MDF would also work for the step-down block. Glue the step-down block to the base plate, and sand the edges flush once the glue sets. Rout and drill the step-down block for a pair of T-blots, and you’re ready to assemble your new elliptical jig.
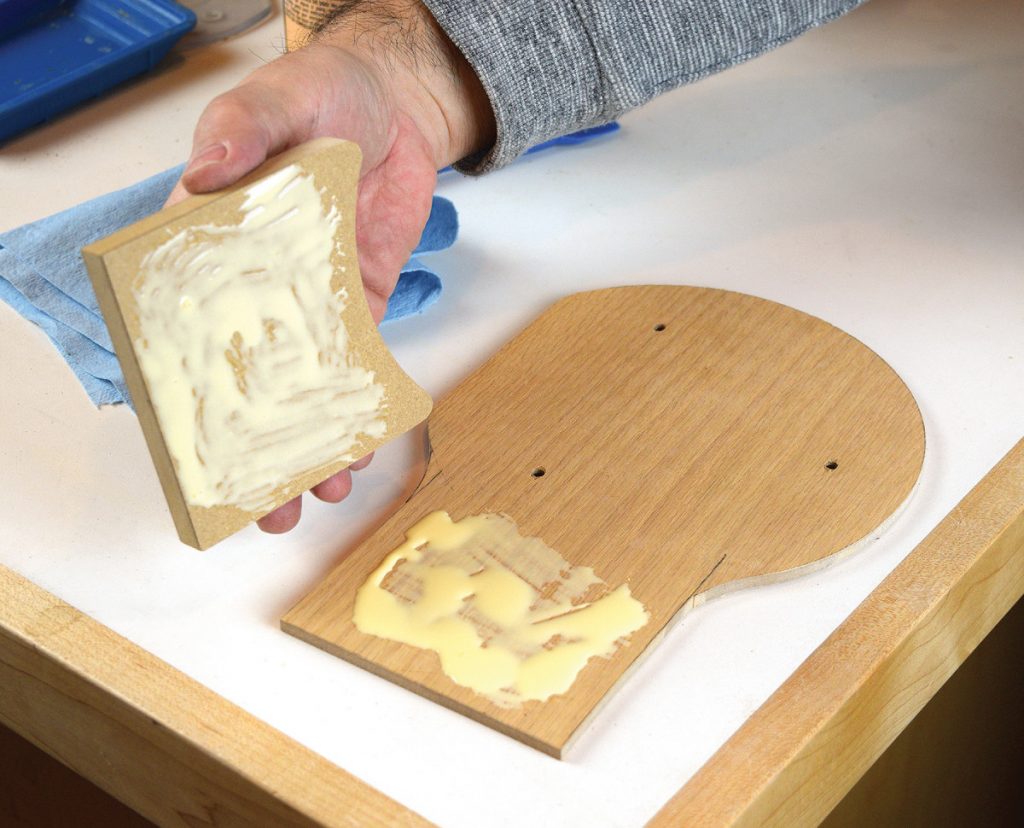
Glue the base plate to the step-down block.
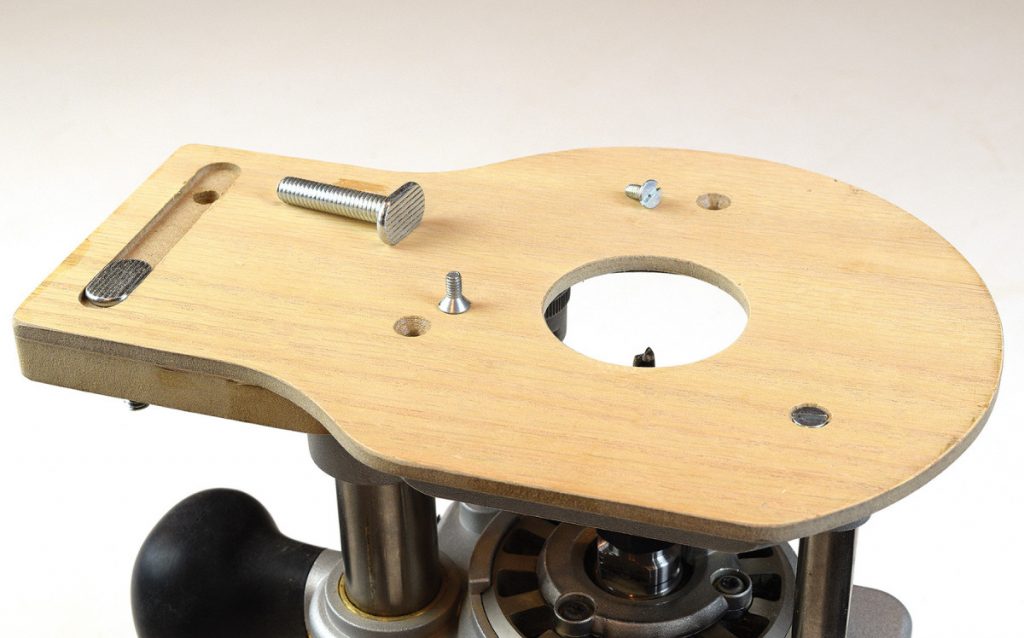
Rout a slot to receive a pair of T-bolts, and countersink holes for the router mounting screws.
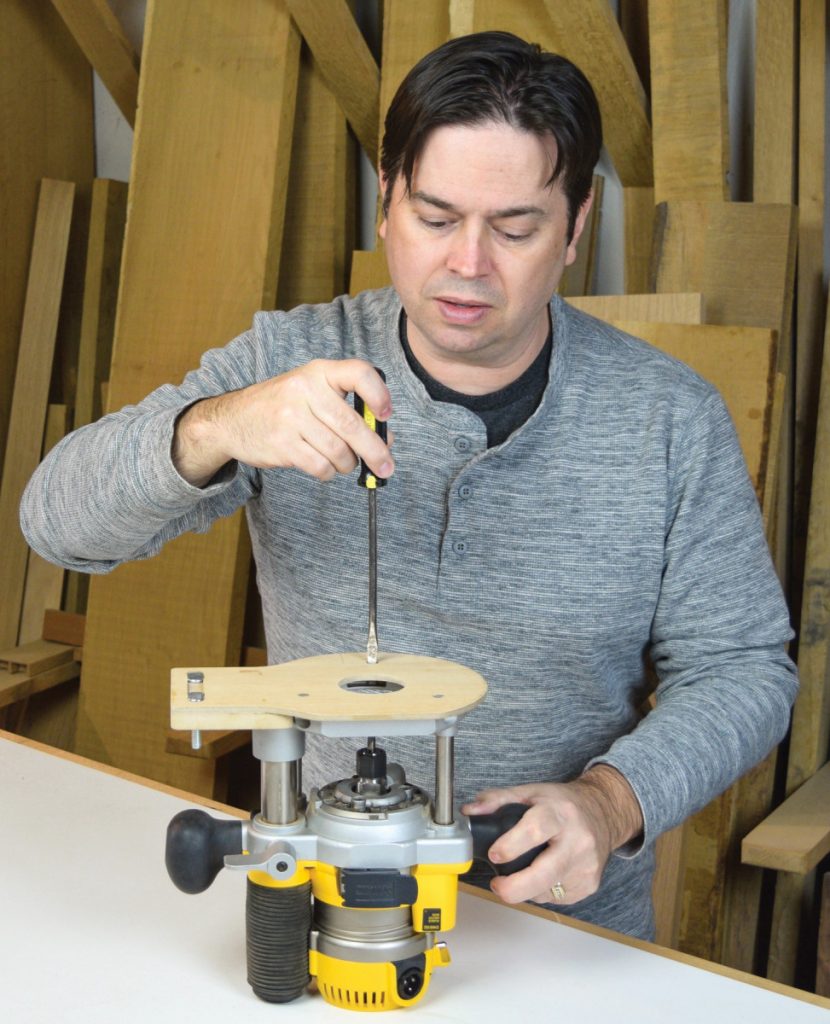
Finally, mount the jigs baseplate assembly to a plunge router with the original screws.
Assembly and Use of Jig
Place the swing arm onto the sliding T-bolts, setting both the major radius and minor radius to the desired dimensions. Install washers and nuts first, followed by star knobs to hold the swing arm in place. The 5/16″ nuts and star knobs function as jam nuts to hold the parts securely together. Alternative you can use locknuts with built in nylon inserts. Attach the baseplate to a plunge router, and secure it to the swing arm with a pair of 5/16″ x 11/2″ long T-bolts. Test the arc of motion at the radii you intend to use. You may find it necessary to trim two sides of the jig’s base to allow the router to pass by.
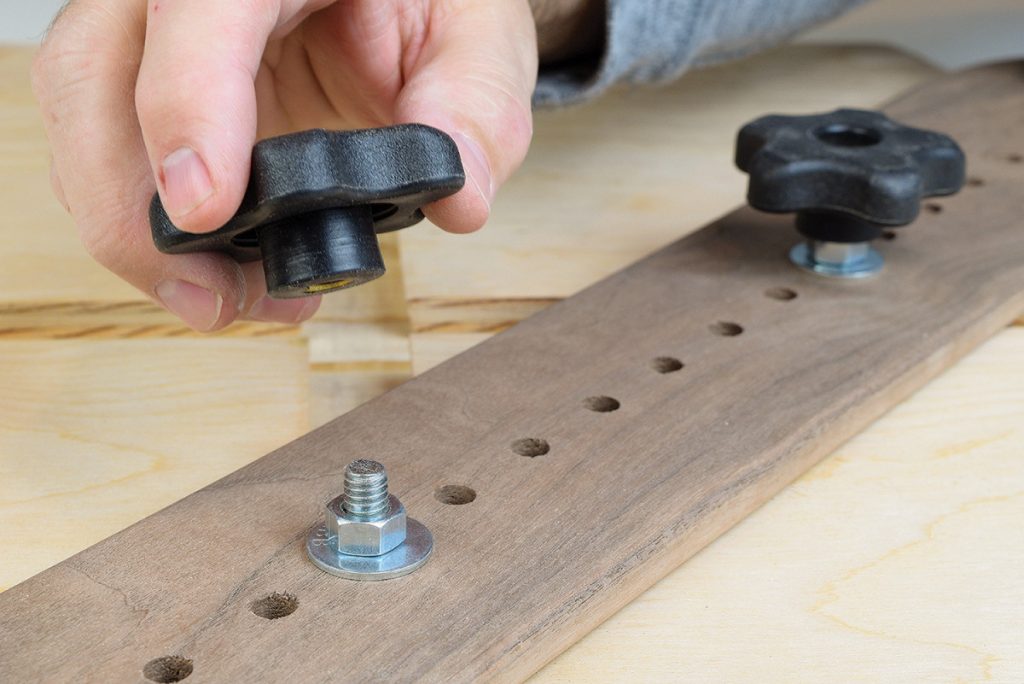
Attach the swing arm to the dovetail sliders with 5/16″ T-bolts, washers and nuts. The star knobs and nuts work together as jam nuts to prevent the swing arm from loosening as you work.
A 1/4″ spiral upcut bit is an ideal choice for cutting out the oval workpiece. Lower the bit 1/4″ at a time, and make multiple passes to complete the cut. Make sure the workpiece is supported on a scrap of sheet goods as you complete the cut. Use this setting to make a full-depth trimming pass in a counterclockwise direction. Make a micro adjustment for a slightly smaller ellipse. This will clean up any bit marks from the previous step.

Rig the power cord and dust hose so they’re out of the way. Select the appropriate holes in the swing arm to make the appropriate size ellipse. Make several counter-clockwise passes with a 1/4″ spiral bit to complete the cut. Make a micro adjustment, and make a full-depth trimming pass to clean things up.
Here are some supplies and tools we find essential in our everyday work around the shop. We may receive a commission from sales referred by our links; however, we have carefully selected these products for their usefulness and quality.


Great article. Very handy.
But an oval is not an ellipse, there’s a reason that they are two different words. As an engineer it is very annoying to hear people use the words interchangeably. An oval is simply an elongated circle, while an ellipse’s size and shape is dictated by an exponential equation. Hence the need for the special jig…