We may receive a commission when you use our affiliate links. However, this does not impact our recommendations.

See the light. A diffuse light will show through even the smallest of gaps – as in between this straigthedge and a handplane sole. The gap is at most .0005″.
Woodworking is a visual art. The capabilities of our eyes and visual system, as well as the quality of the conditions in which we use them, are essential to good woodworking. Basic knowledge of visual function in the shop and the aids used to enhance it can improve a woodworker’s skill. It is also helpful to know a few visual tricks to achieve even better visual performance than seems usually possible.
Let’s first look at the power of this marvelous tool – the visual system. If you are fortunate enough to have 20/20 vision in either eye, with or without corrective lenses, you are able to distinguish, at a viewing distance of 14″, in proper conditions, critical detail in your work of .004″ (four thousandths of an inch). That means if you are cutting dovetails with your eyes 14″ away from the wood, you can see detail equal to the thickness of a sheet of paper.
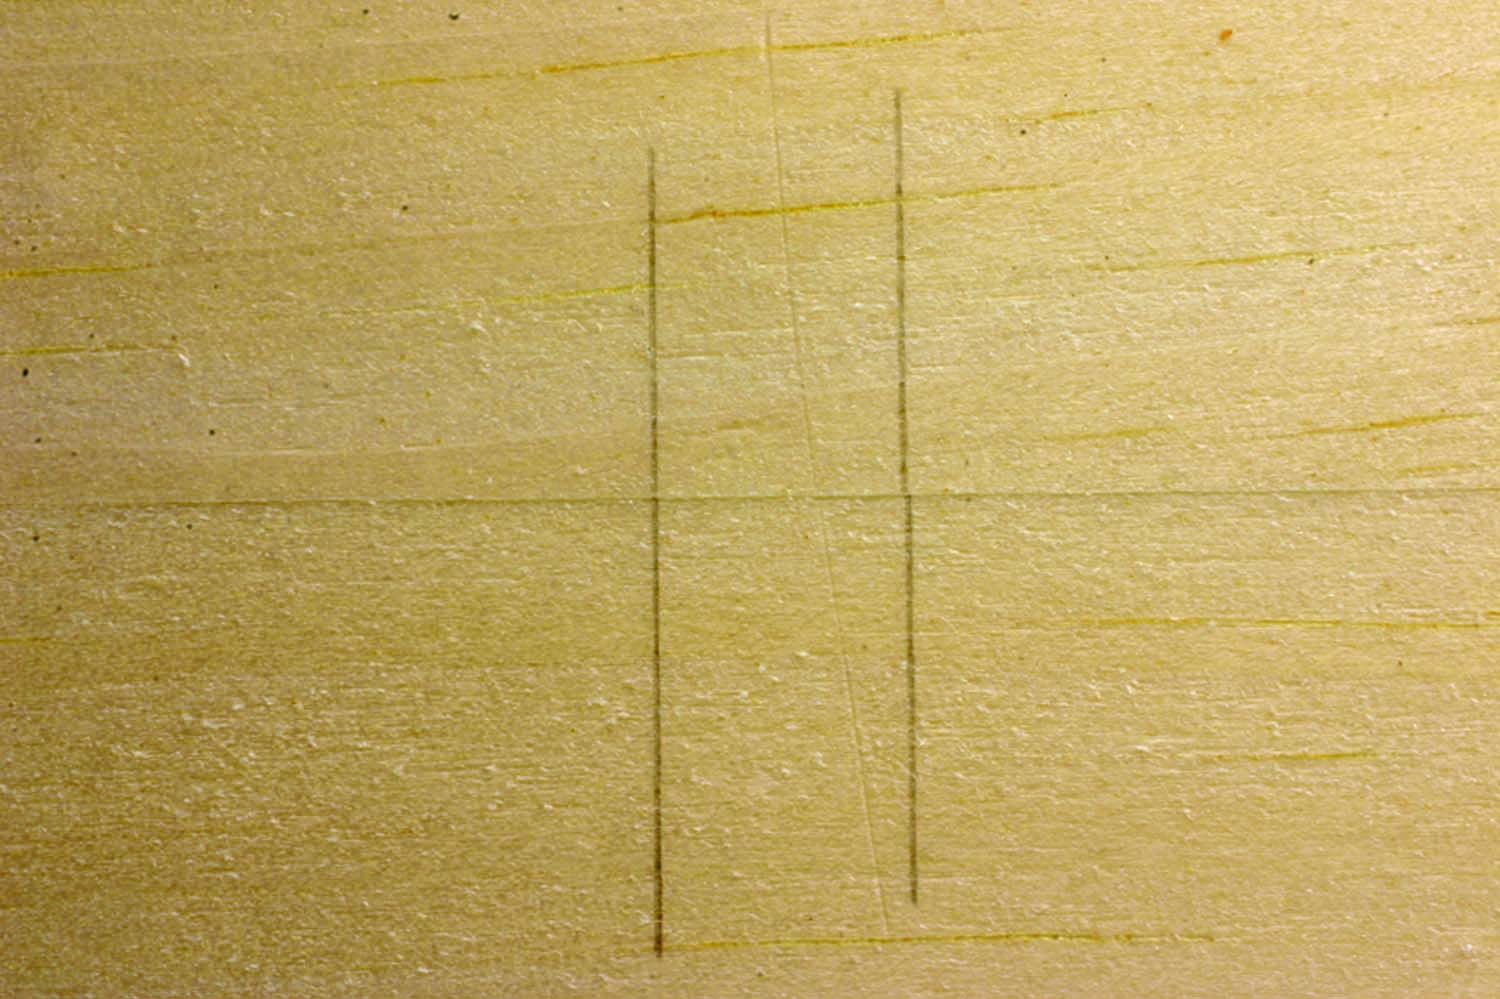
Vernier acuity. This photo illustrates vernier acuity. The pair of lines on the left were marked with the ends of the pieces aligned. The pair on the right were marked with one of the boards offset with a .002″ shim. The pieces were then realigned and the photo taken. Thus, the lines on the right show an offset of .002″, which, remarkably, is fairly easy to see.
Even more powerful is “vernier acuity” with which you can discern a displacement of less than .001″ of two fine lines, such as registration marks on a pair of boards. When using this “super” visual ability to align your work, your eyes equal or exceed the accuracy of the finest calipers likely to be in your shop.
Further, the eye can readily detect a gap of light of a mere .0005″ (half a thou) under a straightedge placed on the sole of a plane held up to diffuse light. That’s probably more accuracy than you need. Turn out all the lights in your shop except one narrow beam aimed across the room to see previously invisible, minute dust particles in the air hovering long after a sanding session and destined for your lungs.
So, the eyes are great tools, but to get the most out of them it is helpful to keep in mind two important factors: lighting and optics. This is especially true if you are older than 40 (when you are, of course, getting much wiser).
Lighting: Angles are Key
Just as in buying a home, the keys to good lighting are location and quality. Think of light as coming from its source at an angle, striking a flat surface, and bouncing off at the opposite angle, just like a ball bounced on the floor outward in front of you. If the eye is at the receiving end of the light’s bounce, you will likely see a lot of glare and not much detail in your work.
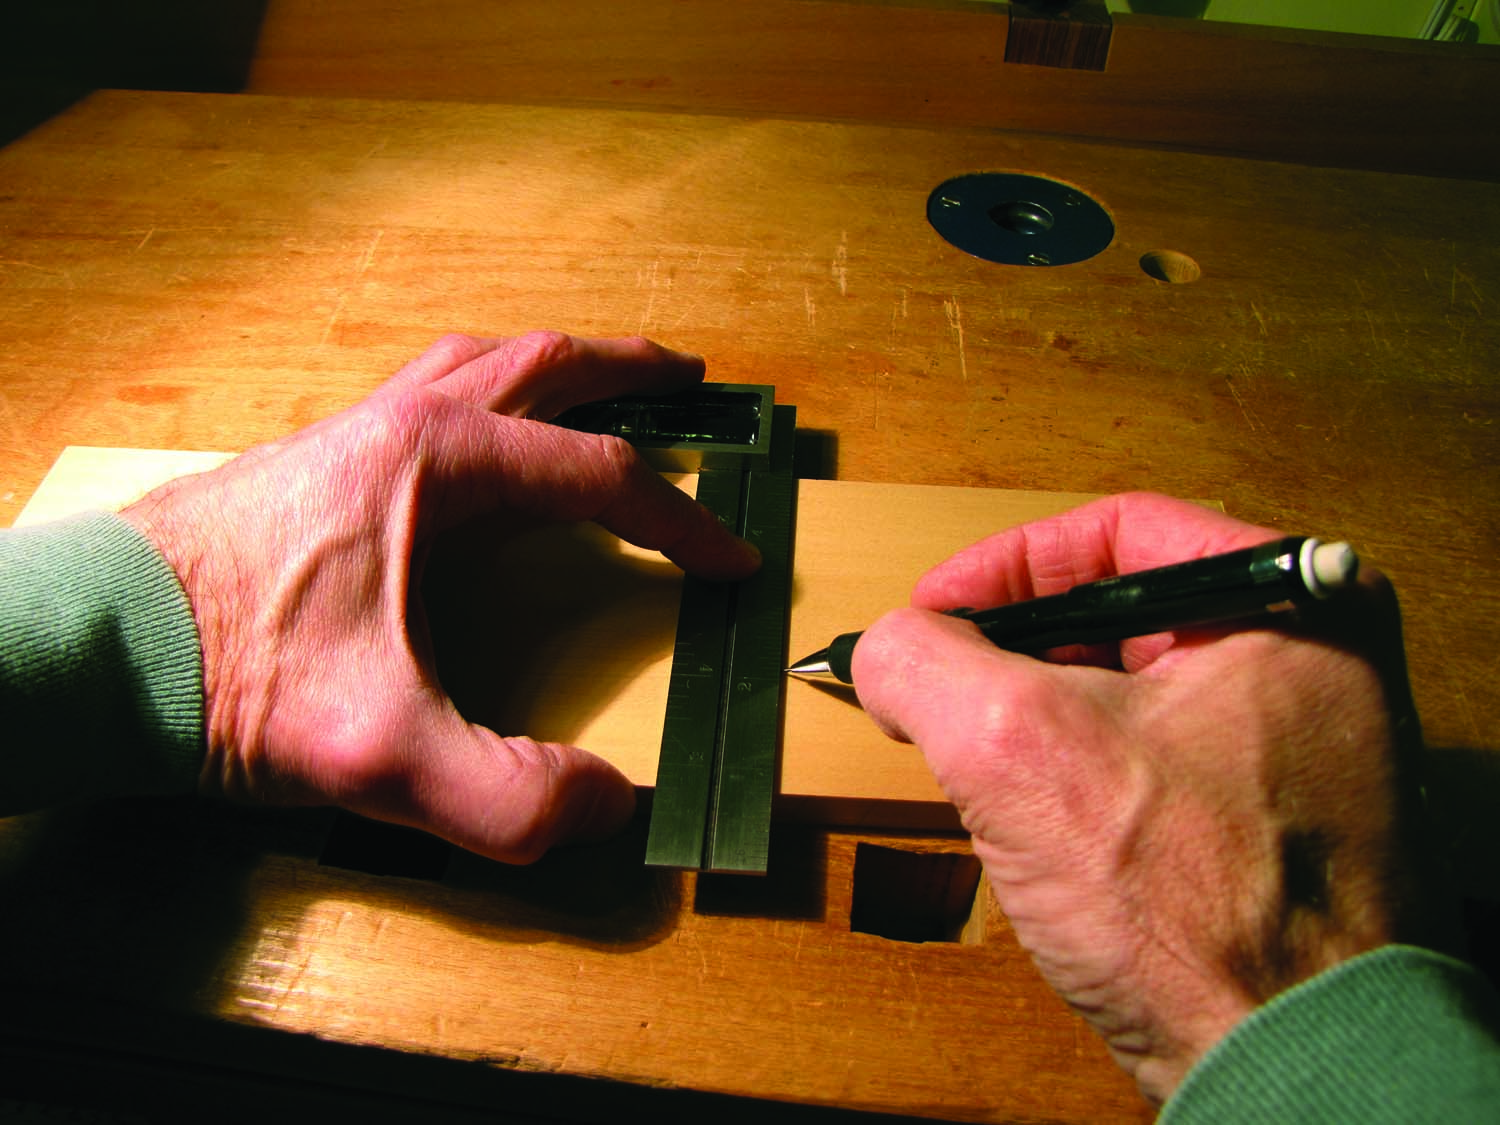
Shadow play. These photos show the value of moveable lighting. In the shot on the above, the marked line is invisible, hidden by the shadows of the square’s blade and my hand. In the photo on the below, you can see the marked line.
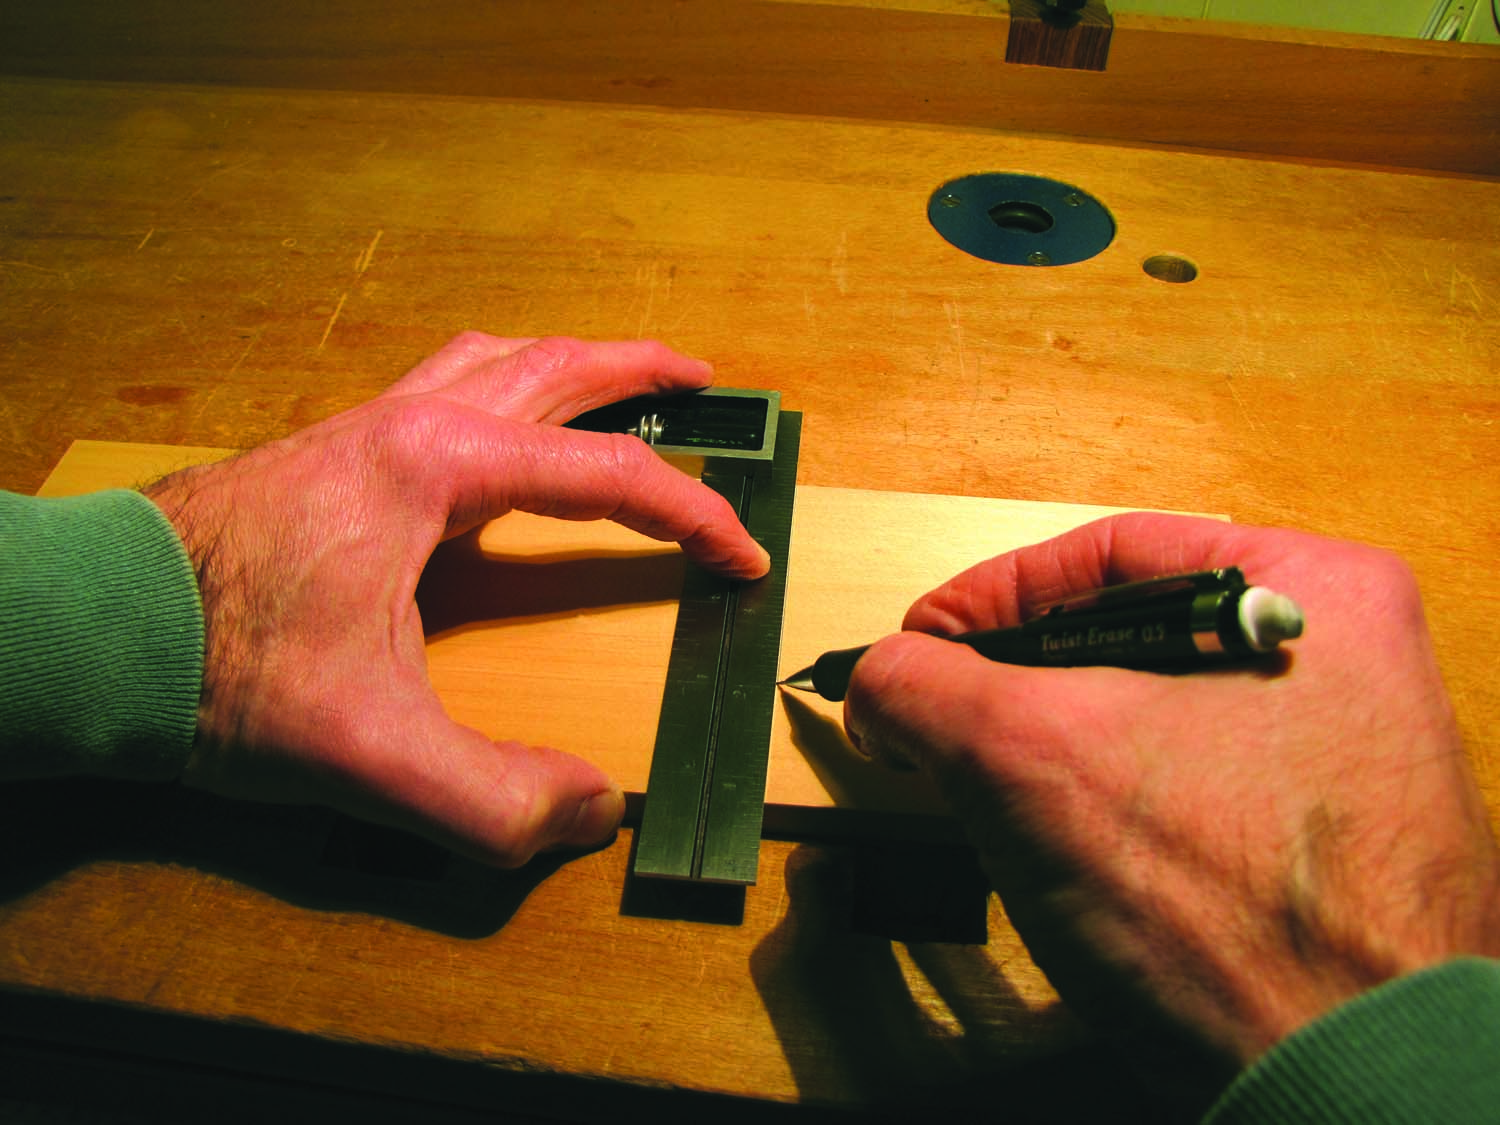 Therefore it is best to locate a light source so the bounce goes away from your face. This usually means the light should come from the side of the direction you are facing, not from in front of you. Practically, this means it is essential to have some moveable light in the shop. I would not be at my workbench without my adjustable-arm lamp that can be easily relocated into two holders near each end of the bench. I also frequently use a portable, rechargeable light that can be optimally placed for everything from sawing to a line on a piece of walnut, to checking the height of a router bit at the router table. Lamps with magnetic holders and flexible arms are handy for machine work, especially at the band saw.
Raking is revealing. Here we see two photos of the same board. In the one on above, light is aimed directly at the board, obscuring the surface. In the one on below, a raking light (light coming in at a low angle) reveals surface imperfections.
 Proper lighting angles are especially important to appreciate detail and texture on the surface of wood, such as when planing a board or applying a finish. Direct a light at a very low angle to the surface to reveal detail that would otherwise be invisible. The idea is to reduce glare and to create revealing shadows. Minute defects in the human retina are detected in clinical examination with essentially this method.
I have emphasized the location of the light source instead of its strength because the illuminance of light on an object decreases rapidly as the light source is moved farther away. Practically, the location of a lamp is more important than whether it has a 75- or 100-watt bulb. Also, a ceiling lamp 8′ over your workbench is not enough for cutting dovetails.
Light quality is a large topic, but here is a helpful concept: Different light sources are composed of different distributions of wavelengths (colors), described by “color temperature.” A piece of wood is seen as having a particular color because it reflects to your eyes a portion of the group of colors in the light cast upon it. Thus, the color that you see depends on the qualities of the light as well as those of the wood. Therefore, it is helpful to evaluate your work, especially when choosing a finish, in lighting similar to that in the location where the piece will be used. Tungsten, “daylight,” “soft white” and so forth are all subjective preferences; awareness and consistency are what matter.
Prescriptions for Woodworkers
If you are younger than 40, you can probably skip this section, at least for a while. That’s because your eyes’ focusing mechanisms are probably still sufficiently flexible to focus throughout any range of distance in which you are likely to do woodworking (with single vision corrective lenses or laser vision correction, if required).
However, after about 40 years of age, the focusing mechanism becomes increasingly inflexible so as to require a different optical correction for near work, such as for most woodworking. Your eye doctor can help you with this, as there are innumerable variations depending on each individual’s eyes, but you can work with the doctor by defining your specific needs as a woodworker.
Intermediate vision. At the table saw, you use “intermediate” vision – about 30″ in this case – to sight the meeting of the board with the rip fence. For most folks in the, say, 50+ category, this viewing distance will be clear with neither their reading nor distance vision prescriptions. They can work out options with their friendly eye doctor.
In woodworking, the eye is often focused at an “intermediate” distance, in the 20″-30″ range. This may, increasingly with age, require a different lens correction than for reading small print at a distance of 14″. This can be achieved in different ways. For example, some woodworkers find it invaluable to have a bifocal or progressive lens (“no-line bifocal”) with the top portion set for approximately a 26″ range (at the table saw) and the bottom portion for a 14″ range (chopping dovetails). Keep in mind that your visual focus distance will affect your physical posture, so you will have to experiment and heed advice from your other health care providers, as needed, to find what gives overall working comfort for you.
Woodworkers doing built-in work which can involve viewing into many odd angles up and down, may find any multifocal glasses difficult to use. The point is to discuss your particular needs with the doctor.
The “right” prescription really does depend upon your functional needs. It is probably no surprise that I recommend you address this issue at the eye doctor’s office, not at the rack of ready-made glasses in the supermarket. I enjoy meeting the particular functional needs that my patients describe to me and I think the same will be so with your eye doctor. While this article is not about eye safety, I do suggest you consider polycarbonate lens material for any eyeglasses used in the shop because polycarbonate is highly shatter resistant.
Optical Aids for Close Work
Sometimes you want to get your vision in very close, for example, checking an edge after sharpening.
A hand-held multi-element magnifier in the 10x range is useful for this. A head borne loupe, such as the Donegan Optivisor LX, keeps your hands free to perform tiny tasks. I suggest you avoid choosing these in “magnification” power and instead select a suitable focal length. I like an 8″-10″ model. Any closer would leave too little room for my hands. Keep in mind that lens distortions increase and field of view decreases as you go to stronger (shorter focal length) lenses. These can be used over your distance or reading glasses, as required for you. And no, they won’t ruin your eyes.
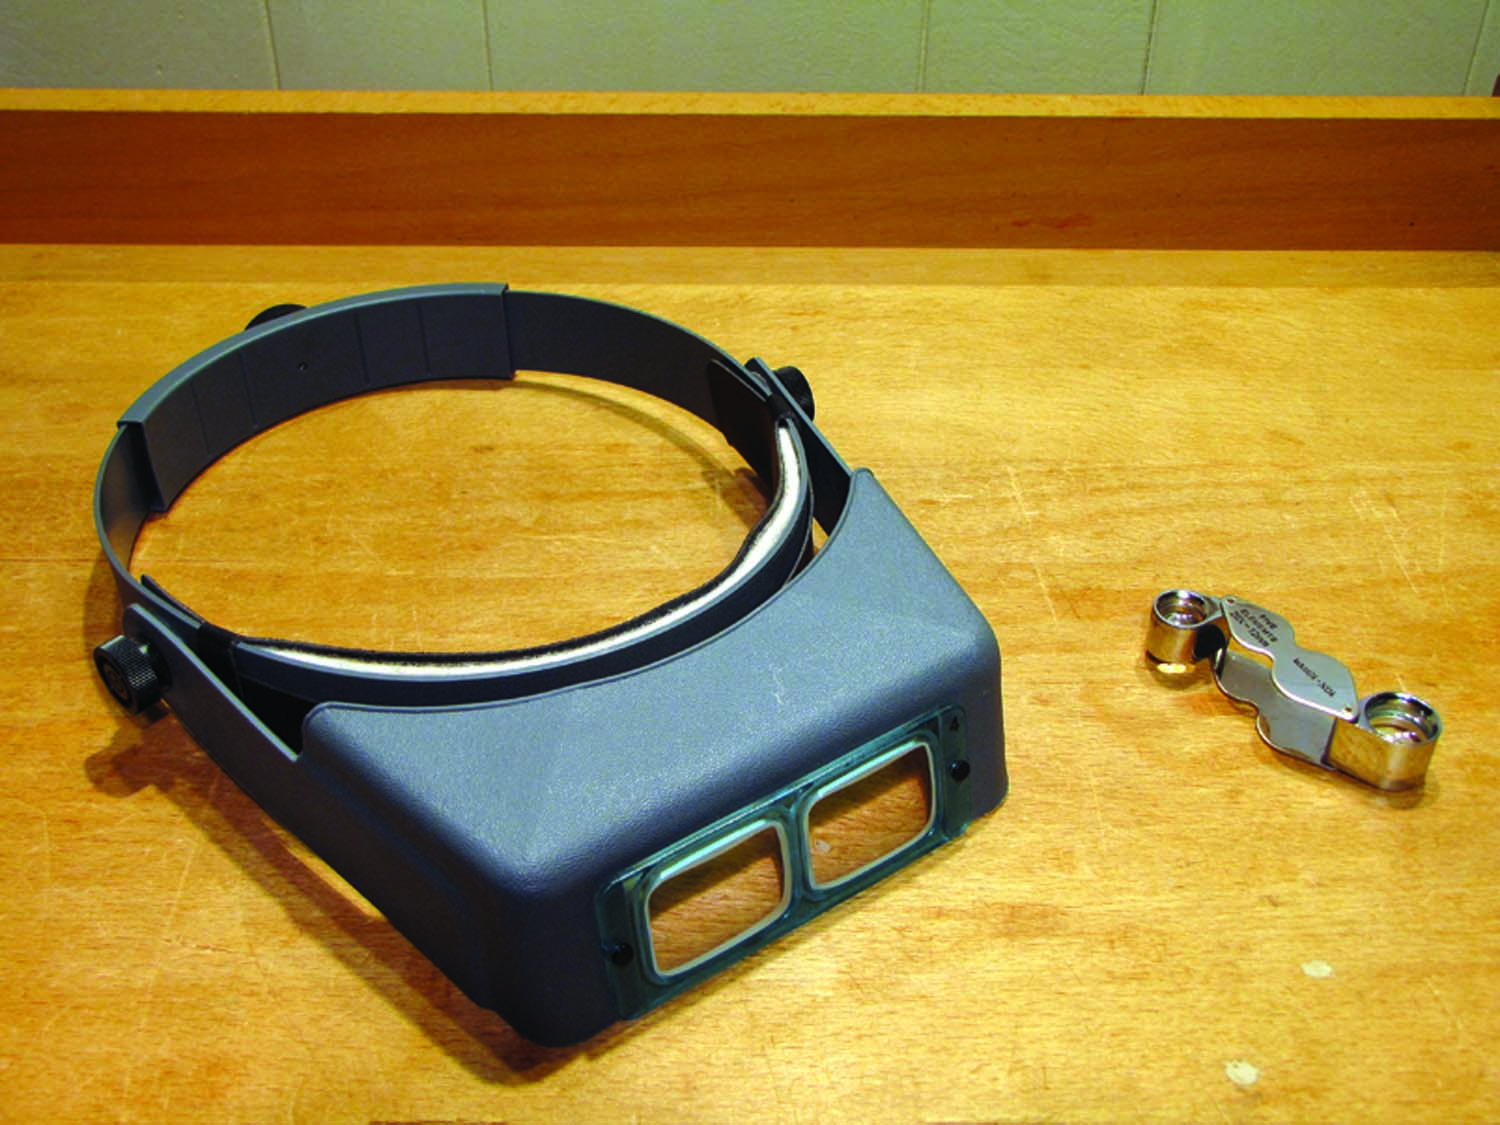
Visual aids. On the left is a Donegan Optivisor LX with a 10″ focal length, which allows you to focus at least that close to your work. On the right is a hand-held multi-element magnifier, which is useful for getting a close look at very small items – such as when you’ re checking for grit scratches on blades while sharpening.
`“Magnification” can be useful, but more is not necessarily better. There is no point in cutting dovetails with a 6″ focal length loupe when they will be viewed in normal conditions at 14″-20″. With few exceptions, it is best to match your working optics to the conditions under which your project will be viewed and save the magnifiers for specialized tasks.
Limitations and Sight Enhancements
As useful as sight is, sometimes it takes second place to a woodworker’s sense of feel. For example, it is more accurate and easily consistent to set a hook rule against an edge than to align a rule by eye. End stops for crosscutting at the table saw will outperform repetitive visual set up.
Similarly, it is easy to feel minute misalignments where edges meet such as when flushing the surfaces of exposed joinery. Determining how tightly a tenon should enter a mortise is not a visual task.
Transferring the knife line for a tenon shoulder around the corner of the workpiece is done mostly by feel. The same holds for setting a chisel edge in a cutting gauge line when chopping to the base of a dovetail. It is quick to swing a straightedge on a surface to feel if it wants to pivot about its center or at an end to sense whether the surface is convex or concave.
Working together, the eyes are more efficient and can detect minute differences in depth – about 1⁄32” at a distance of 14″ – without additional cues such as shadows and overlapping, by virtue of stereopsis.
This enhanced vision only works if both eyes have a clear, unobstructed line of sight to what you are looking at. Stereopsis won’t work if, for example, you stand at the band saw where one eye’s vision of the workpiece is obstructed by the blade guide post. Try threading a needle 14″ in front of you using both eyes then with one eye’s view obstructed and sense the difference.
It should also be noted that it is impossible to fixate the eye’s sharpest, central vision (“look at”) two places at once. For example, when sawing a dovetail, I place the saw to start the cut by eye, then lock in the angle and squareness of the saw and maintain them mostly by feel as my eye tracks the saw teeth down the layout line.
Reminder
While this article is only about functional vision, I would be remiss (you knew this was coming) if I did not remind you of the value of periodic visits to your eye doctor. Don’t take your eyesight for granted. The frequency of checkups will vary widely based upon your personal and family medical and eye history and your age. How to know? Ask your eye doctor, especially if it’s been a while.
Here are some supplies and tools we find essential in our everyday work around the shop. We may receive a commission from sales referred by our links; however, we have carefully selected these products for their usefulness and quality.