We may receive a commission when you use our affiliate links. However, this does not impact our recommendations.
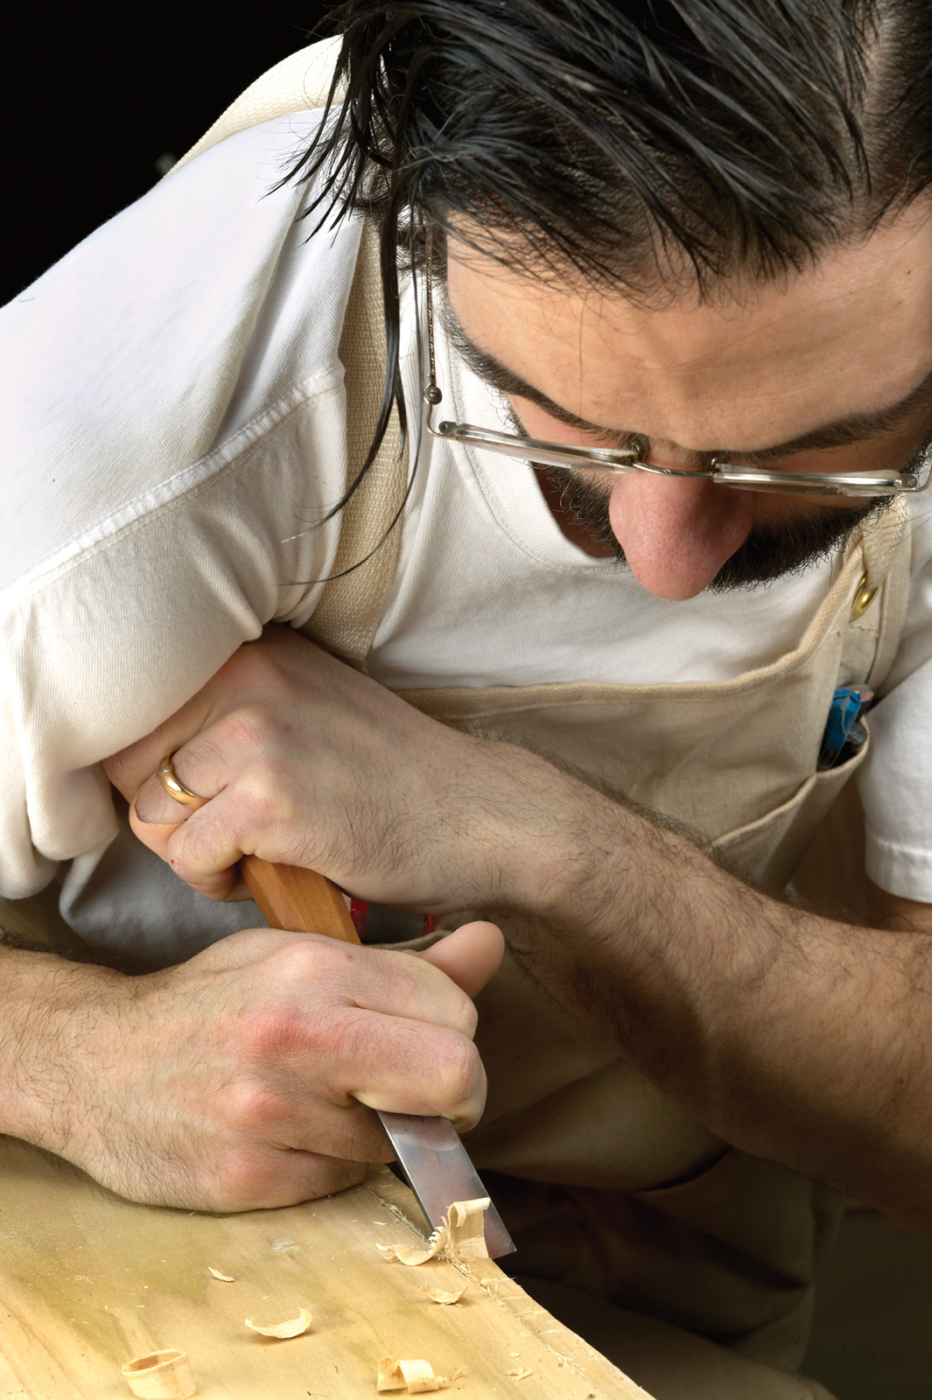
Makinga rabbet using an 18th-century chiseling technique: After scribing the lines for the joint, you can quickly rough out the rabbet by wielding the tool as shown. Then come back with a rabbet plane and clean up the joint to your scribed lines.
When you know what you’re doing, chisels can be wonderfully helpful tools.
If all you want to do with your chisels is adjust machine-cut joints or slice glue drips, any technique or tool will work. This sort of work is occasional in nature, and not particularly strenuous. But chisels offer woodworkers the opportunity to do much more.
For machine-using woodworkers, chisels provide the opportunity to explore new possibilities. You can cut shapes with a chisel that are not achievable by other means. For the beginner lacking specialty machinery, chisels can be used to cut all manner of joints quickly and efficiently. But this work requires more effort than the occasional paring of a joint.
For this sort of work to be practical, we need much more thoughtful tools and techniques. The trouble is, neither the tools nor the traditional techniques are well-understood. What we need is a professional to show us his tricks and the tools we’ll need to perform them. That’s where I come in. Oh, no, I don’t mean me. See, the guy we need died more than 300 years ago.
In this, my second article on working wood quickly and efficiently with hand tools, we’ll look back in time in hopes of discovering the effective and efficient use of chisels.
Paring
“This way of handling may seem a preposterous Posture to manage an Iron tool.”
— Joseph Moxon, “Mechanick Exercises”
When examining period chisels, one can’t help but notice the strange design of their handles. Surviving examples and period illustrations from the 17th, 18th and early 19th centuries indicate chisels typically had tapered or wedge-shaped handles.

Shown here are tanged firmer chisels with traditional octagonal handles scaled from those found in the famous Benjamin Seaton chest. Also shown is a socket firming chisel that is also a copy of one found in the Seaton Chest.
Holding such a chisel is like pinching a watermelon seed. It’s difficult to hold at first, then it grows increasingly slippery the harder you squeeze. The rationale behind the design of these handles is unknown to me.
But rather than immediately tossing out the design as 18th-century muddle-headedness, which is clearly what modern toolmakers have done, we might assume the design served a purpose we do not yet fully understand.
“With pressing the shoulder hard upon the [handle], the edge cuts and pares away Irregularities.”
— Moxon, “Mechanick Exercises”
Joseph Moxon, a chronicler of woodworking techniques in the 17th century, describes a technique in which one’s shoulder is used to drive the chisel. The chisel’s blade is held a bit like a pencil with the heel of the hand resting upon the work. The pinky must be behind the blade so it cannot be cut, and doesn’t obstruct the view of the edge. The other hand guides the chisel handle to the shoulder where it can be pushed with great force.
I tried this technique with my beloved Hirsch firmer chisel. Its downright pointy handle wore a hole in my shoulder in minutes and left a bruise that lasted for days. What I needed instead was a chisel with a much wider butt end. Hmmm.
Creating Joints With Chisels
With the proper chisel, this technique can be used whenever a low angle or paring cut is desired. We usually associate paring with fine cuts, but this technique can produce chips that would make a scrub plane blush.

Shown here are handles of German firmer chisels. The handles’ shape makes them unsuited to the traditional paring technique that uses your shoulder to drive the tool.
Paring Grooves

A groove for a drawer bottom can be created quickly with one scribed line and a chisel that is the width of the desired groove. Use the paring technique described in the article to cut the joint.
Grooves can be created quickly using this technique. In the example shown below, a groove in a drawer’s front is pared to accept the drawer bottom. A marking gauge establishes the top of the drawer bottom. A sharp firming chisel, usually 1⁄4” to 3⁄8” wide, is used. With the board well clamped, start at the far end and begin paring, bevel down, with a few degrees of clearance between the bevel and the work. The edge of the chisel must rest against the marked line to ensure a straight groove. You needn’t mark out both sides of the groove because the width of the chisel dictates the width of the groove.
Paring Dados

To pare a dado with your chisel, first strike a line on the workpiece using a knife and your square. To set the width of the dado, use the chisel’s width to properly position a square and straightedge. Then scribe your second joint line.
Dados can be similarly pared out, but both sides of the dado must be marked to prevent fiber break out. I typically strike the first mark with my striking knife (see “The Striking Knife,” April 2005), square to the edge (using a large square). I reposition the square for the second mark using an appropriately sized chisel to establish the distance between the lines (and the width of the dado). When it’s time to make the mating part, I simply set my marking gauge to the width of the chisel I used and transfer that measurement to the edge of the board. Planing to that line on the mating part is then a simple procedure.
Paring Rabbets
This same technique can be used to make rabbets or fillesters (sometimes called filletsters or cross-grain rabbets) quickly without adjusting any planes or temporarily attaching a batten. Because of the grip I described, it’s easy to work right to the scribed line and leave a nice straight edge behind. The rabbet plane can then use that straight shoulder to clean up the bottom of the rabbet and bring it to final depth.
Raised Panels
What is a raised panel but a board with angled rabbets and fillesters? This technique is a good match for roughing-in raised panels; it’s a sensible approach when the panel has an arched or otherwise curved top.
Mallet Work: Embrace the Bevel
In Moxon’s day, the standard all-purpose bench chisel was called a “forming” chisel or “former.” This later became the “firming” chisel or “firmer.” Today we define firming chisels as general-purpose chisels suitable for use with a mallet and this was probably true in Moxon’s day as well. We shouldn’t look at mallet work as brutish. In fact, using a mallet with a chisel requires a fair bit of skill. Moxon illuminates a little-discussed technique worthy of your consideration:
“…you must bear the [handle] of the Former a little inwards over the stuff.”
— Moxon, “Mechanick Exercises”
When chopping straight down, you must be cognizant of the fact that the wood sees the chisel’s blade as a wedge. As such, the wood wants the direction of the cut to be the bisection (center) of the chisel’s bevel angle (the 25° to 30° you honed on the edge). Driving the chisel straight down typically results in an undercut. Thus, to produce a 90° cut you must pull the handle back ever so slightly away from the scrap side. This is precisely what Moxon meant in the quote above.
Chopping Dovetails
When chopping out dovetail waste, the tendency for the chisel to undercut can be used to one’s advantage. Begin by placing the firming chisel 1⁄16” to 1⁄32” on the scrap side of the scribed line (base of the dovetails) exactly as Moxon described:
“…set the edge of the Former, a little without the scribed Stroak, with its (bevel) outwards…”
— Moxon, “Mechanick Exercises”
Holding the firmer as vertical as possible by eye, strike the chisel two or three times, not more. Each blow drives the chisel’s edge back toward the scribed line. Embrace this.
Now pare away the waste material starting 1⁄8” from the edge of the board to the depth of your chopped line using the shoulder-powered paring technique discussed earlier. Always leave behind the full thickness at the extreme edge of the board.
With the wedge-shaped chip removed by paring, repeat the process until you are halfway through the board. When you flip the board over and work the opposite face, the force of chopping will not simply break the waste, as a portion of it still touches the bench. When the waste is removed you will notice the material you have removed has left an undercut or “V” shape through the end grain of your tail board.
No further work is done to this half of the dovetail joint. This tail board can now be knocked onto its mating pin board. The little extra material created by the initial placement of the chisel will simply yield away as the joint is assembled. With experience the initial placement of the chisel will be governed by the hardness of the stock and exactly how you transfer marks and saw.
I find this only helpful with the tails. The pins should be chopped exactly as Moxon said, with the chisel leaning away from the waste slightly to create a perfectly square edge.
 While we’re on the subject, another trick I use is to lay out my dovetails using the chisel I want to chop them out with. Now my chisels have square sides and my initial placement is not right on the line, so the width of the waste must be slightly greater than the width of the chisel. Theoretically this should be a problem, but in the many years I’ve been chopping dovetails this way, a problem has never arisen. It may be worth mentioning that although bevel-edged chisels were known in the 17th century, they were not generally used by Anglo-American cabinetmakers in the 18th century. Our modern partiality for them may be arbitrary.
Chopping Mortises

Here you can see cabinetmaker’s or joiner’s mortise chisels.
My mortising technique is a bit unorthodox. It uses portions of both of the advanced techniques we’ve discussed so far. Begin the mortise with a single marking gauge line representing one wall of the mortise. The chisel’s width will determine the width of the completed mortise. Place the chisel 1⁄8” from each end, and with the chisel leaning slightly away from the center of the mortise (to make a square cut), apply no more than three mallet blows.
Using the mortise chisel in precisely the same technique as the firmer was used to make a groove, pare a shallow groove between the chopped ends, carefully aligning the chisel’s edge to the marked line. Repeat the mallet blows at the ends of the mortise, and remove the waste between them as before. As the mortise gets deeper, the paring can become more aggressive. The low angle of the chisel during the paring will allow the walls of the mortise to guide the chisel, keeping the mortise nice and straight. Finish the mortise by lightly chopping the ends to the desired length.
Choosing the ‘Right’ Tool
The 18th-century toolmakers offered a variety of chisels. In addition to the standard firming chisel, tool dealer Christopher Gabriel offered a heavy-duty version of this tool called the strong firmer. Socket firmers were known and used by carpenters and wheelwrights. But their use was not exclusive to any single trade. Mortise chisels were available in both socketed and tanged varieties, but we shouldn’t confuse these with the large socketed firmers used by carpenters for framing.
The dizzying array of chisels is no mere testament to personal preference. Substantive differences between seemingly like tools indicate a degree of optimization long since lost. For example: Socketed firming chisels weren’t generally available in sizes smaller than 1⁄2” or so. It’s also notable that tanged firmers were generally available in 1⁄8” increments while socketed chisels were not.
True mortise chisels, socketed or tanged, were rarely available in widths over 5⁄8“, while socketed firmers (framers) were available in widths exceeding 2”.
In addition to the variety of patterns, chisels were available in a wide range of sizes. The standard 18th century set of firming chisels included 12 to 16 tools. Such a set would include chisels from 1⁄8” to 1″ wide, roughly in 1⁄8” increments, then 1″ to 2″ by either quarters or eighths. Artisans would likely add to this basic set, a set of eight joiner’s mortise chisels sized 1⁄8” to 1⁄2” or 5⁄8” by 1⁄16” increments, a few paring chisels, and several firming gouges (for coping). The total cost of these tools could approach a week’s pay. It can be difficult for those of us who have only four chisels, (1⁄4“, 1⁄2“, 3⁄4” and 1″), to understand the sense in having so many chisels.
But the rationale behind these large sets is probably the single most advanced chisel technique we can learn. It is directly responsible for making the use of chisels efficient and productive, while at the same time is not limited solely to the use of chisels.
“Joiners use (mortise chisels) of several Breadths according as the Breadth of their Mortesses may require.”
— Moxon, “Mechanick Exercises”
By carefully applying a chisel to a board, one can make a cut of a consistent and repeatable width. With regard to mortising, one chooses the width of the chisel based on the stock size: Use a 1⁄4” chisel for 3⁄4“-thick, 4/4 surfaced stock, a 5⁄16” for 4/4 rough or 5/4 surfaced, and a 3⁄8” for 6/4 and so on. In these instances we can create mortises of very uniform width with no extra effort on our part.
Similarly, we can “custom design” projects to match our tools. Dovetail layout, for example is a highly arbitrary process many woodworkers fuss with. During carcase joinery, through-pins and tails can be sized and laid out using one or preferably two firming chisels. The chisels themselves can be used to make the marks. Dovetails could be one firmer chisel wide and one firmer chisel (usually a smaller one) apart. Just remember to leave a little extra space between the marks to account for the thickness of the firmer blade and the dovetail saw kerf.
Conclusion
I hope I’ve convinced you that there are things we can learn about using hand tools quickly and efficiently by investigating historical methodologies. Did you ever think to push a chisel with your shoulder? It’s wild isn’t it? And I think it could be useful. But I don’t think this specific technique alone will be responsible for a dramatic increase in your efficiency.
But the ancient and forgotten “Arts & Mysteries” are much more than a mere collection of hand tool techniques. They encompass hundreds of years of industrial evolution and are characterized by consistent philosophical approaches to solving workshop problems.
We have our own “Arts & Mysteries” today such as “measure twice, cut once.” By measuring carefully, we create accurate pieces that fit together. We are aided by a slew of tools that were generally unavailable in Moxon’s day. One can’t help but wonder how craftsmen managed 300 years ago without tape measures, dial calipers and (my favorite) the micro-adjustable marking gauge – if only it had a digital display.
Through our examination of chisel technique, we have discovered the answer and one of the most important of the “Arts & Mysteries.” It allows accurate work to be performed very easily. Like any other technique, it must be practiced to be mastered. PW
“…This Posture, all workmen are at first taught, and Practice doth so inure them to it, that if they would, they could not well leave it.”
— Moxon, “Mechanick Exercises”
A Proper Set of Chisels For Hand Joinery
If you want to be able to make furniture with traditional joinery by hand here’s what I think you need:
Firmers: 1⁄8“ to 1“ by eighths. I grind the small chisels pretty low, maybe 20° to 25°. Hitting one with a mallet is like driving a nail. Edge retention isn’t usually a problem. I grind larger chisels, 7⁄8“ and larger, pretty low as well. The edge is so long that it spreads out mallet force and is thus well retained. (Don’t ever compare the edge retention of two chisels of different sizes. The larger one will always win!) The chisels in the middle receive the majority of punishment, so I grind these close to 30°.
It’s nice to have one really big chisel. A really sharp 11⁄4“ to 2“ framing chisel will suffice. There are plenty of good blades on the market. Trouble is, they are often paired with unfortunate handles. If you love the steel but hate the handle, consider immediately re-handling it.
If you can only have one mortise chisel choose 5⁄16“ – it‘ll work for most materials roughly 1“ thick. The larger sizes are only helpful for the larger stock found on chairs and large tables. When you start getting into mortises over 1⁄2“, I think you are better off to first bore holes and use a framing chisel to clean out the waste. Mortises this big aren’t typical in furniture I’m familiar with. This is more like general carpentry.
A paring chisel with a long blade, and possibly a curved edge is nice to have. A 1“ tool of this form is a nice size. Besides that chisel, it’s nice to have one or two paring chisels in the 3⁄8” to 5⁄8“ range because those firmers see so much use, they may not be quite as sharp as you’d like when you need to take a small shaving.
This article originally appeared in the June 2005 issue of Popular Woodworking Magazine.
Here are some supplies and tools we find essential in our everyday work around the shop. We may receive a commission from sales referred by our links; however, we have carefully selected these products for their usefulness and quality.