We may receive a commission when you use our affiliate links. However, this does not impact our recommendations.
The striking knife was a tool frequently found in the tool kits of early woodworkers. Though it’s extremely useful, it is a surprisingly uncommon tool to encounter today.
Discover a nearly extinct tool that can help you work faster and more accurately.
As preposterous as the notion seems, the historical record suggests cabinetmakers working in dim shops with hand tools were able to produce fine furniture with great speed. Despite the superiority of our modern tools and shops, few can match their productivity. So modern woodworkers are left with this question: How were they able to work efficiently with hand tools?
This article is the first in a series I will write for Popular Woodworking on the subject of working wood quickly and efficiently with hand tools. I shall humbly attempt to do what my 18th century counterpart swore not to do: Reveal the once secret “arts and mysteries” of working quickly and efficiently with hand tools.
My Favorite Tool: The Humble Striking Knife
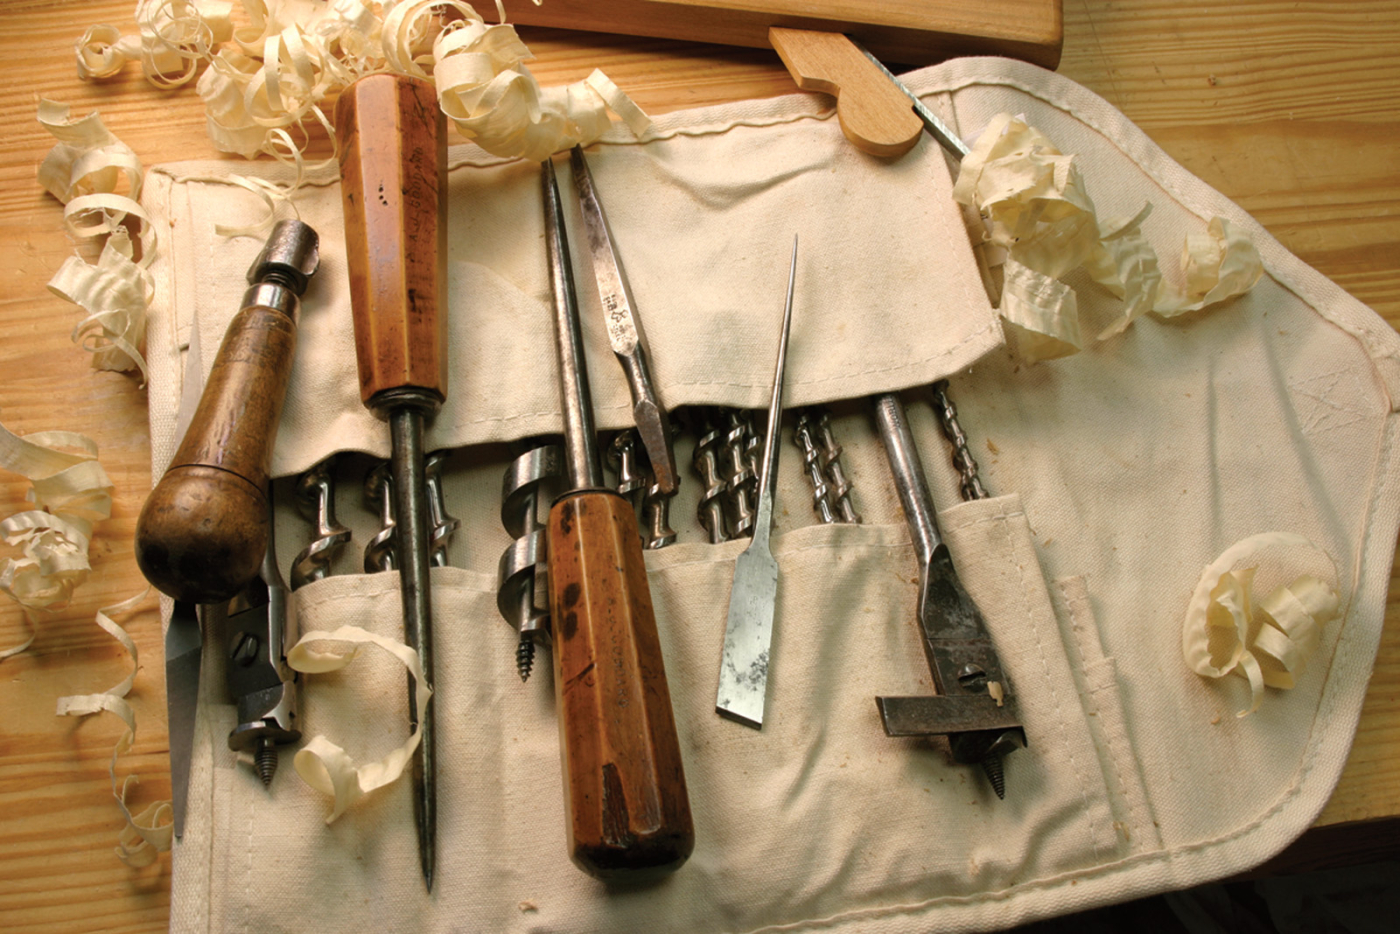
Do you have a favorite tool? It may be a tool that fits your hand well or does a fine job. Or it might be a tool that simply appeals to you. Well I certainly do. It’s a tool not much used anymore called a striking knife. A striking knife is a double-ended marking tool with a skewed chisel-like blade on one end and a scratch awl on the other. My striking knife came to me in a parcel of old Sheffield brace bits purchased from an English auction house. It appears to have been made from a thin, fine-toothed file. Some striking knives have wooden scales (handles), but not mine. Two carefully placed and well-smoothed indentations are all its maker offered to comfort those who have used it.
I understand those who would question the striking knife’s relevance. The 0.5mm mechanical pencil is indeed the fine woodworker’s friend. And while I accept the accusation that I am a traditionalist – even a Luddite in my preference for wooden bodied planes – I defend my use of the striking knife as an important and helpful tool. As a marking tool, it leaves exactly the line you want. It’s like a pencil that can lay a different thickness line depending on the situation. But unlike the pencil, the striking knife leaves a physical feature that is not only useful, but responsible for fine craftsmanship. Allow me to explain.
Awl Marks With the Grain & End Grain
Many marking knives currently available don’t have awl ends, which is unfortunate. The awl side seems crude but it’s quite helpful. Marking with the grain, even on rough-sawn surfaces, is simple with the awl side of the tool (the blade end can catch the wood’s grain, pulling the edge and line astray).
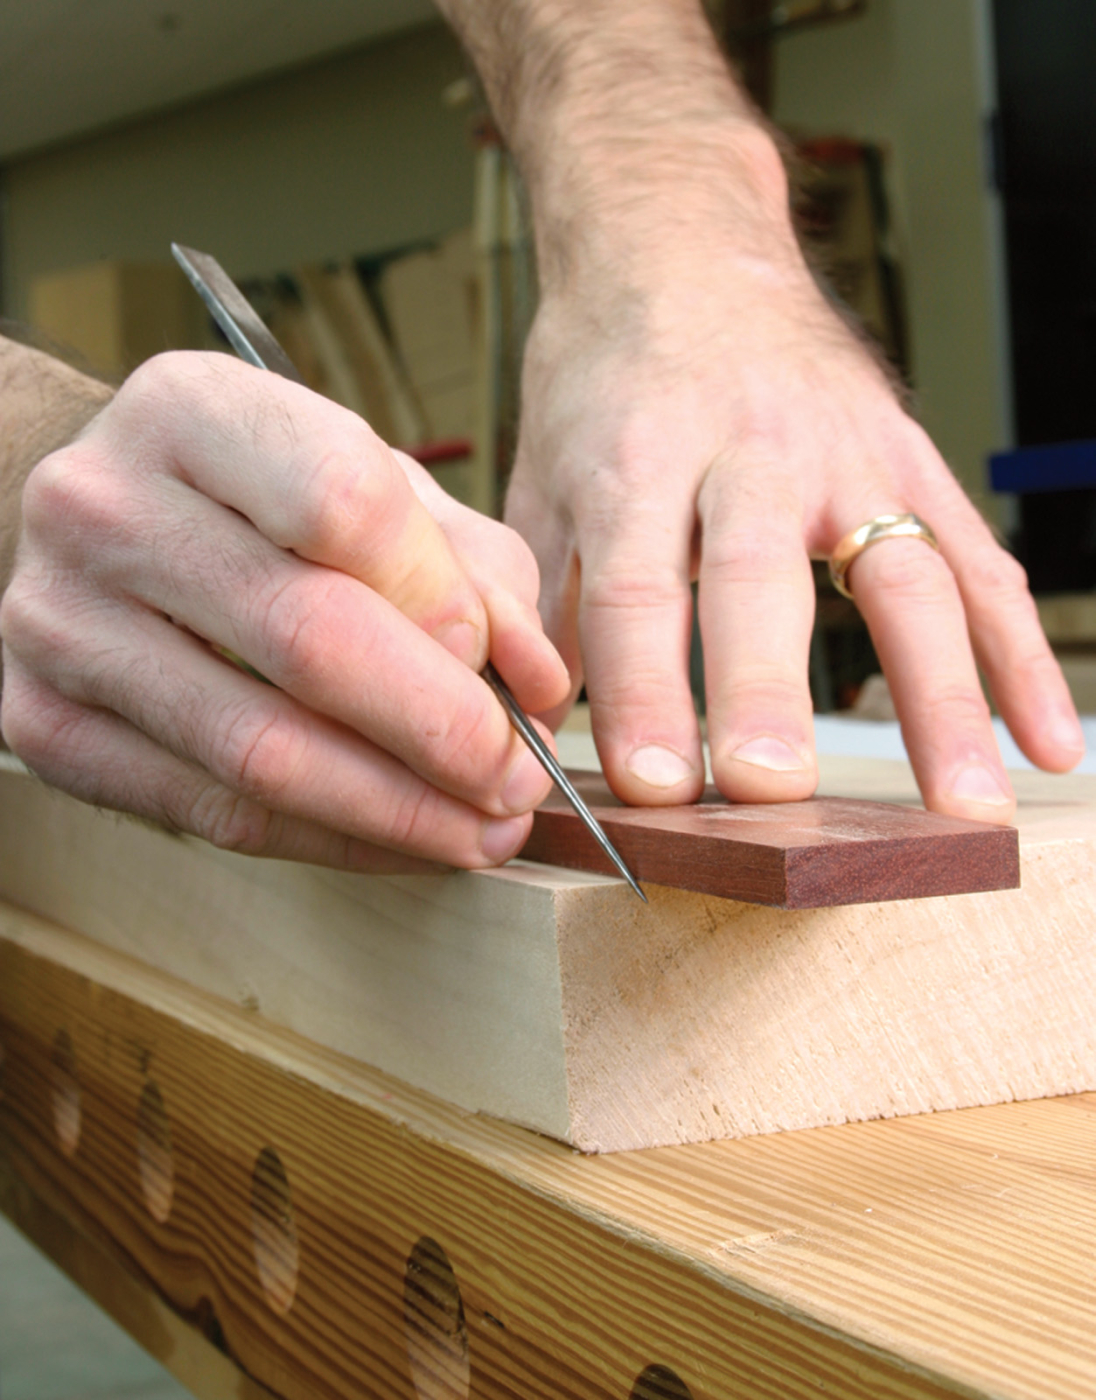
Marking parallel to long grain requires a sharp tool and a light touch. Begin the mark with the tool hanging over the end of the work. The striking knife must be angled down (toward you) and slightly away from the straightedge as shown.
Begin the long grain mark by laying the awl’s point in the corner made between the work to be marked and your straightedge. The point of the awl should hang off the workpiece as you begin the line. Keep the upper end angled back toward you and pitched slightly away from the straightedge. Drag the point onto the work and along the straightedge. Use a light touch and several passes to make an acceptable line. In fine-grained woods, you needn’t make a deep line. Your line will be difficult to find in nearly every species of oak.
When planing to a scratched line (or even a gauged line) you can see where the plane has met the line from the top. The edge of the board becomes slightly narrower as you reach the scored line. Even the shavings emerging from the plane will reveal this.
I also use the awl end of the tool to mark end grain. Unlike awl lines, I can’t see knife lines in freshly sawn end grain, and I prefer not to plane end grain just to see my marks.
It’s difficult to accurately mark end grain. Pencil lines across sawn end grain of dark woods such as black walnut, are nearly invisible in anything but direct light. A scratched line is much better, especially in the raking light typical of all workshops. Here, the striking knife offers an extra benefit: Its slender awl end reaches into tight places like these tiny “London pattern” dovetails.
The long thin awl end is especially helpful when marking dovetail pins. There is an advantage to making the pins very small and the tails very wide, but the trouble with this approach is the marking. The long awl end of a striking knife fits into tiny spaces well.
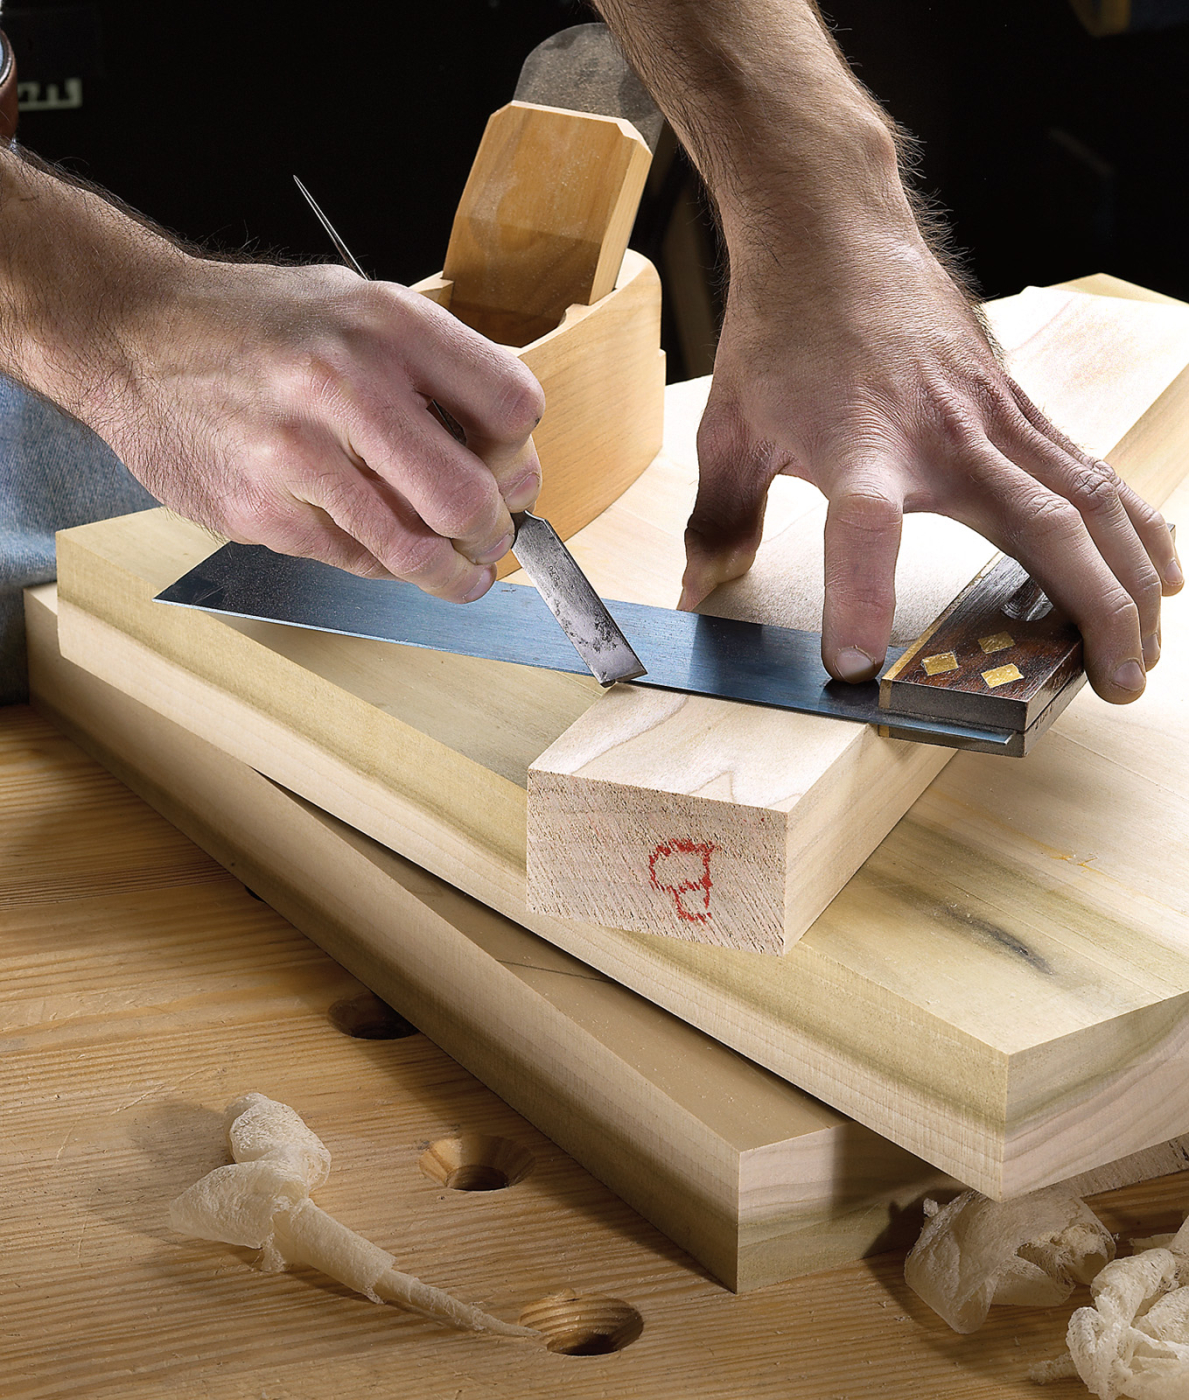
Knife Marks Across the Grain
Making cross-grain marks is where the striking knife excels. Hold the knife using a pencil grip with the tool nearly vertical. Lay the flat side of the knife against a try square’s blade or a straightedge. Place the center of the blade on the corner of your work and make a deep nick. Draw the knife slowly towards you, cutting lightly with its tip. To keep the knife firmly against the square or straightedge, rotate the knife to steer the blade toward the square. Just before you reach the near end, roll the blade down to mark the near corner with a deep nick. If you want a deeper line, make another pass. Never force your knife. That will only cause inaccuracies. Remember: The slow knife cuts best.
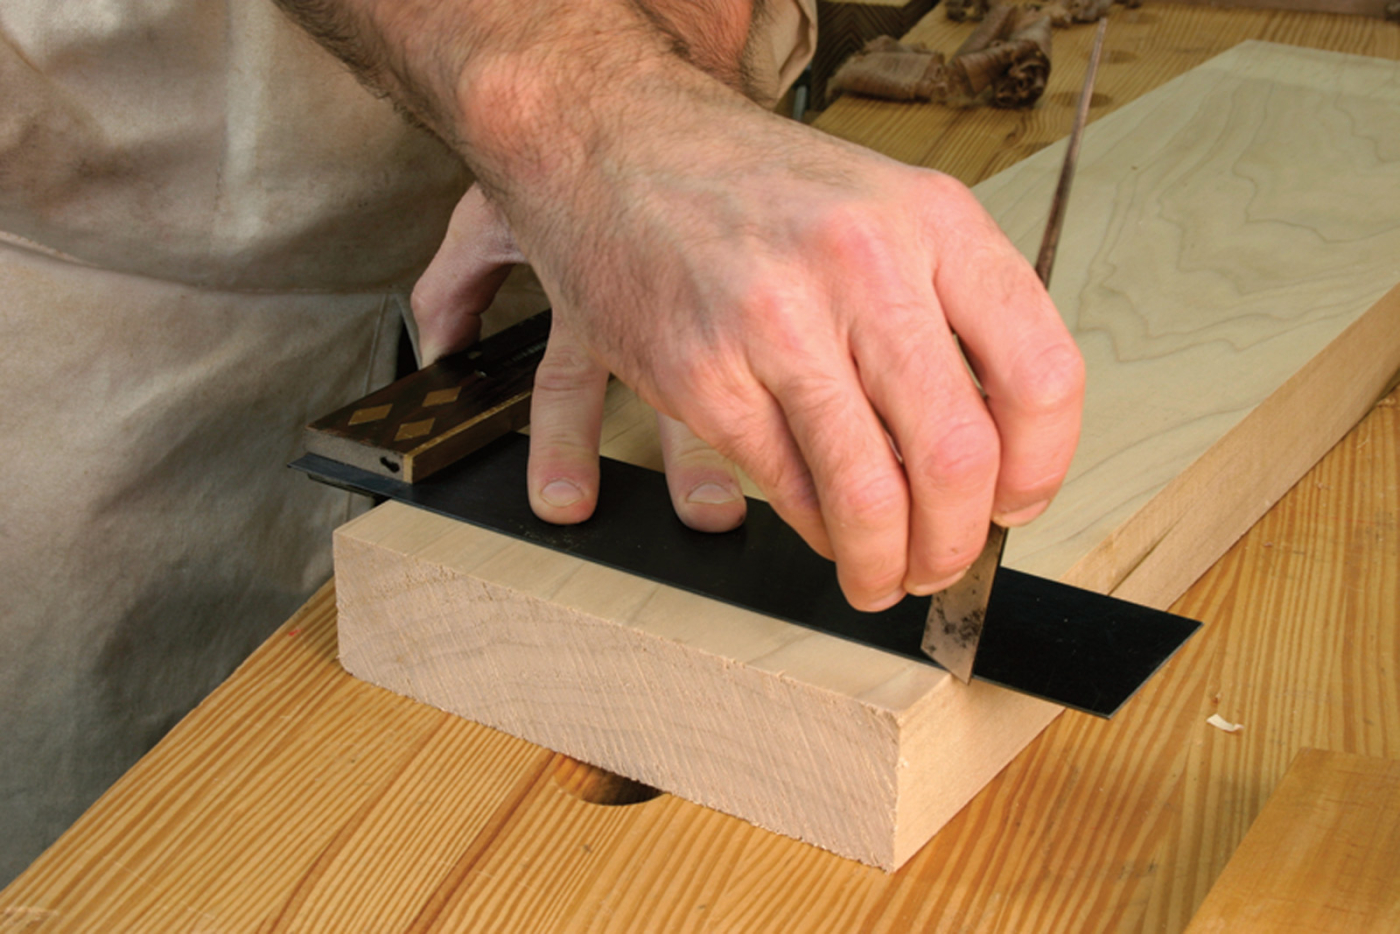
Marking cross grain begins with a nick in the far corner. Notice the angle at which the knife is held. Because most of the wear happens at the tip of the blade, the middle of its edge stays sharp. Draw the knife toward you in one smooth motion. A light touch is all that’s needed here. Notice the knife is still nearly vertical. The grip is relaxed. The wrist is straight.
Those nicks at the beginning and the end of the line offer four important advantages:
1) Positioning your try square: When you wish to make an accurate crosscut, it’s helpful to mark the face and both edges. After marking the face, place your knife back into the nick in the corner from your first mark. Reposition your square to the knife to then mark the edge of the board. Repeat this process each time you reposition your try square.
This is an accurate way to mark multiple faces. If you are working rough stock and the corners aren’t crisp, this technique is especially helpful. But I also appreciate it because my nearsight vision is failing. Pencil lines, you see, force you to align your square by eye. At least some of my woodwork is done in the evening when my eyes are weary. This technique allows me to continue doing good work hours after I should have hung up my shop apron. It may also help explain how such good work was possible in poorly lit period workshops.
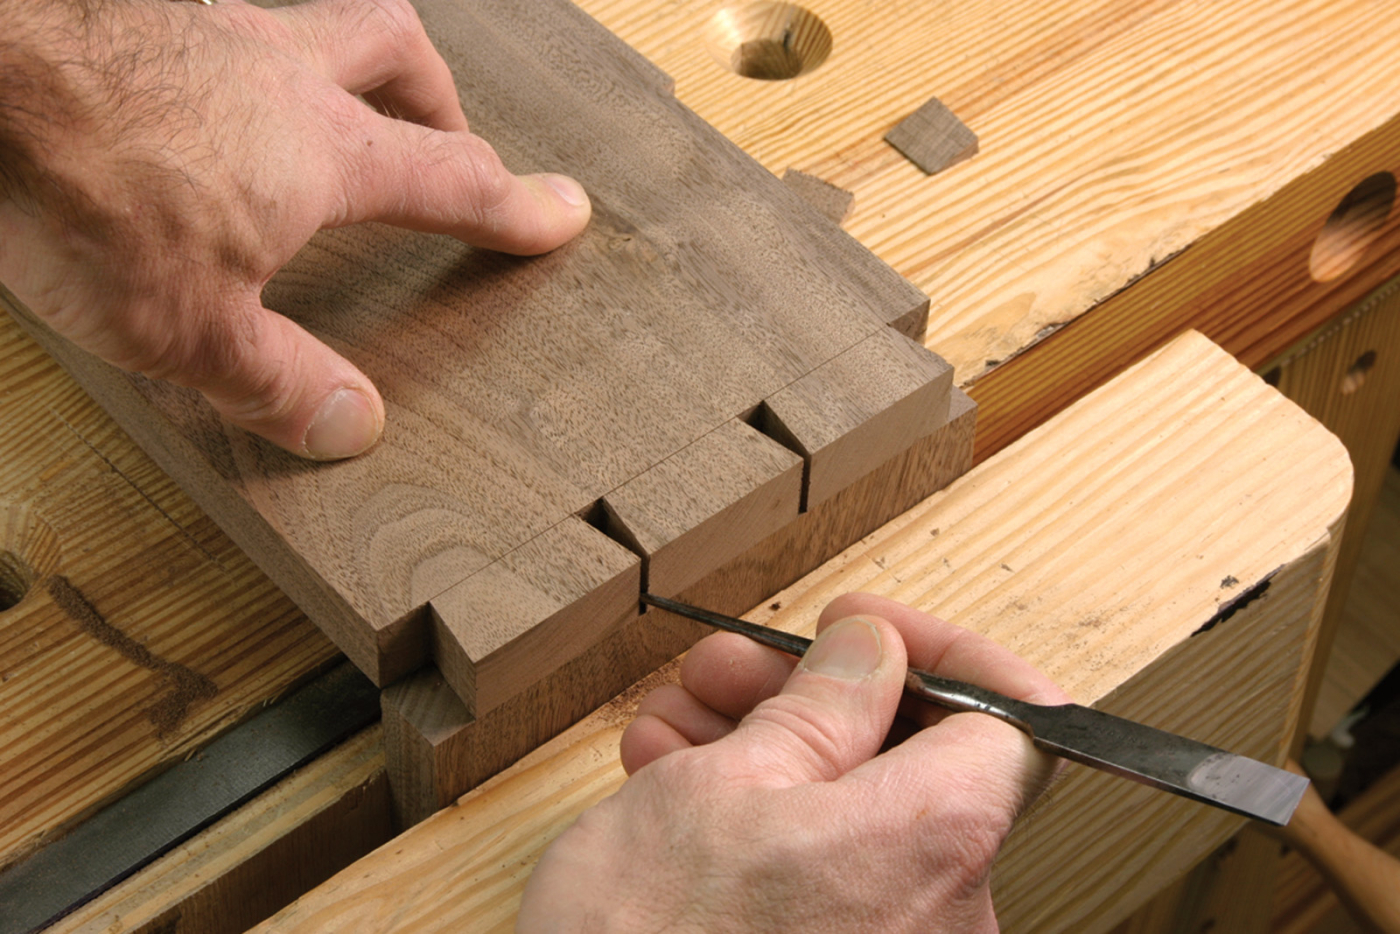
2) Guiding saw cuts: Not only is the mark accurate, but it guides my saw or chisel. The teeth of my crosscut-filed backsaw jump into the knife mark. By keeping a relaxed grip on the saw, I’ve found the saw will find the mark, again sparing me from straining my eyes.
3) Fixing wayward saw cuts: Many beginning sawyers quickly learn to track the line on the face of the stock, but they lose square in the thickness. I do as well. In that case, and provided you are off on the heavy side, you can easily pare away the excess with a chisel. The marked line is most helpful for this operation. I much prefer this approach to planing end grain, which is difficult.
4) Preventing breakout: Having a knife mark all around your stock also helps prevent tear-out when using a crosscut saw. This is especially helpful if your stock has already been surface planed.
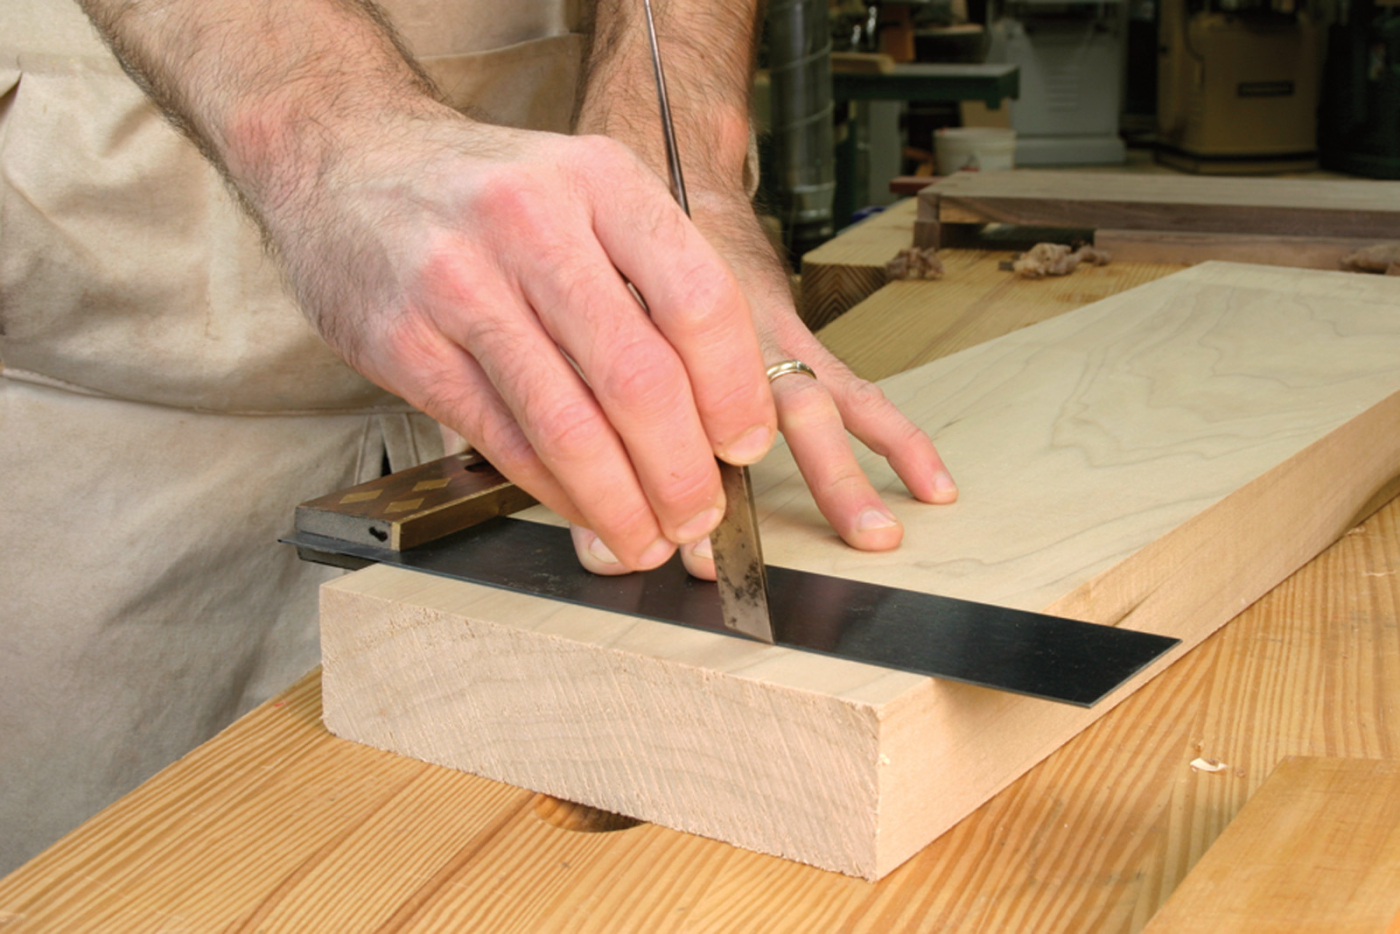
Here, the wrist is relaxed and still quite straight. For softer woods such as this poplar, a single
pass is usually sufficient to leave an acceptable mark. The mark is finished with a near side nick. This is easily made thanks to the low skew angle of the blade.
Having both ends on a single tool is handy when both types of marks are required for a job. Marking a tenon comes to mind. I use a marking gauge to lay out the cheeks, but the awl end marks across the end grain. Obviously the knife end defines the shoulders.
Beyond marking (I told you this was my favorite tool) I find my striking knife helpful for pencil sharpening, dovetail paring, slicing drips of gelled hide glue and clearing shavings from my planes’ throats.
Characteristics of a Good Knife
Old striking knives aren’t common. It would be easy to overlook one. There’s little wonder you don’t see them in tool shops, or even in period inventories of tools. They are among those once-ubiquitous items such as pencils or chalked string lines that would have been accounted for under the catch-all heading: “smalle things forgotten.” The famous Benjamin Seaton tool chest includes a striking knife under the heading “marking awl.”
The striking knife is easy to overlook. This has no doubt led to its near extinction.
The old knives look far less like X-acto knives than modern marking knives do. The blade end has dramatically less skew, maybe 15° or 20° off square. While this forces you to hold the knife nearly vertical, I find this a distinct advantage. When marking the near corner, you must roll the knife down toward your body. If you held the knife as you would a pencil (laying back against your hand), that last roll can be a wrist breaker.
For right-hand use, the left-hand side should be flat. For southpaws, the right side should be flat. I’ve used but don’t love the V-shaped knives, which are supposed to work either handed. The problem I have with them is that the angle at the point is either too steep or exactly double what I would prefer it to be. I’ve never sharpened one, but it seems like it would be a touch more work to hone. Still, a bad knife is better than no knife.
A striking knife would make a great addition to any shop. I love mine, but maybe not solely for the reasons I’ve stated thus far. You see, the striking knife, like this article, offers the attentive craftsman the chance to learn important lessons about woodworking quickly and efficiently with hand tools. For if you think this article is about how to use a striking knife, you’re only half-right. Read it again, but this time forget about learning how to use a striking knife and concentrate instead on learning the lessons it wants to teach you. Consider the ramifications of its use. Only then will you understand my first lesson to working quickly and efficiently with hand tools … and it has nothing whatsoever to do with the striking knife.
Extra: Finding a striking knife — or someone who will make it for you
It’s possible but rare to find striking knives “in the wild.” Most folks don’t know what they are. Knowledgeable tool dealers or tool-collecting organizations may be helpful. British tool dealers seem to be more familiar with the tool and may actually have one or two to sell from time to time.
Old striking knives have incorporated decades of practical experience. Their form is a reasonable starting place for craftsmen unwilling to reinvent every wheel. Surely improvements can be made, but why not start where our forefathers left off?
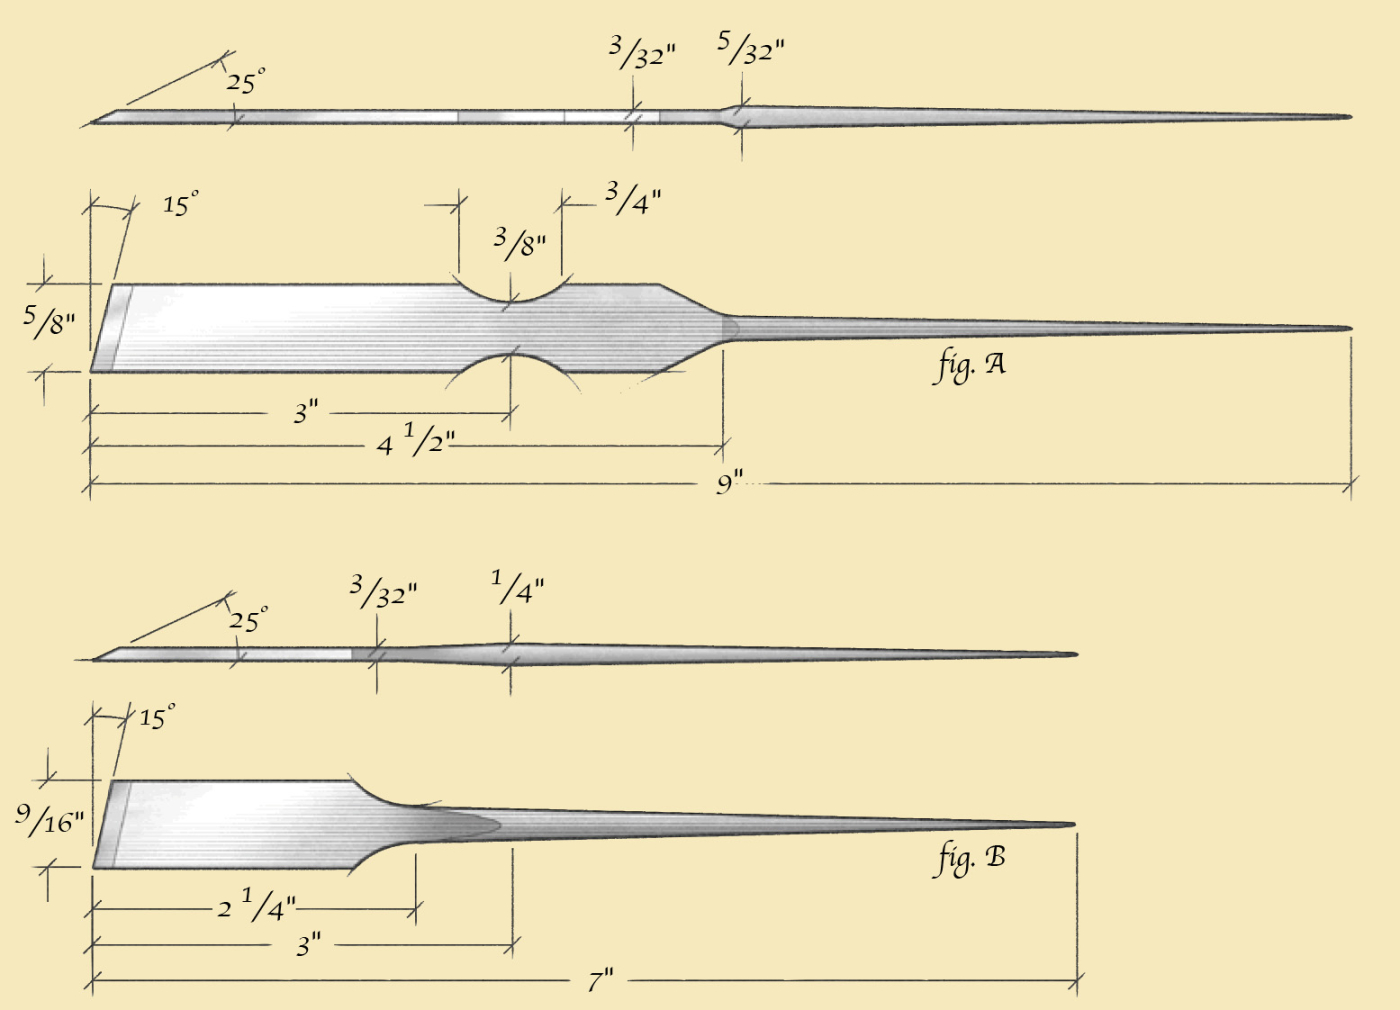
Failing that, I recommend seeking a blacksmith accustomed to making tools or knives. The striking knife can be forged from high-carbon steel; its hardness should be that of a chisel. An old file would be a good place to start. The dimensions in fig. A are for my knife. The dimensions in fig. B are for a knife owned by Executive Editor Christopher Schwarz.
This article originally appeared in the April 2005 issue of Popular Woodworking Magazine
Here are some supplies and tools we find essential in our everyday work around the shop. We may receive a commission from sales referred by our links; however, we have carefully selected these products for their usefulness and quality.