We may receive a commission when you use our affiliate links. However, this does not impact our recommendations.
 Based on watchmaker and spool cabinets, this project is a great way to hone your hand tool skills.
 Based on watchmaker and spool cabinets, this project is a great way to hone your hand tool skills.
Project #2213 • Skill Level: Advanced • Time: 7 Days • Cost: $300
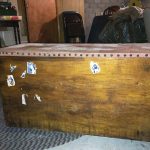
One of my favorite ways to spend my lunch hour is to pop into any one of the dozen antique and thrift stores within a few minutes’ drive. While I’m mainly on the lookout for vintage tools to restore and flip, I’ve found myself recently just browsing the furniture. The always-changing pieces have different styles reflecting what was “in” at the time, different functions depending on when it was built, and countless construction methods. I find an odd joy examining and contemplating these pieces of furniture that span centuries.
A recent find was a small, four drawer cabinet labeled a “watchmaker’s cabinet”. Upon opening the drawers, it indeed had a gob of small compartments within the drawers that I could envision holding various watch parts and gears. A few booths away, there was an old spool cabinet that shared a similar framework. As I was looking at and comparing these two pieces, I started to think about how nice of size they both were and how they could be used for various places around the house or even the shop. So, here you see my rendition of this watchmaker’s cabinet.
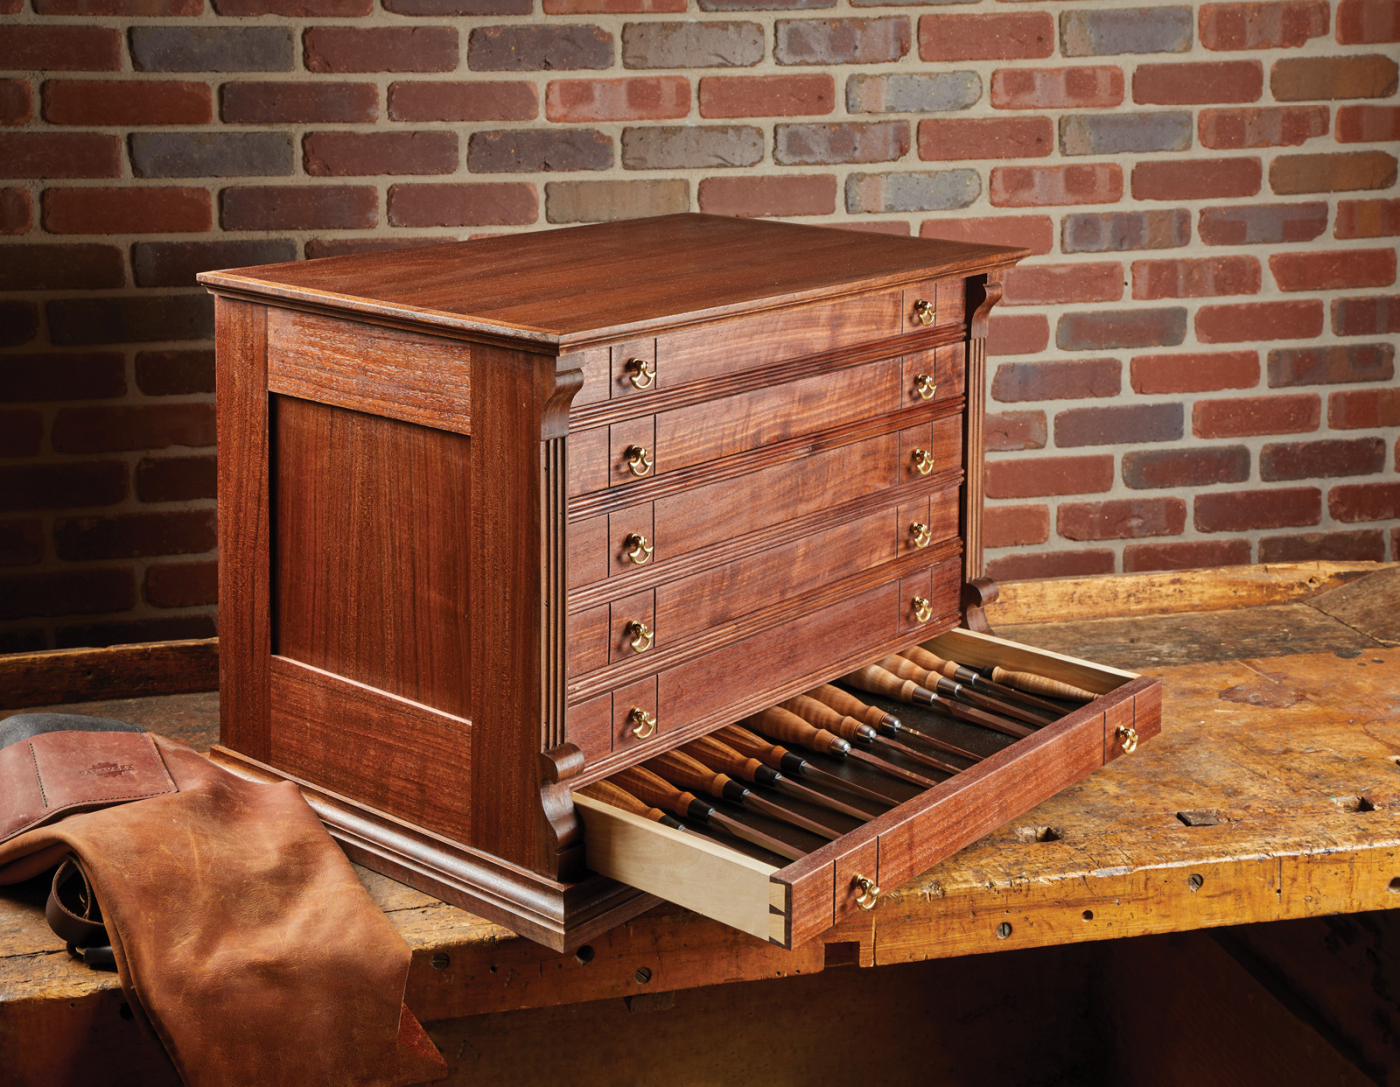
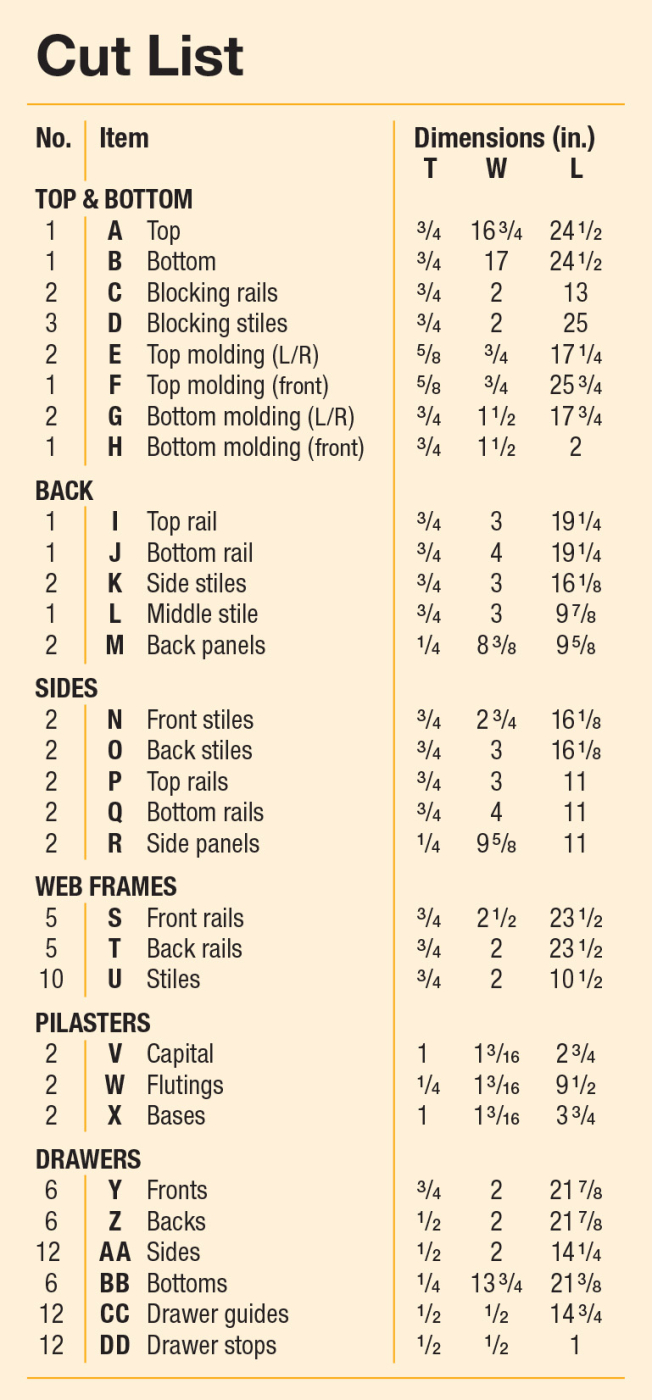
The series of 6 drawers are fairly shallow, keeping with the originals that I could find. Plenty deep for spools of thread, watch parts, or carving tools (which is its fate in my shop). It appears that traditionally, these styles of cabinets have been made from about everything. I’ve seen beech, oak, walnut, cherry … you name it. When I started digging through my lumber stack at home, I realized I had separated out enough quartersawn walnut throughout the last year or so. There was certainly enough for this entire cabinet. The straight grain works well on the clean lines (in my opinion).
For the drawer sides, back, and some of the interior parts, I started looking at the rest of the lumber I had drying and selected some basswood. All right, I can hear it now. “Basswood is too soft for drawer parts. It’s going to wear too fast.” Sure, I’ll give you that. At least, if I was going to be opening these drawers daily. However, with the occasional use of them, I think they’ll be just fine. Plus, a hundred years from now, some stupid magazine editor will be examining this in an antique store trying to figure out why some idiot used basswood.

Sizing Parts by Hand and Eye
The frame and panel construction of this cabinet lends itself well to hand tools but still offers plenty of challenges. Even though I used hand tools, you’ll probably offend someone (but not me) if you invoke a few electrons during this build.
 The first thing to do is clean up my rough-sawn boards. This starts by working one surface with a jack plane. The goal here is to get one face of the board flat. I work at a 45° angle across the face of the board to clean it up, then make passes the length to remove any torn-out grain. I’ll periodically check the board with winding sticks for twist, and even flip the board onto the bench and see if I can feel any rocking.
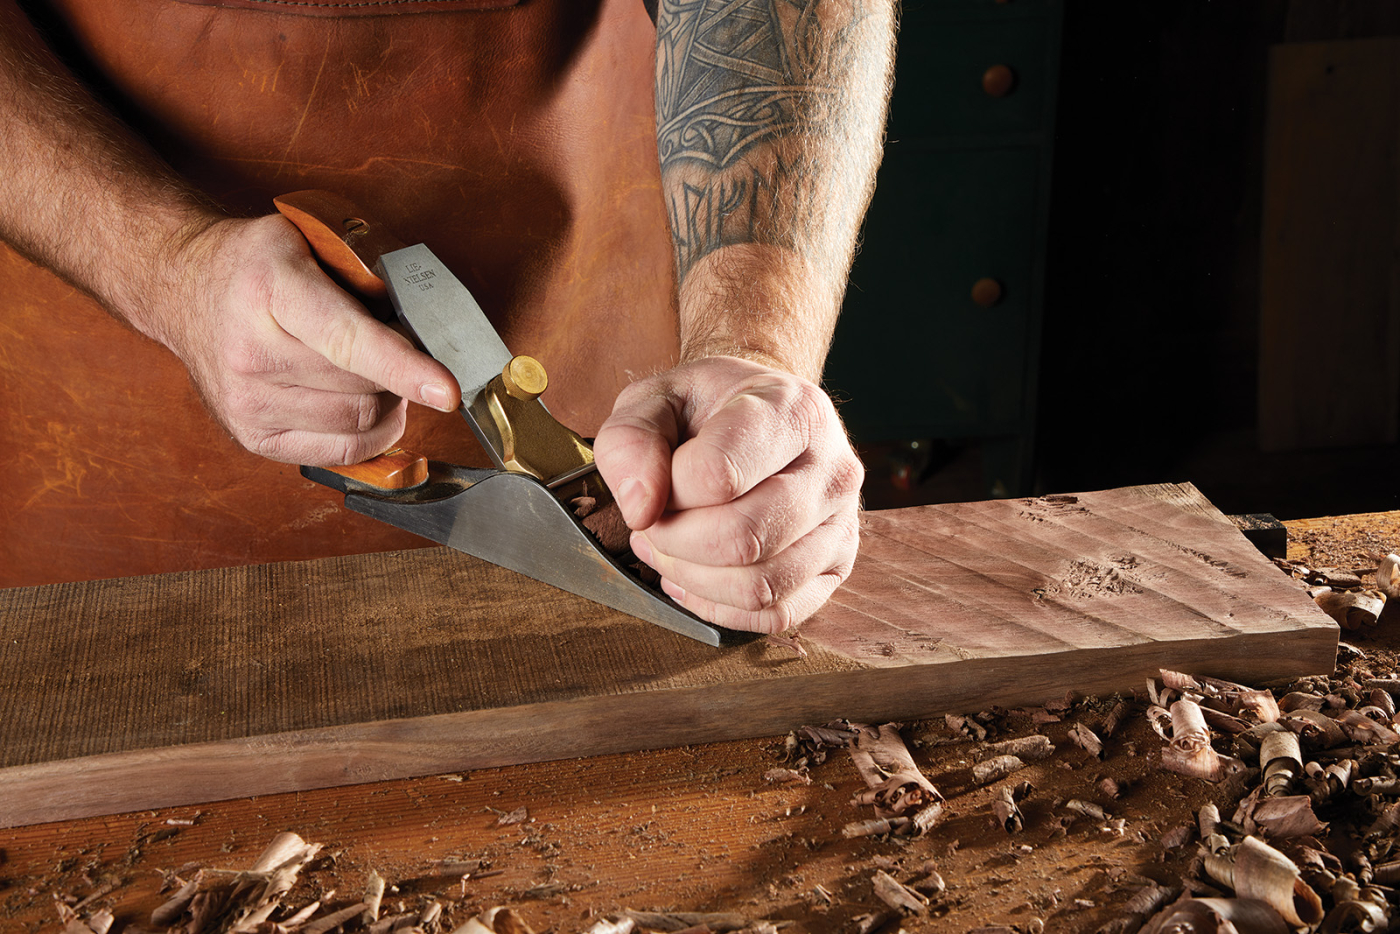
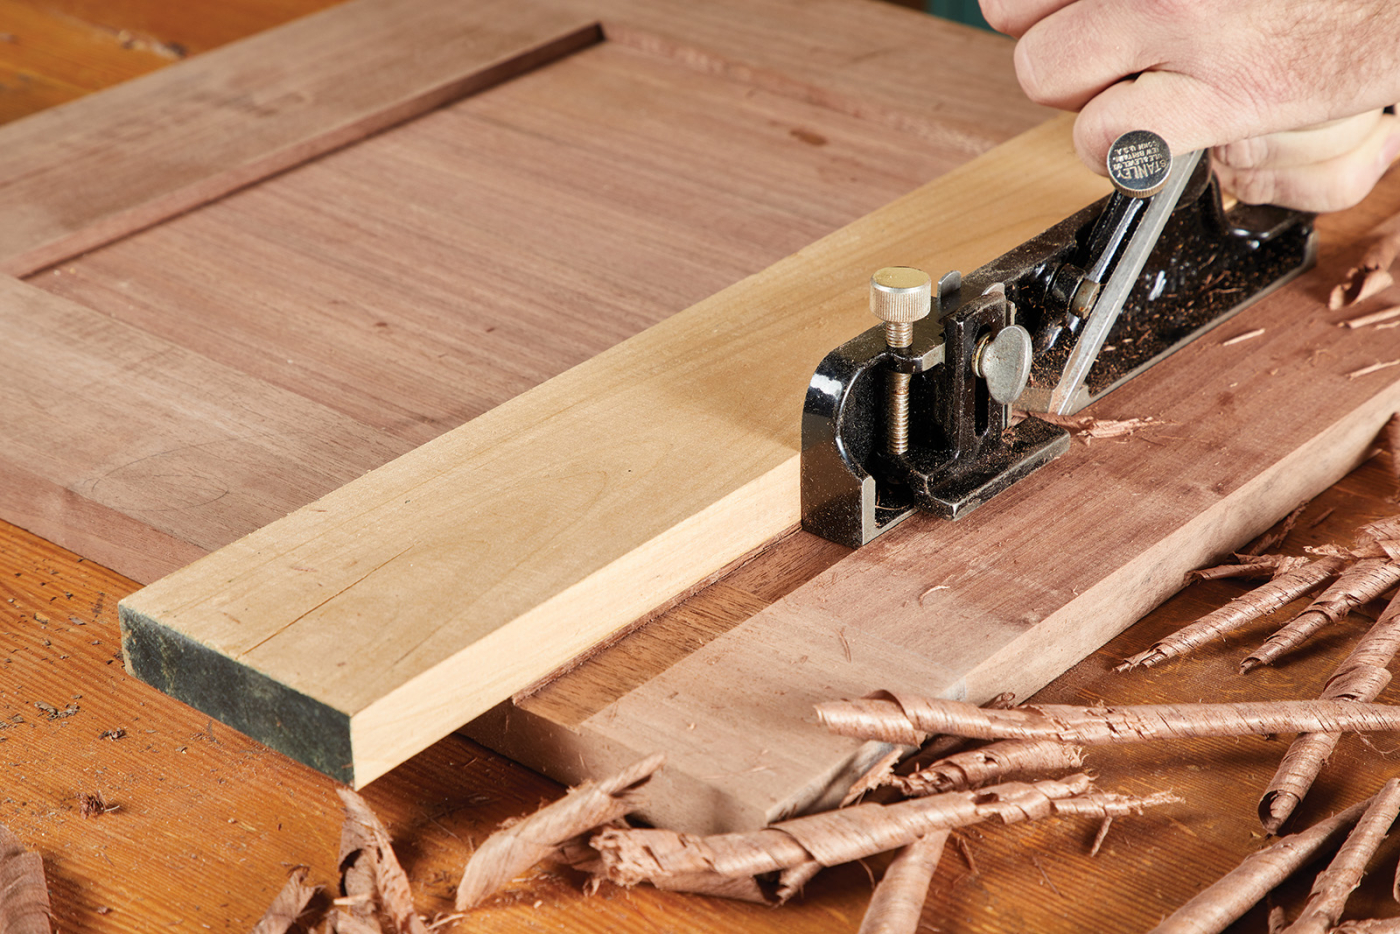
After flattening one face, switch to a scrub plane to quickly thickness the material close to final thickness.
Once I’m happy with the flatness of the first face, I’ll use a marking gauge to mark the final desired thickness of the workpiece. Then, switching over to a scrub plane, I’ll continue to work the surface (still at 45°) down close to the line before finishing with a jack plane and smoother. I don’t worry about tear-out too much with a scrub plane—I just make sure to leave enough thickness to clean up the surface after I’m done.
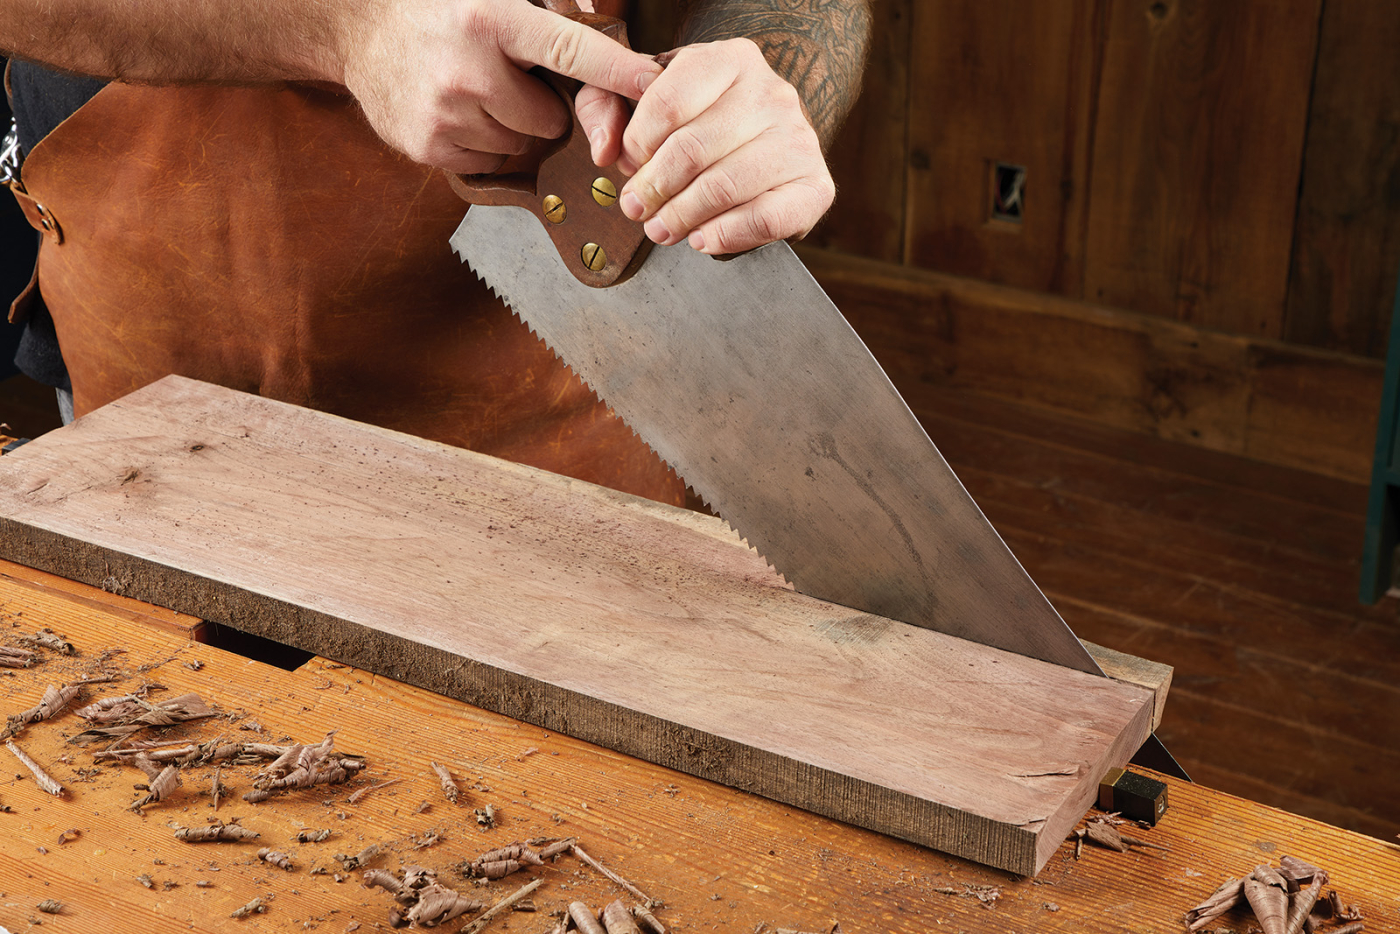
A sharp rip saw will cut straight, cleanly, and quickly. If I have a choice, I always use a thumb-hole rip saw.
Just as with power tools, after surfacing and thicknessing the parts, it’s time to cut them to size. To rip boards, I straighten an edge with my jointer plane, and scribe a cut line. Then, my big Disston D-8 makes quick work of ripping parts to size. A couple of swipes of a plane brings the cut edge to the line.
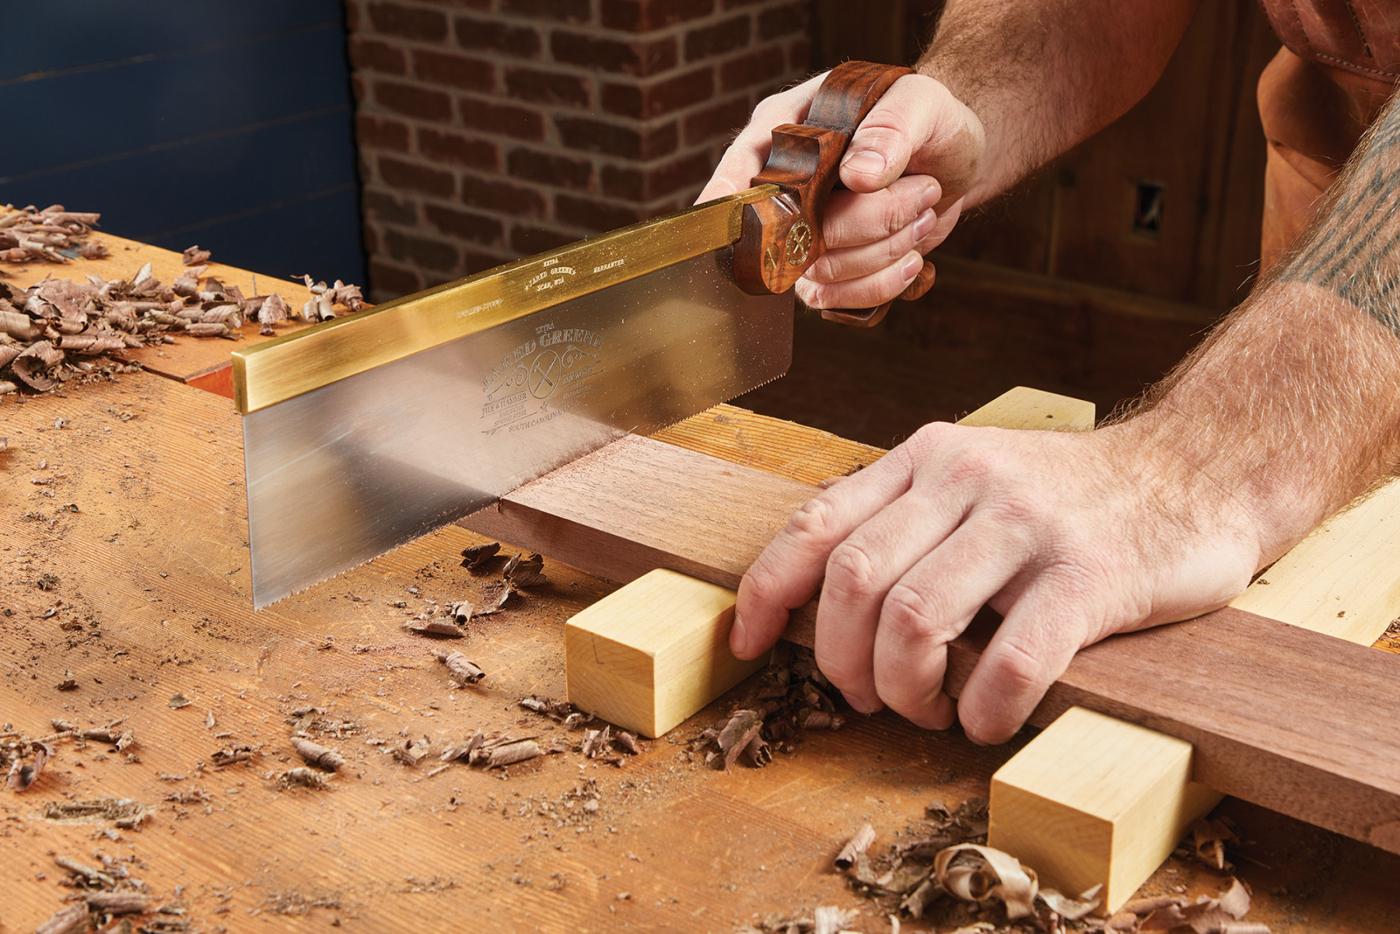
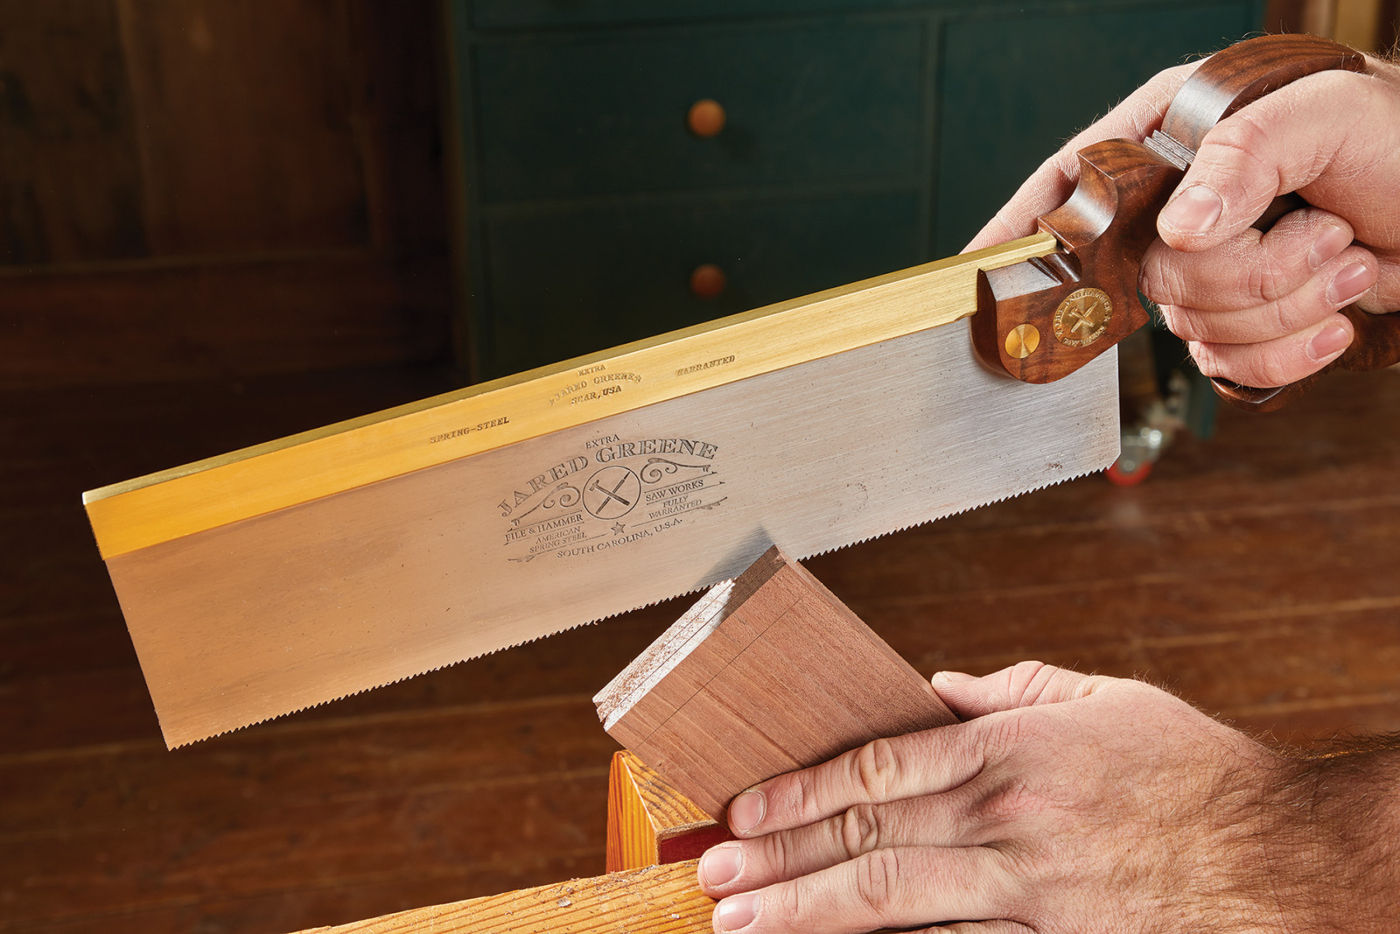
Rough cut parts to length using a carcass saw, but leave the line.
To cut the parts to length, I use a carcass saw with a bench hook. I cut close to my layout lines and then square up the end and sneak up on the length with a shooting board.

Use a shooting board and shooting plane to true up the ends and sneak up on the final length.
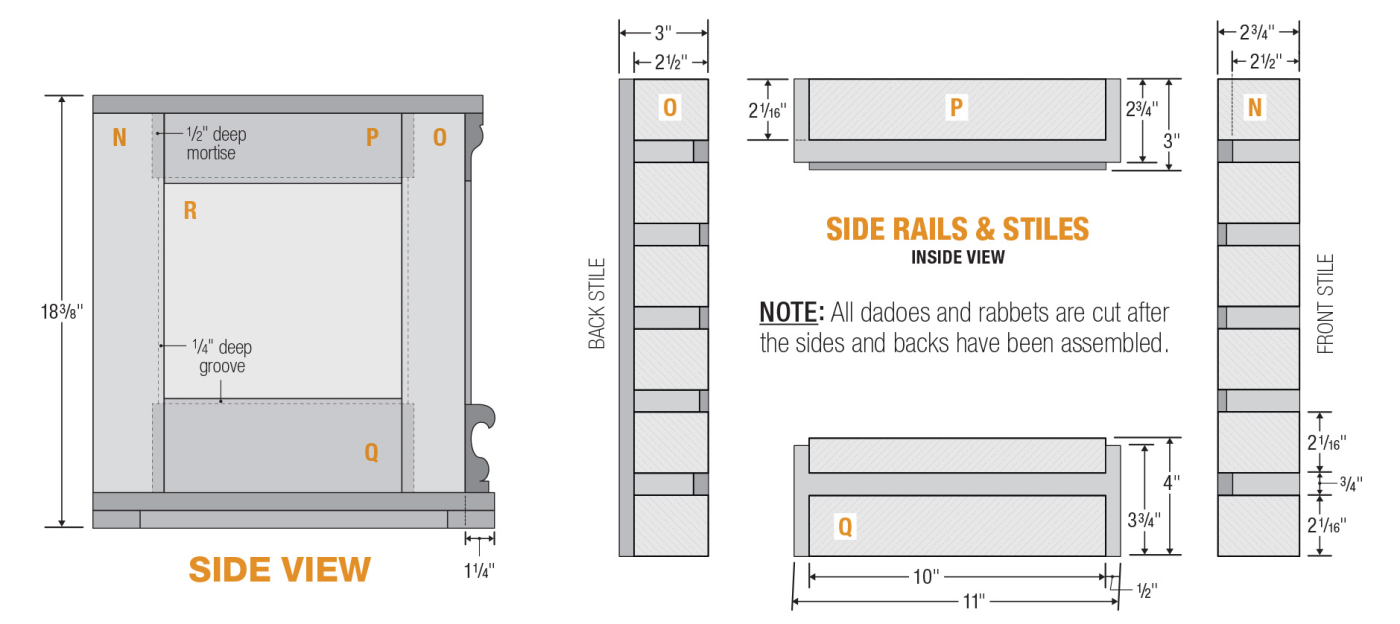
Frame & Panel
Now that we’ve touched, in general, about surfacing and cutting parts, let’s get into the nitty gritty on some of these. The frame and panels that make up the sides and back consist of rails, stiles, and panels. The rails and stiles have grooves to capture thin panels. To create these, I use one of my favorite planes—the plough plane. This single cutter is guided by a fence and creates a groove in the edge of a workpiece. With a plough plane, it’s best to start at the far end of the workpiece and make short strokes. After each stroke, work further and further back until you’re taking full-length passes.
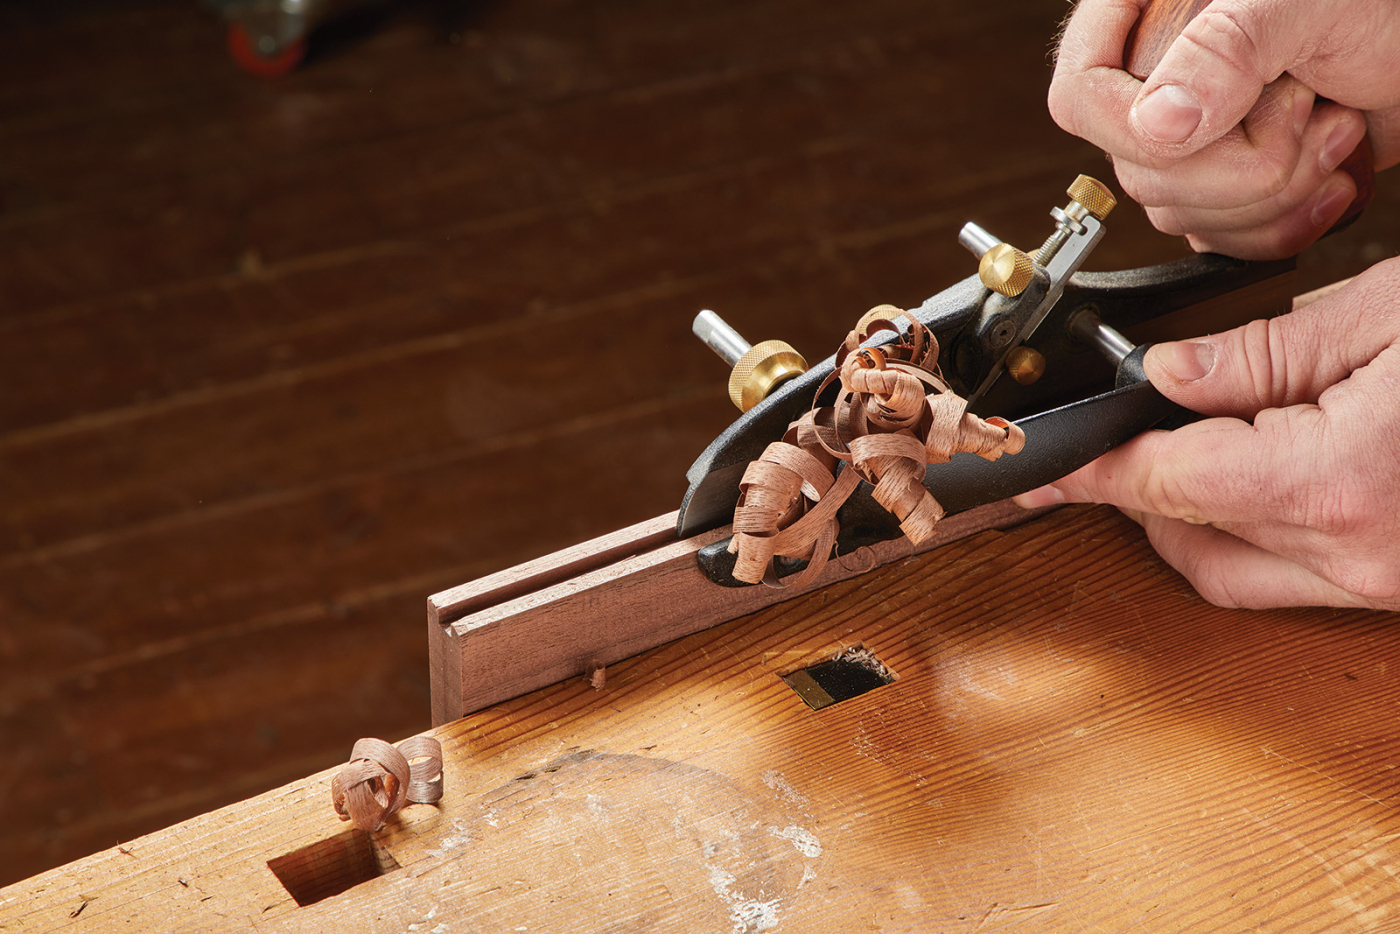
A plough (English spelling) plane is, in my opinion, one of the most fun hand planes to use. It yields long, curly shavings in a hurry.
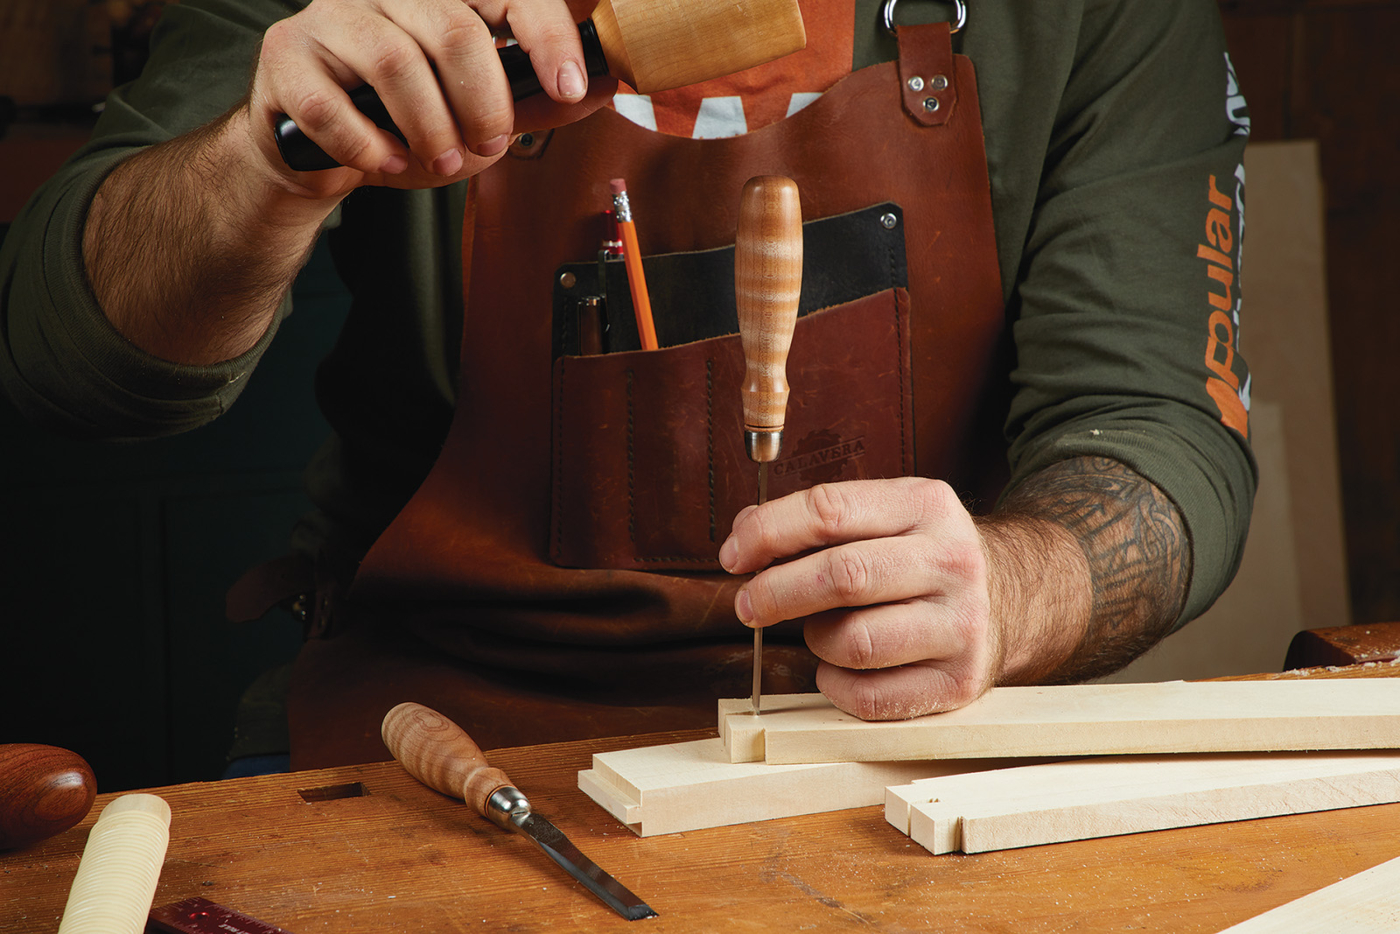
The stiles have deep mortises that will accept the tenons located on the ends of the rails. The groove I cut in the inside of the parts helps position this mortise. I locate a mortise chisel within the groove and chisel out the mortises in all of the stiles. Hand-chopping mortises can be a little slow, but it’s an easy chop, lever out the chip, and repeat.
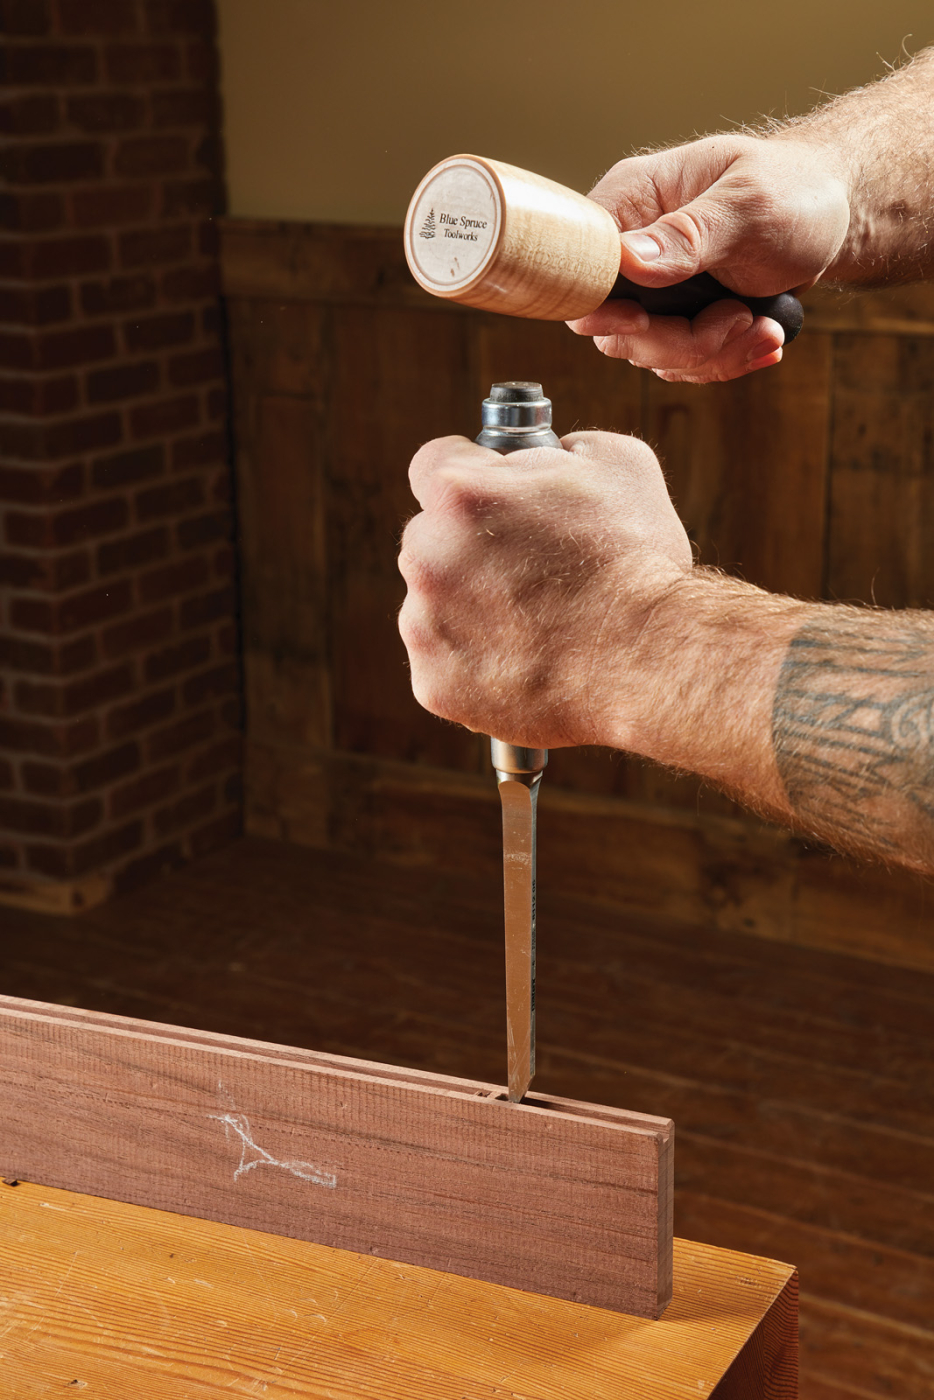
Create the deep mortise using a mortise chisel.
With the stiles done, it’s time to make the mating tenons. After marking the tenon locations with a marking knife, I like to grab my Sloyd knife. As you can see in Photo 8 on the previous page, I use the knife to make a small V-notch along the layout lines. This becomes a starting point for my saw plate. The actual cutting of the tenon is a four-part process. First, I clamp the workpiece in the vise angled away from me and start cutting the cheeks of the tenon. The first cut is at an angle, bringing the teeth just down to the base (shoulder) line. Then, I rotate the workpiece around and make the same cut from the opposite side. This leaves me with a kerf that is down to the baseline but connected with a triangle of waste in the center of the tenon cheek.
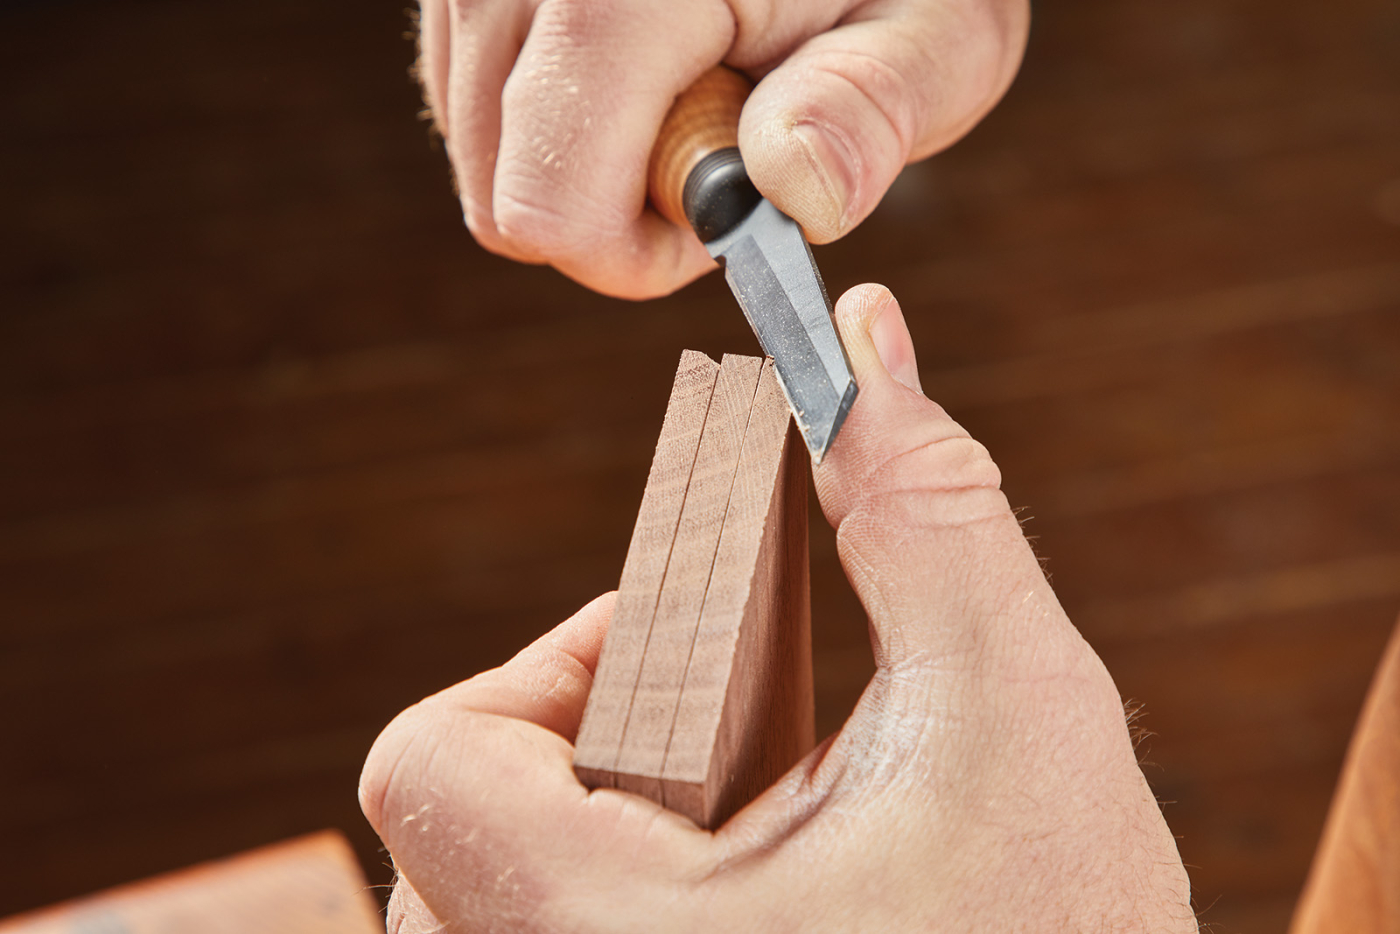
After marking your tenon, use a knife to create V-notches to start your saw in.
Now all I need to do is cut straight down to the baseline, allowing the partial kerf to help guide the saw. This process makes it pretty easy to cut accurate tenons. Now, it’s just a matter of putting the workpiece on the bench hook and cutting the shoulder. Any fine-tuning can be done with a shoulder plane for a good fit.
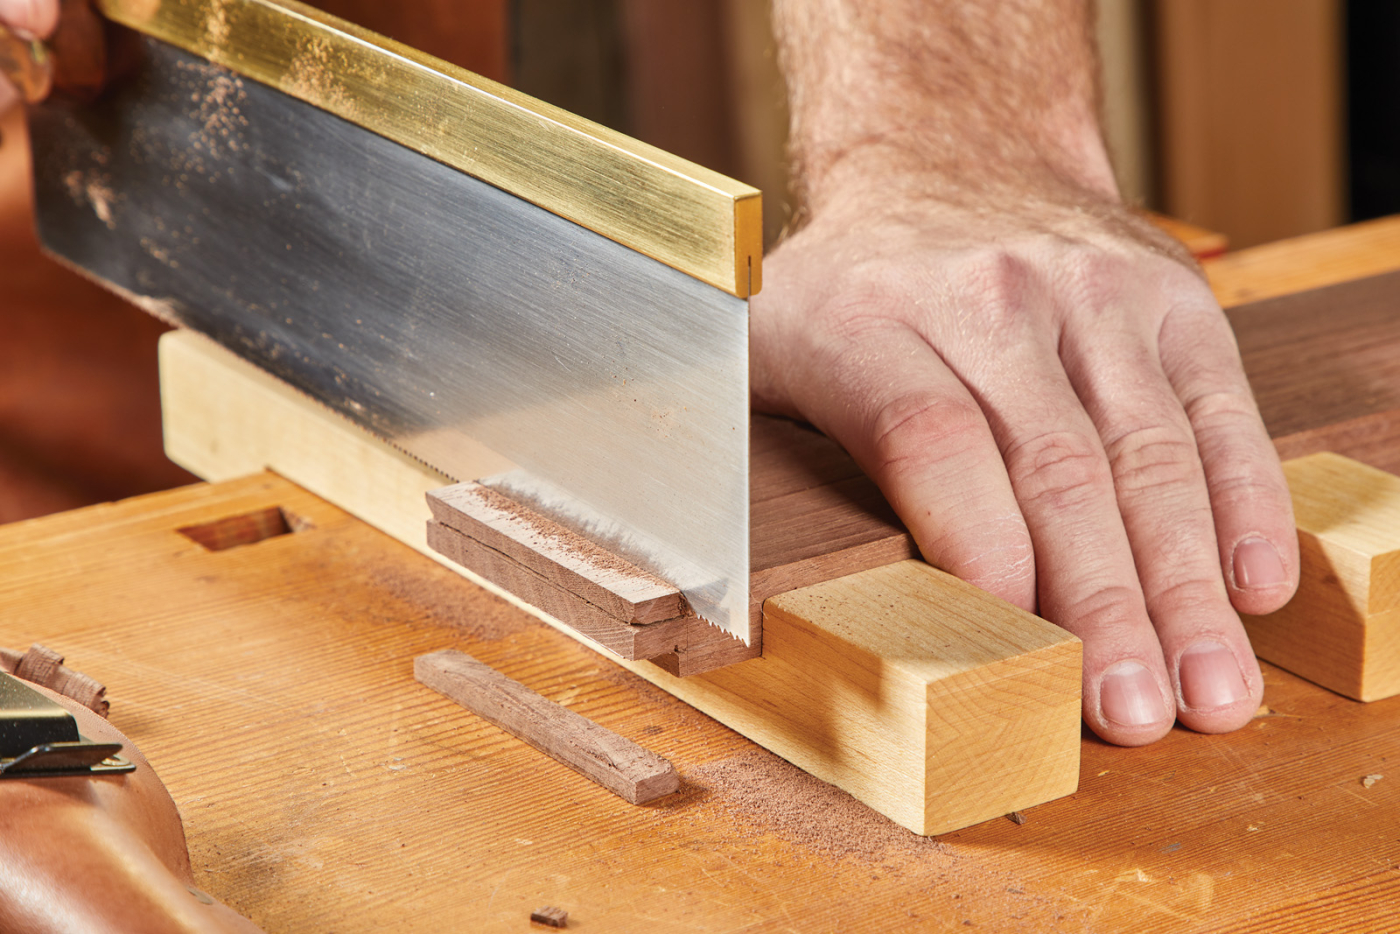
Cutting tenons by hand is a simple practice of seeing your baseline, and cutting to it.
Assembly Time
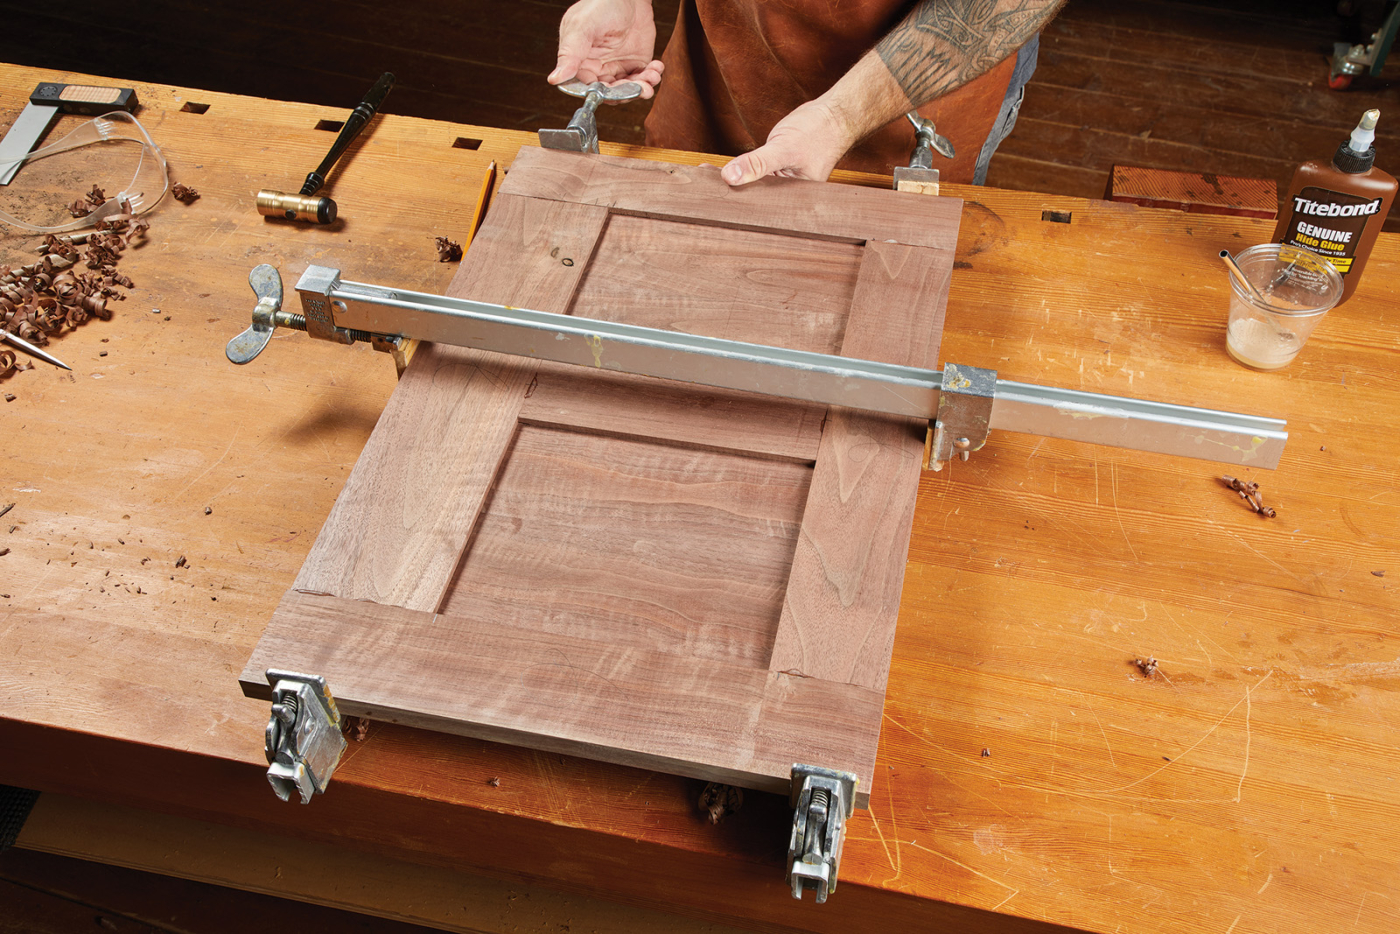
After a good while, you’ll have all of the tenons, mortises, and grooves cut and fit. Your thin panels will be glued up and planed to thickness. You’ll have test fit everything and you’ll be ready for a glue-up. I glued these panels up in groups. The two side assemblies are glued up first, then I glued together the back panel. The back is the same as the sides, except with the addition of one vertical stile to break up the back panel.
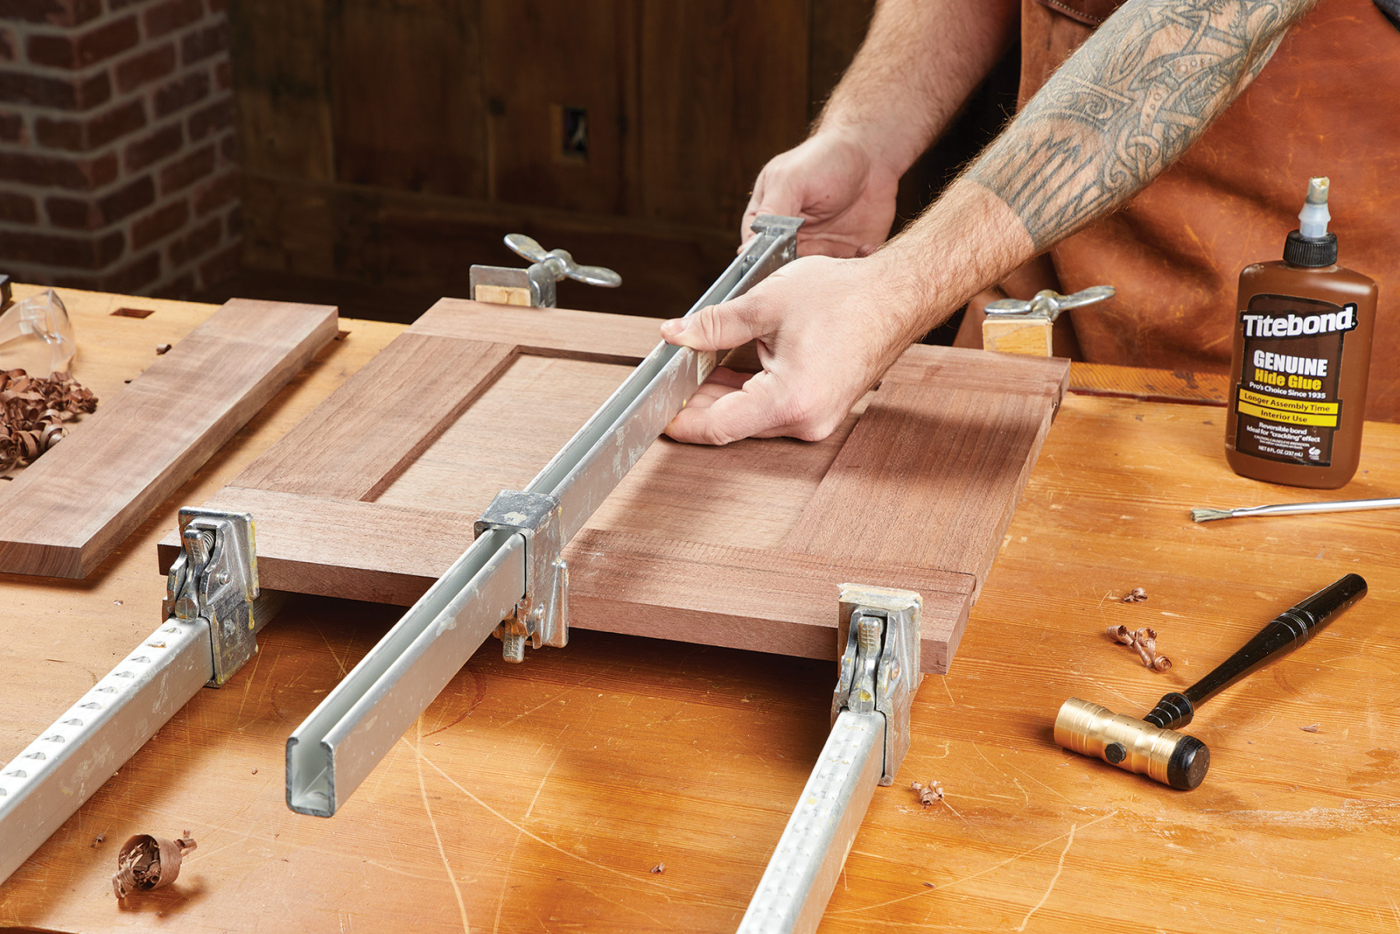
The side panels are a straight glue up with two rails, two stiles and a panel.
Now, here’s the reality of hand-cutting joinery. You may not be happy with the fit of every single one of your joints. And that’s okay. Don’t sweat it. If your tenon is a little loose, you can glue a shim on and plane it back down to fit. Or, you can use epoxy to glue the panels together. Unlike other glue, epoxies will actually fill gaps. If you have a pretty good fit, then I’d opt for whatever glue you normally use. For me, that’s liquid hide glue.
The back panel is similar to the sides, with the addition of one more panel and a middle stile.
Spread a good even layer of adhesive on the tenons and slip them in place. Slide your panels in next, before capping the other side with the remaining stile. For the back panel, I spread a little glue on the tenon of the middle stile, and used a clamp to hold it in place. Then, the end stiles can be added and clamped. I wait to clean up any squeeze out until it’s skimmed over, and at that point I’ll just scrape it off. I was taught, in high school, to use a damp rag to wipe off glue, but have found this can pack the open grain of some woods with glue.
Dadoes, Rabbets & Reeds—Oh My!
After the glue has had a chance to cure, I clean up any additional squeeze out with a card scraper. Now it’s time to cut a little joinery for the inner workings of the cabinet.
A metal-bodied dado plane is guided by the fence and creates
the dado.
The cabinet interior has a series of web frames that divide the drawer openings. These are connected to the sides via dadoes. Cutting the dadoes can be done in a few different ways. The most simple is like you see in the photo above. A dado plane, of the correct width, is ran along a fence clamped in place. The spurs on the plane score the fibers before the cutter removes the waste. This leaves a clean cut and a square bottom. Another option is to use a fence and cut the walls with a saw. Then, it’s just a matter of chiseling out the waste, and cleaning out the bottom with a router plane.
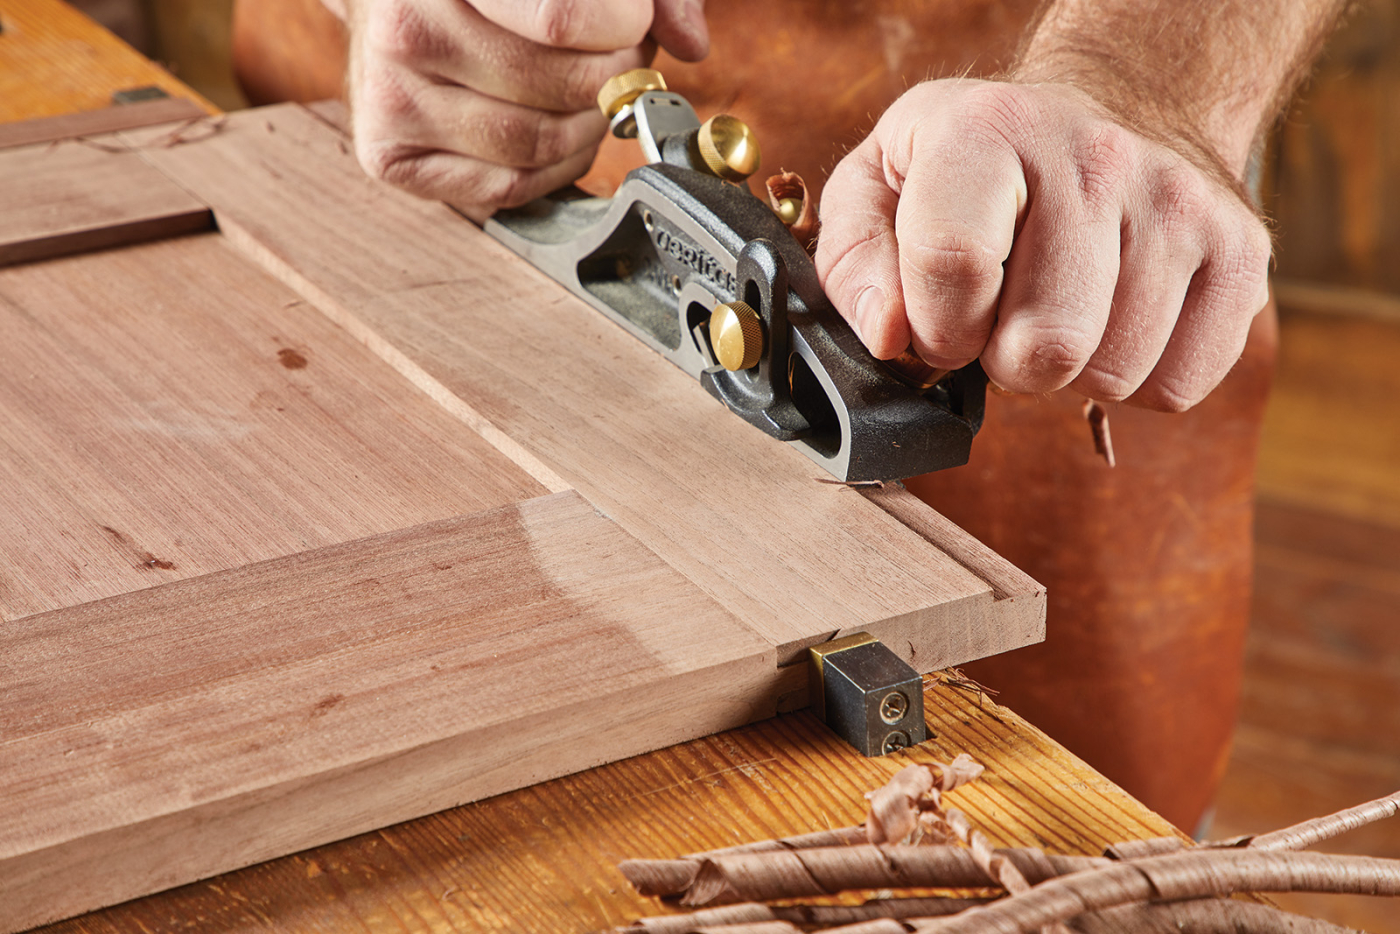
Cut a rabbet in both the back panel and the side panels.
Now, we can tackle the inner web frames. These guys are frame and panel assemblies but without the panel. The front rail of each web frame will separate the drawers, which needs to be walnut. The remaining pieces are all hidden inside the case, so thats where I used basswood. Creating the web frames is done exactly the same way as the outside panels. Just to point out—even though there aren’t panels inside these webs, I did plough a groove the entire way. In my mind, its easier to just groove it with a plough plane instead of chopping mortises.
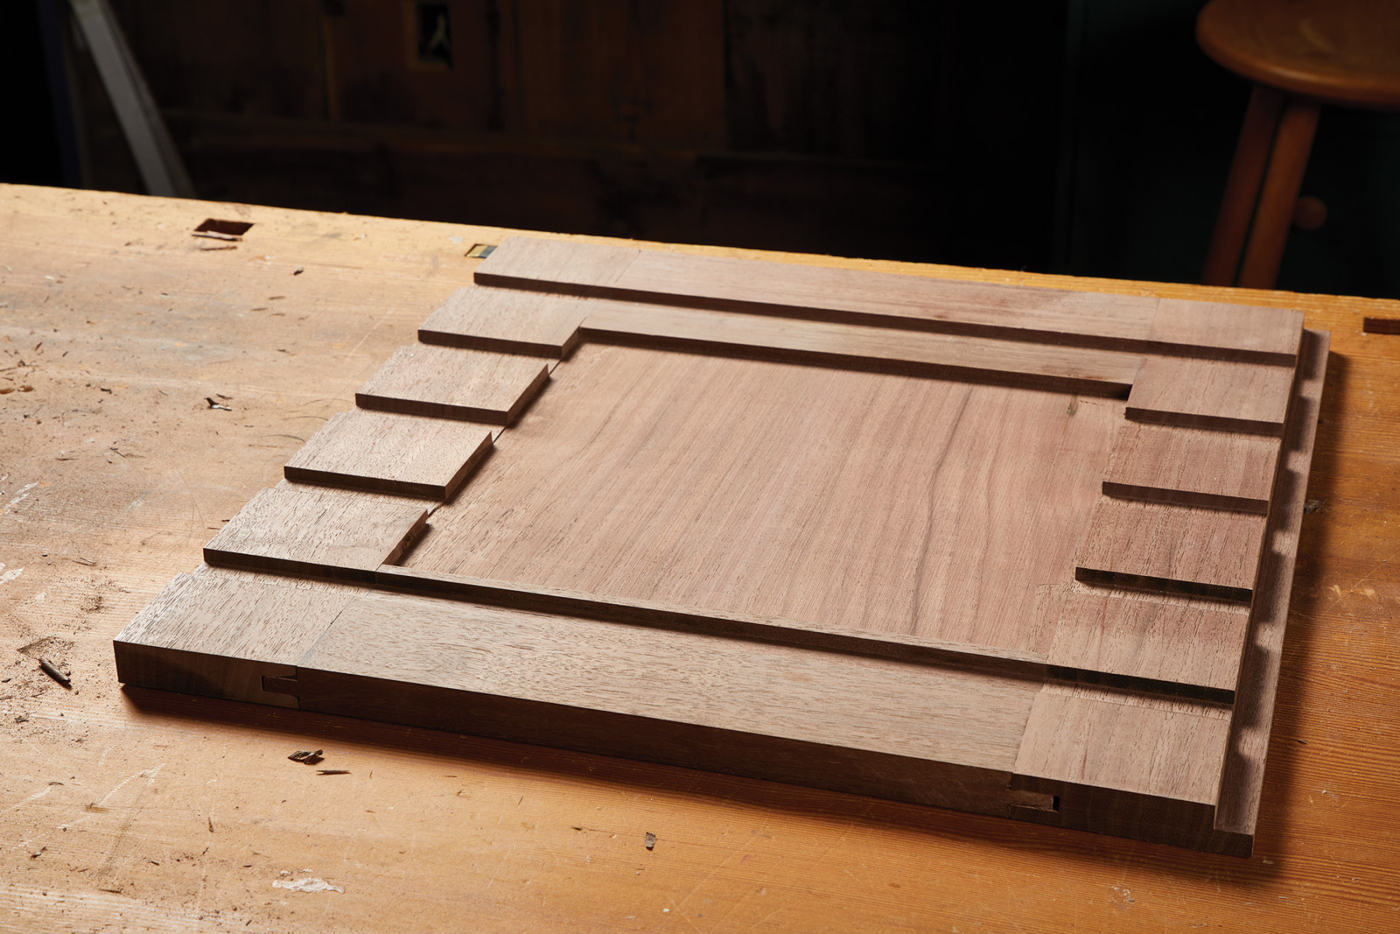
The finished side, ready to accept web frames.
Before gluing together the web frames, I wanted to add a little bit of detail to the exposed walnut edge. I have seen cabinets with
examples of roundovers, some carving, etc. What I chose to do was to create a double reed on the front of each divider. As you can see in the photo below, I used a Veritas beading tool with a custom-made cutter. This is nothing more than a piece of card scraper shaped with a file. This style of tool acts like a scratch stock and scrapes the profile in the edge that you’re working on. It’s slow going and would be much faster with a combination plane. (Which sounds like a missed opportunity for me to add one to my fleet.) But it gets the job done.
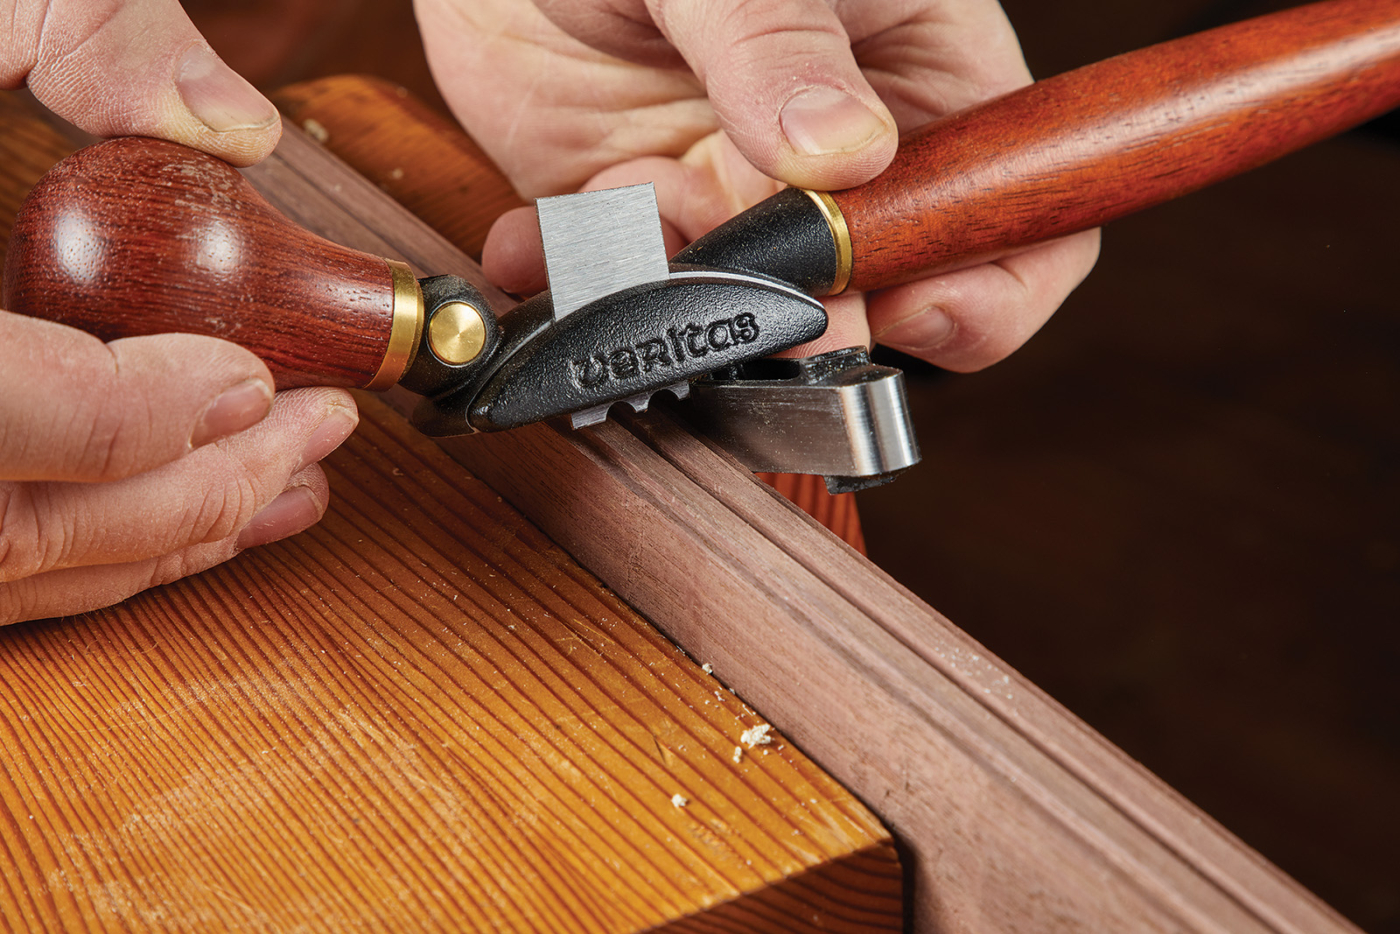
A scratch stock, such as this, can be outfitted with custom made cutters for a variety of profiles.
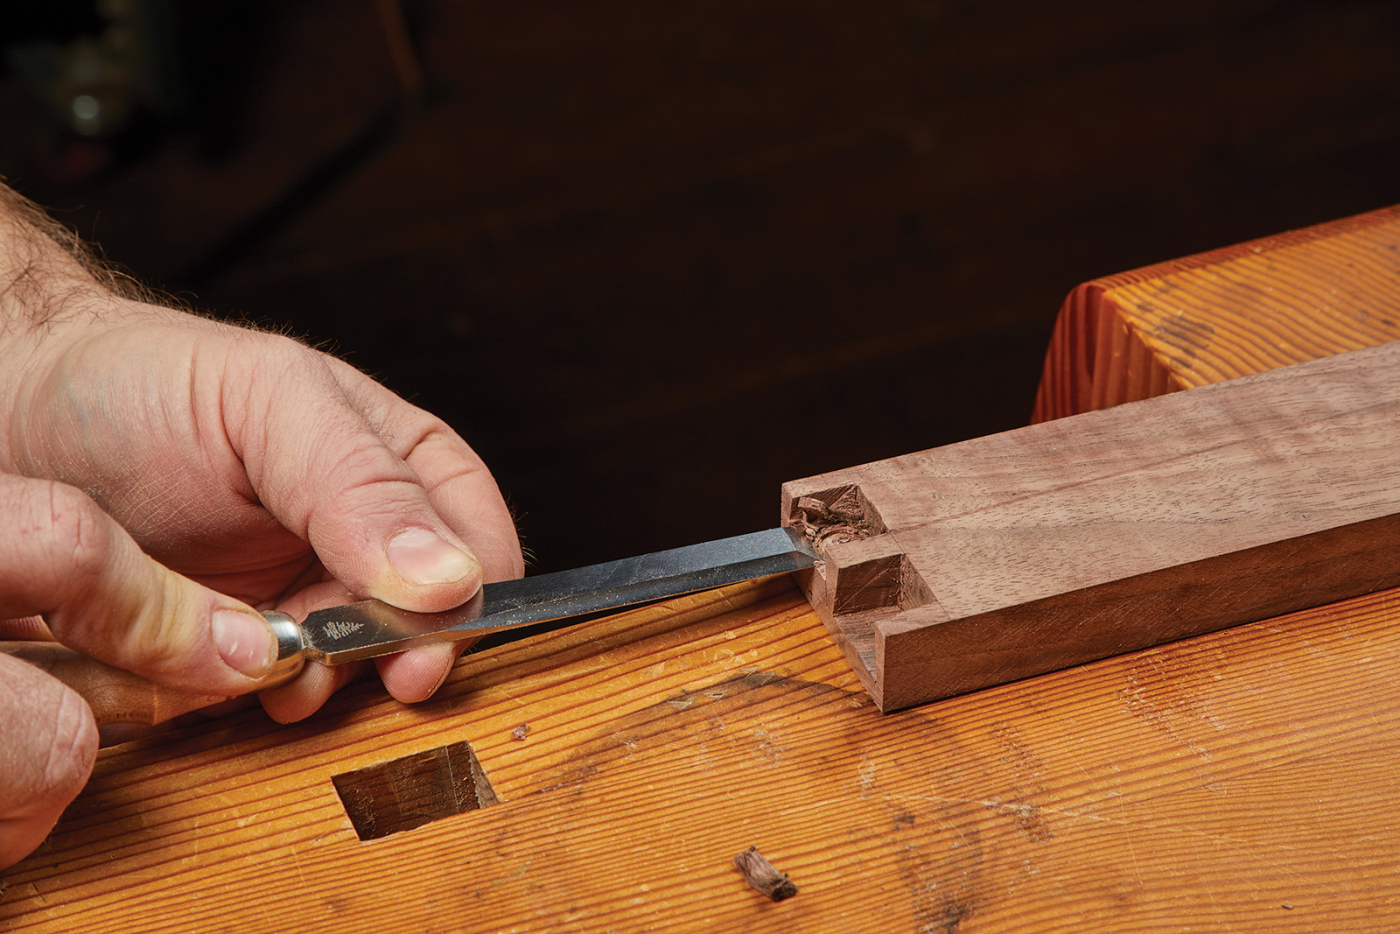
The final thing to do before assembly is to lop off the last little bit of reed from the front of the web. A sharp chisel takes care of paring this away. This creates a wide area where we’ll install some pilasters a little later. The web frames can now be glued together. When clamping, I used a bit of Styrofoam insulation to protect the reed from getting smashed.

Hunks of blue foam create cushion between the clamps and the reed edge.
Slow & Steady
At this point, we’re ready to bring the web frames to the sides and add the back. Take a few minutes to make sure everything fits as it’s intended. Especially sizing parts by hand, you may need to adjust the length on one or two of the web frames that might be slightly oversized. Once you’re confident, grab your clamps.
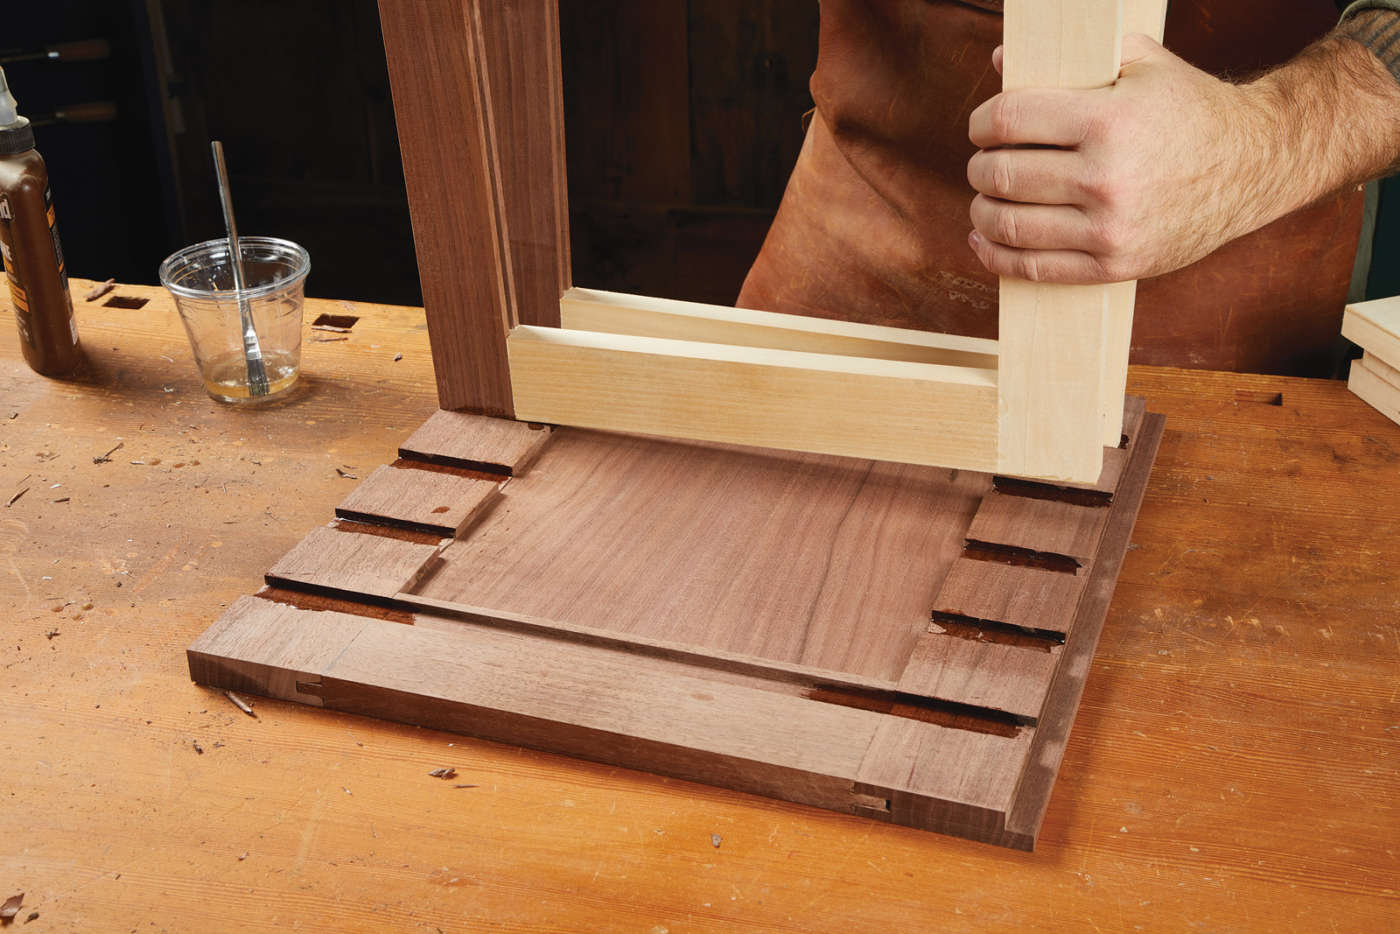
Stand the web frames into the side panel.
As I mentioned before, I’m a fan of hide glue. However, I wanted even more time while putting this assembly together. So here, I opted to use epoxy. The longer open time allows you to really make sure everything is positioned correctly before the glue sticks everything together. One note, though—as you can see in the above photo, the web frame has quite a bit of end grain that is going to be sitting in epoxy. The best practice is to spread a layer of epoxy over the end grain to “pack” it first and let it soak in. Once it’s absorbed, you can apply more epoxy to actually hold the joint together. This prevents the end grain from wicking away all the adhesive and starving the joint.
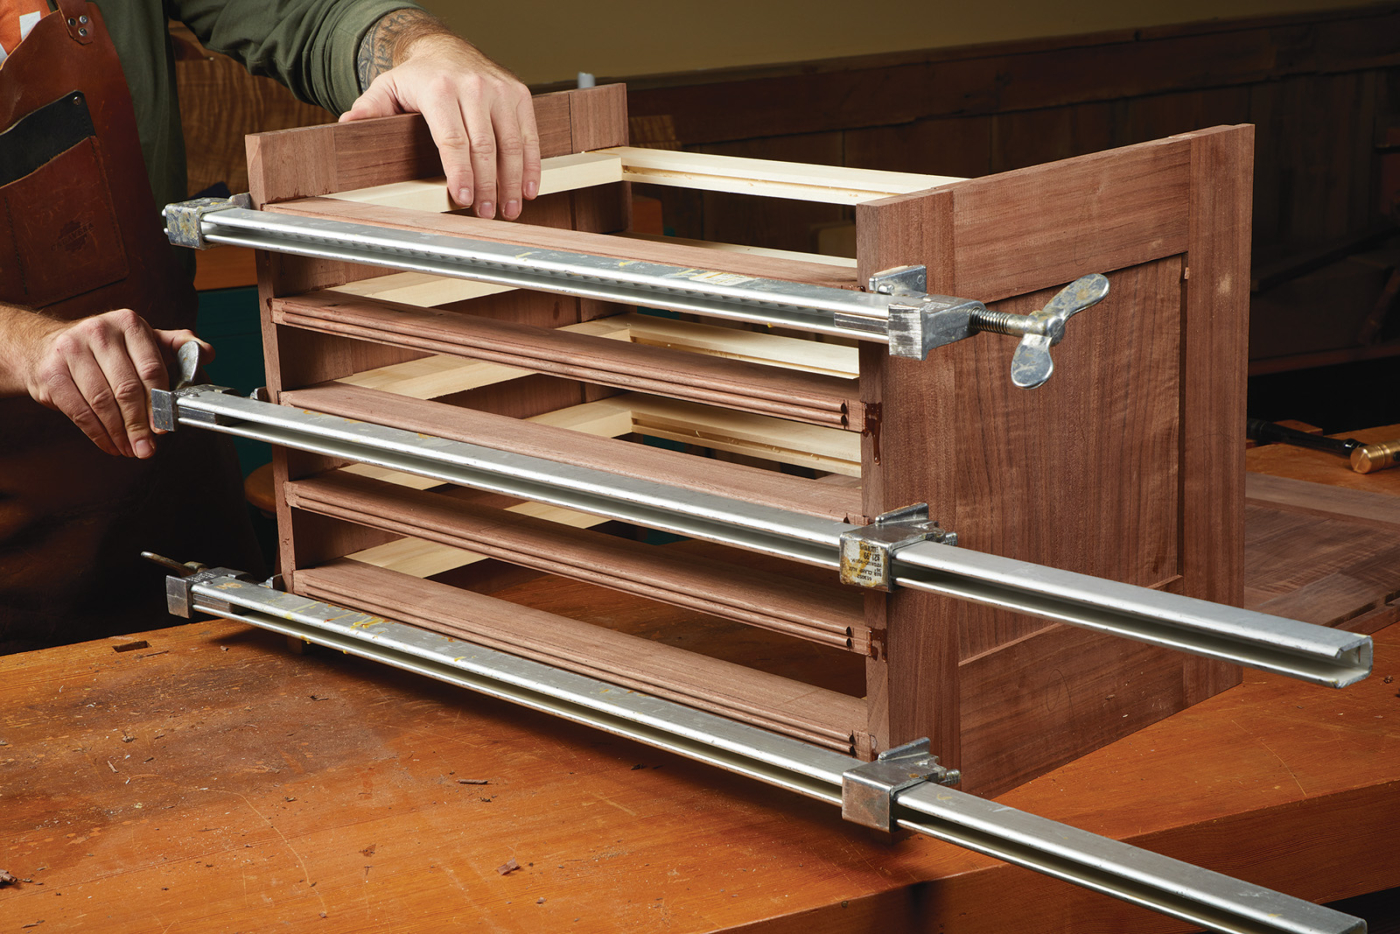
Add the opposite side as well as the back.
With one side panel on the bench, I applied epoxy to the front and back dadoes (although adhesive on just the front dado would have been better to allow for seasonal movement). One by one, I inserted the web frames before adding the opposite side. After the sides were clamped together, I glued the back panel into place, running clamps from front to back to make sure it was good and tight in the rabbet. Give the cabinet case one last look over before setting it aside to work on some drawers.
Gang cut the tails for a much faster dovetailing job. The basswood cuts like butter and chisels like a cloud.
Dovetailed Drawers
With the few examples of these types of cabinets I looked at in person, the drawers were constructed with a locking rabbet joint. I can only assume that it was a much cheaper way to produce these en masse — however, basswood and walnut dovetail like butter.
A soft, secondary wood like basswood allows your dovetails a little more room for error. You’ll quickly learn just how compressible the wood is, and how much you need to fine-tune before assembly.
Cleaning up the half-blind pins is the longest part of this process. It’s a lot of paring and chopping to get a good fit.
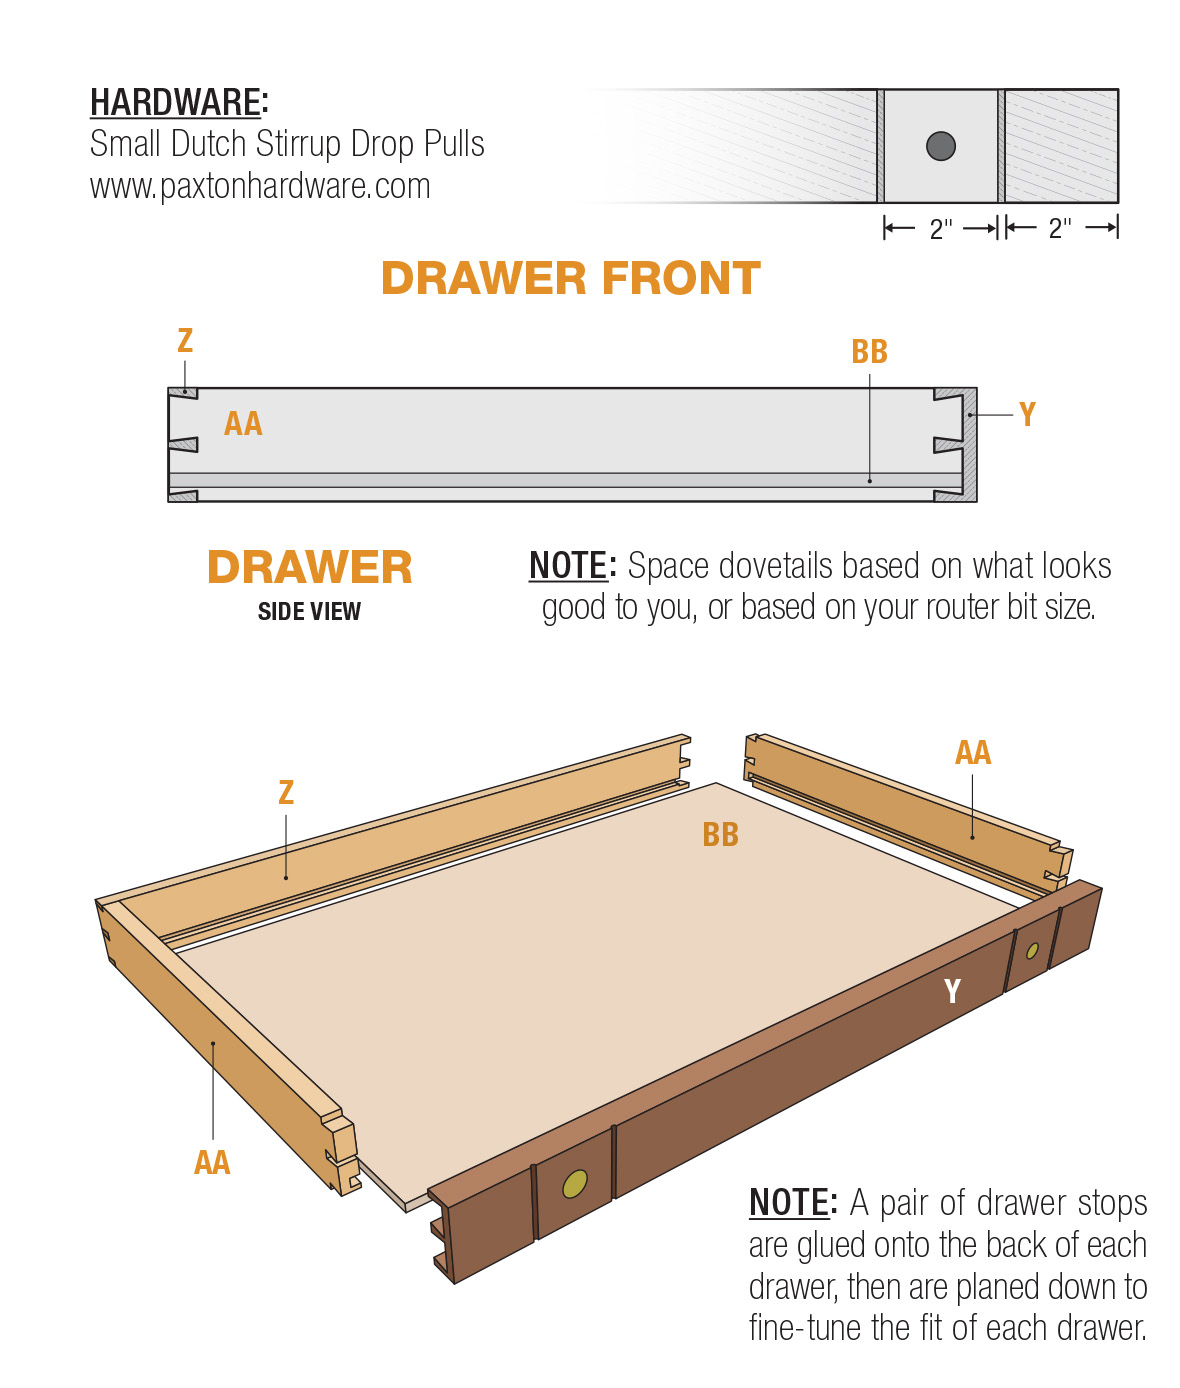
I’ve shown cutting dovetails before, and there’s no real trick here. The half-blind dovetails on the front take a little longer to produce than through dovetails, but I like the clean look. The biggest thing that I’ve found is to cut each and every drawer part to fit its respective opening. And, as you assemble each drawer, mark which opening it’s getting placed in.
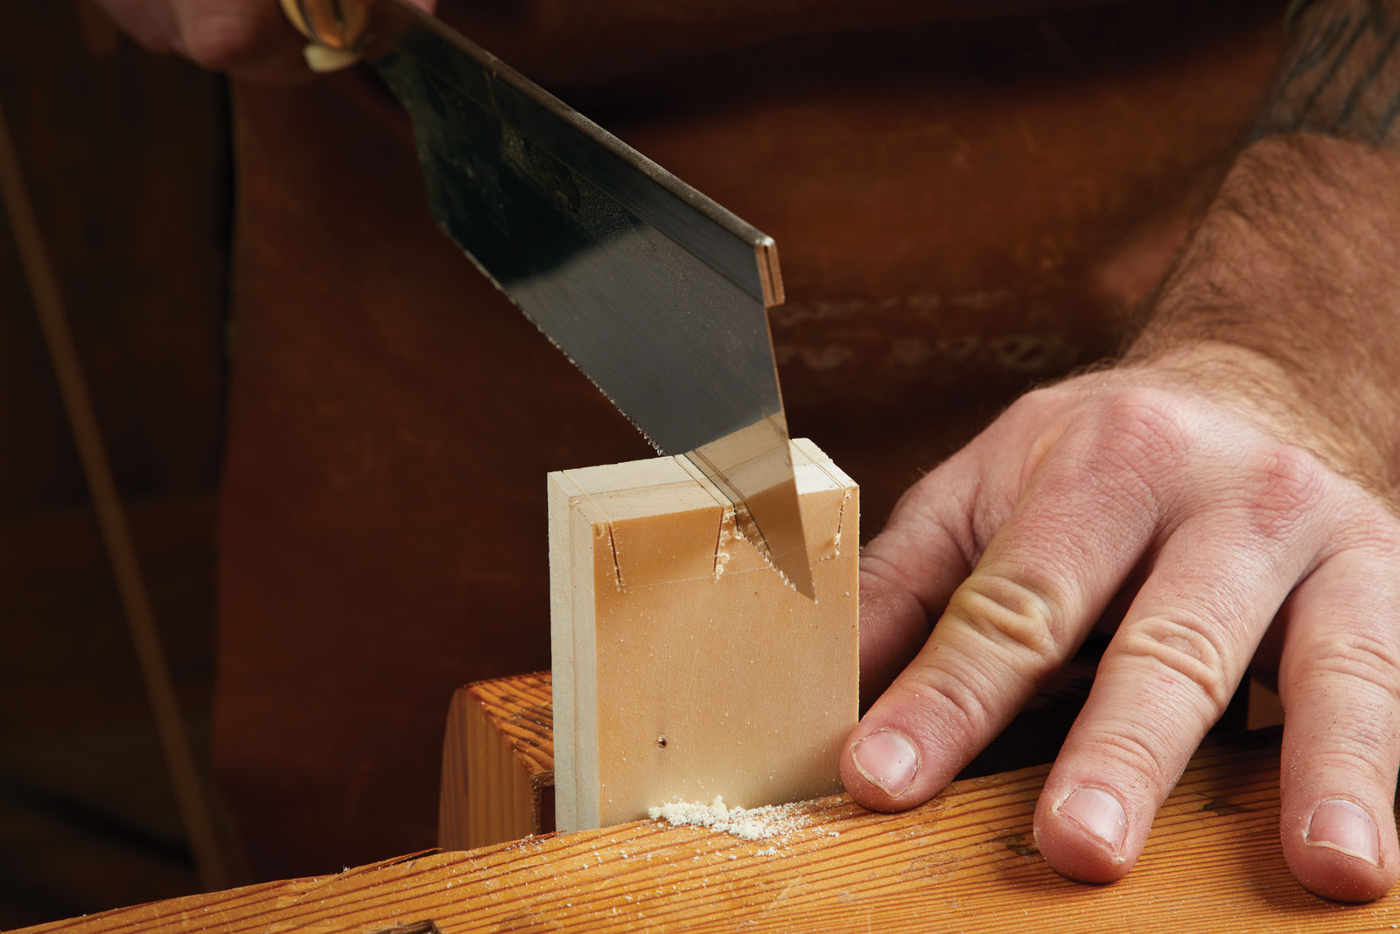
Before gluing up the drawers (which have a plywood bottom—I won’t apologize for that), I spent a little time at the bench to decorate the front of the drawer. Spool cabinets would have a large oval opening where the thread brand would be displayed. Watchmakers would label the front of the drawers with brand names, containing the parts to that particular brand.
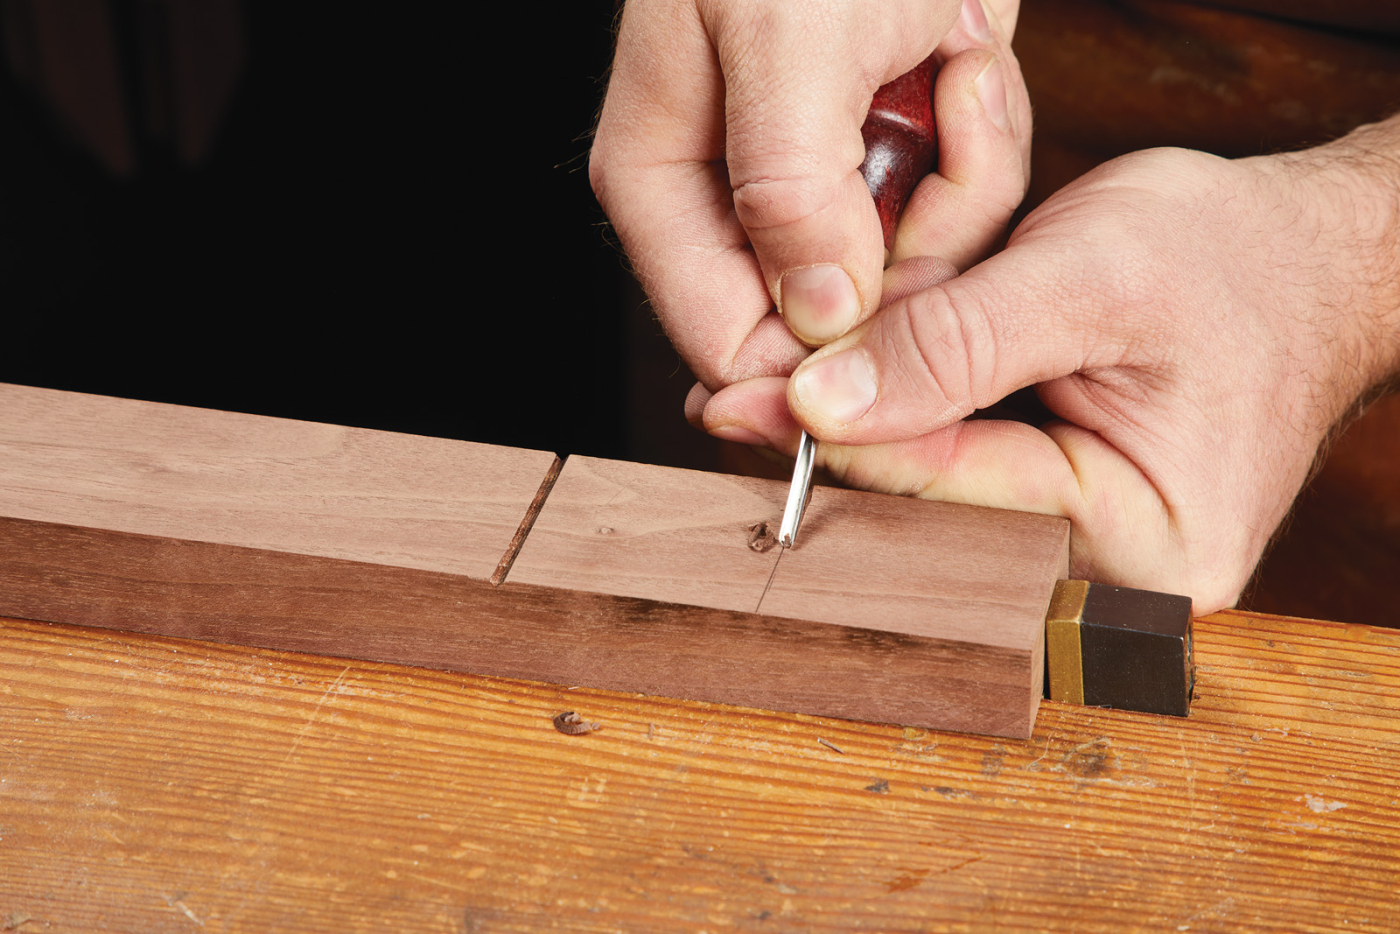
The decorative lines on the front are best cut in one, fluid motion. You can clean them up with a rasp or float when you’re done.
I left mine plain, except for a pair of vertical V-cuts framing where the handle would go. This was a common detail that I found in these cabinets. I marked the location and used a small V-gouge to cut them out. After starting the cut, if you want to clean it up and straighten the line, you can touch up each with the corner of a square rasp or file. Assemble the drawers and set them aside for finishing.
By ganging parts together, you can speed up your work and make sure they’re symmetrical.
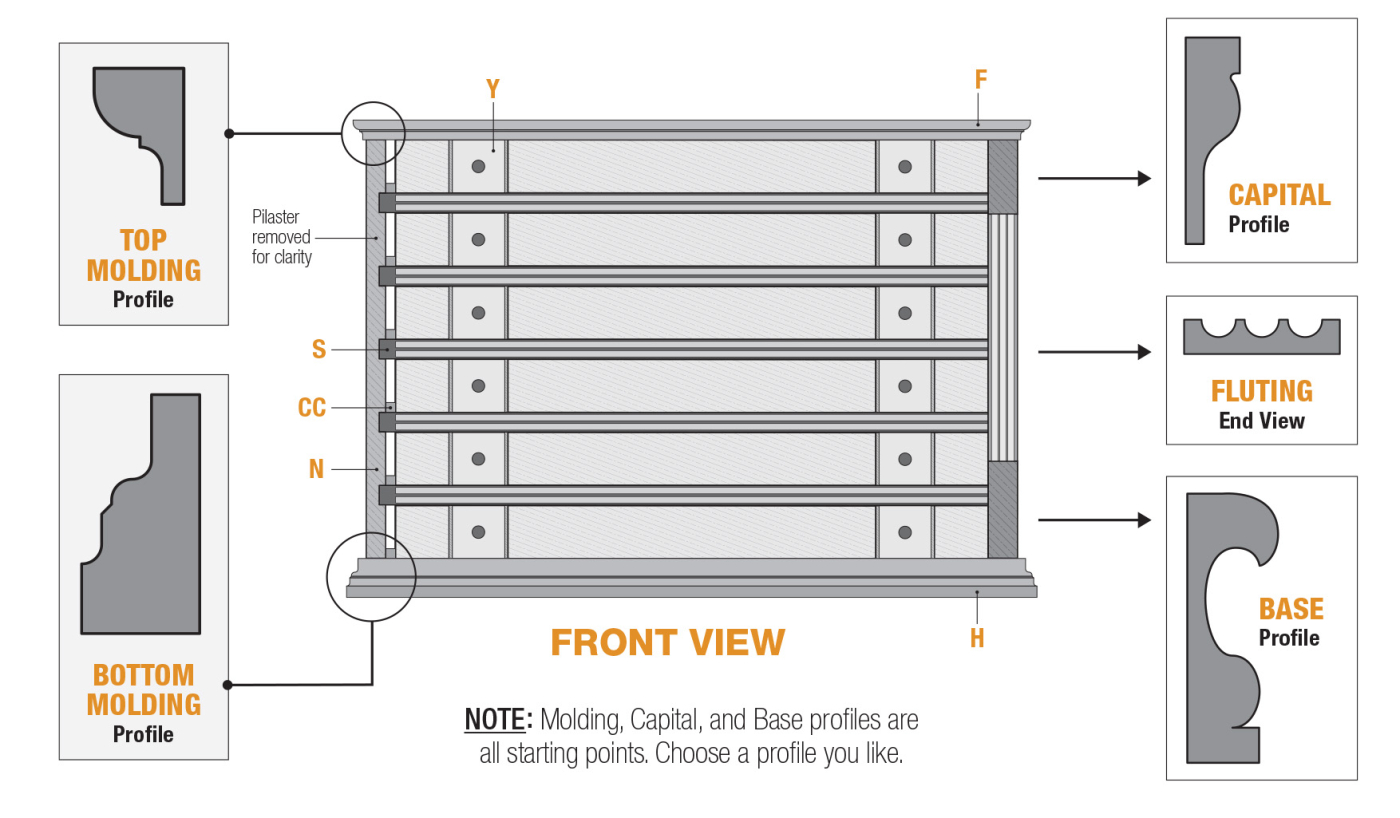
Pilasters & Molding
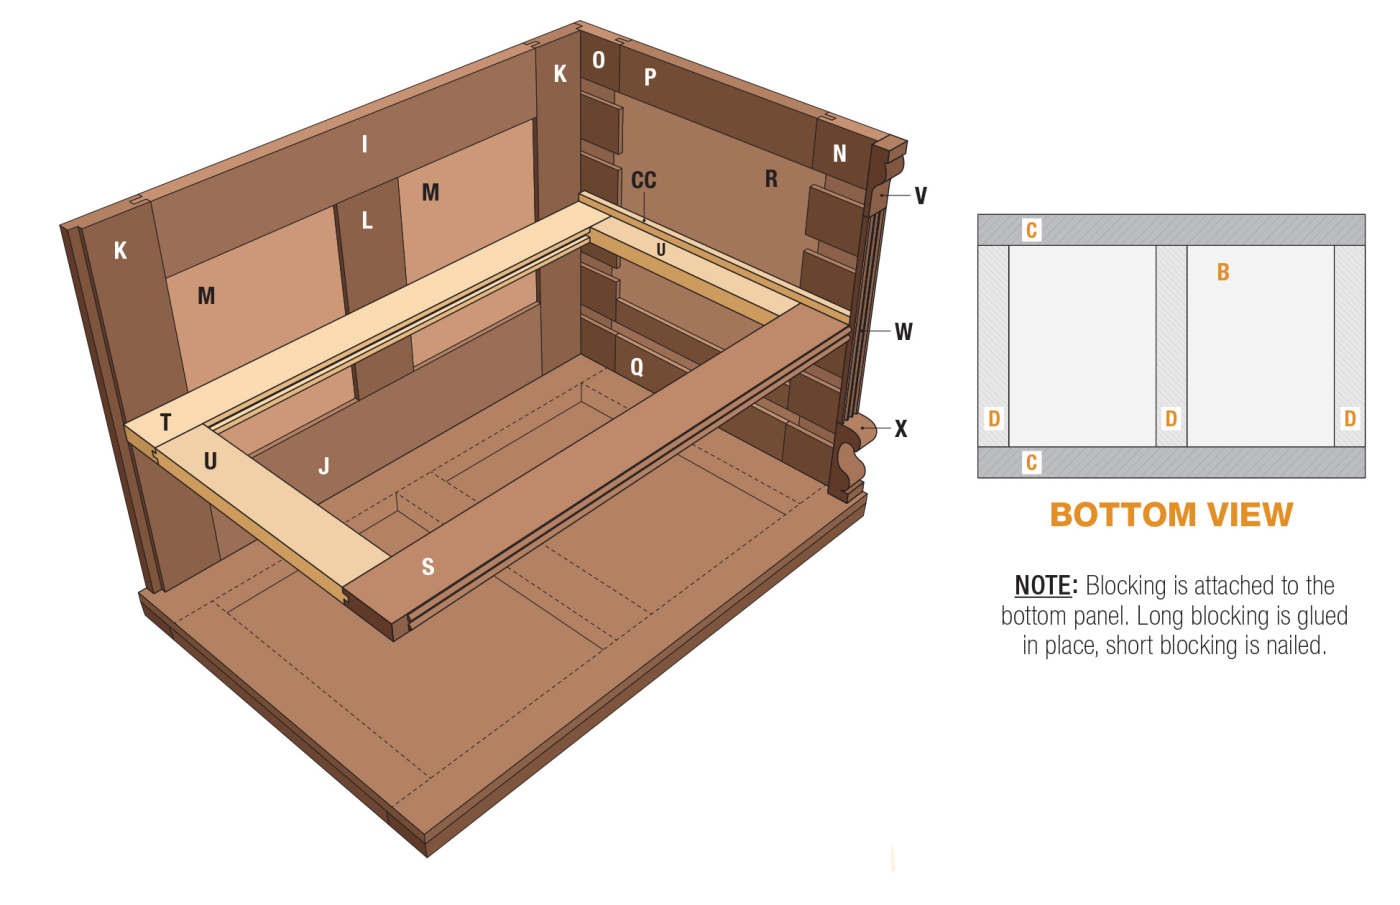
Before attacking some of the decorative bits on this cabinet, it’s time to add the top and bottom to the case. These are glued up solid panels. The top is attached with figure-8 fasteners (before you install the bottom). The bottom is attached with screws in slots, allowing for wood movement. Both the top and bottom are wrapped in molding, which we’ll add in a little bit.
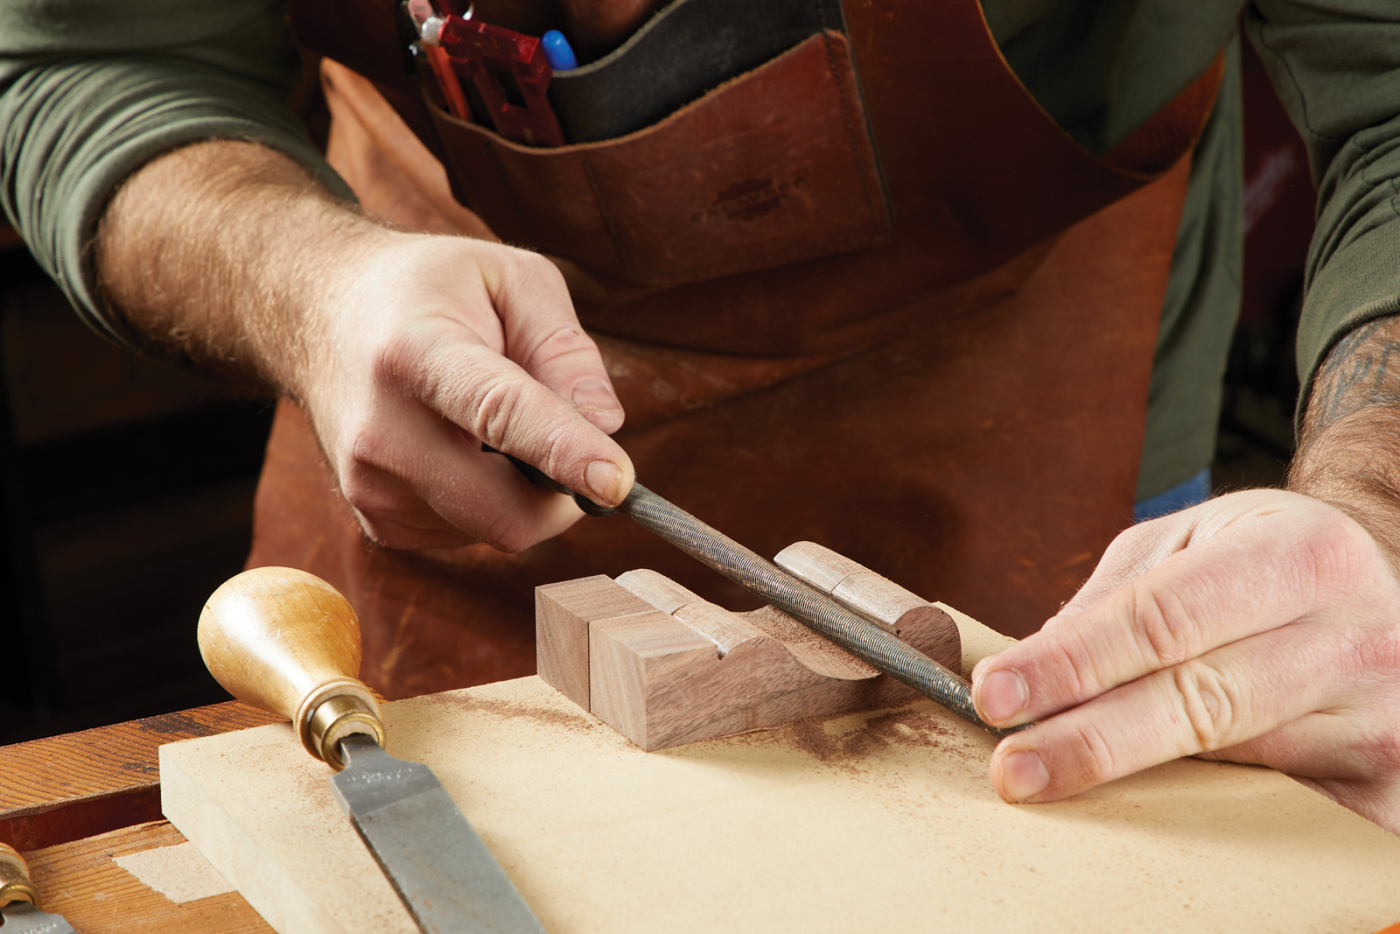
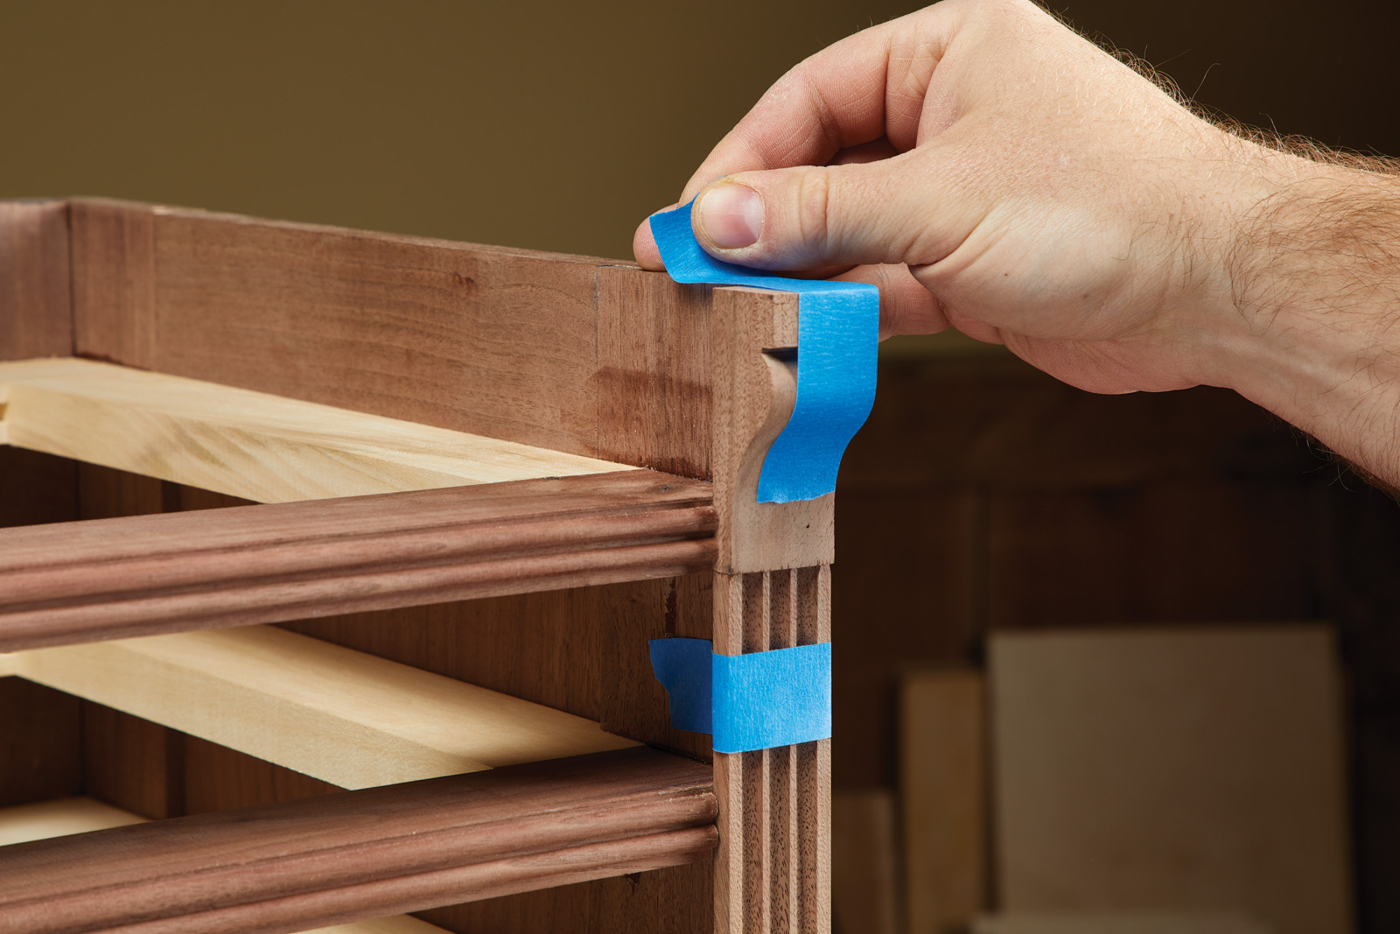
The pilasters, while decorative, add a striking look to the case. They are made from three parts—the base, some fluting, and a capital. Many examples have a turned column, or some chip carving on the base and capital. However, I chose to sketch out a shape for each that I thought would look good, and cut them out with a coping saw. Once I had a pair cut out, I used double-sided tape to hold them to a carrier board and used a rasp to clean up the profile and make them symmetrical. Once the bases(and capitals) are cleaned up, they can be glued in place. A couple of strips of painter’s tape holds them in place as the glue dries.
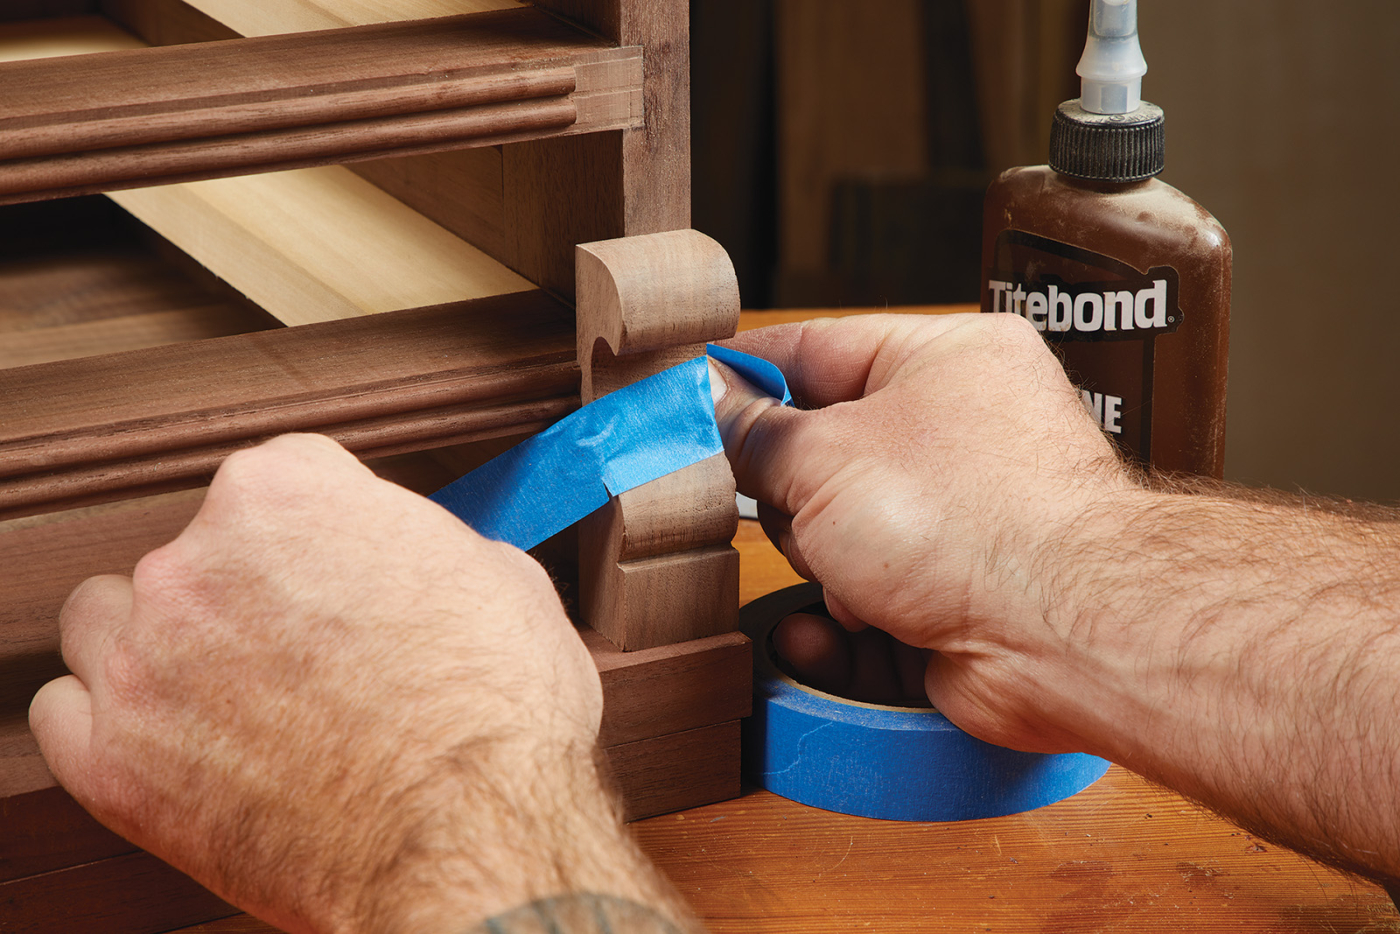
Painter’s tape is the perfect helping hand to hold small parts while glue dries.
The fluting can be made the same way the reeding was made earlier— with a scratch stock (or that combo plane that I still haven’t ordered…). Otherwise, a router bit will get you there faster. Just make sure you start with a wider piece of stock and rip off the thin fluting once you’re done. Then, you can cut it to fit and glue it in place, as you see in Photo 26. It’s important to note that the entire pilaster is wider than the case sides, and it butts against the reeding we lopped off earlier. This gives the illusion of heavy proportions to the side without excess weight.
The pilasters are flush to the outside of the case and against he reeding.
Now, laying the case onto its back, I added some blocking to the bottom. This increases the thickness of the bottom. No glue here— we want to allow the wood to move as it will, so I simply nailed these in place. Remember that nails will flex and move. Screws will not.
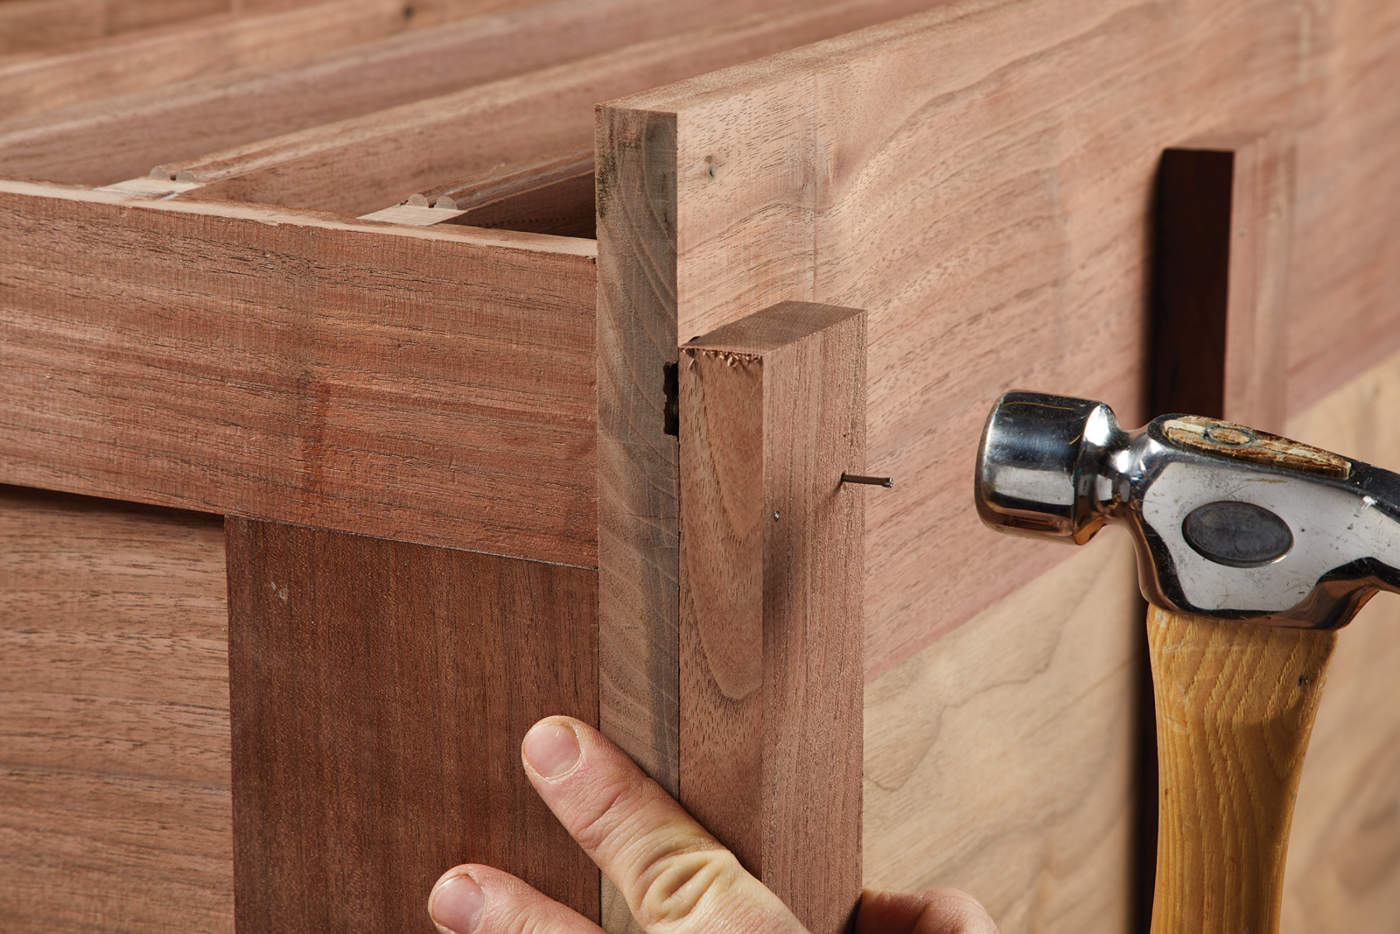
Nail the blocking in place to allow for wood movement. Set the heads to avoid scratching the surface the cabinet is on.
To dress up the edges, I added some molding around the top and bottom. A simple ogee profile with a fillet is easy to make with a pair of hollows and rounds. Don’t fret; I’ll get more into making moldings this way in a future article. Just pick a profile you like and rout the molding. When you install it, glue only the front edge of the molding. A nail along the back edge allows the case to expand and contract without being constrained by glue. The same goes for the molding on the top of the case.
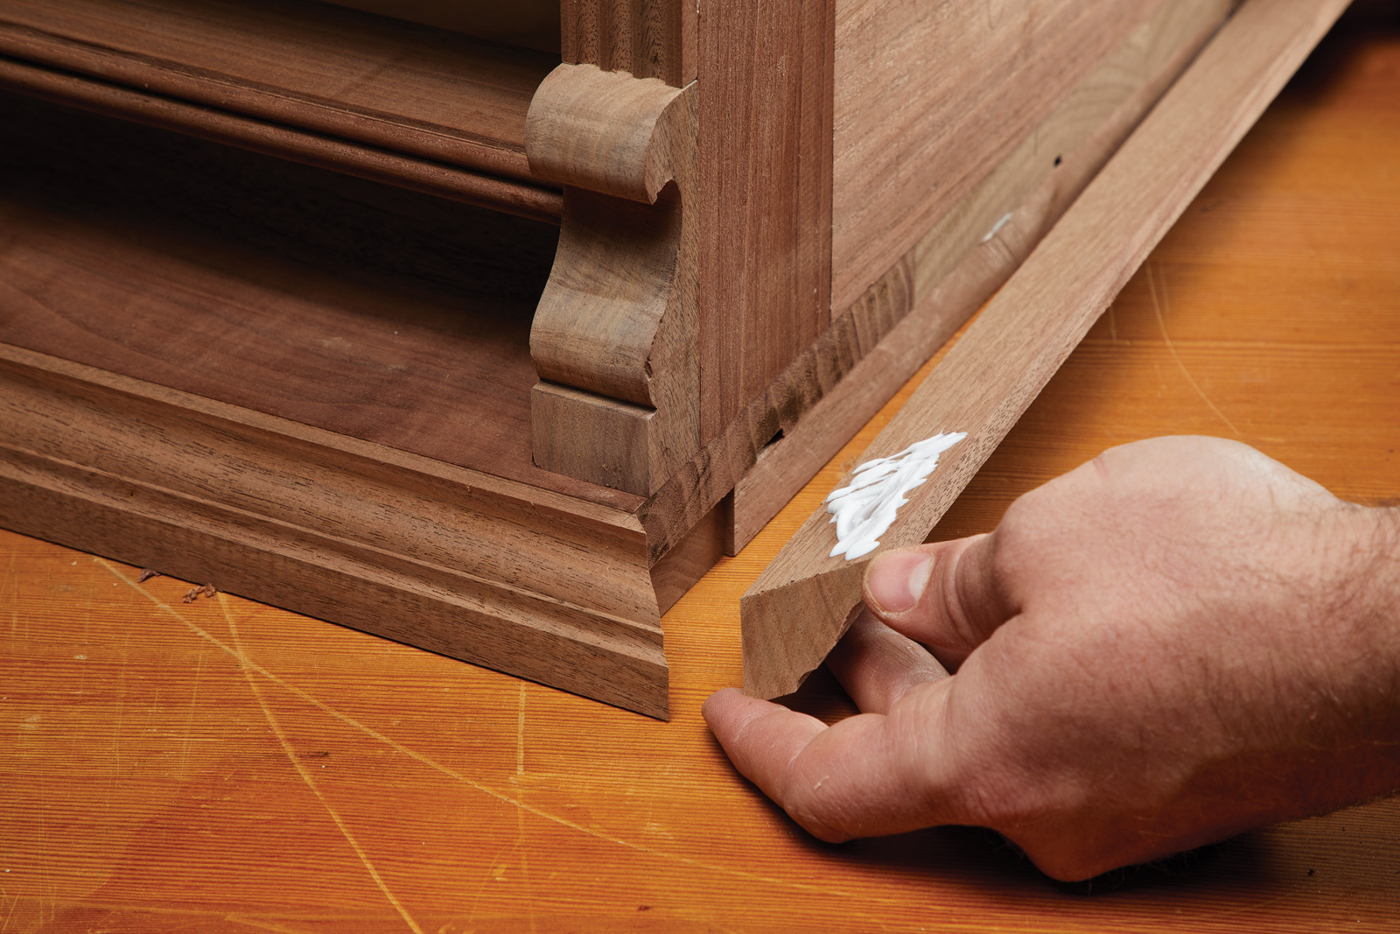
Glue the front edge of the side molding and nail the rear of the molding in place. The front moldings can be glued along their length, as they’ll move with the top and bottom of the case.
Now, the final piece of work before applying a finish is to add a few drawer runners inside the case. These are just basswood and are glued in place—they block out the drawer opening flush with the pilaster.
The finish I used on this cabinet was my go-to: Danish Oil. After it dried, I added a coat of black paste wax for a slightly used and aged look. The Dutch stirrup pulls are common to these cabinets and are from Paxton Hardware. After fitting and waxing the drawers, it’s ready to load up with carving tools.
Here are some supplies and tools we find essential in our everyday work around the shop. We may receive a commission from sales referred by our links; however, we have carefully selected these products for their usefulness and quality.