


We may receive a commission when you use our affiliate links. However, this does not impact our recommendations.
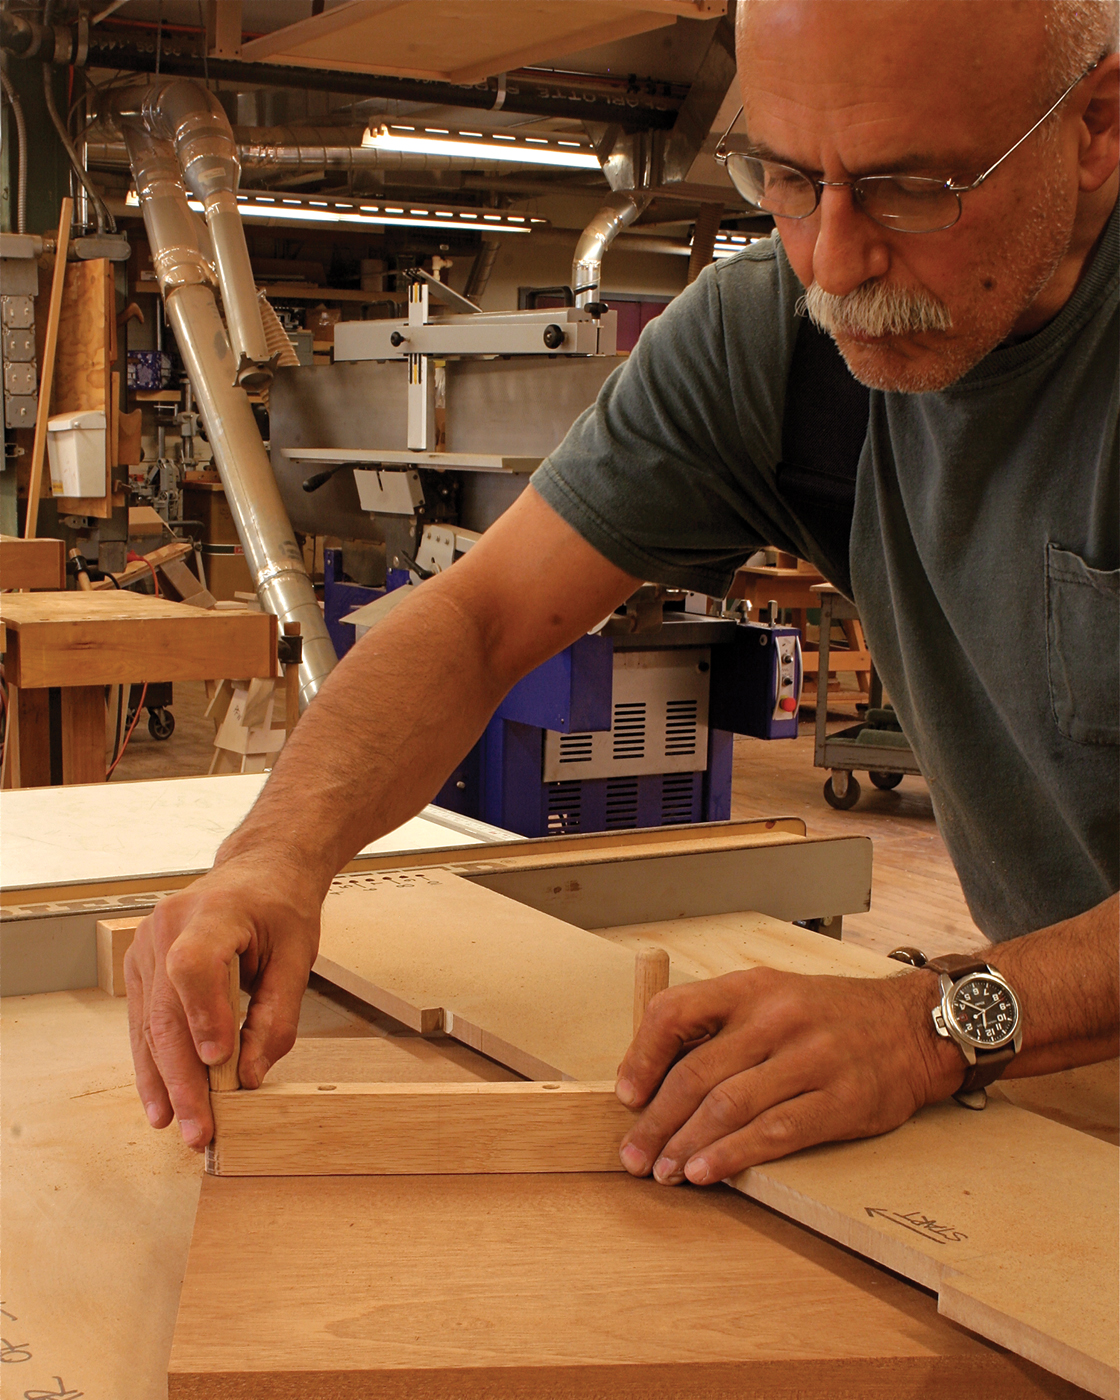
 A table saw and a simple jig make a time-consuming task quick and easy.
Woodworkers use all sorts of techniques to scoop out their chair seats. Many commonly resort to hacking out the waste with traditional tools such as an adze, travisher and scorp. Others design and assemble elaborate jigs to precisely guide and control a router. Some take the high-tech route and employ CNC equipment. But no woodworkers I know would turn to their table saws to get this tricky job done.
About 20 years ago I stumbled onto a unique scooping method in a self-published book by Robert Marquis titled, “Making the Classic Windsor Chair.” As a chairmaker, I browsed the book and was intrigued by one technique that the author used that was radical, imaginative and maybe even daring. Marquis used the table saw to cut a shallow but symmetrical hollow in his seat blanks. His technique yielded results that were flatter, less sculpted and had a machine-cut quality. Because I was making more traditional chair styles then, I shelved the book and didn’t give it much thought for the next 20 years.
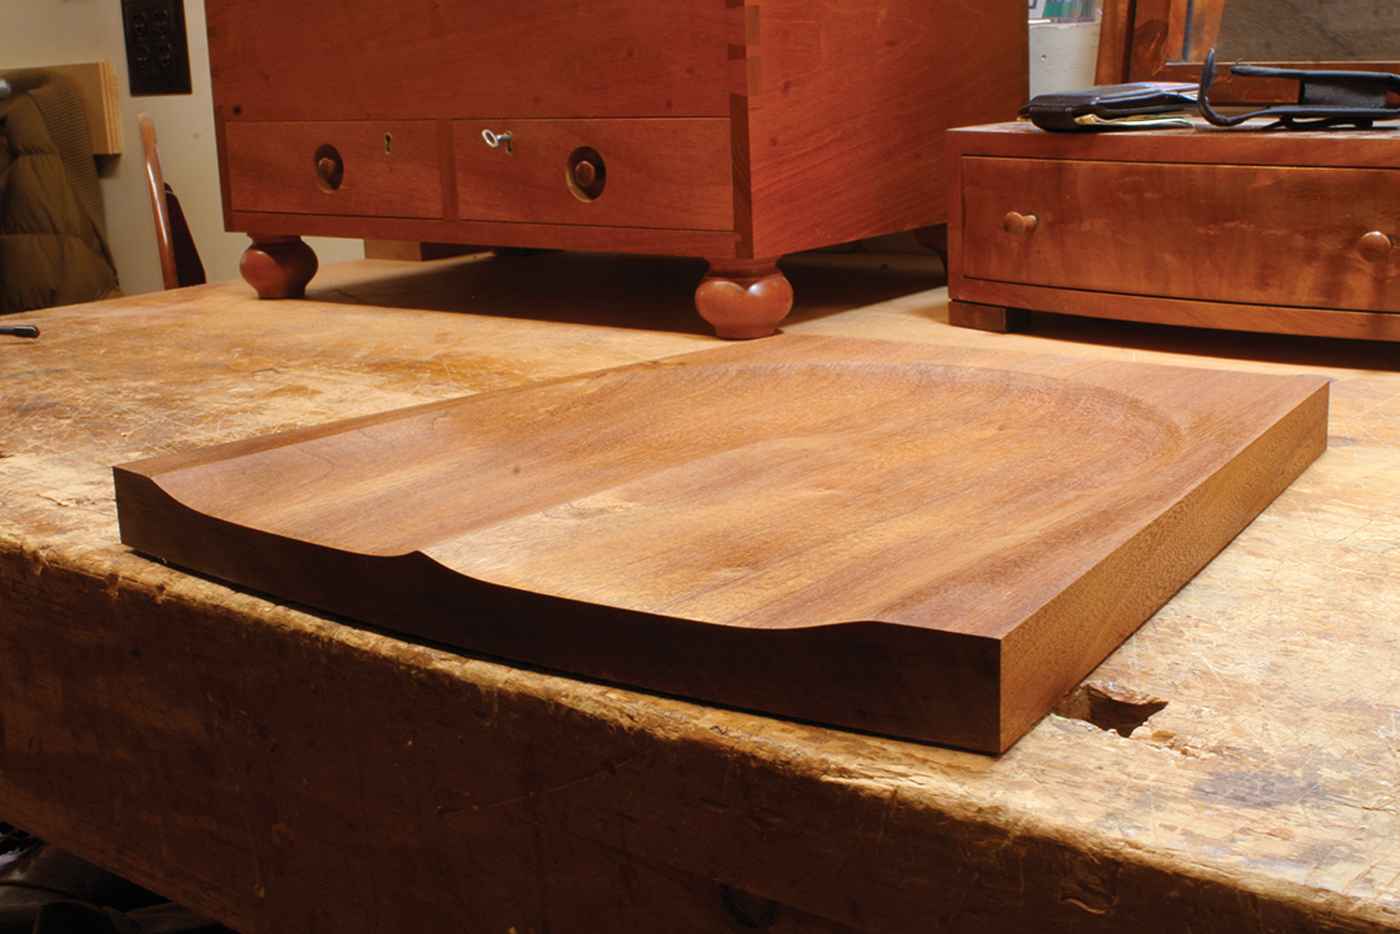
One big scoop. With a simple, shop-made jig, a table saw can make quick work of scooping a chair seat.
Later I became interested in mid-century furniture designs, particularly Scandinavian chairs, and recalled Marquis’ unusual method. I was so skeptical of the technique that I consulted a candidate for a doctorate in engineering before attempting it myself. With a green light from the engineer, I constructed the necessary jigs and prepared a couple of seat blanks.
Watch: Here’s a short video in which Mario Rodriguez put his jig through its paces.
Read: Anne Briggs explains why every woodworker should make a chair.
More Seats: Learn how to make a coopered seat from Charles Brock
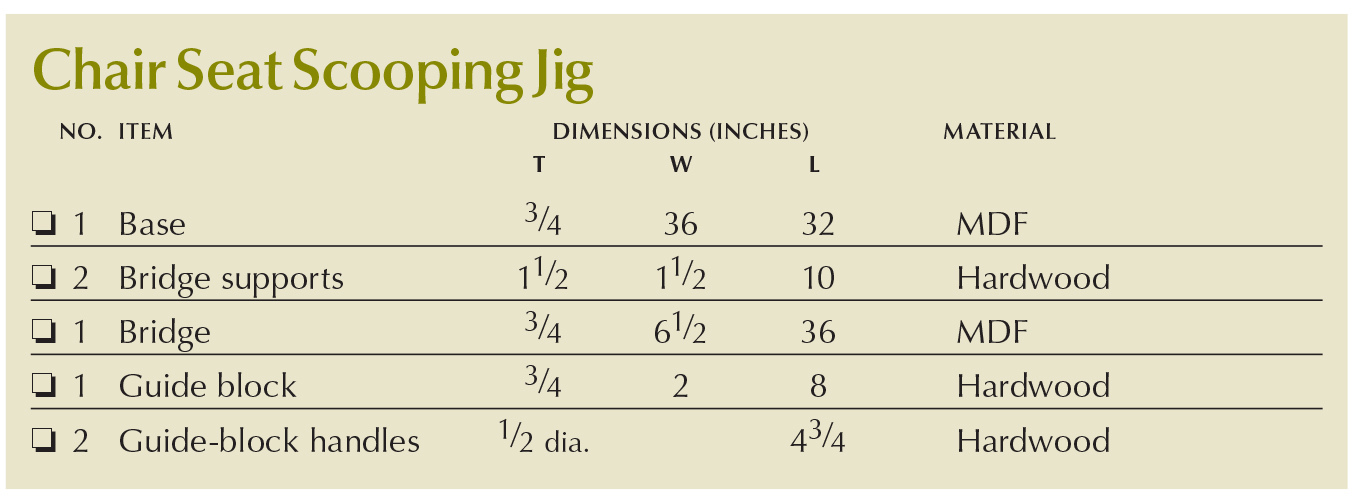
Chair Seat Scooping Jig Cutlist and Diagram
 Cove Cuts on Steroids
Most woodworkers are familiar with cove mouldings cut using a table saw. You pass material along its length, guided by a fence, diagonally across a raised table saw blade to produce a cove cut. Well, the seat-scooping technique is a variation on that.
Using a jig to guide the work, you pass the material across the raised table saw blade, stop at a given distance, then make a U-turn and return to the starting point. Successive passes expand the width of the scoop. The depth of the scoop is determined by the height setting of the blade. I usually cut to a depth of 1⁄4“.
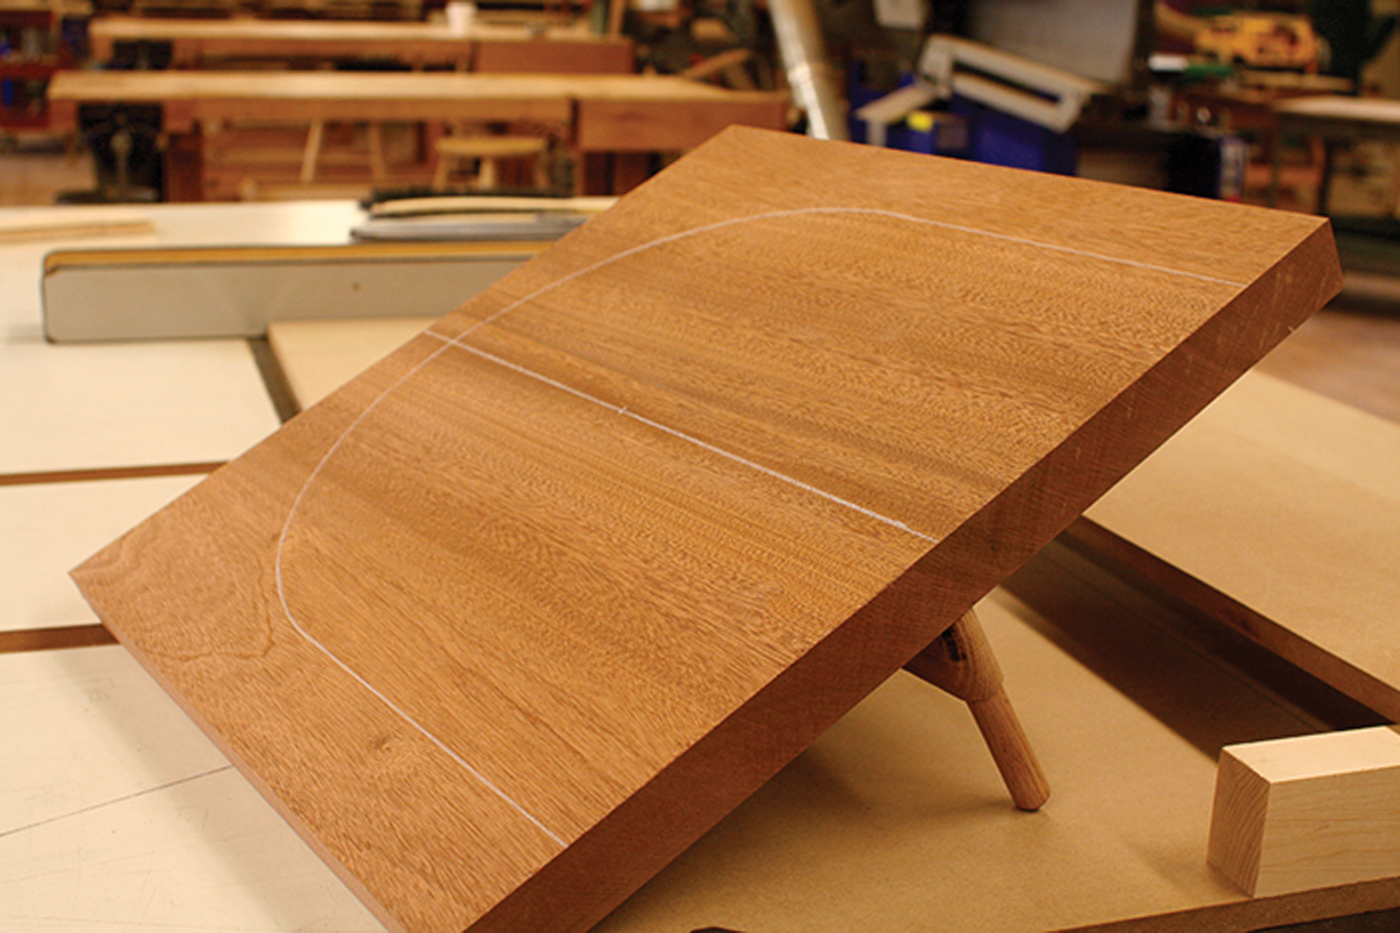
The jigs and technique that follow show you how to cut an attractive scoop that measures approximately 14-1⁄2” long x 14-1⁄2” wide. Both the width and the front-to-back dimensions are reached as cuts are made along the 16″ travel groove, and as the bridge portion of the jig is moved forward on successive passes. Each pass increases both measurements of the seat’s scoop.
First Make the Jig
There are seven relatively simple pieces that make up the jig needed for this technique. All of them can be built in the shop using common materials you probably already have on hand.
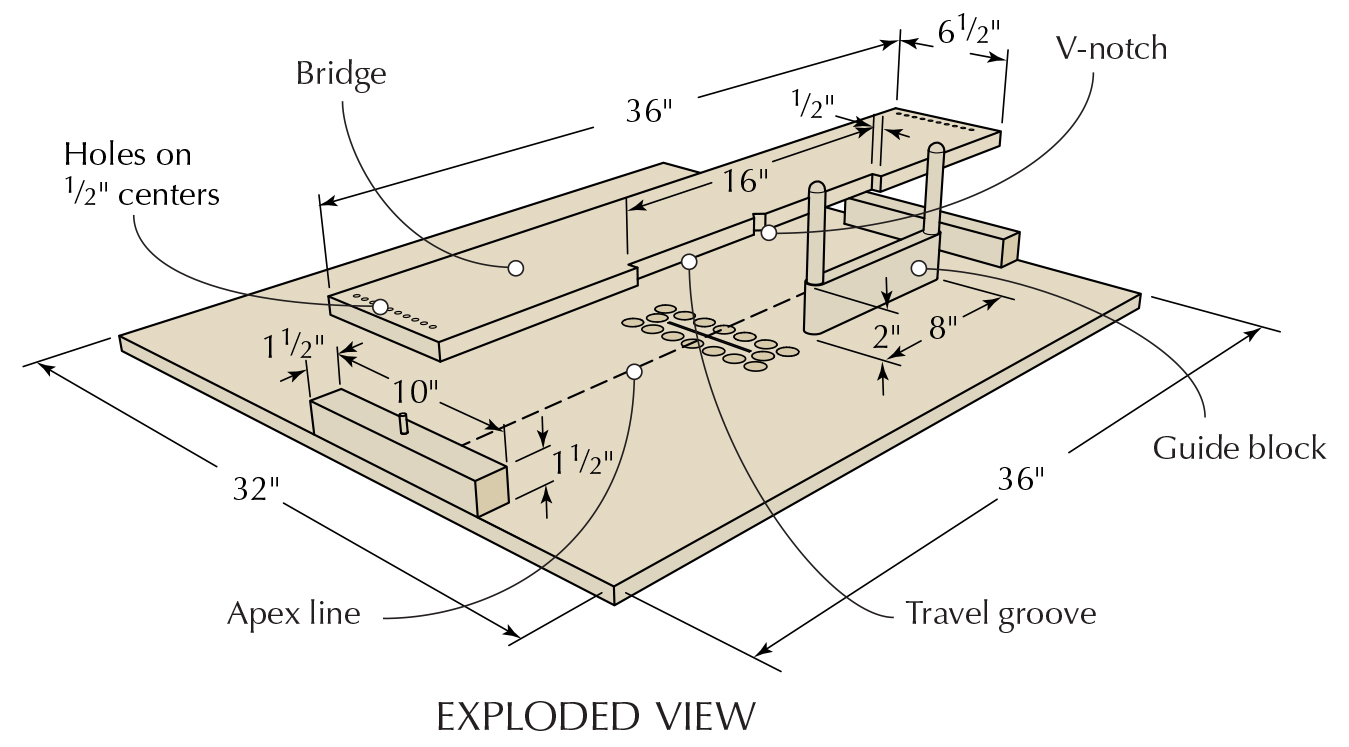
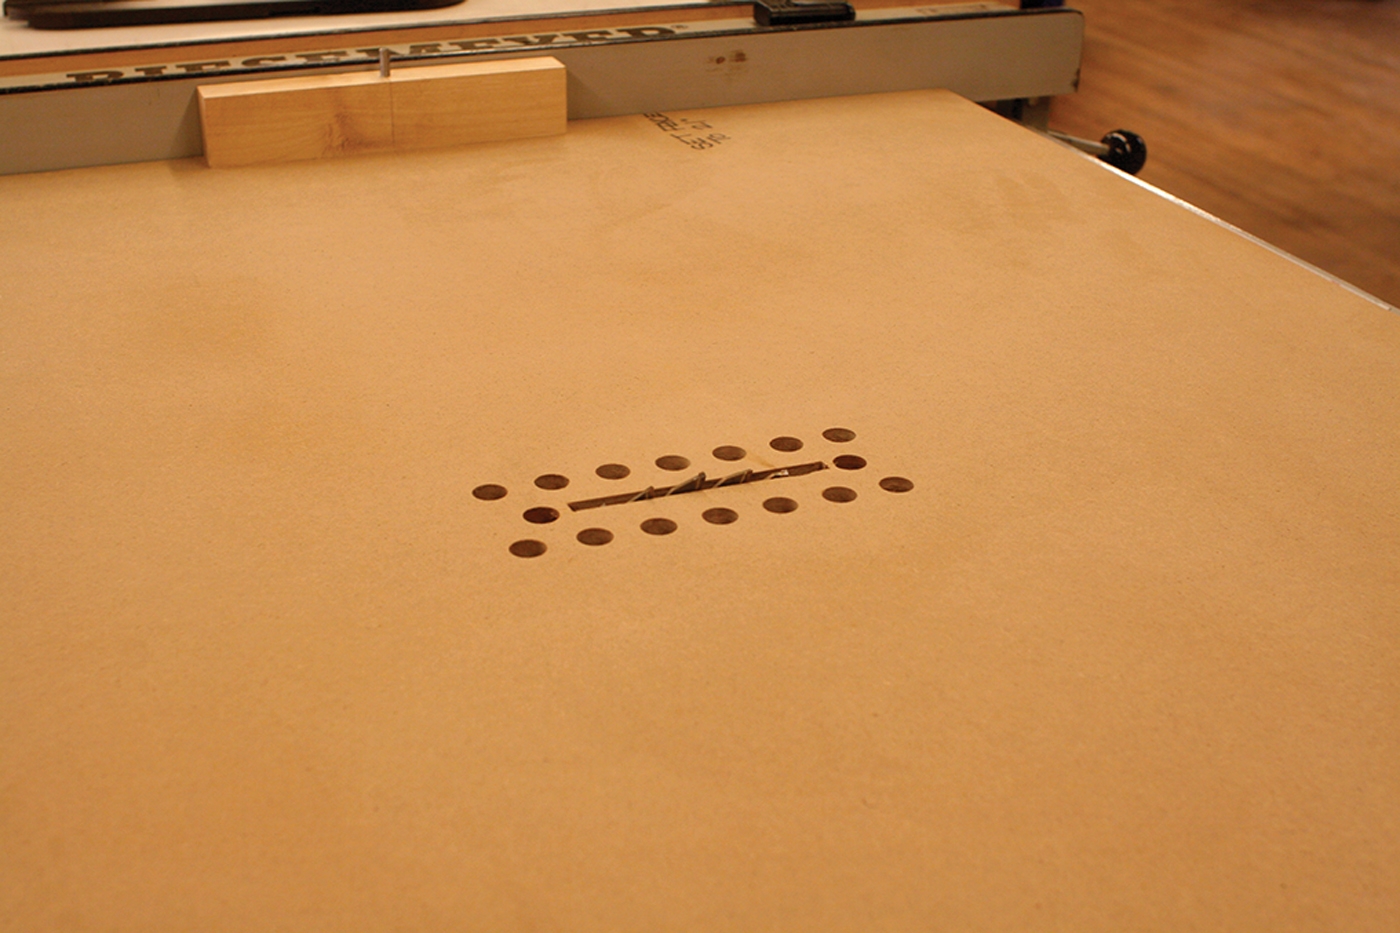
Let’s start with the jig’s base that clamps to the table saw and supports the entire operation. My base is made from MDF and is 36″ wide x 32″ deep (you may need to alter the size to fit your saw).
With the blade all the way down, secure the MDF to the saw. Start the saw and slowly raise the blade through the base about 3⁄8” above the MDF. Remove the base and drill a series of 1⁄2“-diameter holes around the saw cut to facilitate sawdust collection. Based on the location of the saw cut, draw a line perpendicular to the apex of the saw blade’s height.
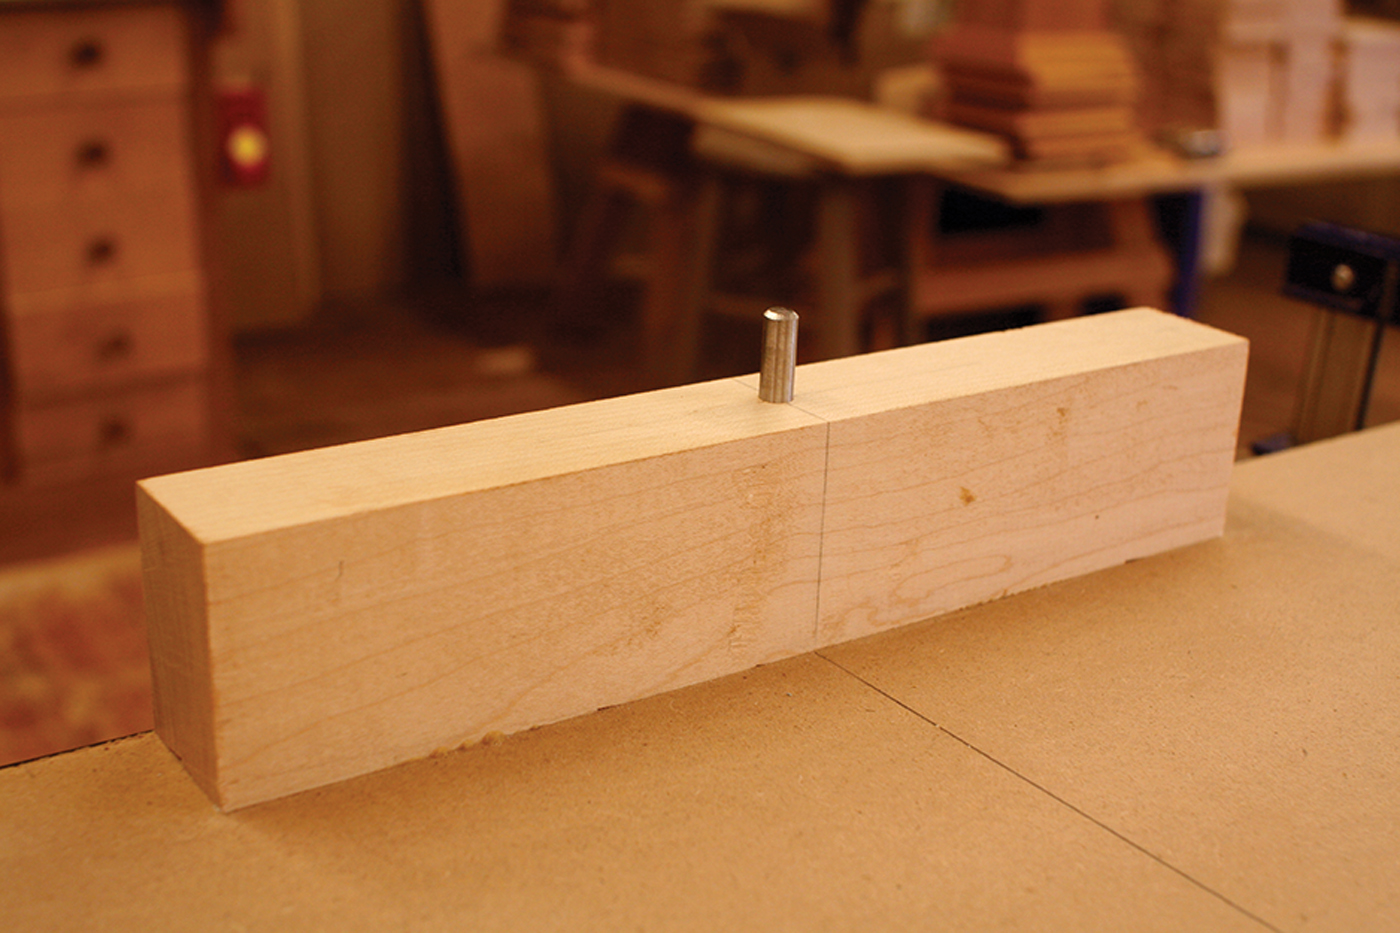
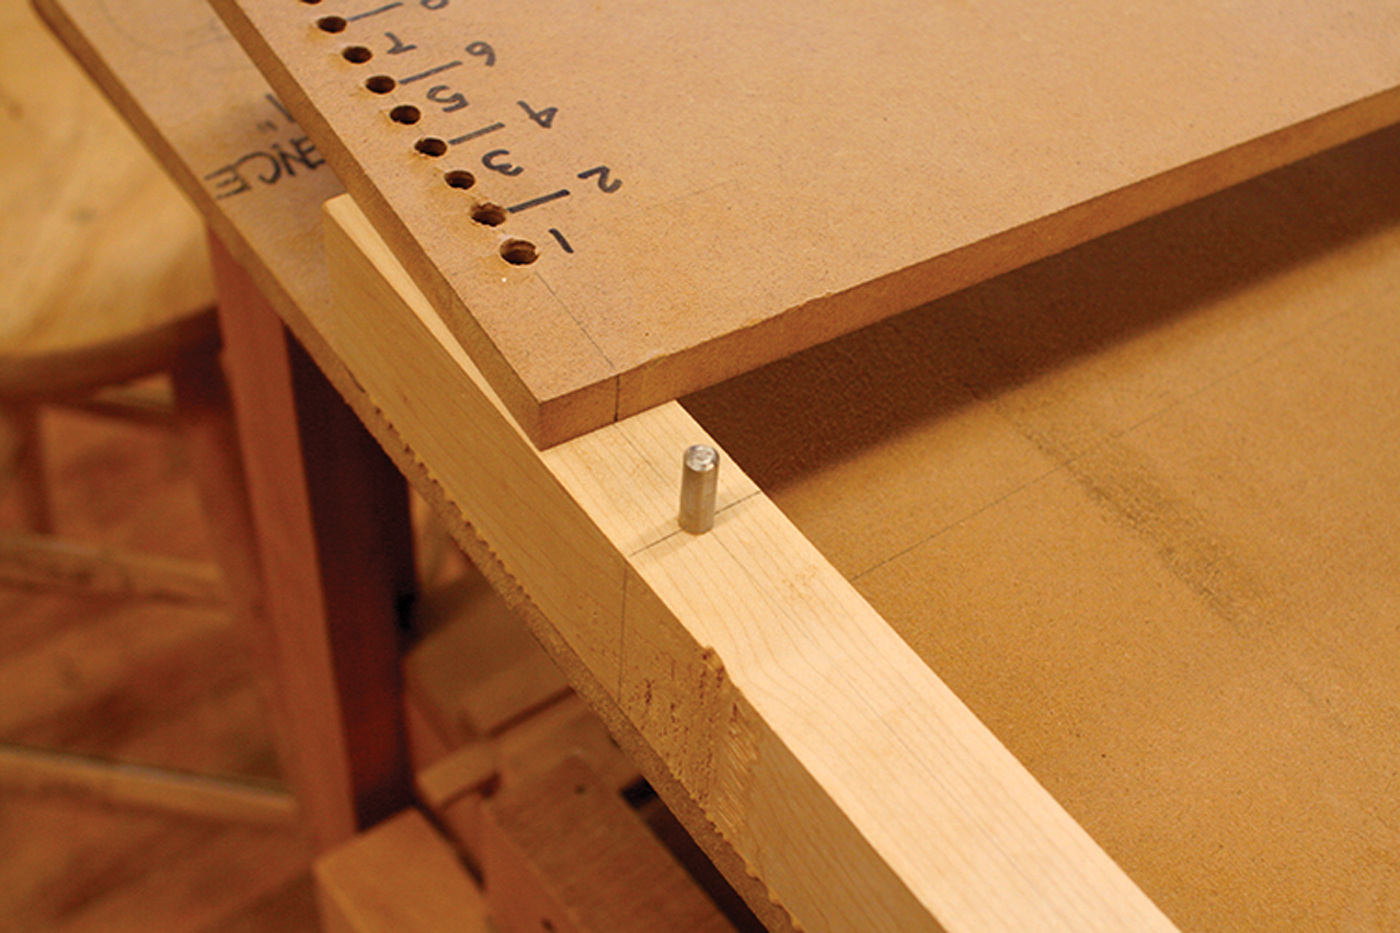
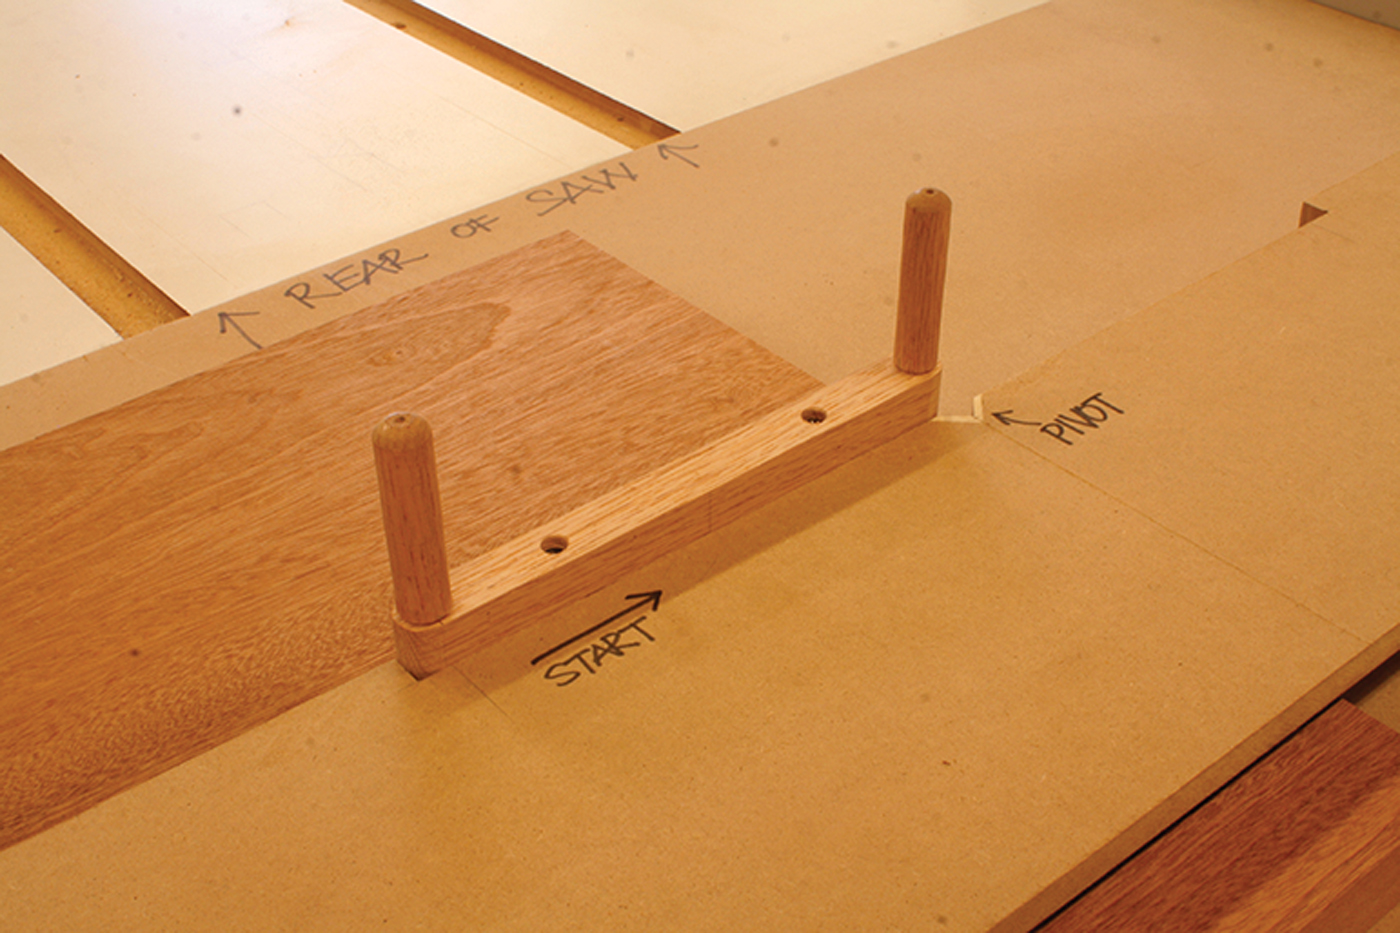
Bridge abutments. Support blocks elevate the bridge and provide space for the seat blank. The indexing pins are used with the holes at the each end of the bridge.
Next, make and install the two bridge support blocks. (These blocks should hold the bridge high enough to clear the thickness of the seat blank as it travels between the bridge and the base.) In the center of the top edge of the blocks, drill a 1⁄4“-diameter hole and tap a 1⁄4” steel pin into each block. (Leave about 3⁄4” of the pin above the block.) Carefully install the blocks on the jig base so the center of the pin aligns with your apex line (see the diagram).
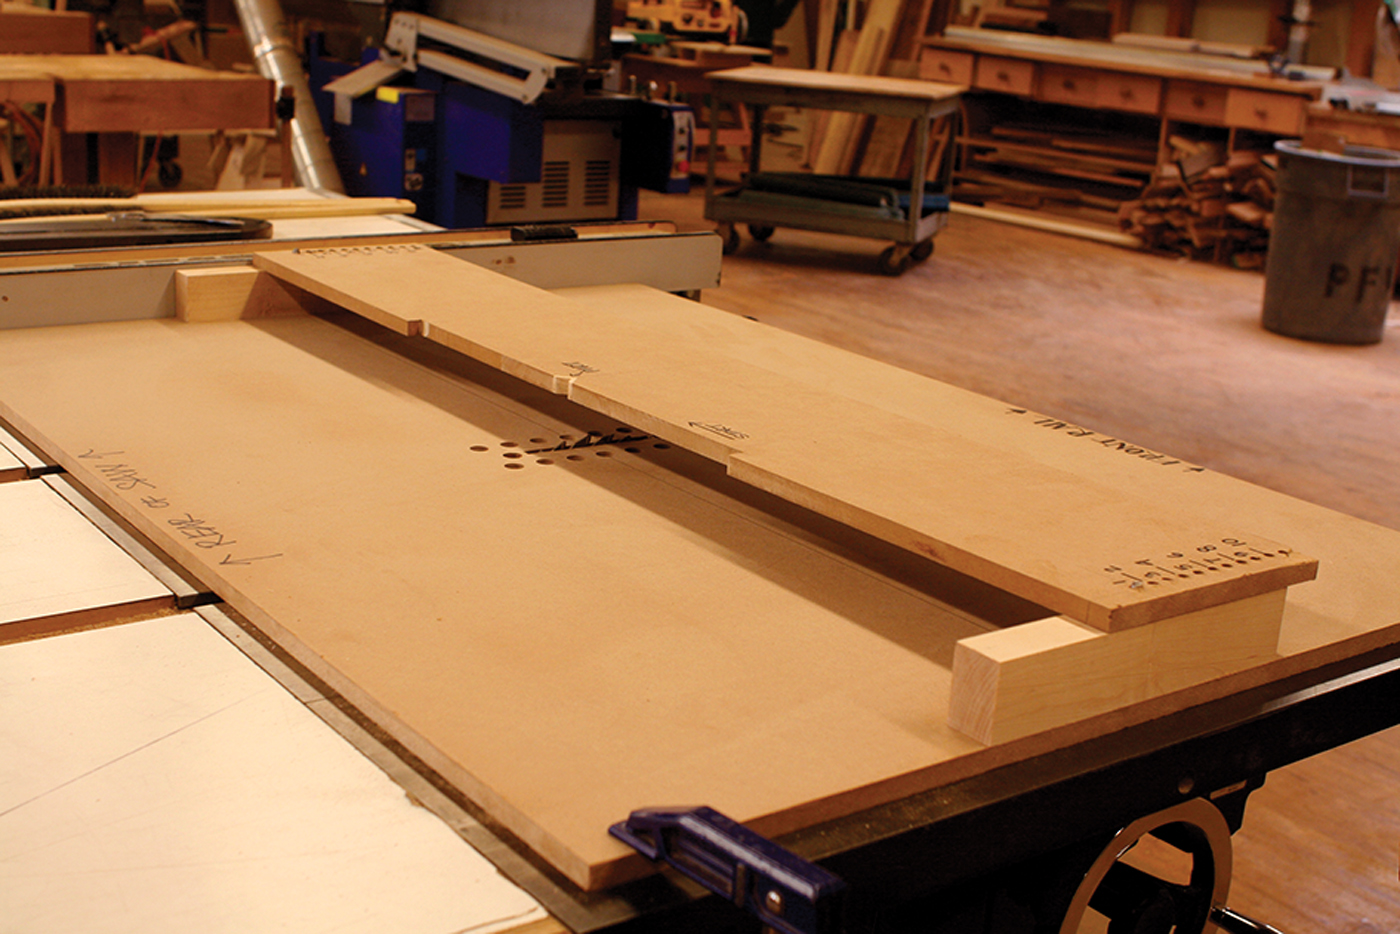
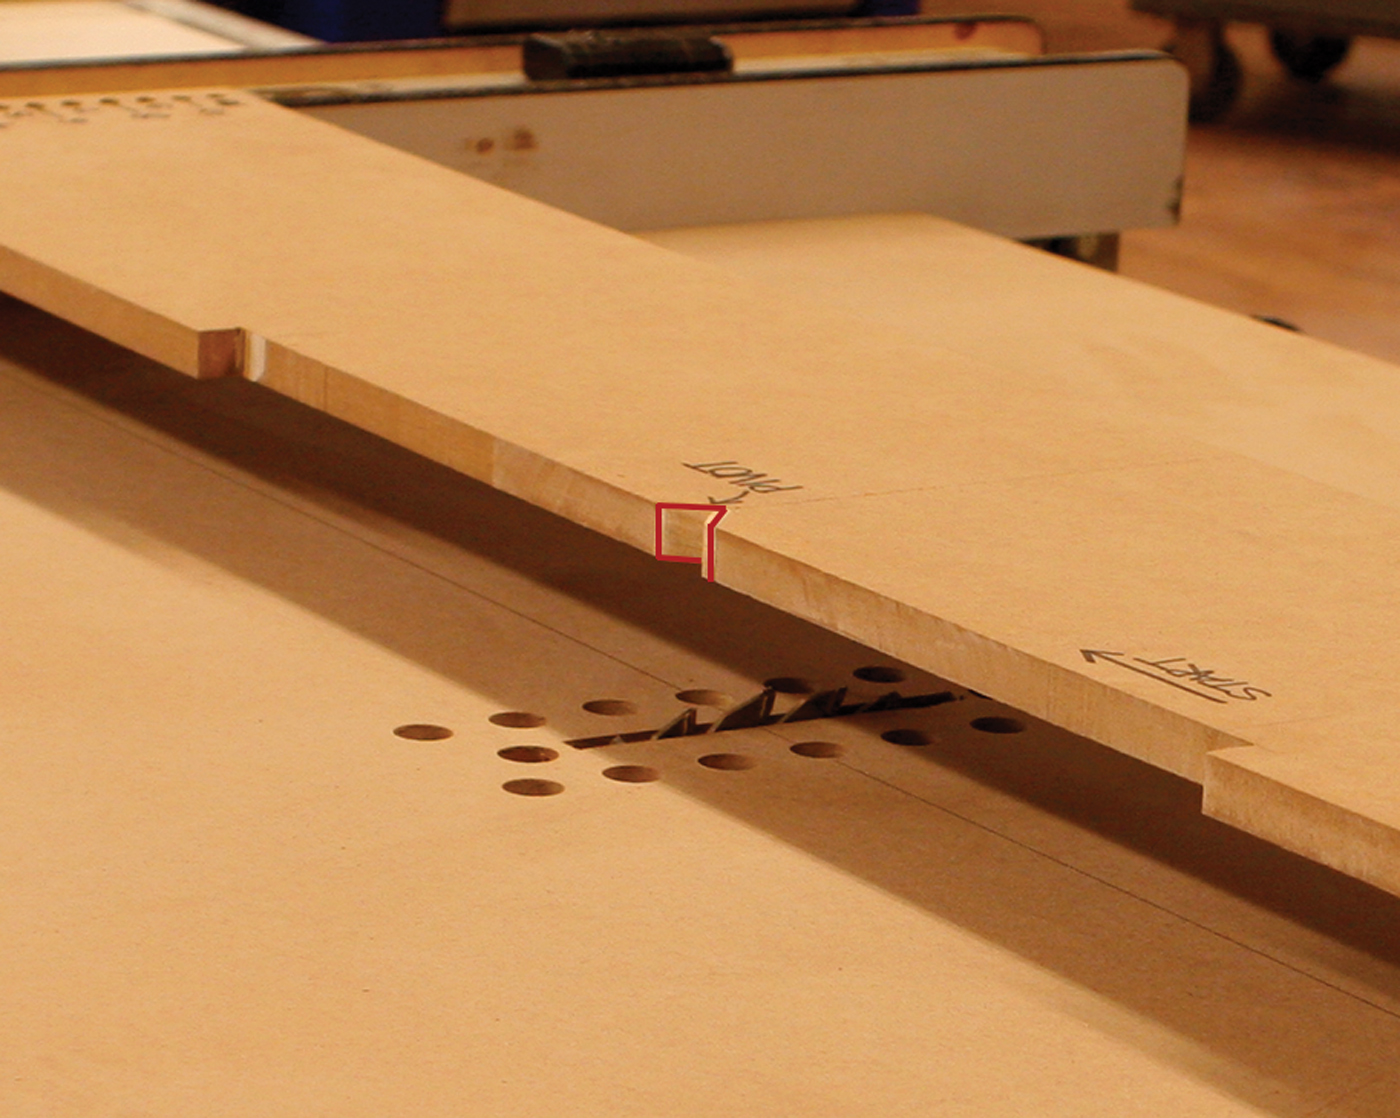
Heart of the jig. The bridge is central to the scooping operation. Its travel groove controls the path of the seat blank and the V-notch (highlighted below) is the pivot point for making the U-turn.
Build a Bridge
The bridge is a critical part of the jig. It controls the width and length of the scoop (the depth is controlled by the height of the saw blade). The bridge extends across the table saw and is approximately 6-1⁄2” wide and as long as the width of your jig’s base. Centered along its length is a 1⁄2“- deep x 16”-long cutout that I call the “travel groove.” Centered on the travel groove is a 3⁄8“-wide V-notch. At each end of the bridge is a series of ten 1⁄4“-diameter holes, spaced 1⁄2” from center to center. These holes must be spaced side to side so that the bridge will drop onto the 1⁄4” pins in the bridge support blocks.
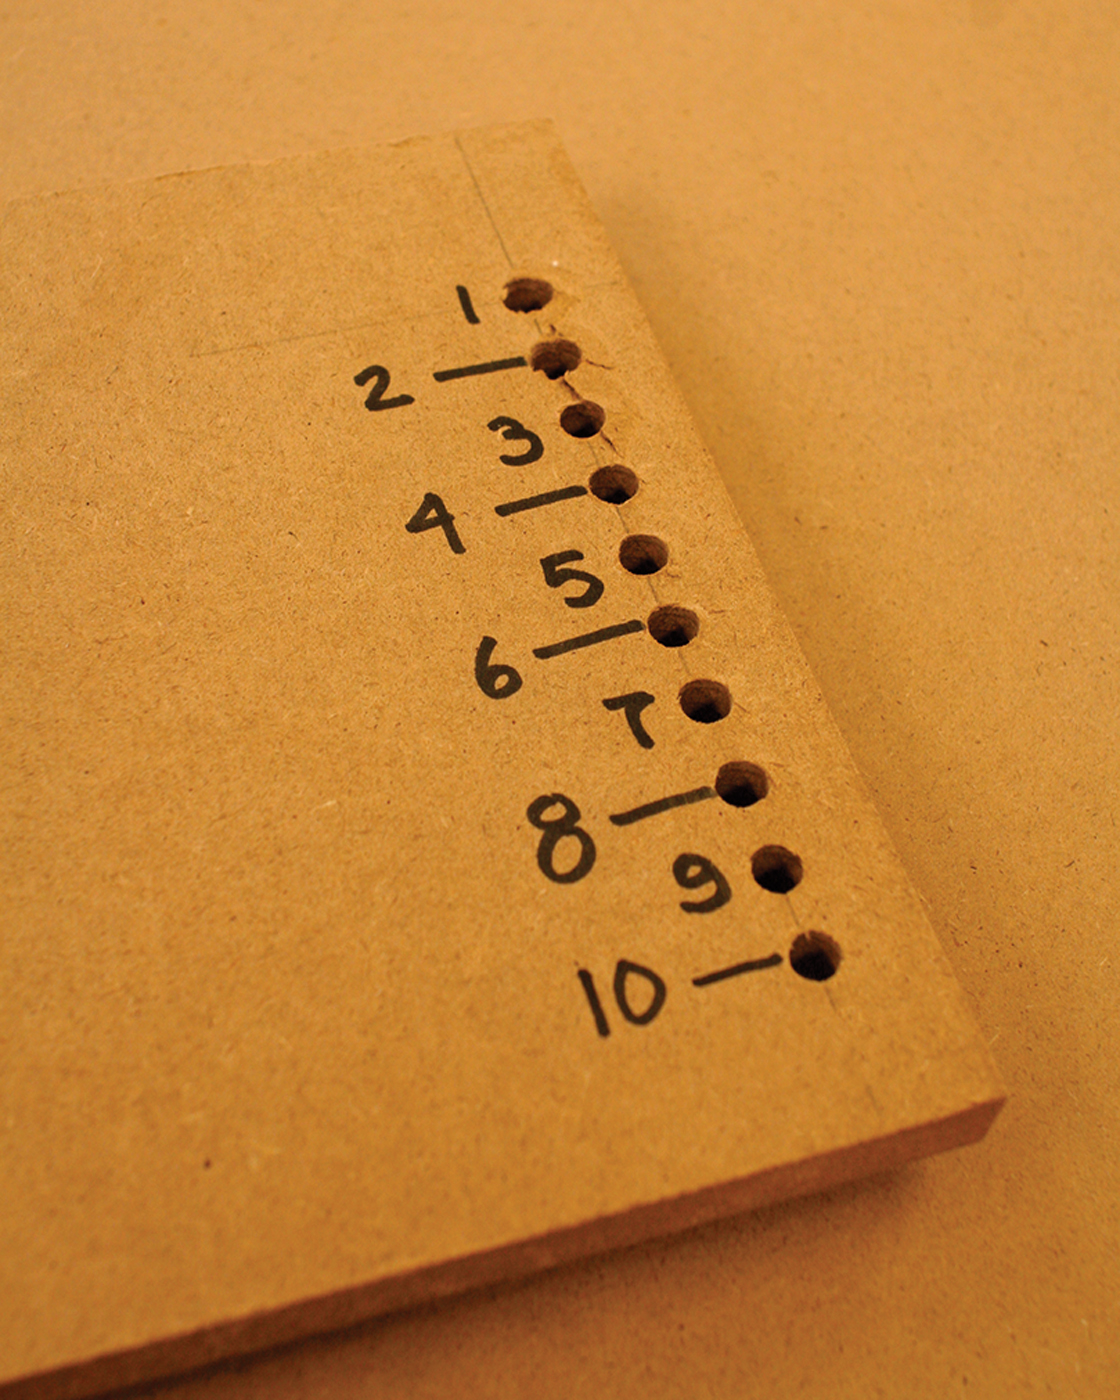
Bridge indexing. Both ends of the bridge have 1⁄4″ holes set on 1⁄2″ centers that are used to position the bridge on the support pins.
Make the Guide Block
The guide block is screwed to the underside of your seat blank and slides along the travel groove in the bridge. It also provides handles for pushing the seat blank along, and is used to make the pivot motion in the V-notch of the travel groove. It is this pivot that swings the blank 180° to finish its trip along the travel groove. Make the guide block taller than the top edge of the travel groove when the guide is mounted to the bottom of seat blank (2″ in this example).
At each end of the block are dowels used for handles. These handles need to extend at least 1-1⁄2” above the block – long enough to provide a secure grip for the operator while guiding the seat blank along the bridge’s travel groove. The guide block is mounted perpendicular to and flush with the front edge of the seat blank, and it’s centered side to side.
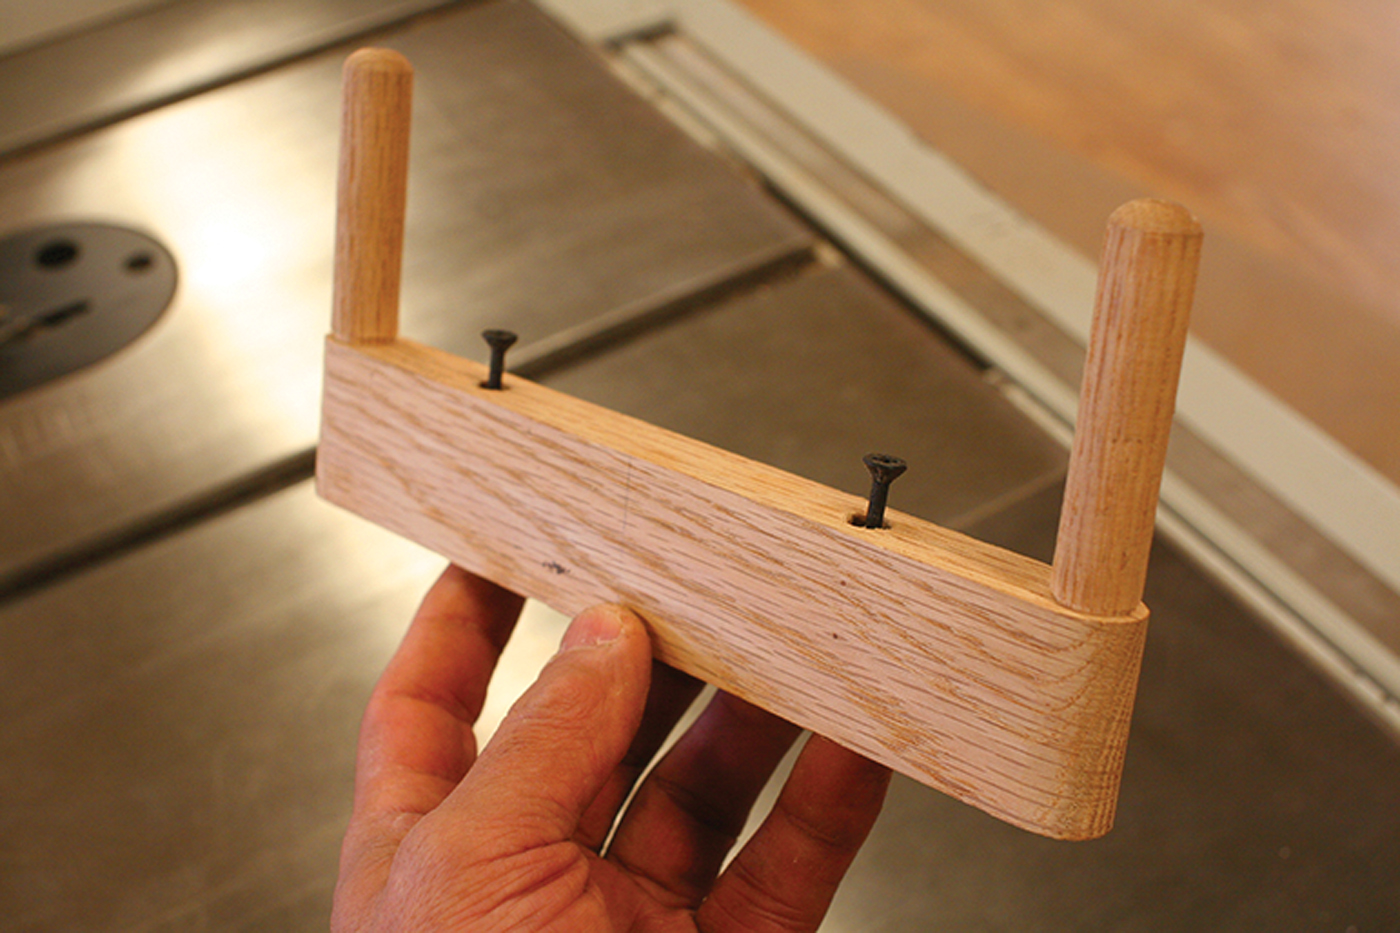
Get a handle. The guide block attaches to the bottom of the seat and controls the blank’s travel along the bridge. Dowels serve as handles.
That’s all there is to the jig, and it’s one you can use over and over as long as your seat blank thickness fits between the jig base and bridge. Step up to your saw. You’re ready to start scooping seats the quick and easy way.
Here’s the Scoop
Scooping a chair with this table saw jig isn’t as scary as it may seem at first glance. Sure, I was a bit nervous when I first used it – but I quickly learned it really is a safe operation. Best of all, the result is a crisply carved chair seat that is done in little time and requires a minimal amount of sanding. I usually spend no more than 10 to 15 minutes cleaning up the seat blank after the scooping is done. You might wonder what saw blade to use. In my shop, I use a standard combination blade.
Here are the steps to carve seat blanks using the jig:
Get ready. To prepare for scooping, clamp the jig securely to the table saw then raise the saw blade to 1⁄8″ above the base of the jig.
1. Remove the table saw throat plate to improve dust collection. Clamp the jig base to the saw and raise the blade to 1⁄8” above the base.
Hold on to your seat. The guide block is secured to the underside of the seat blank. It’s held at the front edge and centered from side to side.
2. Attach the guide block to the underside of the seat blank. It should be screwed down at the front edge of the seat and centered on its width.
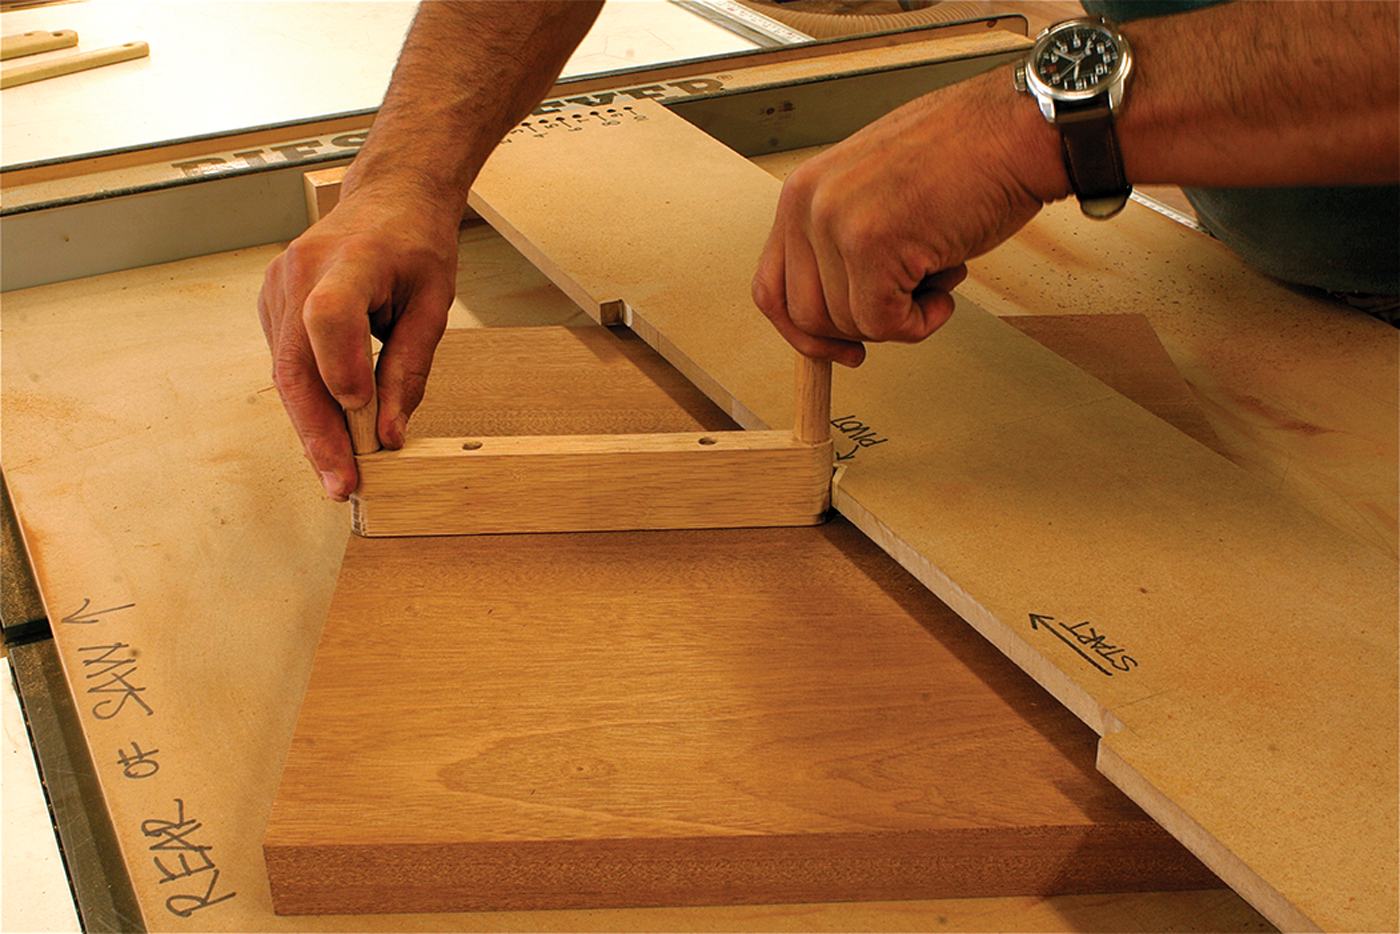
Bridge ahead. Place the bridge on the support blocks with the indexing pins in the No. 1 bridge holes.
3. Place the bridge on the bridge support blocks. Engage both the right (R) and left (L) holes marked “1” on the bridge with the steel pins on the bridge support blocks.
In position. With the guide block placed against the left-hand stop of the travel groove, everything is ready to begin the first pass of the scoop.
4. Place the seat blank upside down on the jig base. About half of the blank will be under the bridge. The blank should be positioned to the left of the saw blade with the front edge of the seat facing to the right. Align the guide block with the left stop of the 16″-long travel groove in the bridge.
5. Start the saw and with the blade spinning, carefully and slowly move the guide block along the travel groove from left to right until it reaches the right stop of the travel groove. This places the opposite end of the guide block at the centered V-notch.
Pivot point. Once the guide block reaches the right stop, it is pivoted in the V-notch in a counterclockwise rotation. After the pivot, the guide block is pushed to the right travel stop to complete the first pass.
6. Slowly and carefully engage the end of the guide block in the V-notch by turning the guide block in a counterclockwise direction. Rotate the block and seat blank 180º, making a complete U-turn.
7. With the front edge of the seat now facing left, continue moving the guide block along the travel groove back to the right stop. The first pass is complete.

Round trip. After the first pass is made, the saw blade is raised to 1⁄4″ and the process is repeated. The result is a clean scoop.
8. Raise the blade to establish the full depth of cut (1⁄4“) and repeat the process. For a seat such as mine, the 1⁄4” blade height will be all the depth needed. You can leave the blade set here for the rest of the scooping process because each successive pass now makes a slight cut, expanding the width of the previous pass.
9. With the left side of the bridge still engaged in hole 1 L, move the right side of the bridge to hole 2 R and repeat the cutting operation.
10. Now move the bridge to holes 2 L and 2 R and repeat the operation again. Then move the bridge to holes 3 L and 2 R. By advancing the bridge in this staggered progression to higher-numbered holes (up to 10), the width of the saddling is increased.
During the scooping process, interrupt the operation periodically to clear accumulating dust from the jig base as needed.

Clean up. After the series of passes are made, the seat is fully scooped. The blank is then sanded or scraped to remove any milling marks.
The saddled seat will be mildly scarred by saw blade marks. These are easily and quickly removed with sandpaper or a card scraper once the blank has been completely scooped.


