


We may receive a commission when you use our affiliate links. However, this does not impact our recommendations.
If you like to rely on a honing guide during sharpening, you will benefit from using an angle setting (or indexing) jig. An indexing jig will allow you to accurately set the right amount of blade protrusion in the guide to ensure that the sharpening angle is repeated each time you mount the tool into it.
Veritas, the maker of one of the most successful and popular honing guides in the market, sells a great angle setting jig. But the jig will only work in tandem with their proprietary honing guide.
Lie Nielsen, who makes the best Eclipse style honing guide to date, provides instructions on how to build an angle setting jig plate. And in their sharpening tutorial videos they show how to use it.
The indexing jig that I built recently is much more compact than the Lie Nielsen jig, and will take less time to build. While it provides only four setup angles (compared to the eight on the LN jig) I do believe that many will find it a nice and practical addition to their sharpening kit.
So here we go…
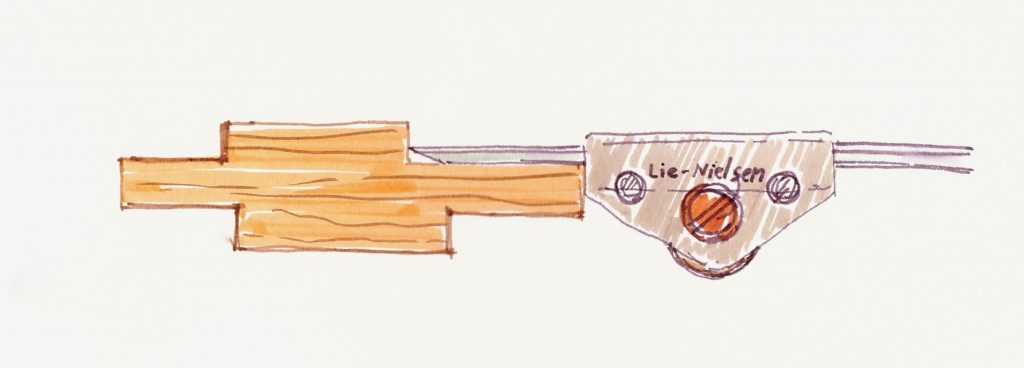
 The jig includes four steps whose treads’ depth varies to allow for the registration of different angles. The deeper the tread, the lower the honing angle. To make it, you just need to find a square or rectangular block of wood, mark the dimension of each step, and cut them off with the tools of your choice. Finding the correct amount of protrusion (step depth) is easy for those of you who own a LN honing guide. Just follow the protrusion measurement as denoted in the LN guide’s building instructions. You can find them in a PDF document on this page.
If you own one of the Eclipse knock off guides, and are still able to read the protrusion recommendations (they appear on the guide’s cast body) do use this data when laying out the treads.
But if you use a guide that doesn’t specify exactly the recommended protrusion per angle, or in case that you want to set up an angle (say 27 degrees) that is somewhere in between the more common angles of 20, 25, 30, 35, 40 than you will have to find the exact amount of blade protrusion via experimentation.
Indexing the jig
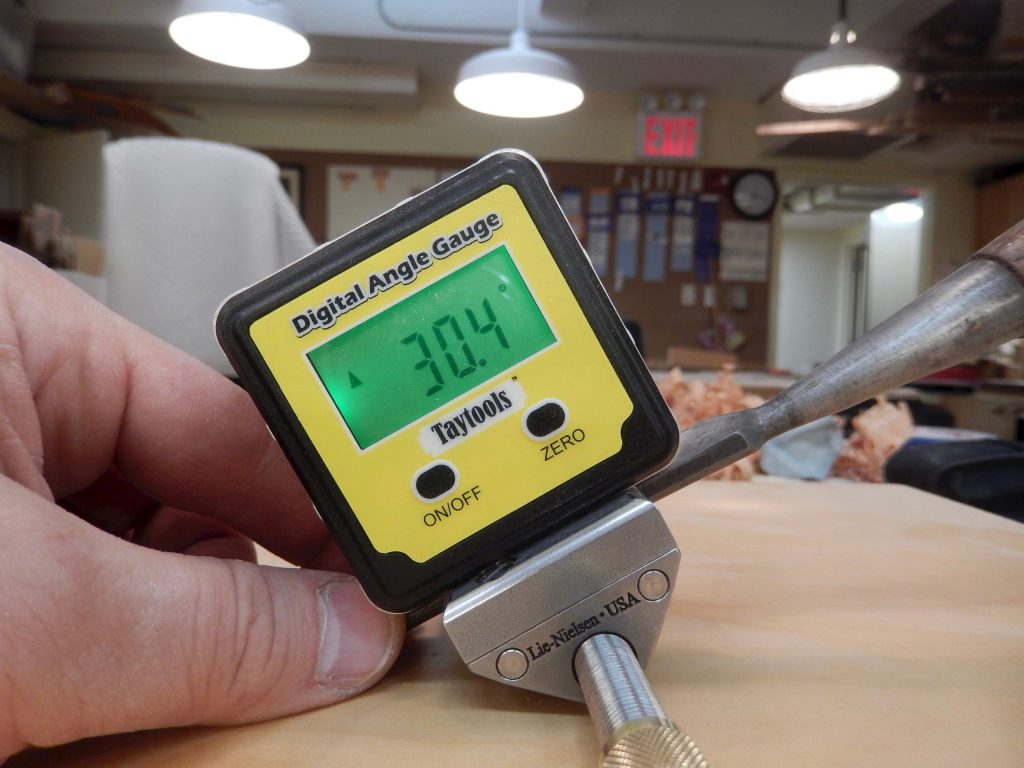
The best tool for indexing the protrusion/angle number is a square digital level. First find a flat surface to work on, lay the level on it and calibrate the level to zero degrees.
 Now affix the level to the back of your chisel or plane iron and clamp them inside your honing guide.
 Gradually protrude (or retract) the tool from the guide’s clamp until the honing angle reading matches your intention.
 Now tighten the clamp and note with a sharp pencil or a marking knife the distance between the tip of the tool and the front of your honing jig.
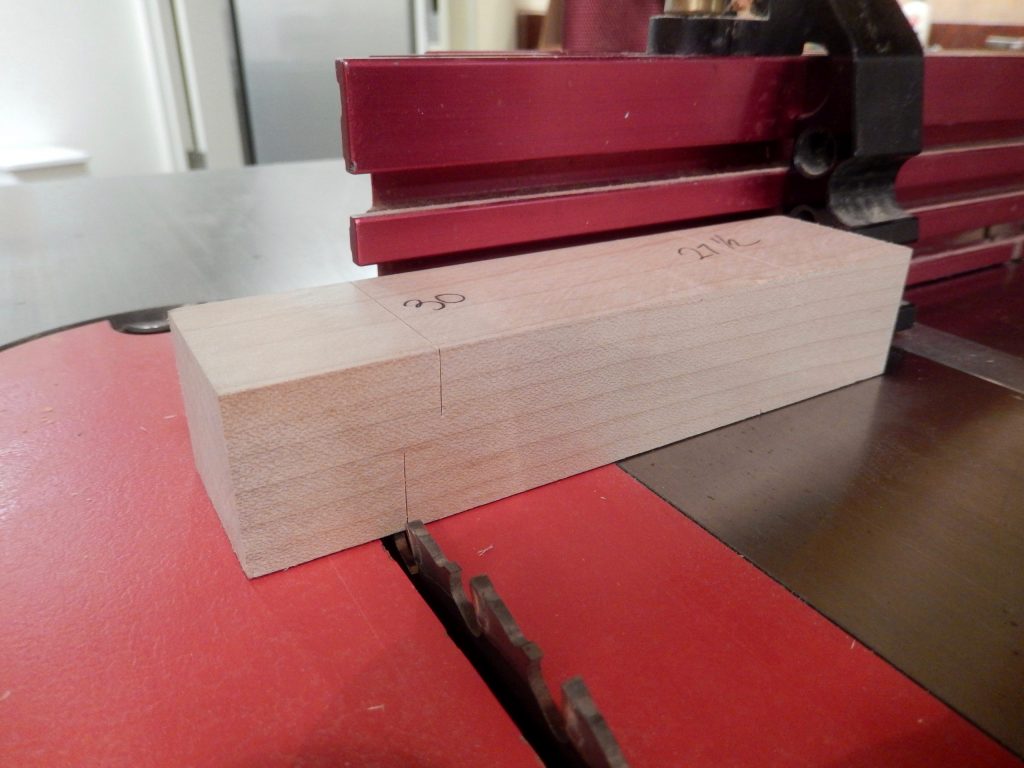
 Transfer this measurement to the wooden block – this is how deep the step should be milled. Repeat this procedure three more times to find other honing angles, then lay them out on your block.

-

- Re configure the protrusion to other honing angles and transfer the dimensions to the indexing block


-
- Using a square score the line across the block


The blocks are ready for milling. I made two identical blocks: one for my school’s LN honing guide, and the other for the guide that I have in my home shop.
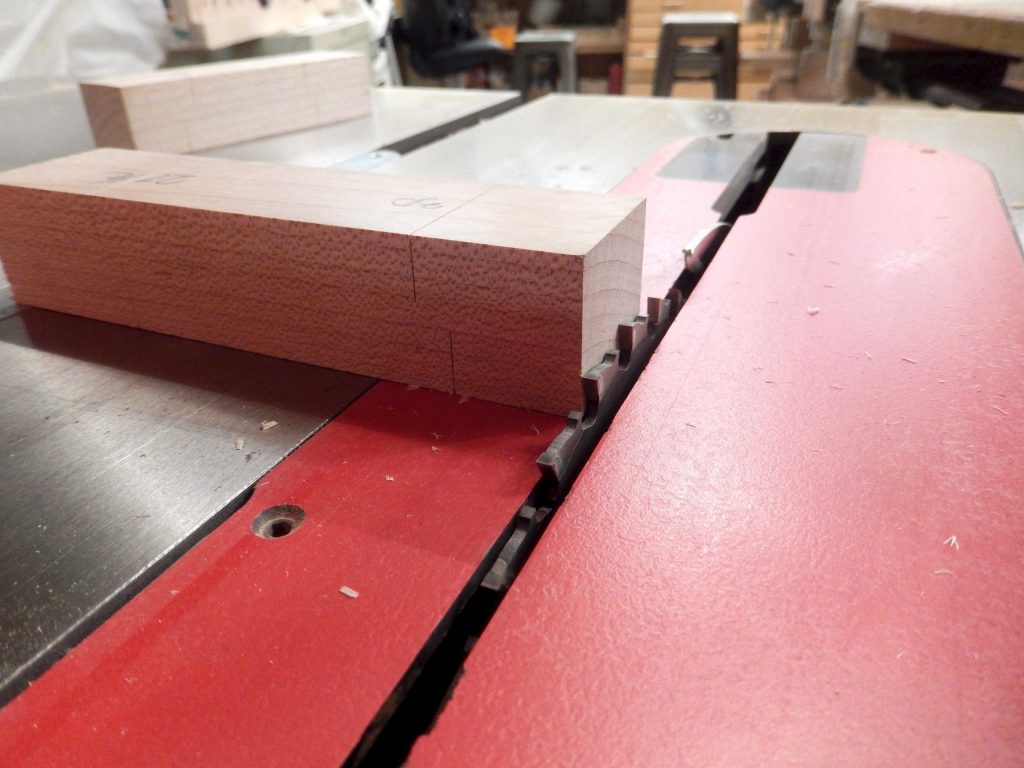
Next mill the steps. Use a bandsaw, a table saw or just work accurately with hand tools. In the end you should hold in your hand the compact four-step indexing jig.
Set the blade height
Set the cross cut location carefully.
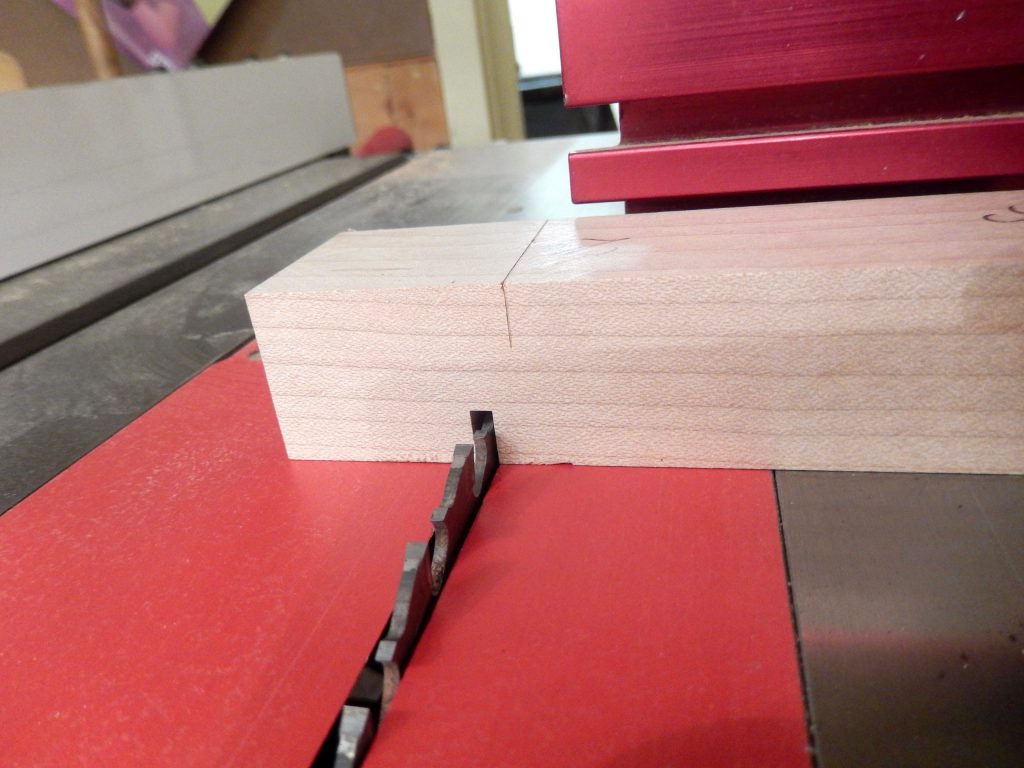
Cross cut
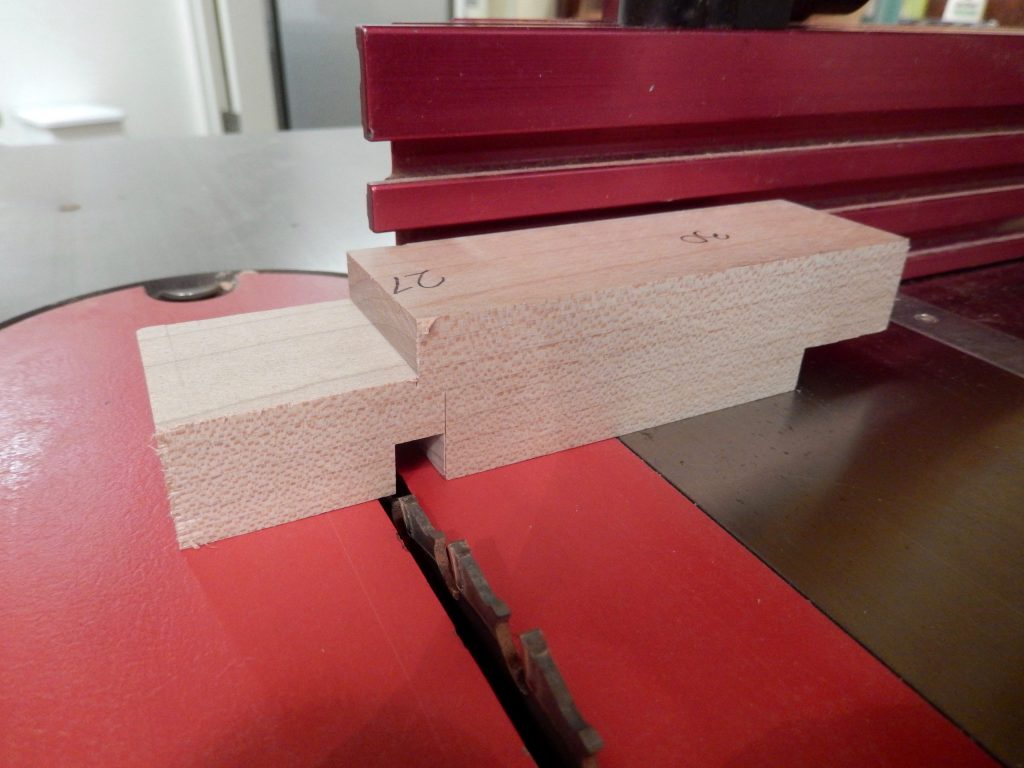
Repeat the cross cut until you completed forming the step.
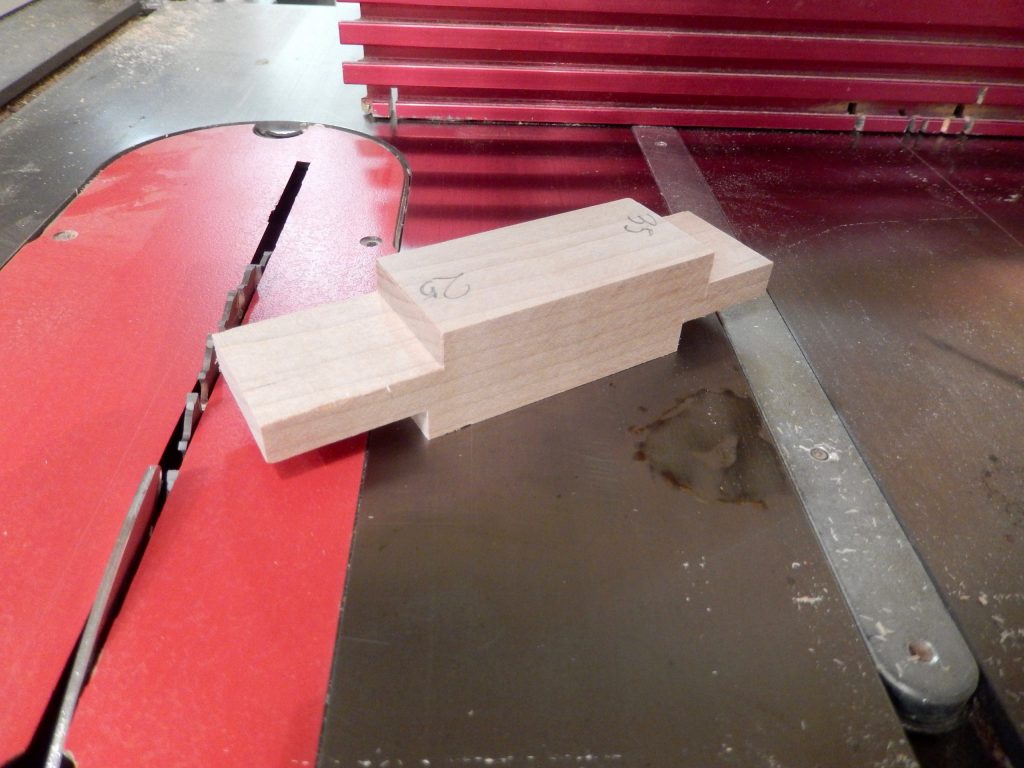
The indexing jig is ready
Using the jig is straight forward:
- Insert your edge tool into the honing guide and lightly clamp it.
- Introduce the blade’s edge to the step of your choosing.
- Adjust the length of blade protrusion (in or out of the guide) until the tip register with the step’s riser and the ledge of the honing jig reaches the edge of the wooden block.
- Tighten the clamp and begin honing.
If you own one of the Eclipse style guides you will have to decide whether to build the indexing jig to work with the lower clamping grooves (for holding chisels and narrow shoulder plane blades) or with the top grooves (for plane blades). You can of course build two jigs for each of the clamping options or make a jig with two steps for the top groves, and two for the lower one – which if you think about it might suffice for most of our sharpening challenges.
Here are some supplies and tools we find essential in our everyday work around the shop. We may receive a commission from sales referred by our links; however, we have carefully selected these products for their usefulness and quality.


