We may receive a commission when you use our affiliate links. However, this does not impact our recommendations.
Double-Duty Shop Stool
It's all plywood, and only uses a half sheet.
By Eric Smith
|
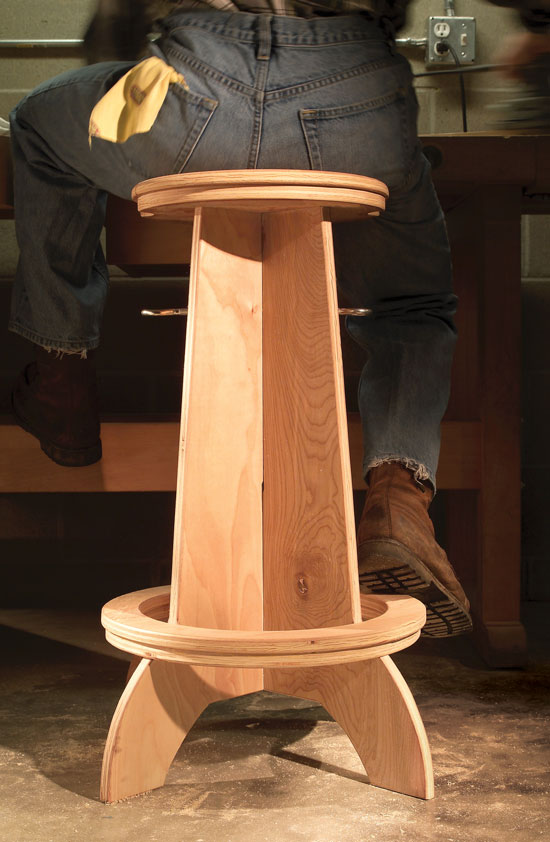
A combination stool and work support? OK, it’s an odd pair, but in my crowded shop, it makes a lot of sense. Anything that takes up less room is a good idea! The stool’s seat is divided into three pieces. When you raise the center section, you get an absolutely rigid work support that extends to 48 in. high. That’s tall enough to hold long pieces on a drill press or serve as an outfeed support for a bandsaw or tablesaw. Most commercial roller stands don’t extend this high. Just turn a simple handle—a hardware-store eye bolt—and the telescoping top locks in place. |
You may also like… |

|
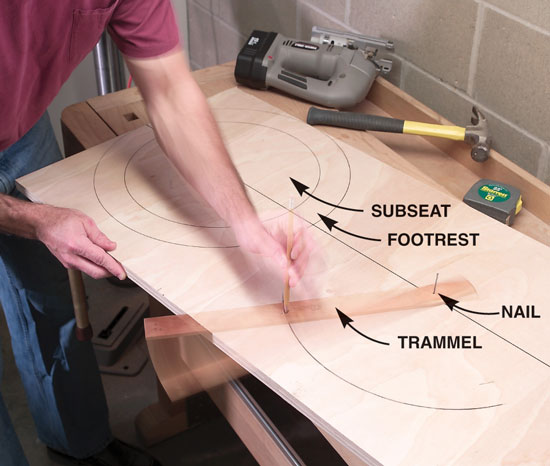
Draw two pairs of circles on a sheet of plywood. The outer circles are parts of the footrest; the inner circles are parts of the seat. For drawing circles this large, use a shop-made trammel—a thin strip of wood with a nail for a centerpoint. Cut the circles using a jigsaw. |
Click any image to view a larger version.
|
|
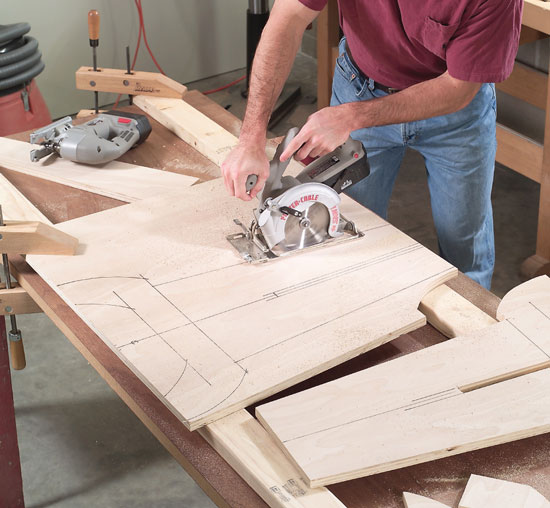
Cut out both base pieces using a circular saw and jigsaw. Support the pieces on sacrificial 2x4s. Lower the blade of the circular saw 1/4 in. below the plywood and cut right through the top of the 2x4s. |
|
|
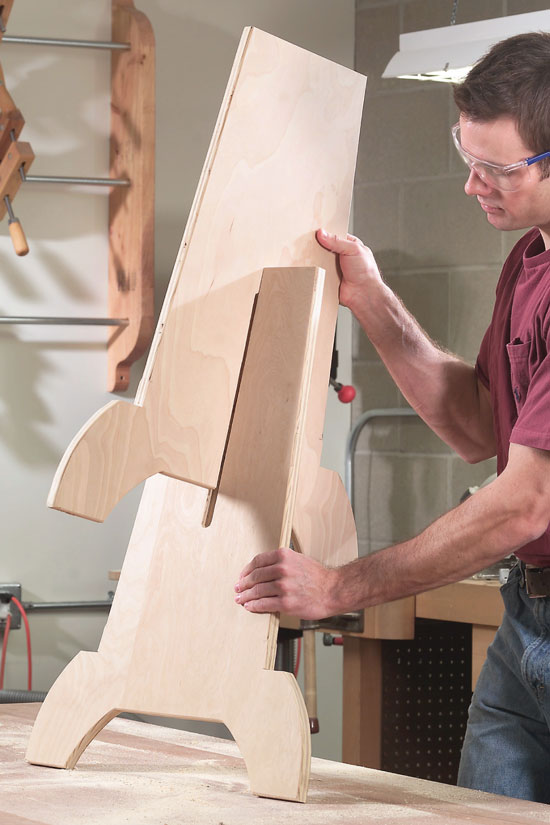
Slide the base pieces together. Don’t worry—the fit doesn’t have to be precise. Additional parts of the stool will lock these two pieces into one solid unit. |
|
|
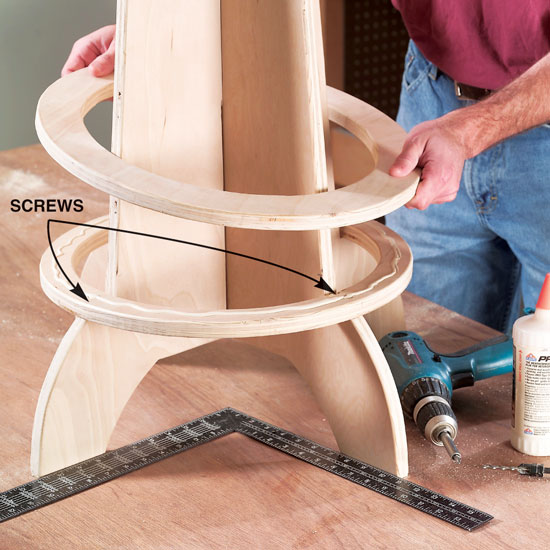
Attach the footrests in three steps. First, adjust the base pieces so they’re square to each other. Second, attach the bottom ring with screws. Third, glue and clamp the top ring. |
|
|
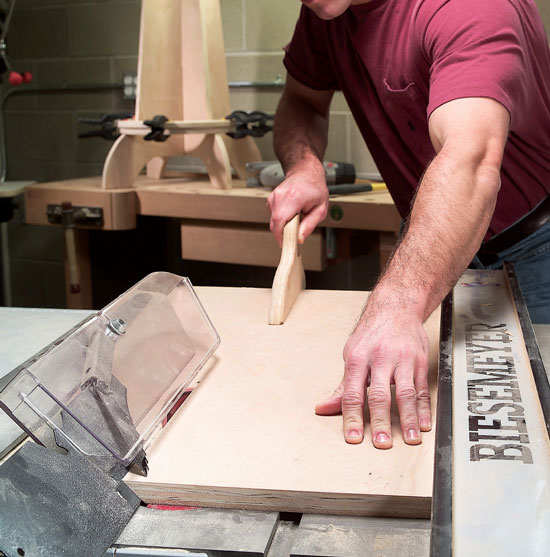
Rip two beveled corner braces on the tablesaw. To avoid kickbacks, tilt the blade away from the fence. On a right-tilt saw, shown here, that means placing the fence on the left side of the blade, opposite of where it normally goes. |
|
|
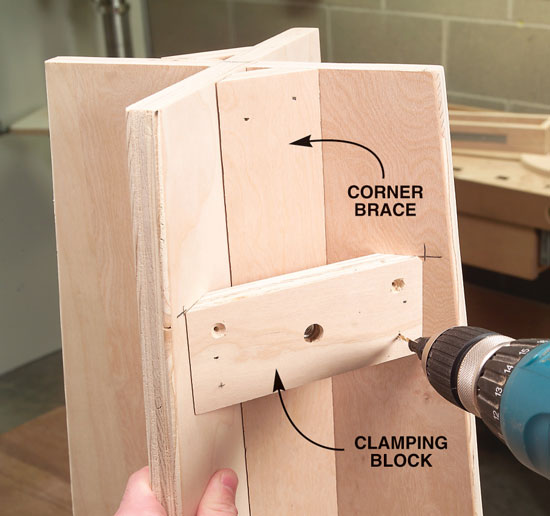
Install a clamping block with a T-nut opposite each corner brace. Temporarily tack the blocks in place using brads; then predrill pilot holes for screws. The screws go in square to the blocks. |
|
|
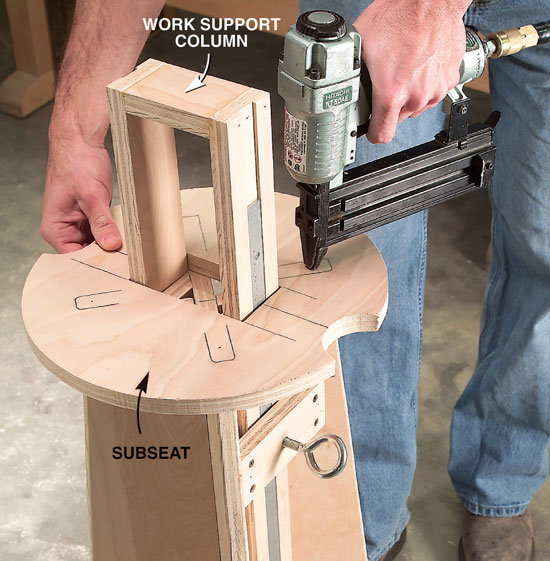
Glue and nail the subseat to the base. After the subseat is tacked in place, reinforce the joint with screws. A rectangular hole in the subseat guides the adjustable work support column. |
|
|
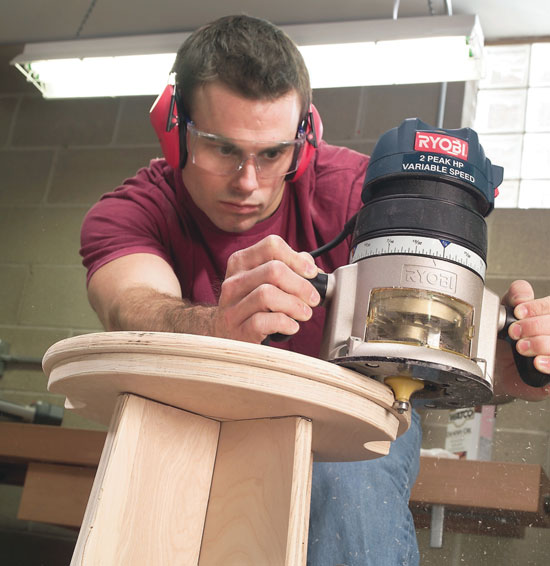
Round the edge of the top after it’s glued and nailed in place. A large radius makes the seat quite comfortable. This story originally appeared in American Woodworker October 2005, issue #117.
|
|
Here are some supplies and tools we find essential in our everyday work around the shop. We may receive a commission from sales referred by our links; however, we have carefully selected these products for their usefulness and quality.