


We may receive a commission when you use our affiliate links. However, this does not impact our recommendations.
 Sometimes, no matter how diligent we are, defects creep into our projects. Often we’re the cause and other times the defects are beyond our control. Or are they?
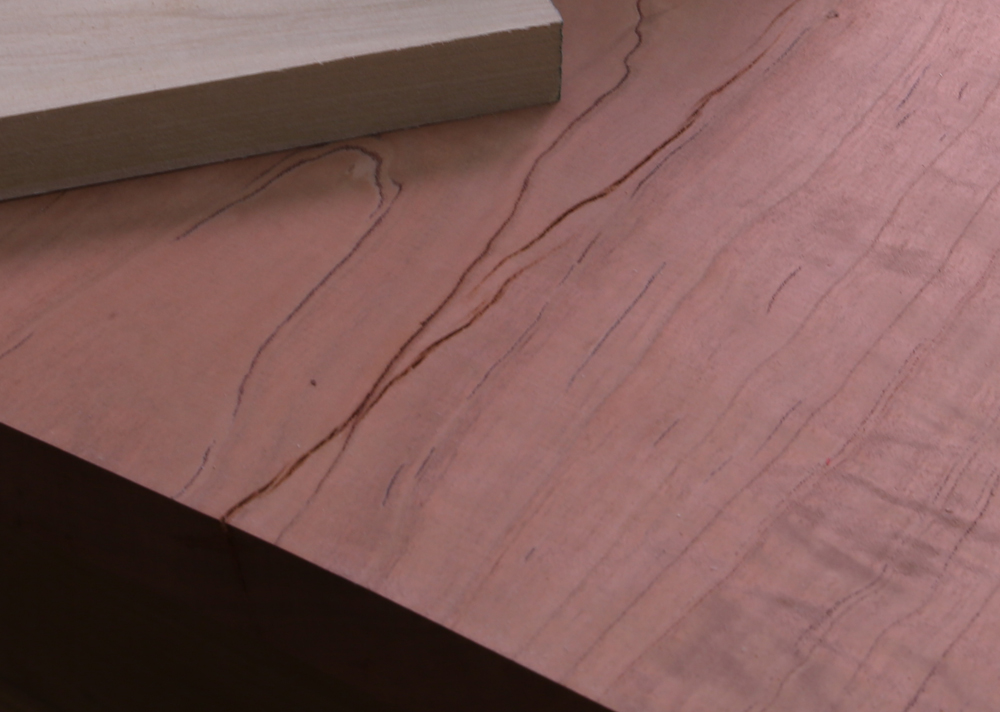
Cherry is often rather brittle and the fibers occasionally fracture while the log is still standing. So it came as no surprise as I worked the curly cherry for the April issue project that I came across a rather wide board that was substantially cracked over a great deal of its length. The crack didn’t go all the way through the board but it did run about halfway through the thickness of the plank.
I like to see wide boards used whole in pieces. The figure carries through better than narrow boards glued up and generally they’re just more impressive. One method of fixing this type of problem is to saw the board in two along the check, then glue it back together. While this minimally affects the figure in the wood if done correctly, I just couldn’t justify cutting this particular board in two.
 A solution that I’ve used for years is to mix a small amount of sawdust (created from offcuts from the same material) with a slow-setting structural epoxy (I use a 12-hour variety). The idea is to add just enough to fully color the adhesive while maintaining its ability to bond both sides of the gap.
The problem comes in how to fully fill and bond the crack. What follows are some tips that I’ve used successfully over the years.
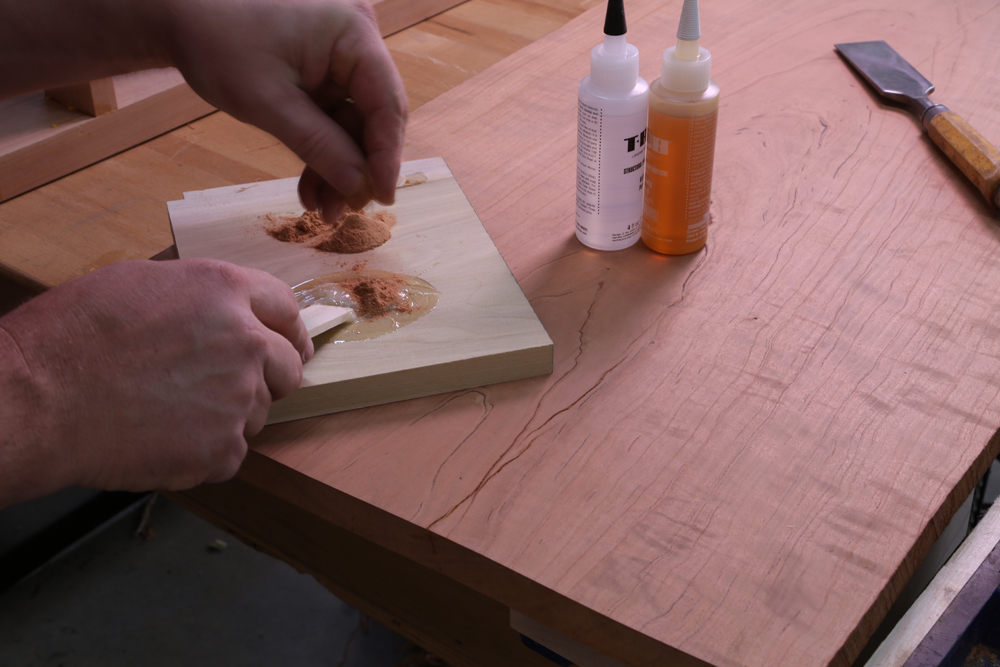 First, clamp the board into a vise or overhanging your bench. Mix the epoxy with about 30 percent sawdust and start spreading it across the board forcing it into the check. Once you’ve forced as much epoxy into the crack as you can, gently (and I can’t emphasize the word “gently” enough) put pressure on the part of the board hanging in space. Rock that portion of the board back and forth while using the epoxy spreader (I often use a pallet knife but sometimes resort to a thin stick) to force more epoxy into the void. Did I mention you need to do this gently?
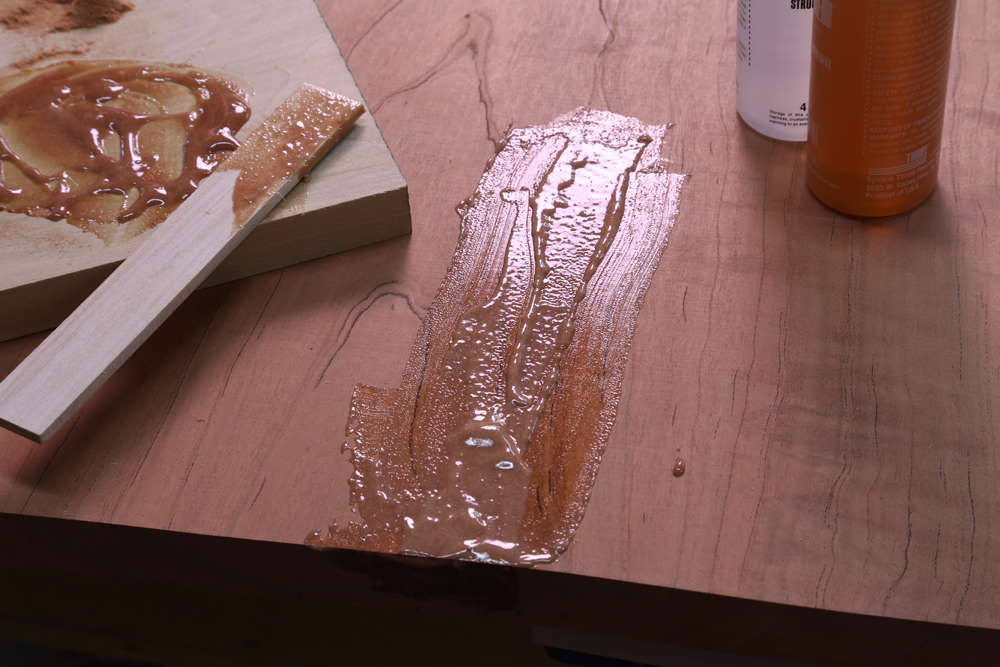 Once you see epoxy being squeezed from the deepest part of the crack, you’re almost done. Force a little more epoxy into the crack, leaving some mounded on top of the board’s surface. This way, as the epoxy slowly cures and gravity does with it will do (the epoxy will continue to seep into the crack and will also shrink a little as it cures), you won’t end up with a partially filled crack. If the void is particularly deep or troublesome, you might also use compressed air and a blow-gun to force the epoxy into the crack (providing you have compressed air available in your shop).
Another tip is to leave the board a little over in thickness, then fill the crack. When the epoxy fully cures (in my case the next day), rasp off the bulk of the extra epoxy then run the board through the planer to final thickness. This saves cleaning epoxy off the sole of your smooth plane (don’t ask me how I know).
The great thing about using a structural adhesive epoxy is that it is both gap filling and bonding at the same time. It’s tough stuff that, at least in my experience, has lasted decades without incident. Wood is an imperfect medium but this trick will allow you to maintain its beauty without compromising the structure of a project.
P.S. – 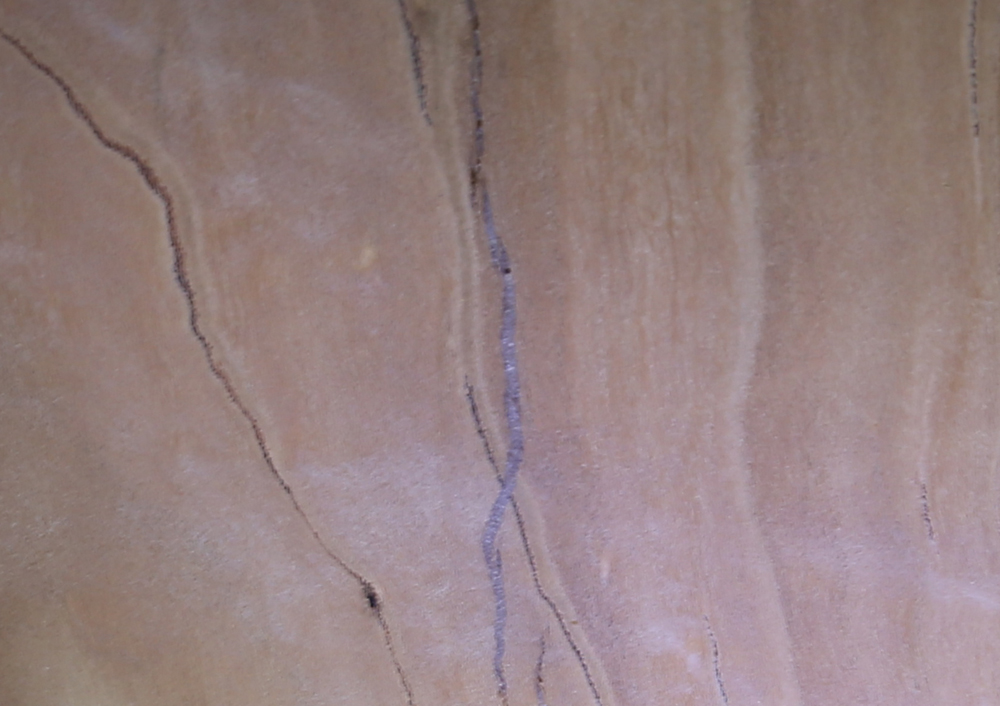 Over the weekend I received an email asking to see a picture of the crack after the epoxy has cured and been leveled with the rest of the board. It’s not the best shot but here goes. As you can see, the check is filled and the color is not far off from the surrounding surface. If it were not on the interior of the piece I’m making, it would blend fairly well once color and finish were applied.
Here are some supplies and tools we find essential in our everyday work around the shop. We may receive a commission from sales referred by our links; however, we have carefully selected these products for their usefulness and quality.


Chuck,
I used to fill the epoxy with sawdust as you have and I know of people who use cinamon and such as a colorant. I find if i just use the epoxy alone it actually looks better as it picks up the color along the crack and blends in better. try it on a scrap!
Here’s an example of where Don Williams used EVA as an adhesive for cracked wood:
http://donsbarn.com/shoe-polish-saves-the-day/#comment-29
My woodworking teacher told me to use pocket screws and glue 🙂
I have a friend who began a business making slab furniture, and he filled cracks using epoxy. After a few years, he started receiving complaints about the cracks continuing past where he’d filled them. He was sure the problem was too much moisture exchange, so he started sealing the slabs with clear epoxy so they wouldn’t expand and contract. When he told me about this, I shook my head, not wanting to believe someone would try to lock wood – beautiful, breathing wood – into a plastic shell. But his experience led me to research the topic of filling cracks. I came upon this gem-of-an-article written by Don Williams, senior furniture conservator at the Smithsonian. The gist of his research is that epoxy, because its rigidity, will eventually exacerbate fractures, and that flexible and reversible EVA hot melt glue is the definitive gap-filling adhesive. It makes so much darned sense when reckoning that wood will continue to move. https://s3.amazonaws.com/theBarn/Articles/Conservation/Williams,Don-Gap_Filling_Adhesives.pdf.
I work quite a bit in mesquite. My preferred technique is to dye the epoxy black and fill the crack, emphasizing the character marks and harmonizing with natural marks in the wood. Some of my friends use turquoise, other minerals, even copper flakes and other metals, though that is not my preference. While the use of a matching sawdust works well, dye also gives you the option of greater color control.
Hey Chuck,
I often use epoxy as well, but rather than try to hide the defect, I tend to celebrate it by filling it with a contrasting crushed mineral. I’ve used turquoise in mesquite, malachite in walnut, and garnet in maple. You can also guild the defect with gold, silver or bronze leaf, after, or instead of, filling it with epoxy.
I generally regard most defects as character elements to be employed rather than disguised.
Just my 2¢
Tom