


We may receive a commission when you use our affiliate links. However, this does not impact our recommendations.
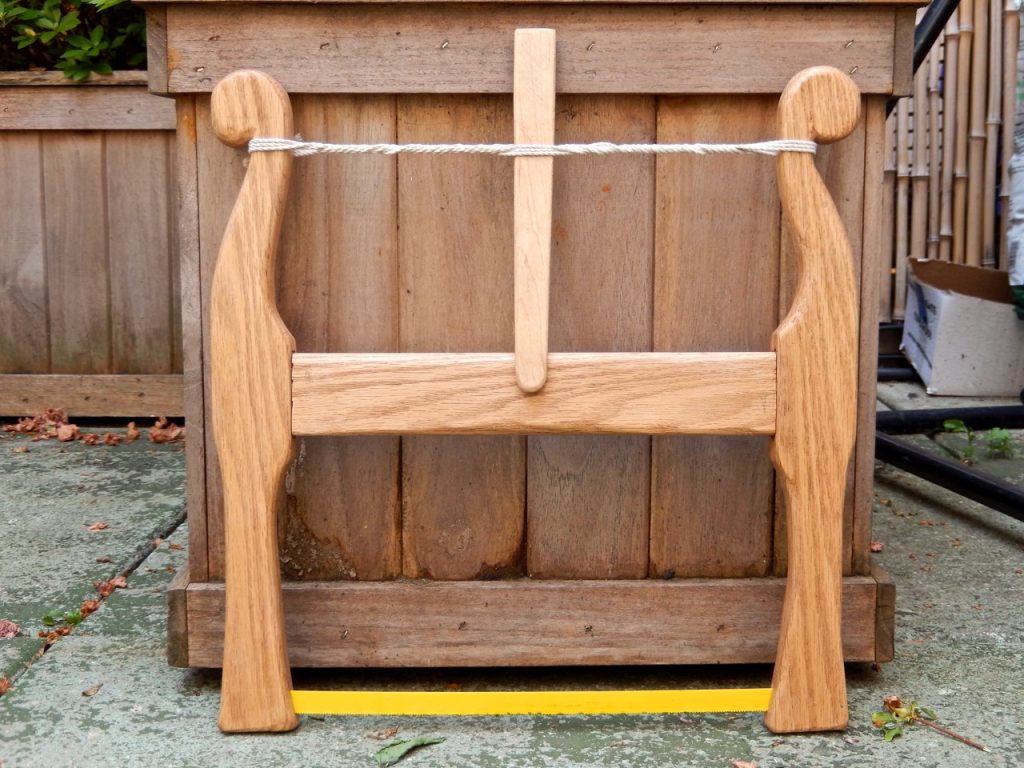
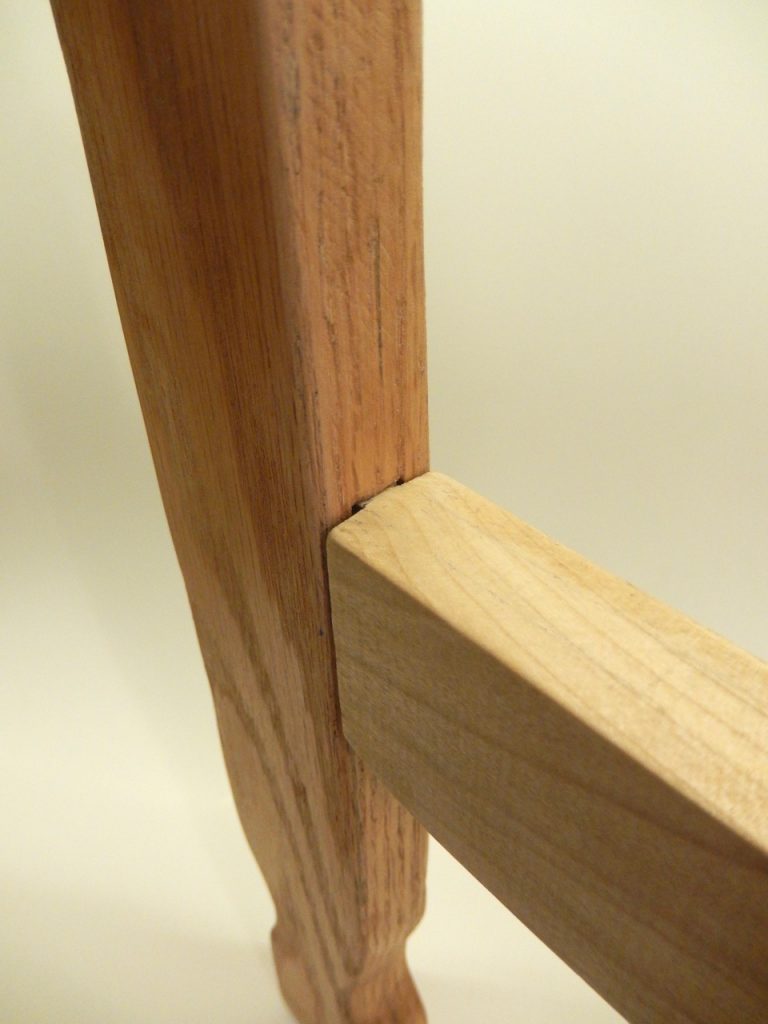
Stefania’s saw
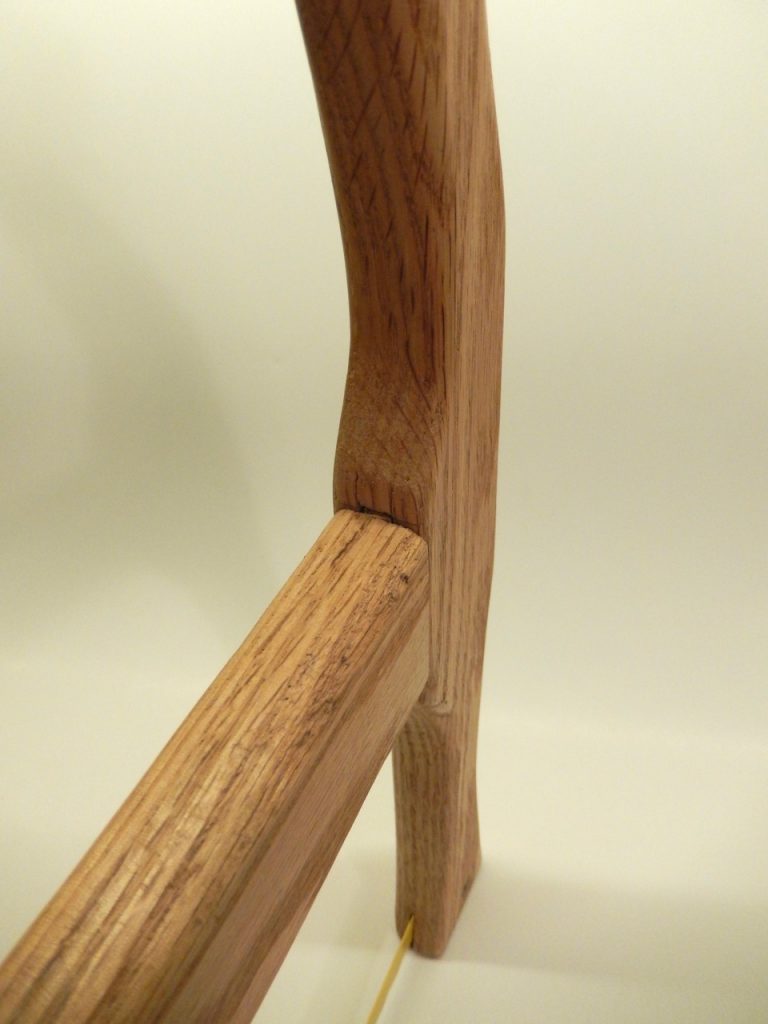
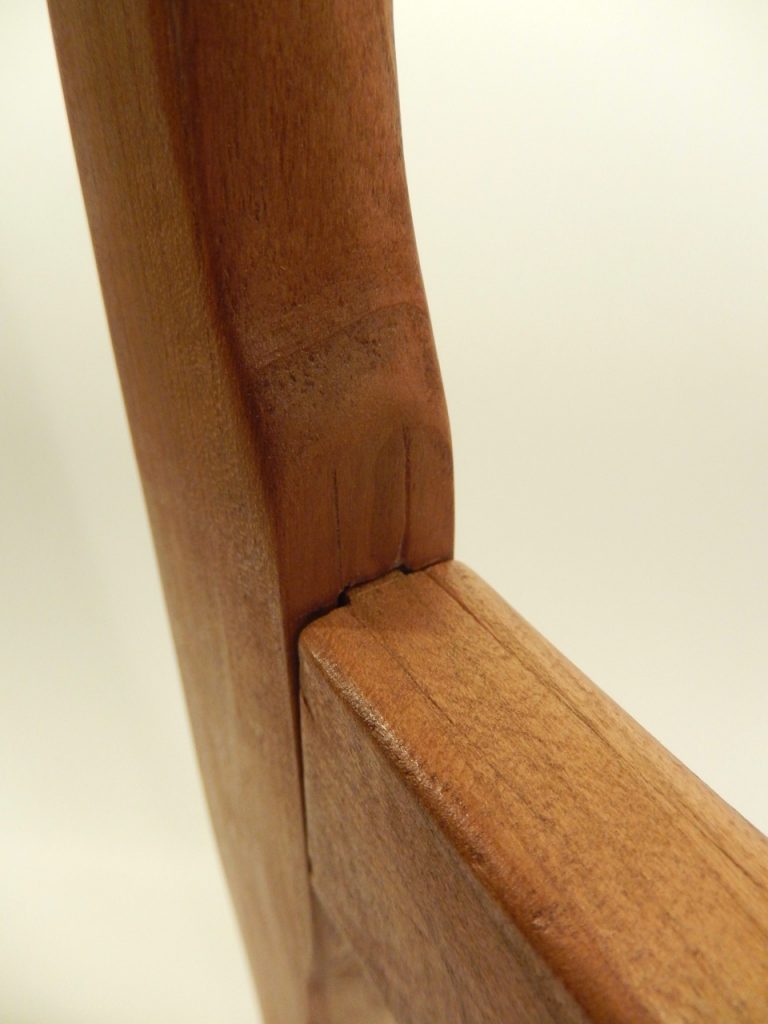
Stefania’s saw, detail
A few months ago I blogged about plans for a frame saw design that was equipped with a hack saw blade. I explained how I intended to build this saw with my seventh grade class, focusing on excavating mortises and shaping tenons, using hand tools only.
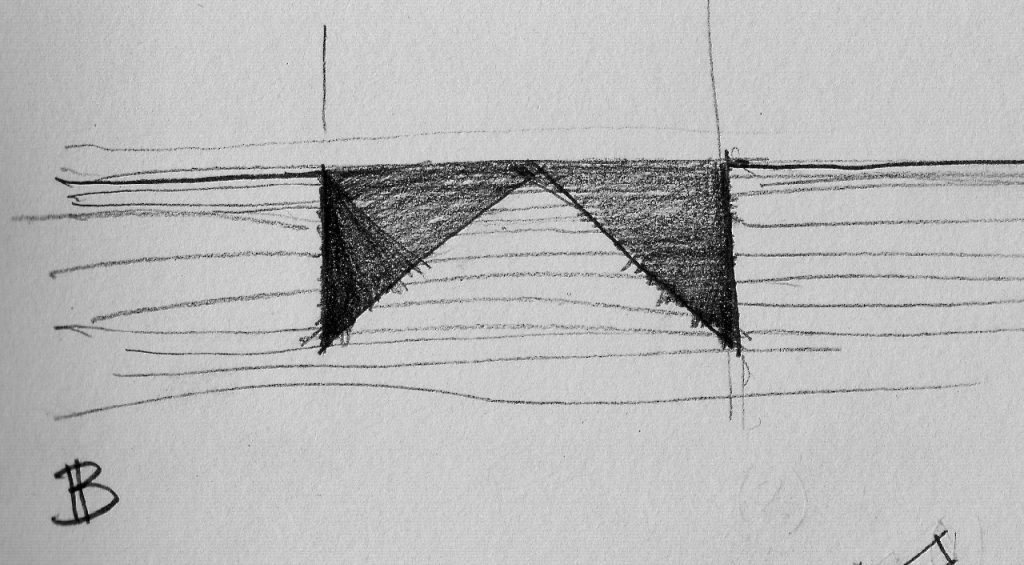
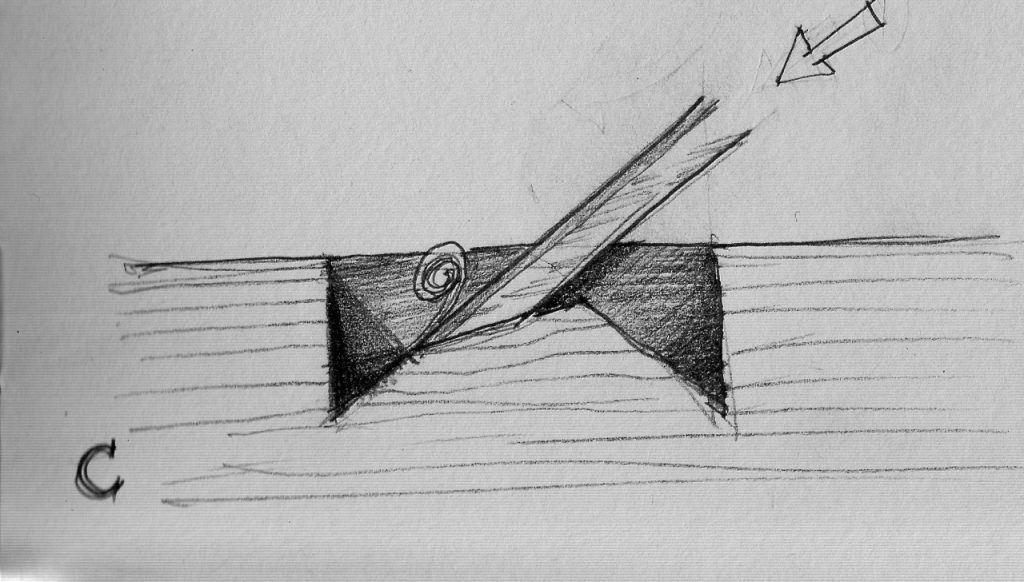
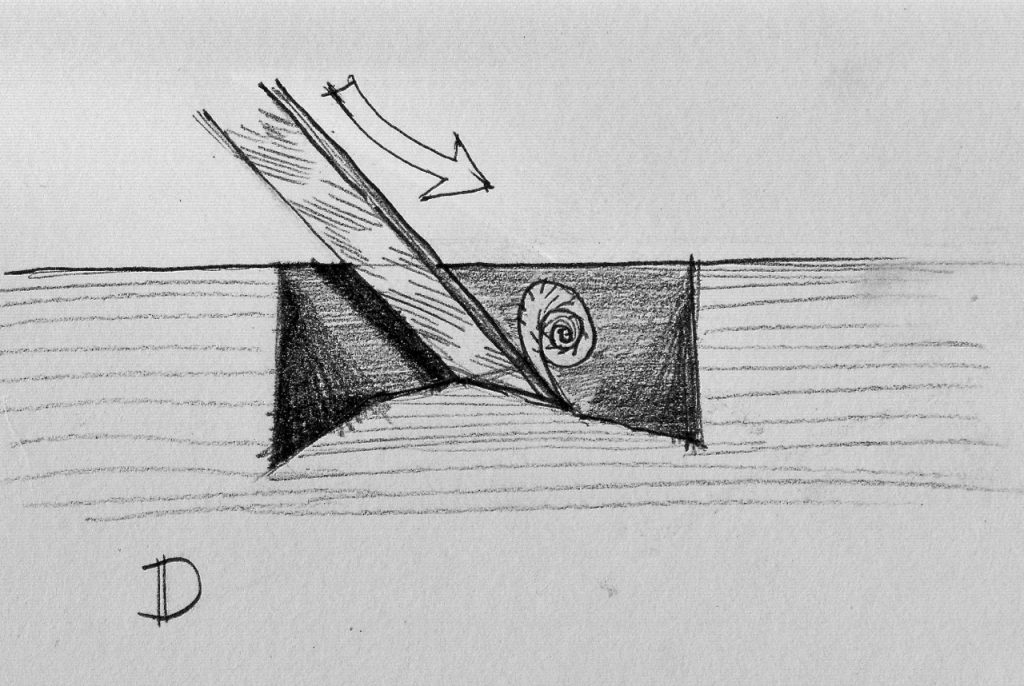
Now that the school year has ended, I can show you some of the final products. I also want to reveal that I did a small modification on the mortising technique that I initially showed to my students. I originally demonstrated this technique specifies using the chisel at an acute angle, bevel up, to hog out the mortise’s slopes. But after noticing some difficulties by my young students driving the chisel that way, I changed it to bevel down. I’ve learned over the years that when there are difficulties, always default to bevel down. Once my students tried it that way, they discovered that they needed to apply less force and that their results were more controllable and predictable. Below you can find sketches of the modified mortising technique and a lengthier explanation of this project. Additionally, if you would like to read the original blog entries click on the links at the bottom of this blog entry.
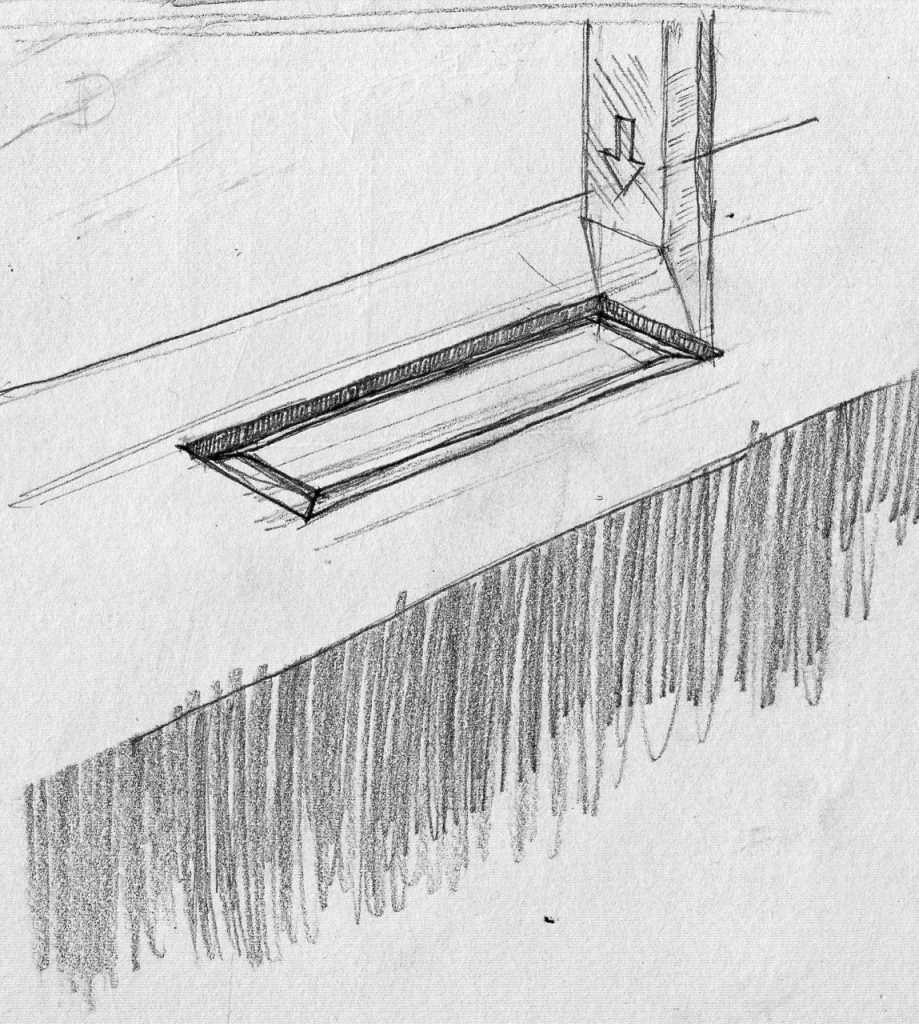
Create a knife wall in the parameter of the mortise.

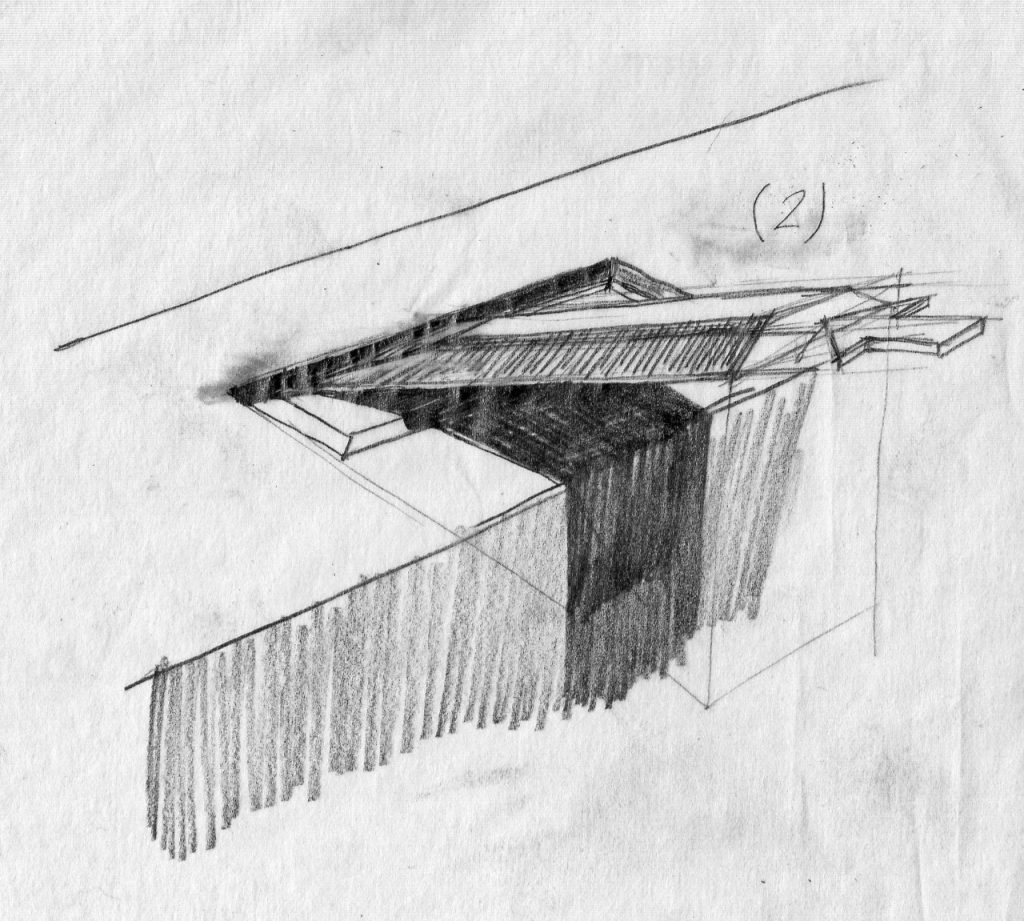
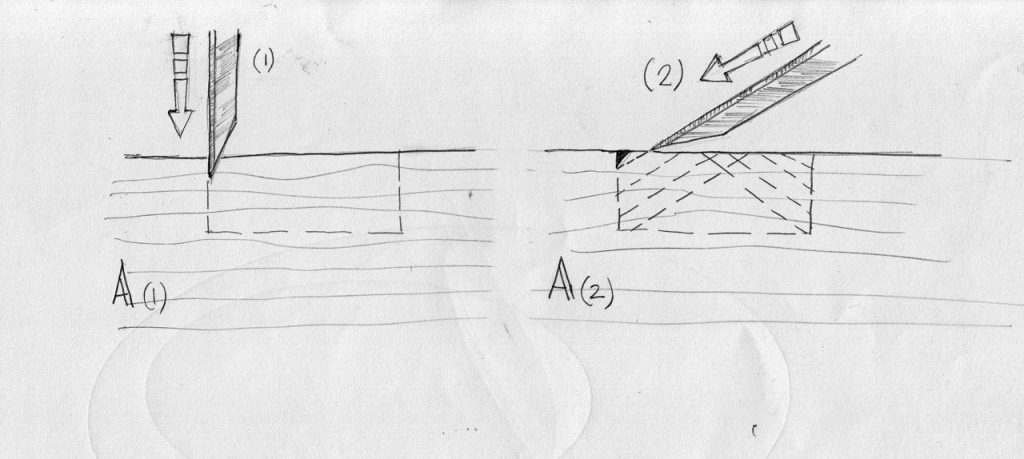
Use the chisel at an acute angle, bevel down, to hog out the mortise’s slopes.
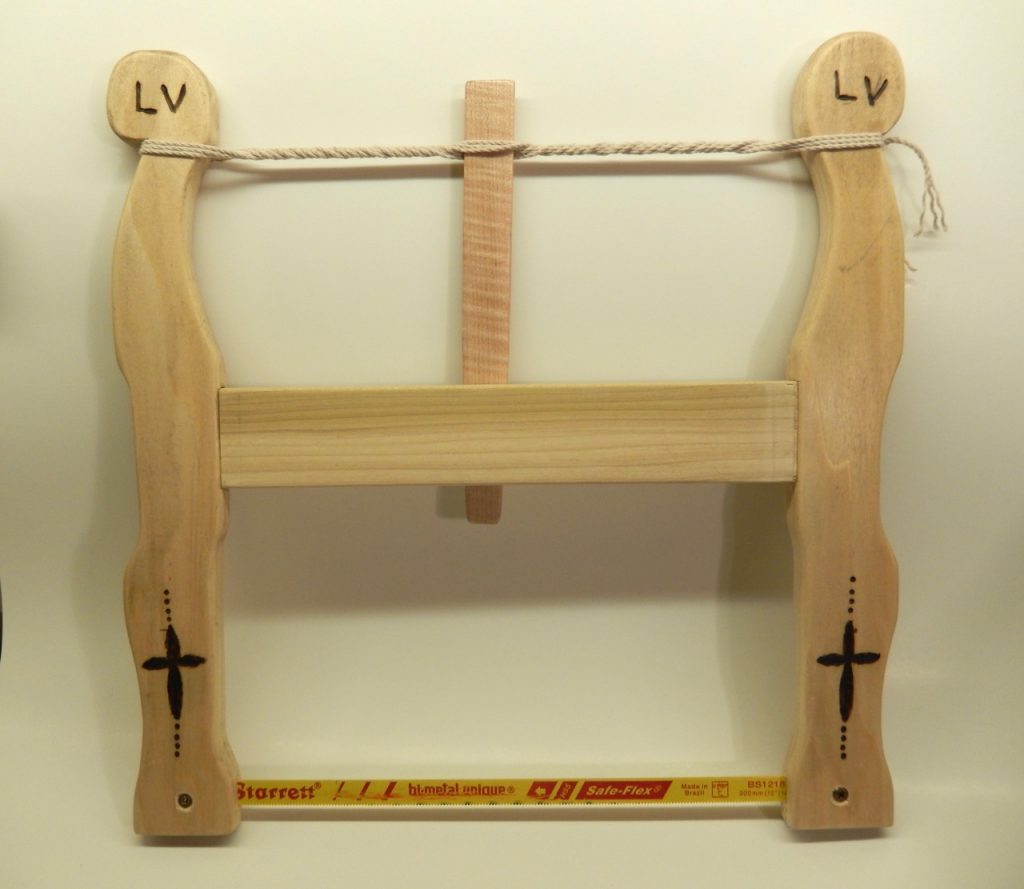
Explanation about our saw project
The seventh grade frame saw class presented the students with the challenge of creating a tool for cutting wood and metal. The pattern of our saw is based on a millennia-old form that has proven to be one of the most successful designs known to man. Our saw’s contraption is fitted with a standard hacksaw blade that is tensioned via a twist of a rope and wedge mechanism. At the beginning of our project, students were asked to form the saw’s frame and to precisely cut and shape its mortise and tenon joints. They then refined their saw’s frame by superimposing their own design onto it in order to make it both functional and beautiful.
Building a functioning tool is a fantastic skill-building exercise for anyone who studies woodworking. This is true whether it is a mallet, a spoon or a butter knife. The process of creating an object that will be used for making other objects, as in the case of the frame saw, adds magic to the learning process. Our saw project requires attention to detail and it demands precision in building its interdependent parts. A frame saw requires a careful layout, marking, cutting and aligning its “H” frame parts. Additionally, prudent excavation of the two mortises is required, as is careful shaving of the complimentary tenons. Both mortises and tenons have to work in tandem, with just the right amount of lateral movement to facilitate tensioning of the blade. Our frame saw uses a common 12” 18 TPI hacksaw blade, which allows us to cut wood or metal and is available at any hardware store.
The “H” frame is the basis for a functional saw but it doesn’t mean that it should retain its simple “H” figure. Our students were encouraged to carve, sculpt and chamfer the parts to make them both comfortable to hold and beautiful to look at. Some of our students chose to be influenced by geometrical, animal or architectural themes when developing their saw’s design.
Lastly, a frame saw is a great demonstration of the physical forces that govern many of the structures that surround us, i.e. compression, bending and tension.
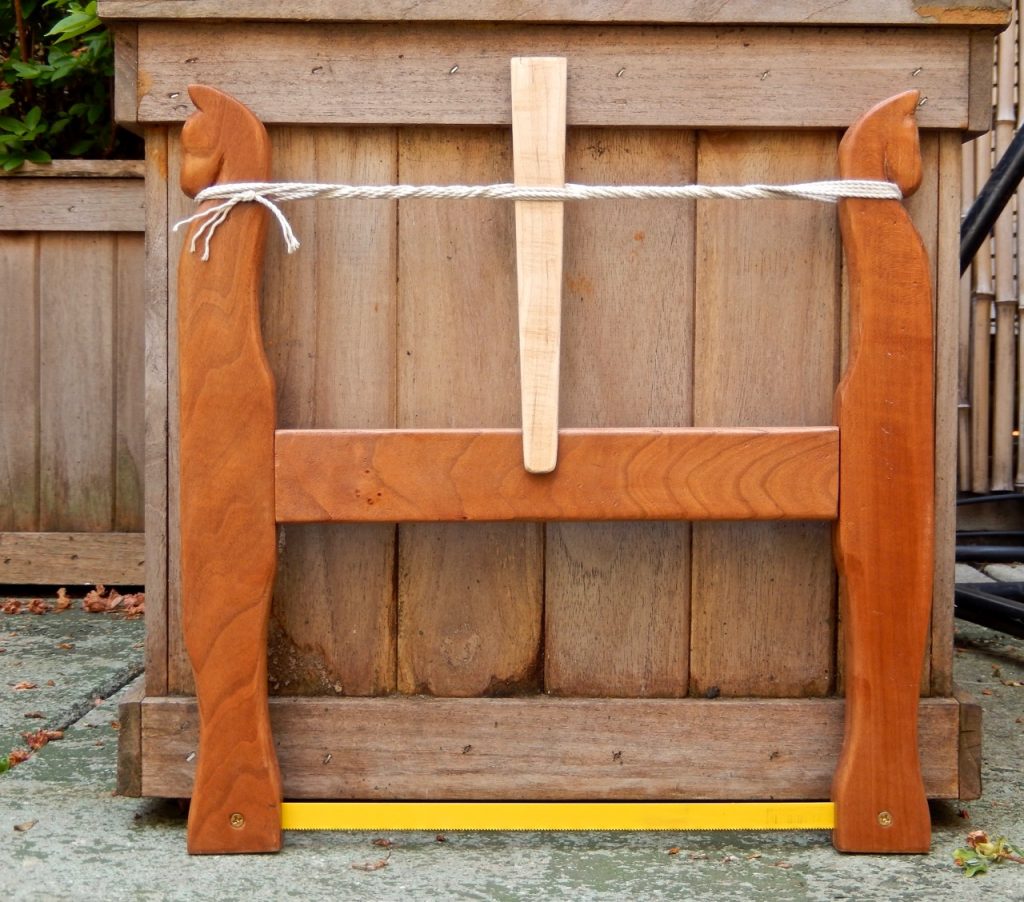
Julia’s cherry “Horses” saw
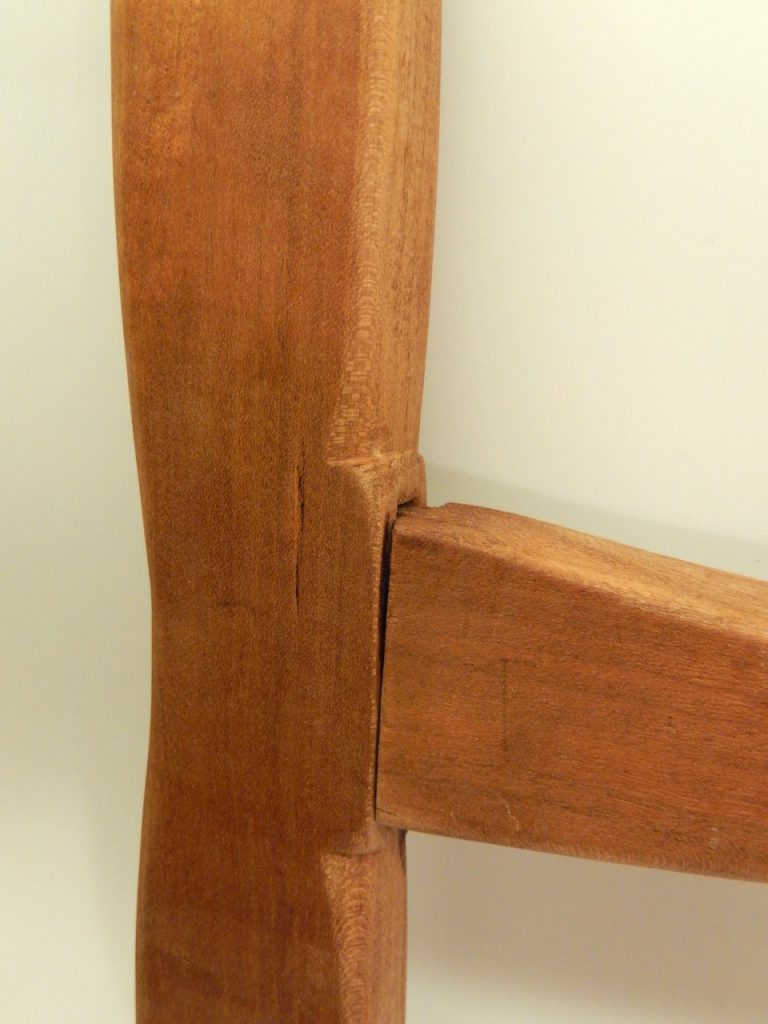
Julia’s “Horses” saw’s mortise & tenon detail

Sam’s saw

Sam’s saw
Lucia’s saw

Miranda’s saw
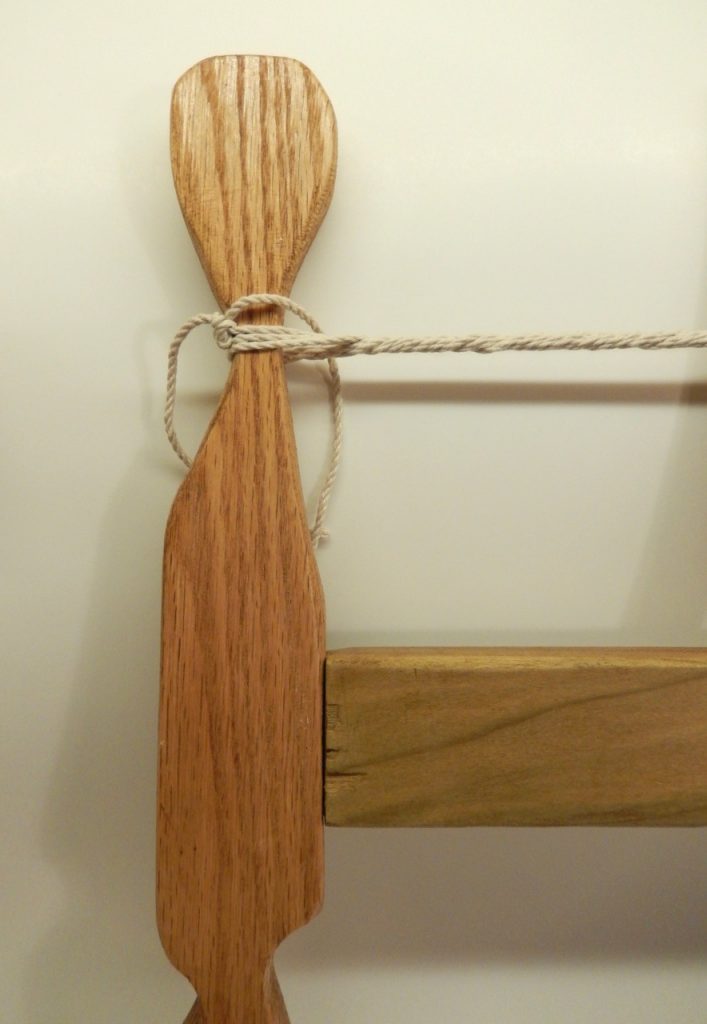
Miranda’s saw. Joinery details.
Another great looking mortise and tenon
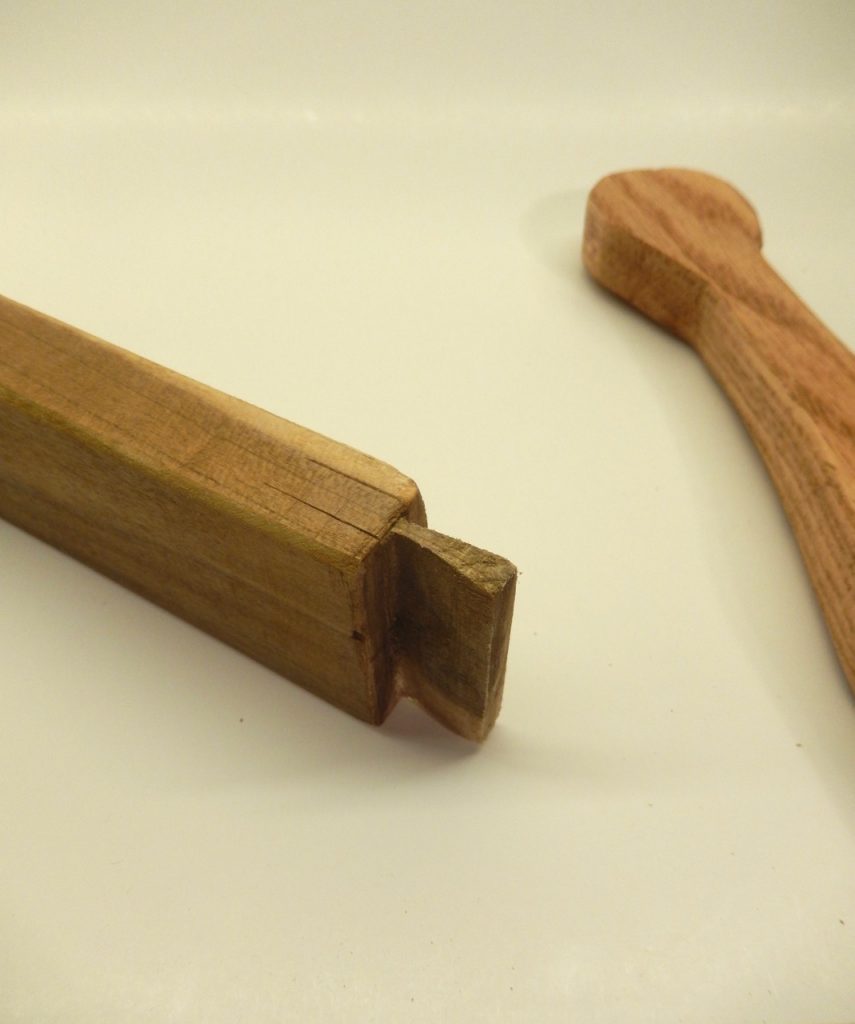
In a few cases a student over cut his or her tenon and in two cases we had to glue a wood shim over and after the glue dried to re-shape the tenon.
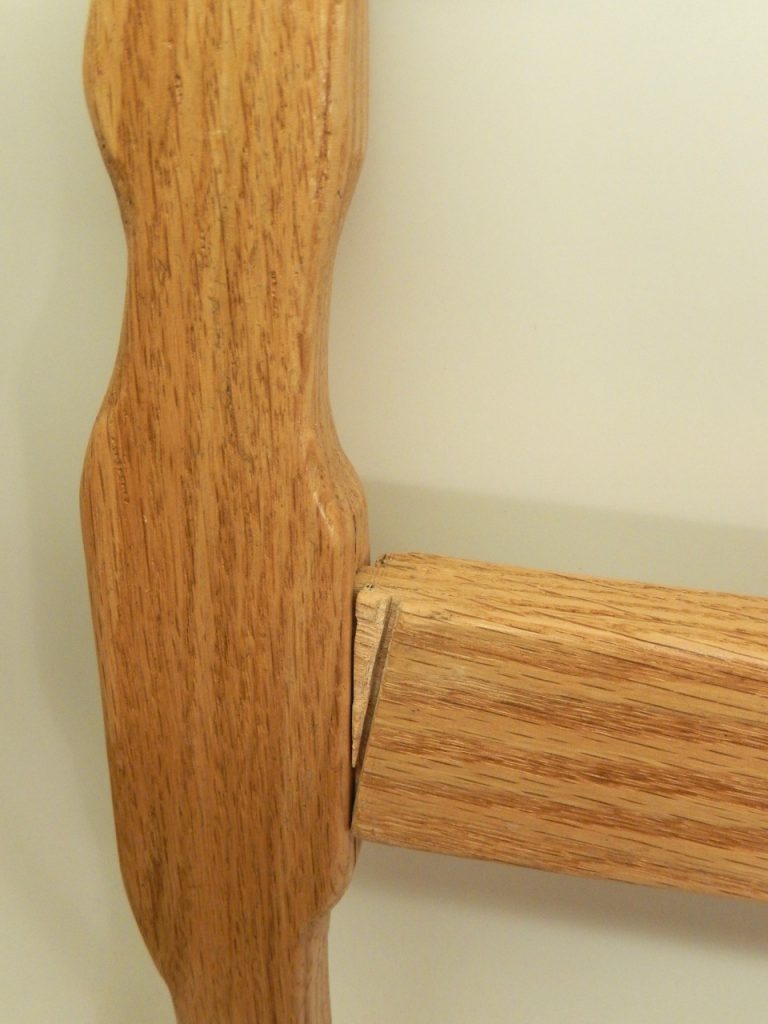
The neck of this frame saw’s arm was cut too narrow. I tested it for tension and the oak wood arm held well. Oak is such a strong wood…
In this case I spotted just in time a sawing mistake that could have been challenging to the integrity of this tenon.
 If you want to learn more about using and maintaining handsaws, check out “Handsaw Essentials” by Christopher Schwarz at shopwoodworking.com…
Here are some supplies and tools we find essential in our everyday work around the shop. We may receive a commission from sales referred by our links; however, we have carefully selected these products for their usefulness and quality.


Some 66 years ago, in fourth grade, on our afternoon off, school offered a woodworking class which I took.
I haven’t been a master woodworker, but I like to work with wood.
Anyway, at that time, our teacher instructed us to ALWAYS use a chisel with the bevel down since that gave you less chance of the chisel digging deep into the wood and would be a more controlled operation!
Glad to see this reconfirmed in my new home country.
The kids did a great job! Thanks for posting their work. It put a big smile on my face and really made my day. I love the personal touches and especially love the “mistakes” because they learned they could be easily fixed (over cut tenon) or really weren’t a problem (saw arm to narrow).