


We may receive a commission when you use our affiliate links. However, this does not impact our recommendations.
Building customized storage solutions is one of the joys of being a woodworker. I never seem to have enough storage at home or in the shop. On days when I don’t have a lot of time in the shop, when I have some nice scraps I want to use or when I want a quick warm-up, I often find myself making boxes and other storage solutions for items I want to take care of. Over the next few posts I’ll explore a few storage solutions of increasing complexity that I hope will inspire you to get out into the shop.

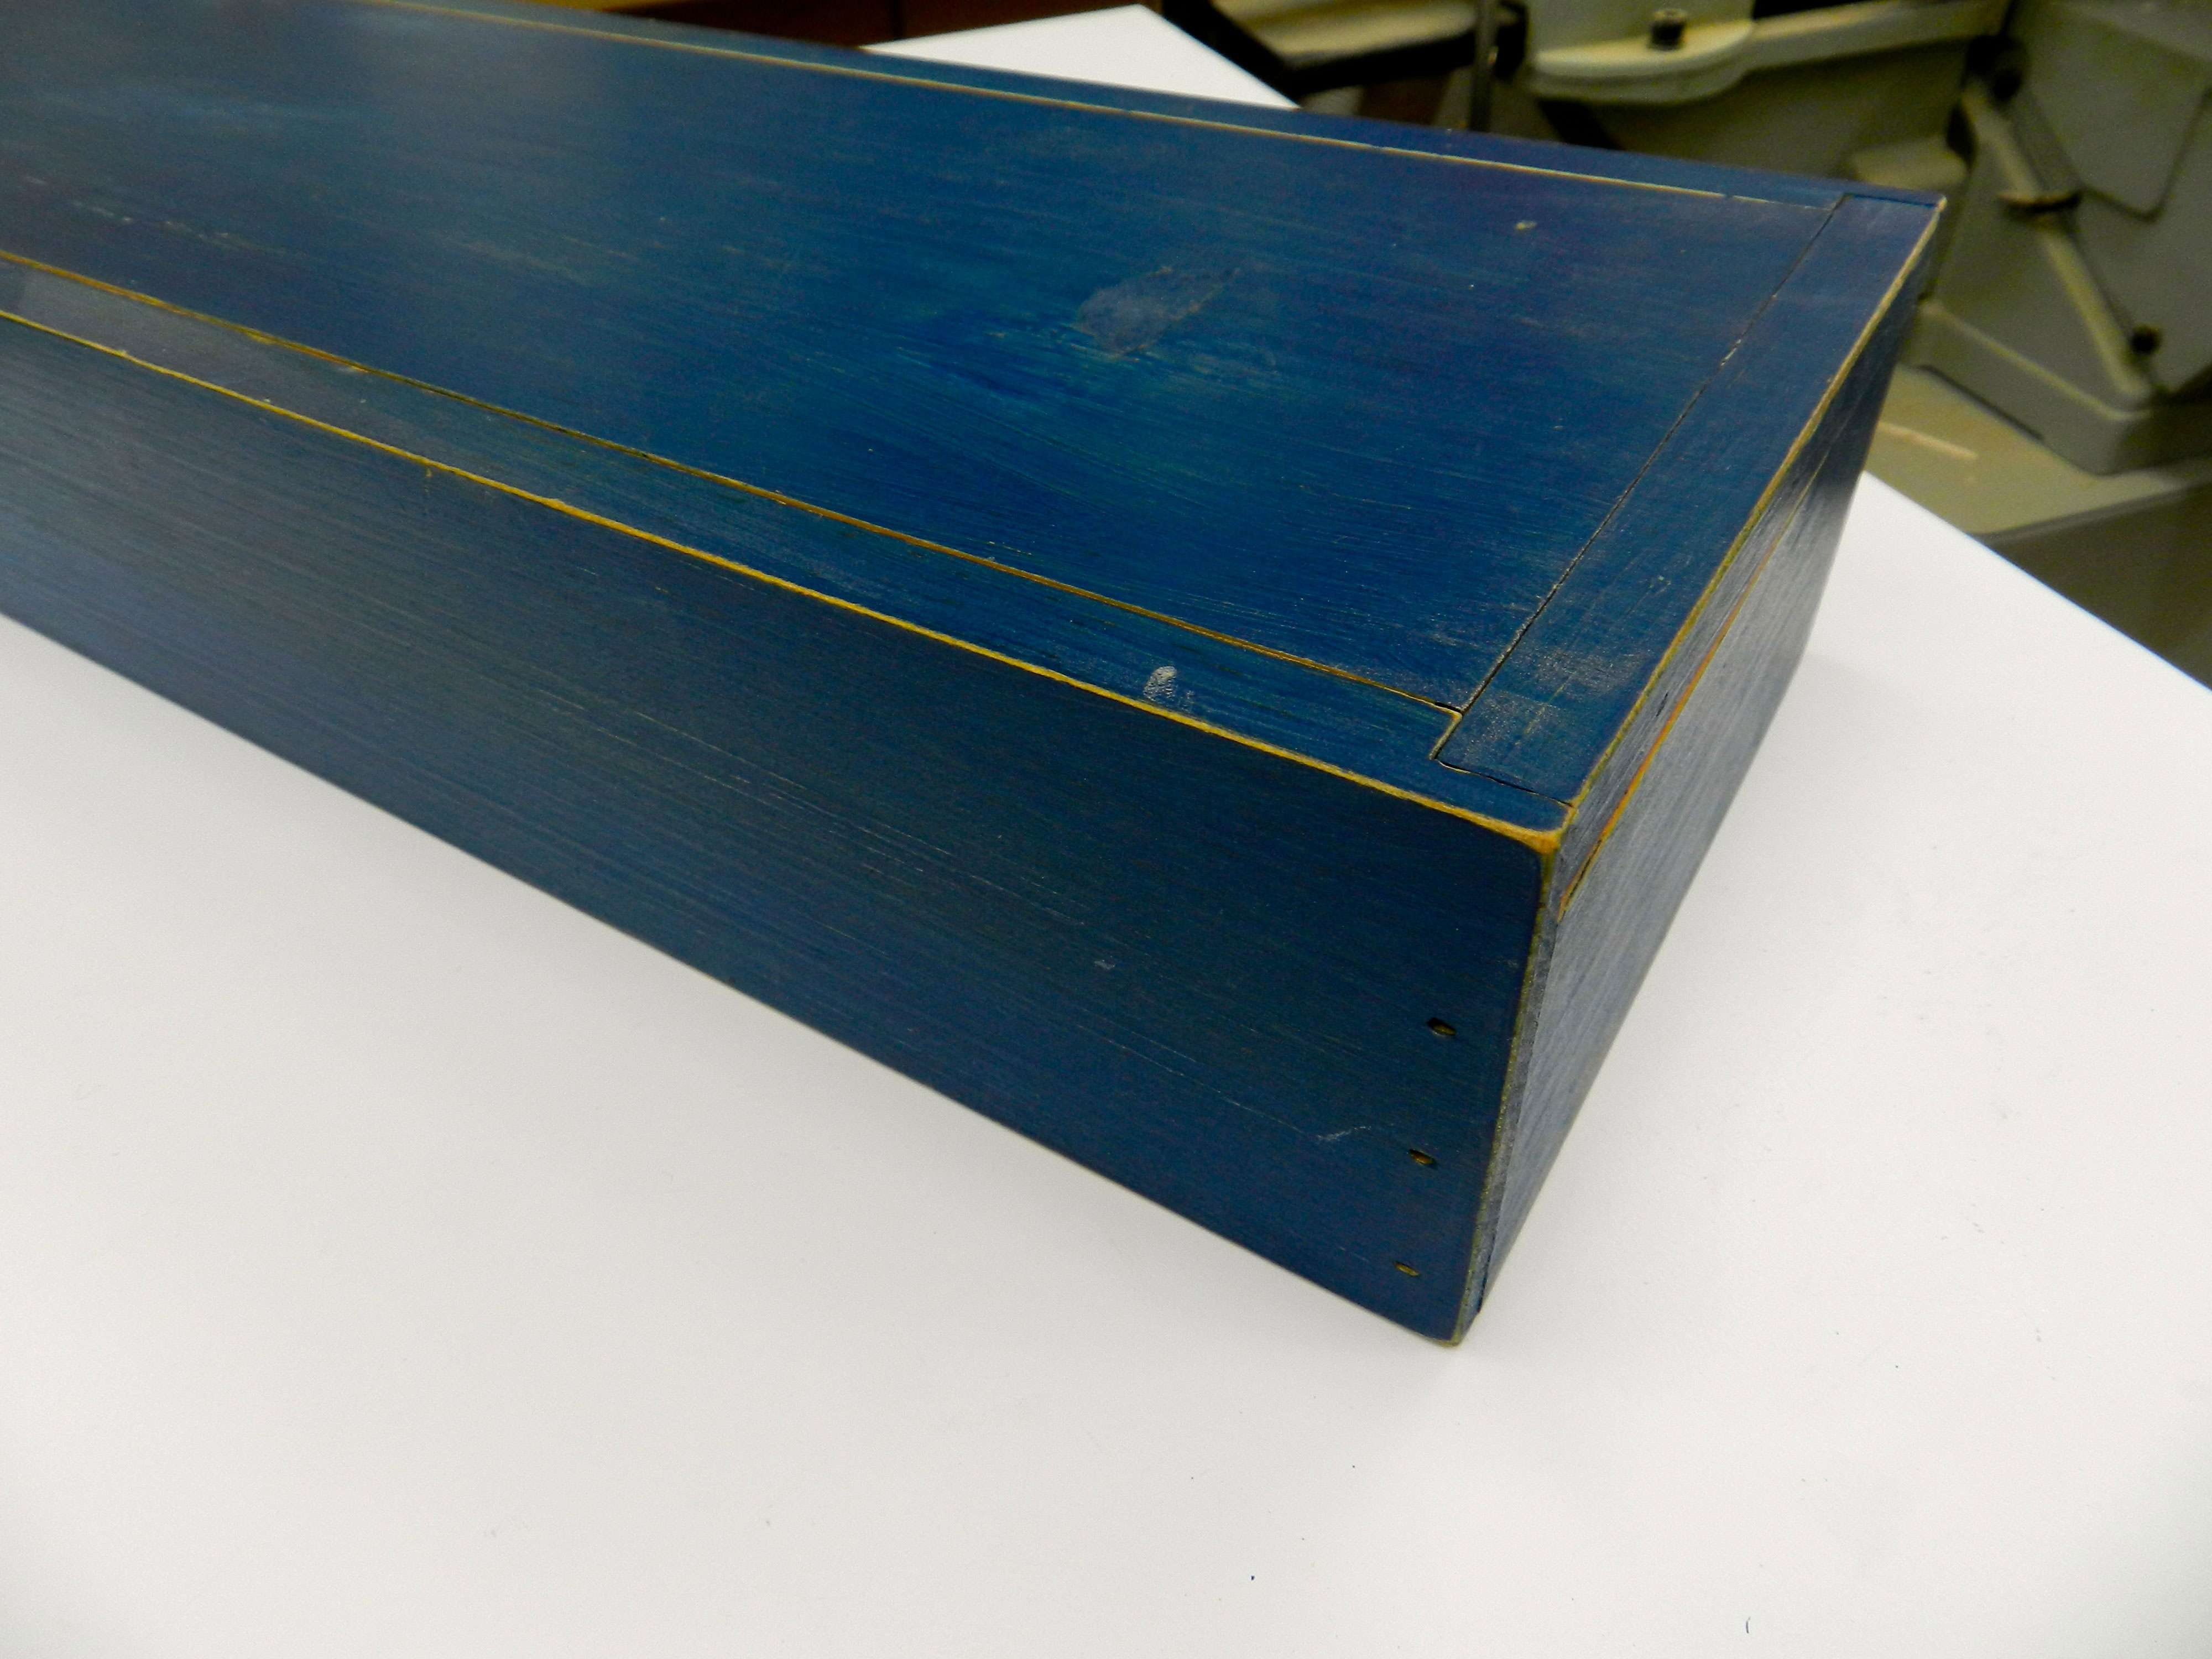
Timber framing chisel box
What makes a good box?
When building a box I like to think about how I will use it and access its contents. I like a good box that is sturdy, well suited to hold what I want to store in it, and visually interesting.
Let’s explore the creation of a timber framing chisel box. For this sort of project I want a box that is quick to build, will hold up well in the shop and out in the field, but not so nice it will walk off the job-site.
This traditional-looking box is made from Eastern White Pine. The joinery is pretty straightforward with dadoes capturing a bottom panel and a sliding top. The top has a breadboard end that is nailed and glued in place (I’m not overly worried about wood movement on that breadboard on so narrow a box — as boxes I built years ago and period examples I have examined have held up well.) You do need to pay attention to wood movement in the captured panel and the sliding box top. For the top you want a smooth movement that is neither too loose nor too tight and you want the panel to move with the seasons and not break the corner joinery.
Chisel box joinery detail
The corners are held together with rabbeted joints that are secured with cut headless brad nails and glue. (Don’t fill in the nail depressions with putty — the square holes are part of the look) The rounded depression in the lid is used to open the box and is made via a stopped cut carved with a gouge. The little details like this catch and the cut nails really add to the appeal of this sort of box.
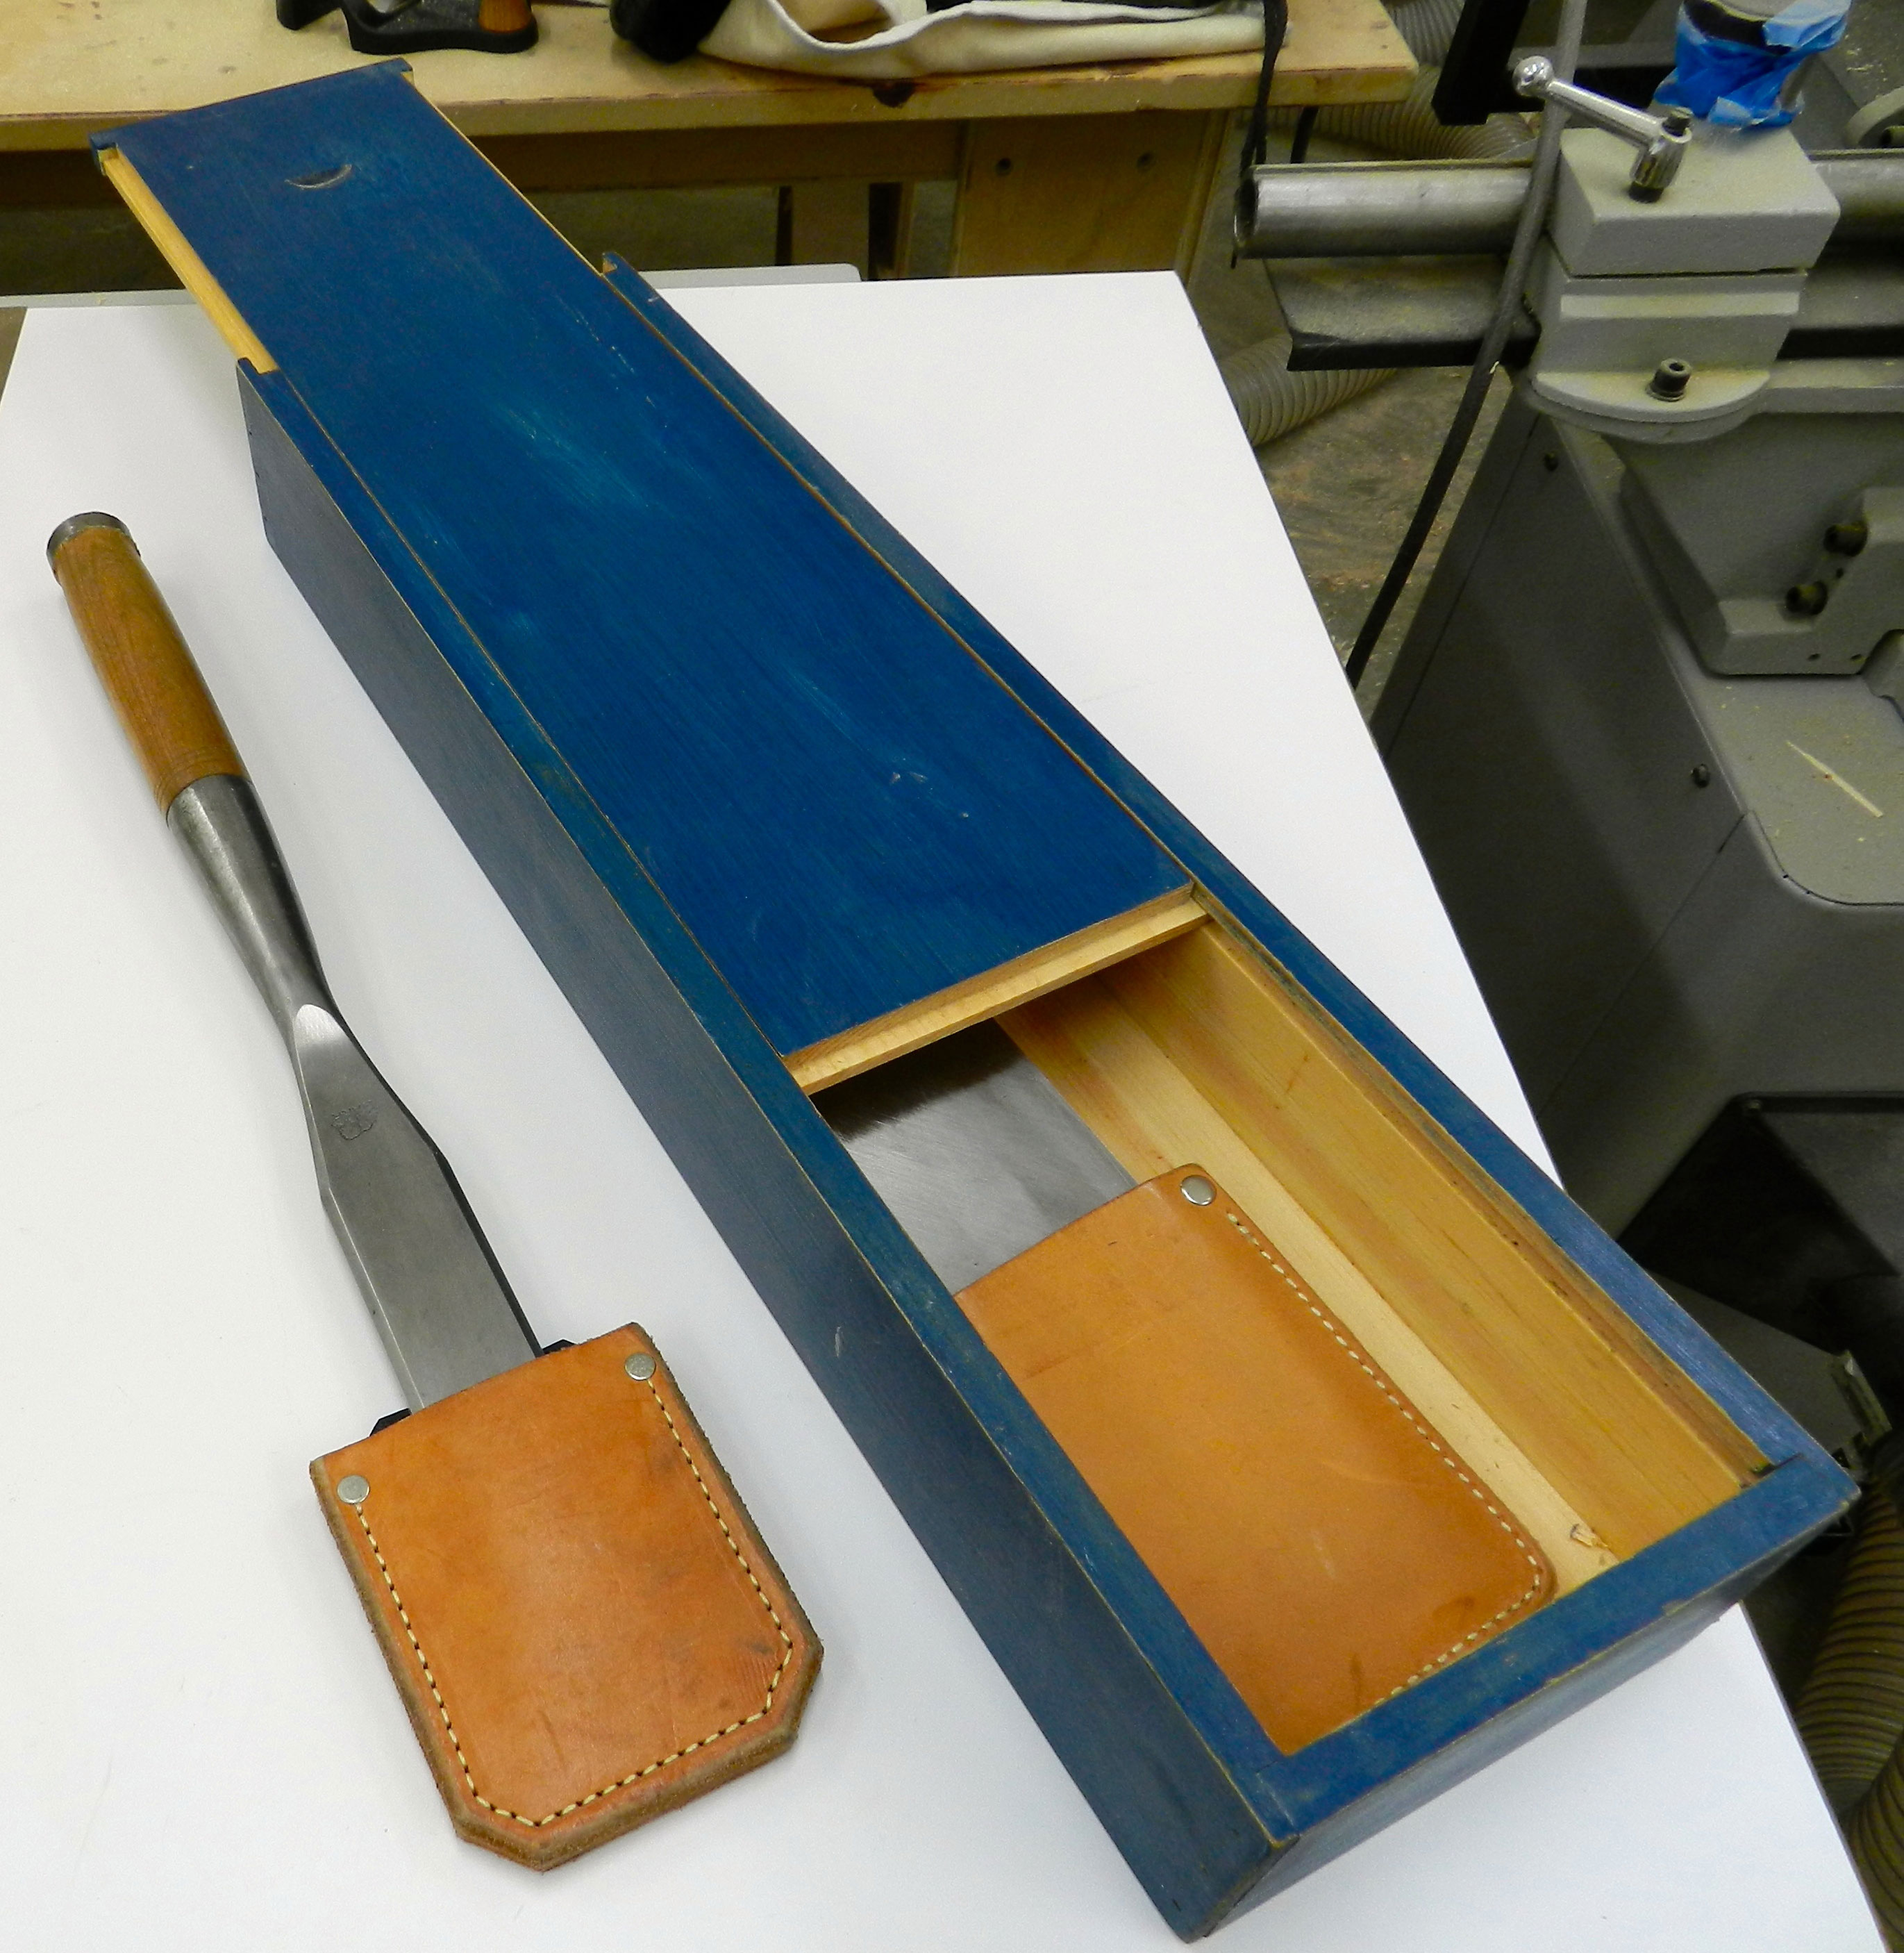
Sliding top box interior details

Two hours of expert instruction from Bill Rainford on hand drafting. Click the picture to learn more about what’s covered and watch an excerpted video.
How to use milk paint for a finish with character and age
I want a finish that is easily renewed or will not look bad with all the dents the dings it will accumulate out in the field. For this sort of application I like to use milk paint and wax. I apply milk paint with a fine brush or a lint-free rag in thin coats so that the grain can show through. After the milk paint dries I sand it gently with 220 grit sandpaper, possibly sanding a bit more in places that will likely get worn from use — so near the the thumb catch, corners, edges etc. I then take a block plane and knock off the corners which exposes the wood under the paint. I then finish the inside with wax being sure to coat the sliding surfaces of the lid. I similarly apply a coat of wax to the outside of the box.
While the outside of the box may look like it has a 100 years of wear on it, I like the surprise of opening the box and seeing a crisp, clean and natural finished interior. The distressed milk paint will only look better with age and use, so I encourage you to learn how to use milk paint and try the finish on one of your projects. Please share your results with us in the comments section!
Take care,
Bill Rainford
http://rainfordrestorations.wordpress.com
Here are some supplies and tools we find essential in our everyday work around the shop. We may receive a commission from sales referred by our links; however, we have carefully selected these products for their usefulness and quality.


