We may receive a commission when you use our affiliate links. However, this does not impact our recommendations.
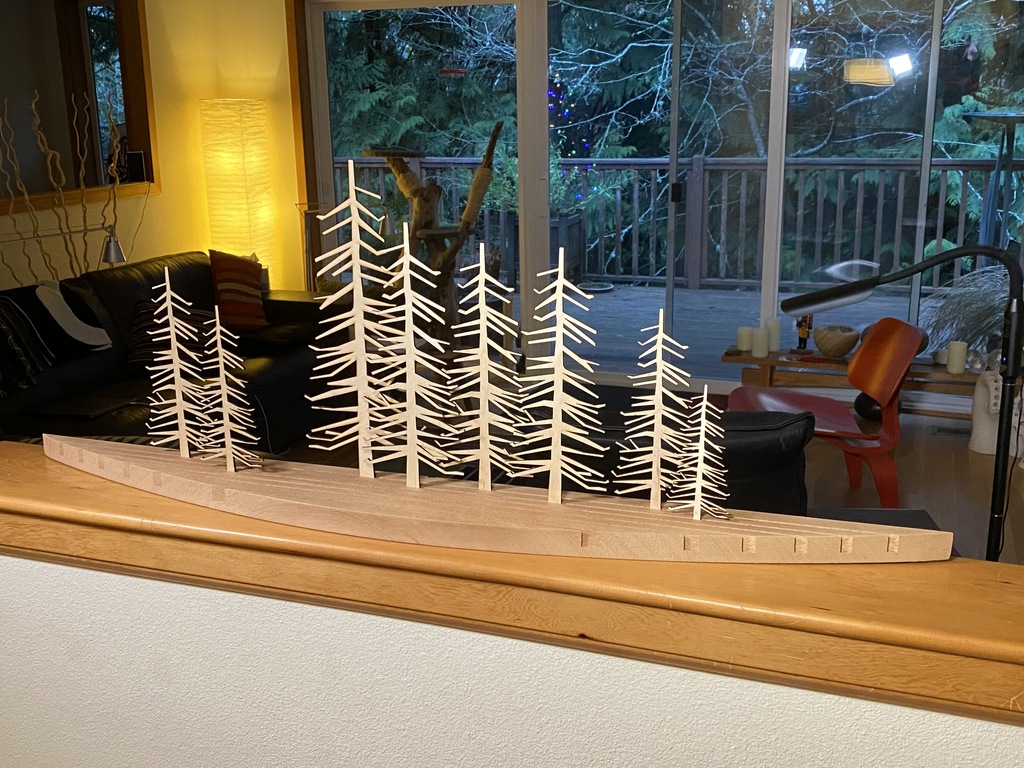
Laser-cut trees and table saw cut grooves make a great card stand.

Use several sizes of trees and create a base sized for the number of holiday cards you expect to display.
While enjoying a leisurely lunch the Sunday before Christmas, it hit me. Something was missing. Nope, it wasn’t the usual holiday panic — a forgotten gift or missed greeting card, but an urge for a holiday-theme woodworking project. Something that could be made with woodworking tools between now and New Years’. Something simple, Something needed. Something fun. And, with time short, something quick.
A stack of holiday cards
Staring at the growing stack of holiday cards on our dining table, it hit me. Our extended family consists of a number of talented artists that put a lot of thought and effort into creating original greeting cards and yet we don’t have a way to display and enjoy them. There was my project. It was time to make a holiday card stand.
Thinking back a few years, I remembered that I designed a laser cut Xmas tree for a class I taught at the Marc Adams School of Woodworking. This tree was the perfect place to start.
Laser-cut trees
What I decided to do was to combine laser-cut Xmas trees with a stand that could hold both trees and holiday cards. Since my trees are laser cut from 1/8” plywood, that was the clue I needed. Normal table saw and track saw blades are also 1/8”. So, I cut 3/4” deep grooves in a wide, 1” thick piece of scrap hardwood that could support a grove of trees in the background and holiday cards in the foreground.
For laser cutting, I used a Dremel LC40 Laser Cutter and cut the trees from 1/8” Baltic Birch Plywood. I scaled and cut several different sizes to create a forest background. Then, I cut rows of grooves every 3/4” or so in a base with a table saw, planted the trees, displayed the cards in the foreground, and the project was completed in a few hours.
I even had time to make this short YouTube video with all the details…
To make a holiday card stand of your own, a laser cutter is an ideal tool for making the trees, but if you don’t have one, a small CNC or handheld CNC like the Shaper Origin with a 1/8” bit would work just as well. Just move slowly as the small tree branches and thin plywood are very delicate.
If you don’t have either digital woodworking tool, no worries. You can easily cut your own forest of trees with a scroll saw. Just print out the PDF tree file at different sizes and spray glue the prints onto thin plywood and cut away. Cut grooves in a base and you’re card stand is done.
A simple, fast, fun, holiday project. And, it could be a much-appreciated last-minute gift.

Happy Holidays!
Additional Resources
- Tree/Card Stand on Thingiverse
- Tree/Card Stand Shaper Origin Version
- Digital Woodworking on Instagram
- Digital Woodworking YouTube Channel
- Personal Work on Instagram
Here are some supplies and tools we find essential in our everyday work around the shop. We may receive a commission from sales referred by our links; however, we have carefully selected these products for their usefulness and quality.