We may receive a commission when you use our affiliate links. However, this does not impact our recommendations.
Rarely a day goes by when we aren’t using a router for some aspect of a project. We’ve been building all kinds of jigs and trying new ideas (and ideas recently unearthed from our archives). A router is truly one of the most versatile tools in the shop, and we just had to share these tips from the archives with you.
Router Jointer
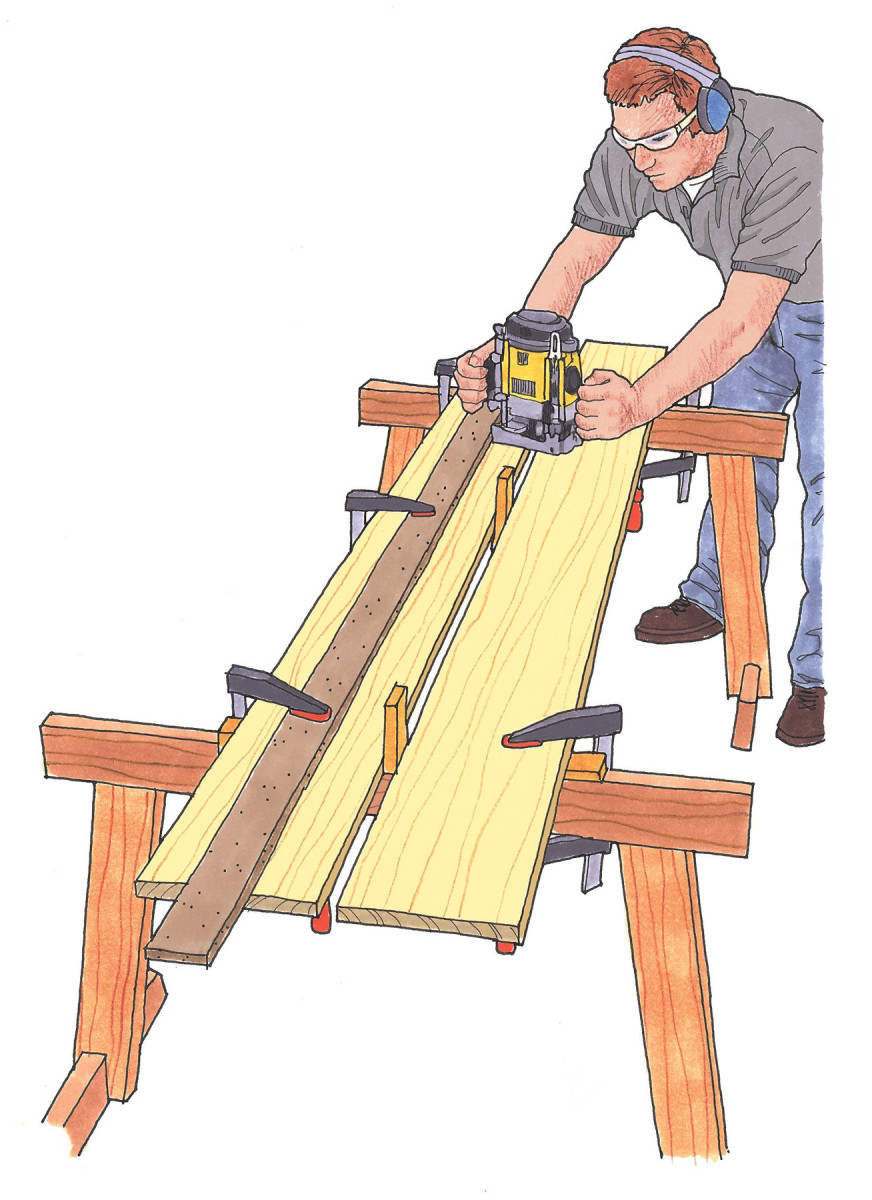
You can use a router to joint two boards at once. This is a really handy trick if you don’t have a long-bed jointer or you don’t have a jointer at all, and you’re working with really long stock.
The trick is to rout both boards at the same time, so the edges mirror each other. Bowed or not, they’ll always fit tightly. To set this trick up, mill three spacer blocks to 11⁄16” thick. Clamp the boards to a pair of sawhorses with the spacers between them.
Chuck a 3⁄4” bit in your router. Clamp the guide board so the bit takes an equal amount off both boards, about 1⁄32“. Ride the router tightly against the guideboard, removing the spacers as needed. Any deviation or wandering from the router will be mirrored on the opposite board, providing a perfect fit.
Offset Router Base
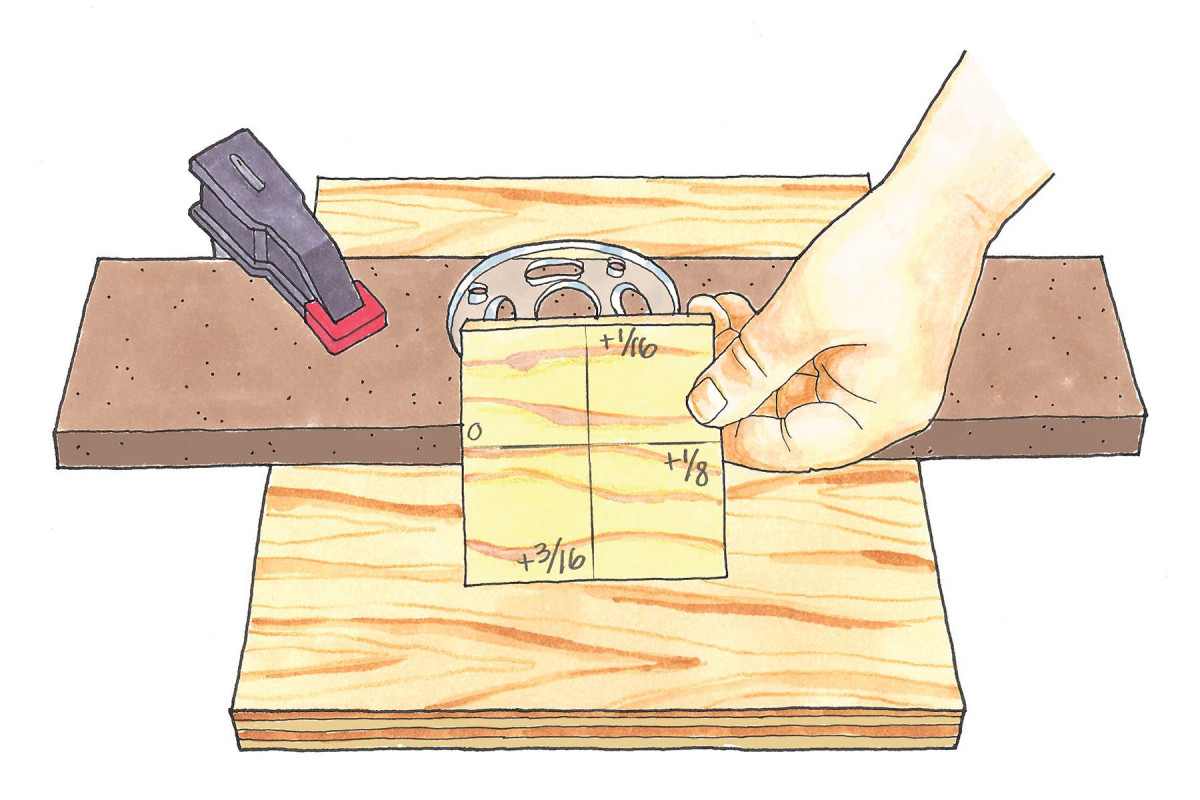 By simply adding a custom, shop-made base to your router, you can adjust your cut distance from the fence. A turn (or two, or three) of your router and you’ve set a new distance.
 This kind of base, with different offsets, can be used for cutting dadoes and rabbets, as well as stepped rabbets. You could also make one with 1⁄32” graduations for sneaking up on cuts and fine fitting dadoes.
Router Scarfing Jig
 Boatbuilders often need to join boards end to end to make longer planks. Instead of a butt joint they make a long taper on each board and overlap the ends. This is called a scarf joint. One or two scarf joints are easily planed by hand, but for any quantity it’s well worth spending half an hour to make this simple jig.
The illustration shows 3⁄4” stock being joined with a slope of 8 to 1, which gives an overlap of 6″. Position the plank so the end to be joined is flush with the end of the jig and wedge it securely. Make one pass with the router using a straight-flute plunge bit to remove the bulk of material. Then reset the router for a second, lighter cut, stopping just short of a feather edge at the plank end. You may wish to clean up the scarf with a few passes of a low-angle block plane.
No-Fuss Mortising Jig
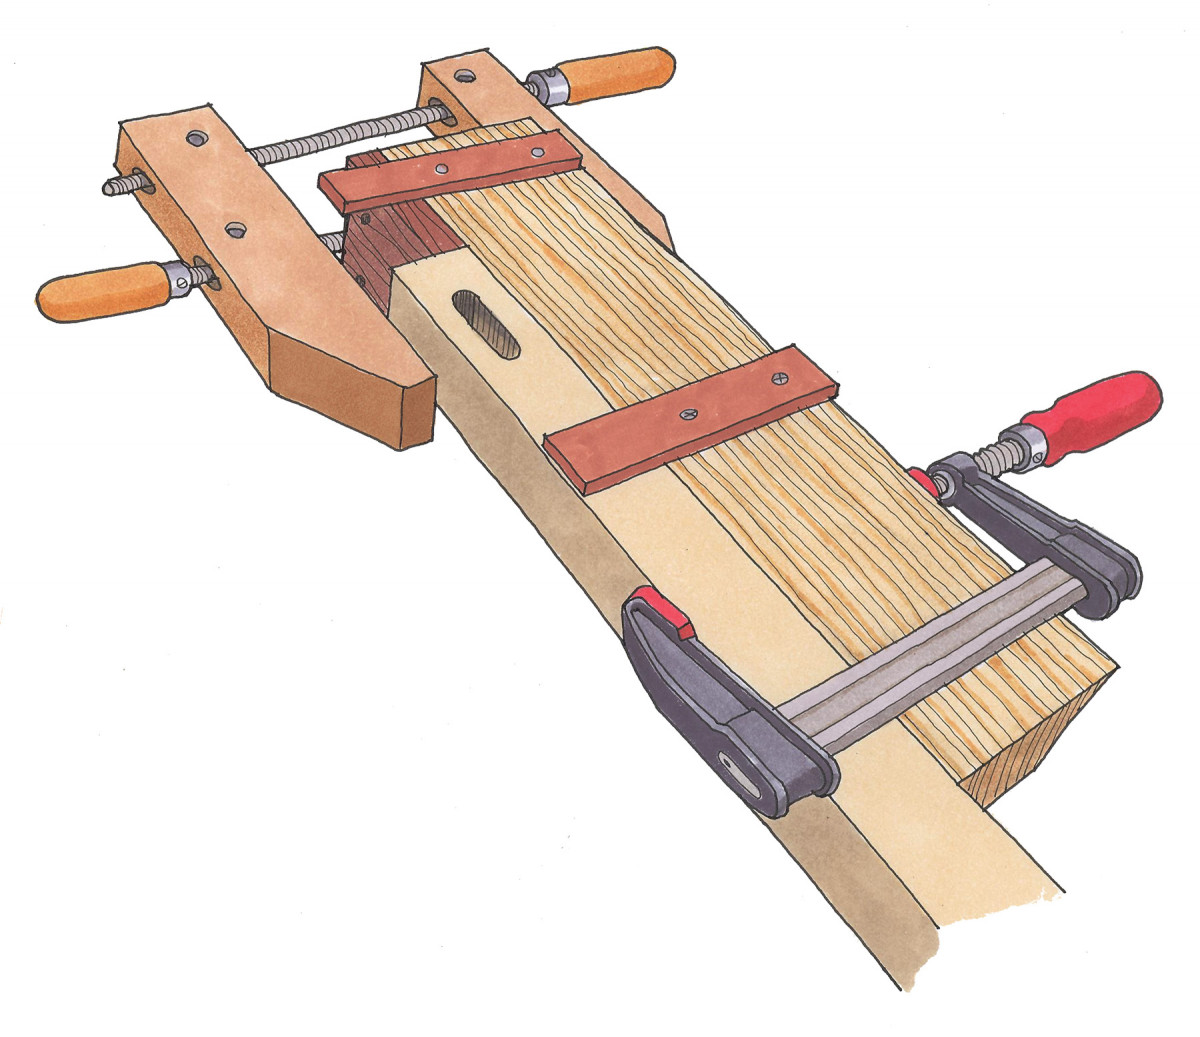 Want a dirt-simple mortising jig? This one takes just a few minutes to put together, not the whole weekend. You will need a plunge router equipped with an edge guide.
First, clamp a 3″- to 4″-square block to your bench. Fasten a 5″-long stop block to its side, near one end. Butt your workpiece up to the stop block and clamp your workpiece to the large block. (A large handscrew is ideal for this job because it has a deep reach.)
Lay out your mortise on the workpiece and adjust the router’s edge guide so the bit cuts within the layout marks. Finally, add two stop blocks on top of the big block to limit the back-and-forth movement of your router. These blocks define the mortise’s length. If your mortises are centered, go ahead and cut all of them. If they are offset, simply change the fence setting as needed.
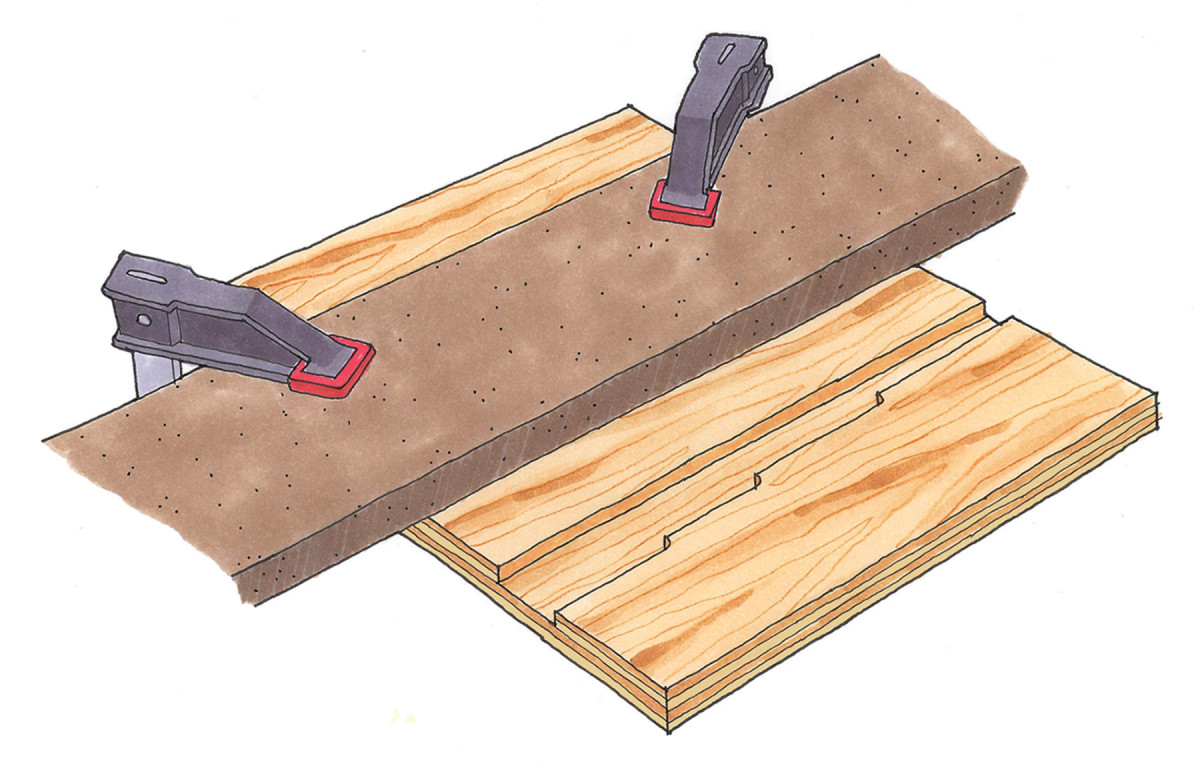
Minimize Router Burns
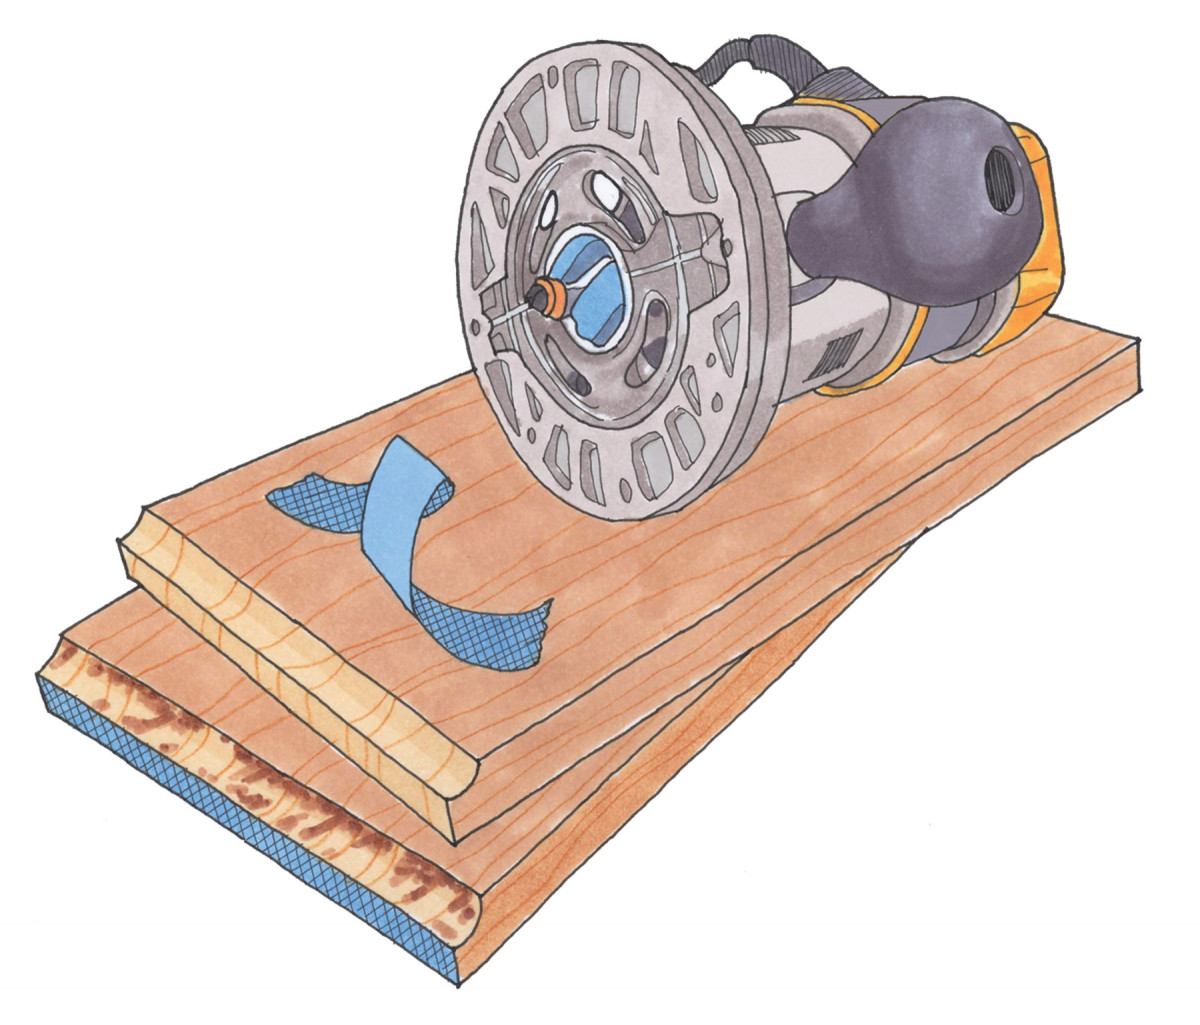 End grain burns easily on maple and cherry, and those burns are hard to remove. Here is an easy solution that removes those unsightly burns without requiring that you adjust the bit’s height or fuss with an edge guide.
Before routing, three layers of masking tape on the bottom of the board’s edge, where the bit’s bearing rides. Then make two passes. The first pass produces the rough profile, when burning is most likely to occur. After making the initial pass, remove the tape and rout again. This very fine second pass removes all but the worst burns. If this method still leaves scorches, your feed rate is too slow or you need a new router bit.
Here are some supplies and tools we find essential in our everyday work around the shop. We may receive a commission from sales referred by our links; however, we have carefully selected these products for their usefulness and quality.