We may receive a commission when you use our affiliate links. However, this does not impact our recommendations.
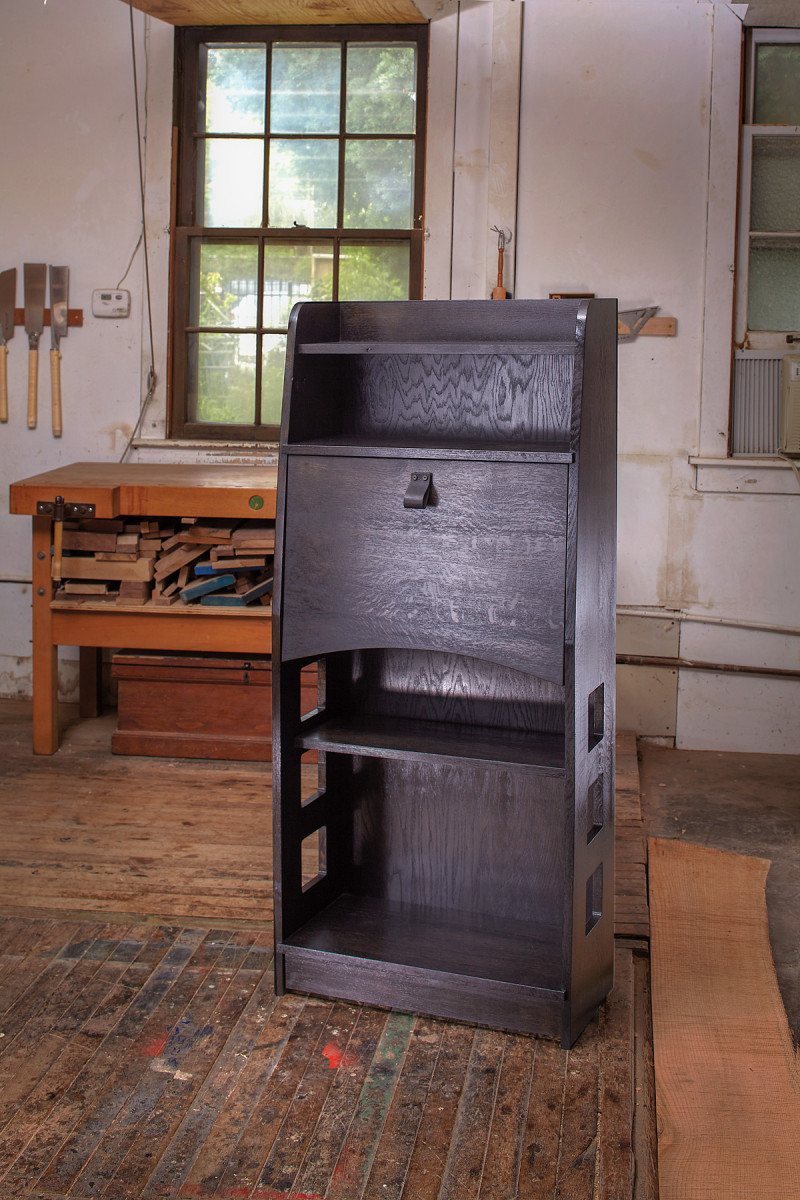
This rare and timeless silhouette is updated for contemporary use.
When our youngest went off to kindergarten, my wife took on freelance copy-editing and needed a work station. An executive-size desk would not fit in out compact Chicago apartment, but this classic drop front, originally designed by Arts & Crafts master Charles Limbert, only needed a few minor changes to accommodate today’s small electronics.
Limbert’s original design is surprisingly compact. Measuring 10″ x 20″ x 51″, its interior doesn’t even fit a 13″ laptop. Using a quick prototype, I scaled it up about 15% to 11 1/2” x 24 1/2” x 56 1/2“, keeping the worktop height the same to maintain the functionality of the original. Quartersawn white oak is really beautiful but expensive, and its irregular grain can present unique design challenges. Borrowing from another Arts & Crafts master, Charles Rennie Mackintosh, I planned to dye and stain the desk an arresting black. I elected to use a 1/4“-thick piece of plywood for the back and a sleek leather pull for the drop front.
Getting Started
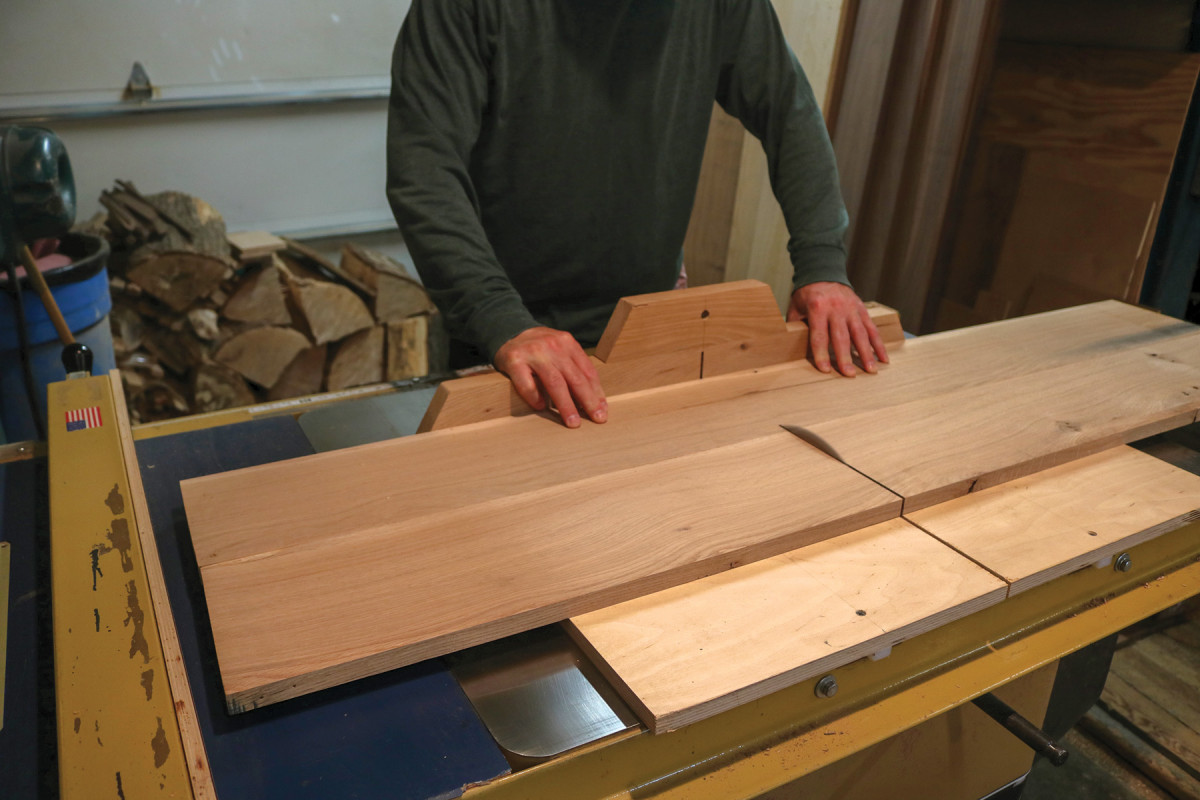
1. The door is the most important part of the project. After gluing up carefully selected wood, joint one side, rip a parallel side and then crosscut to the exact width.
Mill all of your lumber to thickness and then glue up your pieces for the drop front. After the glue dries, square up the blank and cut exactly to width. Leave additional length on the blank for clamps, so placing the curve is simple. Rip a 3/32“-thin piece of wood on the tablesaw, which, when bent will help draw the curve. Measure a centerline on the door and then 2″ off the bottom of the door. Place clamps to rest on the thin piece of wood, and bend the wood to the centerpoint. Draw a line, then cut the curve using a jigsaw or band saw. Use the offcut as a custom sanding block for the curve. I leave the front slightly oversize so I can fit it precisely during assembly.

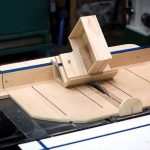
2. Position two clamps adjacent to your marks. Push the 3/32″-thin, straight-grained piece to the marked center point. Trace the curve starting on the inside and working back toward the clamp. Take care that the thin wood doesn’t deflect.
Next up, start work on the sides of the desk. The sides are the most complicated parts. While they’re asymmetrical mirrors of each other, inevitably the parts will ideally face in or out, up or down, depending on the figure and location of knots, etc. Every time I made a cut or process, I matched or faced the parts toward each other, as it would be easy to cut two identical pieces versus mirrored pieces. It’s important to remain
methodical in working these parts.
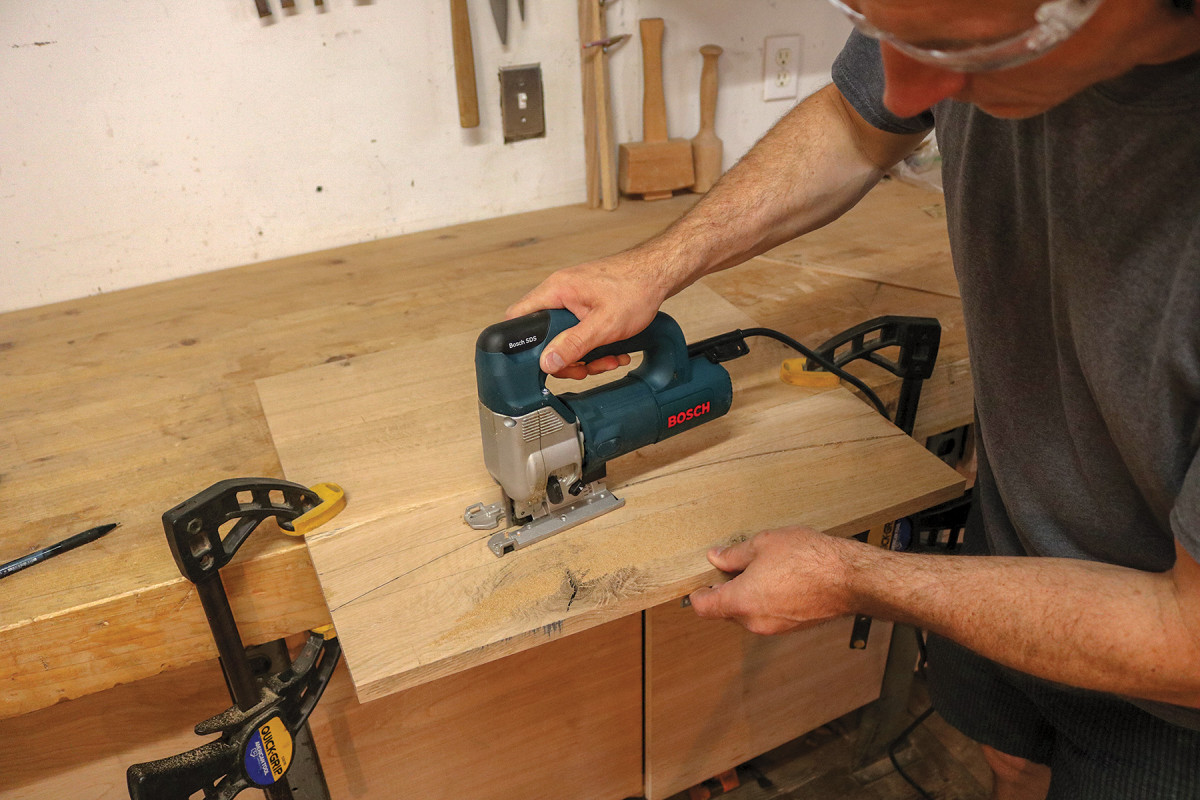
3. Jigsaw or band saw the curve you’ve drawn. Use a sharp blade and take care to stay just off the line. Keep the cutoff and use it as a rigid sanding block to smooth the curve.
The production of the sides requires two router jigs and some accurate measuring. One jig helps situate the square cutouts, and you can find that in image 10. I chose to cut it on a CNC router, however, you could carefully make it by hand or find a vendor to cut this on a CNC or laser cutter. With the square jig, I use a pattern bit after cutting out the bulk of the waste with a jigsaw. The other jig is for making the dadoes and stopped dadoes with a router.
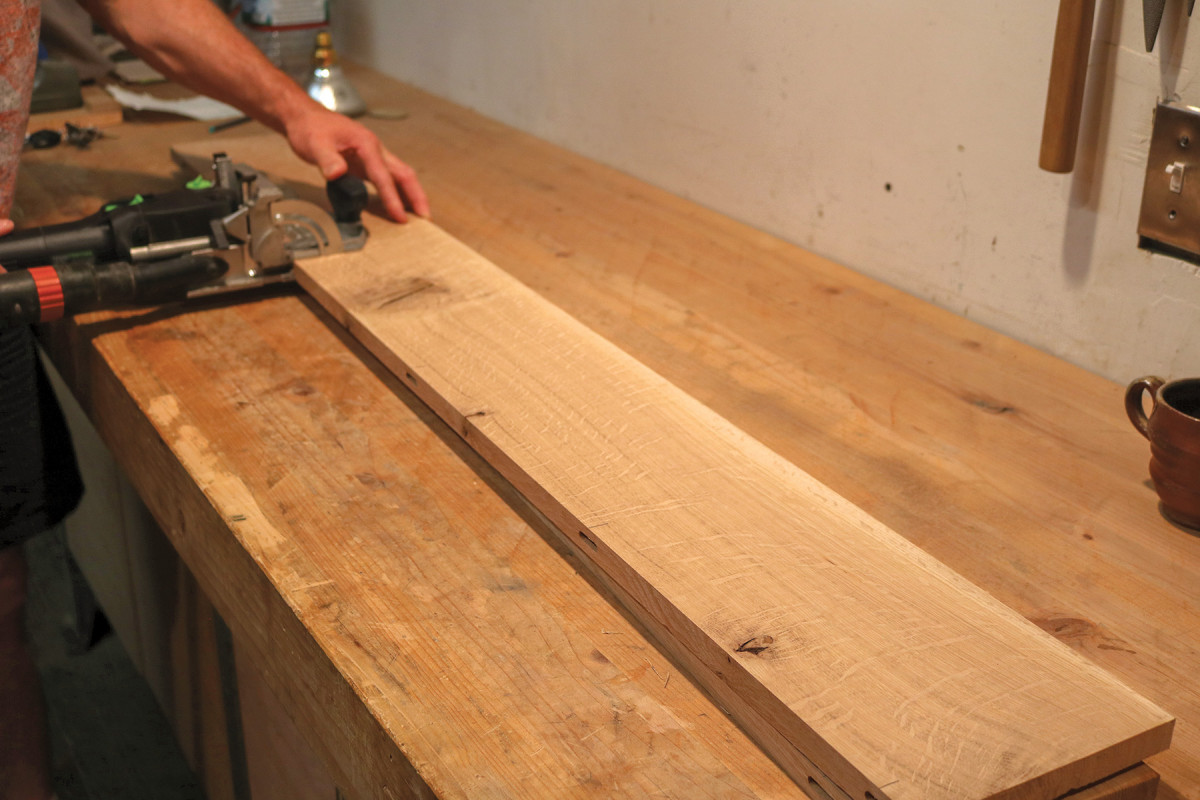
4. I elected to use Dominos for this glue-up. Normally I skip Dominos or biscuits when gluing up panels, but by the time I jointed and planed the sides, my boards were already at final thickness and I didn’t want to take any chances. I marked 5 locations and used 6mm Dominos.
Lay out the square cutouts, stack the sides on top of each other, and then bore out the corners with a drill. I set parts on a sacrificial board to minimize tear-out, and I stay 1/8”
away from every corner. Next, clamp the board overhanging your workbench and connect the drill holes with cuts using a jigsaw. The corners remain curved, so be careful to not cut into the them. Now clean out the rough holes using the template and a router with a top-bearing straight bit. I made my template with 1/2” MDF, but it could be made out of any stable material laying around your shop.
5. Because I work by myself most of the time, I prefer Titebond III, which gives me 15 minutes of open time. I apply glue along the length first and don’t bother to put glue in the domino holes, as I’m not using the dominos for joinery, only for alignment. After 45 minutes, I scrape the glue, which is rubbery and no longer wet.
Limbert used relatively conventional units when laying out his hundreds of designs. In my adaptation of his desk, I tried to remain true to this logic. Mark out the position of the dadoes in width and length. Remember to mark the angle for the desktop dado. Once the jig is clamped on top of the side, you should be able to see your waste marks. If not, you’ll know you have aligned it to the wrong side of the line.
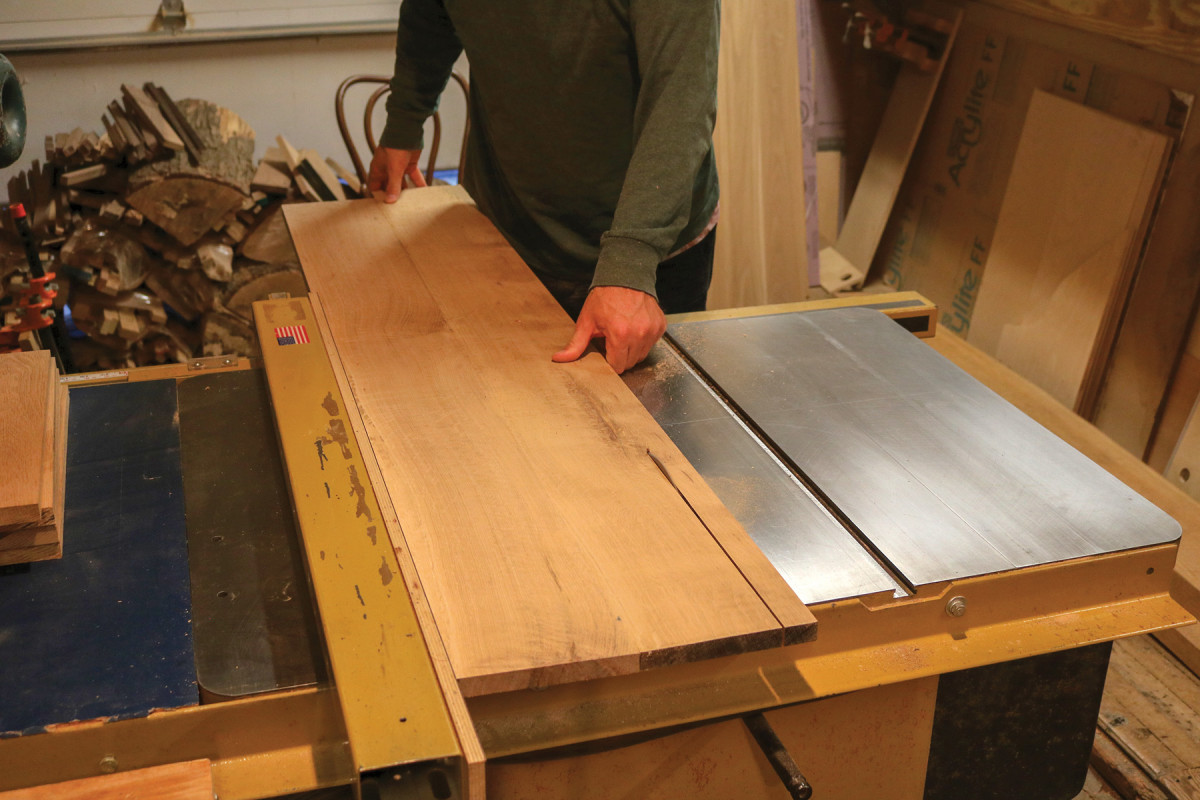
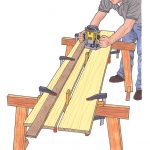
6. All of the following processes for shaping the side require an exact dimensioned blank. Rip both sides at once, and then crosscut to exact length.
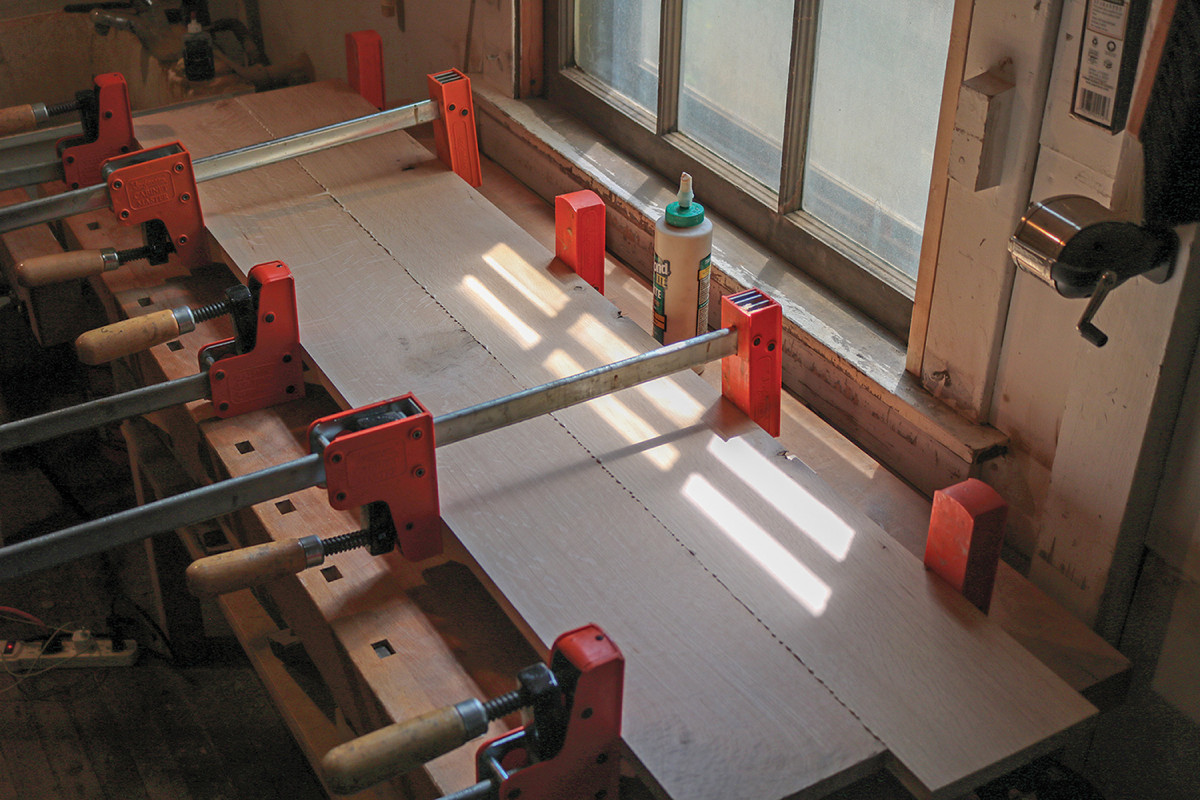
Next, you’ll make the router jig. To assemble the jig, glue and screw together two right angle Ls. After the glue dries, take these two angled Ls and sandwich a scrap of your shelves between the two parts. Press the parts against a side, and clamp everything together, keeping it all square. Then, screw and glue these in place.
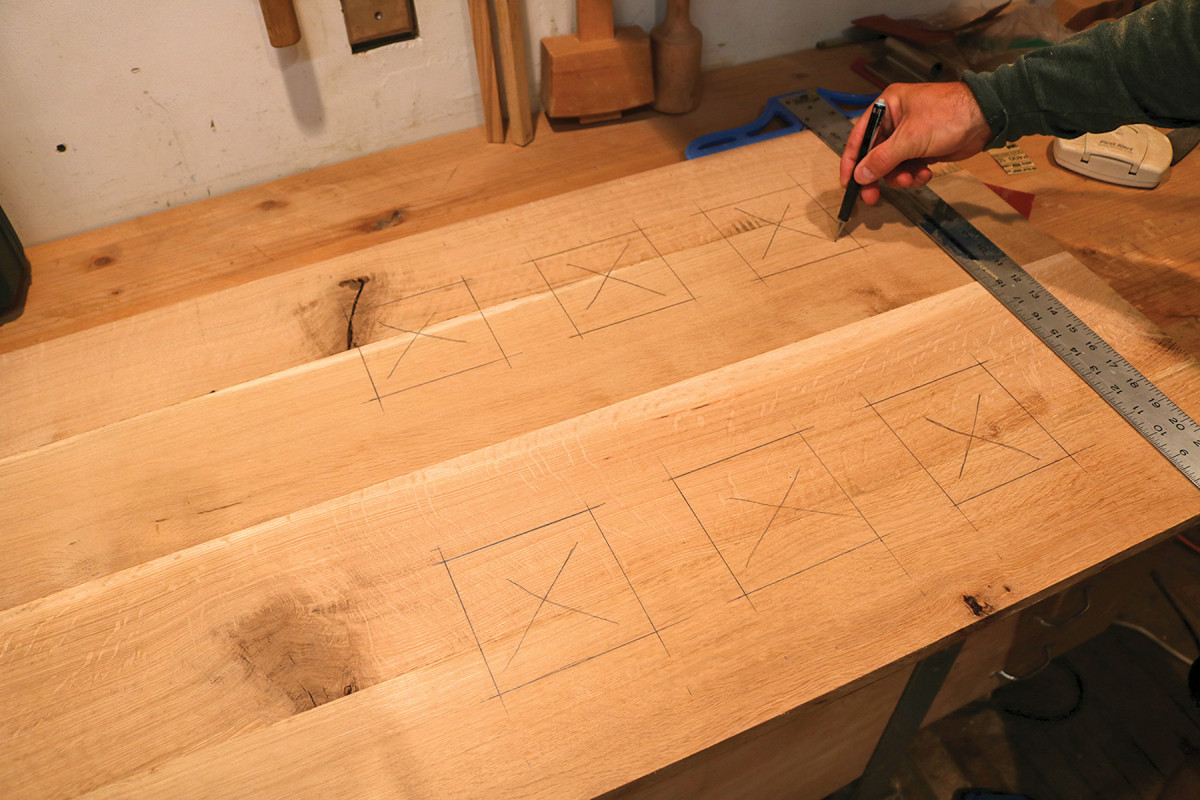
7. Draw all of the holes at once. Align the bottoms of the two side pieces and measure. Clearly mark the waste so you drill and cut in the correct place.
Each dado is 3/8” deep and 3/4” wide. The depth can be made in 3, 1/8“-deep passes with your router. Use a 1/2“-wide pattern bit with top-bearing and make clockwise passes to get to the 3/4” shelf thickness. Before cutting the stopped dadoes, set the bit down close to the terminus of the dado and put a piece of painter’s tape on the jig as a reminder to not go too far. After cutting all of the dadoes, square the ends of the stopped dadoes with a chisel, including the angled one.
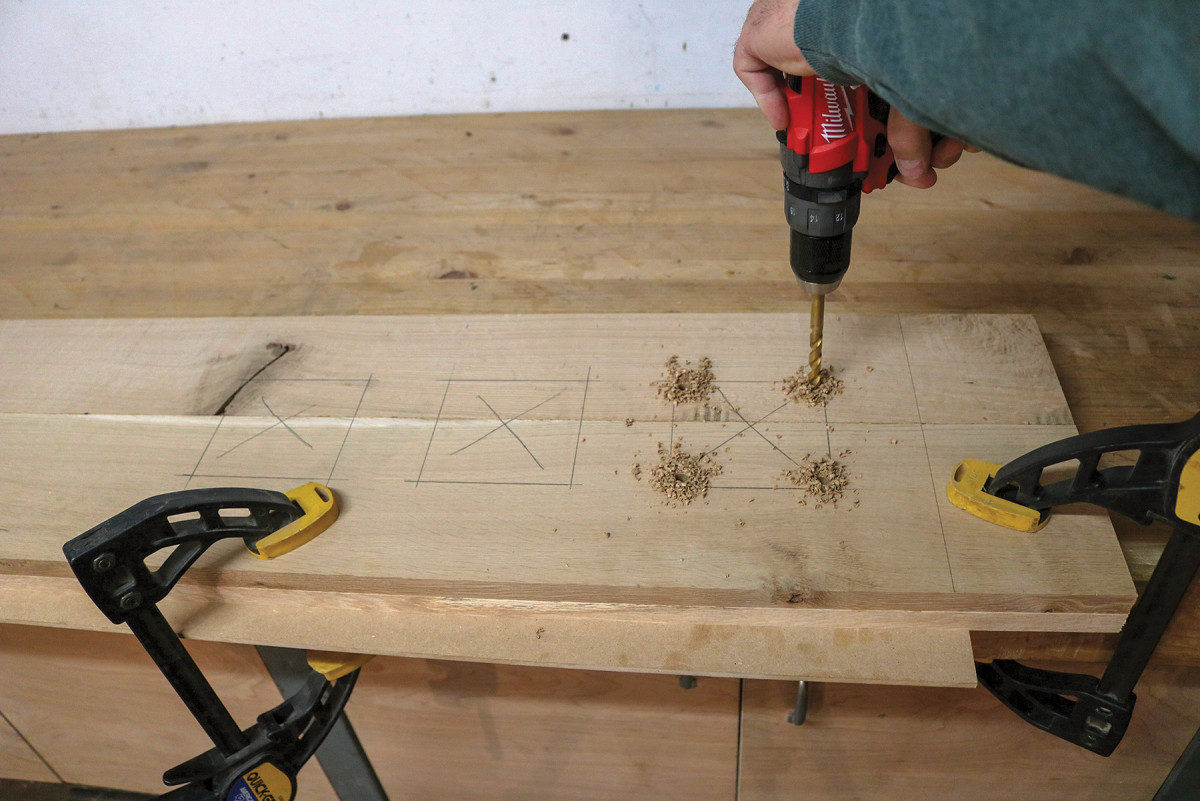
8. A 3/8″ bit is the perfect size for drilling out the corners for rough cutting out the waste. Stay 1/8″ away from the lines as this is just a rough cut. Take care to drill vertically as badly angled holes could drift and make for a poor hole. Place scrap underneath the side blank and clamp it to the bench to protect from tear-out.
The back is inset into the sides, and you’ll need to cut a 3/8“-wide by 1/4“-deep rabbet for the 1/4” plywood back. Use a 3/8” rabbeting bit with your router for this. (The diameter of the rabbeting bit was larger than the factory baseplate on my router, so I made an auxiliary plate with a hole large enough for the bit.) Take numerous passes to avoid tearout on the way to the finished depth of 1/4“.
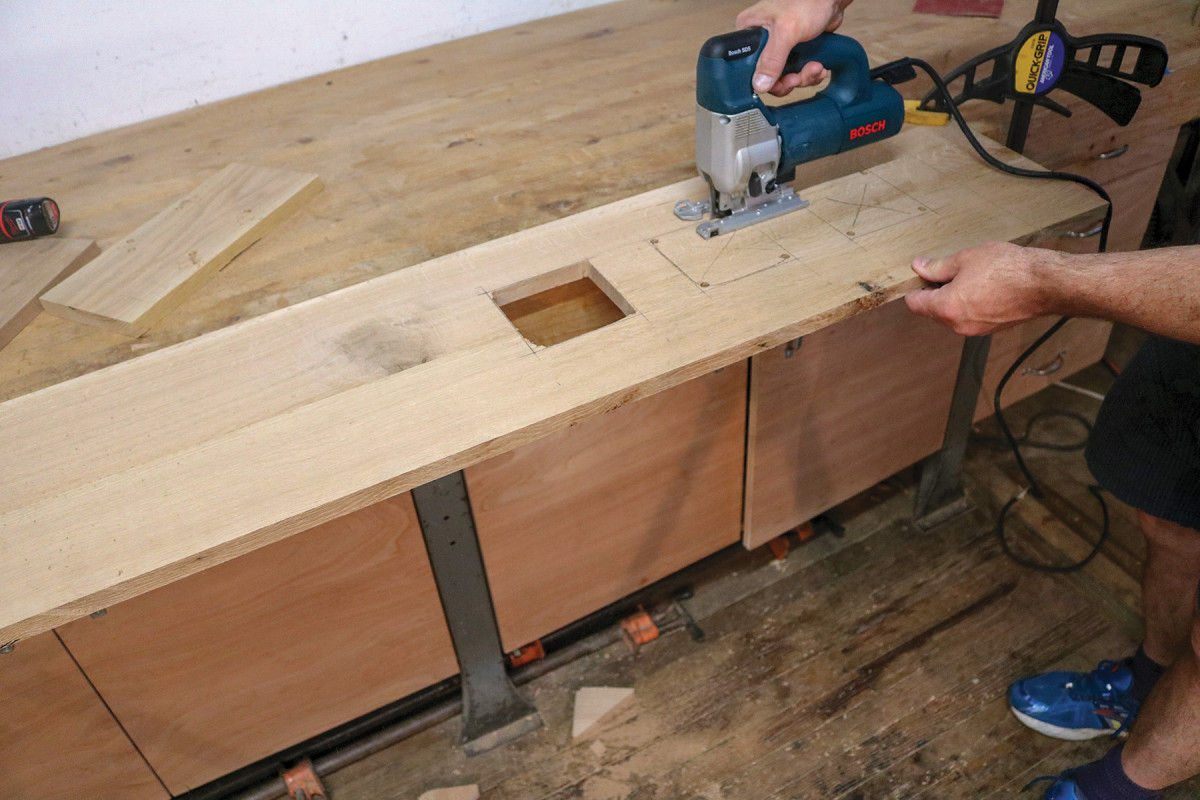
9. The board is clamped overhanging the edge of the workbench to accommodate the plunging blade. Do not cut all the way into the corner, as the final shape has a radius.
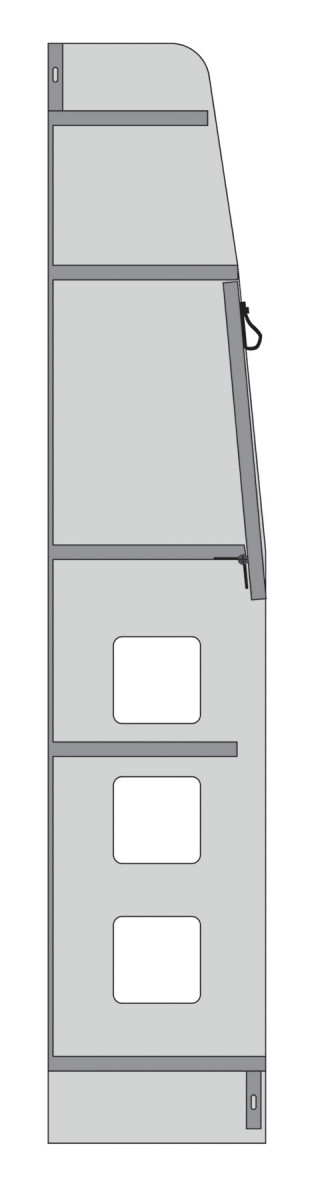
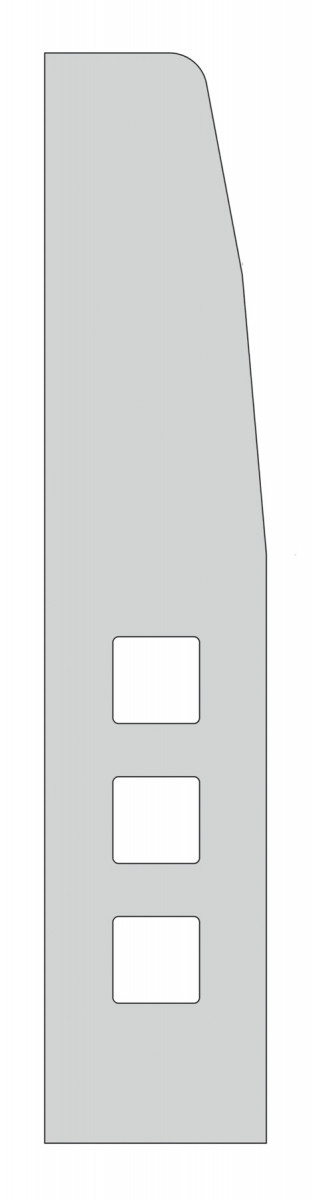
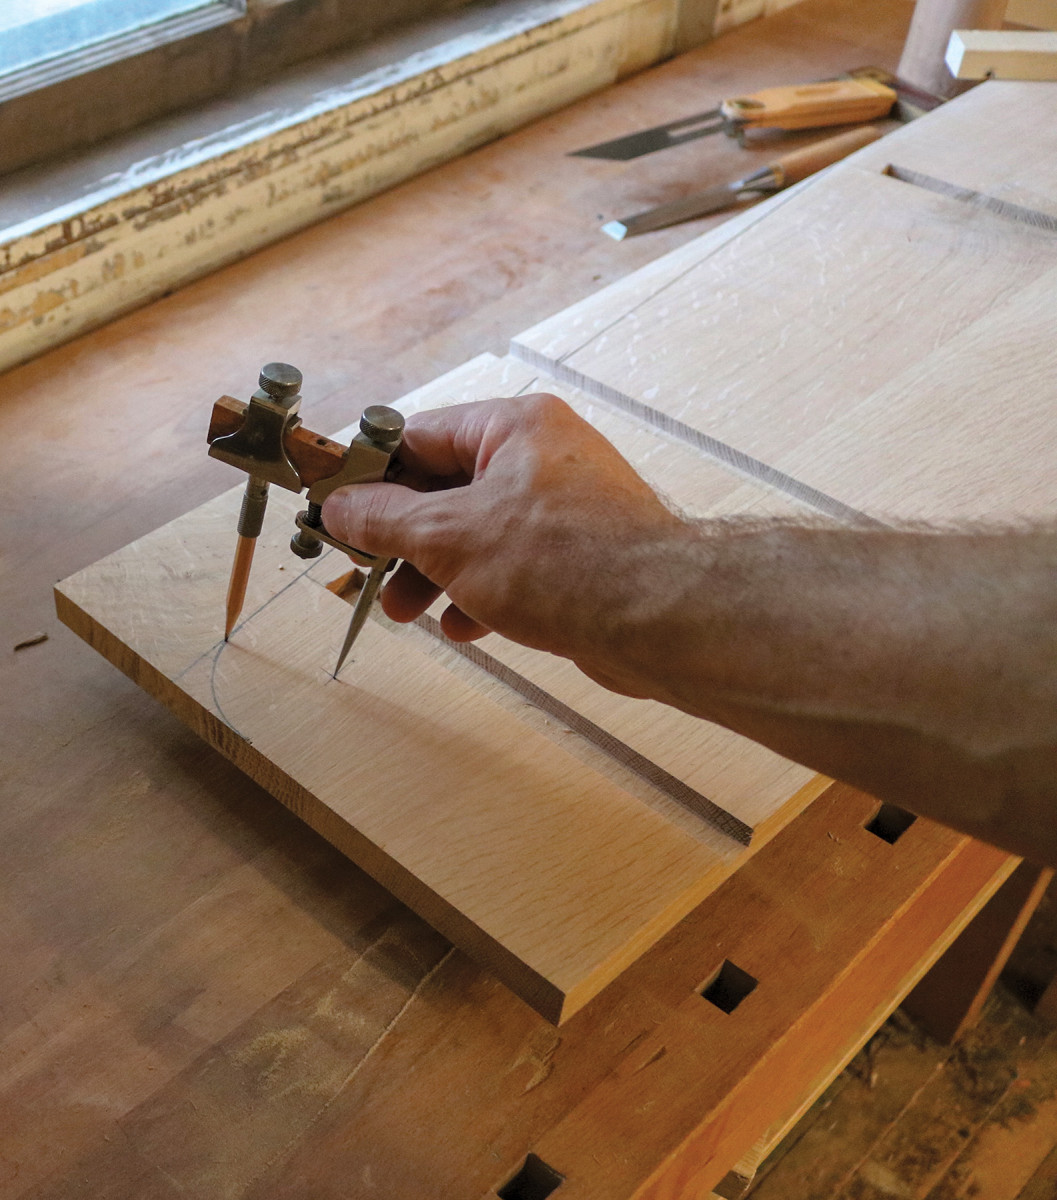
Lastly, draw the profile and radius on one of the sides to give the desk its distinctive shape. Follow diagram to the right to draw out the profile. For the radius at the top, draw a center point 2″ from the angled front line, and another 2″ from the top.
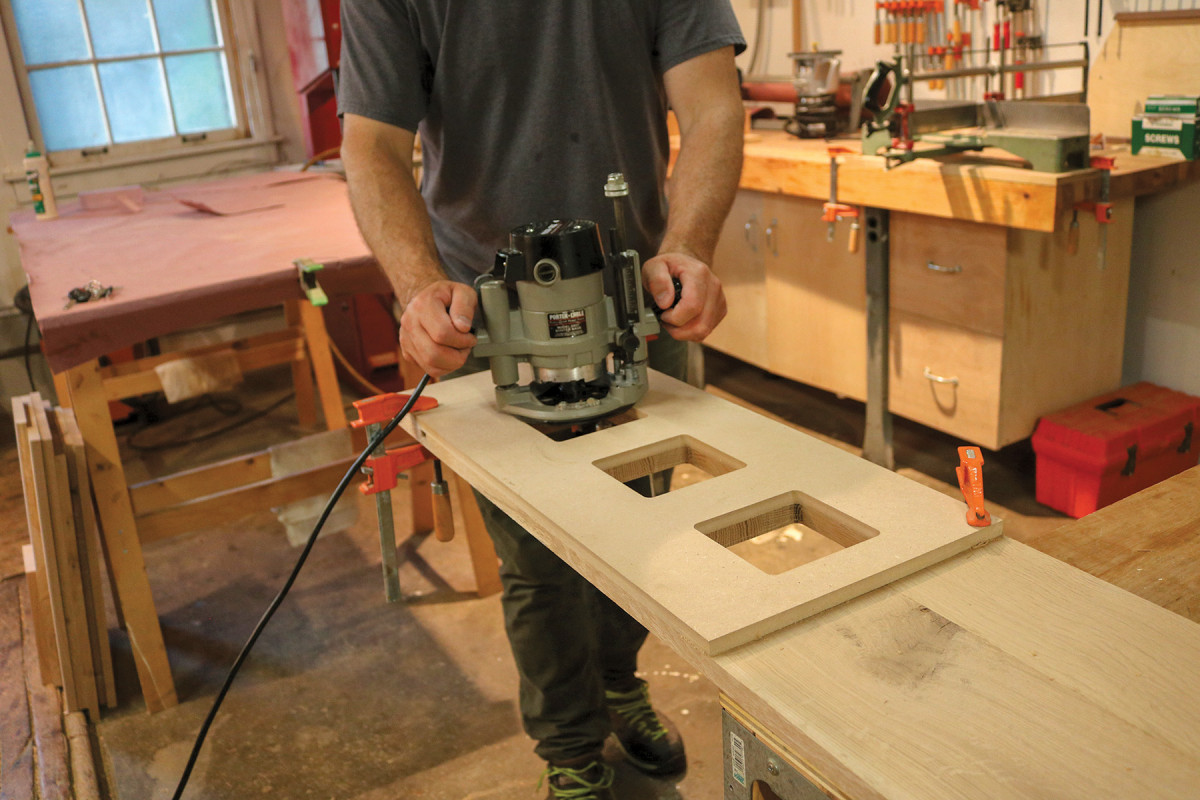
10. The template is the exact same width as the sides, and the holes are centered on the template, so alignment with the sides is simple. The template can be made with laser cutter, CNC or with scraps from the shop. Clamp the template firmly to the side and the bench. Move the router slowly and deliberately to minimize tear-out.
With a compass or trammel, draw a 2″ radius circle connecting the tangent points with this curve. Cut along the pencil line with a jigsaw, sand smooth and then use this as a template for the second side, which you can rout with a straight-pattern bit.
Limbert Drop-Front Desk Cut List
No. Item Dimensions (inches) Material
t w l
1 Door 3⁄4 x 16 1/2 x 22 3/4 White Oak
2 Sides 3⁄4 x 11 1/2 x 56 1/2 White Oak
1 Shelf A 3⁄4 x 11 1/2 x 23 3/4 White Oak
2 Shelves B and D 3⁄4 x 10 1/2 x 23 3/4 White Oak
1 Desk shelf C 3⁄4 x 10 1/4 x 23 3/4 White Oak
1 Shelf E 3⁄4 x 9 x 23 x 3/4 White Oak
1 Top gallery 3⁄4 x 3 1/2 x 23 White Oak
1 Toe Kick 3⁄4 x 3 x 23 White Oak
1 Back 1⁄4 x 23 3/4 x 49 1/2 Plywood


 Next Steps
 Next Steps
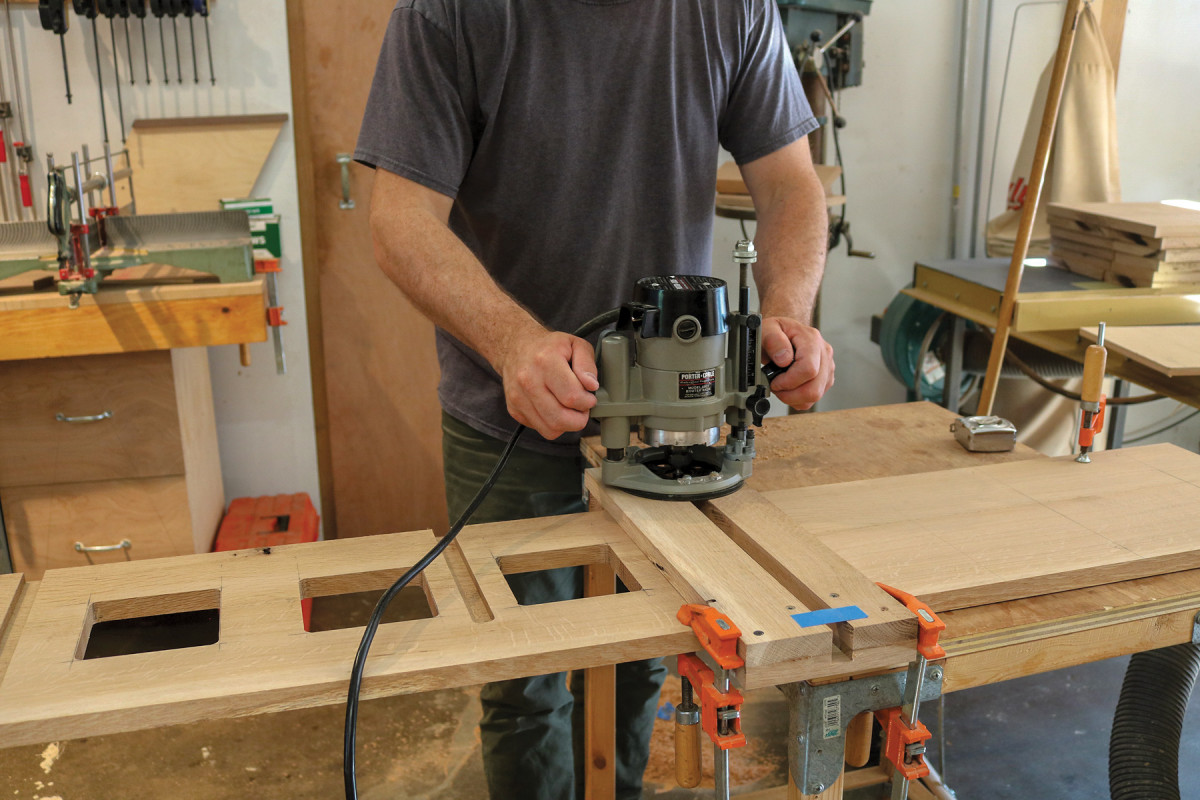
11. Make a jig for routing the shelf dadoes. The router uses a pattern bit with top bearing. The jig pressure fits onto the side, and I put two clamps on either side to prevent the jig from drifting. For the stopped dadoes, measure and place a piece of tape to remind yourself to stop.
There are five shelves of differing depths in this desk, as well as the gallery and toe kick. They should all be made from 3/4“-thick material. Cut all of the shelves to length at the same time so they are all the exact length. The gallery and toe kick do not inset into dadoes. They butt against the sides, so they’ll be 3/4” shorter than the shelves. After all of the cross members are cut to length, cut to width. Cut the 6° angle on the front of the desk shelf. After all of the parts are cut to size, it’s time to sand the parts. Sand with #100 grit and #150 grit using an orbital sander, and finish by hand-sanding with the grain using #150 grit wrapped around a cork block, and then chamfer the edges.
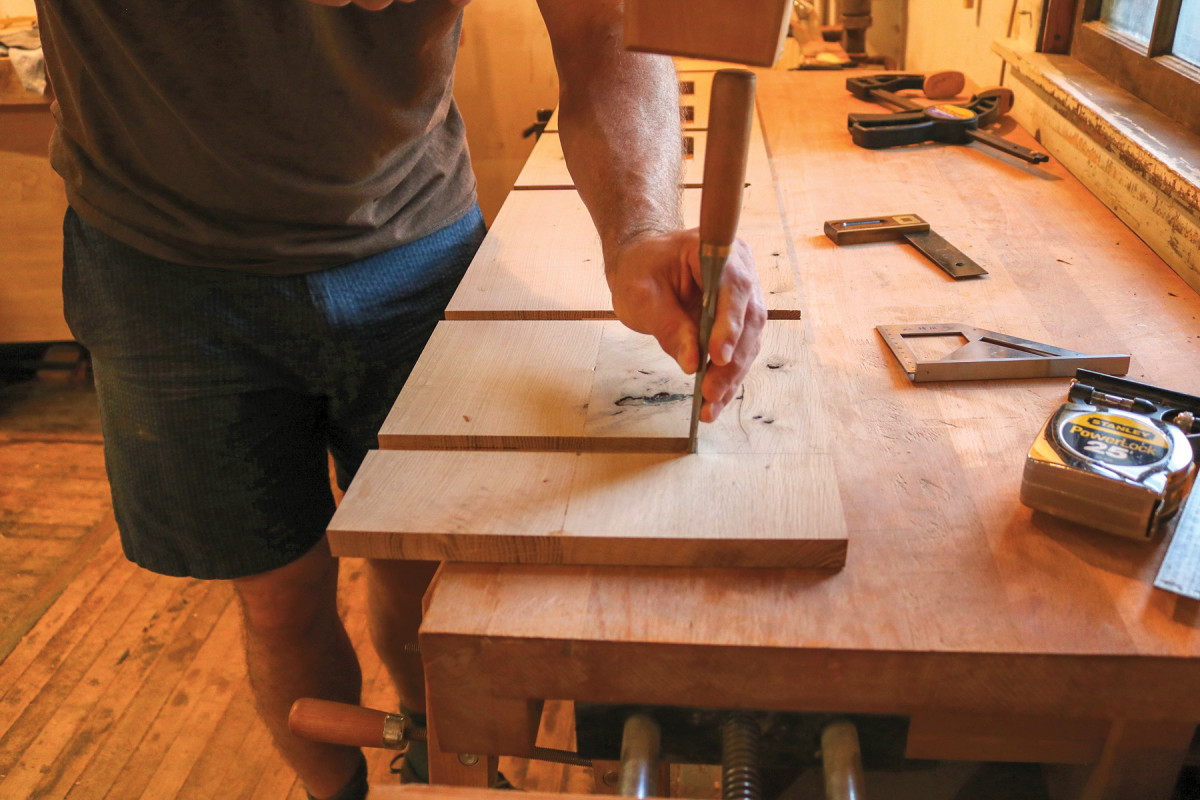
12. Clean up the shelf dadoes with a sharp chisel. Remember the end of the desk shelf dado is at an 6° angle.
The gallery back and toe kick are attached to the sides with floating mortise-and-tenon joints (made with a Festool Domino joiner). Each only requires one mortise per side as there will be a long glue line where each piece also meets a shelf. The gallery is flush with the back of the sides, but the toe kick is inset 1/4“. First mark and then cut Domino mortises in the ends of both the gallery back and toe kick, and then in the top of the side. Next, reset the fence for a 1/4“-offset cut, and cut the Domino mortise in the front of the sides for the inset toe kick.
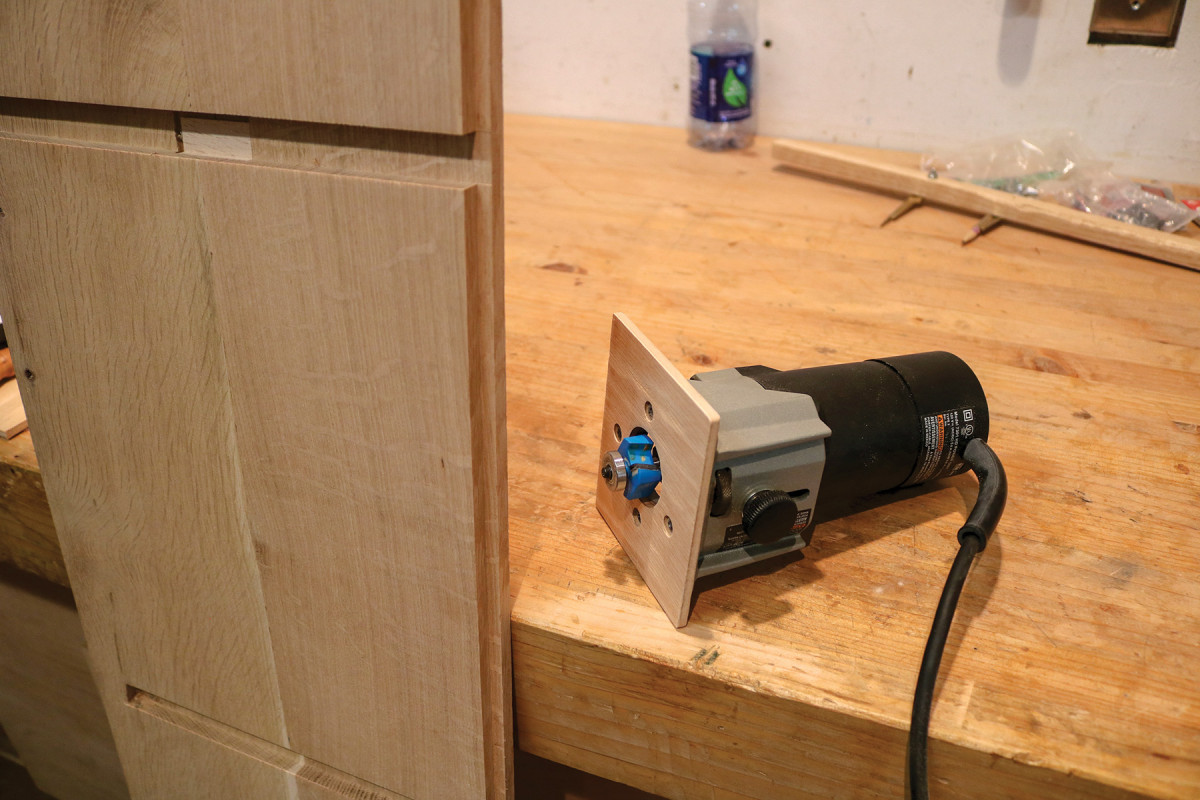
13. Install a 3/8″-rabbeting bit with bearing in a router and rout a rabbet on the back of each side. Rabbeting bits can be larger than the hole on many factory base plates, which was the case with this tool. If so, make a quick auxiliary base plate with a larger hole, constructed with plywood.
The desk shelf needs mortises for the hinges, so when the desk door opens flat, the void between shelf and door would not be too prominent. I chose a conventional black door hinge with rounded edge from Hillman, available at most home stores. However, many different hinges would work. Note that large door hinges often come with longer than 1″ screws, and this desk needs a 5/8” screw so the screw doesn’t protrude through the shelf or door face. The hinges are completely hidden when the desk is closed, and the home center did not carry black screws in the size I needed, so I found some zinc (silver) screws the correct size and bought them for efficiency’s sake.
14. Lay out the profile on one of the sides. The original seems to have long gentle curves but I have simplified it to have straight lines, except for the 2″ radius on the top edge. To draw the radius, first draw 2 lines 2″ away from the front line, and top edge. At the intersection, place a compass or short trammel and strike the curve.
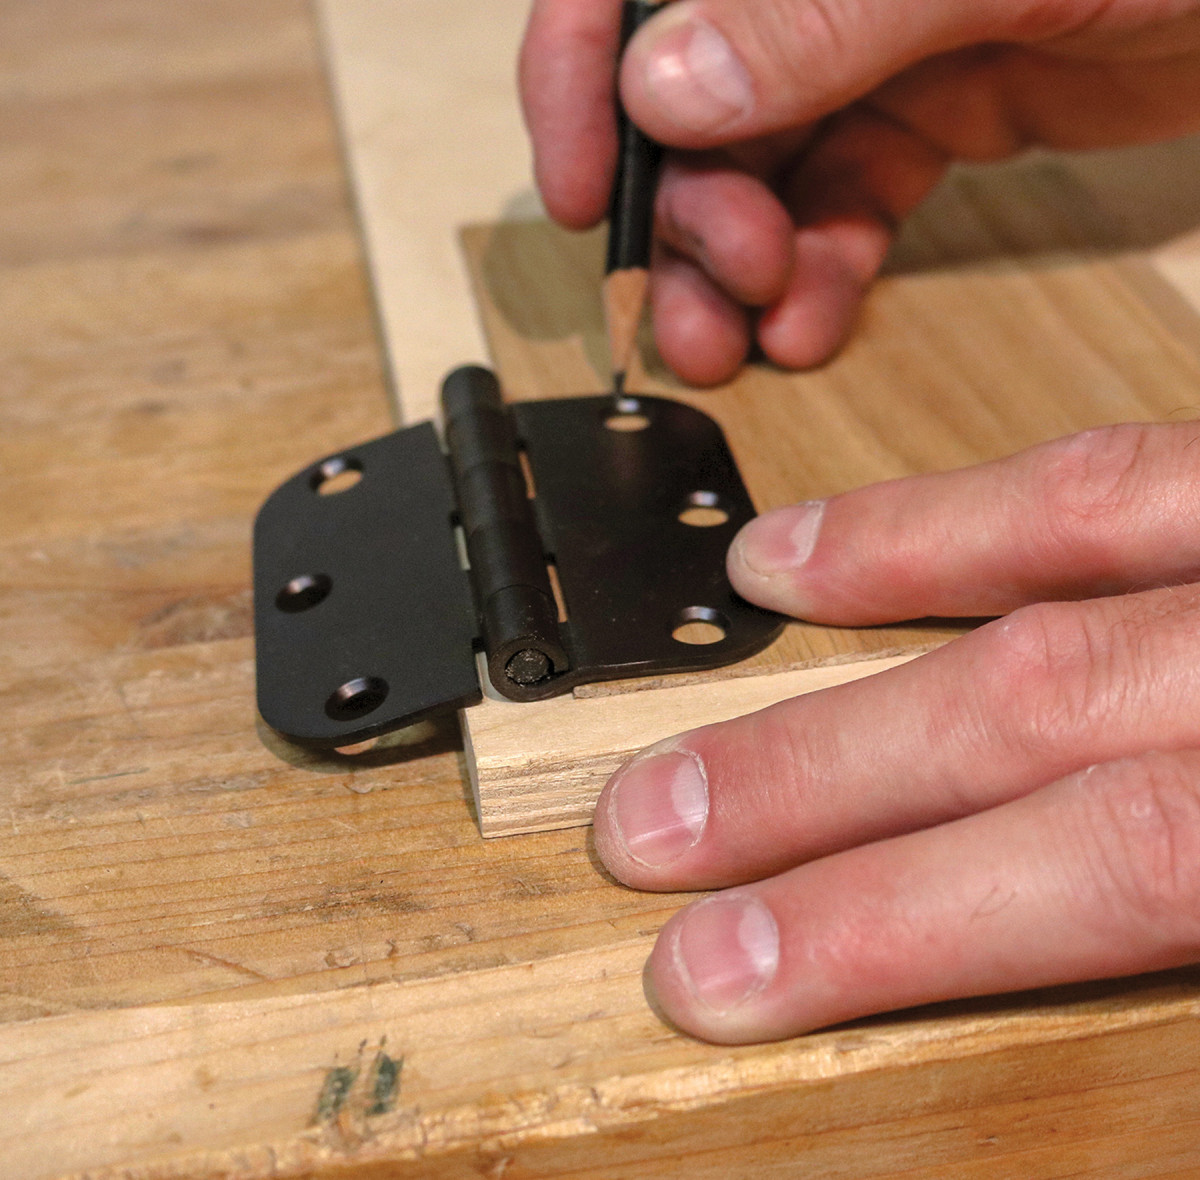
Align the hinges 1″ from the edge of the desk shelf. The mortises are stepped, to accommodate the pin barrel of the hinge. After marking the location, square to the angled face of the shelf, use a straight bit in a palm router to clean out the main flat surface of the mortise, and then lower the bit to remove material for the barrel. Next, use a chisel to clean up the edges of the mortise. Fine tune to get the perfect fit.
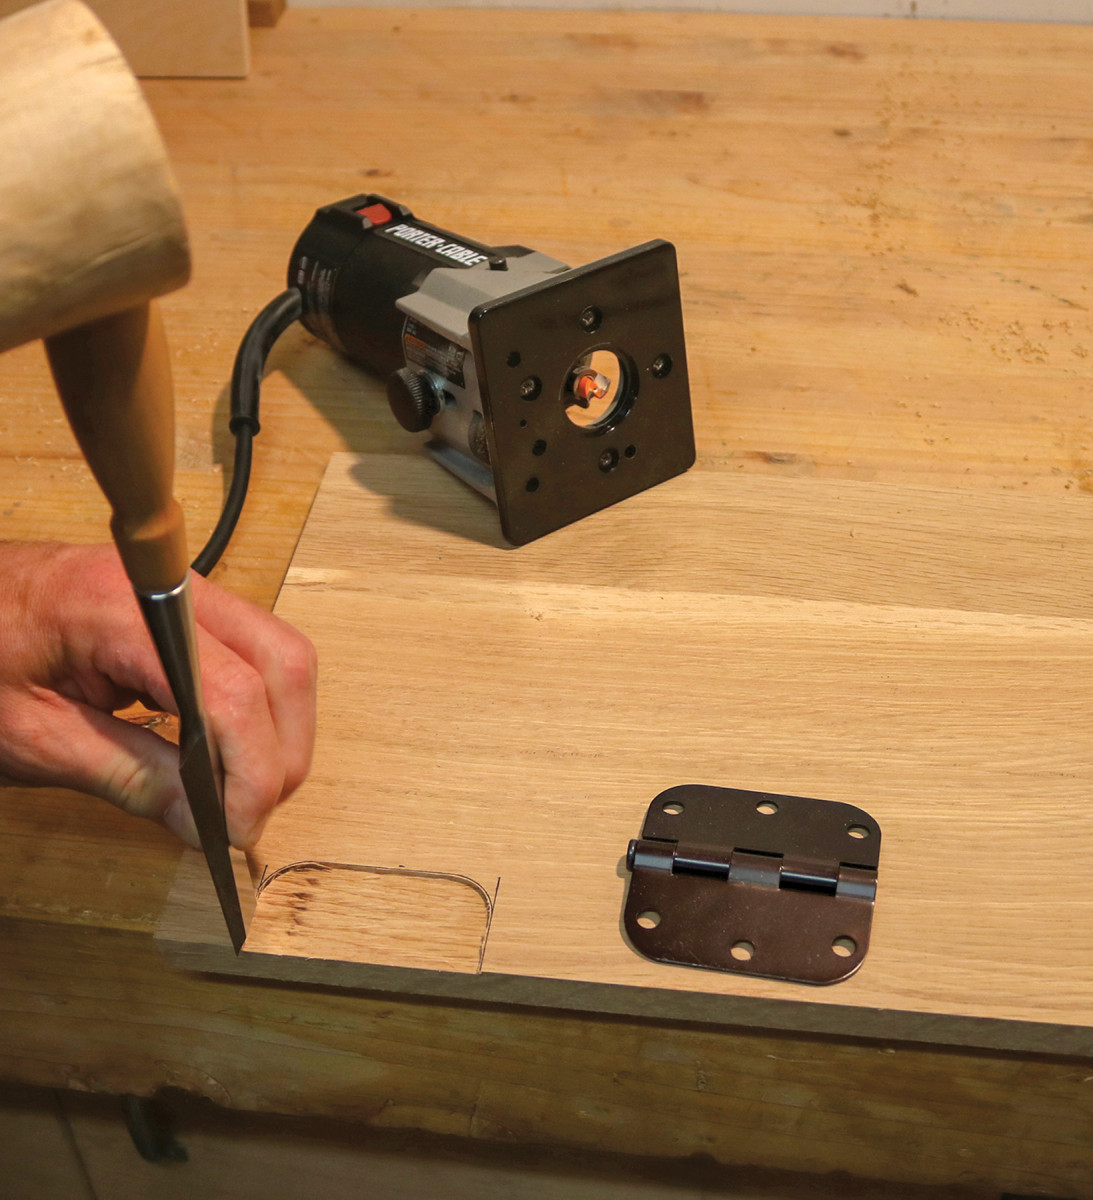
15. After measuring out the hinge positions, trace the hinge in place. Use a straight bit in a palm router to roughly clear out the waste. Set the depth to the thickness of the hinge, and cut as close to the line as possible without going over. Fine-tune the fit with a chisel.
Now it’s time for a dry fit before the glue-up! The scale, complexity and sheer number of parts that need to fit is a real challenge. There were 10 dadoes and eight mortises, plus glue is added where the gallery and toe kick attach to the related shelf. Number all of the shelves and tune each one to fit its corresponding mortise.
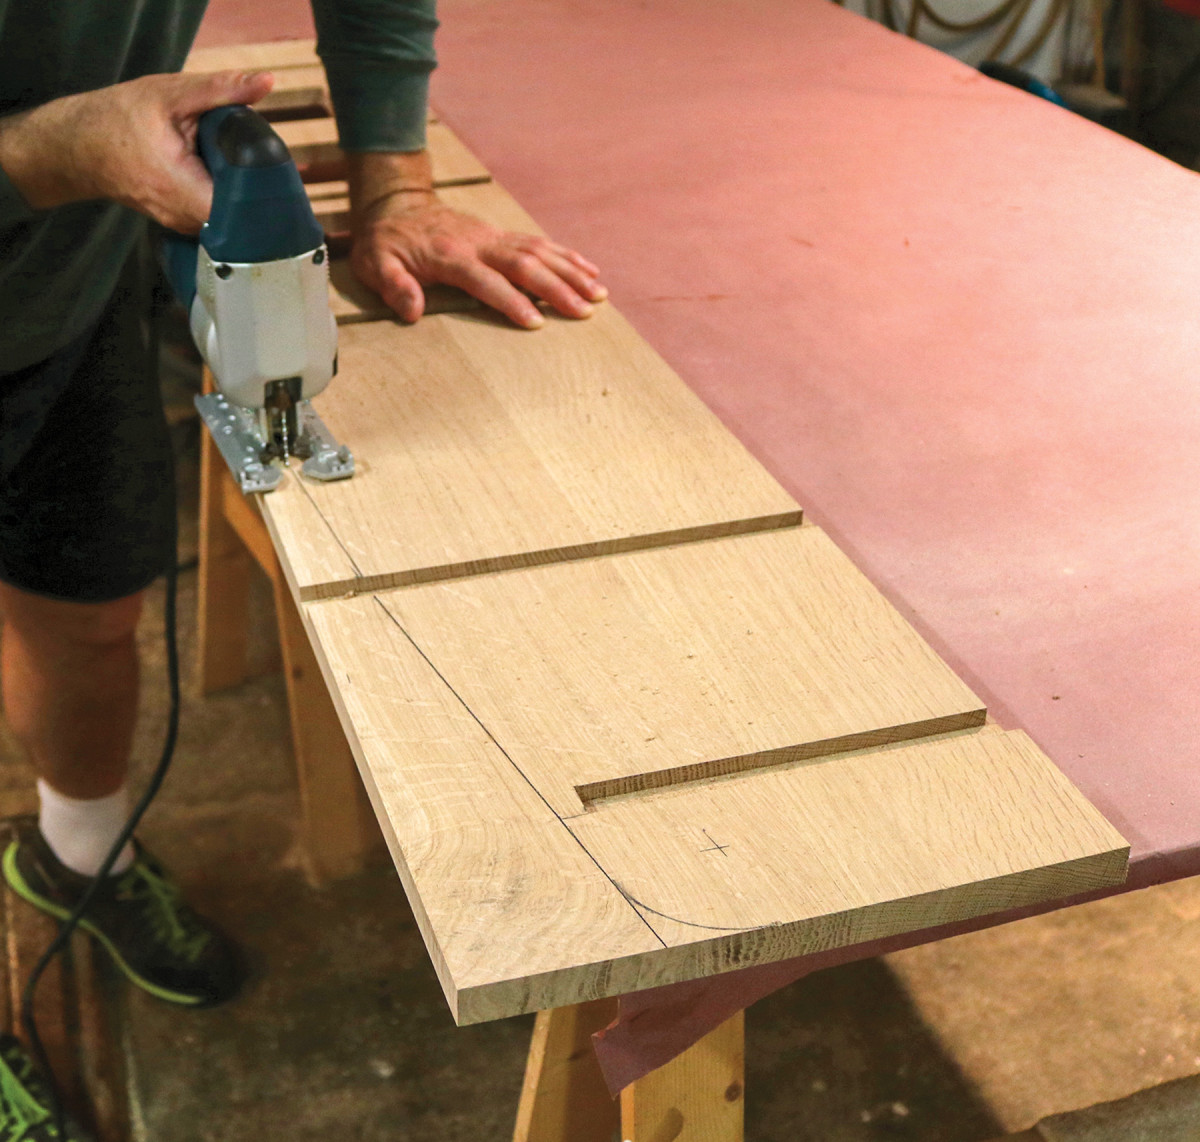
16. As the old adage goes, you can bring the part to the tool (band saw) or the tool to the part. In this case, jigsaw is a great choice. Cut within 1/32″ of the line, and clean it up with a plane and sand paper. Then, use this as the pattern for the second side so they match perfectly.
Have a pal help apply glue (I used Titebond III for its longer open time) and align all of the parts at once. The glued-up desk, with all of the hinges was extremely heavy. Tip up the desk to make sure all of the shelves are seated to full depth. If not, grab a mallet and drive the shelves home and clamp the assembly. Lastly, check for square by measuring from corner to corner, and also with a square at all of the shelves. Then take a deep breath! After an hour, chisel the rubbery glue in the corners, and then let the glue cure overnight.
Finishing
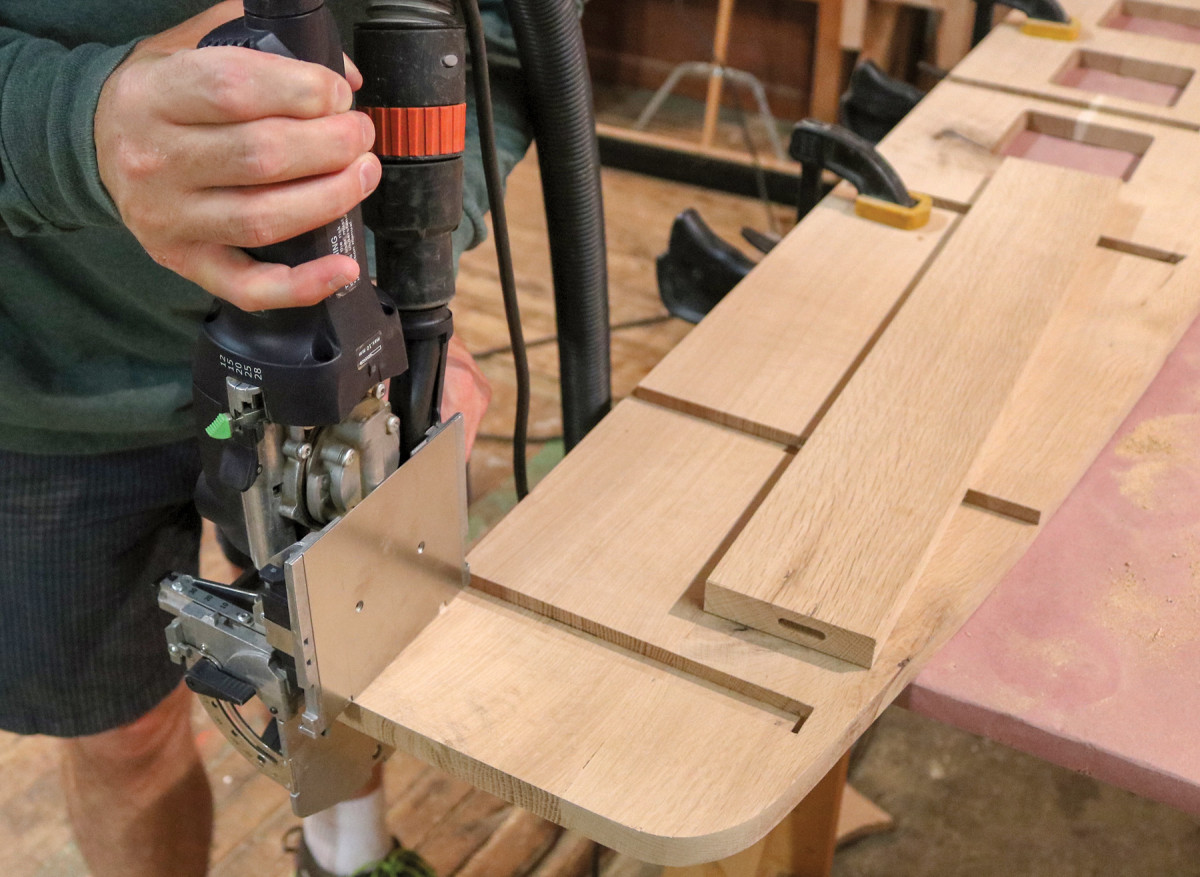
17. The gallery only needs one Domino mortise on each side to align it to the back. I cut the mortises first on the gallery back (laying on the side, here) and then tip the Domino joiner up and plunge the cutter down into the side. Use the same technique for the toe kick.
It’s easiest to finish the rest of the assembly before mounting the back and the drop front. To match our current furniture, this piece strays from the conventional Arts & Crafts colors of reds and browns and employs a more contemporary dark black. The finish does, however, utilize a multiple-step finishing process to get a complex and rich tone on the wood. Dye sets a deep basecoat with very fine pigment, and the oil-based stain on top adds richness and depth. Lastly, I apply a protective polyurethane coat.

18. This glue-up is not for the faint of heart! It requires 10 clamps, and lots of drippy glue along dadoes. Take your time, rehearse your glue-up and check for square often.
I started with Trans Tint Black dye stain mixed into a suspension of denatured alcohol. The dye is extremely intense, and it’s important to measure. I tried two different mixes; one with 50 drops of pigment per 8 ounces of alcohol, and a second with 100 drops of pigment per 8 ounces of alcohol. I preferred the latter. Apply this dye with a 3″ foam brush. Work quickly, washing the dye mixture on the wood, keeping a wet edge so the fine pigment cannot pool and make dark spots, and then follow with a wipe of cloth for a balanced application. Wait a couple of hours before staining.
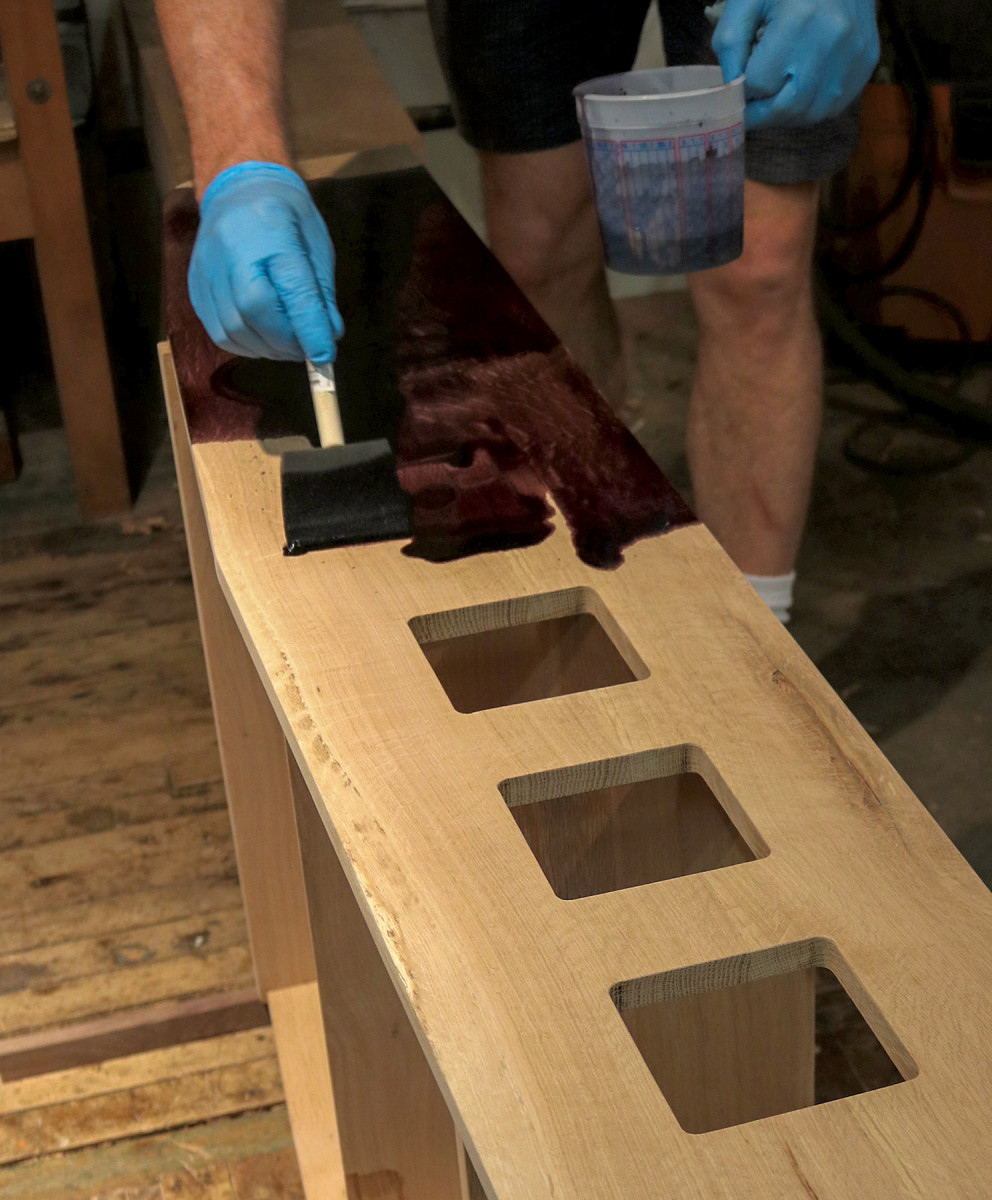
19. Working quickly, I flood the surface with the dye mixture. I follow with a wipe using a clean cloth. When working corners and intersections, wipe quickly as as it’s easy to get uneven pigment in this area.
I followed the dye with General Finishes Ebony gel stain. Use an inexpensive bristle brush to get the gel in all of the pores of the white oak and on the surface. Work in small sections; wipe the excess gel stain before it dries on the surface. When finishing the shelves, don’t slather the gel into the corners, rather work each plane at a time. Rub it off until it’s completely dry, and almost burnish it with a clean cloth. Despite this process, the gel stain doesn’t cure for 24 hours.
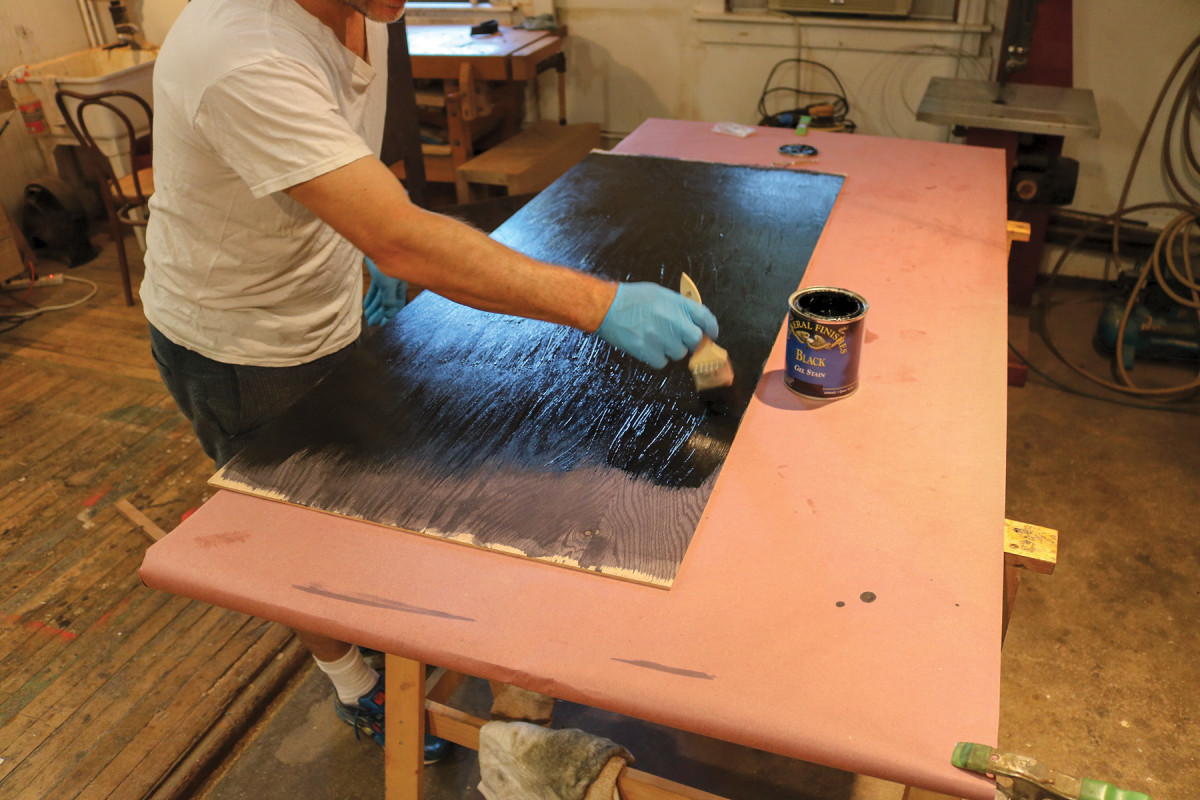
20. After the alcohol/dye mixture has fully evaporated, I apply the Gel Stain to the parts. On large parts like the back I apply the gel quickly and wipe immediately.
Then, spray a polyurethane top coat. The oil-based solvent in polyurethane is the same as the gel coat, and by spraying, you avoid the risk of dragging the pigment around with a bristle brush. My preference for smaller projects like this is Minwax semi-gloss polyurethane in an aerosol can. The fine mist dries fast and the nozzle sprays in a fan as opposed to a jet, which seems to lay down a smooth finish. Between coats, sand with 220 grit abrasive. I applied three coats.
Added Touches
21. My heavy-duty hinges needed shims to allow the desk to open fully. I used 1/16″ veneer as a shim. After tracing, I cut out the shim with a utility knife.
Now that the whole cabinet is glued-up, and finished, be very careful with your almost-completed piece. Before mounting the hinges, however, make two shims for the hinges to accomodate the depth of the hinge barrels. Trace the hinge on a 1/16” piece of scrap, and cut out the shape with a utility knife.
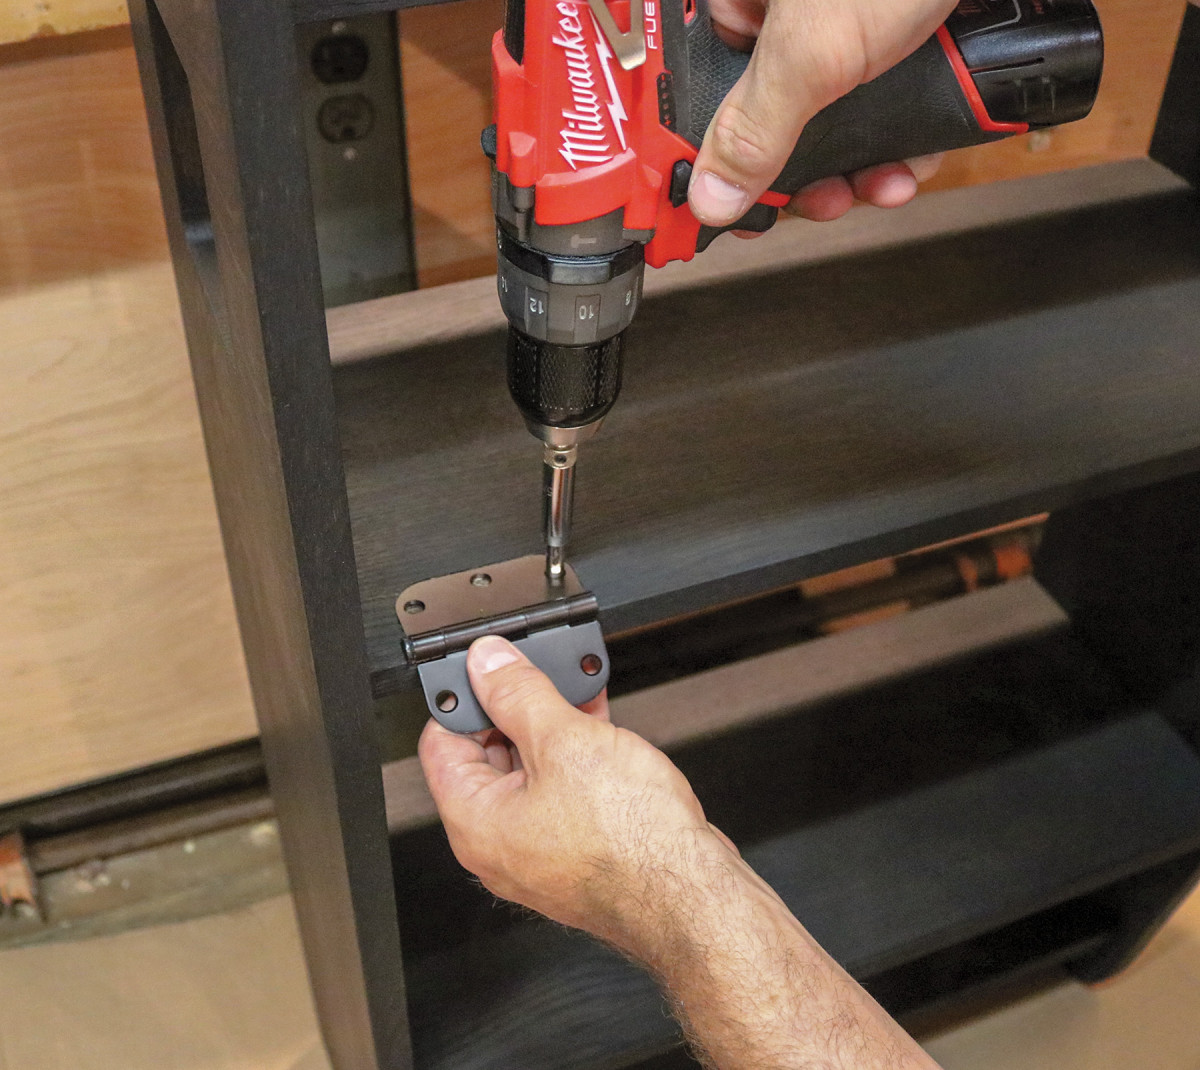
22. Carefully, I flip the desk and set it on a clean surface. I use a self-centering Vix bit to predrill the holes for screws.
Flip the desk over and fit the hinges to the mortises. After ensuring the hinge is seated in its mortise, use a self-centering Vix bit to drive pilot holes. Next, fasten the hinge in place with aftermarket 5/8“-long #10 screws. Apply a length of double-stick tape to the hinge to hold the shim in place, which is essential for the next step.
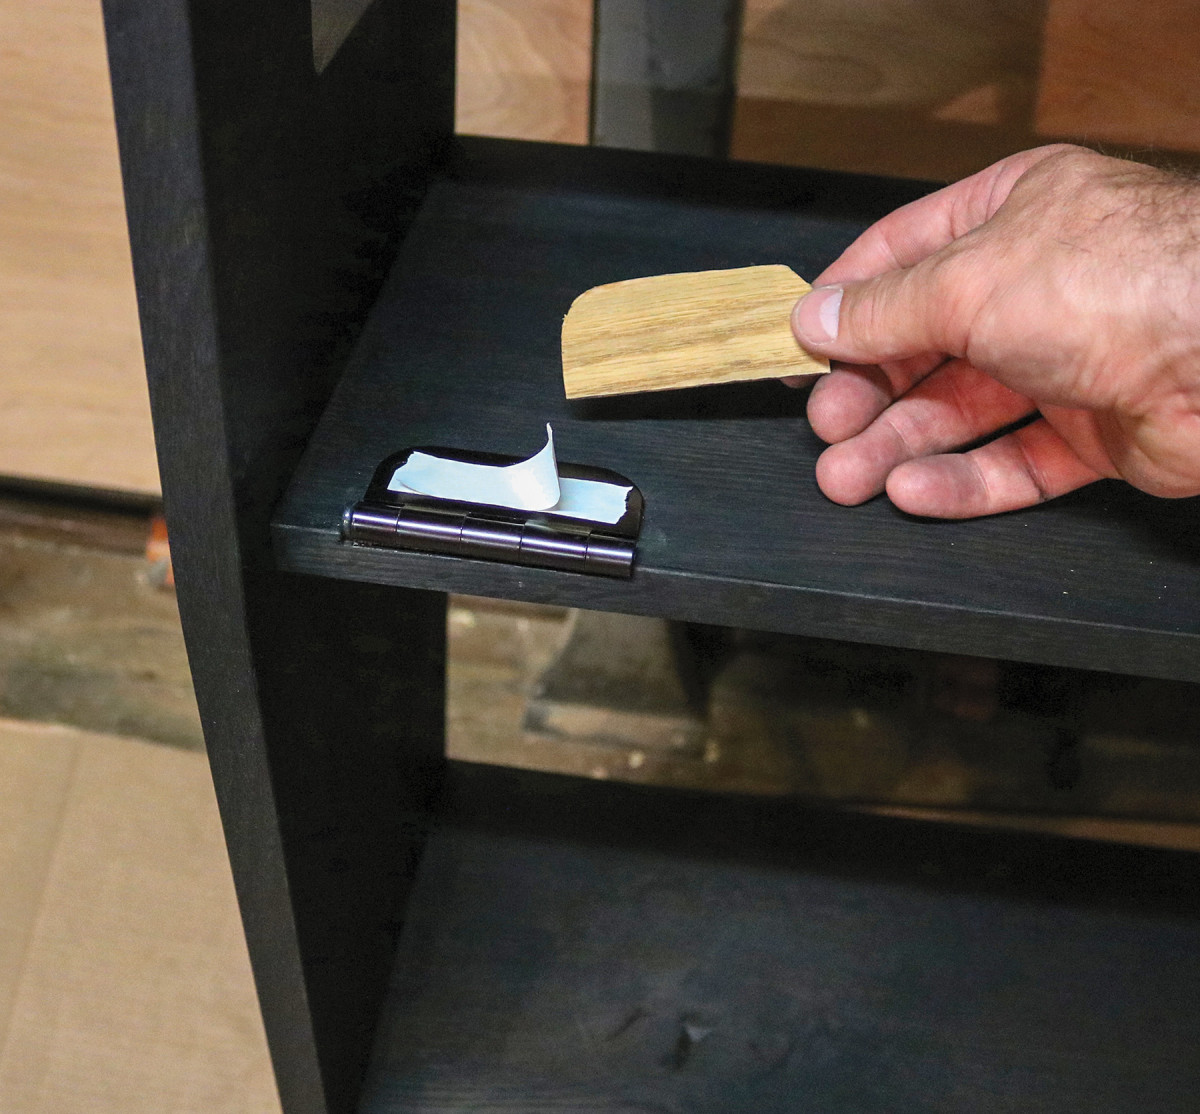
23. Flip the hinge over. Attach a piece of double-stick tape to the hinge and fix the shim in place.
Lift the desk onto a workbench on its side (a friend is a backsaver here!). From the front, set the door in its final position and gently shim the door so it’s centered equally between the sides, and the same distance from the shelf at the top of the door. The door should be firmly wedged in place. From the back, fold the hinge with shim flat to the door. With the Vix bit, predrill center holes for the screws. Again, utilize aftermarket screws. After driving all of the screws to hold the door in place, carefully tip the desk upright and remove the shims.
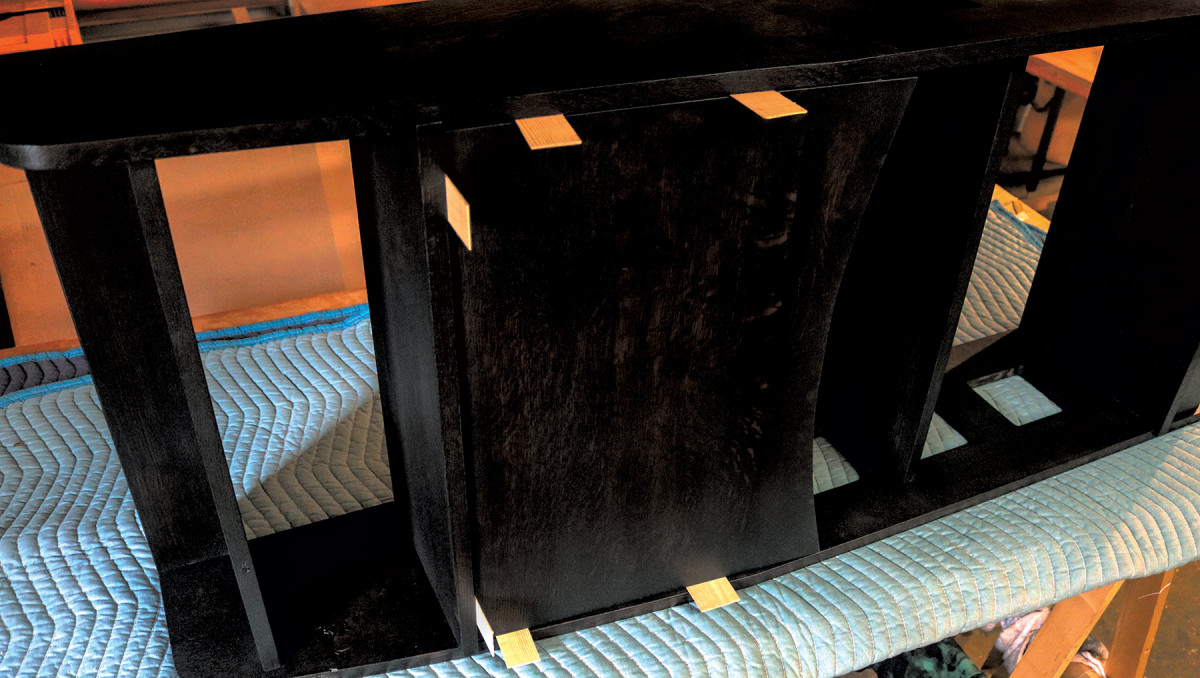
24. Lay the cabinet on its side and carefully place the door in its place. I use a collection of shims to get the door perfectly centered and sitting the same distance from the top. The door should be wedged firmly in place with the shims.
The original desk had a combination lock/handle. I couldn’t find any that I was wild about, and securing the contents of the desk wasn’t imperative in our flat. I decided to go with a 8-9oz. leather strap, looped back on itself.
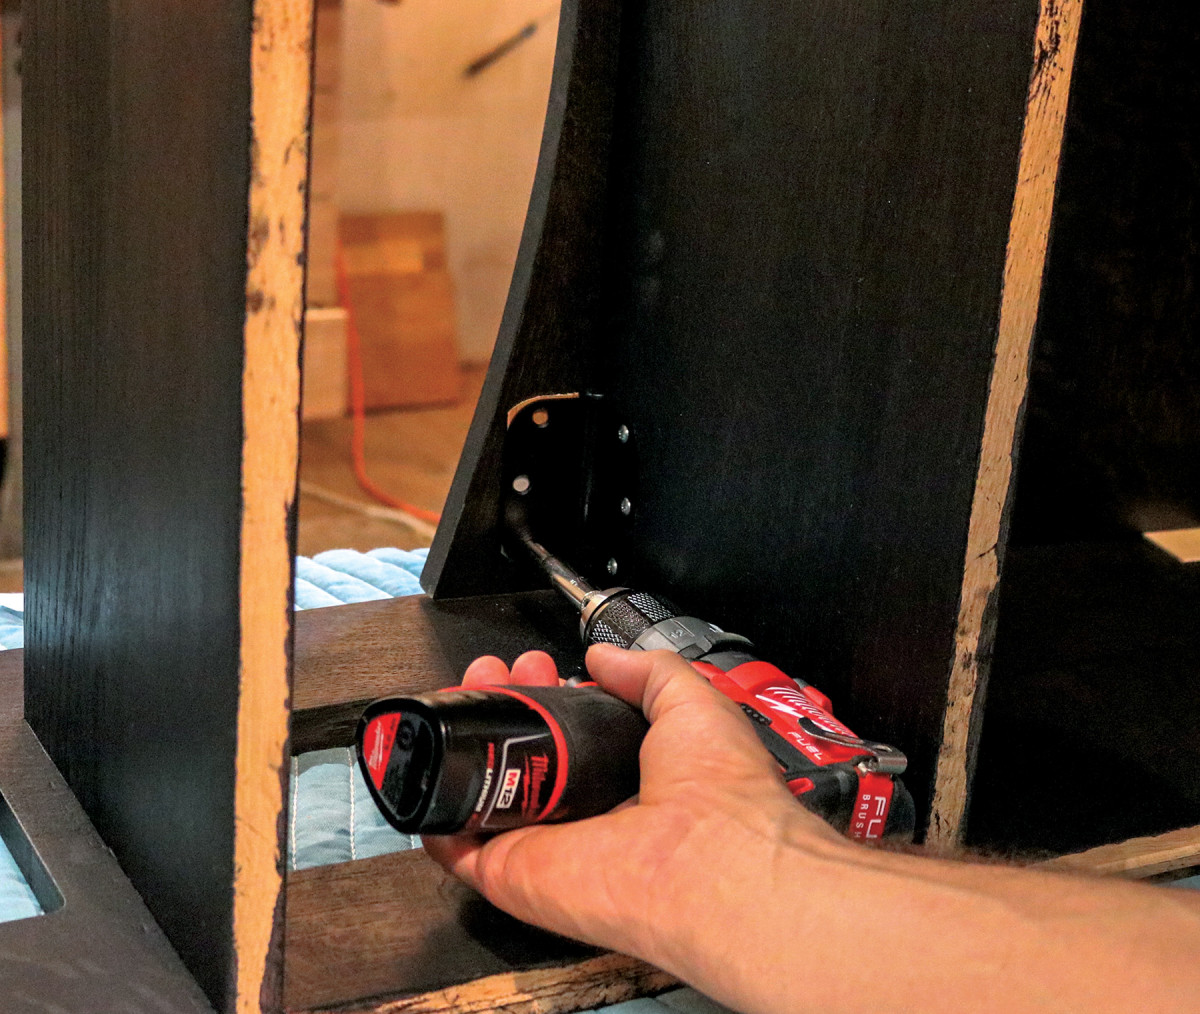
25. With the back still off, from behind, gently fold the hinge with shim attached so it flattens against the bottom of the door. Again using a Vix bit, I carefully drill out the six holes. Next, I drive the aftermarket screws in place.
The edges of the strap are unfinished after cutting to size and length, so I burnished the edges with #320-grit sandpaper and then carefully painted the edges with a satin latex paint. I used a leather punch to make the holes. After trying out a number of variations, I opted for two, black, low-profile screws with a small hex drive. While not necessary, a pair of magnetic latches attached inside the desk hold the cabinet door in place.
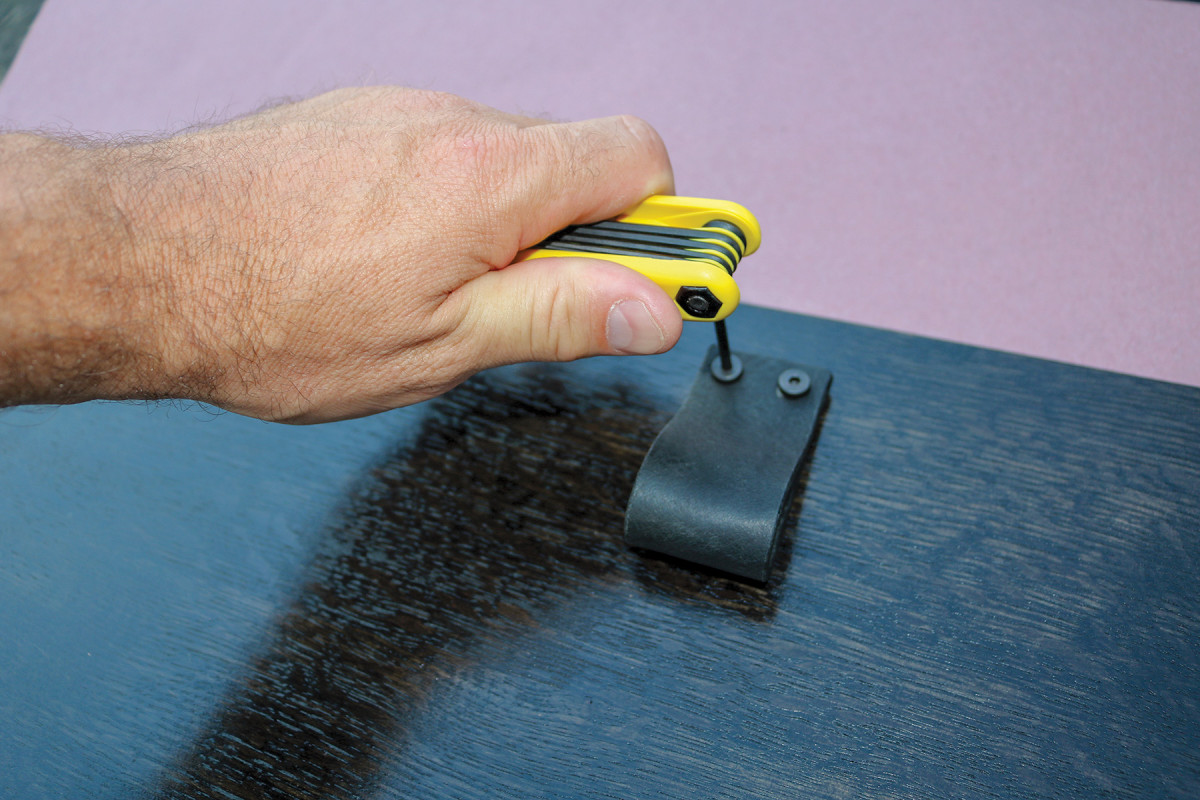
26. Black leather pairs well with the dark black of the desk. I drove the black bolts into pilot holes with a hex wrench. The visible hardware is in keeping with the spirit of the original, however the leather is a nice contemporary detail.
The last step is to attach the back. Dry-fit the back to the assembled desk. Measure the location of the shelves and transfer to the back. Pre-drill and countersink the holes for attaching the back. Set the back in place and counterbore for the screws. Drive screws on all of the horizontal shelves to hold the back in place. Then set the desk upright and get to work!
Here are some supplies and tools we find essential in our everyday work around the shop. We may receive a commission from sales referred by our links; however, we have carefully selected these products for their usefulness and quality.