


We may receive a commission when you use our affiliate links. However, this does not impact our recommendations.
A clear plastic triangle makes it easier to line up your cut.
I like to augment tabletops and drawer fronts with decorative banding, inlaying it around the perimeter. The problem has always been the fussy trimming of the mitered corners. It’s hard to cut the miters perfectly using a chisel freehand while cutting to a layout line. I recently cobbled up a jig that simplifies the process and virtually ensures perfectly fitting miters every time.
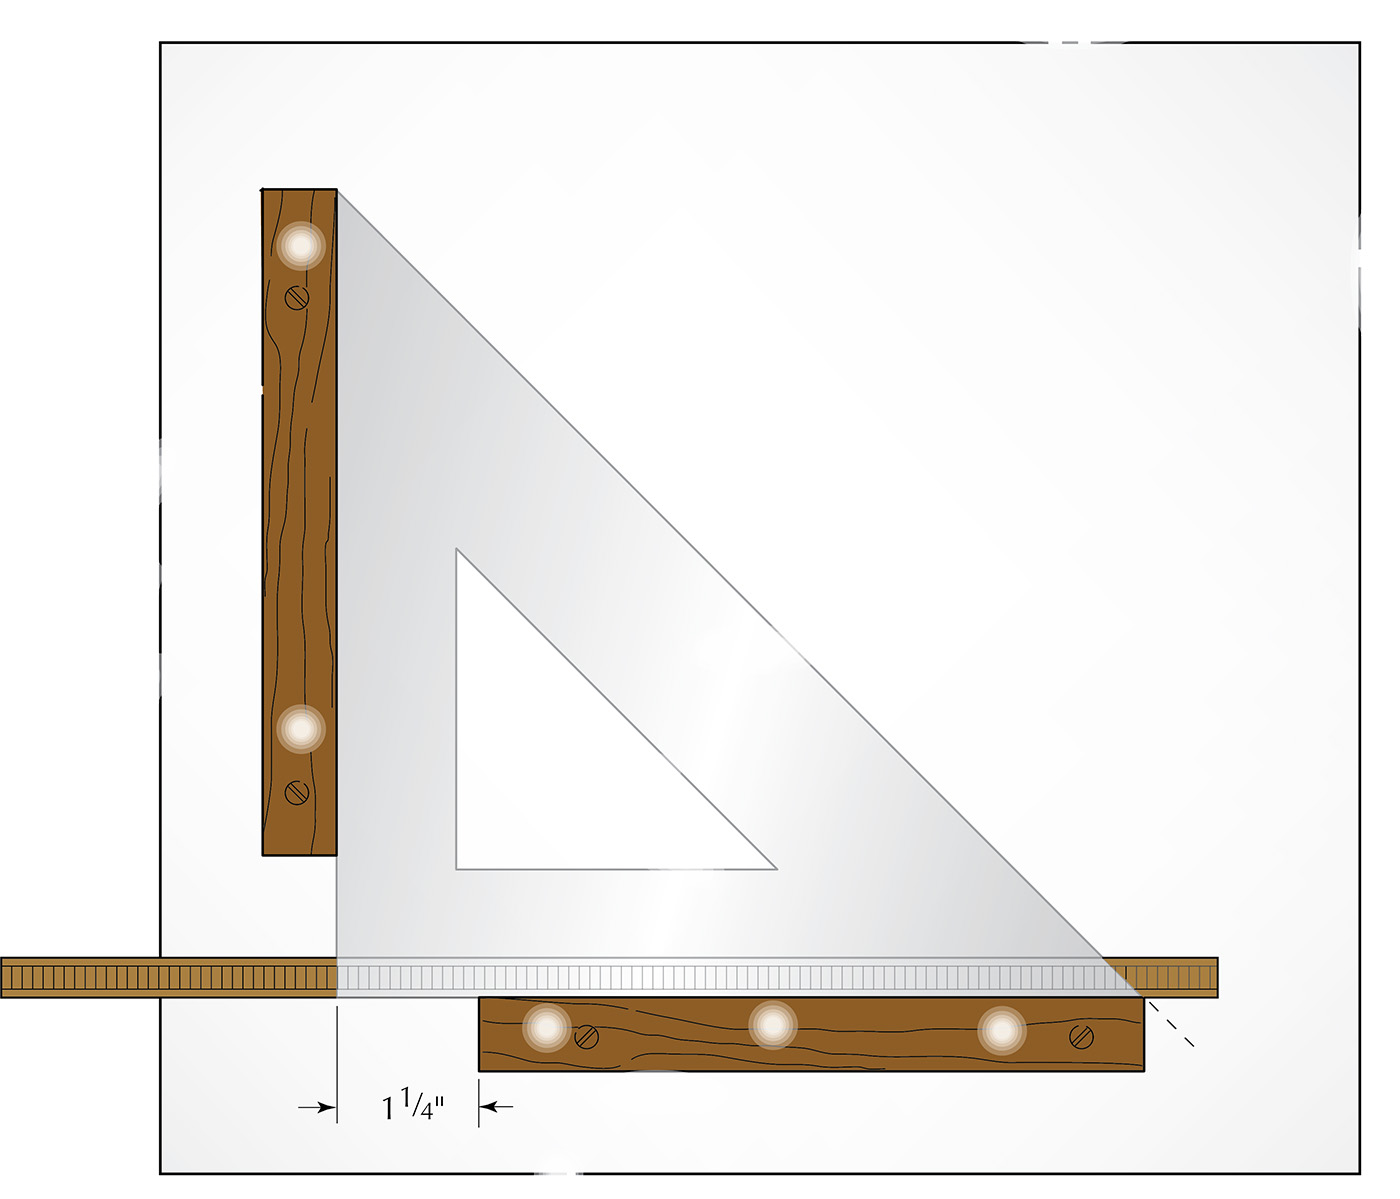
The jig consists of two short wooden fences screwed to a 3⁄4“-thick melamine panel at 90° to each other. Position the fences so that one end of each terminates at the 45° tips of a clear plastic drafting triangle as shown. The opposite end of each fence should stop short of the triangle’s 90° corner by about 1-1⁄4“.
To use the jig, place the marked banding good-face up against the appropriate fence. (I apply a short section of masking tape to the banding for layout line visibility.) Lay the triangle on top, pressed against both fences. Slide the banding as necessary to align your cutline with the long edge of the triangle. Make the cut using a razor-sharp chisel, with its back pressed against the edge of the triangle. I find that it’s best to angle the chisel a degree or so inward to create a slight back-cut, which ensures that the top faces of the miter butt tightly against each other. — Bill Coker


