


We may receive a commission when you use our affiliate links. However, this does not impact our recommendations.
Close your eyes and picture it: your entire shop organized, a place for every tool, never struggling to find your cardscraper when you need it, and a stress-free day of woodworking. Sound like a dream? Not anymore! Finally get your shop organized just the way you want it.
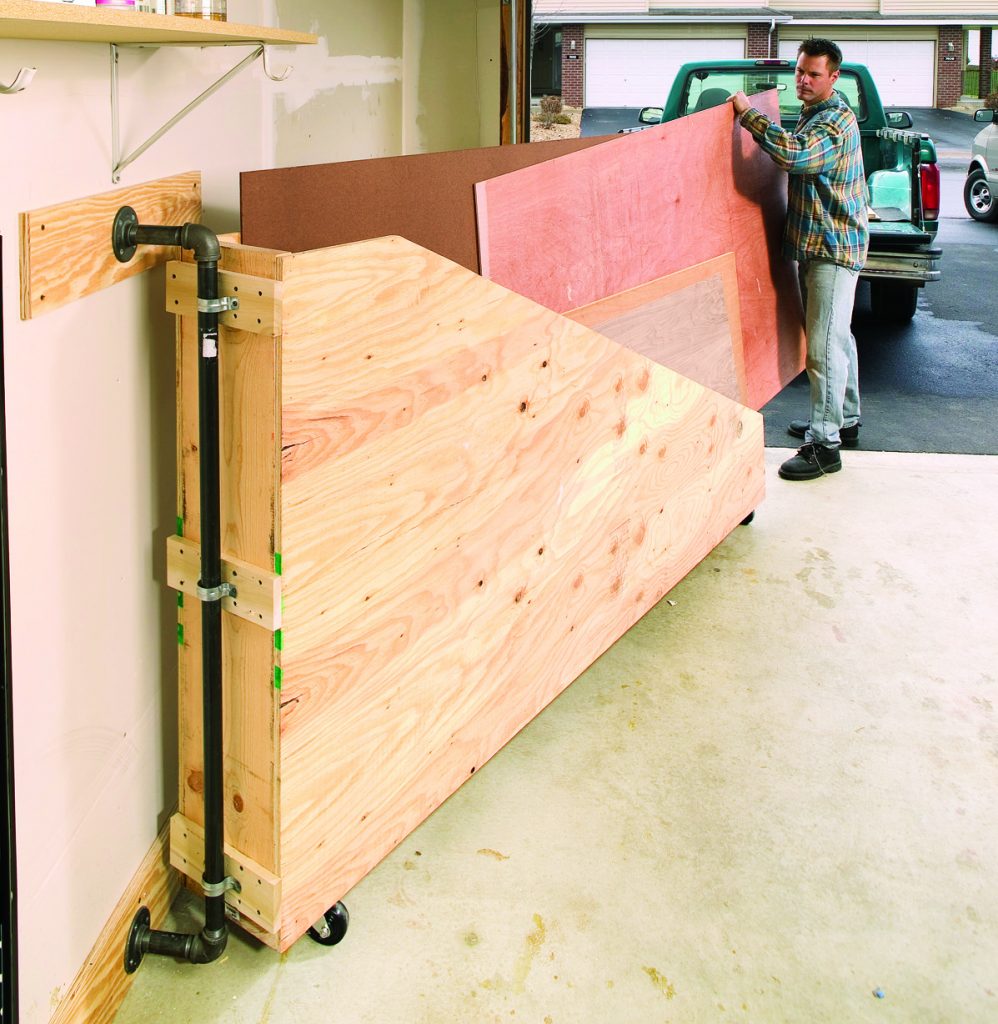
Swing-Out Plywood Storage
I was looking for a way to keep my small inventory of plywood organized and easy to access. The garage at my town house is small, but I did have a narrow space along one of the sidewalls next to the overhead door. After some head scratching I designed this swing-out storage unit. It fits the space perfectly and allows me to access any piece of plywood that I want because it works like a file folder.
I bought all the materials for it at my home center for around 75 bucks. The hinge is made out of 1-in. pipe parts and fastened to the end of the storage container with 1-1/4-in. pipe straps. The pipe is connected to the wall with pipe flanges. The unit rolls on four 3-in. non-swiveling casters.

Deep Drawer Organizer
I built a deep drawer for my workbench so I would have lots of storage, but it created another problem. The tools I wanted were always at the bottom of the heap. I solved my frustration by adding an upper and lower tray. The upper tray slides forward or backward on top of the lower tray, making the lower tools fully accessible. Both trays are removable, so I can carry them closer to a project, if I need to.
I made my trays out of 3/8-in.-thick pine and assembled them with glue and brad nails. –Kevin Groenke
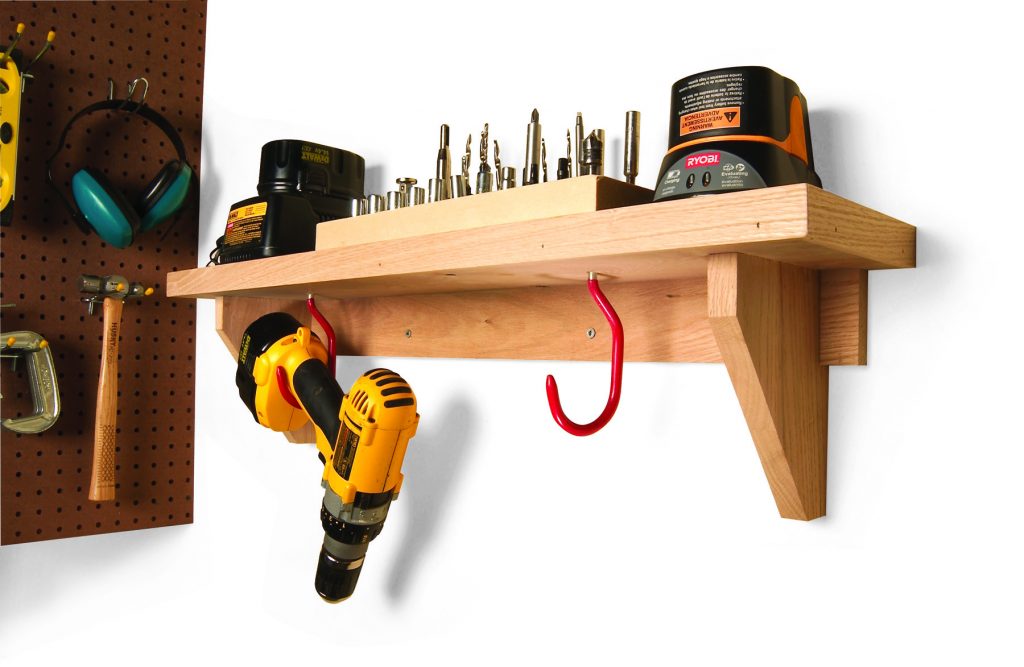
Hanging Your Cordless Drills
While building this little station to organize my cordless-drill paraphernalia, I discovered that bicycle hooks make great drill holders. Mounting the station on the wall saves valuable benchtop space. Now I never have to hunt for my drills, chargers and bits. –Hans Wendt
 Vertical Lumber Organizer
 Vertical Lumber Organizer
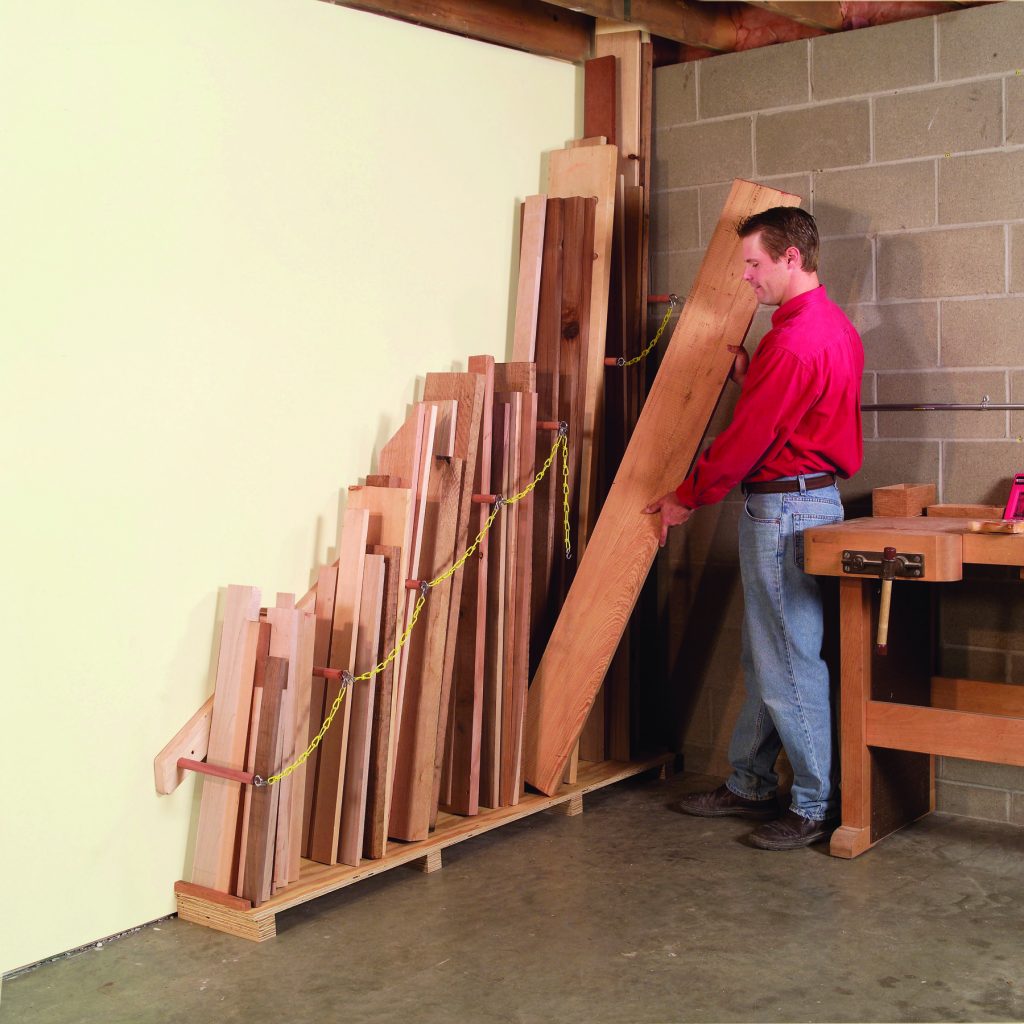
Before I installed this vertical storage rack, my lumber was hard to manage and a housekeeping nightmare. I could never find the piece I wanted, and removing a board from the back of the stack was sure to cause trouble. Finally, after a major board slide, I decided to take action. I drilled holes and installed 1-in.-dia. dowels in a 2×4 that I anchored to the wall. Mounting it diagonally allows me to separate my boards by length. Eye screws and chains help to secure them. A raised exterior-grade plywood shelf keeps the boards off the floor, so they don’t absorb moisture from the concrete. –Richard Helander
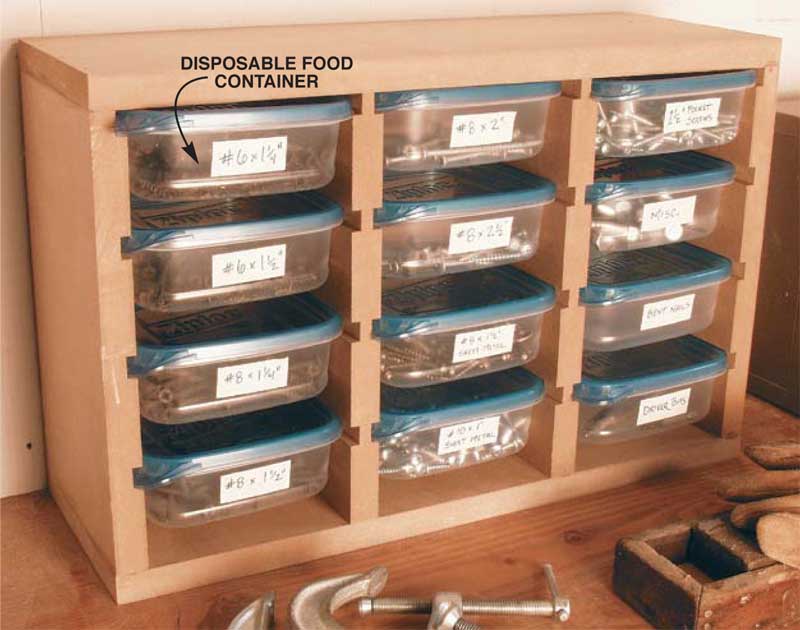
Small Parts Organizer
I’ve designed a small-parts chest that’s as useful as it is simple to make. I’ve found those disposable, plastic containers for leftovers are ideal for small parts, such as screws and nails. The containers come in a variety of sizes. I like the “soup-” sized ones that measure 6 in. x 4-3/4 in. x 2-3/4 in. They cost about $3 for a five-pack. The overhanging edges of the container fit into dadoes cut into the sides and dividers of a simple box. The containers work like drawers with or without the lids. I keep the lids on mine so my screws don’t end up packed in sawdust. –Carey Moore
 Card Scraper Organizer
 Card Scraper Organizer
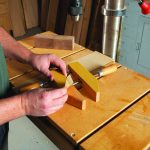
A scraper’s edge is very delicate. I used to keep my card scrapers loose in a drawer, but to avoid nicking their edges, I decided to make a simple stand for them. I cut a few slots in a 2″ thick piece of hardwood using a backsaw; the scrapers fit perfectly in the saw’s kerf. There’s extra space on the stand in case I need to add more slots. –Alejandro Balbis
 Sanding Strip Organizer
 Sanding Strip Organizer
I cut sandpaper strips for pen turning. The problem is that some of the strips don’t have the grit information on them. I used to just clip the stacks of strips in clothespins with the grit sizes marked on the clothespins. I’ve improved on this by building this sandpaper strip organizer which allows me to easily see when certain grits need to be refilled. The tubes are plastic conduit. I fastened the clothespins on the organizer and use the strip in the clothespin until it’s worn out. You could do without the clothespins if you like. –Charles Mak
 Tablesaw Storage
 Tablesaw Storage
Perfboard isn’t just for walls—it’s perfect for organizing stuff wherever you need it. I’ve bolted a piece to the end of my tablesaw’s extension table to hold all the accessories I turn to each day in the shop. Choosing from a wide variety of hooks makes it possible to hang just about anything. –John Cusimano
 Blade Box
 Blade Box
Proper saw blade storage not only keeps things organized, it also helps keep the teeth from getting dinged. This box is actually a variation on one I found in an old issue of American Woodworker. It’s simply a hinged plywood box with slots to organize the blades and keep them from bumping into one another.
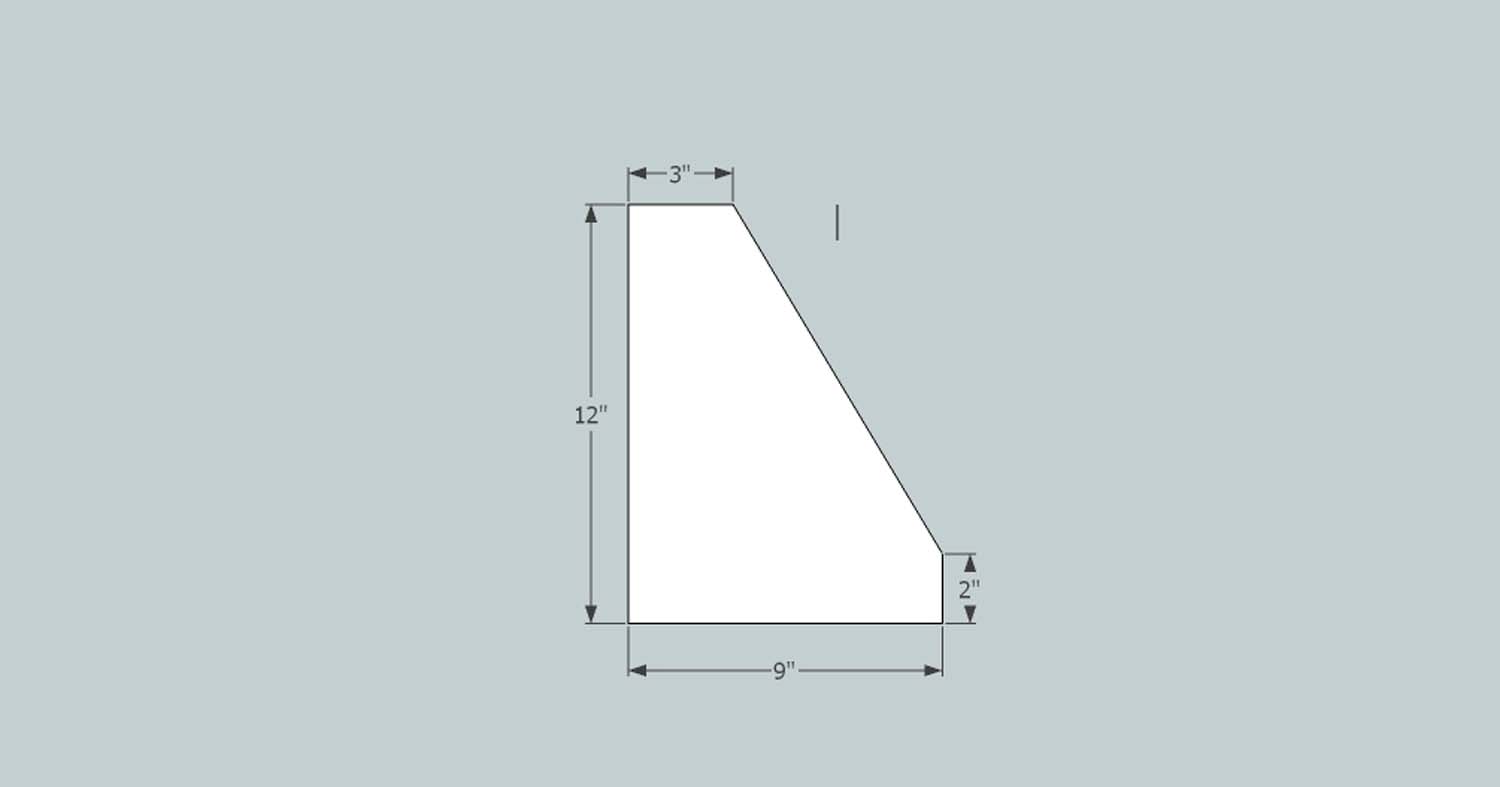
A.
To make the storage slots, you’ll need a stack of thin plywood cut as shown in the illustrations. For storing 10 blades, you need eleven “A” parts and ten “B” parts. Starting with an “A”, glue all these parts together in a stack, alternating A’s and B’s. Besides adding more slots than the original, I made a couple more changes that to me are notable improvements.
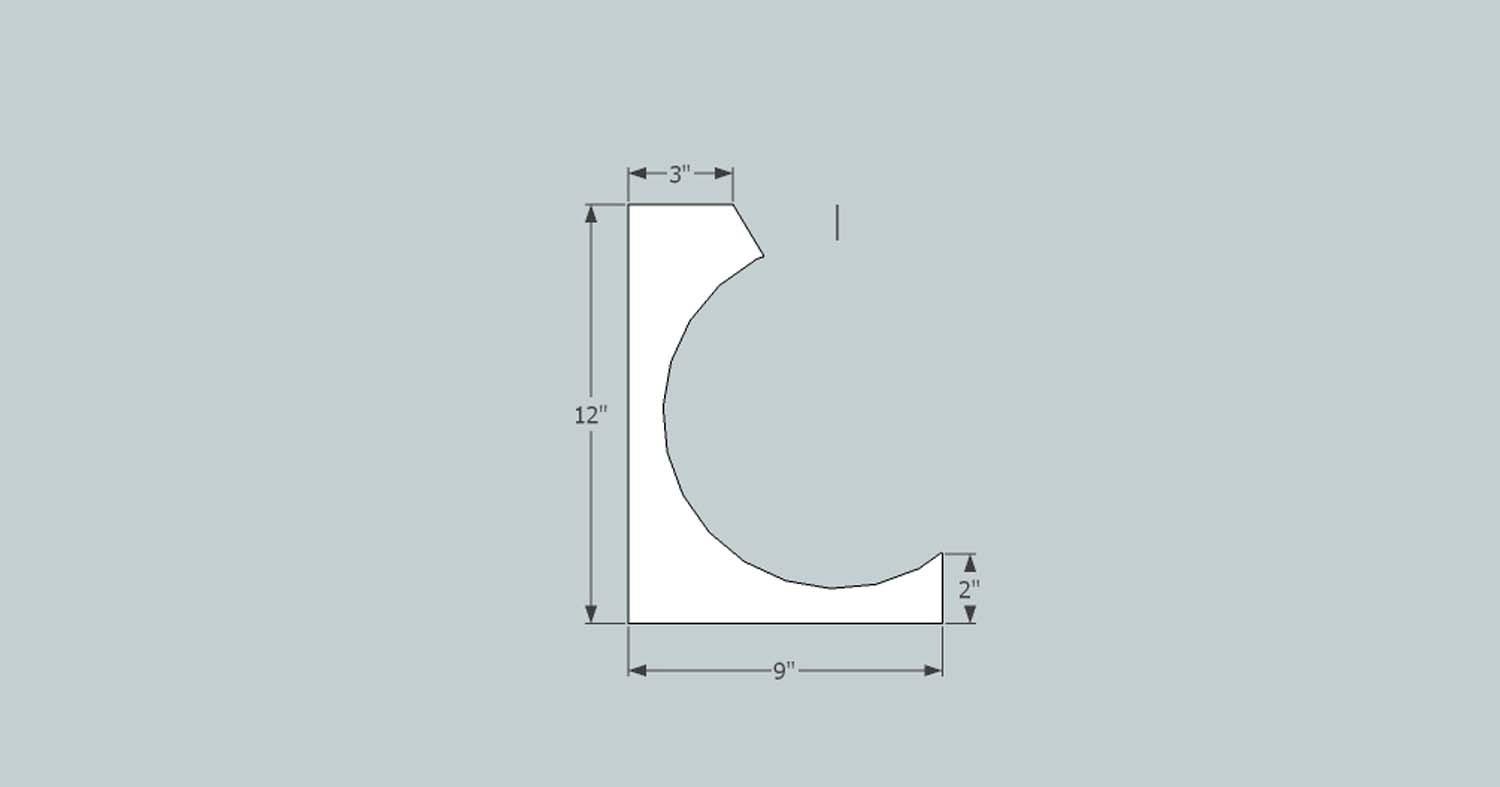
B.
I used cabinet hinges instead of butt hinges. This allows the lid to flip all the way down so it’s much easier to access the blades. I covered the hinges with a piece of wood because I found that it was too easy to bump the teeth against a hinge when taking the blades out or putting them away.
Next, I numbered each blade and attached a “data sheet” with numbers corresponding to each blade inside the box’s lid. The sheet tells me all the information I need about each blade; i.e. kerf width, purpose, and when it was last sharpened. –Pierre Falzon
Slide-out Tool Storage
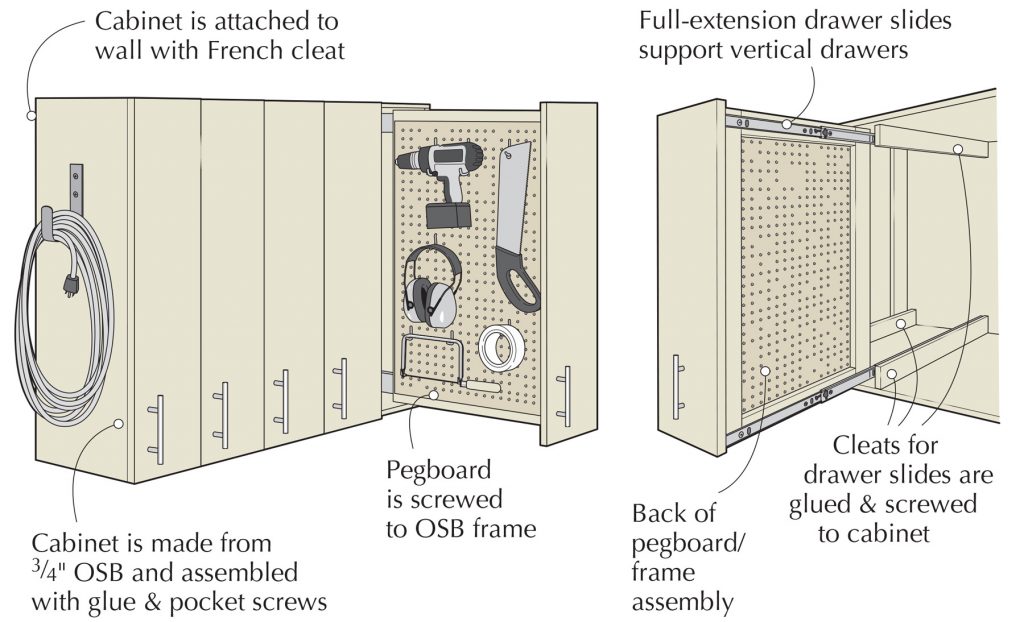
I needed an easy-access storage unit that wouldn’t take up a lot of room but would hold a large number of tools. My solution was a wall-hung tool cabinet with slide-out vertical pegboard drawers.
I used 2′ x 4′ sheets of pegboard and a sheet of 3⁄4” oriented strand board (OSB). The outside dimensions of the cabinet, minus the face-mounted doors, is 28″ wide x 28″ high x 17″ deep. It’s assembled with glue and pocket screws, and hangs on a French cleat.
The five drawers are 16″ deep, framed with 2″-wide pieces of OSB and attached to Lee Valley 16″ full-extension slides rated at 100 pounds. (#02K30.16). The pegboard tool hooks are from a local hardware store.
Metal garden hose hooks are screwed to both sides of the cabinet, and hold extension cords and vacuum hoses. -Dyami Plotke
Here are some supplies and tools we find essential in our everyday work around the shop. We may receive a commission from sales referred by our links; however, we have carefully selected these products for their usefulness and quality.


I love the vertical lumber rack. There’s a new more flexible system out there called the speed divider by fastcap.com . Works great and way cheaper than pipes with floor flanges and 2x4s. The dividers slide left and right in 1/2″ deep saw blade kerf in any pc of wood as a cleat so its flexible as your lumber quanities change.