We may receive a commission when you use our affiliate links. However, this does not impact our recommendations.
“Measure twice cut once” is probably the most commonly passed-on bit of woodworking advice. With that in mind, we’ve gathered some of our favorite tips to make measuring easier, more accurate, and sometimes altogether unnecessary!
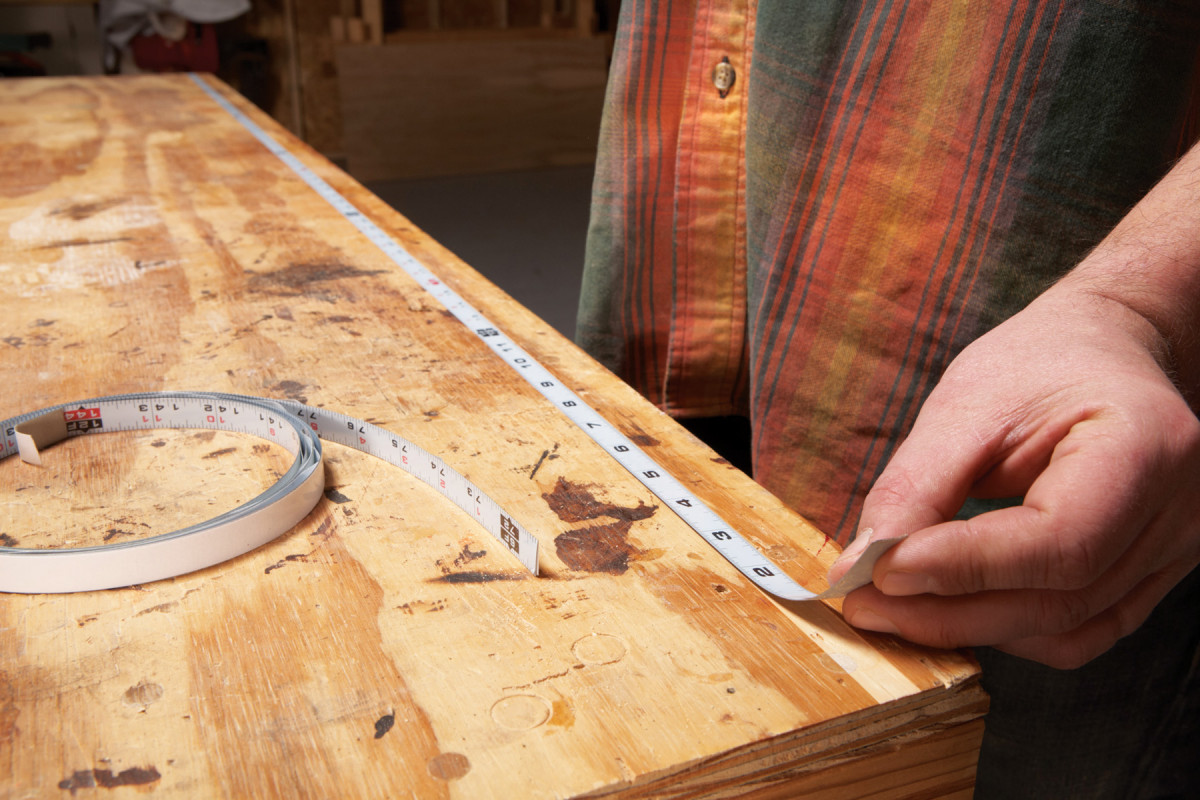
Benchtop Ruler
I wish I had three hands sometimes, when I’m measuring and marking. After dropping a tape measure I don’t know how many times one day, I decided to make my bench hold the tape for me. Using a guide, I routed a 1/64″ deep x 1/2″ wide groove in my benchtop and installed a metal adhesive-backed flexible rule in it. –Stephen Goad

Centerline Marker
Sometimes it’s fun to build a gadget just because it’s a neat idea. There are many ways to draw a centerline, for example, but this method is very clever. It doesn’t require any measuring or trial-and-error adjustments.
To build the marker, you’ll need two hardwood bars 3/4″ x 1″ x 12″, two Plexiglas links 1/4″ x 3/4″ x 4-1/2″ and four #6 pan head screws 3/4″ long. Start by making the links. Scribe a line down the exact center of one link and mark two holes with an awl, 1/2″ in from each end. Stack the two links together and drill the holes using a drill press. (The holes should be just barely large enough in diameter to let the screws slip through.)
Mark centerlines along both wood bars. Drill pilot holes for the screws that are 1″ and 5″ from the end of each piece. Fasten the links to the bars. Leave the screws a little loose so the links can pivot. Close the bars together and mark holes in each link directly above the line formed by the bar’s inner edges—this is the precise center of the links, end-to-end. Drill holes on these marks just large enough to admit the point of a sharpened pencil. Countersink the holes if you wish.
To mark a centerline, snug the bars up to your stock. The marker works for boards up to 4″ wide. –Bill Wells
Goof-Proof Center Finder
To mark the exact center of a board, I measure an equal distance from both ends and make two marks. This distance is just an approximation—it doesn’t matter if it’s longer or shorter than exactly half the length of the board, as long as the marks are reasonably close together. Then I just split the difference by eye. –John English

Precision Height Gauge
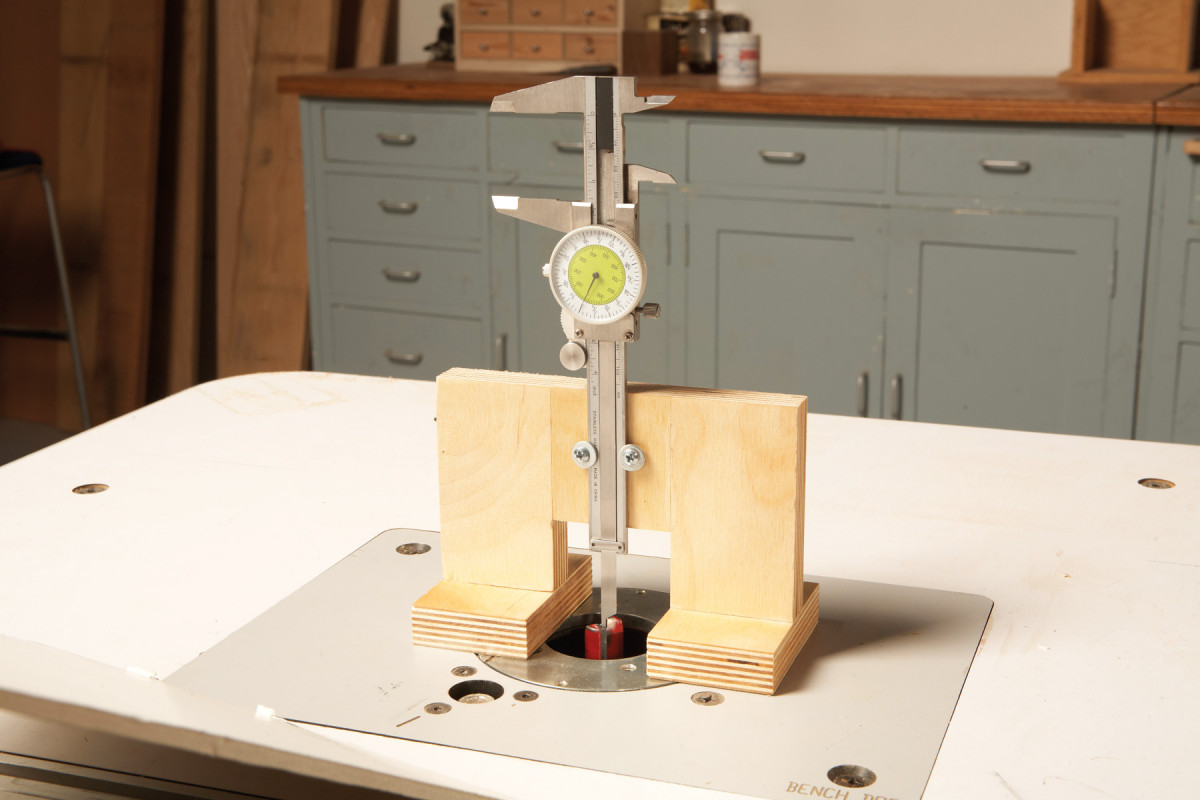
To set the height of a router bit—within .001″, if necessary—I made this simple stand for my caliper. It works on a router table or a hand-held router.
Two screws with washers secure the caliper. When I need the caliper without the stand, it’s easy to remove. The exact position of the caliper on the stand isn’t important; it just has to be plumb.
To use the gauge, set the bit at roughly the height you want. Place the caliper over the bit. Extend the caliper’s depth rod until it touches the top of the bit’s cutting edge, then turn the caliper’s dial face so the zero is right on the needle.
Slide the gauge away from the bit and push the depth rod down to the table’s surface. The reading you get is the bit’s height. If the bit’s height is not quite right, adjust the bit and repeat the procedure. –Fred Adams
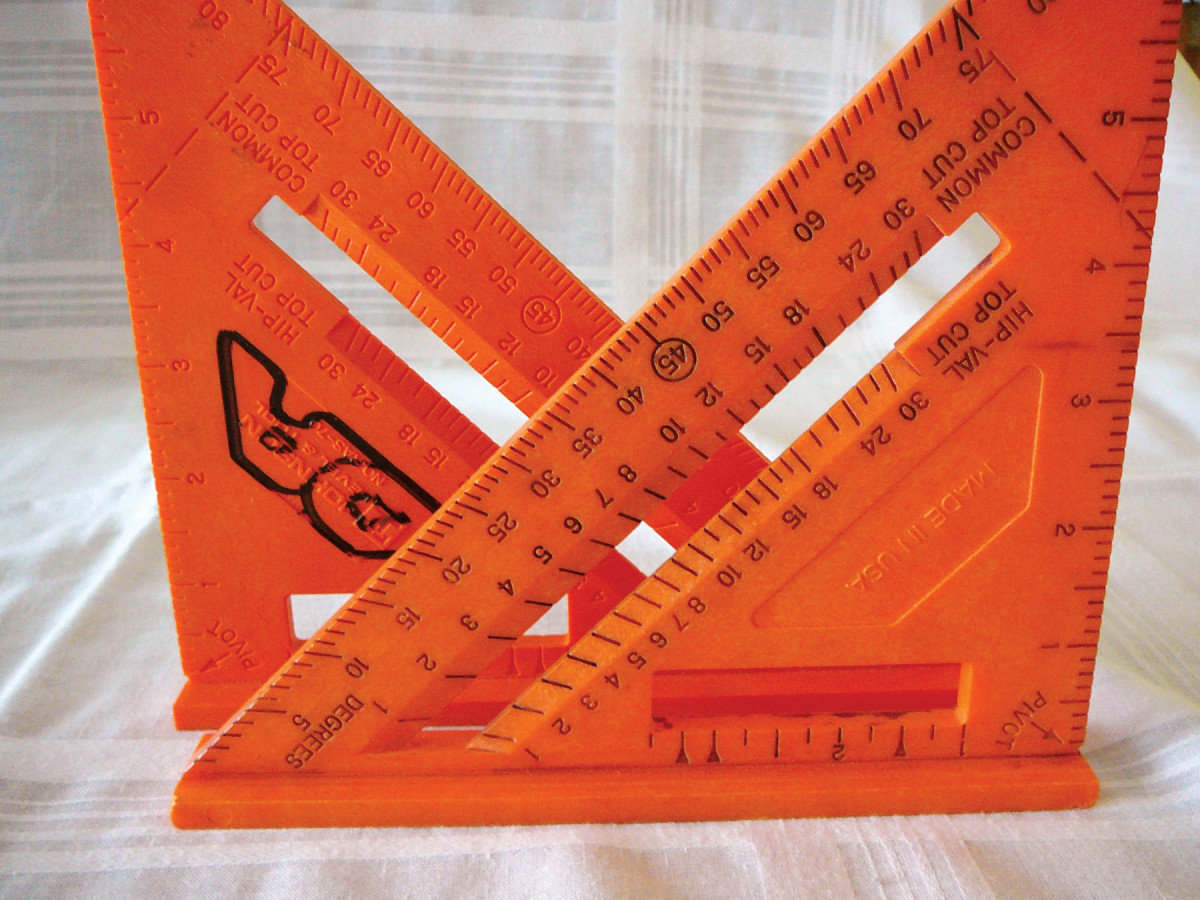
Easy-Read Speed Squares
I really like bright-colored speed squares because they’re easy to locate on the job, but I find them difficult to read. To solve this problem, I spray-painted my speed squares black. After they were dry, I used a 3M Scotch-Brite pad to remove the paint. This left the marks and numbers black. –Dewey Armstrong
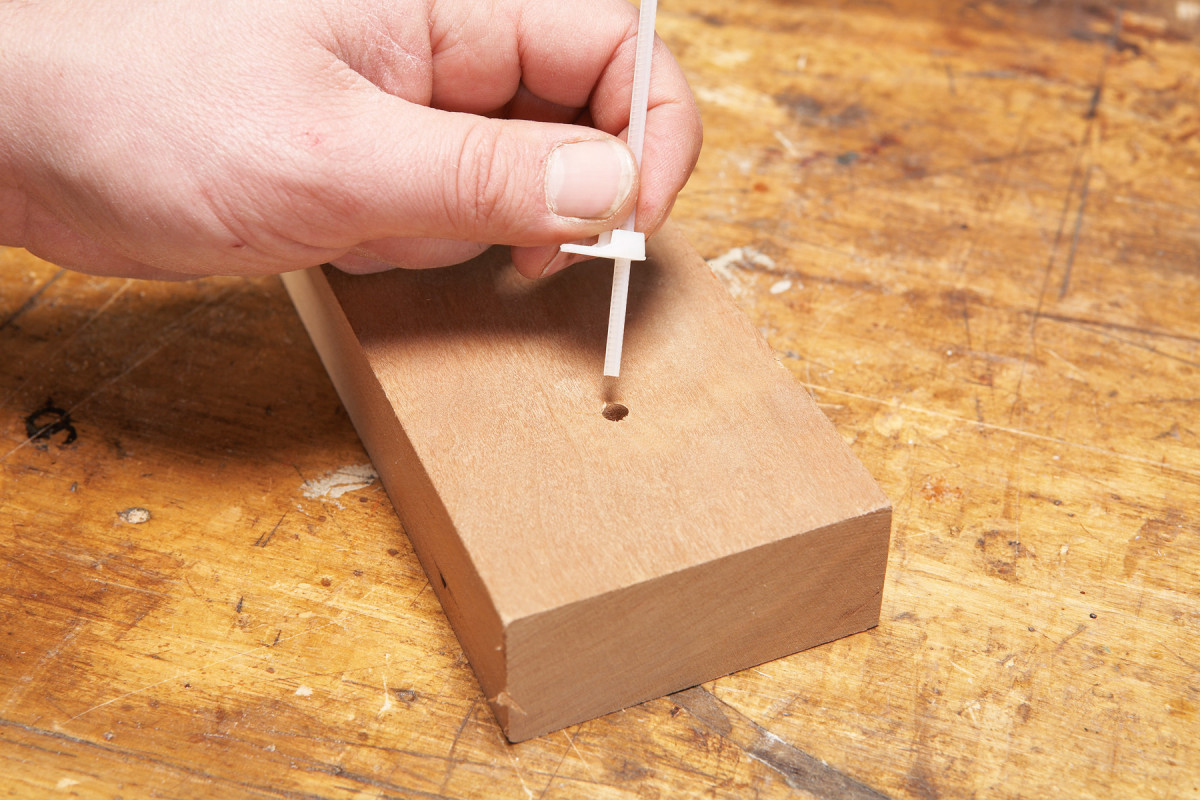
Zip-Tie Depth Gauge
I first used this technique to measure tire tread depth, but found it to be quite useful in the shop to find depths of holes or transfer measurements. Just cut off the “zipper” end of the zip tie, insert the straight end into the hole and zip it through to the proper position. You can measure the zip-tie with a tape or just transfer the measurement directly. 100 plastic ties cost about five bucks. –Ed Waali
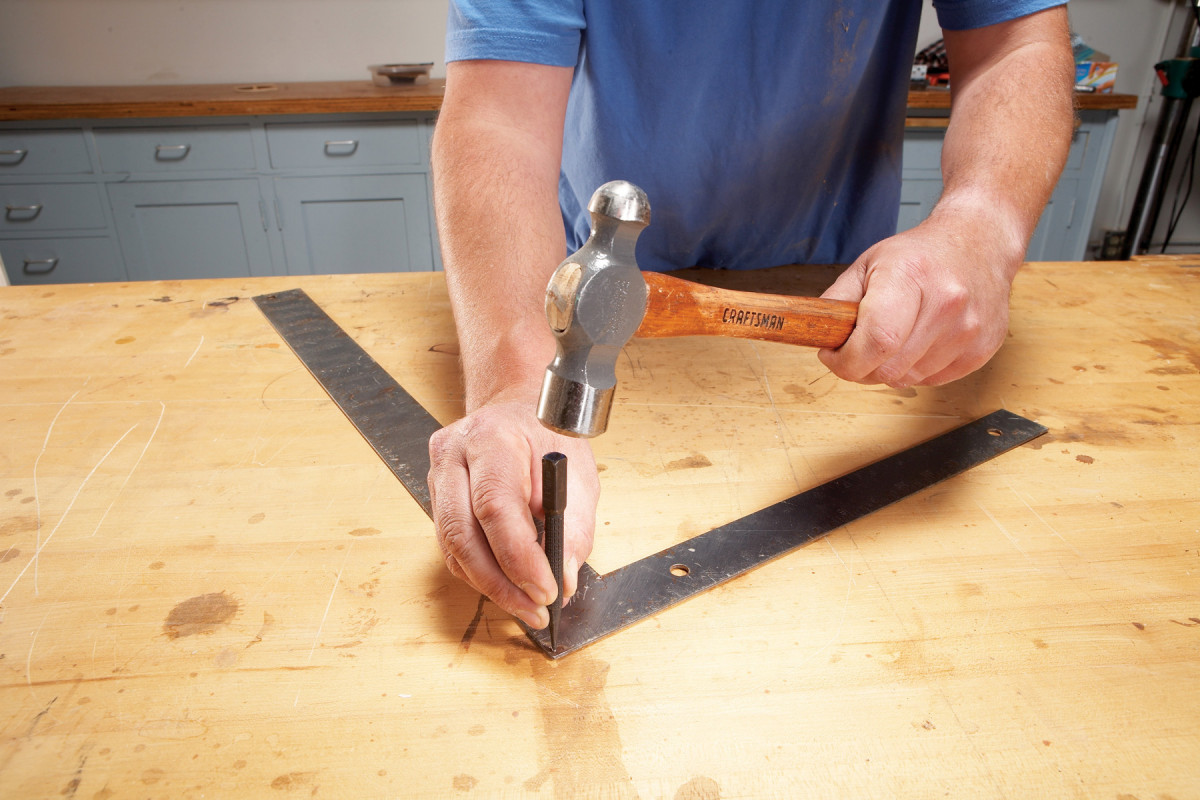
Squaring a Square
If your old carpenter’s square (or new one) isn’t precisely square, don’t throw it away. You can adjust its angle using a ball-peen hammer and a center punch.
First, check to see which way it’s off. Lay the tongue along the edge of a board and draw a line against the blade. Then flip the square and repeat. If the lines coincide, your square is accurate. If they don’t, punch near the outside corner to reduce the angle; punch near the inside corner to increase it. –Hugh Lineback

Perfect Shelf Pin Spacing
This is an incredibly easy way to drill evenly-spaced 1/4″ holes for shelf pins. Just cut a strip of perf-board 1-1/2″ wide and trim it to the length of the panel. Cover the holes you’re not using with masking tape, and then position the strip on the panel’s side. Clamp or tape the jig in place. Flip the jig over to drill the other edge of the panel. –Heinz Rudau
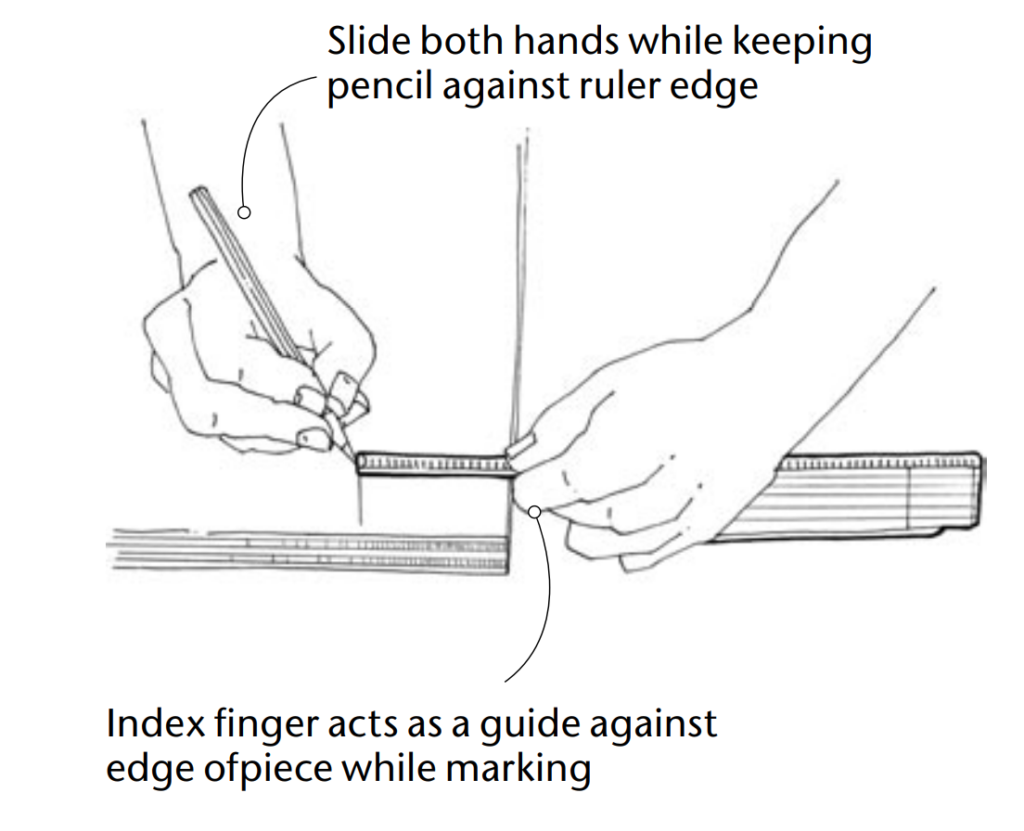
Finger-Guided Ruler
When you don’t need an absolutely accurate line drawn on a piece (say for a shooting/nailing line or layout line) all you need is a wooden folding ruler, a pencil and your two hands. Lay the rule on your piece the proper distance in, then hold the rule in your left hand with your index finger against the edge of the piece. With your pencil against the tip of the rule, slide both hands the length of the piece, using your left hand as a guide against the piece’s edge. –David Lyell
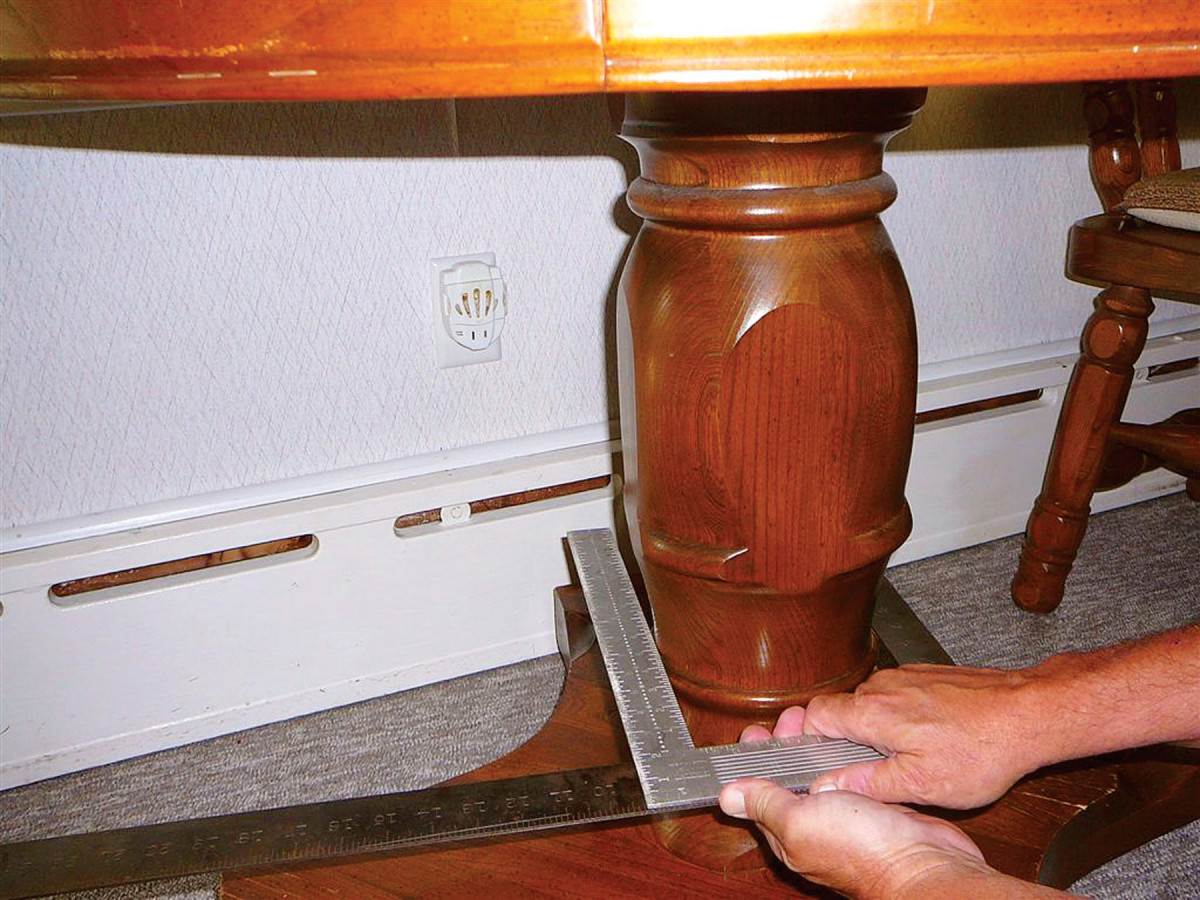
Giant Caliper
Did you ever have to find the exact diameter of a large part? Here’s an easy solution that doesn’t involve math. You’ll need 2 framing squares. Place the squares in opposite directions and slide them together, keeping their blades (wide part) flush, until the tongues (narrow part) are tight against the sides of the part being measured. You can read the measurement from the inside edge of the square’s blade. –Larry Lundholm
Here are some supplies and tools we find essential in our everyday work around the shop. We may receive a commission from sales referred by our links; however, we have carefully selected these products for their usefulness and quality.