


We may receive a commission when you use our affiliate links. However, this does not impact our recommendations.
No matter what your style of woodworking, you need a basic set of hand tools. Here’s where to begin.
When I came to America, I had a lovely wife, two suitcases and 50 bucks. Oh man, where do I start?
Everybody needs a basic tool kit, especially if you want to do woodworking. I had a limited budget. Starting out in America, I got paid low wages even though I was a Master; they tried to blame it on my language skills. Thank God my first boss did not treat me well or I’d probably still be working for him!
I started to buy tools and build this toolbox. The first tool I got was a 10″ dovetail saw. You need a marking gauge; I made one. I also bought a 6′ folding ruler.
A week later I went to the same store and bought a nice set of chisels that included 1⁄8“, 1⁄4“, 3⁄8“, 1⁄2“, 3⁄4” and a 1″ chisel. I bought a two-sided Arkansas oilstone, one side rough and the other super fine. The salesman wanted to sell me sharpening oil; I told him I use kerosene.
I kept going: A No. 4 Stanley smoothing plane, low-angle block plane, small hand saw, two hammers and two mallets – I made one on a lathe and the other is square. At a flea market I found an old Stanley No. 7 jointer plane.
I kept asking around about where to find old tools. I went to tool-collector meetings and tool sales. I found beautiful Stanley planes with Brazilian rosewood handles and brass fittings, and I began collecting them very fast.
But let’s get back to the basic toolkit. To work wood, you need squares: a framing square and a couple of any brand of small squares, 8″ or 6″. Plus a 1″ putty knife – make sure the blade is flexible – an awl and screwdrivers. You need at least five flat-head screwdrivers (your screwdriver should fit the screw) and three Phillips-head screwdrivers. Rasps: a Nicholson No. 50 patternmaker’s rasp and bastard-cut rasp, a mill file, a cabinetmaker’s scraper, a scraper burnisher, nail sets and pliers.
You need sanding blocks: one cork-bottom block for sanding wood and one felt block for sanding finish.
As you grow in your woodworking, your toolkit will grow with you. If you want to do veneering, you need a veneer saw, tape dispenser and a small roller. If you run into curves you need a compass plane and a spokeshave. I could go on and on.
Woodworking tools have come a long way. We have beautiful high-quality tools such as those by Lie-Nielsen Toolworks and Veritas/Lee Valley. And – finally – some of these quality tools come ready to use. My first dovetail saw needed serious work to make it work for me. I had to sharpen it and make the set smaller. Lie-Nielsen and Adria dovetail saws come sharpened and ready to go.
To enjoy woodworking, you need to have sharp tools. Invest in some good sharpening stones with at least two or three different grits. When buying chisels choose your brand carefully.
Although you need basic tools to work wood, the most important tool in a workshop, especially for handwork, is a sturdy workbench like mine. It holds the wood for any task. With a bench like that, you will enjoy your work.
The Basic Kit of Tools
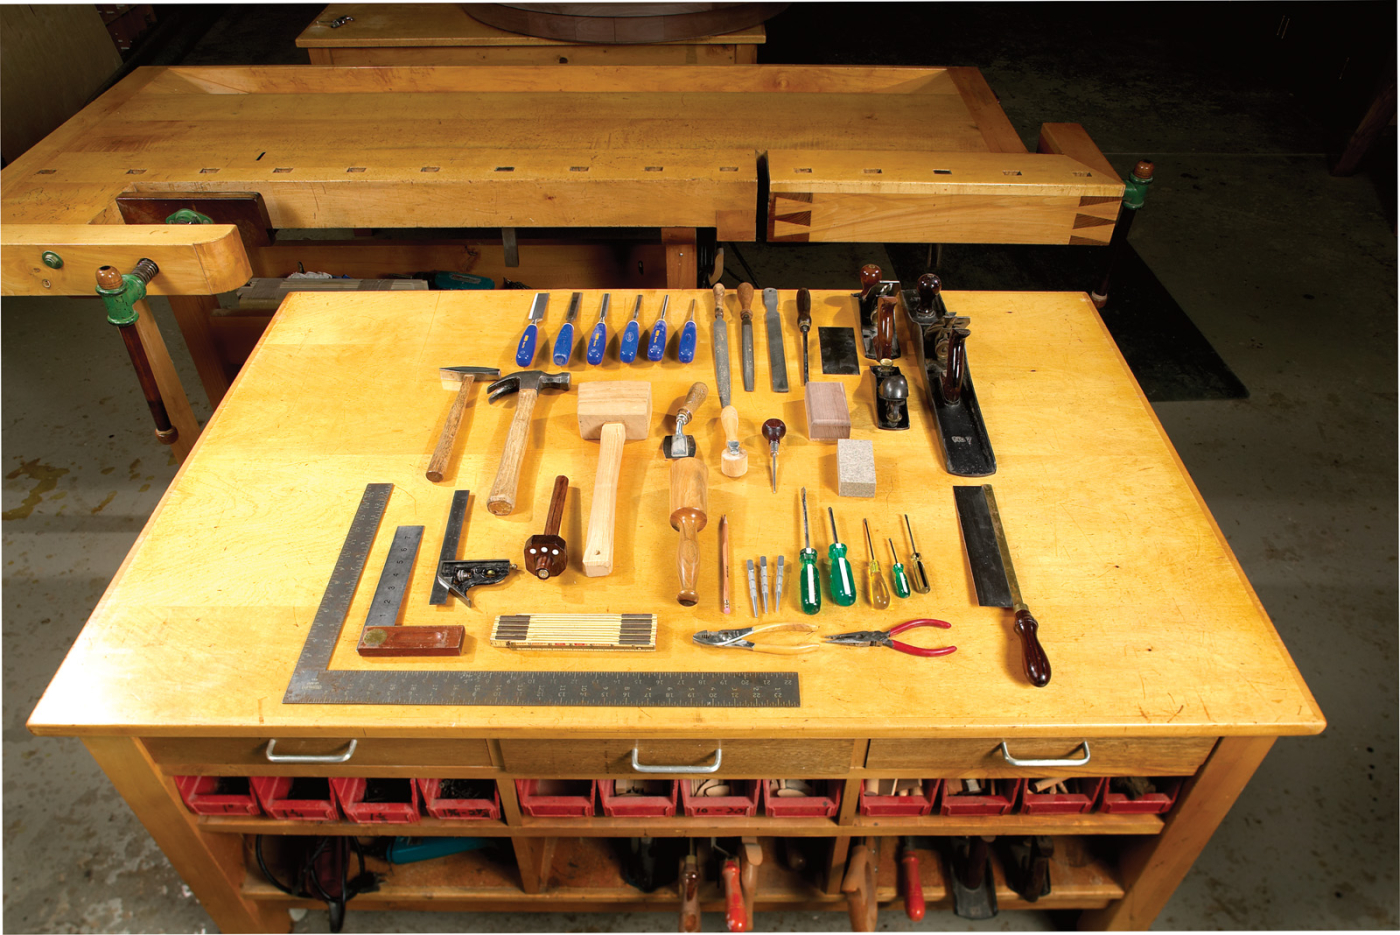 Below is a list of tools essential for good woodworking. These tools are widely available from a variety of sources, from your local home center, specialty stores and catalogs.
• Six bevel-edge chisels, 1⁄8“, 1⁄4“, 3⁄8“, 1⁄2“, 3⁄4” and 1″. Two-sided oilstone (not shown).
• Nicholson No. 50 patternmaker’s rasp, Nicholson half-round bastard-cut rasp, mill file.
• Burnisher and card scraper.
• No. 4-sized smoothing plane (9“-long sole), No. 7-sized jointer plane (22“-long sole), low-angle block plane.
• 16 oz. claw hammer, tack hammer, nail sets.
• Carpenter’s mallet (16 oz. ) for mortising, smaller-lathe turned mallet for chopping dovetails and other light work.
• Veneer saw, small edge roller.
• Scratch awl.
• Cork-faced sanding block, felt block.
• Screwdrivers. #0, #1 and #2 Phillips screwdrivers plus at least five straight screwdrivers.
• 10” dovetail saw. I like a rip saw filed with 15 to 16 tpi. Either a straight or pistol-grip saw is fine. And if you prefer Japanese dovetail saws, that’s fine, too.
• Steel framing square, 8” try square, 12″ combination square, 6′ folding extension rule. Tape measure (not shown).
• Marking gauge.
• Pliers, needle-nose pliers.
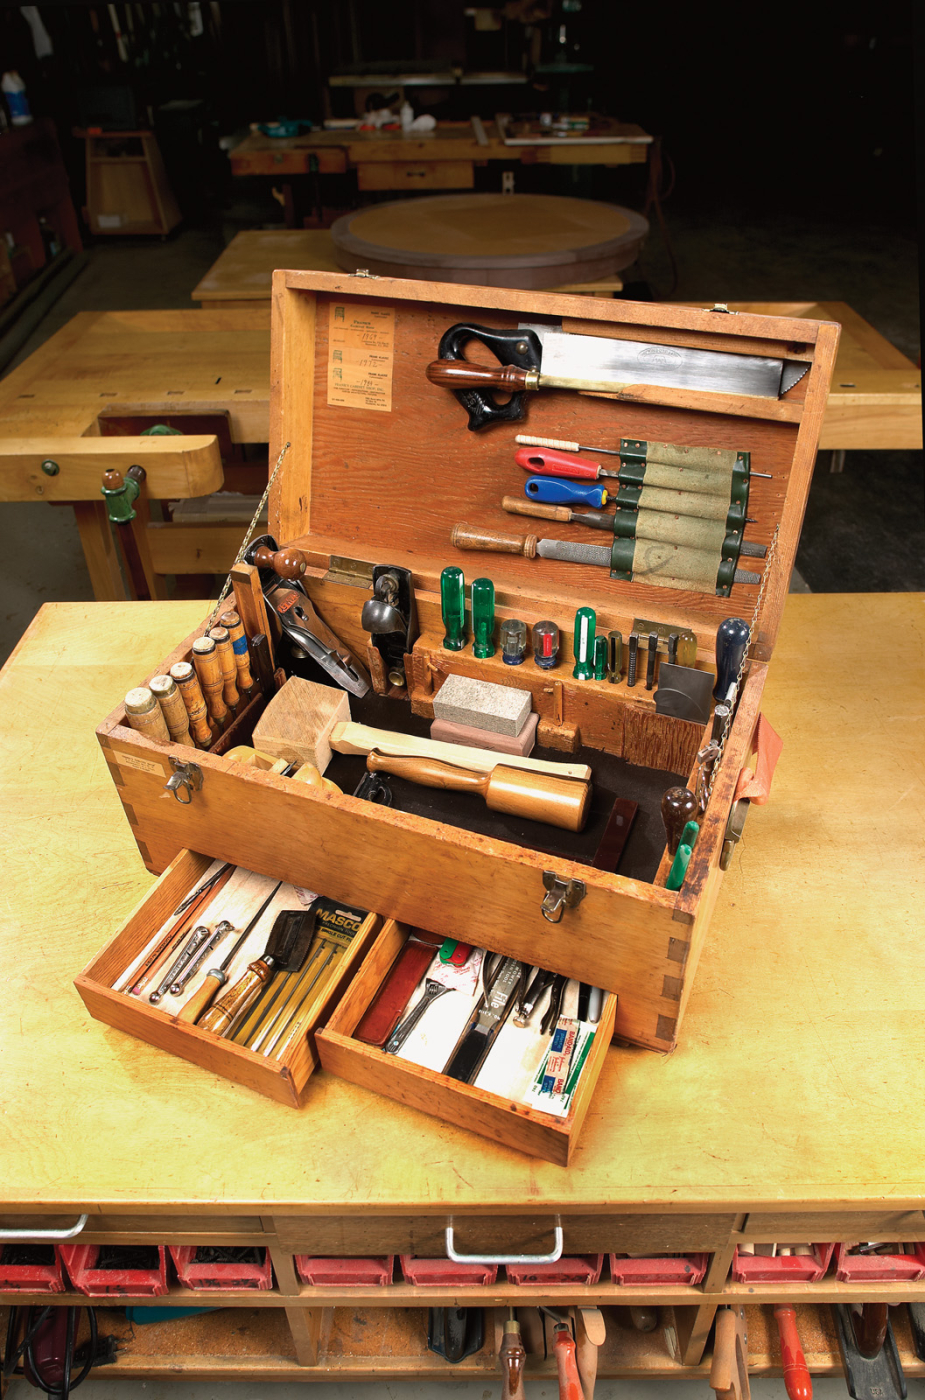
A Basic Toolbox
Your toolbox does not need to be large or fancy. This small one has served me well for 20 years, both by my workbench and out on jobs.
Try not to make your toolbox any larger than you have to. This toolbox was fine for the first 20 years, but if I made it again I would try to make it a little smaller. Whatever you do, make the toolbox fit your kit of tools.
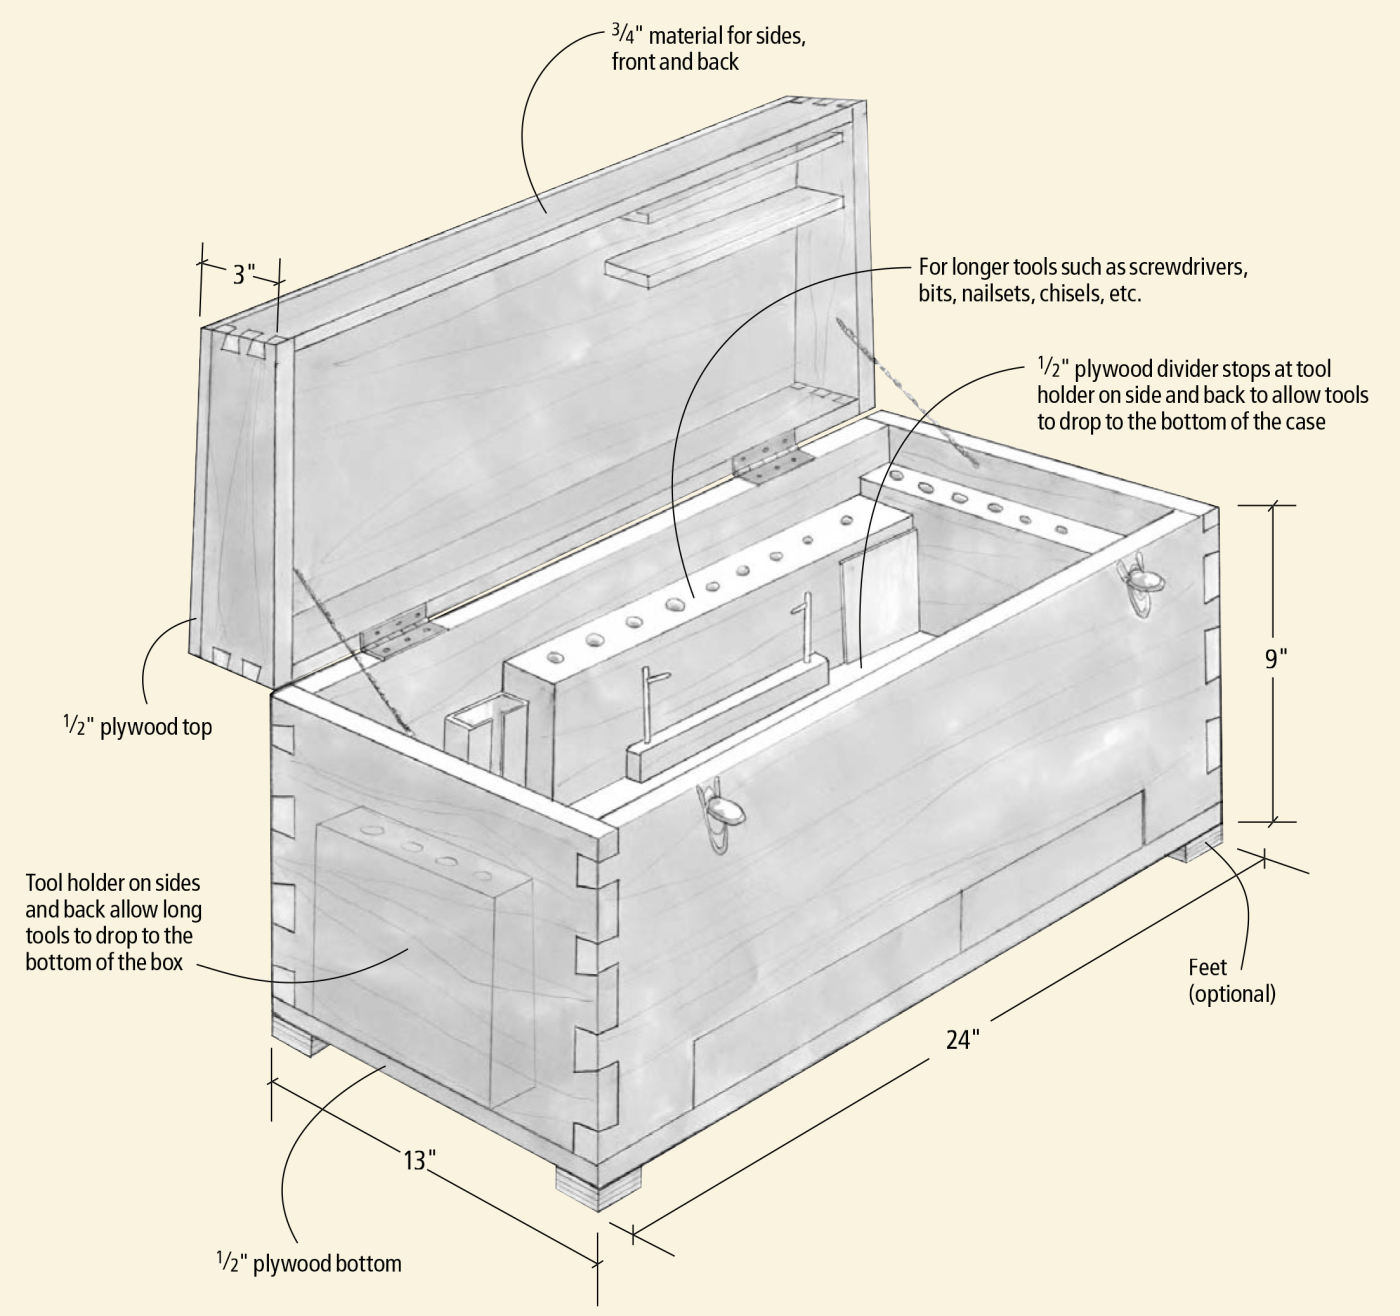
Some construction details: The sides, front and back of my toolbox are made of Eastern white pine that I dovetailed together. Your toolbox does not need to be dovetailed. Finger joints are no problem. Miters would work. There are lots of ways to build a box.
The top and bottom of my toolbox are 1⁄2“-thick plywood pieces that are simply glued to the top and bottom of the box with a few finishing nails, too. You could put the top and bottom in a rabbet or a groove if you want to make it more complex.
The 1⁄2” horizontal plywood divider between the drawers and the open section of my toolbox rests in a groove in the box and the tool holders are attached to the side and back. This could be simplified. You could put glue blocks in the box and glue the divider to the glue blocks. What’s important about the divider is that it not go all the way to the sides and back of the toolbox. The longer tools, such as the chisels and screwdrivers, drop all the way to the bottom of the toolbox. This is also why the drawers aren’t the full depth of the box.
My drawers are dovetailed front and back. Yours don’t have to be. To save space, I did not put the 1⁄4“-plywood bottoms into a groove in the drawers. Instead, I cut a rabbet in the bottom of the drawer and put the bottom in that.
My toolbox sits on four feet nailed to the case. This makes the toolbox sit flat on irregular surfaces. You could use furniture glides instead or omit the feet.
It’s your toolbox so it’s your choice.
Here are some supplies and tools we find essential in our everyday work around the shop. We may receive a commission from sales referred by our links; however, we have carefully selected these products for their usefulness and quality.


