We may receive a commission when you use our affiliate links. However, this does not impact our recommendations.
Firm foundation. A successful project begins with accurate measurement and layout work. These tasks require good tools along with the practice and development of skills.
Double-check your tools, your technique, and your thinking.
One of the most important skills in woodworking is rarely discussed or considered as a thing that needs to be learned or practiced. The basic skills of measuring and its close cousin, layout, are essential to produce quality work. As a bonus, mastery of these basics reduces frustration during the building process.
But things aren’t always what they appear to be – measuring is a risky business. To be successful, you need to know what can be trusted and what is likely to lead you astray. Any measurement is only an approximation; no matter how precise you think you are, someone can come along with a better device and a finer unit.
Measuring in fine increments has diminishing returns when it comes to making things, and there are swampy areas on the road to precision that can make fitting one part to another more difficult. The goal in woodworking is to have pieces that fit each other and look nice when finished. That goal may or may not require hitting every desired dimension exactly.
The difference between a tenon that fits nicely and one that rattles around in the mortise is quite small, whether you refer to that difference by a decimal point followed by a few zeros, or as a “smidgen.” Instead of declaring one method or another as absolutely right, let’s look at where and how things can go horribly wrong – and how to keep on the right track.
Don’t Agree to Disagree
An easy way to get in trouble is to assume that a piece of wood is square, straight or the correct dimension. It doesn’t matter if it’s a piece of 1x purchased S4S, or a piece that you milled from rough lumber. You need to prove things, but you also need to prove that the tools you use are accurate.
The common suggestion is to use one measuring device throughout a project – but if one device was suitable for all measurements, there would be no need for small precision rules, calipers or folding rules. Different tasks demand different tools. The better approach is to check all of your measuring tools for consistency and get rid of the ones that disagree. If you measure twice with the same tool and method, the odds are you’ll repeat a mistake instead of catching it.
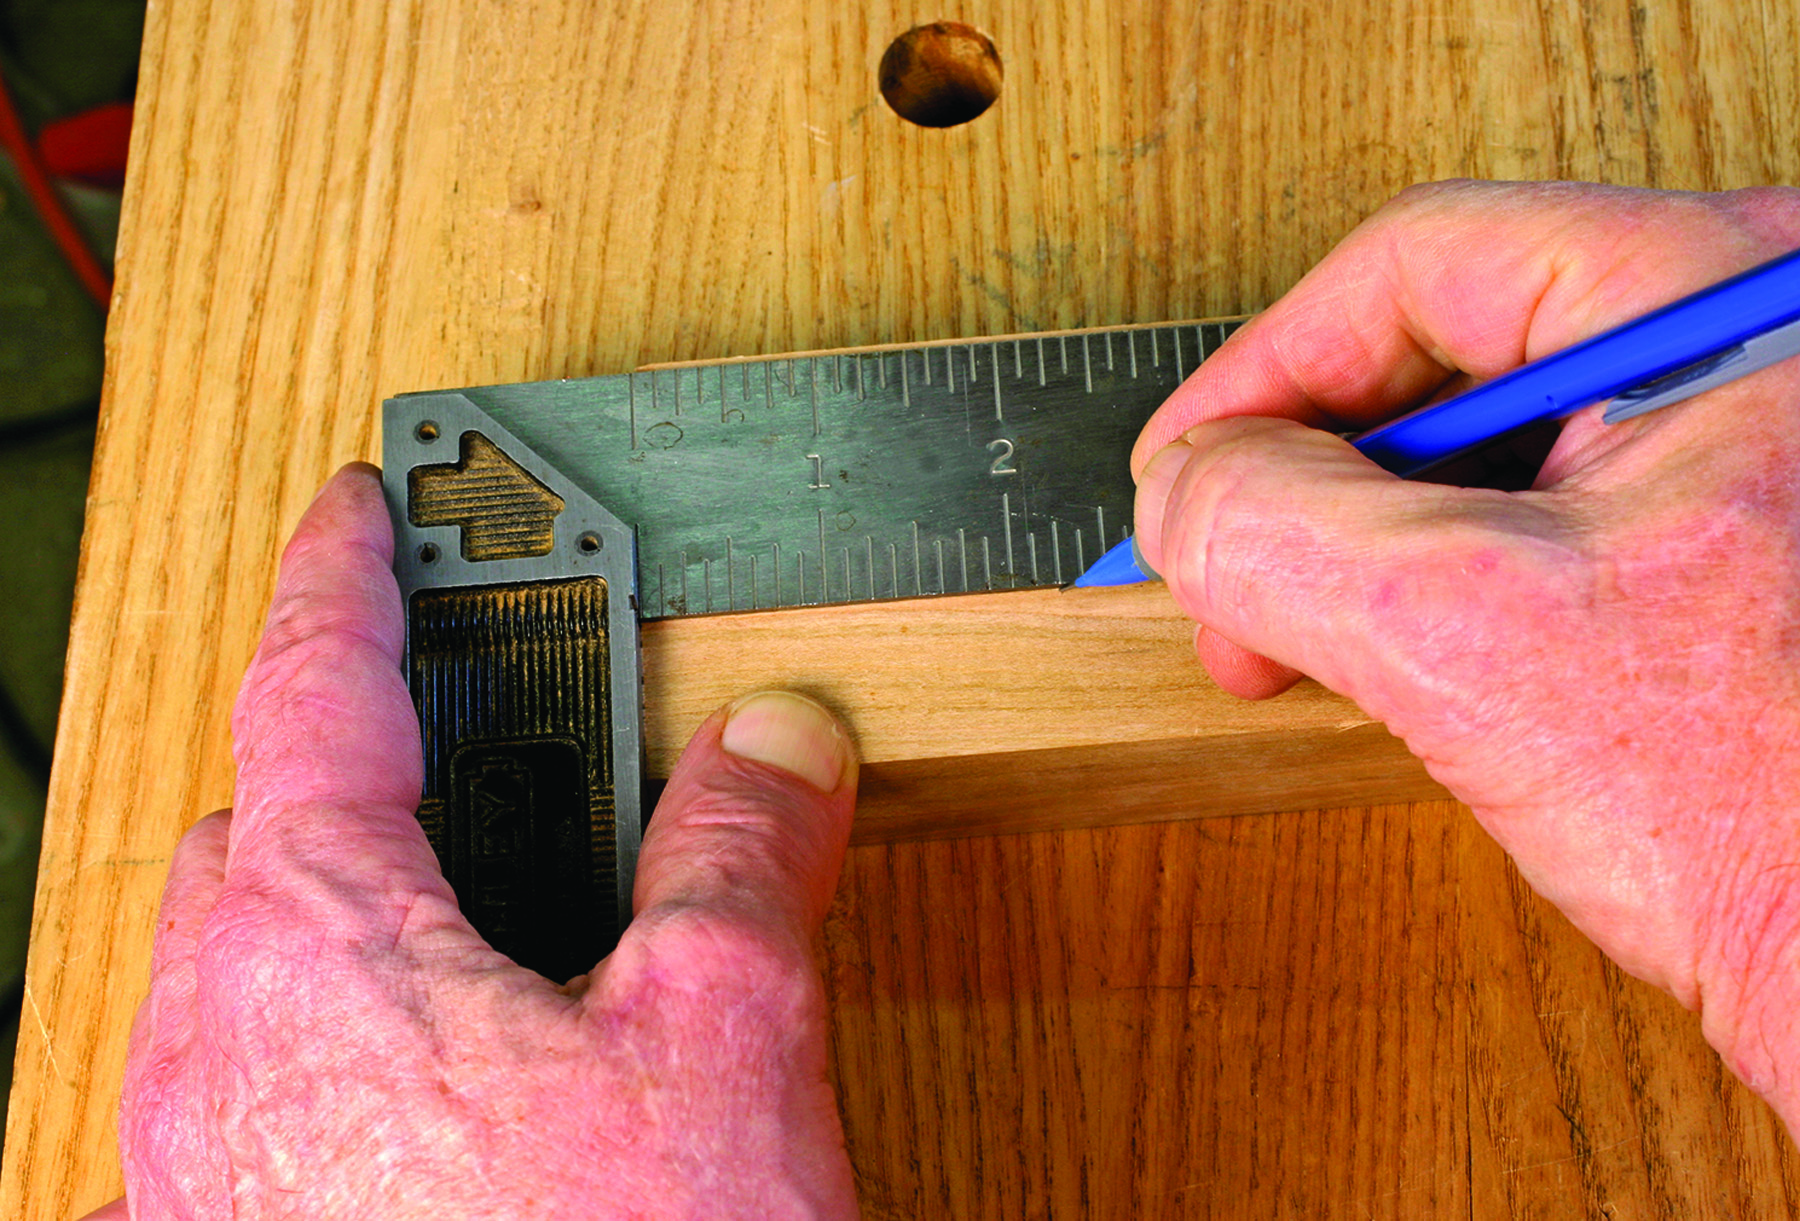
Proving a square is simple; all you need is a straightedge and a sharp pencil. Draw a line against your square, then flip the square over and draw another line. If the lines coincide or are parallel, all is right with the world. If there is a gap at either end of the two lines, the distance between the lines is twice the actual error.
Take a Good Look
Match is a must. Compare your measuring tools, and get rid of any that don’t agree with one another. Establish a standard and stick with it.
After you eliminate the risk of an inaccurate tool leading you astray, make sure that your own vision won’t do you in. You may need to add some light to your work area, and you may need some magnification as well. Most important is to find a point of view where your eye, the object you are measuring and the lines on your rule are all in line. If you observe from an angle, an error of parallax can lead to an inaccurate reading.
Get in line. An accurate measurement comes from a good point of view; your eye, the thing you’re measuring and the marks on the rule need to be in one line.
If you’re using a tape measure, keep the tape parallel to the distance you want to measure. It is also important to ensure that you are certain where you are measuring from. You will be more accurate if you don’t line up the starting point by eye or with a finger. Use a block of wood or a known flat surface instead.

Parallax problem: A point of view from an angle makes it difficult (if not impossible) to get an accurate reading from the rule, no matter how precise.
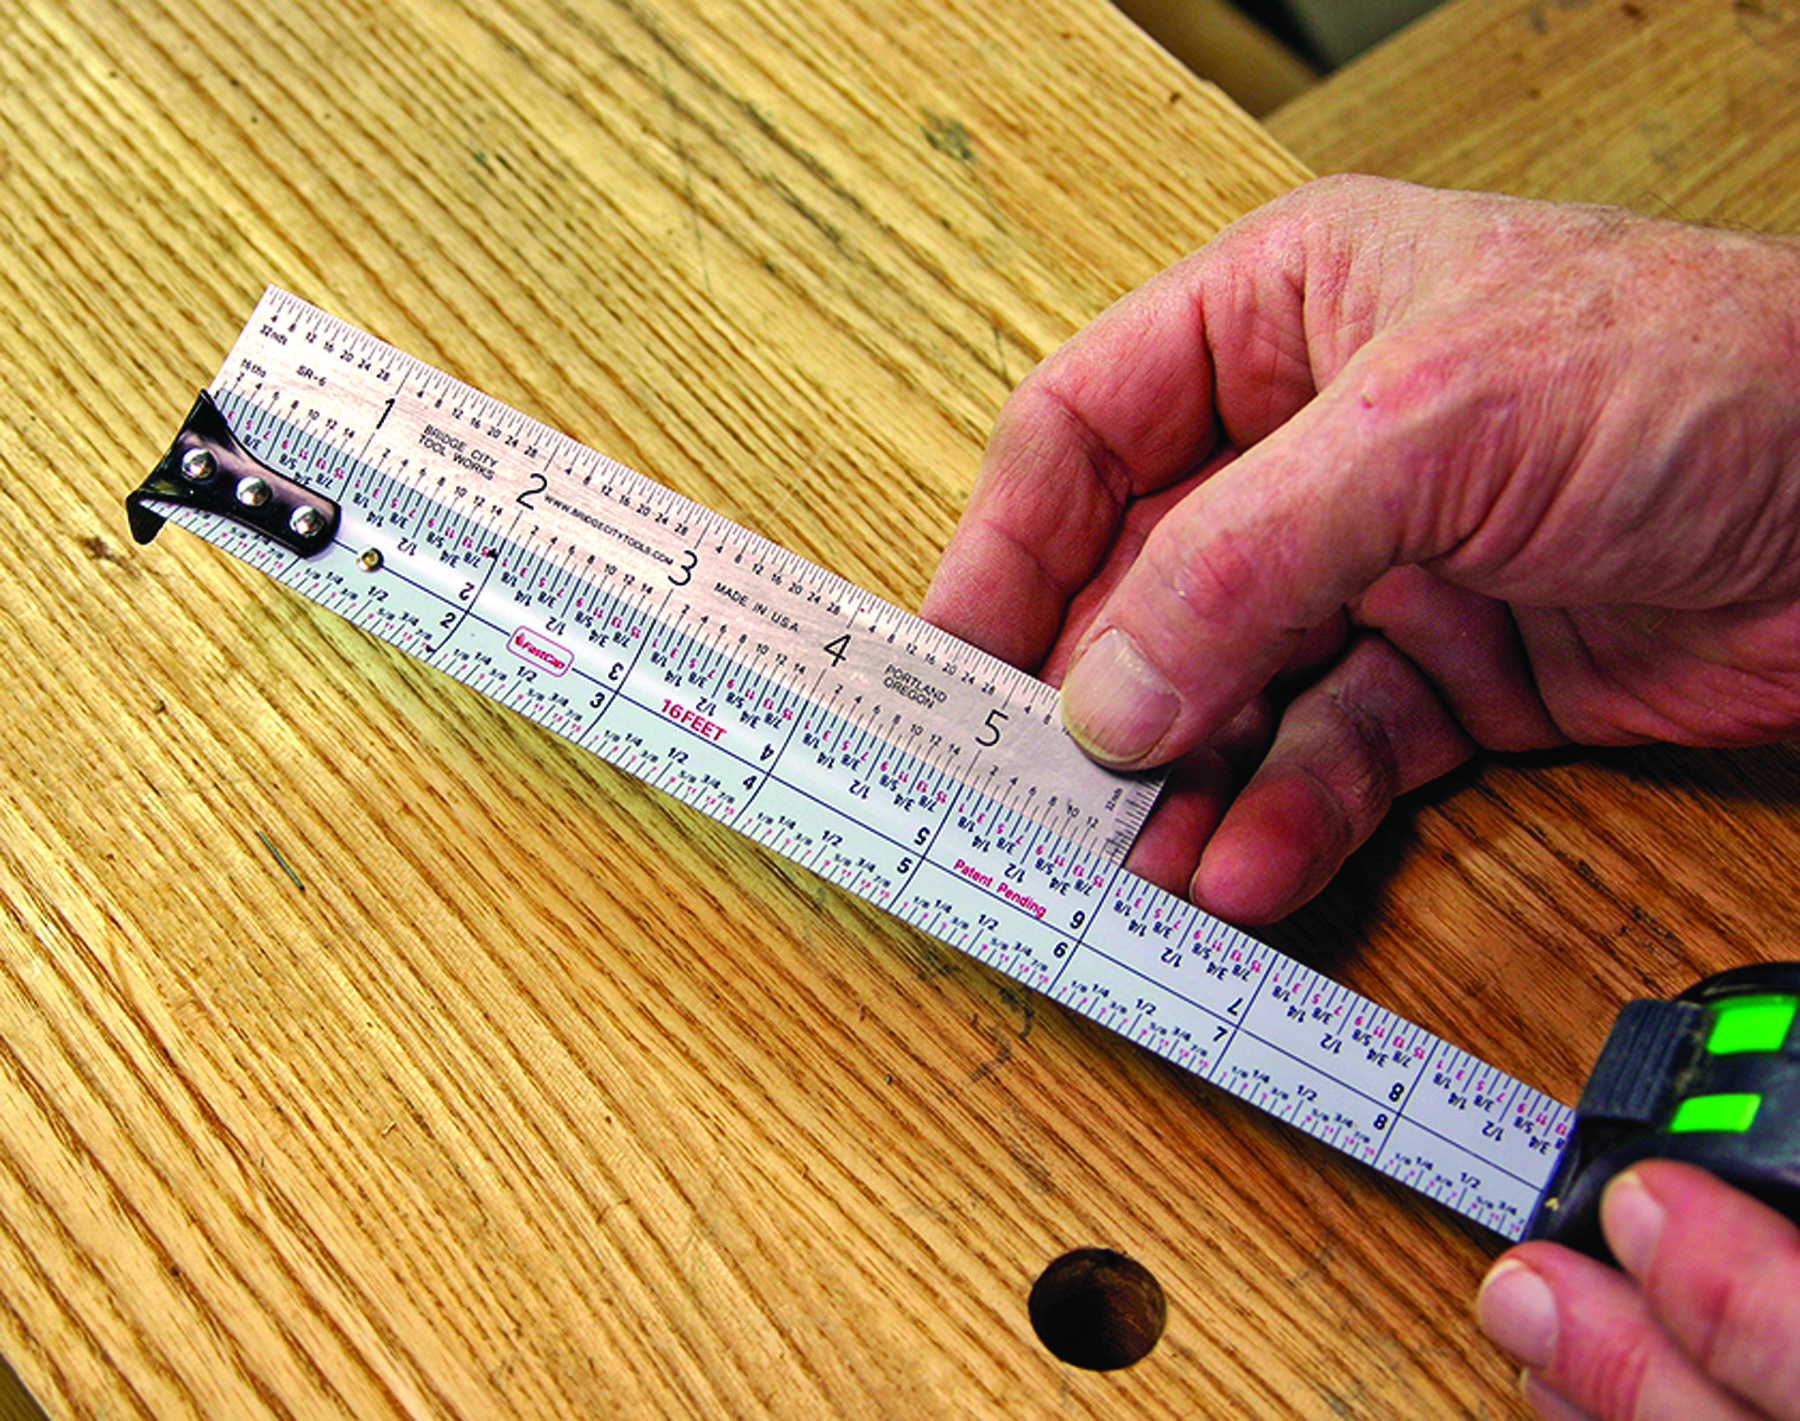
The next-best thing is to start with a line on your rule or tape instead of the end. Many woodworkers measure from the 1″ mark, but it’s easy to forget about that and make the “one-inch mistake.” It is just as easy to start from the 10″ mark. Mistakes are still possible, but far easier to recognize.

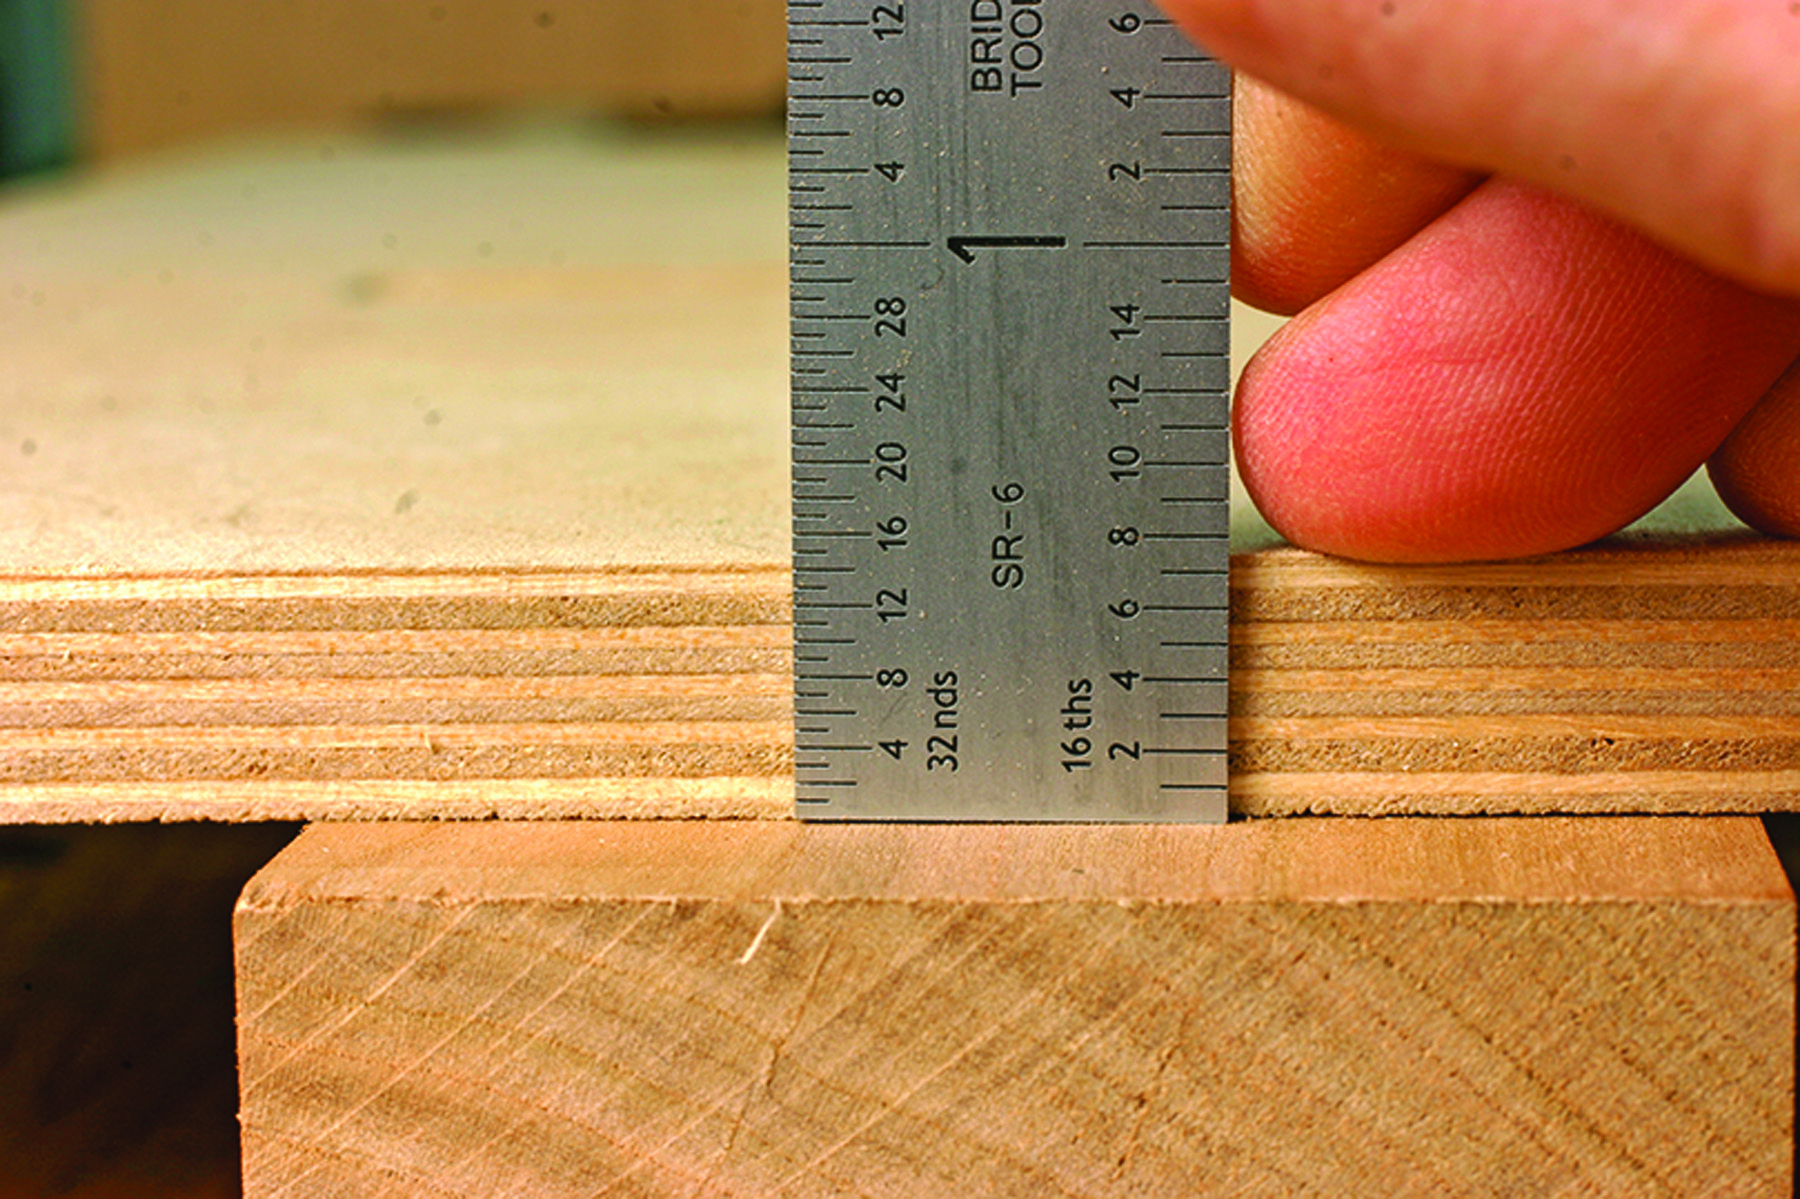
Soft surface. Where you measure from is as important as where you measure to. The end of the rule needs a firm reference.
One of my favorite layout tools is a steel square with a rule marked in 8ths of an inch (shown in the opening photo). The stock of the square is a definite starting point and the larger divisions make it easier to find the increments I’m looking for.
Good start. A block of scrap against the edge or a solid surface allows you to register the end of the rule at a definite place.
When measurements get smaller, it’s easy to get confused. A lot of people give up when they get to 32nds or 64ths of an inch. One method is to refer to the closest 16th, but to add a descriptive term: “9⁄16” plus” is the equivalent of 19⁄32” and “9⁄16” heavy” is equivalent to 37⁄64“. Going the other direction, “minus” means 1⁄32” less, and “light” means 1⁄64” less than the nearest 1⁄16“.
You Need Calipers
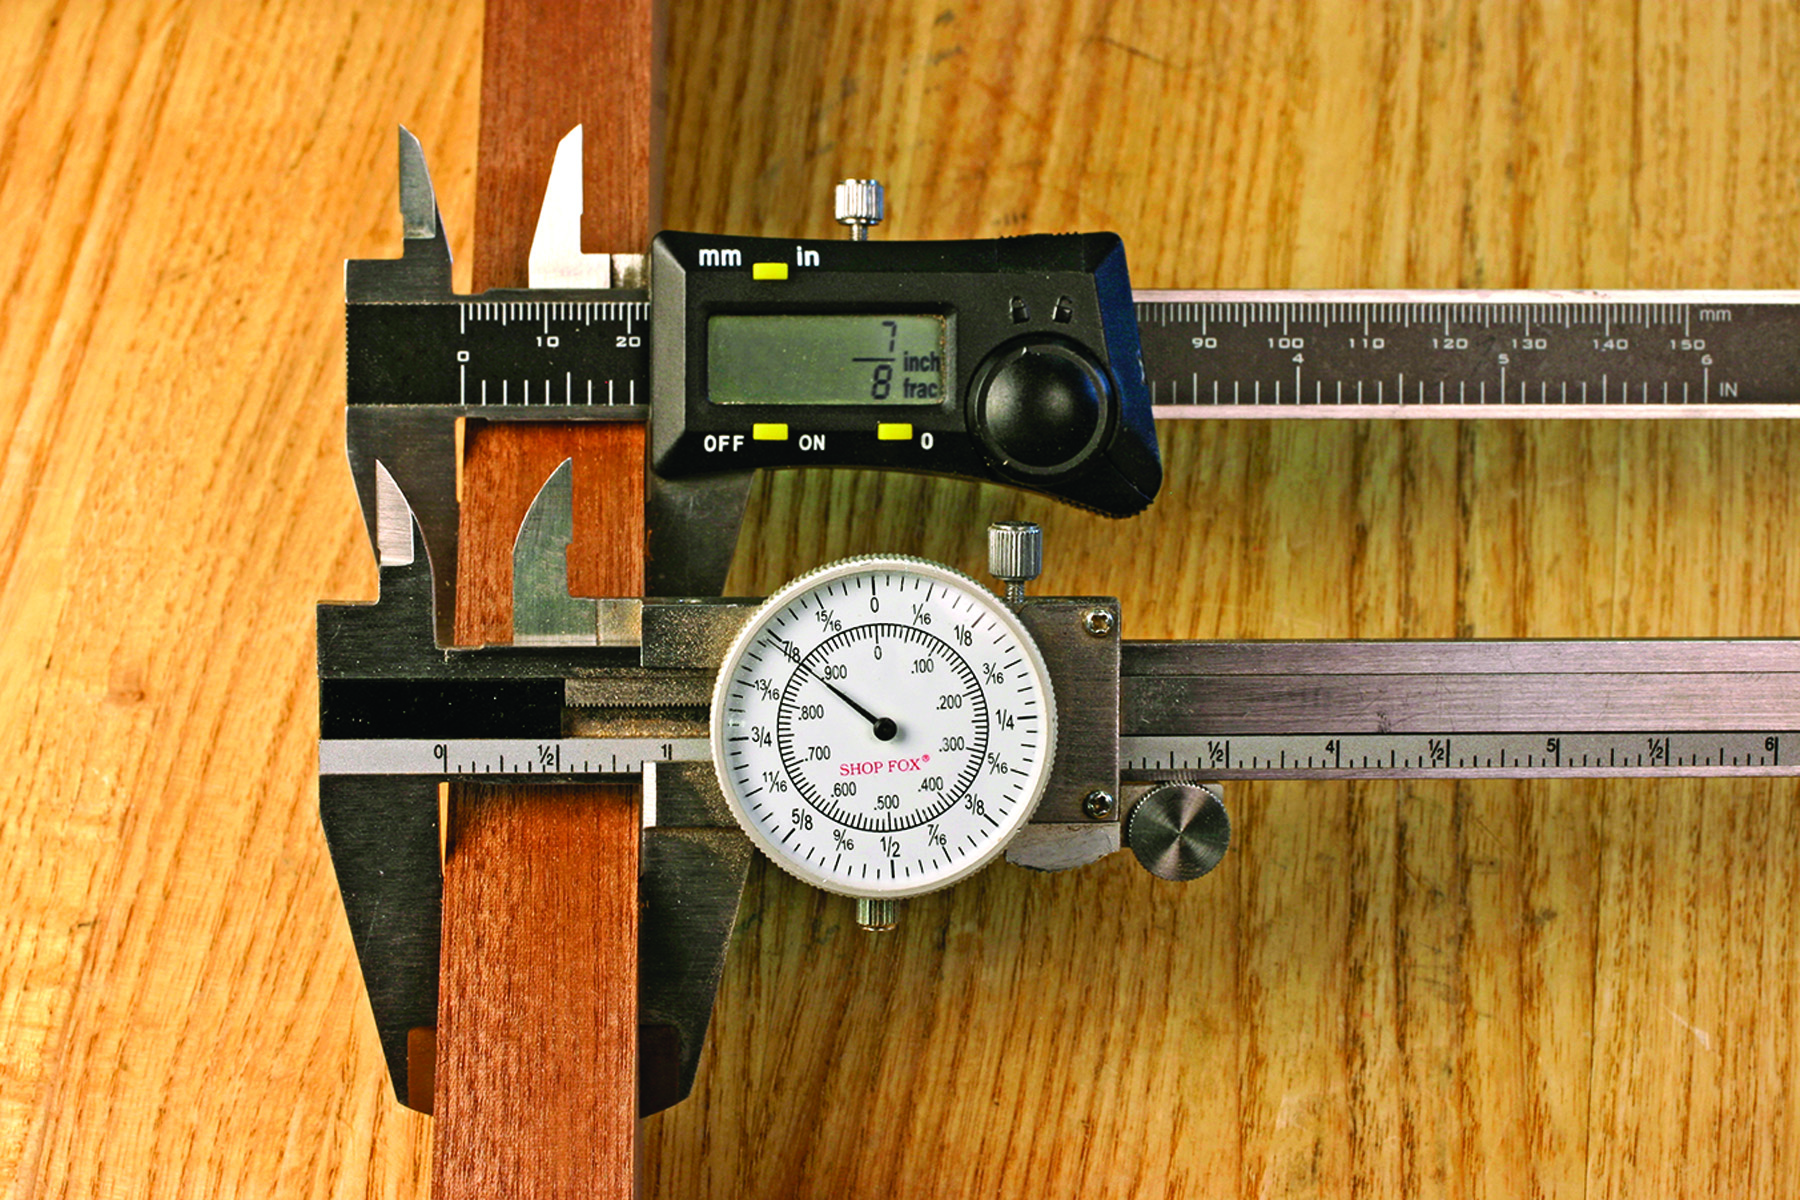
Digital doubt. Any numerical measurement is an approximation. In this case, the digital calipers leave plenty of room for doubt.
When you need to deal with small increments, the shortcomings of rules become obvious. A pair of dial calipers will speed the process and improve accuracy. Avoid the temptations of decimals and digital devices. If you start to use 1,000ths of an inch instead of fractions, you’ll spend a lot of time translating from fractions to decimals and back again. With digital calipers, you can waste half a day watching the display bounce back and forth between .253″ and .254″.
The problem with electronic calipers that read in fractions is that there is a significant rounding error; 1⁄64” is slightly less than .016″ (below). The display will round off to the nearest 1⁄64“, so what you read can easily be off by .008”. With analog fractional calipers, you can see (and judge) how far from the mark you really are.
Digital devices for measuring angles are even worse, even though the stated accuracy of one 10th of a degree sounds impressive. But make a square, mitered frame with 12″-long sides and the angles cut at 45.1° instead of 45°, and you’ll have a gap 1⁄8” wide when you’re done.
Accuracy vs. Numbers
Split the difference. With practice, you can mark and measure to the visual center between marks on a rule.
You can work accurately to twice the resolution of the finest mark on the measuring tool. With a little practice, most people can divide a given space into two equal parts (top, left). Your little brother could do it with a peanut butter and jelly sandwich, and you can do it with the marks on your rule or tape measure.
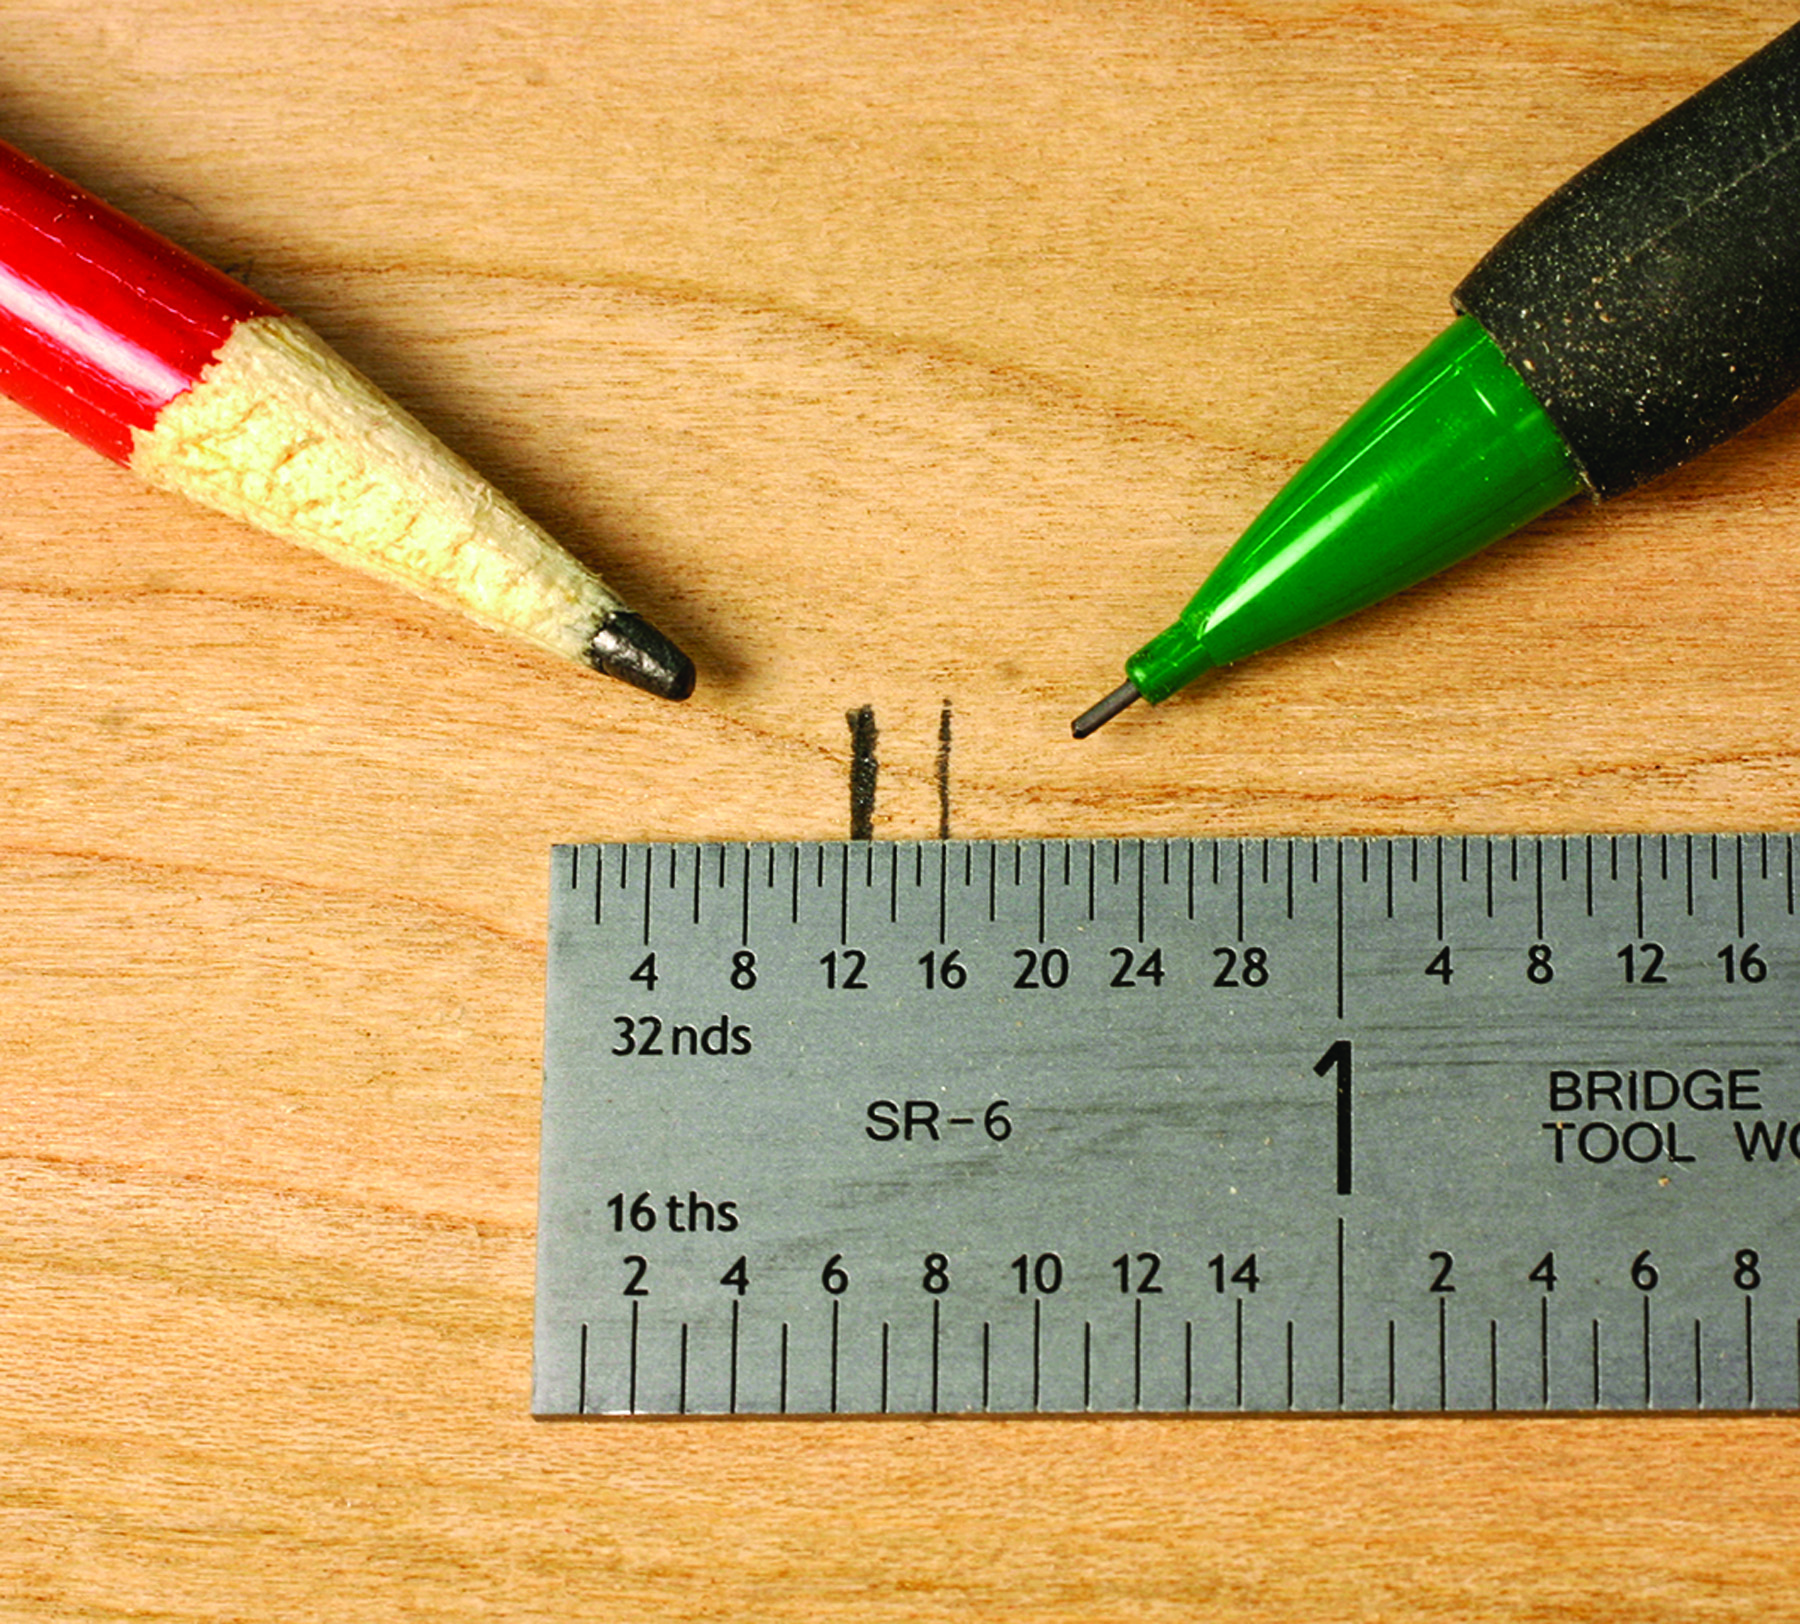
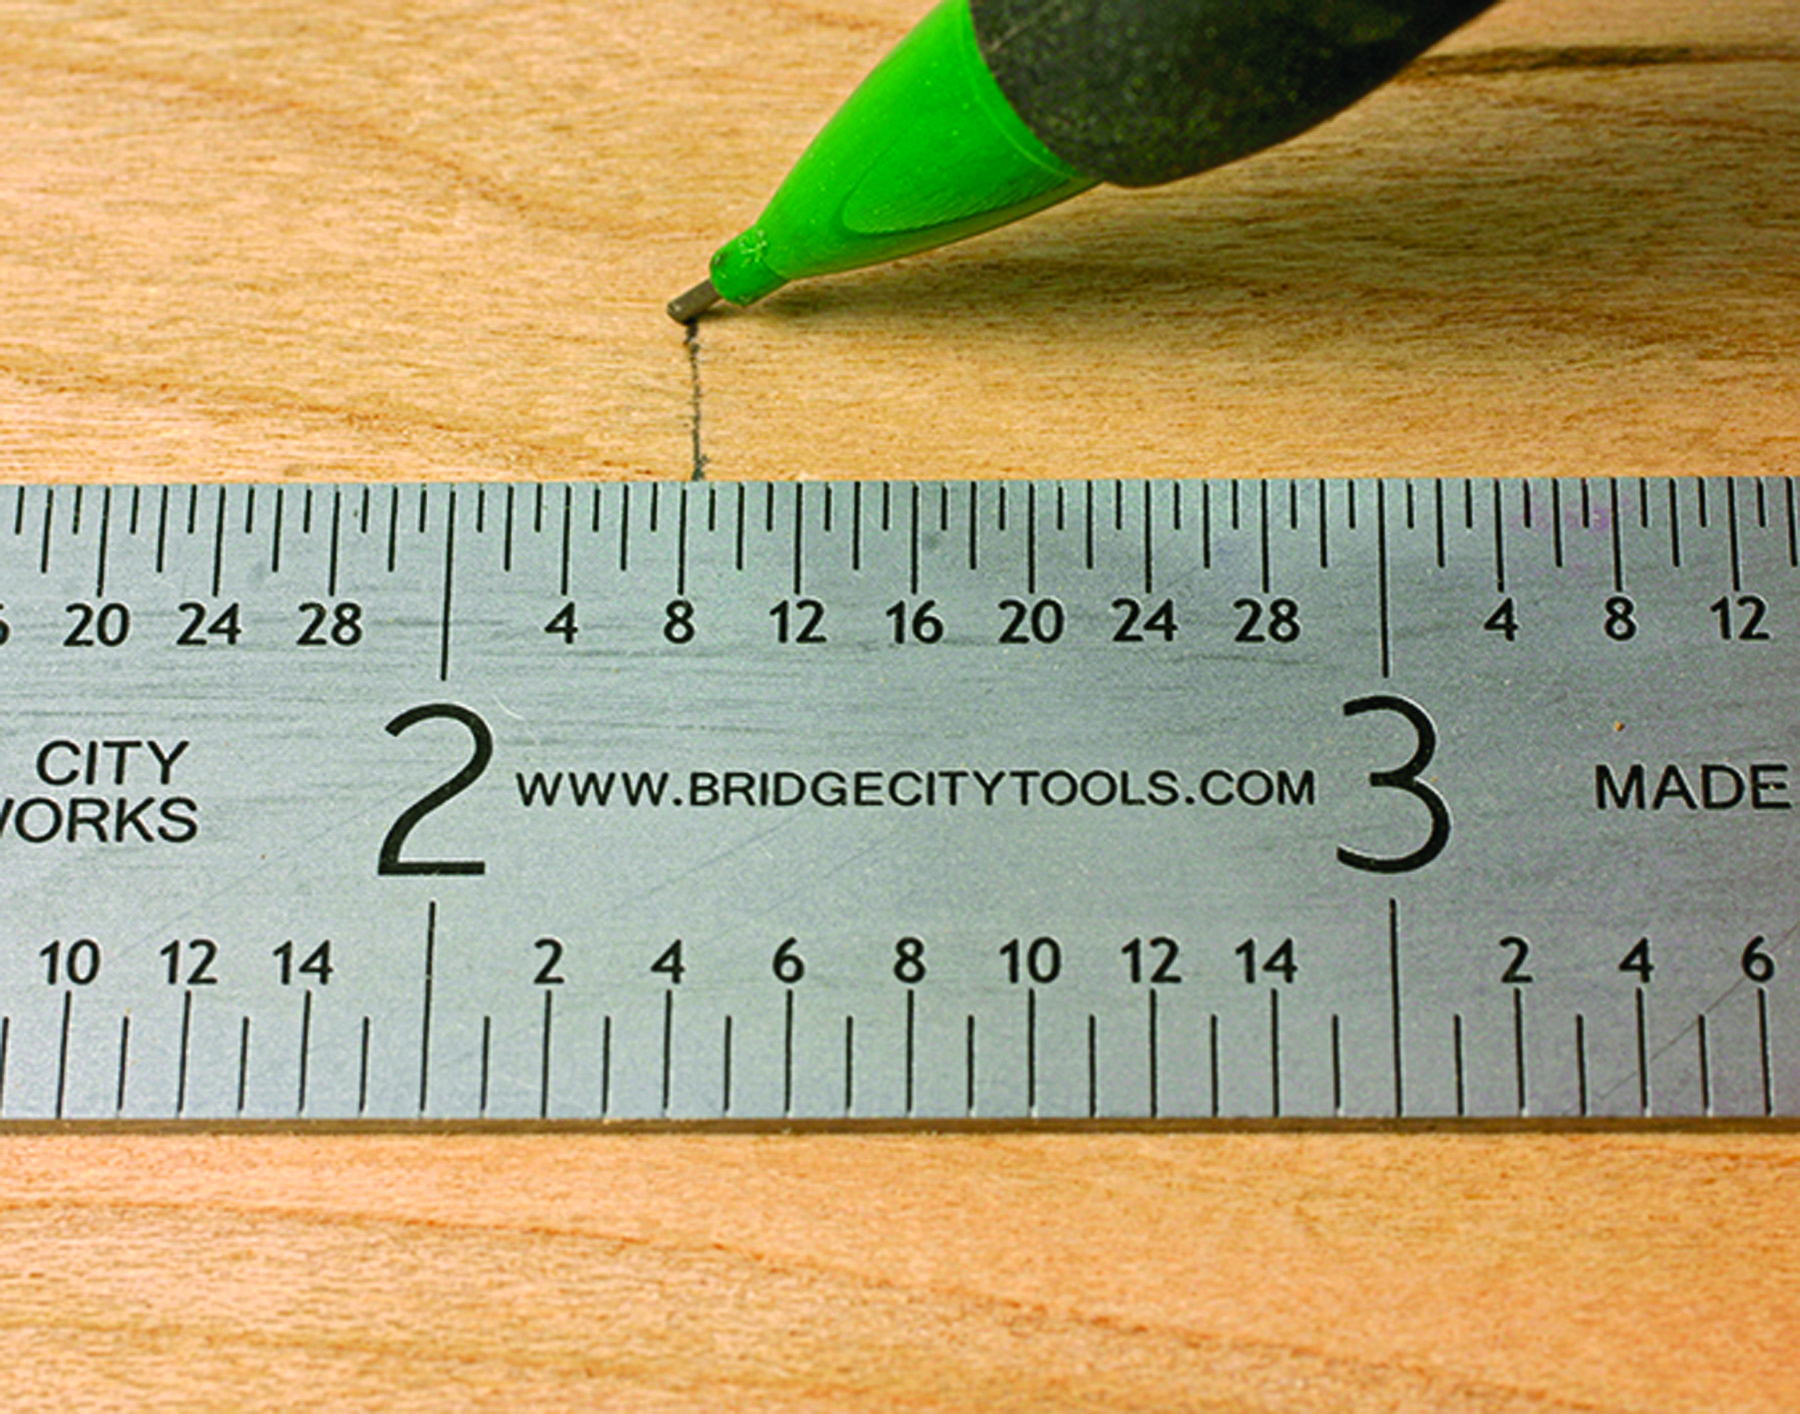
Get to the point. Your own marks can lead to errors. A wide pencil line can’t define an accurate location if it is wider than the tolerances of the work.
You need a sharp pencil or a knife to do that, and .5mm mechanical pencils make a much sharper line than a good old No. 2 pencil. If you use a soft pencil, the lines you make can be wider than the tolerances you need for quality work.
Developing good techniques for measuring is worthwhile, but the introduction of rules and numbers to the building process can slow things down and actually increase the chances of making a mistake or of making parts that don’t quite fit.
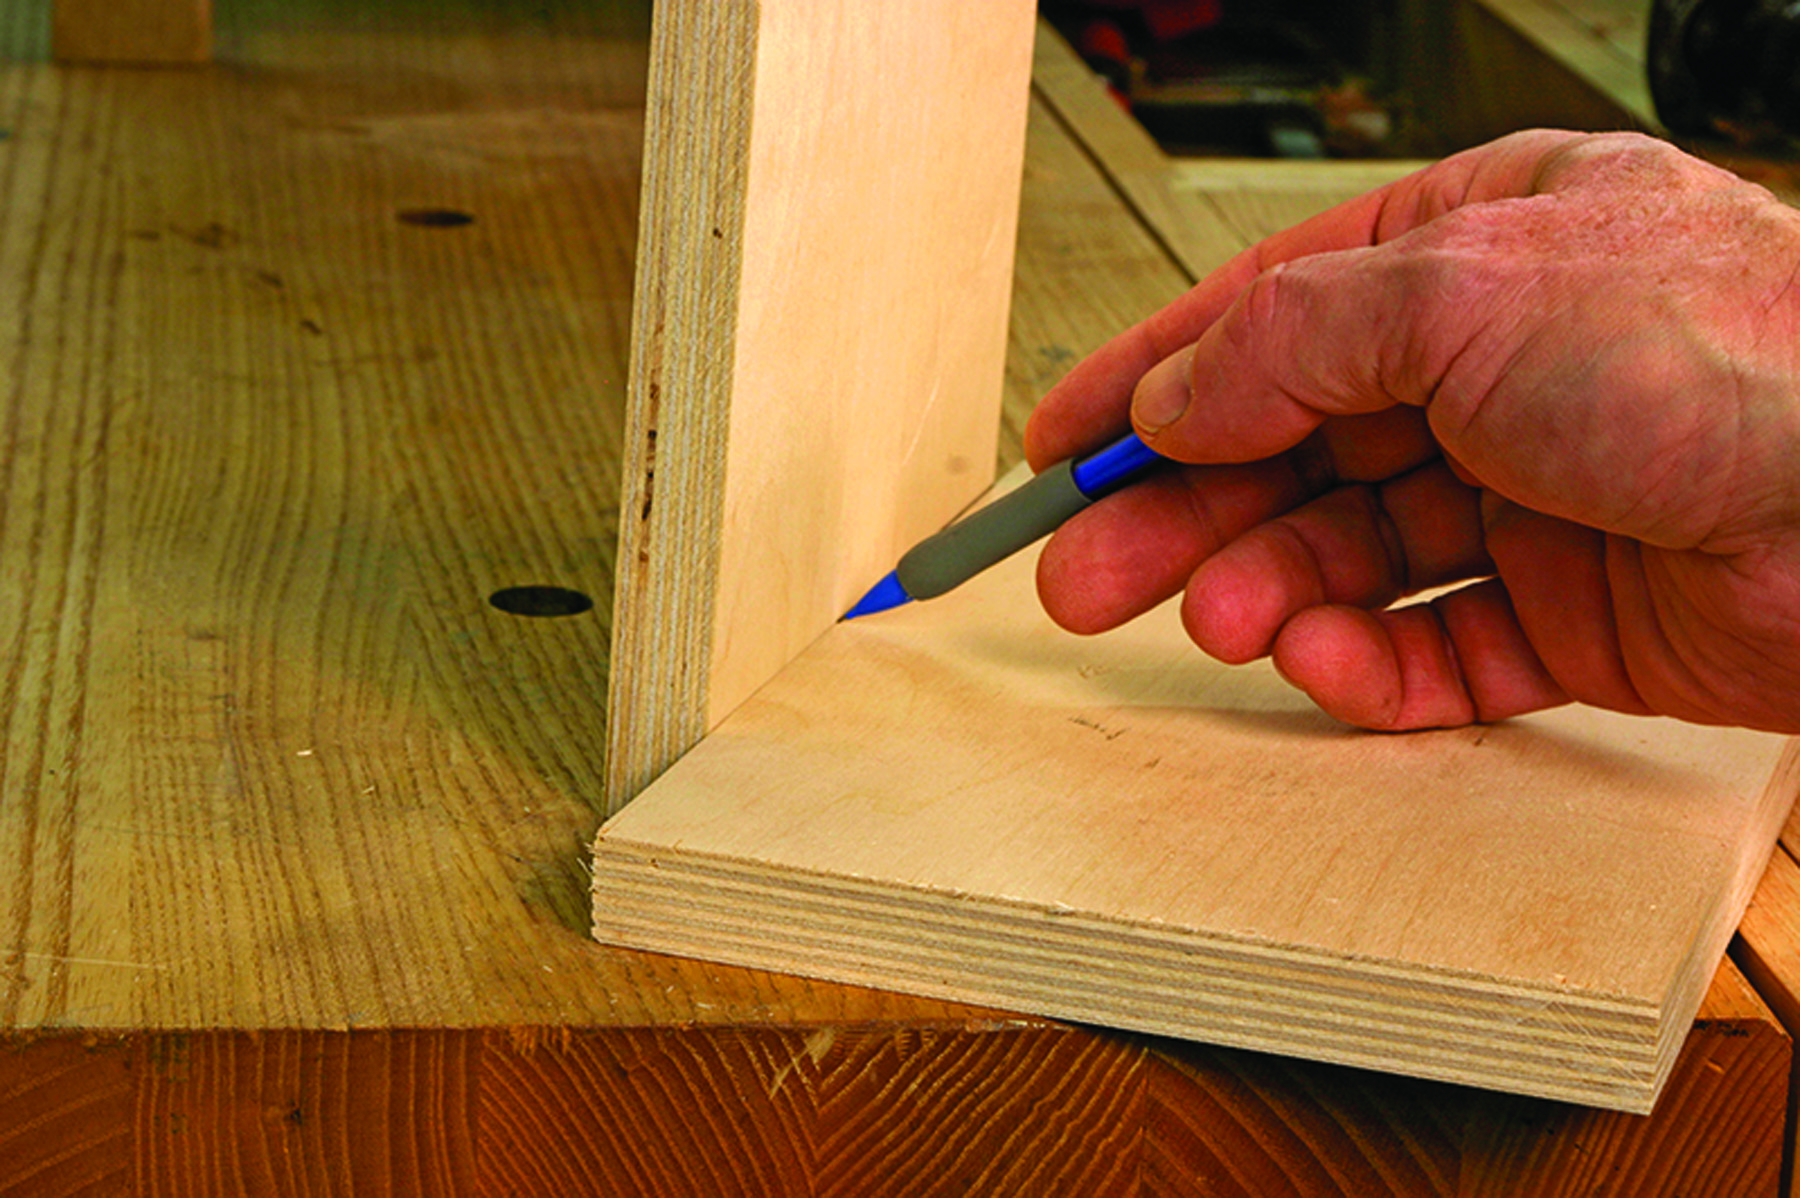
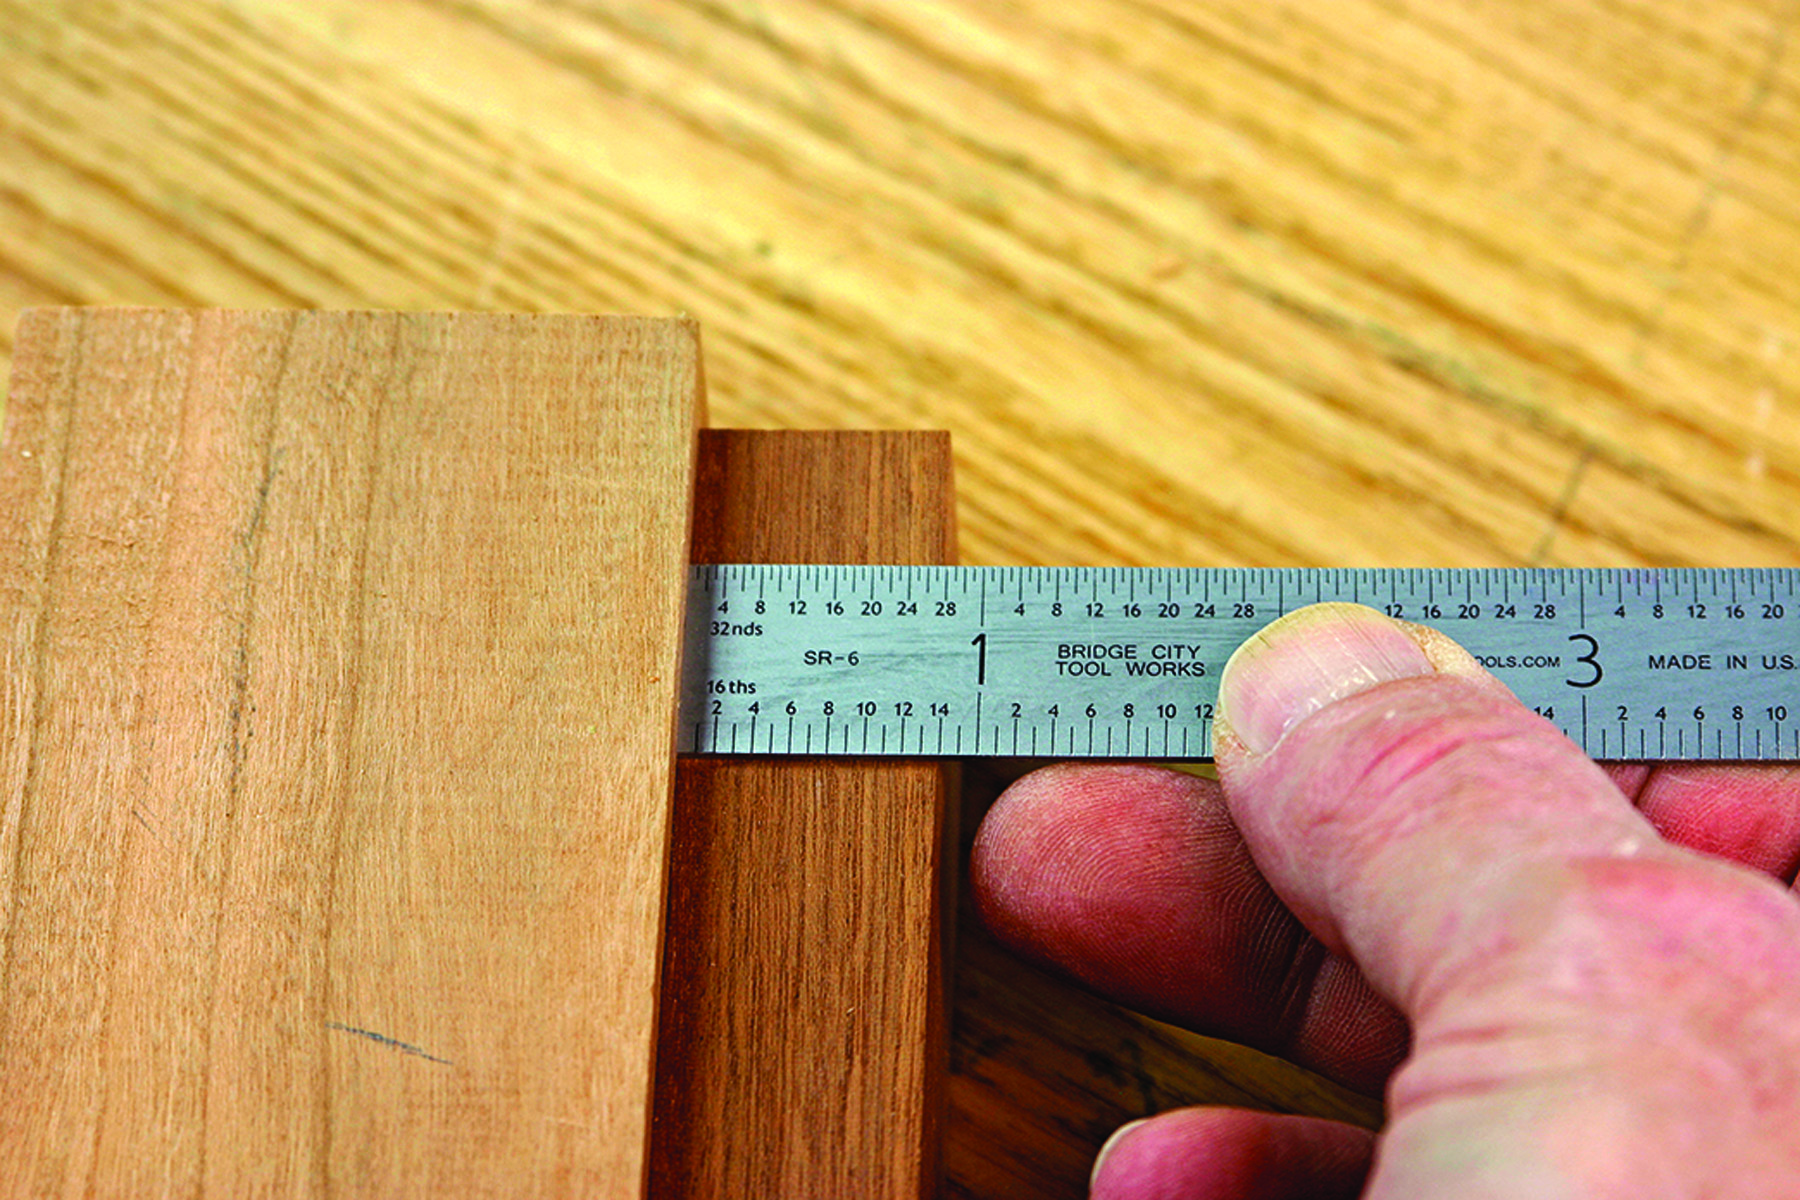
Direct reference. Marking one piece from another is far more accurate (and faster) than measuring the first piece, then duplicating that measurement on the second.
If there is a way to mark one piece directly from another, you won’t have to work as hard or think as much. If you can line up your tools directly to the mark you made, you can come closer than you possibly could by measuring, marking and measuring again (top, right).
If you put all the important dimensions from a plan on a piece of wood (a story stick) and use that as a reference for marking all your workpieces, the project will fit better, and layout and marking will be faster.
Gauge distances from parts whenever you can. Use a combination square, calipers or the material you will be using to make your layout marks rather than measuring. Your work will be more accurate and won’t it take nearly as long.
When it comes time to make a cut with a router, table saw or miter saw, find a way to line up your marks with the exact path of the blade or cutter. A zero-clearance insert on the table saw or fence of the miter saw (if it’s fresh and the slot from the blade isn’t ragged) will be easier to use for alignment than the blade itself. With router jigs, use the path of the cutter or a bearing-guided bit to line up your layout marks.
Trust Your Judgement
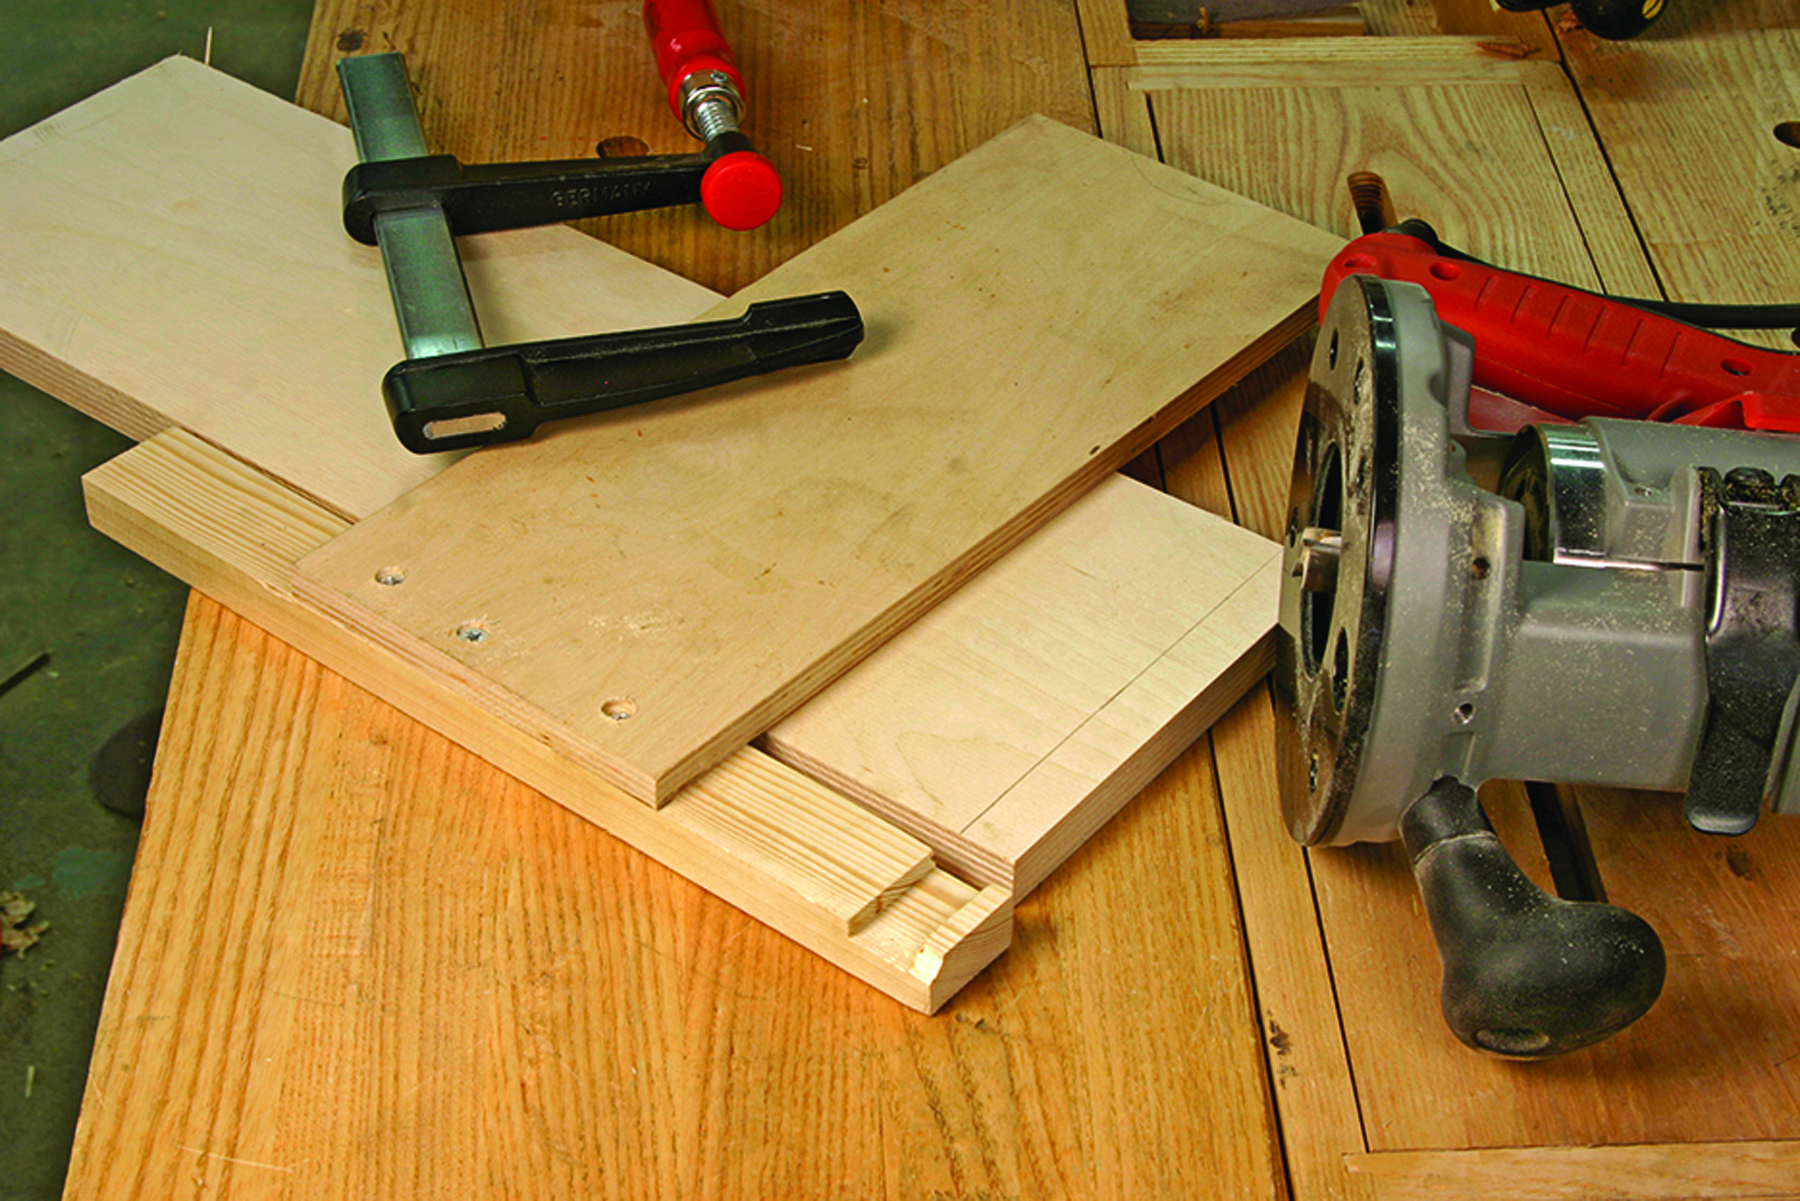
No doubt. This dado jig includes the path of the router bit. Line that up to the mark for precision without fuss.
Only you can decide the degree of accuracy to which you want to work. With experience, you’ll find that accuracy is a moving target. Sometimes a small number is crucial, as when fitting a joint or avoiding a gap at a joint. At other times no one will ever know, care or be able to tell if a dimension is “correct” or not – consider a round tabletop that measures 173⁄4” instead of a specified 18″; it’s a difference that would be undetectable by eye.
As with most skills in woodworking, accurate work comes down to enough practice with the proper tools to arrive at a place where you can trust your own skill and judgment. It also comes down to the discovery of what works for you. Finding that is far more important than any specific system, tool or technique.
Here are some supplies and tools we find essential in our everyday work around the shop. We may receive a commission from sales referred by our links; however, we have carefully selected these products for their usefulness and quality.