


We may receive a commission when you use our affiliate links. However, this does not impact our recommendations.

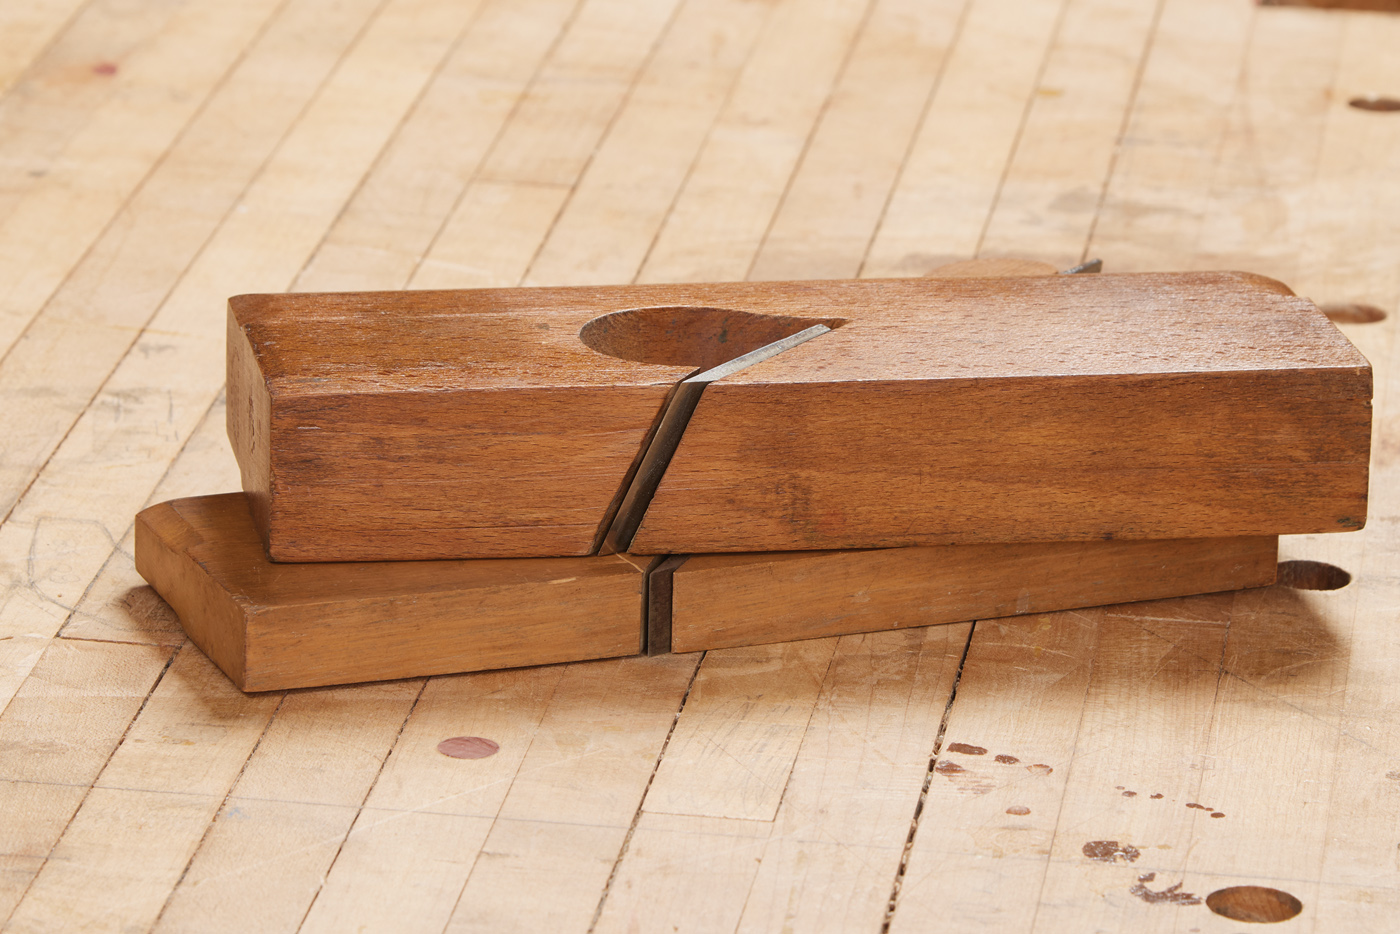
1 A pair of wooden planes look similar, but the one on the left is technically a shoulder plane, and the one on the right is a rabbet plane.
Cutting rabbets by hand can quickly and easily be done with vintage and modern planes alike. Both just take a little know-how.
I would consider a rabbet joint an essential woodworking joint to know how to cut. It’s as equally valuable building the case of a chest as it is building down and dirty drawers. In the modern shop, many craftsmen will load up a dado blade in the table saw or a rabbeting bit at the router table. However, cutting a rabbet is easily done with some simple hand tools. Of course, there are many ways to skin a cat—a back saw and chisels, a router plane, amongst others—here, we’re going to concentrate on rabbet planes and using them to create accurate rabbets.
2 The rabbet plane has a skewed blade, more open mouth, and a large opening for shavings to eject during use.
Rabbet Planes of Old
Take a stroll through any antique store worth its weight in gold, and you’re bound to come across someone selling a variety of molding planes. Often, you’ll find rabbet (shoulder) planes such as Photo 1 mixed into the bunch. And, it makes sense. Often, rabbets are used in conjunction with molding planes to create a variety of profiled moldings. But you really have to know what you’re looking at to avoid picking up the wrong plane and getting confused. The two planes in Photo 1 look the same (except the width), but one is a shoulder plane, and the other is a rabbet plane. The difference has to do with the blade angle and the escapement for the shaving.
A shoulder plane is designed to help refine shoulders on joinery, specifically end-grain. This means that they’ll often have tight mouths, and the blade will be bedded at a lower angle than a rabbet plane. These are not for removing a mass amount of wood at once. That’s not to say you can’t cut a rabbet with one—but what you will find is that the mouth clogs up pretty quickly as you start working.
A rabbet plane, on the other hand, is designed to get that wood up and out of the way. Most of the time, you’ll see that the blades are skewed on rabbet planes. This allows the shaving to come out at an angle and spiral out of the escapement. You’ll see some of these shavings in the next few pages. The escapement is also opened—the left side (assuming it’s a right-hand plane) will be larger than the right-hand side. The skewed blade picks up the shaving and throws it through the large opening in a spiral fashion.
When looking at rabbet planes “in the wild,” pay attention to the corners and the mouth. A fairly open mouth is OK, but I look for a body in good shape. Also, make sure the wedge is tight (you can make a new one, however, if needed) and that the blade isn’t pitted.
Wood to Wood
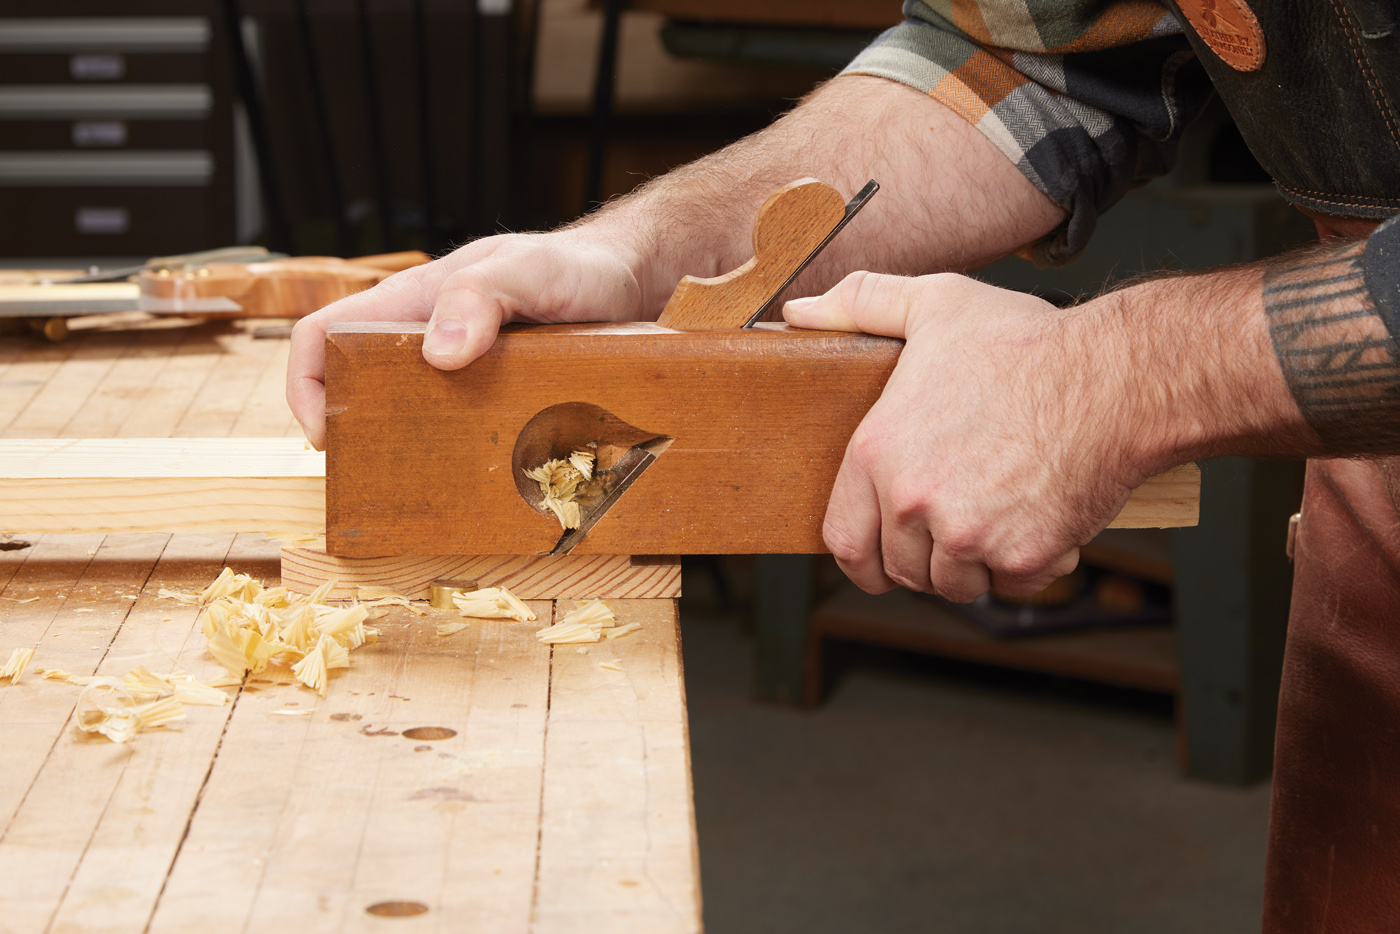
So, first things first. With a wood body plane, I like to lay out my rabbet on both ends of the workpiece. This gives me a visual gauge of the location, depth, and squareness of the cut.
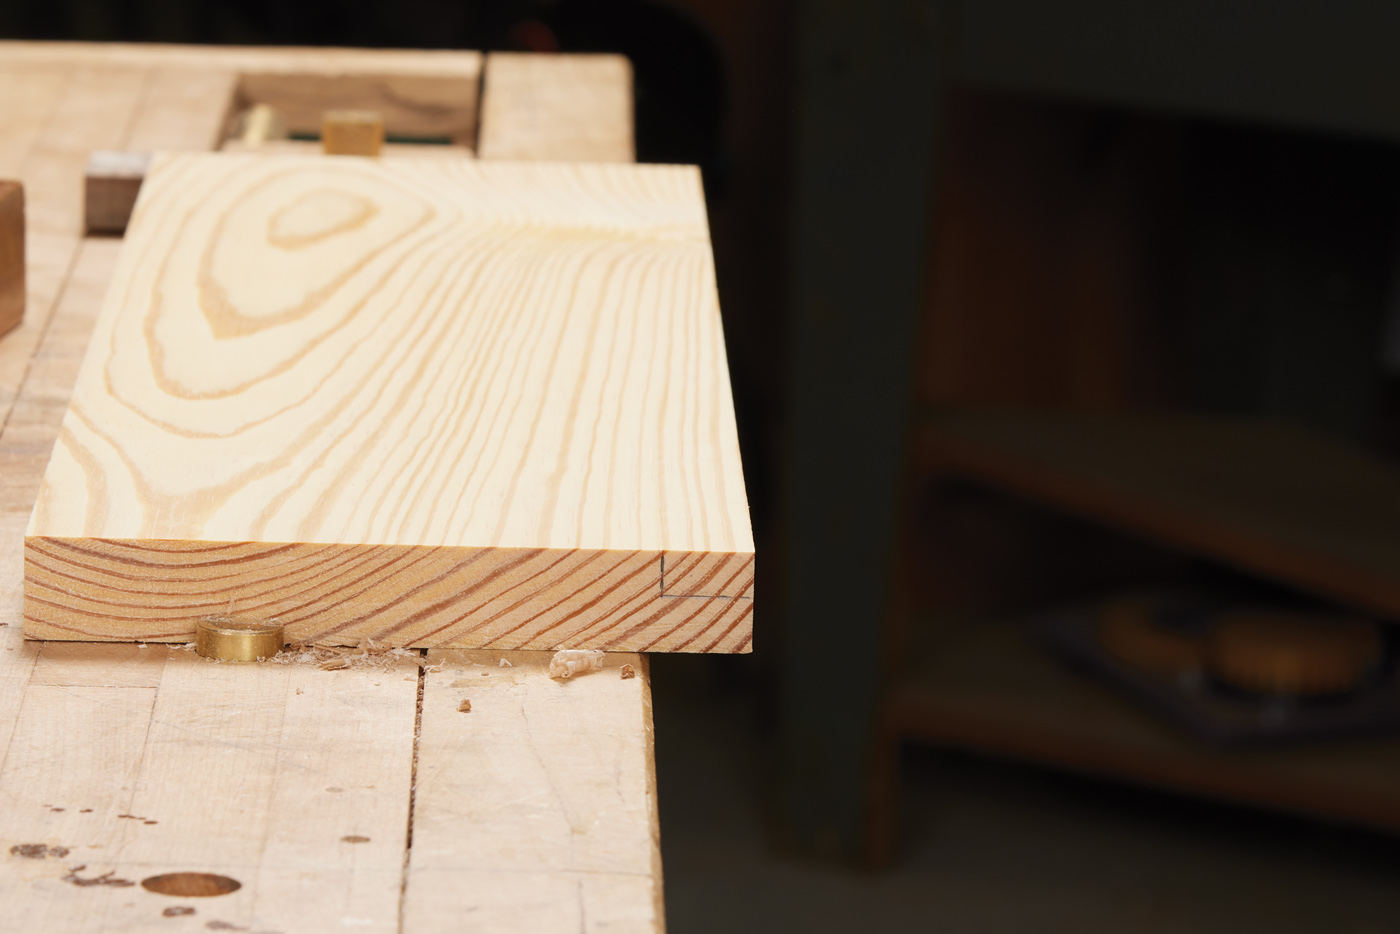
3 A pair of lay out lines show you where your rabbet is going to be cut and help guide your progress.
A lot of wood rabbet planes won’t have a fence, but you may occasionally find ones where an owner screwed or nailed one on. You’ll need a way to guide the plane if they don’t. The most simple is to hold your fingers on the bottom of the plane and use them as a gauge to position the sole. You can see this in photo 4 below. If I’m doing this, I’ll start with the plane leaned over heavily and create a small groove with the corner of the blade first—this gives me some form of guide to help line up the plane as I’m working. Then, you’ll rock the plane back to square and cut down to your line. This method is certainly the fastest, but I find it can be somewhat inconsistent. Instead, I like to use a wood fence to guide my plane.
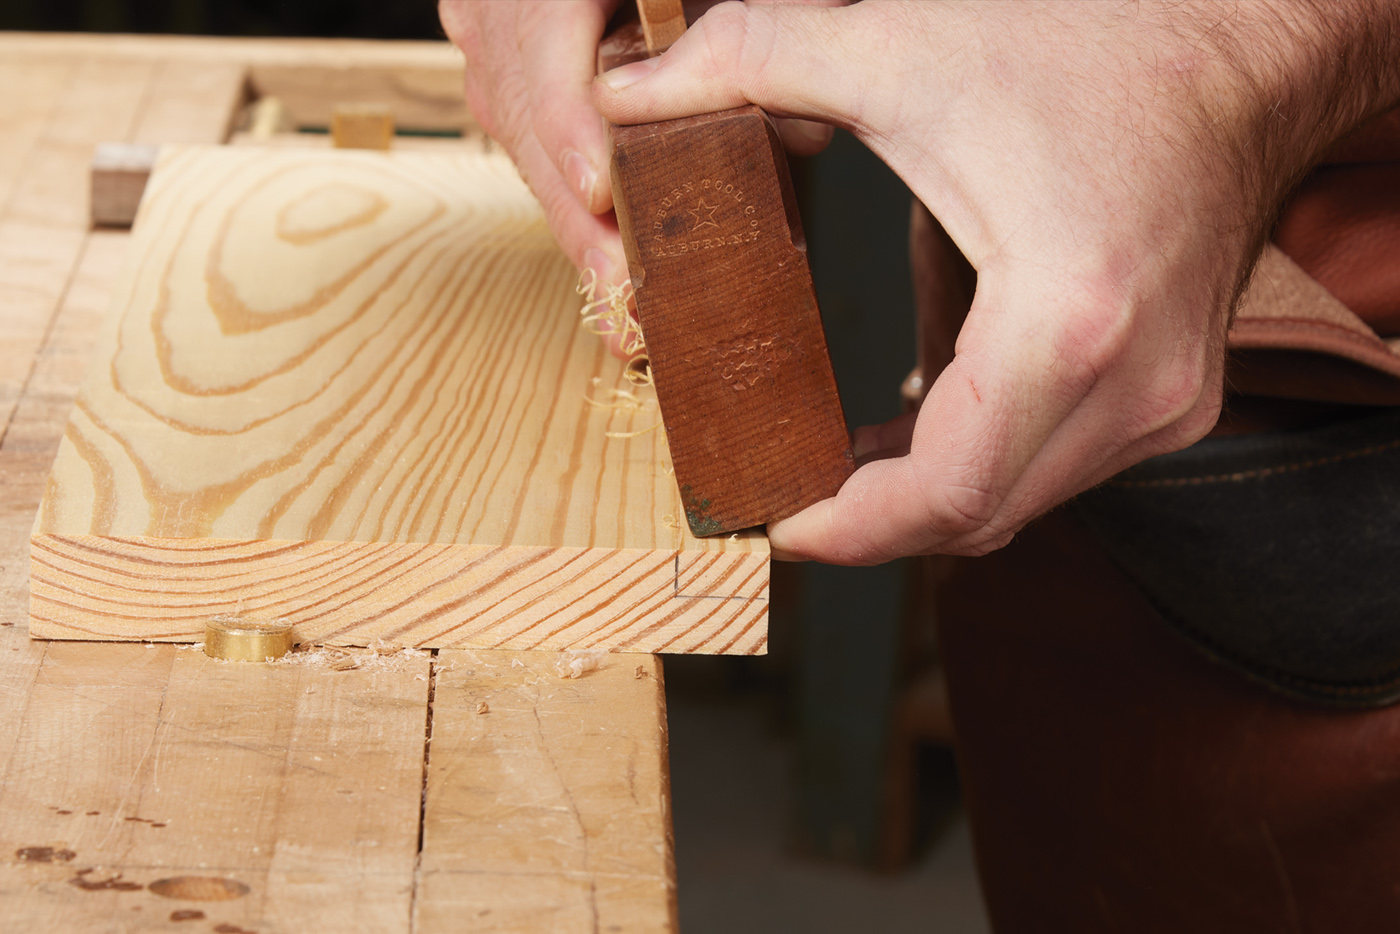
4 Tilting the plane allows you to use the corner to create a small shoulder that will guide the plane.
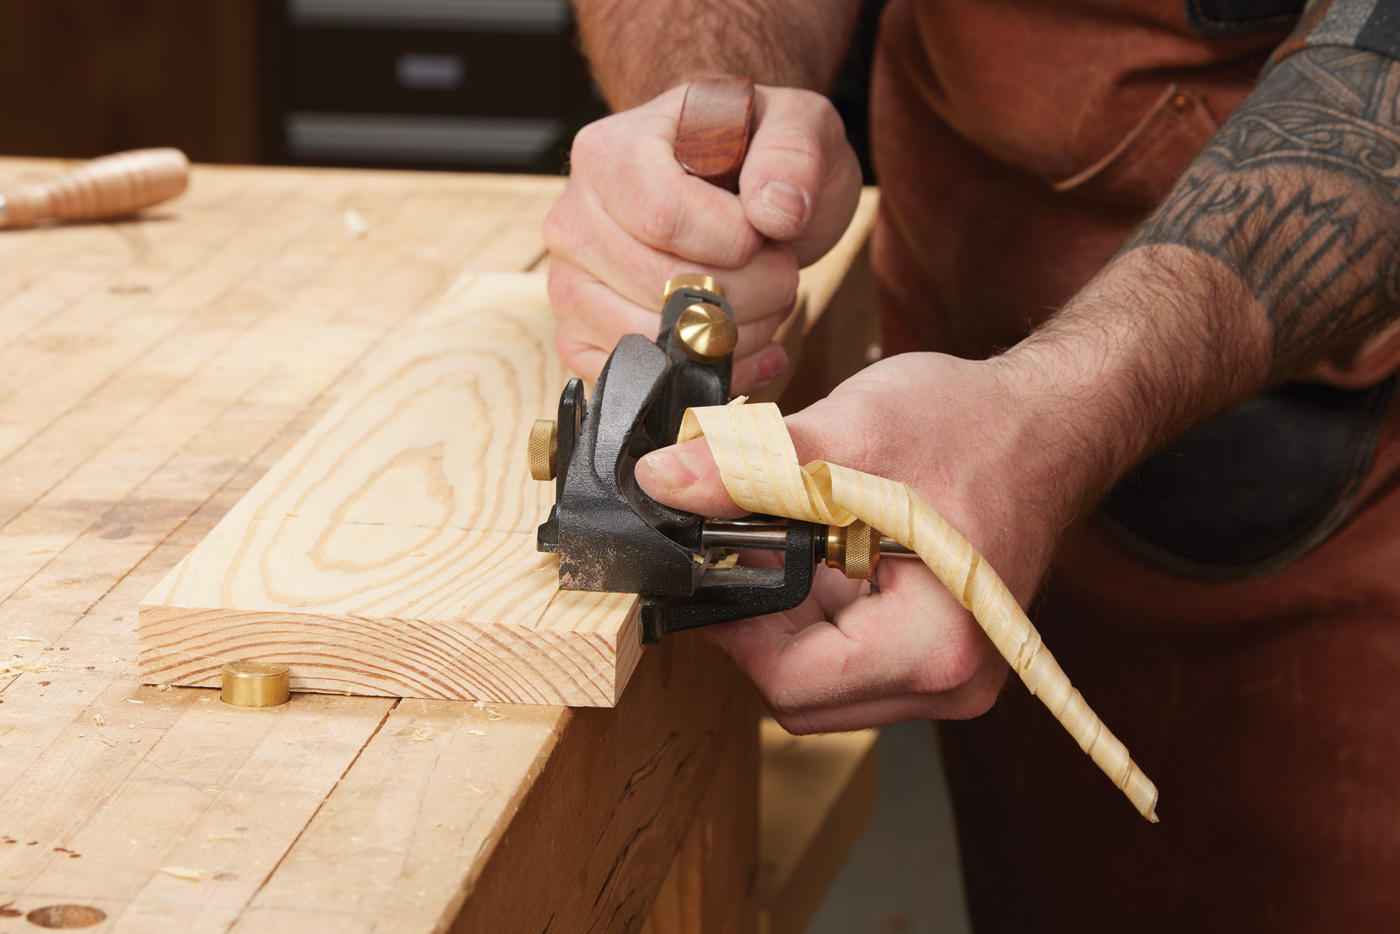
As you can see in Photo 5, I’ve attached a wooden fence to my workpiece. Here, it’s held down with double-sided tape, but holdfasts work well also. There shouldn’t be much pressure against the fence as you cut; it’s just there to guide the plane. Notice the spiral shaving coming out of the plane—that’s the difference between a shoulder plane and a rabbet plane. With a rabbet plane like this, I try and make full-length passes instead of short little strokes at the beginning (like you would with a plow plane). This keeps the depth consistent as I work.
5 My preferred method is to clamp a fence in place and use this to guide my rabbet plane.
I’ll slow down and gauge my progress as I get closer to the final depth. This is where the layout lines really come into play. I’ll sneak up on the line on both ends and make a measurement in the middle to make sure it’s the same depth all the way across.
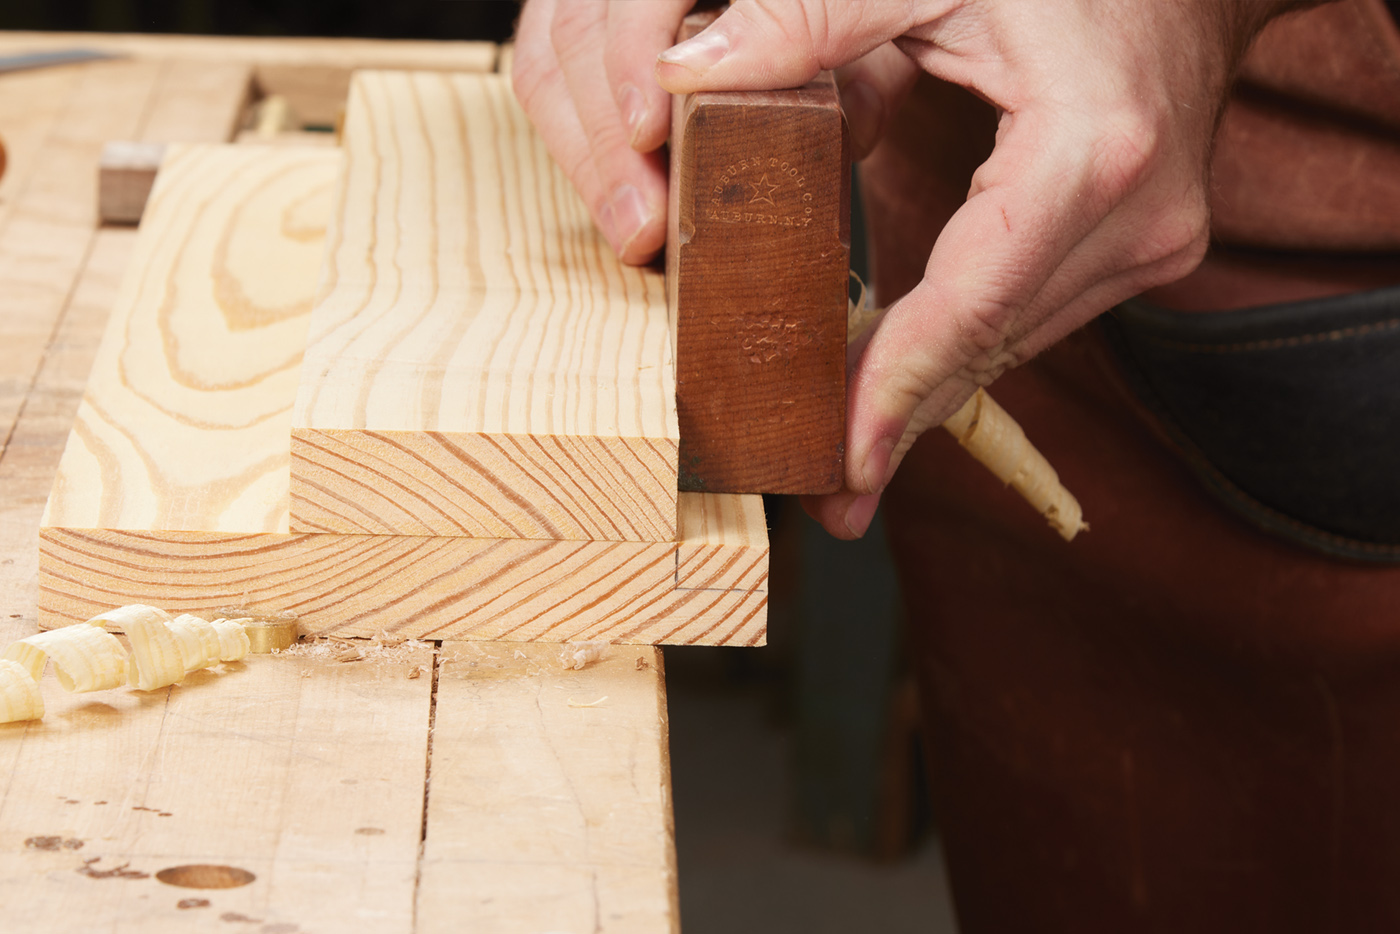
With a wood rabbet plane such as these, long-grain rabbets are easy. Cutting cross-grain rabbets can be trickier if your plane doesn’t have a nicking blade (more on that in a bit). Here, I’ll use a back saw to cut a shoulder before I plane.

6 A back saw with a tall plate (such as a tenon saw) is a good way to sever the endgrain fibers if your plane does not have a nicking blade.
7 Cutting across the grain doesn’t produce long curly shavings. Instead, they come out in clumps due to the short grain structure.
Using the same style of fence, I’ll saw down to the final depth along the fence. This keeps the fibers from lifting along the shoulder. Now, the plane can be run across the grain to remove the waste. You’ll notice that the shavings here are different—they come out in sections instead of ribbons. This is because of the short grain fibers as you cut across the grain.
Modern Metal Rabbets
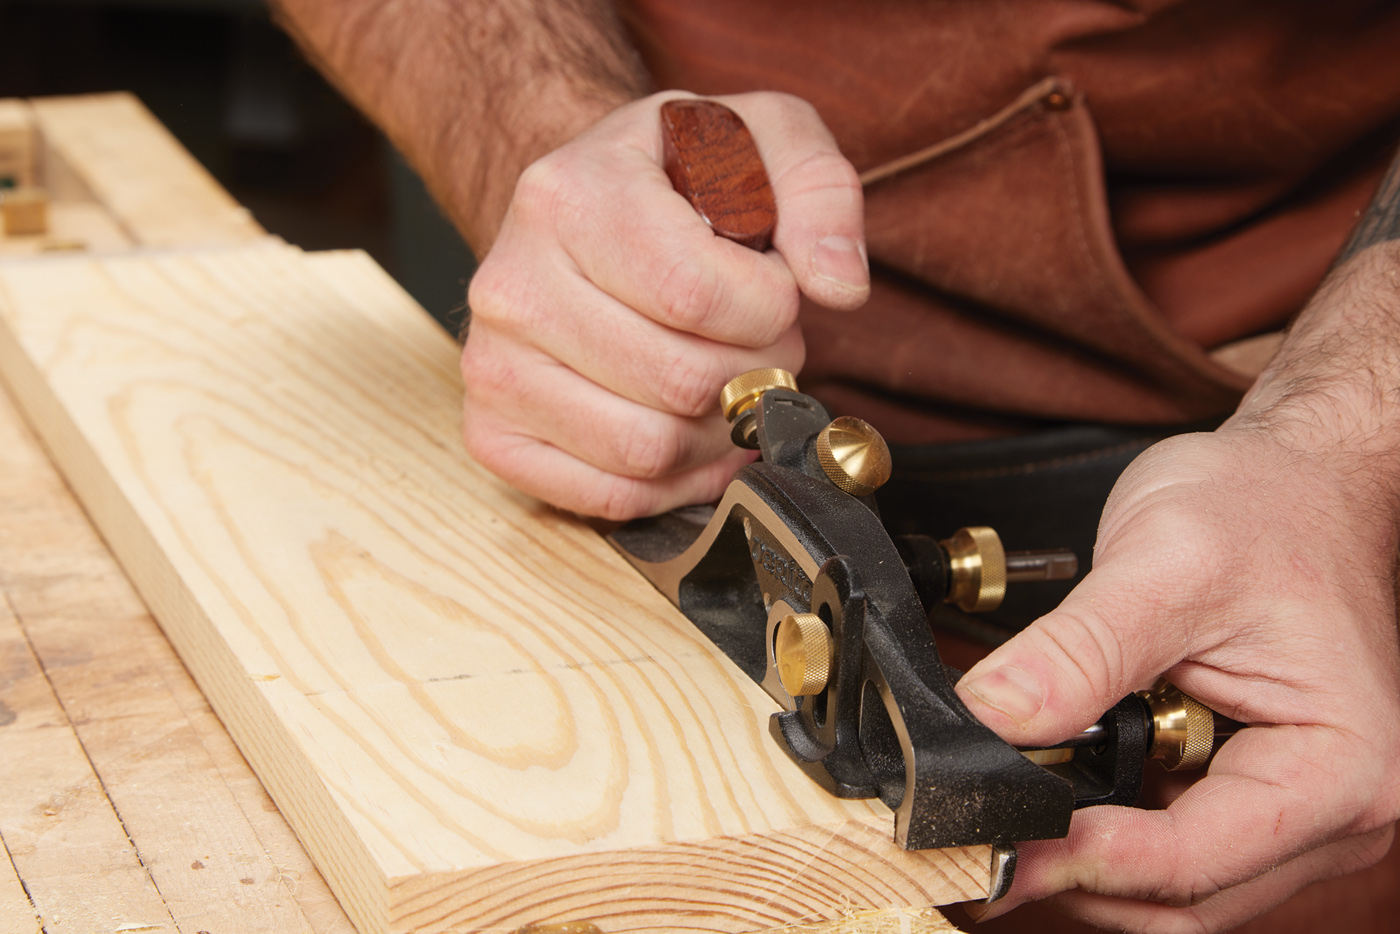
If vintage planes aren’t your style, Veritas offers a modern rabbet plane, as seen in this section (there are others, but this just happens to be the one I have). In use, they’re very similar to their wood counterparts but with some features that make them a bit easier to use. First, they have a modern blade adjuster, so you don’t have to fidget with a plane-adjusting hammer. Next, most metal body planes will have a fence that sets the width of the rabbet (some vintage wood planes also have them—these are referred to as fillister planes). You can see this in photo 8 above. (I removed the front knob off my rabbet plane, as I like to have a lower grip, keeping my fingers against the fence). Now, to set the depth, there’s a depth stop. In photo 9, you can see that it is engaged, keeping the plane from cutting any deeper.
8 The Veritas rabbet plane has a fence that sits under the sole to set the width of your rabbet.
9 A depth stop sets the final depth. Set this based on the blade location, not the sole.
Finally, most metal rabbet planes will have a nicking blade, as you see in photo 10. This is so to sever the fibers as you work across the grain. By dragging the plane backward (photo 11), you pre-score the fibers to avoid tearing out. If you have never used a rabbet plane to cut a rabbet, you owe it to yourself to grab one and try it. You may find that it’s your new favorite way to create this simple joint.
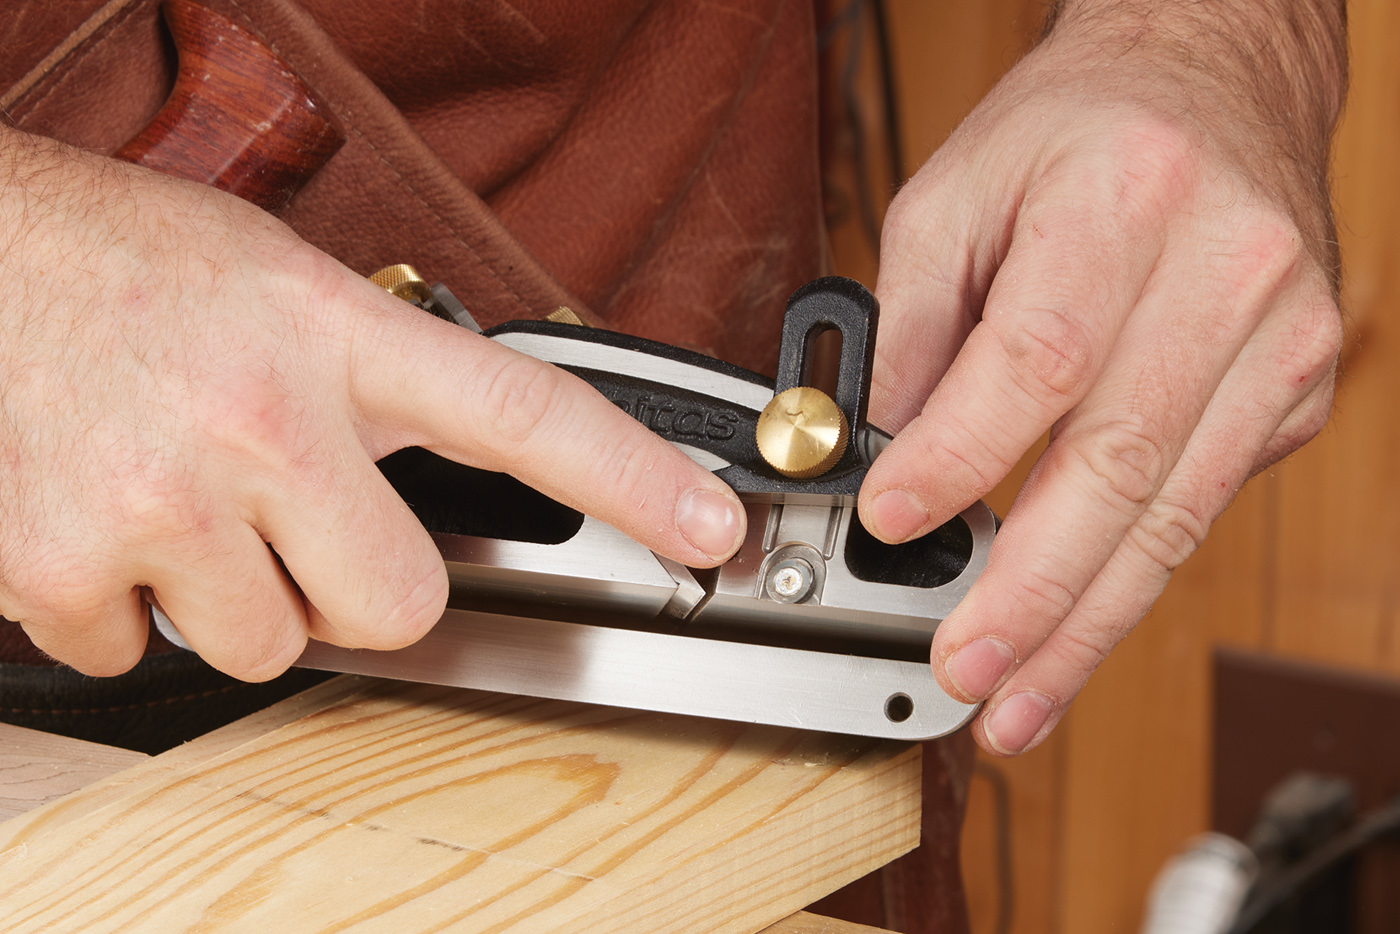
10 The round nicking blade is used to pre-score cross-grain fibers.
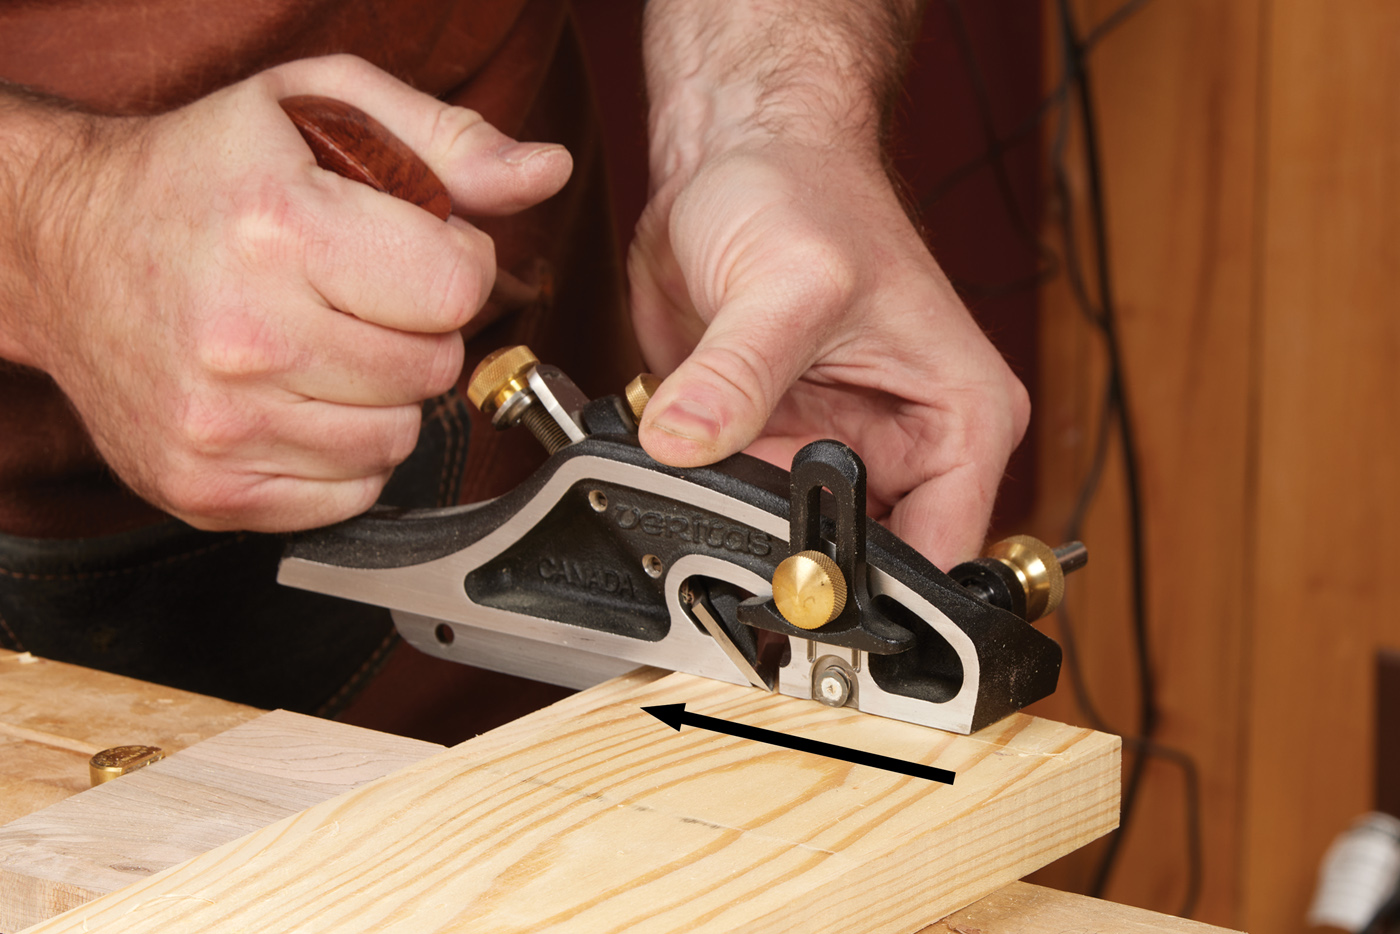
11 Drag the plane backwards to score first before cutting.


