We may receive a commission when you use our affiliate links. However, this does not impact our recommendations.
Buttons are but one method for attaching tabletops. Here’s how they work: Slip the button’s tongue into its groove and screw it to the tabletop. Avoid jamming the button’s shoulder tight to the apron. A gap ensures the tabletop’s natural movement can be accommodated. Buttons are screwed to the tabletop, not the aprons. But each has a tongue that projects into a groove in the apron, pinching the apron tight to the tabletop.
Methods that allow wood to move with the seasons.
About a decade ago, I made a drop-leaf table for a book of projects. When it came time to mount the top, I just drilled pilot holes and drove cut nails through the top into the aprons. Are you horrified? Actually, the approach worked great. In the years since I put it together, the top has remained sound and firmly affixed to the aprons. And while I don’t hesitate to use this approach when the circumstances are right, such as on an informal kitchen table, there are many better ways to mount a tabletop to its stand.
You could attach a tabletop to its stand with blocks glued securely to both the aprons and the tabletop. This doesn’t allow the tabletop to expand and contract, of course, and the resulting stresses eventually will split or buckle the top.
And herein is the challenge: How to prevent wood’s ongoing expansion and contraction from destroying the assembly or itself. The tabletop must be held tight to the leg assembly, but in such a way as to allow the top to expand and contract.
Most woodworkers know this, of course, and I think that’s why so many of them cringe at the thought of face-nailing a tabletop to its stand. Well OK – it may also be an affront to their aesthetic sensibilities.
To make it a bit easier, let’s assume here that the tabletop’s grain is square to a rectilinear leg-and-apron stand. That is, two of the aprons are parallel with the tabletop’s grain and two are perpendicular to it. The shape of the top – square, rectangular, round, oval, free-form – has no bearing on this. The grain direction, and thus the direction of expansion and contraction, is what’s important.
If you’re building a table with curved aprons, or no aprons at all, you’ll have to extrapolate from my examples to fit your specific design.
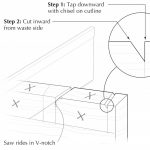
Glue & Screw Blocks
How do I make those narrow slots, you ask? I bore a hole at each end of the layout, then nibble away the waste between them with the same drill bit. It’s not particularly elegant, but it works.
An improved version of the glue-block method is to secure blocks or ledger strips to the aprons, then drive screws through them into the tabletop. This is an excellent approach, so long as elongated pilot holes, properly oriented, are used to allow for seasonal expansion and contraction of the wood.
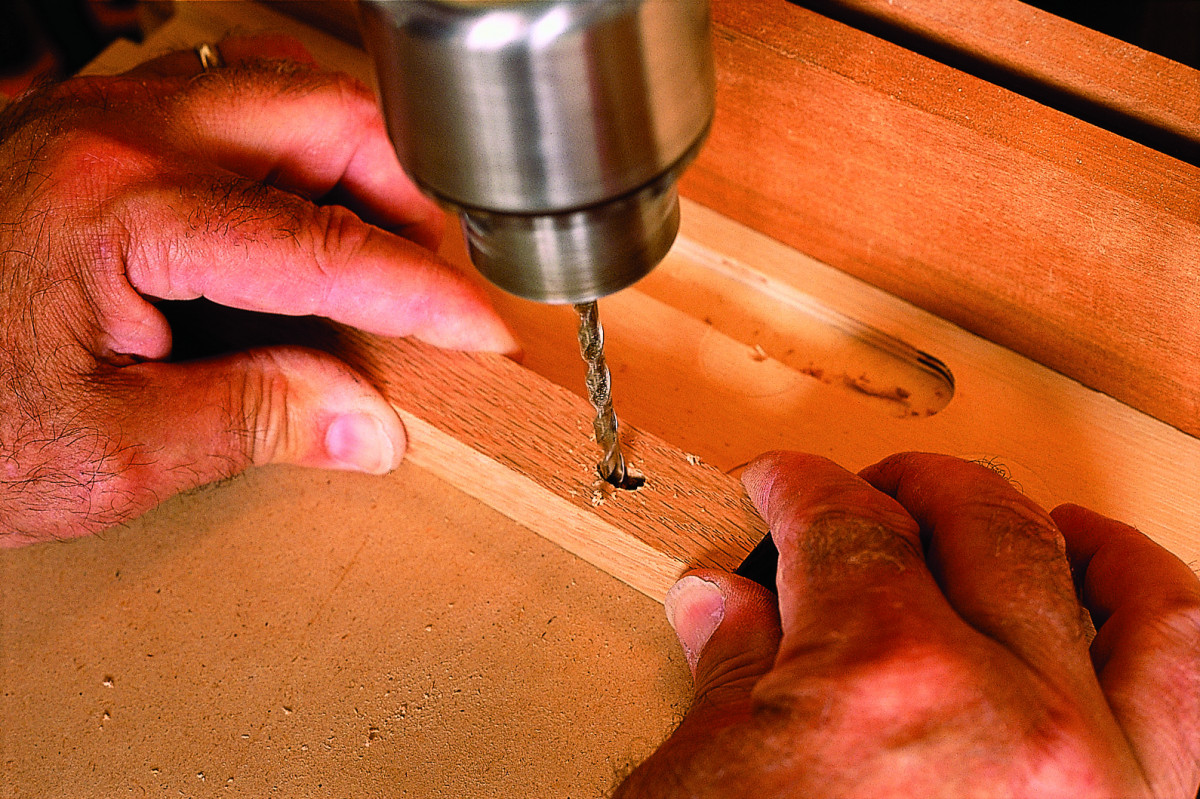
First of all, the grain of the blocks should parallel the apron’s grain. Wood movement doesn’t have an impact here, so you can glue, nail, or screw the blocks to the aprons. But before you do, bore pilots for the screws – you want to use screws, not nails – to secure them to the tabletop.
At the center of the block that runs cross-grain is a “fixed pilot,” a hole matched to the diameter of the screw. This screw anchors the tabletop to the leg assembly; all the movement occurs on either side of this point. Flanking the fixed pilot should be pilot slots that parallel the block’s grain.
The blocks that run parallel to the tabletop grain should have only slotted pilot holes, and they must be oriented across the grain.
Making the fixed pilot is, of course, simple. Drill a hole. But making the slots is more of a challenge. Typically, I use a 3⁄16” twist drill bit in the drill press. I position the block with a thin (low) fence clamped to the table.
Drill holes to delineate the ends of the slot, then nibble away the waste between them. A twist bit, of course, skitters off the wood into one or the other of the holes, but it doesn’t take long to form a trench. Lock the quill and slide the work back and forth along the fence to tidy the slot.
With the right sort of screw, one with a washer-like head, you can use 1⁄4“-wide slots, which you can produce easily with a Forstner bit. This is a little less trying than using a twist bit, because a Forstner doesn’t wander.Although I’m a dedicated router user, I don’t view this as a router job. The diameter and length of bit necessary – 3⁄16” to 1⁄4” – makes routing an iffy proposition, in my opinion. You also need two setups, one for the cross-grain slots, another for the long-grain ones.
Were I to tackle this as a router job, I’d rout the slots in a wide board, then rip the strips from it. Then I’d lay out the slots and use an edge guide to position the long-grain cuts and guide the router. Next, use a T-square to guide the cross-grain cuts. Just eyeball the beginning and end of each slot, and make each slot with a series of cuts, each plunged progressively deeper.
Screw Pockets
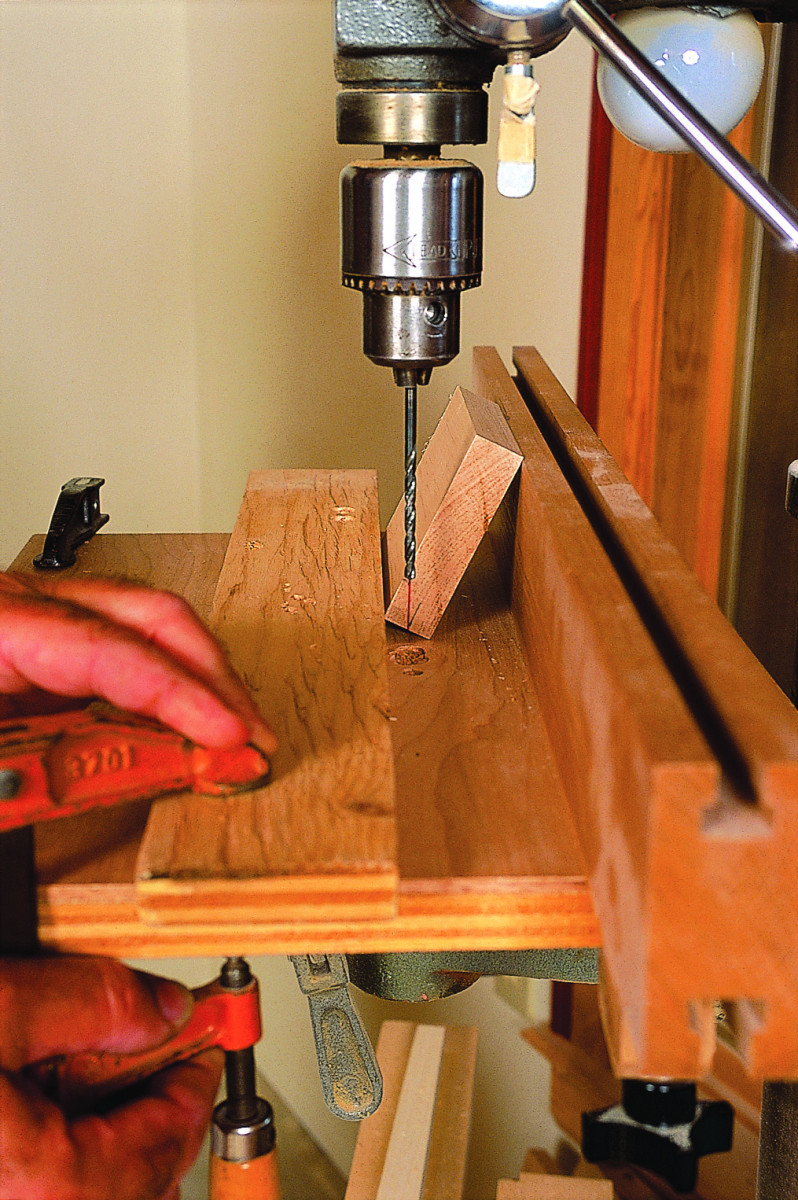
The key to drilling pockets is attitude – that is, the angle of the apron in relation to the bit. Lean the apron against an upright fence, align the pilot layout on the end with a bit in the drill chuck, and trap it at the right angle with a flat fence.
It’s quite common these days to skip the blocks and just drill oversized pilot holes directly in the aprons. You can run long screws straight up through an apron’s edge and into the tabletop, or through angled pockets cut in an apron’s inside face. The latter approach works better for me, because it lets me use shorter screws.
Creating the pockets and pilots is easiest if you have a pocket jig and related accessories, but it’s not the only way.
With a drill press and Forstner bit, you can make very tidy, uniform pockets. Lay out the pocket locations on the apron. Chuck a Forstner bit in the drill press – I usually use a 1⁄2” size. Hold the apron at an angle and bore the pocket. The design of the bit enables it to slice cleanly into the wood to form a flat-bottomed pocket.
The real trick here is setting and holding the apron at the right angle. You typically see the apron cradled in a nifty custom-made jig. Is such a jig worthwhile for the occasional project? I don’t think so. I use two fences: One is upright to lean the apron against, the second is a flat trap fence set against the apron’s bottom edge to hold at it the correct angle.
I establish the angle by laying it out on the end of a scrap of the apron stock. I’ll usually put a small rule on the scrap’s end and draw an eyeballed angle from the center of the edge to a spot 11⁄2” to 2″ up the inside face. If you prefer to use a sliding bevel, set it to about 15°.
Chuck a twist bit in the drill press, lower the bit almost to the table, and lock the quill. Line up the layout line with the bit, setting the upright fence so the apron is tilted just right. Then slide the trap fence against the apron to keep the bottom edge from skidding forward and changing the angle. Change to the Forstner bit, set an apron in place, then bore the pockets.
After boring all the pockets, switch back to a twist bit and bore the pilots. Most of these pilots must be elongated, of course, but with pockets, this is usually accomplished by rocking the drill to expand the exit hole. You can’t do this on the drill press so switch to a hand drill. Rock the drill parallel to the aprons that will be across the tabletop’s grain, and across the aprons that will parallel the grain.
Buttons are Better
The completed pocket is flat-bottomed and large enough for a screw with an integral washer.
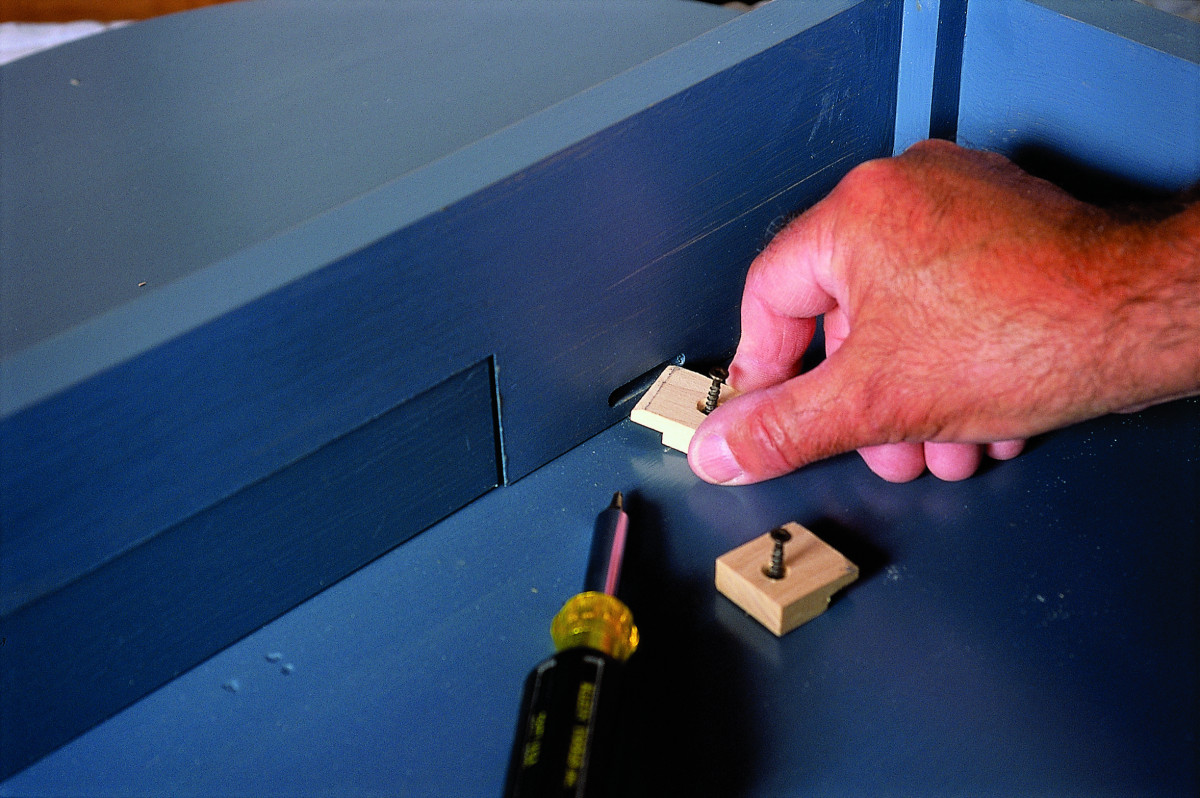
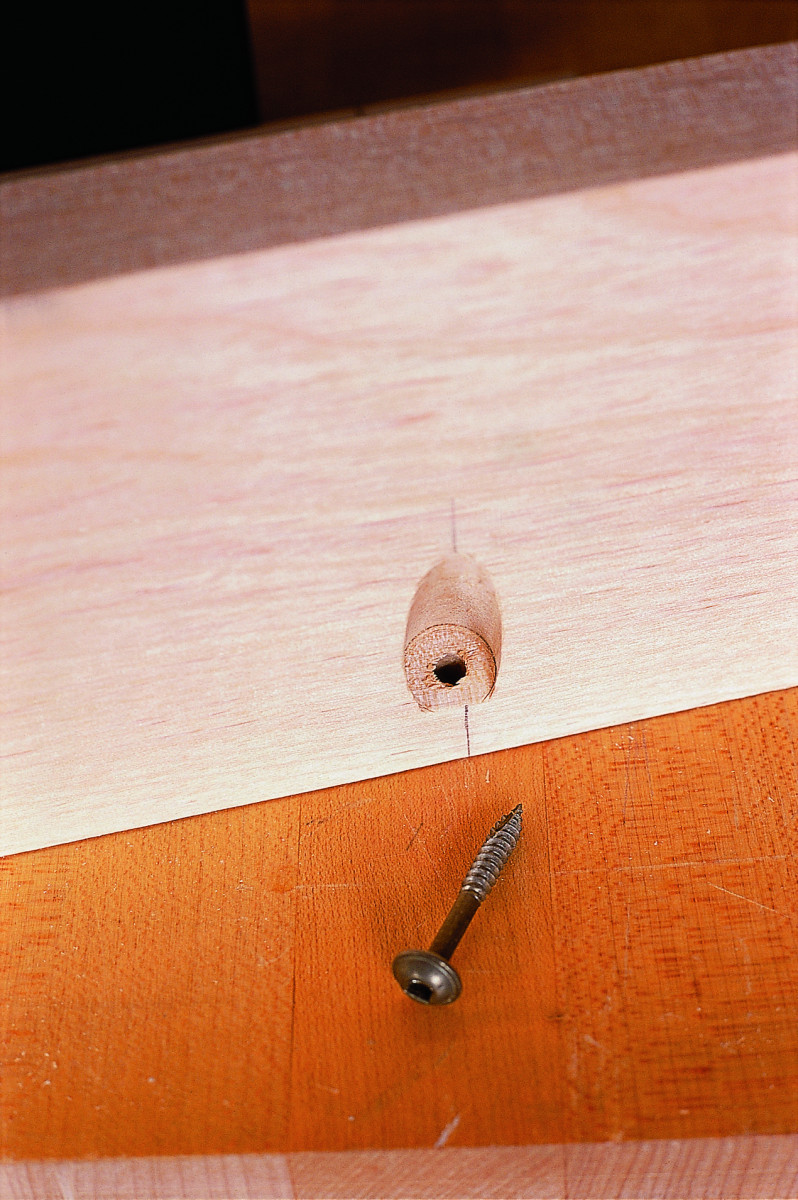
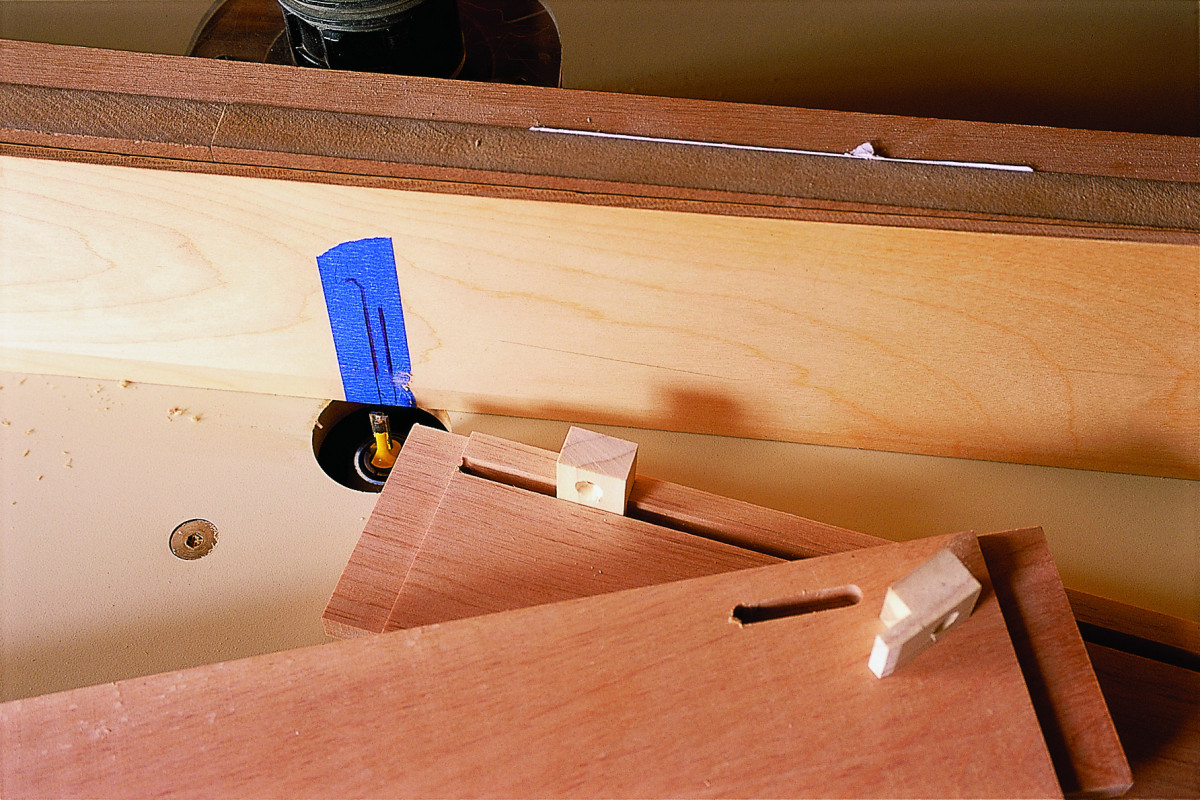
And there’s yet another solution, and it’s one I often use when constructing a table. It uses “buttons” spaced around the tabletop inside the aprons. A button, often called a cabinetmaker’s button, is a small block, roughly 11⁄4” square and 3⁄4” or less thick. It has a tongue, which you stick into a groove cut in the apron. You then drive a screw through the button body into the tabletop. Over time, as the tabletop expands and contracts, the button moves with it. As it does, the tongue moves along, or in and out of, its groove in the apron.
A through groove is less venturesome to rout than the stopped groove, and requires no layout. A button works in either.
The apron grooves can be through or stopped. Some use through grooves in the aprons that cross the tabletop grain, because the button’s tongue will move along the groove. But they use stopped grooves in the long-grain aprons, figuring that here the tongue is moving in and out. I tend to use stopped grooves all around. I’ll divvy up a long apron’s length for three or four buttons, but use only a single one in the center of a short apron.
Through grooves can be cut on the table saw or routed with a straight bit or slot cutter. Stopped grooves are a router proposition, or you could use a biscuit joiner.
To ensure the tabletop is held tightly to the stand, design the button so its shoulder is slightly shorter than the space between the apron’s top edge and the groove. When screwed to the tabletop, the button should be slightly pitched. The tongue should be slightly thinner than the width of the groove. To accommodate the pitch, you may need to chamfer the tip of the tongue.
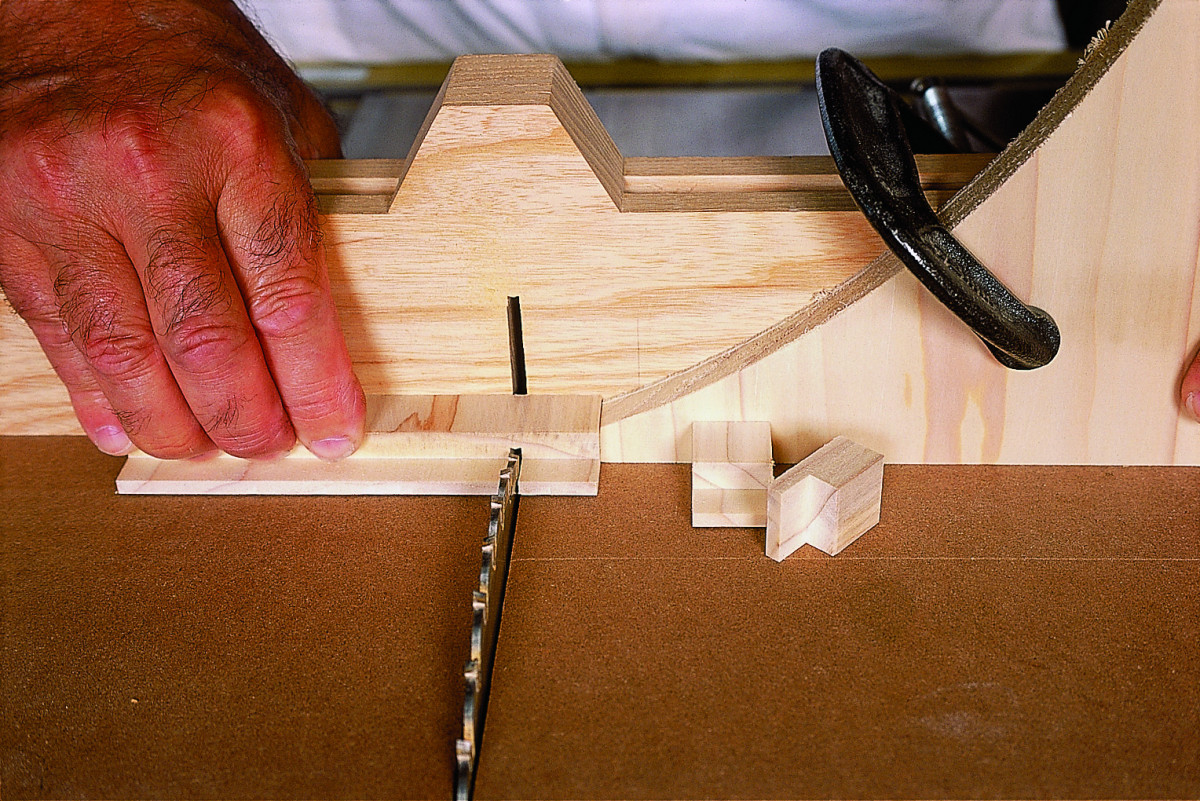
Cut a rabbet across the end of a wide board, then cut off a strip as long as you want the buttons to be. Clip the strip into uniformly sized buttons.
First, figure out the thickness of button needed, mill a scrap board, and cut a rabbet across each end. Crosscut a strip about 1 1⁄4” long from each end, then rip the strips into buttons about 1″ wide. Drill a pilot hole through the body of each button.
With any of the attachment methods I’ve described – glue-and-screw blocks, screws in pockets, buttons – final assembly involves setting the tabletop, show face down, on the bench. You upend the leg-and-apron assembly and align it on the top. Then you drive the mounting screws.
Here are some supplies and tools we find essential in our everyday work around the shop. We may receive a commission from sales referred by our links; however, we have carefully selected these products for their usefulness and quality.