We may receive a commission when you use our affiliate links. However, this does not impact our recommendations.
Before
Finding and restoring vintage shop machinery.
Editor’s note: This article originally appeared in the October 2016 issue of Popular Woodworking
You pick up an old handplane at the local flea market. You clean it, flatten the sole, tune the adjusting mechanism, hone the iron to a frightful edge. That first shaving. You know the one. Full length, full width, the sound. You are grinning inside and out. Ever wish you could get that experience from a machine? Ridiculous notion you say? Well, read on.

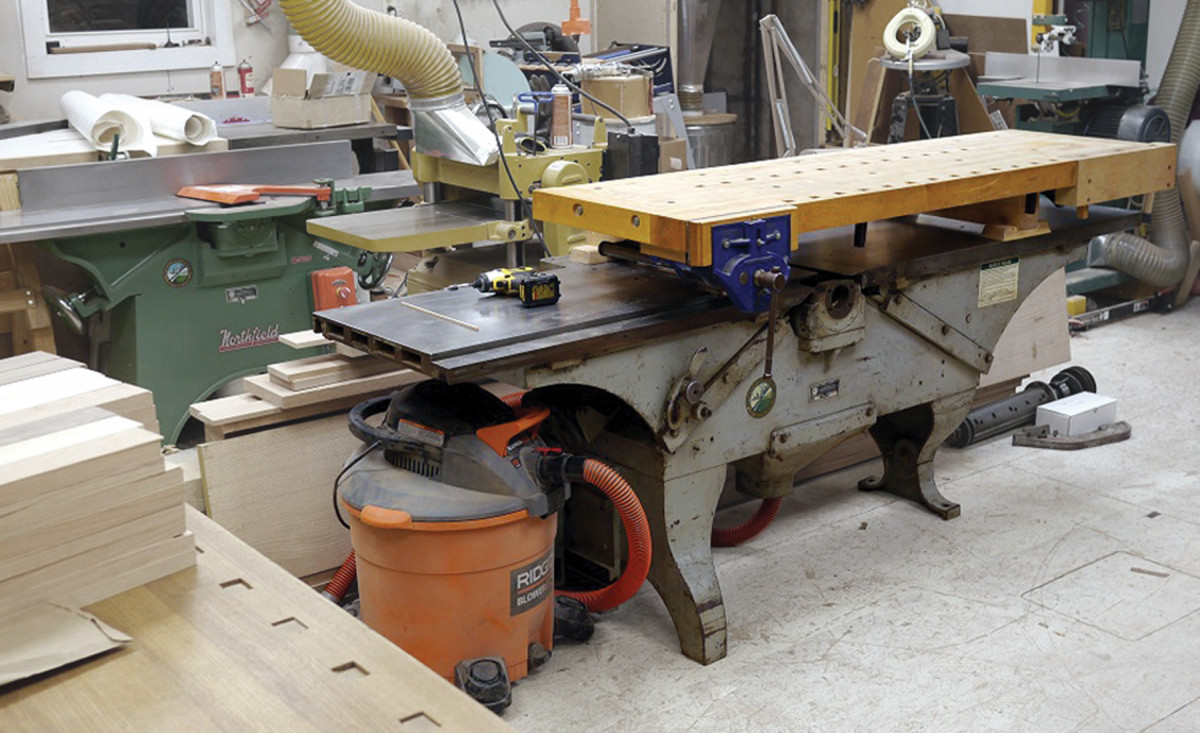
After
Before we get into the nitty gritty of the how, I think we need to discuss the why a little bit. I got sucked into vintage machinery in much the same way I got into traditional workholding devices. I was fed up with what was available, so I decided to look to the past. I won’t get into the politics of buying American vs. an Asian copy. I’m not much for politics (the golden rule rules this roost), so I’ll leave that to the internet forums. So then, why restore an old woodworking machine? Nostalgia, quality, patriotism, frugality? Yes.
It all started for me when I bought a brand-new drill press about 10 years ago. The machine did what it was supposed to do. It turned bits and went up and down. But there were aspects of it that made me curse. The adjusting handles were sized for an Oompah Loompah. The castings had sharp edges. The belt guard wasn’t much more than tin foil. The depth stop was difficult to set and wouldn’t hold. It was the minimum amount of stuff a corporation could throw together and still call a drill press. I hated it.
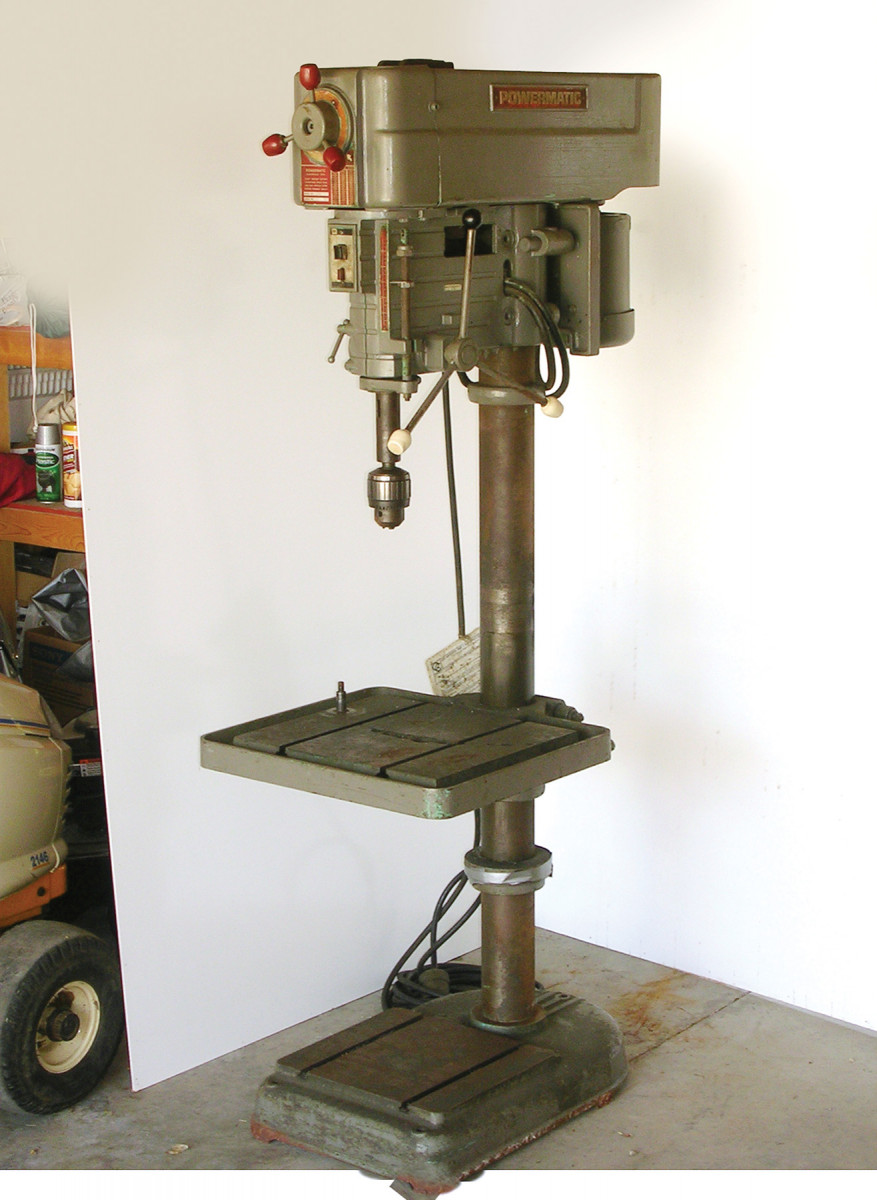
That was the breaking point for me, so I started hunting around for an old machine. Within a few months, I found a 1970s Powermatic 1200 on Craigslist. The 1200 is large, with a 20″ swing (you can drill to the center of 10″ material). The previous owner bought it at auction and decided it wasn’t worth the effort to restore it. It looked like hell. It had been painted numerous times over the years – controls and everything – but once I got it home I couldn’t wait to tear the thing apart. That started me down the rabbit hole that is old iron, or “old arn” as we enthusiasts like to call it. So what exactly is old arn? The general definition is any machine built more than 20 years ago. But this being 2016, that doesn’t exactly apply anymore. What about machines built by a company that is no longer in business? That’s tricky, because I would call any new Northfield machine old arn. What about machines built overseas? Those are mostly copies of American machines, so that’s also foggy. I guess the simple answer is, you’ll know it when you see it.
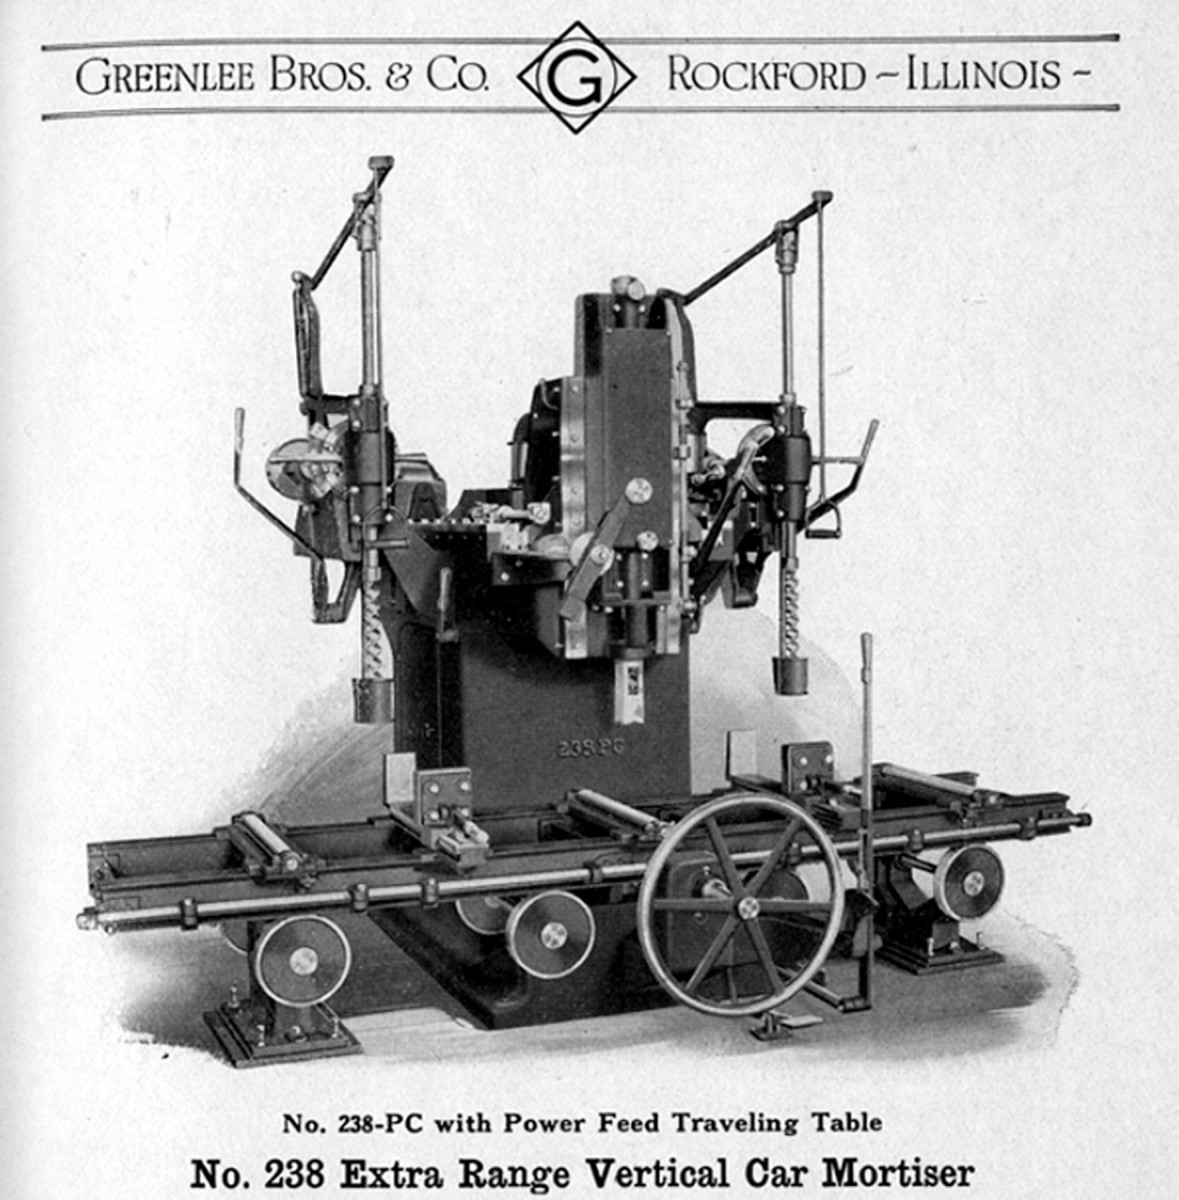
All aboard. This rail car mortiser’s hollow chisel is the size of your biscuit joiner.
Back in the mid-19th century, when the Industrial Revolution was getting up to speed, hundreds of companies started producing woodworking machinery of all shapes and sizes all over the country. You could buy a hollow -chisel mortiser capable of cutting a 3″ x 3″ square mortise in timbers up to 18″ x 20″! There were of course smaller machines designed not for producing rail cars, but for more common millwork and producing household furniture.
On the Vintage Machinery website, there are listings for more than 1,000 distinct companies that produced woodworking machinery. Today, you can count on probably a couple hands the number of companies still producing woodworking machinery in the United States.
Diamond in the rough. There is a gem of a drill press under all this rust, grime and paint.
The good news is there are thousands of machines out there. The bad news is most of the companies are now defunct, so parts can be hard to find. There is, however, an enthusiastic group that supports and promotes the restoration of these machines. Websites such as Old Wood Working Machines (OWWM) provide various forums for restoration techniques and classifieds forums for sourcing machines and parts. Between the Vintage Machinery and OWWM sites, you can easily find the information needed to restore virtually any machine produced in the last hundred years and beyond.
Finding Your First Machine
Barbarian hoarder. Get clever and you can stash machines in your resto queue with ease. I tucked this 16″ jointer under one of my workbenches.
My first restorations were drill presses, and I think this is an excellent machine to get started with. Why? It’s a ridiculously common machine, and you can get them in many sizes to suit your work. The first place to start looking is your local Craigslist. I like to save individual Craigslist categories in my bookmarks folder out to about a 2-hour radius from my shop. This makes it quick to check the site frequently (if you get the bug, you’ll check way too much) so you can snatch up a machine before it’s gone. But oftentimes these machines just sit unsold because modern folk don’t want the trouble of fixing them up. This makes for a perfect situation: great machines at low prices.
Other places to look for machines are estate sales. Auctions are also an option, both local and online. Like all auctions, sometimes you get away with murder, other times you leave shaking your head. I’ve also bought machines through local governments. Many school shop programs have gone the way of the dodo in recent years, and you can often find old, industrial-sized machines at city “garage sales.” Call your local school surplus center or department of education and you might be surprised to find they have a storage facility full of machines they are eager to get rid of.
It’s particularly satisfying to find an old machine that was used in a school (maybe even your old junior high!) and resurrect it from the potential scrap pile. You might also pick up a cheap deep fryer or trumpet while you’re at it. I also make sure to mention that I’m “into old machinery” when I visit lumberyards or machine shops. Pretty soon you’ll find that machines start coming to you instead of the other way around.
Getting Your Machine Home
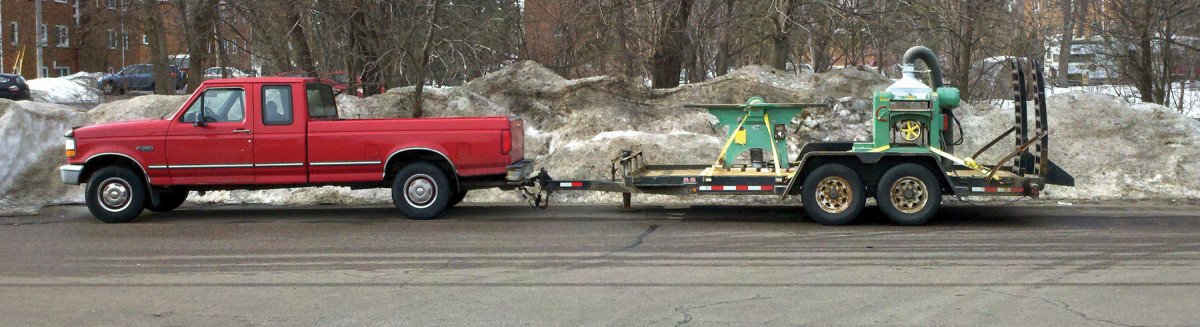
Road trip. My old Ford F-250 and a borrowed trailer allowed me to pick up this matched pair of Northfield machines from a Twin Cities high school.
Smaller machines are easy to transport. Toss them in the back of a pickup or minivan. For bigger stuff you’ll need a trailer and heavy straps. I’ve moved machines with everything from a skid loader to a come-along tied to the base of a shrub. You have to get inventive sometimes – you’d be amazed at some of the gigantic machines people have shoved down the cellar door.
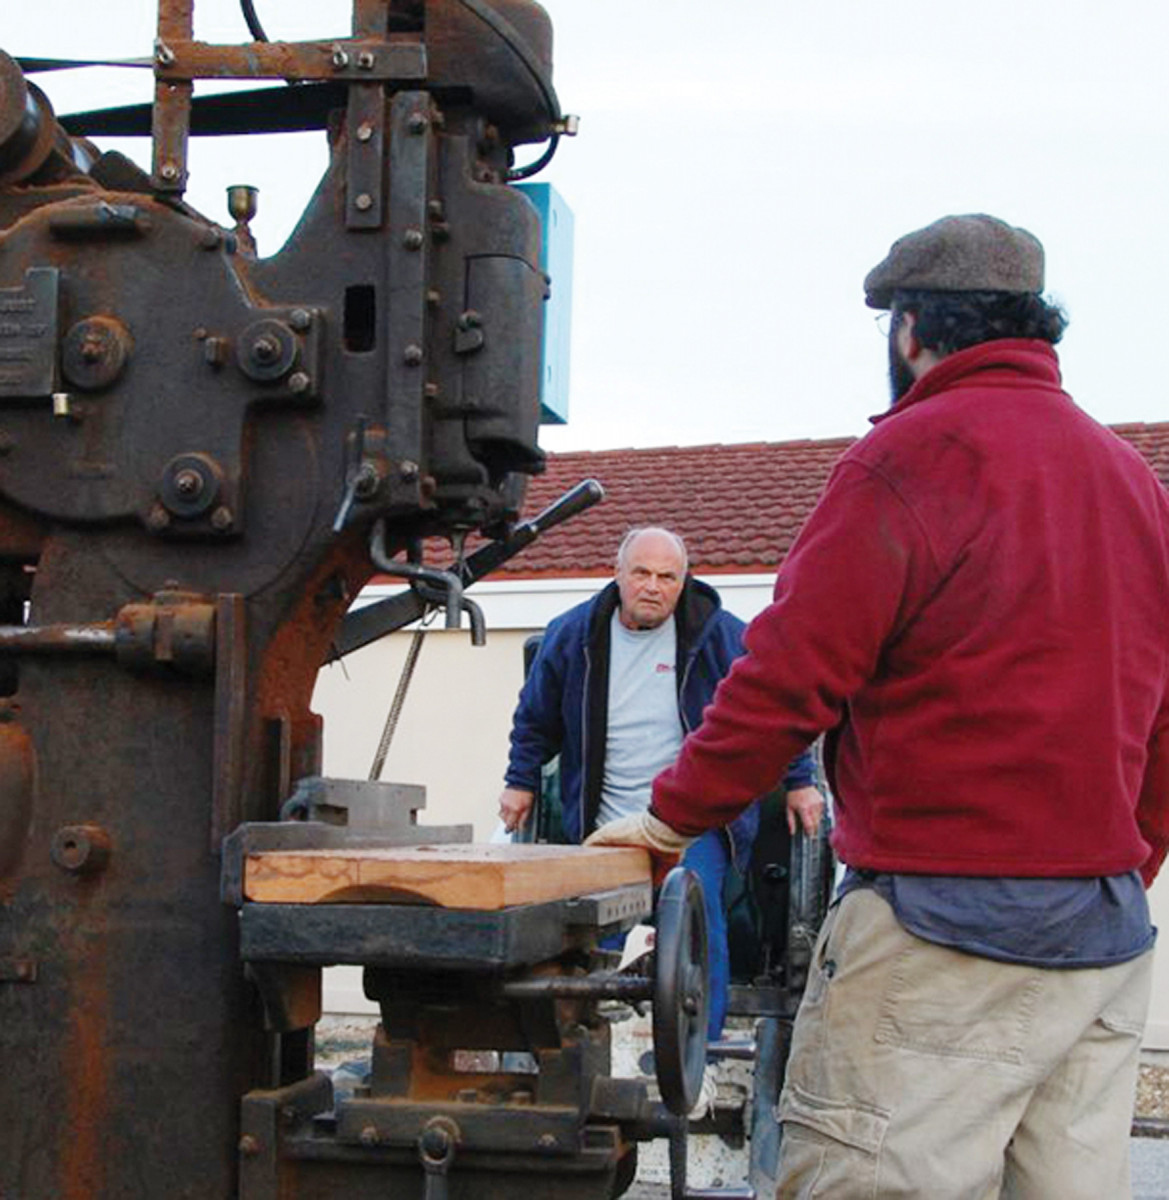
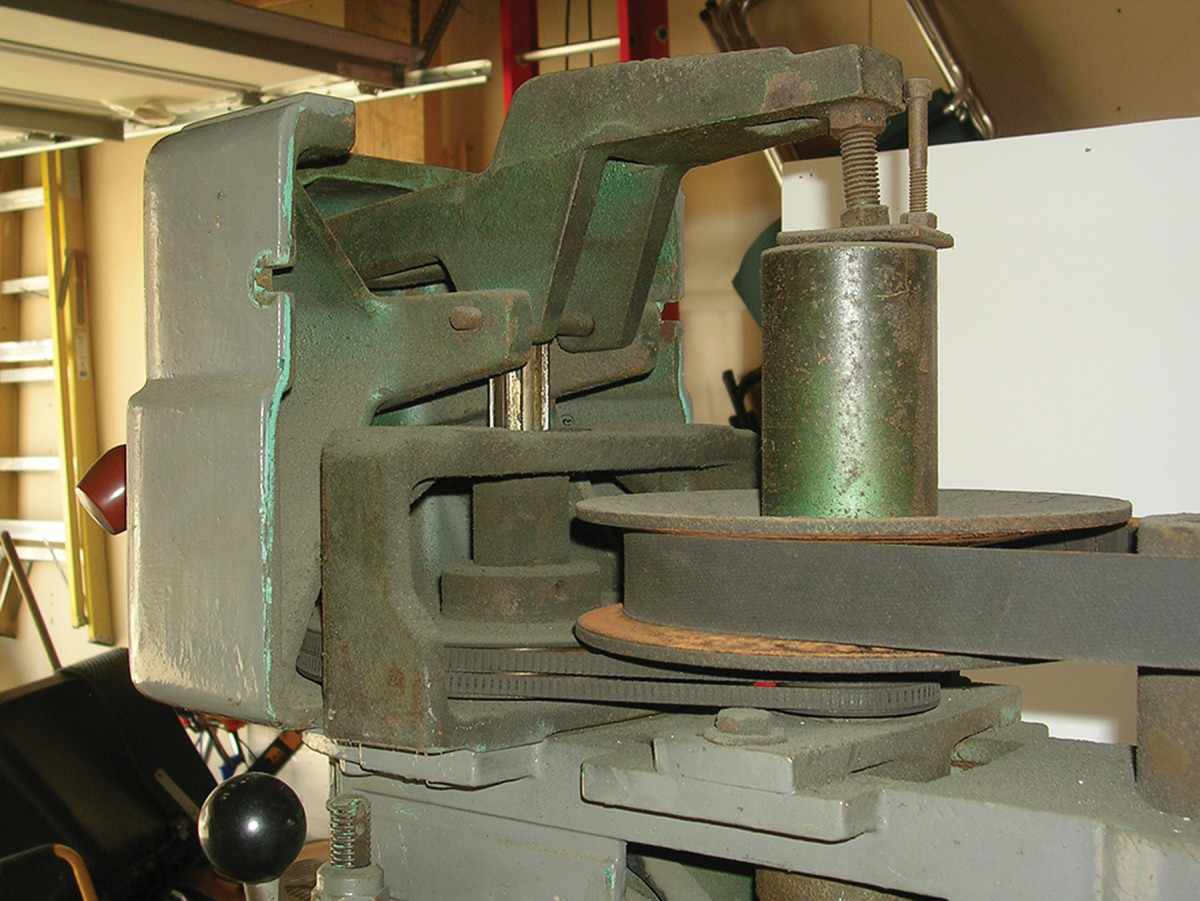
Pick your battles. A family friend helps me unload an ancient mortiser, perhaps reluctantly. I got excited at an auction and bought this 2,300-pound beast with no idea how I’d get it home.
One of the great things you can rent is a drop-deck trailer. The entire floor of these trailers drops down to ground level, where you can (relatively) easily roll 2,000 pounds of planer, flip a switch to raise the deck, strap the machine down, then drive away. Reverse the process to unload. This more or less eliminates the need for a forklift.

Dank & dreary. Sometimes you have to strike while the iron is hot. My friend Ron Brese and I hauled this Covel surface grinder up the back stairs of a cramped basement over two cold and rainy days. A folding cherry picker got the base casting into Ron’s pickup.
Tearing Down Your Machine
So you’ve found a drill press that needs a little love. Chances are it’s full of grime (especially if it came out of a metal-working environment) and has multiple coats of haphazardly applied paint.
The first thing to do, before you grab a wrench, is get yourself a bunch of heavy zip-top bags, a pack of Sharpie markers and some tubs or boxes. Lidded food packages are also good for smaller parts. You’re going to bag and tag everything. And I mean everything. You can download parts explosions for many machines, but that’s not always the case.
The next thing you need is a camera. This is the sole reason I upgraded from a flip phone to a smart phone a few years ago. I take pictures of the machine from many angles, in good light, before I take one nut off. My phone is set to upload pictures to the cloud so I can easily do research back in my office, show the folks at the industrial supply store or post photos to Internet forums with ease. I also take pictures throughout the dismantling and restoration, especially for complex assemblies. I can’t stress this enough. Things that look simple during disassembly will be forgotten when you’re putting it back together weeks or months later.
Make sure you take pictures of the wiring too. This is especially important if you don’t know much about electricity.
You also need to describe what’s in the bags very accurately so parts don’t get mixed up. I sometimes take pictures of the labeled bag next to the area on the machine the parts inside came from.
Cleaning
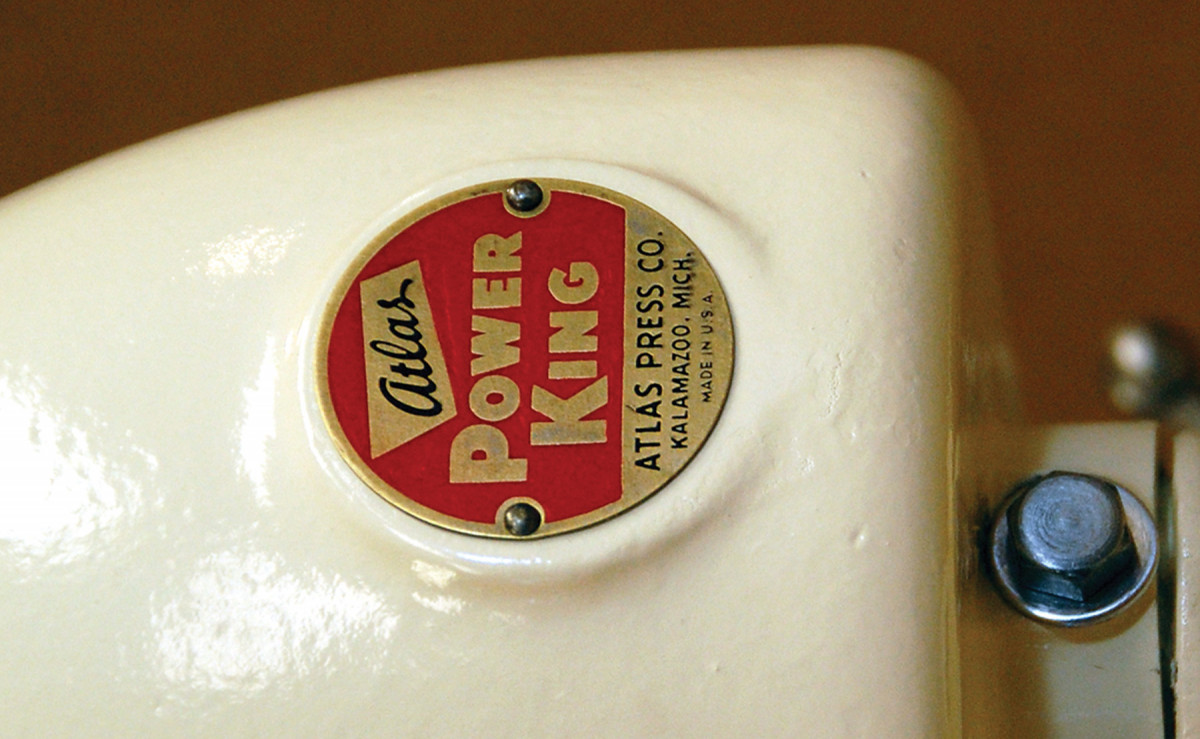
Details make it. This brass emblem was grimy and worn. I block-sanded it to preserve the shallow etch, then carefully filled the red background and black letters with paint from the hobby shop.
This is the least fun part of the process. If your machine’s paint and raw metal surfaces are in good shape, just a basic cleaning can be done. I like to use the “purple” or “green” cleaners to get off grease and grime, along with a vacuum and compressed air. Avoid water-based cleaners so things won’t rust.
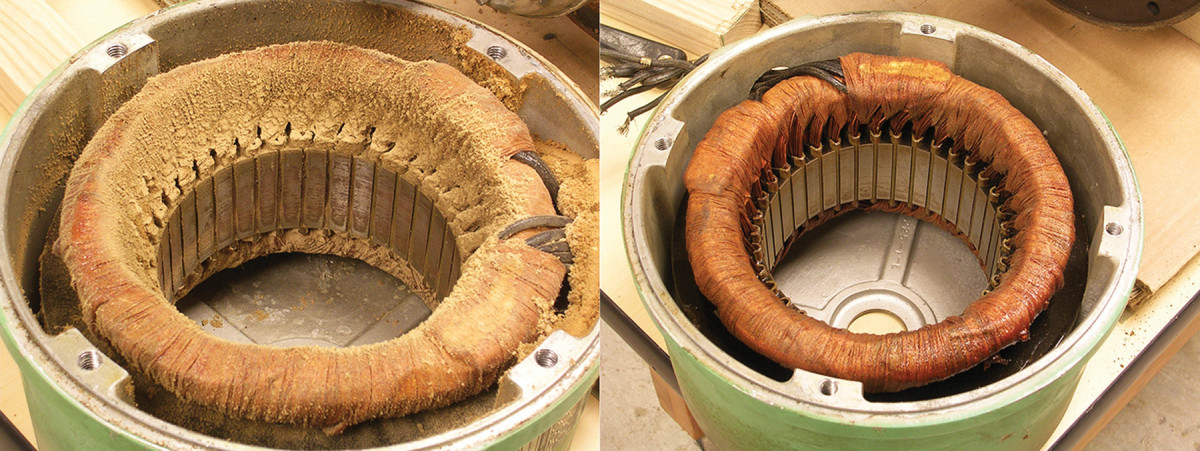
Dust blows. Upon cracking open this jointer motor, you’d think it was ruined. Nope. Just a little dusty. A little vacuuming and it looked good as new.
Cast iron surfaces can be refreshed with grit-infused rust erasers. I also have love for gray and maroon Scotch-Brite pads. These do a fantastic job of shining up raw metal surfaces such as jointer beds and adjustment knobs.
For flat, rusty surfaces, such as a jointer bed that’s been sitting outside for years, a little WD-40 and a razor scraper do wonders. I also use a wire wheel in a cordless drill or angle grinder to clean up big, shaped castings.
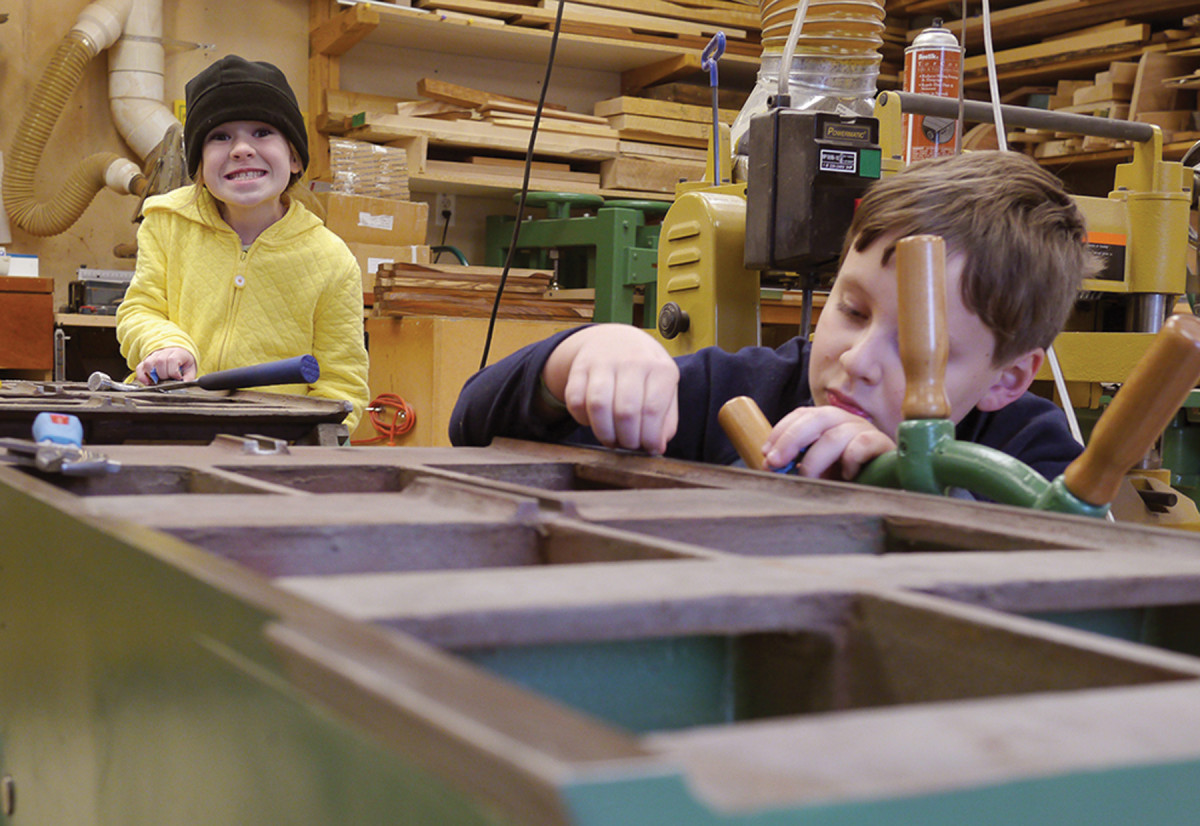
Small detailing. Enlisting some neighborhood kids to clean the nooks and crannies costs only a couple lollipops and maybe a trip to the soda fountain.
For small parts such as knobs and handles, I take those to an old grinder I have outfitted with a wire wheel. One of my favorite aspects of restoring old machines is sprucing up the metal handles. I use a deburring wheel on a 6″ grinder. This is a rubber-based, grit- infused wheel that will put a beautiful finish on raw metal. This is for cosmetics only. You don’t want to use the deburring wheel for machined surfaces such as ways or bearing journals. If you don’t like the shiny look, you can finish up with maroon Scotch-Brite for a matte finish, or even treat the raw steel with gun bluing for a dark look.
Paint
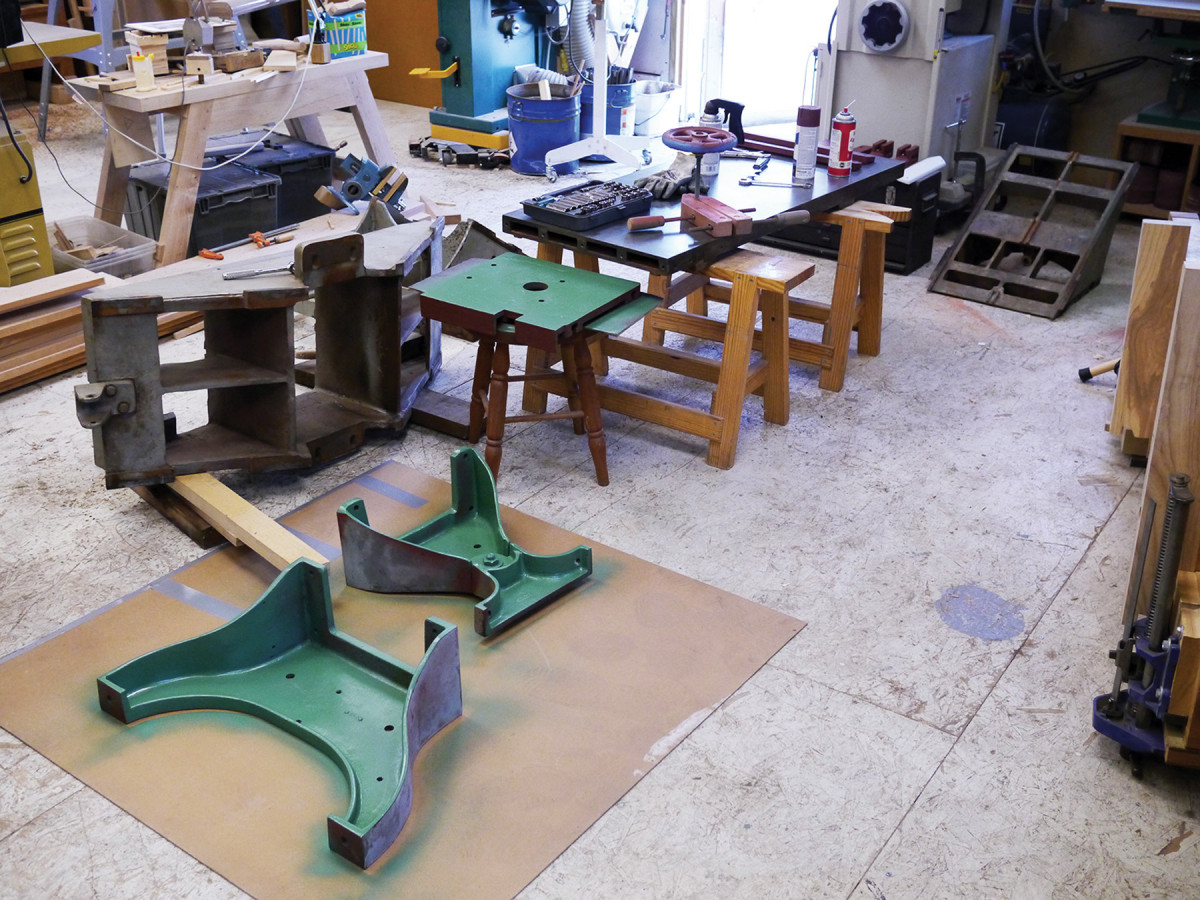
Plan of attack. Stage your painting sequence to save time and effort. Here I’ve painted the inside of a set of legs for a 16″ jointer – areas that would be very difficult to reach on an assembled machine.
Before I even start a restoration, I decide whether or not I’m going to paint the machine. If the paint is in decent shape and I want the machine to maintain a patinated look, I clean a bit more carefully so I don’t actually damage the paint surface. If the machine requires paint, I take one of two routes: get down to bare metal or simply refresh on top of an existing, sound paint job.
The former requires judicious use of wire wheels, sandpaper and often-times chemical paint stripper. If you have a sandblasting facility in your area (call around to automotive body shops for leads), this is the easiest way to get to bare metal, although it’s more expensive than elbow grease.
I recently used a sandblasting facility to clean a cast iron lathe bed and leg set. I first masked off the lathe bed itself to protect that machined surface from the blasting grit. High-quality duct tape is the thing to use here. When masking off machined surfaces for paint, I use blue painter’s tape.
Depending on how much I want to put into a restoration, I use one of two different paints.
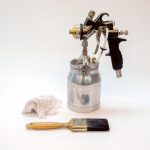
The first is a good-quality industrial enamel (Sherwin-Williams is one source) that I either brush or spray on after slight thinning with mineral spirits. This paint is extremely tough and what I use for bare-metal, full-on restorations. It really holds up well in the shop environment once cured.
For quicker, less-durable jobs, I use rattle can (spray) paint. I scuff the paint surface for good adhesion, followed by a couple wipe downs with mineral spirits or alcohol to clean it. One coat of primer (I like Rustoleum 2x) followed by two to three coats of color is what I usually do. If you want more durability from the spray paint, do more coats, then topcoat with clear lacquer. I prefer semi-gloss or satin finishes.
Do not paint bearing surfaces or parts that move against belts or metal.
Bearings
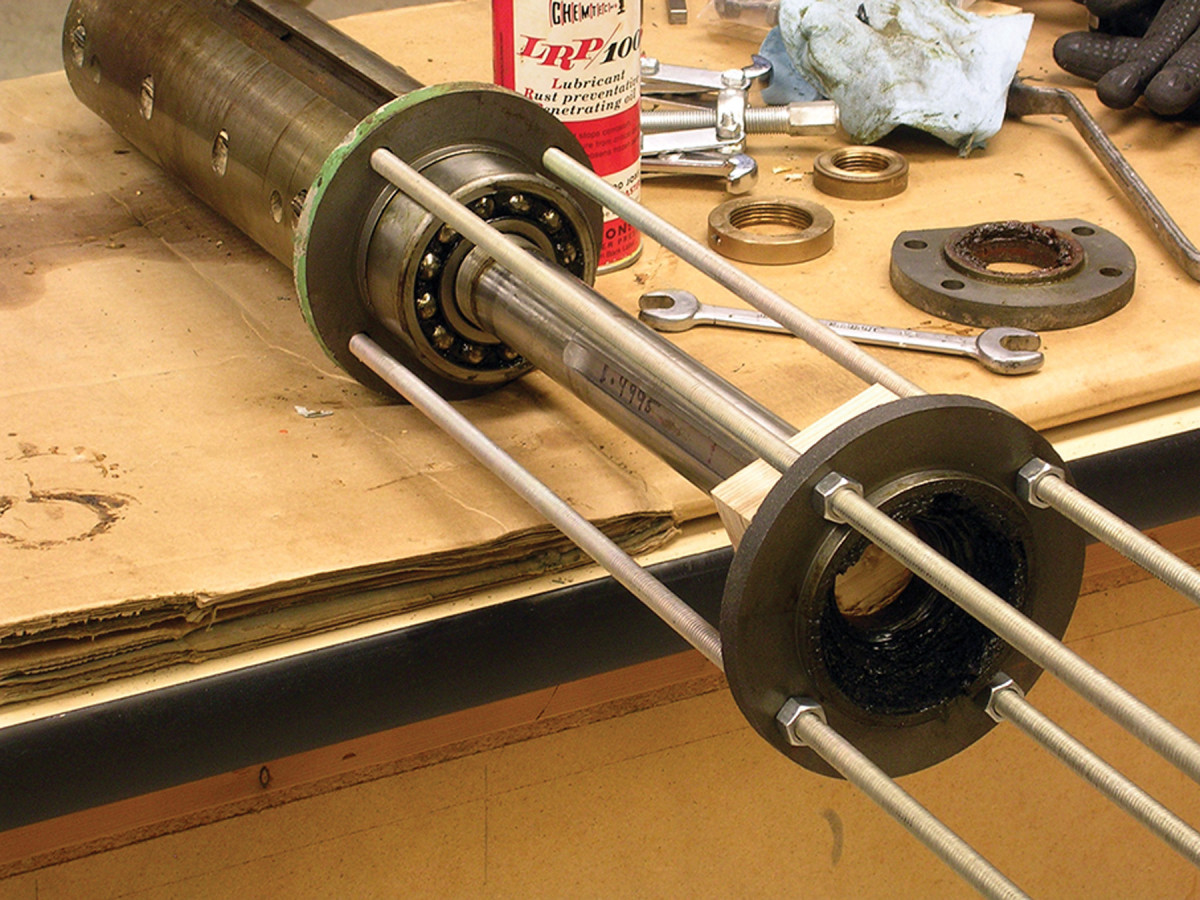
Get lucky. Here I’m using this 12″ jointer’s integral bearing flanges and some threaded rod to pull a main bearing off the cutterhead shaft.
Chances are the bearings in your machine have seen better days. Replacing bearings is not difficult but can require some specialized equipment like an arbor press. So far, I’ve gotten by mostly without one, enlisting a friend with a press on those other occasions.

Old & new. I pulled the guts out of this jointer’s original and sweet Deco-style switch box and replaced it with new electrics that work with the VFD, which I tucked in back, out of sight.
Depending on how old your machine is, you might have sealed bearings (the easiest to deal with – just press them on), open bearings (you pack them with grease and felt seals, then refresh them periodically with a grease gun – still pretty easy to deal with) or Babbitt bearings, which require the melting of the Babbitt alloy (it’s sort of like solder, if you’ve done any plumbing) and pouring the molten Babbit around a shaft and journal. It sounds difficult but, like most things, just requires the correct method and the right tools and knowledge to perform. I’ve never poured Babbitt, but I wouldn’t hesitate to buy a machine that used it. When properly done, the bearings are excellent and long lasting.
My main source for bearings is the Accurate Bearing Company in Addison, Ill. The OWWM forum has an excellent set of guidelines for how to order bearings from Accurate.
Electrics
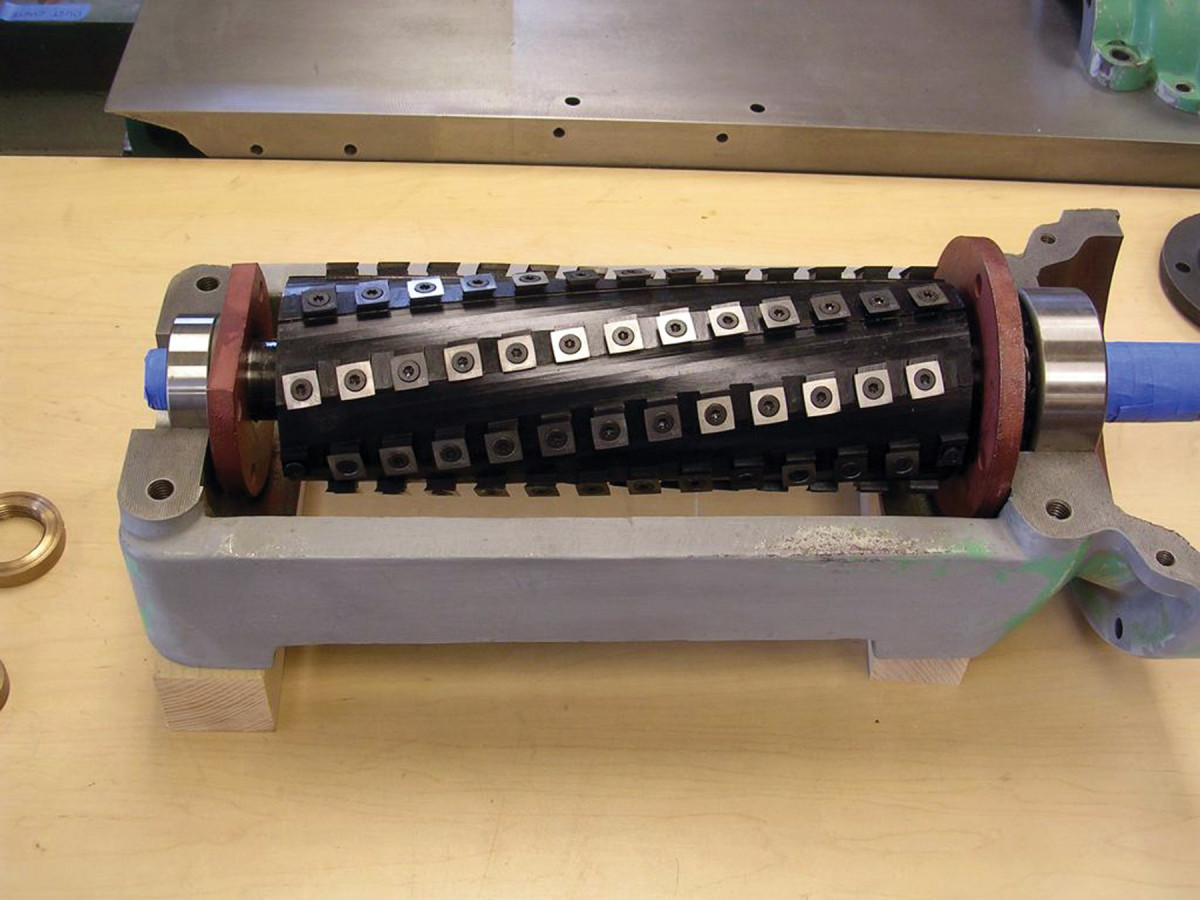
Beautiful carbide. Here’s a sweet Byrd Tool Shelix head being fitted to a jointer’s yoke.
Many a woodworker is turned off by old machines because of the term “3-phase.” I didn’t know dink about electrical phases before I bought my drill press. But now, after diving in, I’ve seen the error in my ways. My press came with a 3-phase, 220-volt (V) motor. I thought I had to buy a new, single-phase motor, but it turns out that’s not the case.
You can buy what’s called a variable frequency drive (VFD) to control a 3-phase motor with standard 220V single-phase power – something everybody’s got in his or her shop. The VFD is used primarily in industrial applications to control motors, such as those used for conveyor belts in huge factories, so they are pretty inexpensive. You can get a VFD for a drill press for just more than $100. The bonus feature: You also get variable speed. A dial on the front of many VFDs controls the output to the motor, so you can get ridiculously slow speeds for drilling metal or spinning big Forstner bits without having to mess with step pulleys and belts. You can also have instant reverse if you like (for tapping threads). VFDs work most economically for machines up to about 3-horsepower. Above that and things get expensive.
For bigger motors you can make your own 3-phase power by picking up a control box off eBay and pairing that with a 3-phase motor to make a rotary phase convertor (RPC). If you pick up a used motor on the cheap or free (check local motor winding houses or scrap yards), you can get a basic RPC setup for a couple hundred bucks. That will allow you to power nearly any machine you come across.
Generally, I don’t recommend static phase convertors. They rob you of one-third of your motor’s horsepower, but in some cases they are fine.
Upgrades
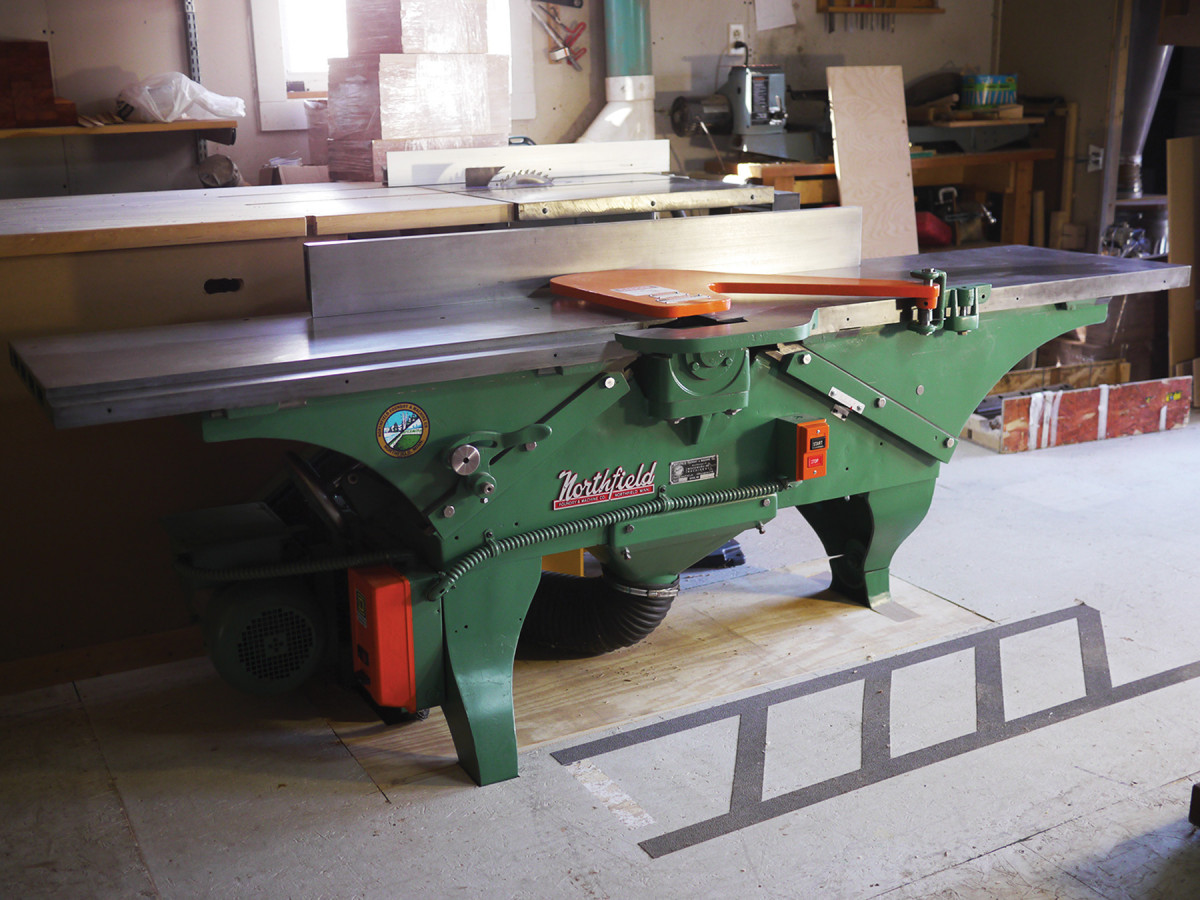
USS Northfield. My 1959 16″ jointer is my favorite machine and the heart of my shop. I found it in a farmer’s barn in rural Iowa. It makes every board in my shop dead flat.
The beauty of older machines is that you can often customize them to make them even better. I’ve restored several jointers and planers and fitted them with Shelix carbide-insert cutterheads from Byrd Tool. This offers the best in classic performance with modern cutting technology.
Make no mistake, the Byrd heads are expensive. What I’ve done is find a machine to restore on the cheap, restore it, then sell it. I then use the profit to buy a Shelix head. If you play your cards right and are patient, you may end up with a free machine, with the only cost being your labor.
My 1959 16″ Northfield jointer with a Shelix cutterhead was funded by restoring several machines and selling them. It’s my favorite machine, not only because it’s such a sweet beast of a jointer, but because it cost me only sweat equity.
Marques
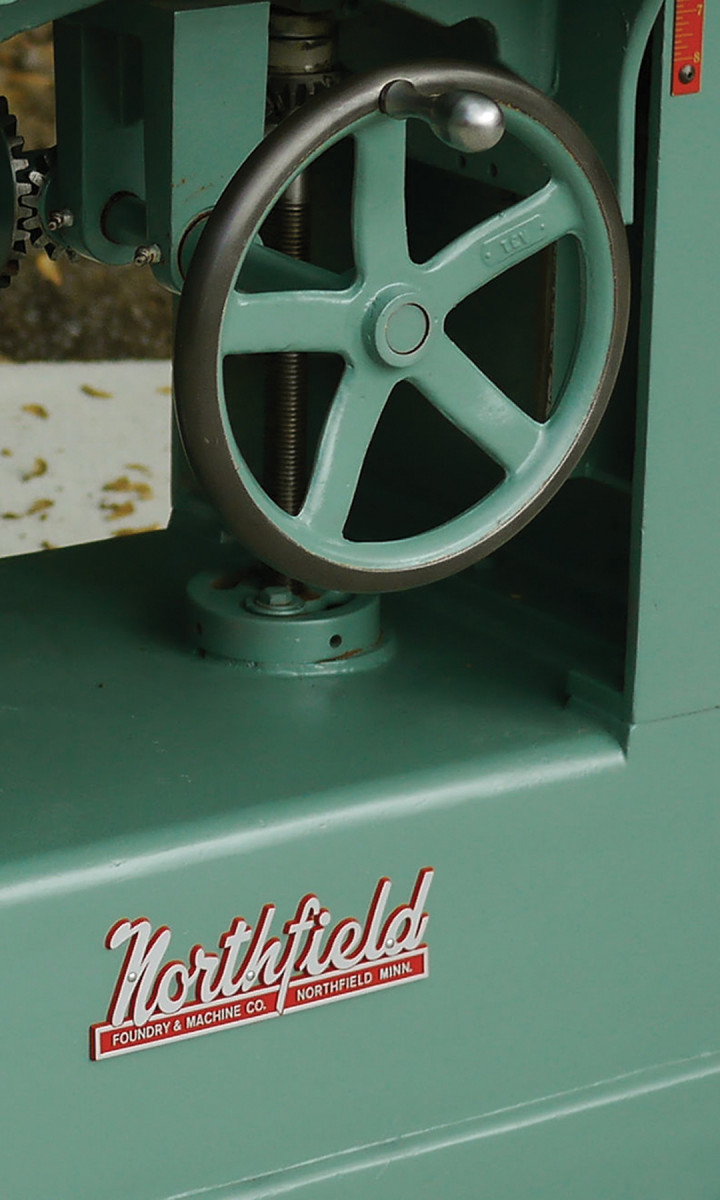
Crowning touch. I always put the emblem on last if I can. It’s the perfect final, satisfying step of a restoration.
It’s probably wise to focus your initial search on the really big companies (but don’t rule out a good deal on a lesser-known brand), including Delta, Rockwell, Oliver, Powermatic, Yates and Northfield, among others. Northfield is actually still in business, and although its new machines are expensive (and out of reach for most of us), the huge plus to finding an old Northfield is that you can call up the factory and order parts for machines that have changed little over the past century, from knowledgeable people who can help with your restoration. Some companies, including Delta and Powermatic, also still have some parts available for older machines.
The Slippery Slope
Once you restore a machine and put it into service in your shop, you might find yourself becoming addicted to the satisfaction it brings. Be careful. Before long, you could end up being a machine restorer instead of a woodworker. But that’s OK. Once you outfit your shop with a set of classic machines, you’ll derive great pleasure from “getting back into woodworking.” There is nothing quite like the feeling of making great furniture with old arn.
Here are some supplies and tools we find essential in our everyday work around the shop. We may receive a commission from sales referred by our links; however, we have carefully selected these products for their usefulness and quality.