We may receive a commission when you use our affiliate links. However, this does not impact our recommendations.

Veritas’ mammoth French curves. Notice how big they are compare to the Taylor Toolworks block plane.
In the proto-CAD (Computer-Aided Design) world, draftsmen and draftswomen had to rely on a set of curvy templates when they needed to connect two or more points via a graceful arc or curve. In places where a simple arc, drawn with a compass, could not make the cut the designer would have pulled out the curvy templates and try to find one curve among the many that would allow for an elegant sweep to connect point A to B.
French Curves have their obvious place in woodworking too. From helping in the scale drawing of the piece’s curves on the drawing board to the full-scale layout of the parts on the stock. Though some woodworkers have big printers that can produce full-scale drawings that one can cut and transfer to the wood, most of us still need to pull out a pencil, a ruler, a compass, and a French curve template to do the job correctly.
In the last few years, two great French curve sets have debuted on the market. These tools, one made by Lee Valley and the other by Crucible Tools, an offshoot of Lost Art Press, had proven to be a good solution for our curvy needs.
The Lee Valley plywood French Curves are colossal. In fact, I have never seen such formidable curves throughout my entire design career. Their size is actually their big advantage as you can rely on them to draw those Queen, Chippendale, and the rest of the classic canon curves straight on your mahogany or plywood medium. Just grab a curve and try to find an elegant sweet sweep to connect the design landmarks.
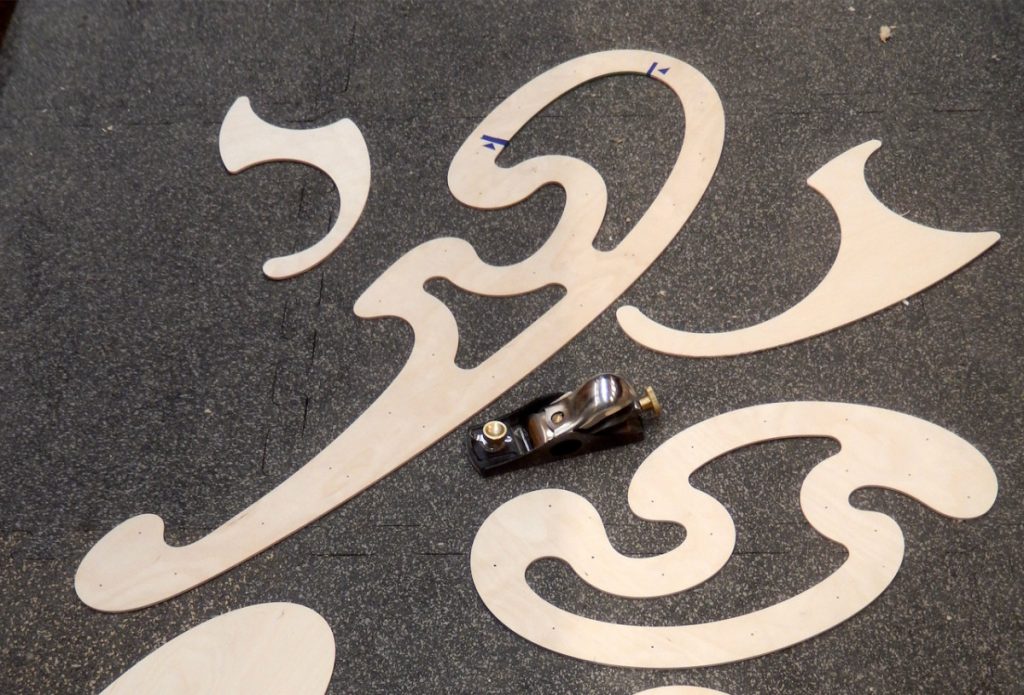
In the above picture, you can see the Veritas set that we bought for our woodworking program. We use the behemoth template to setup curves on all kinds of projects but the one that is mostly in demand is drawing an ellipse for our stools’ seats. Teaching the technique of drawing an ellipse with a string tied between nails is fun and practical but when short in time I prefer to show the students the curves and explain how to use them.
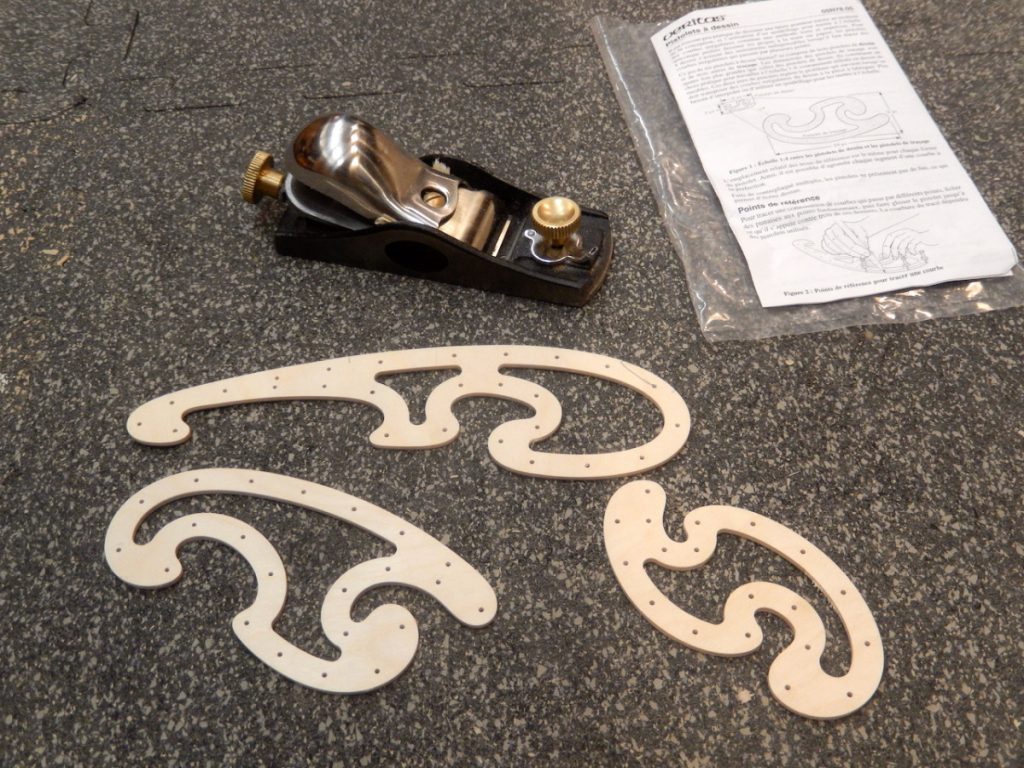
The Veritas set also includes a small set of curves to be used mainly for scale drawings.
First, we draw the ellipse’s long axis, then we intersect it with the ellipse’s short axis.
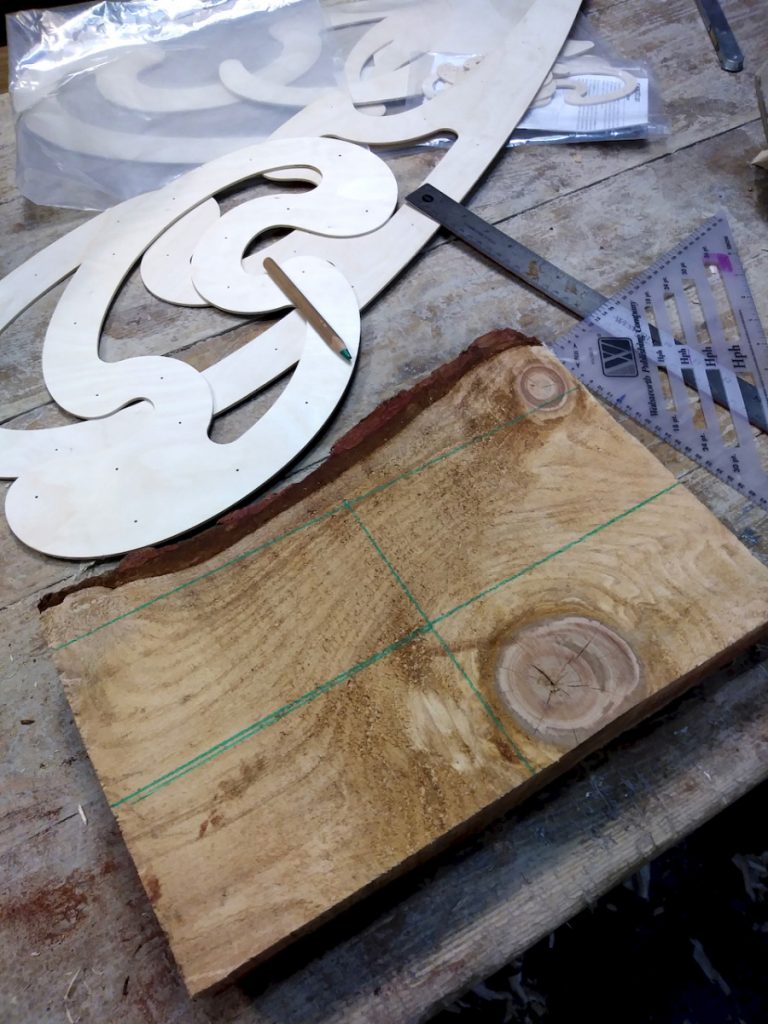 We then look for an appropriate curve to draw the ellipse’ quadrant. When looking for the right curve aim for a curvature that becomes tangent to the rectangle that frames the ellipse. In other words, each of the quadrants needs to flow smoothly as it connects to its neighbor.
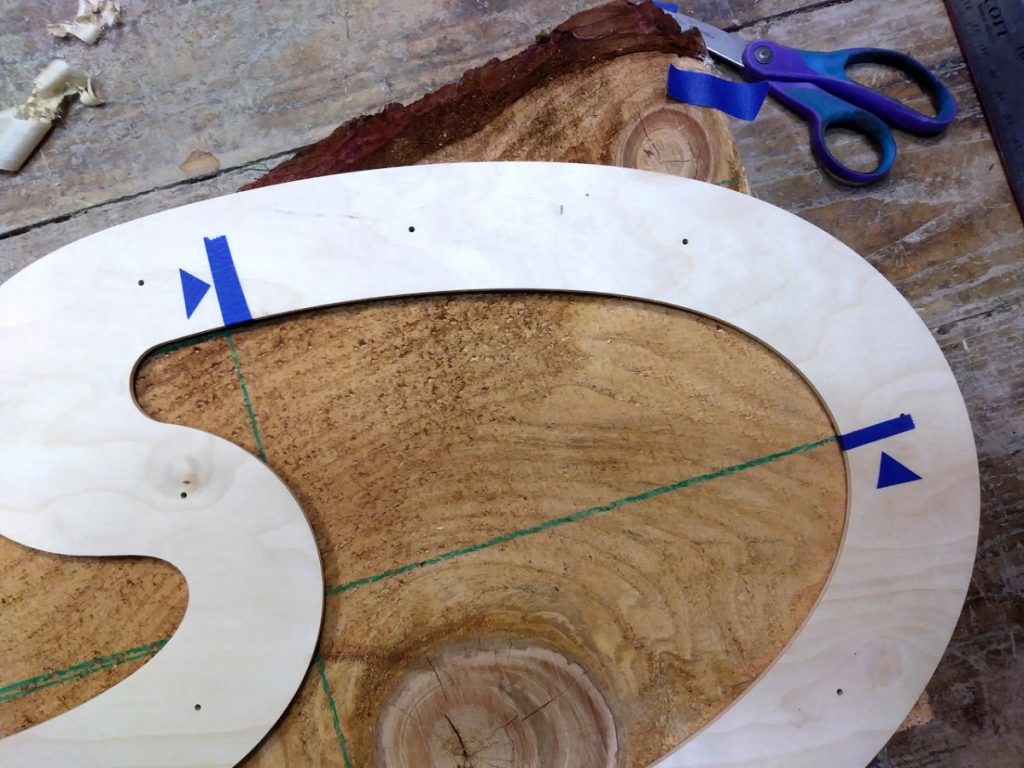
Once you find such as curve make sure to demarcate it. Many use pencil tick marks on the curve’s start and endpoint but I prefer using masking tape which I fold over to the other side of the template. I do so to save myself the hassle of erasing the pencil lines later on.
 The masking tape technique is also very useful once you flip the template over to draw the mirror quadrant. To make it clearer – which of the masking tape edges mark the terminus of the curve – you can cut and affix small masking tape triangles or just use a sharpie and denote the relevant edge of the masking tape.
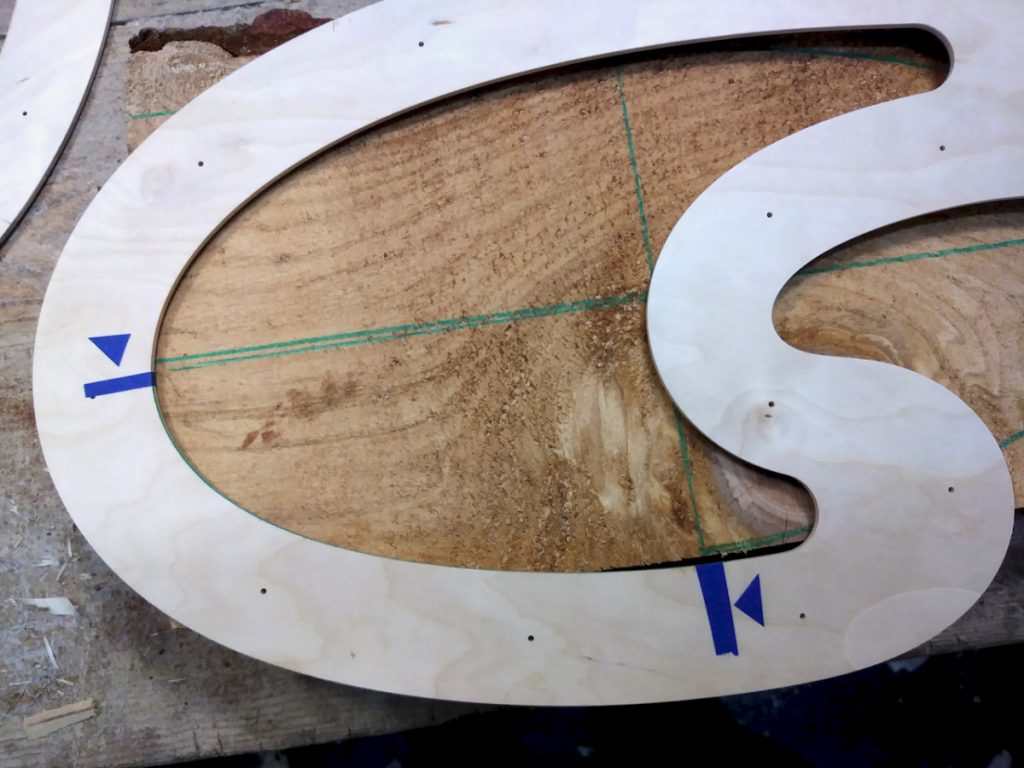
After the four quadrants were drawn, we peel off the masking tape and tuck the templates for future use. My last piece of advice: The Lee Valley templates come unfinished so I would recommend finishing them with some sort of protective oil or varnish.

Here are some supplies and tools we find essential in our everyday work around the shop. We may receive a commission from sales referred by our links; however, we have carefully selected these products for their usefulness and quality.