We may receive a commission when you use our affiliate links. However, this does not impact our recommendations.
 Demystify cutting tenons on curved parts using these simple steps and jigs.
 Demystify cutting tenons on curved parts using these simple steps and jigs.
Ever wonder how furniture builders cut joinery on curved parts? A common place to see this is on chair backrests, especially large rocking chairs or Morris Chairs with adjustable backrests. The most common technique is to start with thick 8/4 stock and form the tenons before cutting the curved shape. This usually involves cutting offset tenons on the thick stock so the resulting tenon is reasonably centered after cutting the part to the final size. As long as thick stock is available, you can make nicely curved backrest parts this way.
When recently examining an Eastwood chair at an antique shop, I realized the backrest rails were deeply curved. This particular chair would require 12/4 stock to make the curved rails in the typical way, so I searched for alternative methods. I’ve done quite a bit of experimenting with steam bending and glued laminations and find the latter more reliable to bend. While the amount of “springback” when releasing steam-bent parts is highly variable, glued laminations are quite predictable. In fact, the slats for the Eastwood chair had a total of 1/4“ springback when releasing them from the bending form. Whether you laminate or steam bend the parts, there’s an interesting challenge when it comes time to cut the tenons or joinery on the ends. Because there’s no longer a flat reference surface, joinery on curved parts would be very difficult without the right jig.
I wanted a jig that was simple to construct and could handle both concave and convex parts. Sometimes, jigs for curved parts are ridiculously complicated to build and require multiple curved parts to exactly match the profile of the workpiece. On projects in the past, I’ve spent almost as much time building jigs as I did making the actual project. So, the emphasis was simplicity with this curved parts tenoning jig. The bonus with this jig is that it’ll trim your parts to the final length, as well as the tenon cheeks.
 Let’s Get This Jig Started
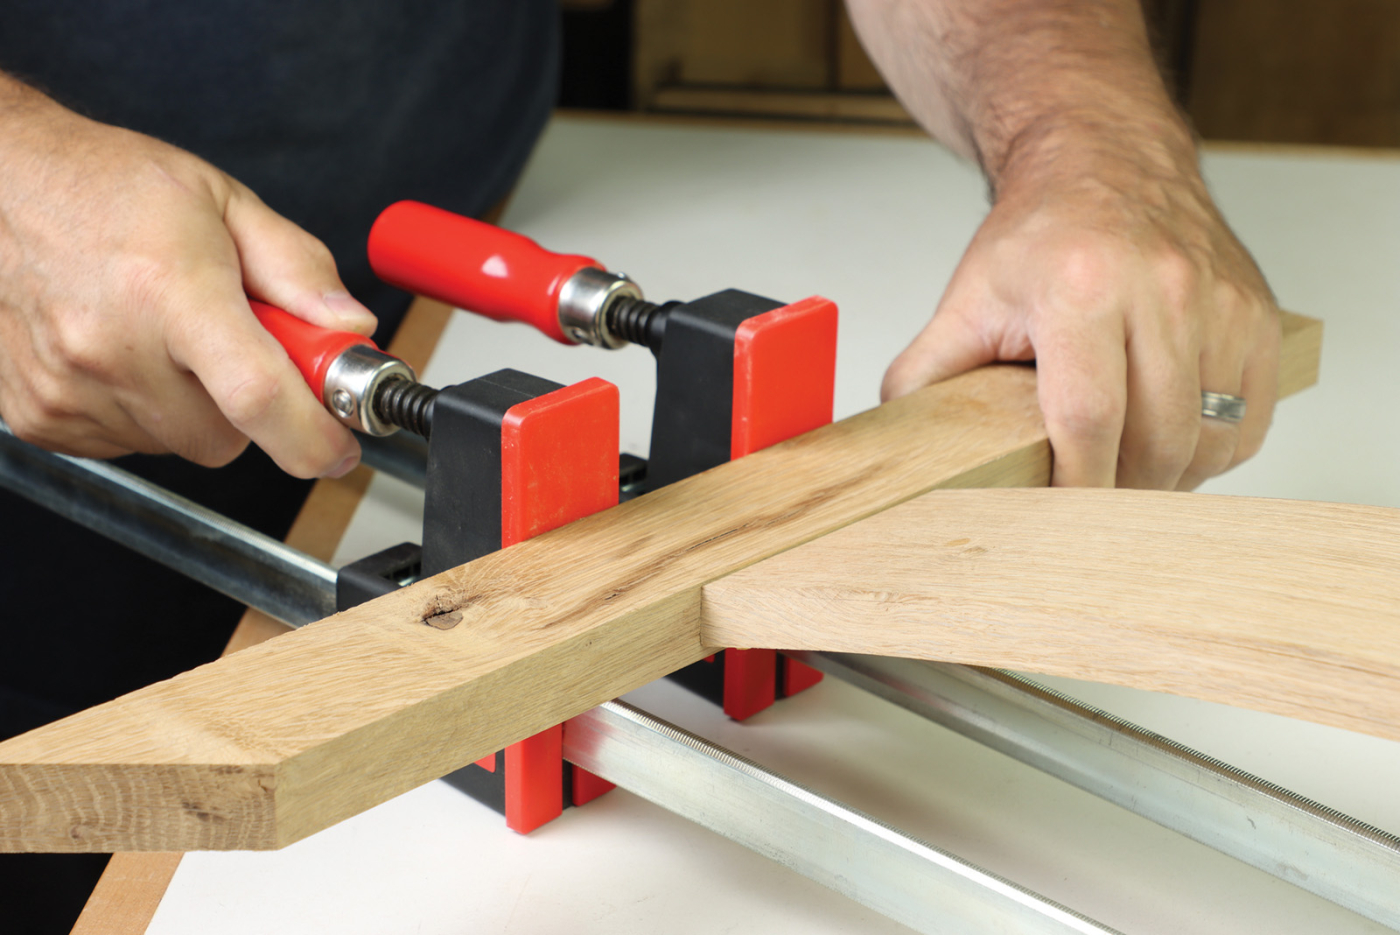
Start with a 4“ wide strip of 3/4“ plywood, cut to the same length as your overall workpiece, which is 26“ in this case. This will form the main rear fence of the jig, and you’ll also need a strip of plywood for the front fence, which is 2“ tall.
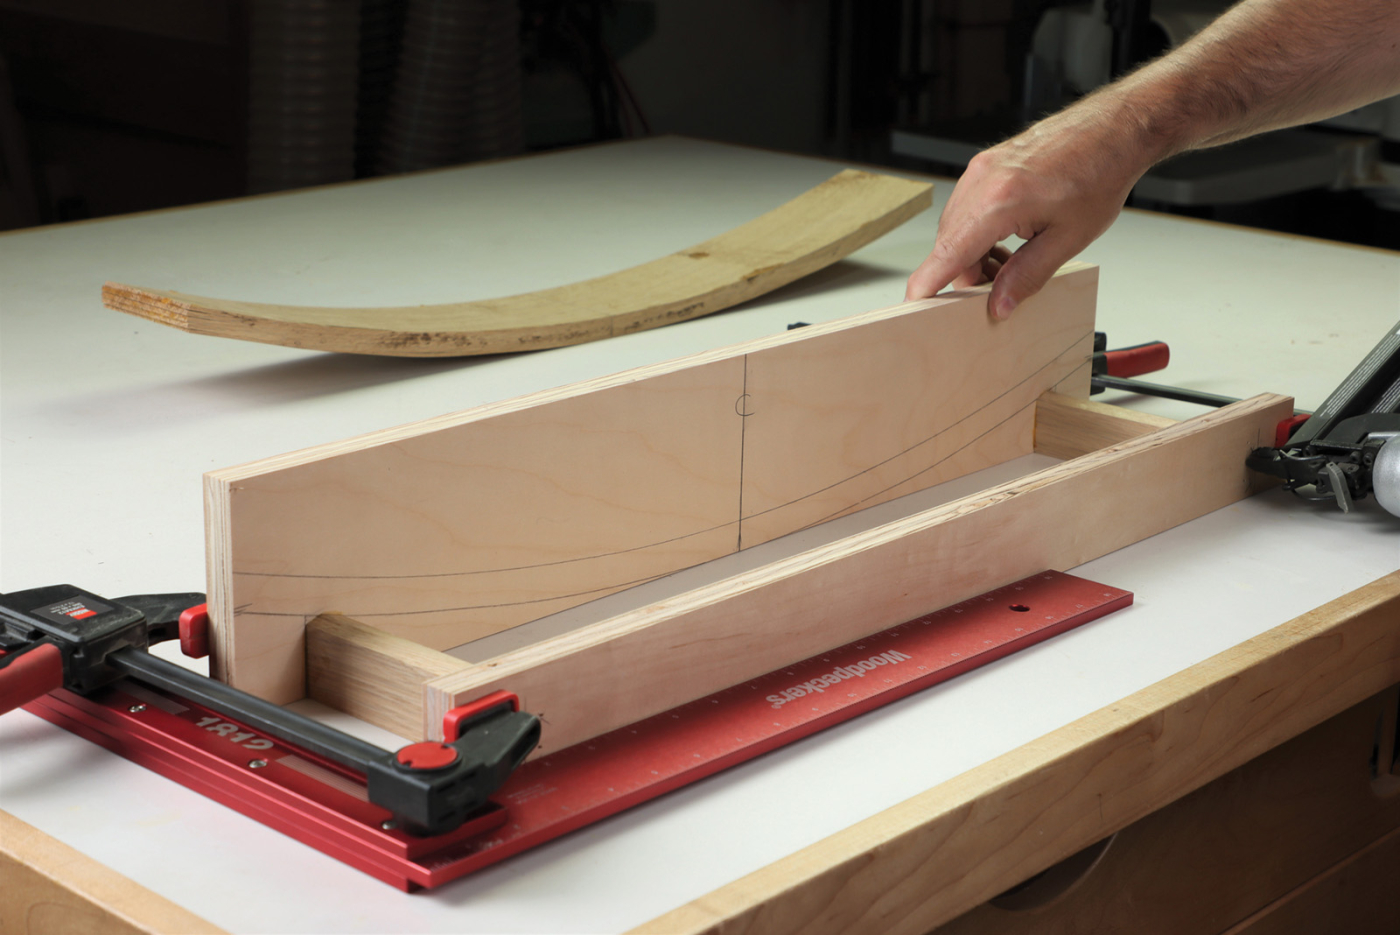
1 Construct the simple jig, consisting of a taller rear fence and shorter front fence, connected by beveled strips of hardwood.
The whole key to accommodating convex and concave parts is a double-bevel cut on hardwood strips that connect the two fences. Using a scrap that’s above 10-12“ long by about 2“ wide, tip your table saw blade to 15°, and bevel one edge. Then, flip the board over and cut another bevel so they form a peak at the center. Draw location marks 11/2“ in from either end of the plywood fences. With the concave face upwards, the curved part should rest on the table saw and be fully supported by the beveled blocks. Position the curved rail in the jig and trace the curved shape onto the rear fence for reference. This will indicate the required height of the beveled strips, which in this case is 11/2“. Rip the beveled board to this width before cutting two pieces 43/4“ long for the jig. Glue and brad nail the strips between the front and rear fence, making sure the assembly is square as it goes together.
2 The double-bevel strip is the key to accommodating both concave and convex shaped parts.
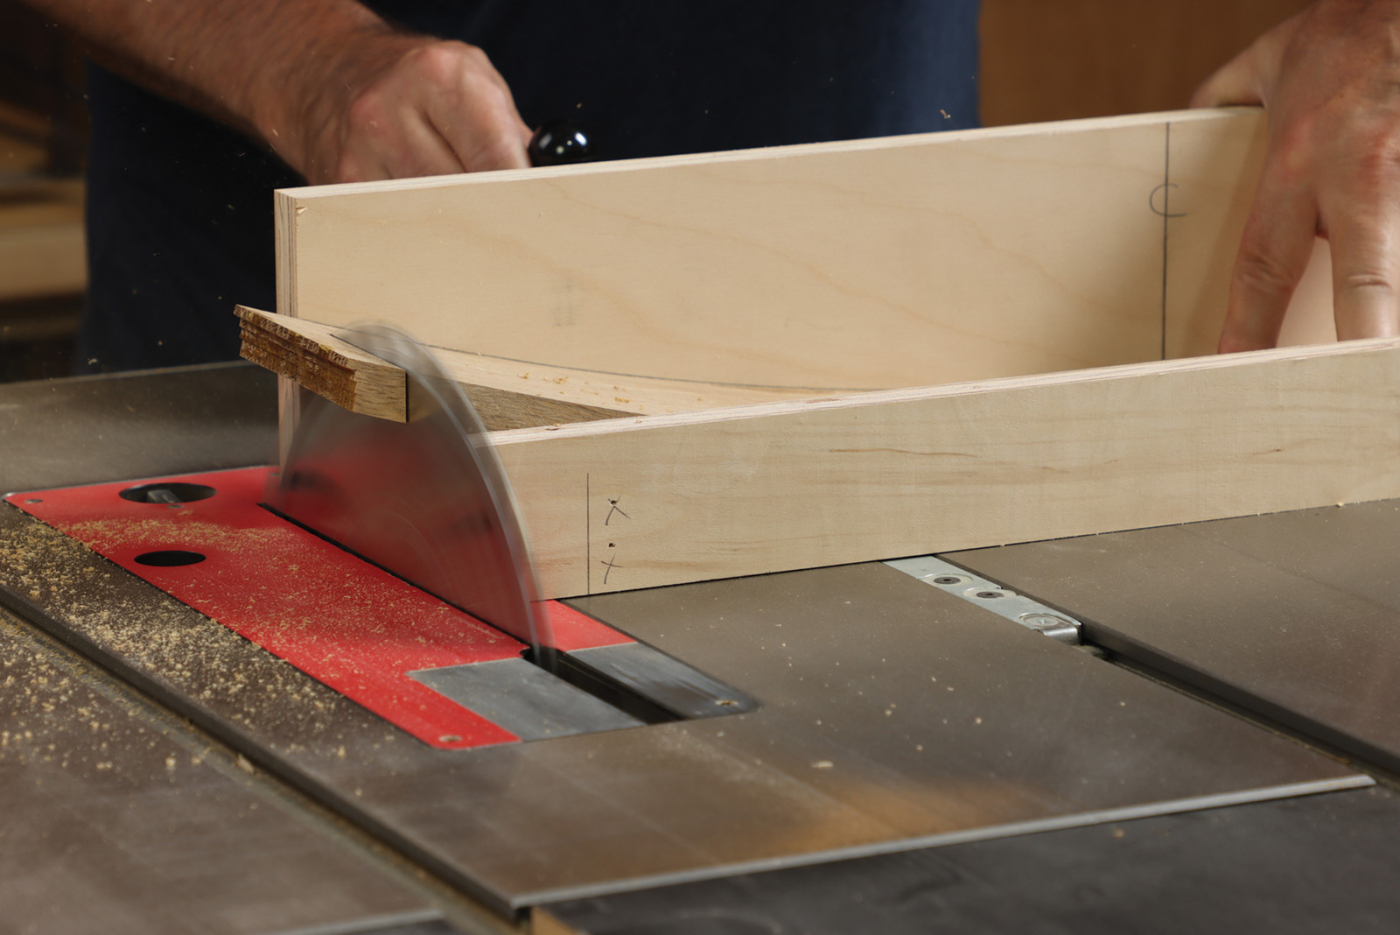
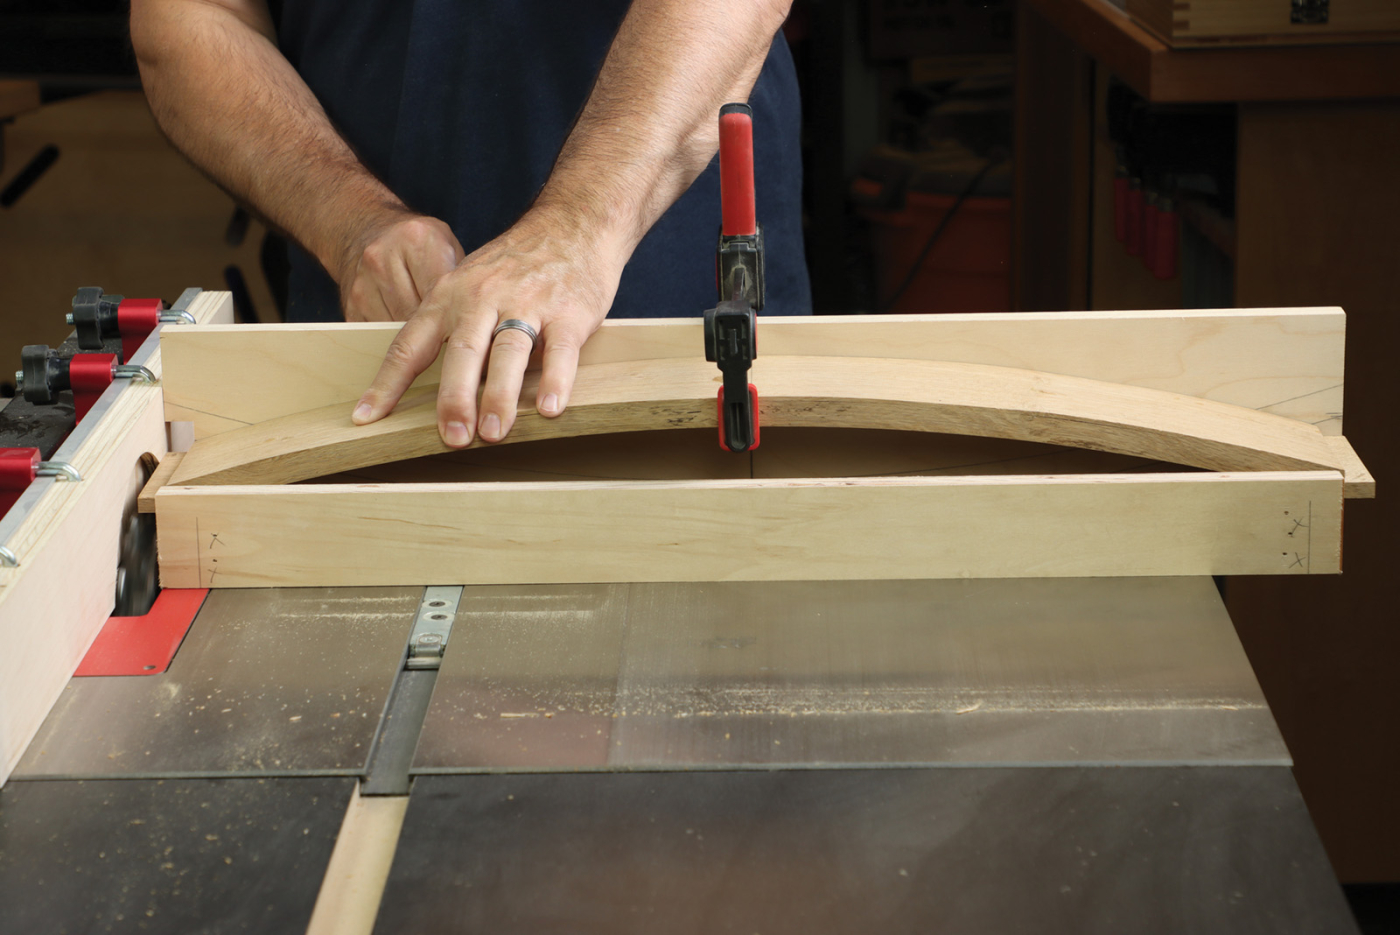
With a single kerf blade on the table saw, attach the jig to a sturdy miter gauge with a pair of screws. Align the end of the jig with the blade for this step. Aligning parts in the jig is always based on center marks, so you’ll want to clearly mark the center of the jig, as well as the center of the curved parts. If you’re using glued laminations, I recommend making the center of your bending jig and strips of wood as you glue them up. That way, you can avoid the challenges of measuring and marking curved workpieces. Then, simply hold the part to be cut in the jig, concave side up. With the center marks aligned, push the jig past the blade to trim one end of the rail. Then flip the workpiece 180° (still concave side up) and trim the other end to length. Complete this step on all parts required for your project before moving on to the next step. Luckily, there are only three curved rails for the Eastwood chair, so they’re pretty easy to take care of.
Next, you can trim 5/8“ width off each end of the front fence at the bandsaw. This step is optional but avoids the dado blade chewing through the front fence in the next step. Mount a 3/4“ wide dado blade and sacrificial fence. Set the rip fence for a 5/8“ long tenon and remount the jig to the miter jig. This time, set the edge of the rear fence all the way against the sacrificial fence. Now you’re all set to make both the front and rear tenon cheeks with this setup.
3 With the concave side up, the inner bevel supports the ends of the curved rail.

4 Flip the rail over and the outer bevel supports the workpiece just as well. Align the parts to the jig using centerlines.
Rear Cheek Cuts First
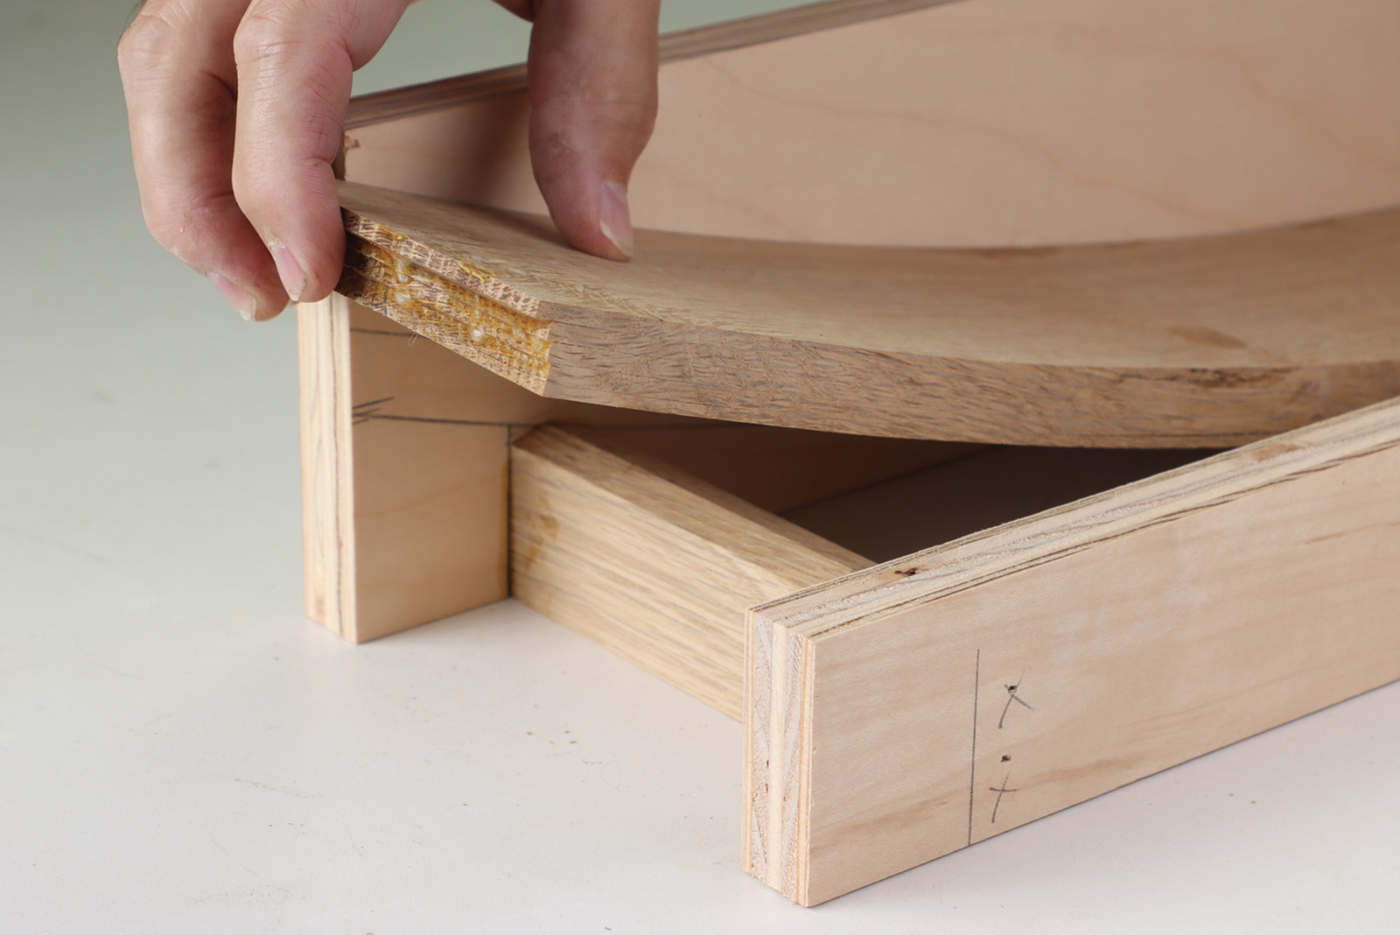
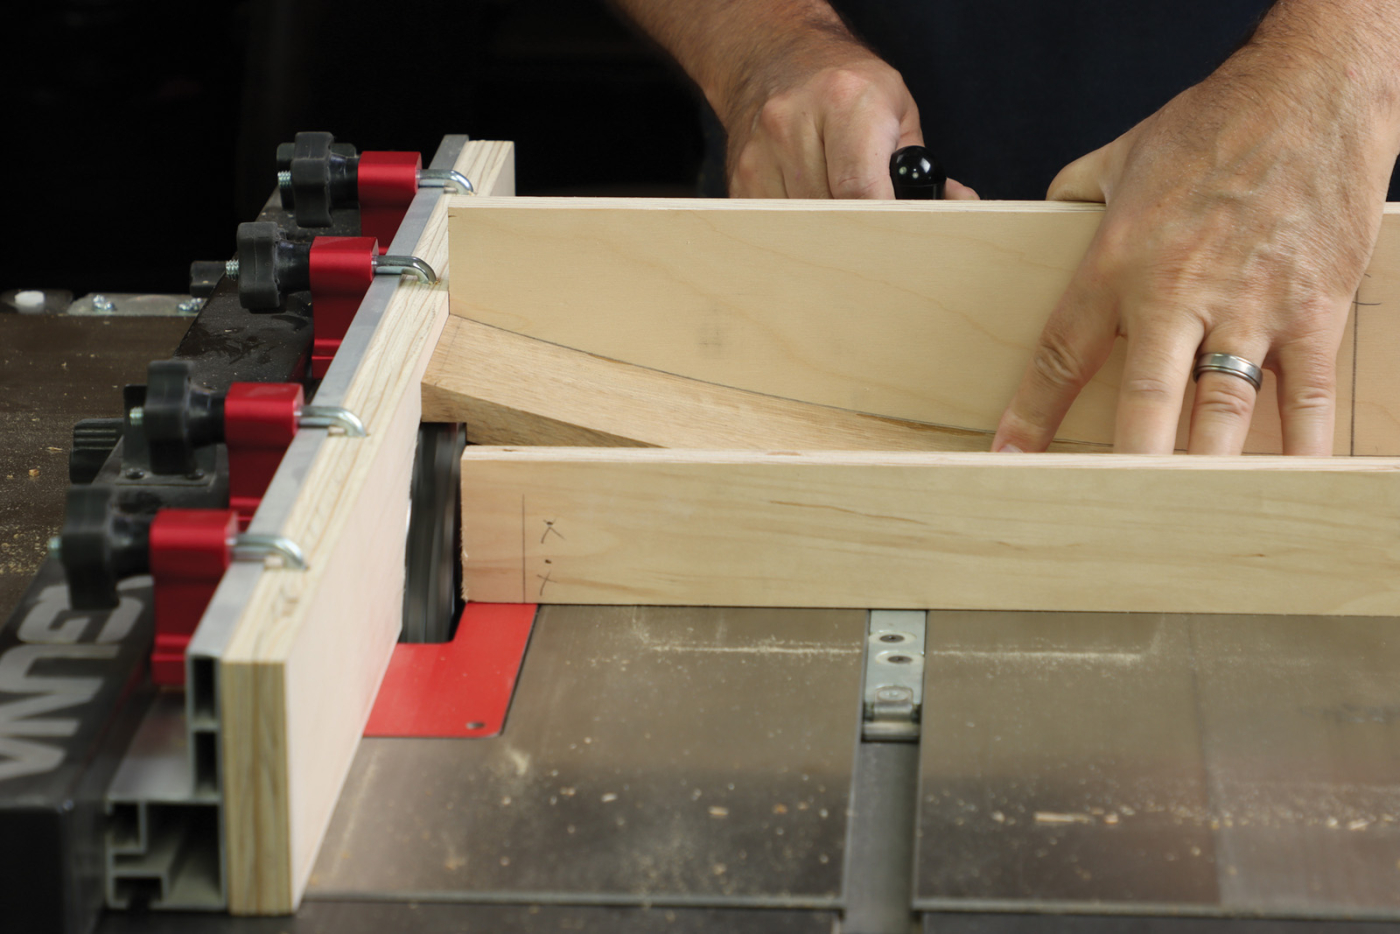
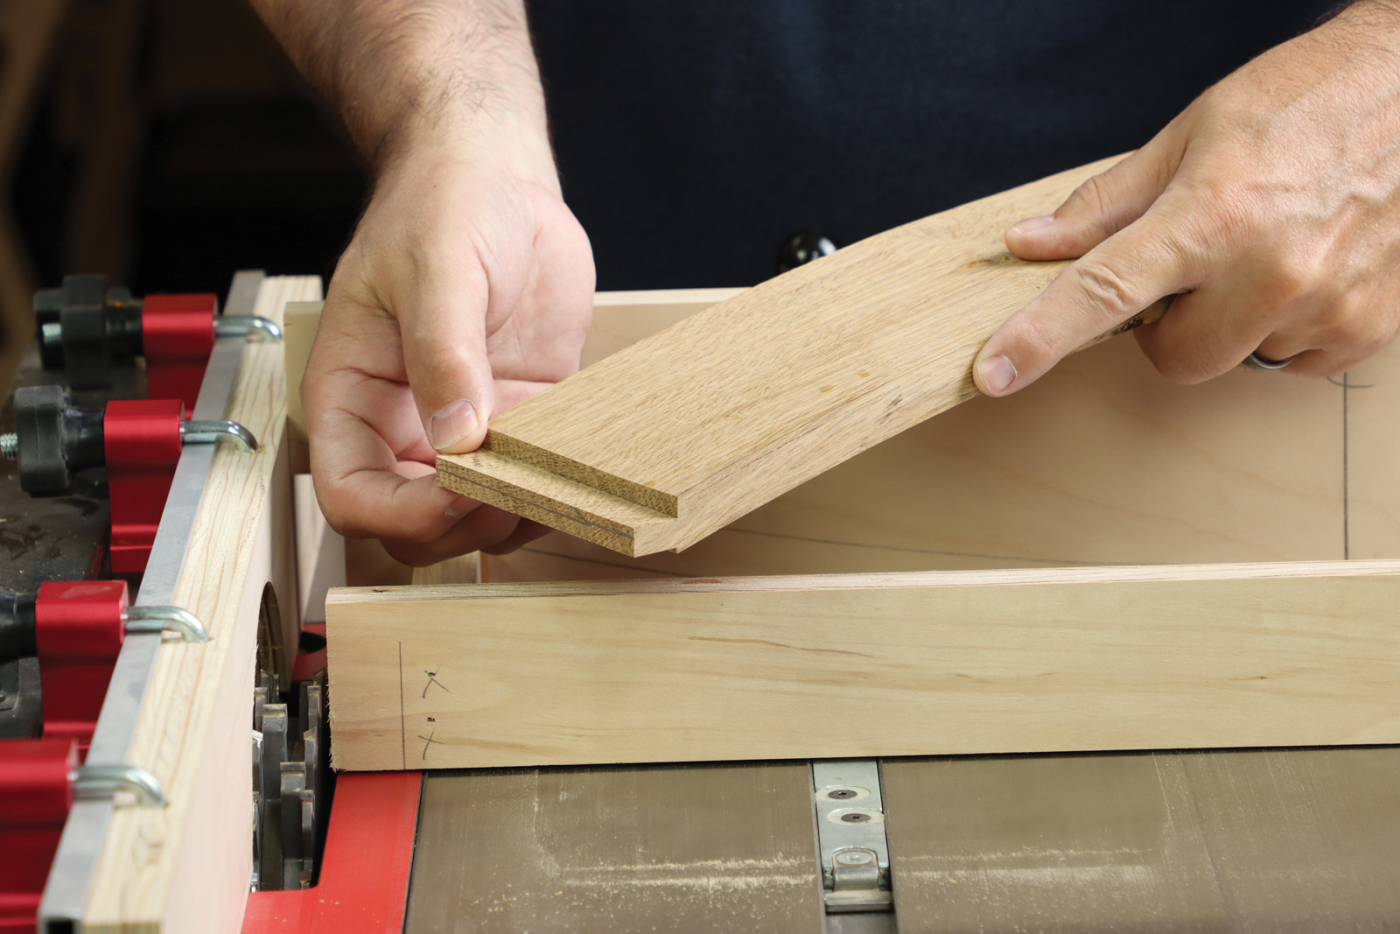
Start with rear cheek cuts, made with the curved rail positioned concave-side up. Butt the end of the rail against the sacrificial fence and make a pass to establish the rear cheek. The blade height for the Eastwood chair is approximately 21/8“ for this step. Confirm that you have a 1/4“ deep shoulder on the rear of the curved rail, and complete this step on all parts for your project. Then, simply flip the part over in the jig and lower the dado blade for a skimming cut. Raise the blade incrementally until the tenon fits in a 5/16“ mortise. A word of caution here: the front shoulder is only about 1/16“ deep, so sneak up on your cut for a nice fit. Once the blade height is correct, batch out the rest of your parts in the same way. The tendency with the new woodworkers is to make joints “sledgehammer tight,” but you’ll want to resist the urge here. The joints should slop together without much fuss and shouldn’t be overly tight. Remember—you’ll be clamping against thin, curved parts to assemble the backrest. I’ve seen original Gustav Stickley Morris Chairs with 1/2“ thick backrest rails, however, that’s a common source of failure with antique furniture. For reproductions, I make them a minimum of 5/8“ thick.
5 Place the curved rail in the jig with center marks aligned and trim the part to length. Flip the workpiece around and trim the other end as well.
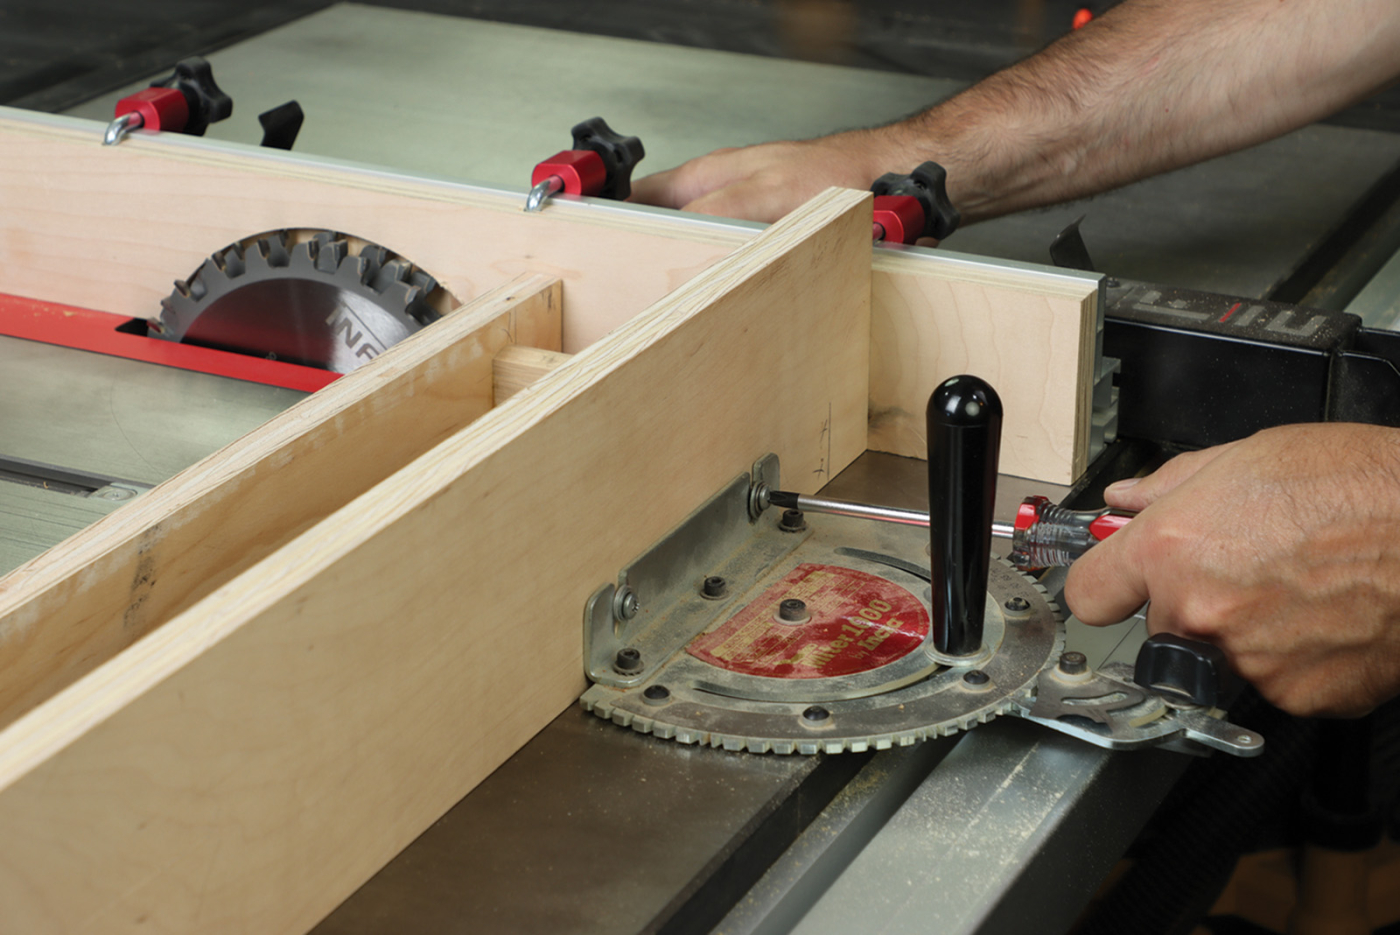
6 Install a dado blade on the tablesaw and set the fence for a 5/8″ long tenon. Re-mount the jig to the miter gauge so it contacts the sacrificial board on your rip fence.
7 Place the curved rail concave side up in the jig and make the rear cheek cut. The blade height is approximately 21/8″ for this step.
8 The goal is to create a 1/4″ deep shoulder on the back of the curved rail. Once the blade height is correct, complete this step on all parts.
9 Flip the workpiece over in the jig and secure it with a clamp. Lower the blade for an approximately 1/16″ deep shoulder on the front of the curved rail.
Tenon Shoulders
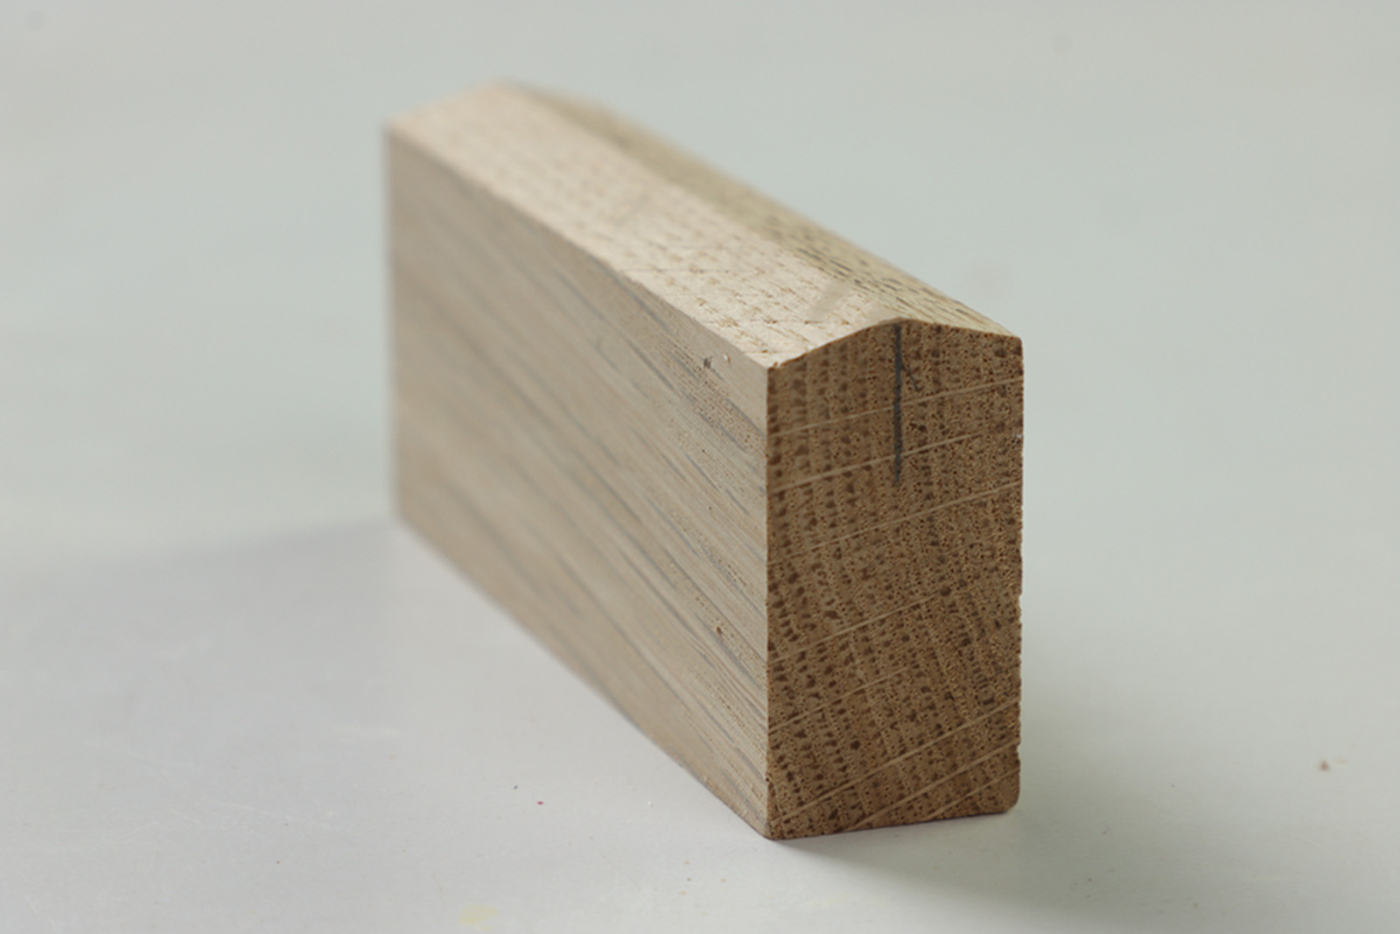
Complete the shoulder of the tenons just takes a moment with a dovetail saw. After all, you already have the cheeks established, so it’s just a matter of “connecting the dots,” as it were. You can fine-tune the tenon fit with a shoulder plane as needed. I was pleasantly surprised with a good consistent fit right off the saw. This jig, like many in my shop, is an experiment for a specific cutting operation. I’ve never seen anything quite like it, but perhaps you’ve come up with something similar to solve a specific challenge in your shop.
incrementally until you’re left with a 5/16″ thick tenon that fits the mortise.
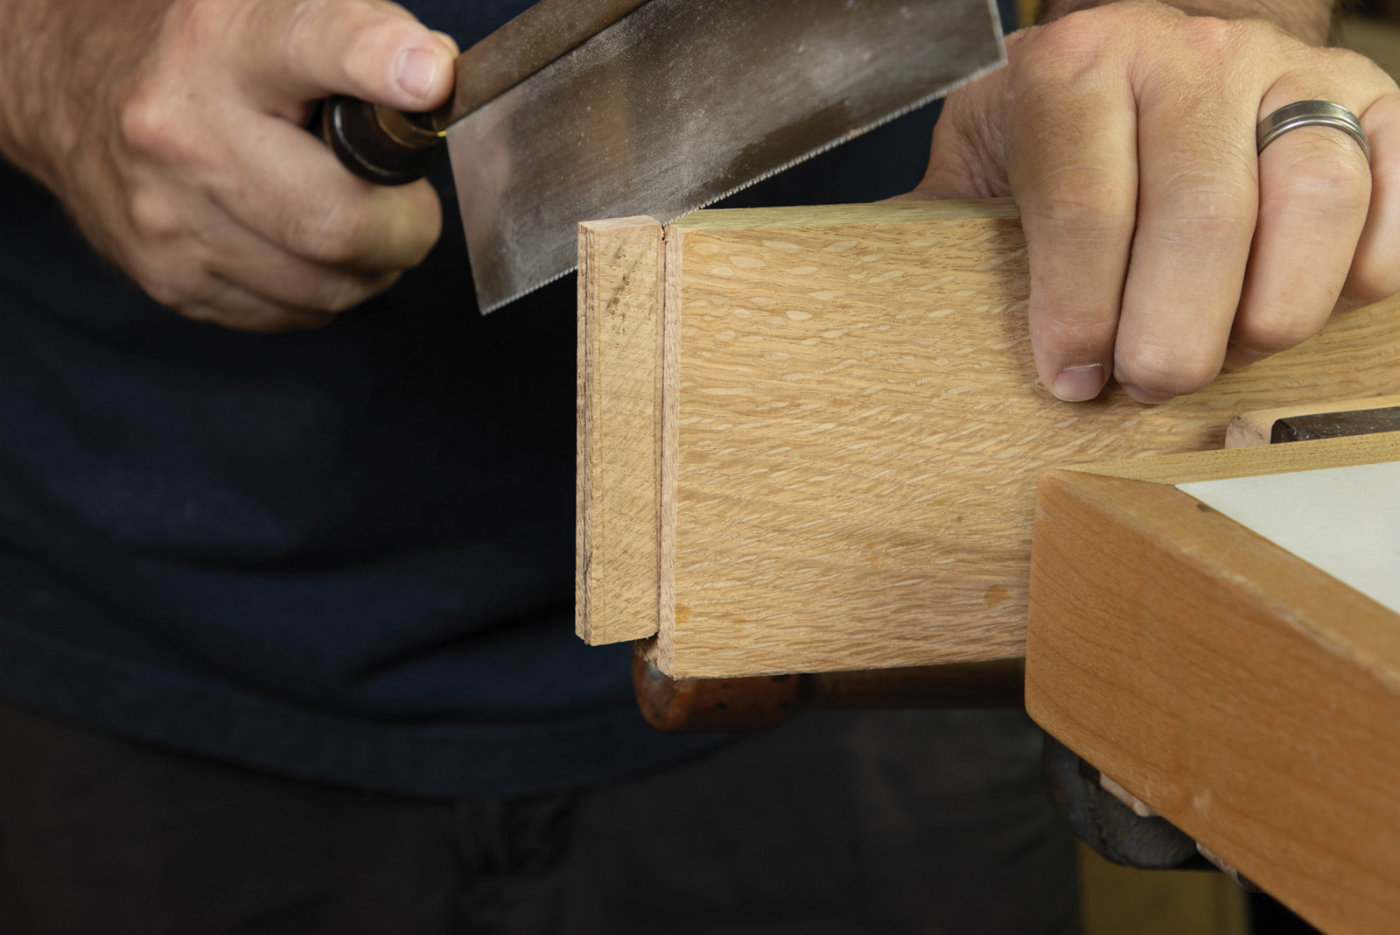
11 Complete the shoulder cuts required for your project with a handsaw. With the cheeks already established, this is a quick and easy step.
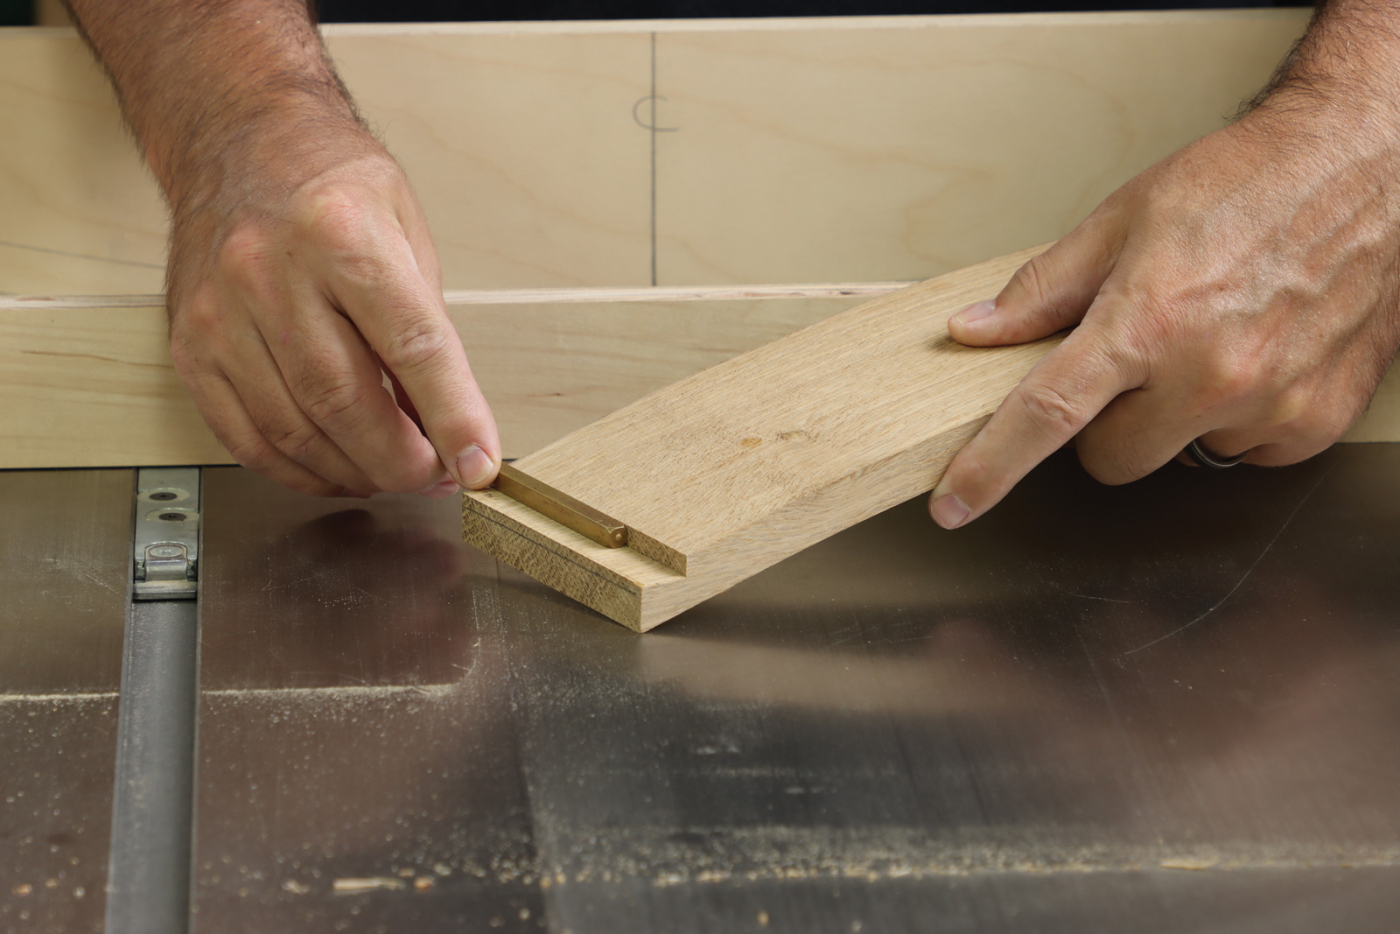
12 Test fit the completed tenon in a scrap board with 5/16″ wide mortise. Arm for an easy fit, as clamping curved parts has it own set of challenges.
Here are some supplies and tools we find essential in our everyday work around the shop. We may receive a commission from sales referred by our links; however, we have carefully selected these products for their usefulness and quality.