We may receive a commission when you use our affiliate links. However, this does not impact our recommendations.
Hand-cut appearance with half the fuss.
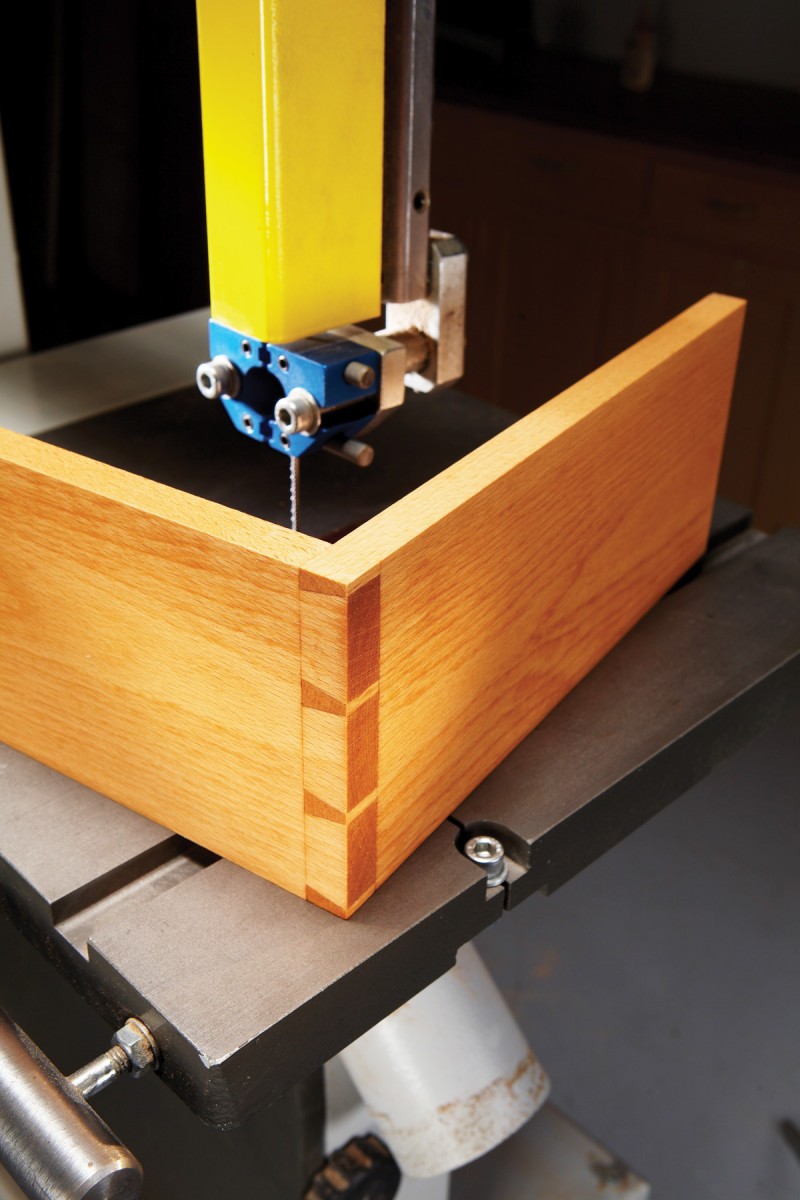
If you’ve labored over hand-cut through dovetails, you’ll be amazed how much faster they can be cut on the bandsaw. You get all the benefits, including strong joints, classic appearance, the ability to use boards of any thickness and the freedom to size and space the pins and tails however you want.

1. Outfit your bandsaw with a 1/8-in. blade with 14 teeth per inch (tpi). Bandsawn dovetails require making sharp turns in confined spaces. You’ll also have to replace your saw’s metal or ceramic guide blocks with Cool Blocks. Cool Blocks support the thin blade without damaging its teeth.
The only limiting factor is the your bandsaw’s throat capacity. My saw allows making joints up to 14-in. wide. That’s wide enough for any drawer, but not for a blanket chest.
2. An angled sled allows cutting the pins without tilting the bandsaw’s table. Sleds with different angles cut pins that slope differently. In this story, I’ll use the 10-degree sled. It cuts pins that slope at a ratio of about 1 to 6.
As with any woodworking technique, mastering this one takes a little practice. You’ll need a sharp blade for your bandsaw (Photo 1) and a jig that you can make in less than half an hour (Photo 2). I usually keep a chisel handy, too, for fine-tuning the fit.
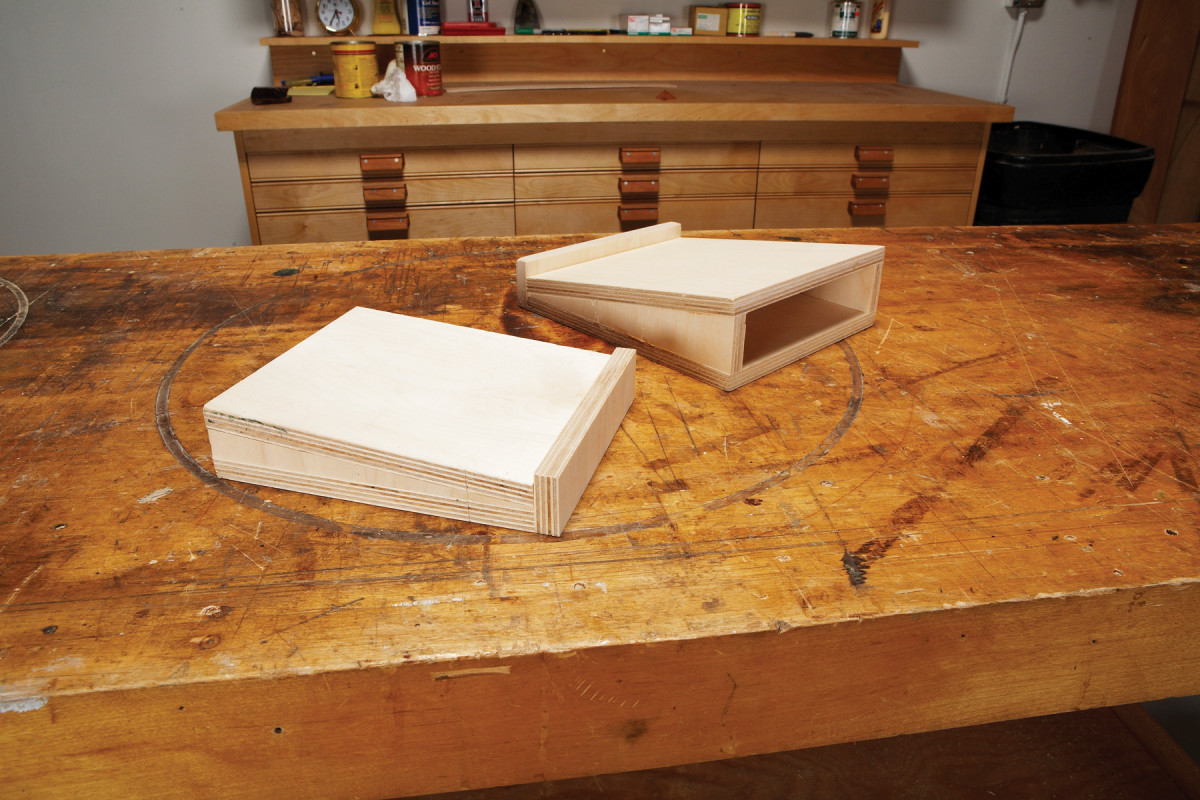
Make The Jig
The jig is an angled sled. The slope angle you’ve chosen for the pins determines the sled’s angle. Ratios of 1 to 6 and 1 to 8 are commonly used to determine pin slope angles. To create pins with a 1- to-6 slope, make a sled that slopes at 10 degrees.
Cut the angled sides with your miter saw—you can cut both sides at once by centering a wide piece and making one cut. You could also cut the angled sides on the bandsaw or tablesaw, using the fence and a tapering jig. Make sure the angled pieces are identical. Then simply glue and nail the parts together.
The jig makes it easy to cut both sides of the wedge-shaped pins. After cutting all the sides that slope in one direction, you simply rotate the sled and reposition the workpiece to cut the sides that slope the other direction.
Lay Out And Cut The Pins
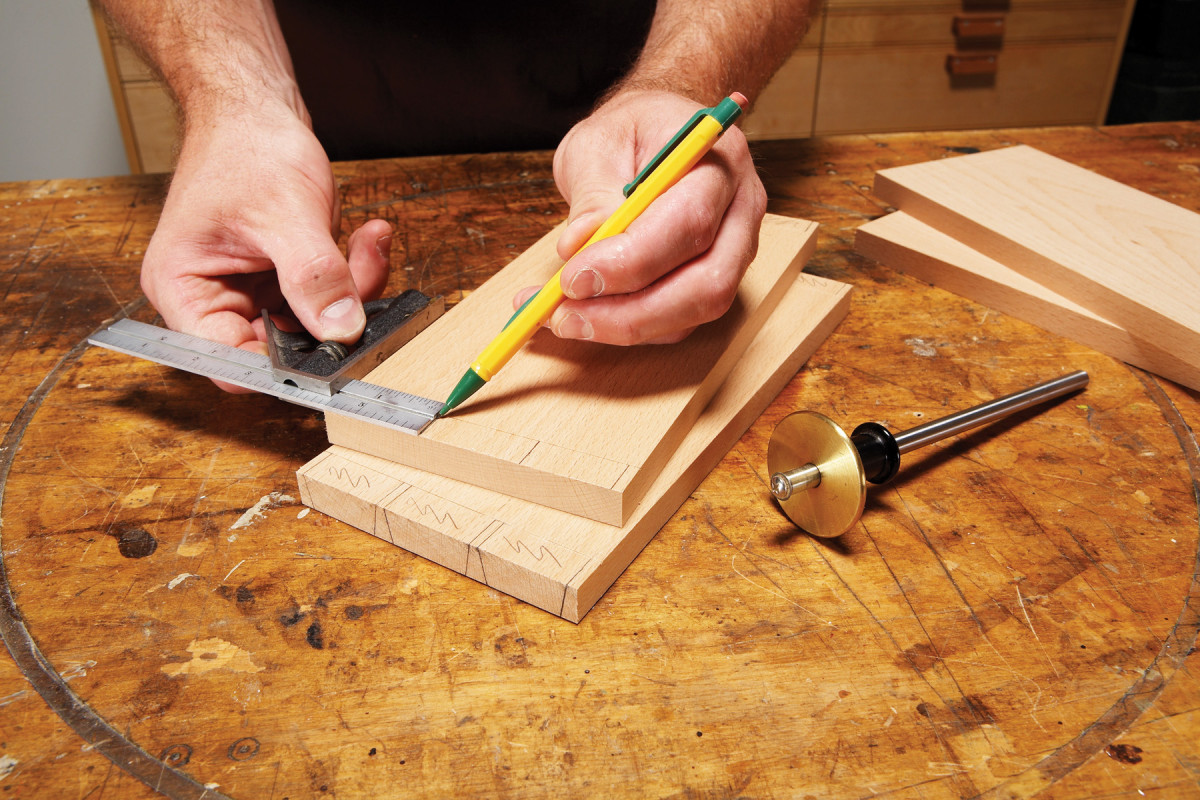
3. Locate the pins on the end of one board. Then use an adjustable square to transfer the straight lines to the remaining pin board faces. Laying out bandsawn dovetails is easier than hand-cut, because you don’t have to mark the wedge-shaped pins on the end of every board.
Lay out the pins on the end of one board, after scribing the board thickness onto the ends of all the boards (Photo 3). As with handcut dovetails, the number of pins, their spacing and the angle at which they slope is up to you. Typically, half pins are used at both ends of the board. Before you start cutting, strike lines on the end of the board to indicate the cutting angle. These lines aren’t precise, they’re simply indicators. Use them to make sure the sled is oriented correctly and to assure you cut on the correct lines.
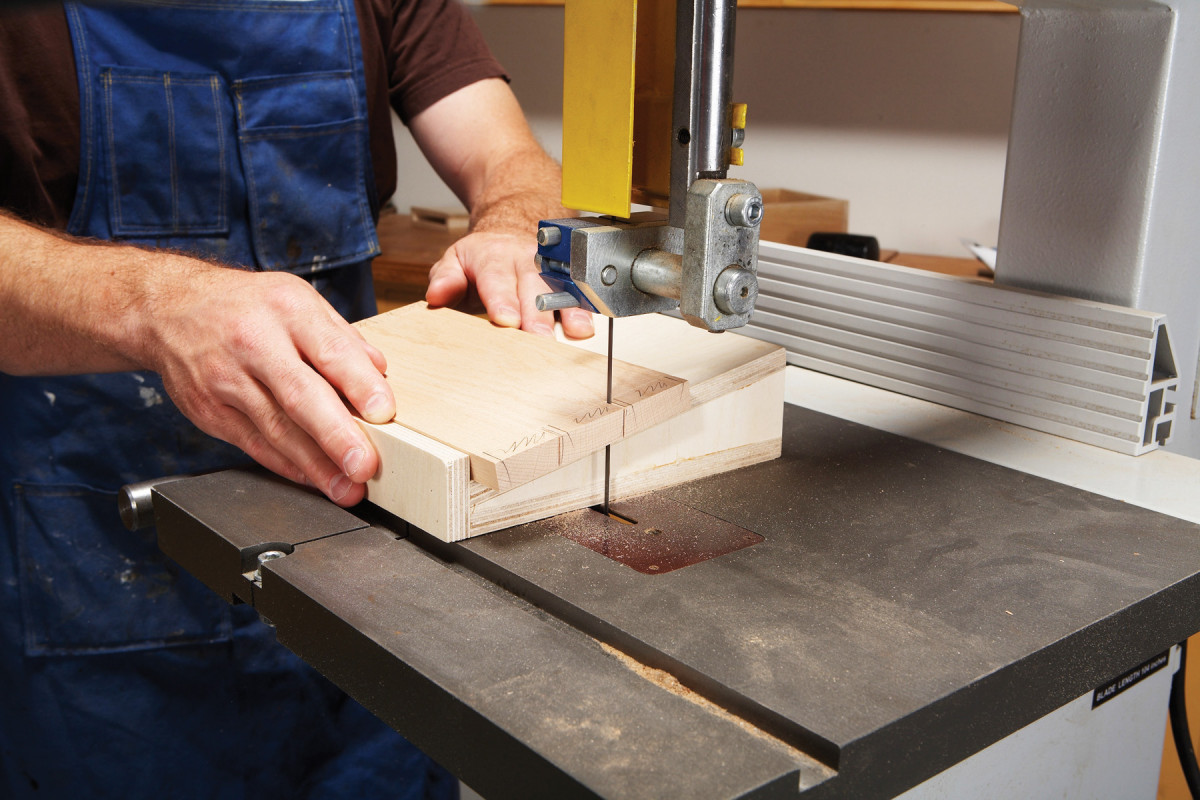
4. Cut the first side of all the pins. Make straight cuts, following your pencil lines. Stop at the board-thickness scribe mark. Your angled sled automatically slopes the pin. I strike angled marks on the ends to avoid cutting the wrong lines.
Place the workpiece on the sled, against its fence and make a straight cut to the scribe line on one side of each pin (Photo 4). I make these cuts freehand, but you can also use the bandsaw’s fence.
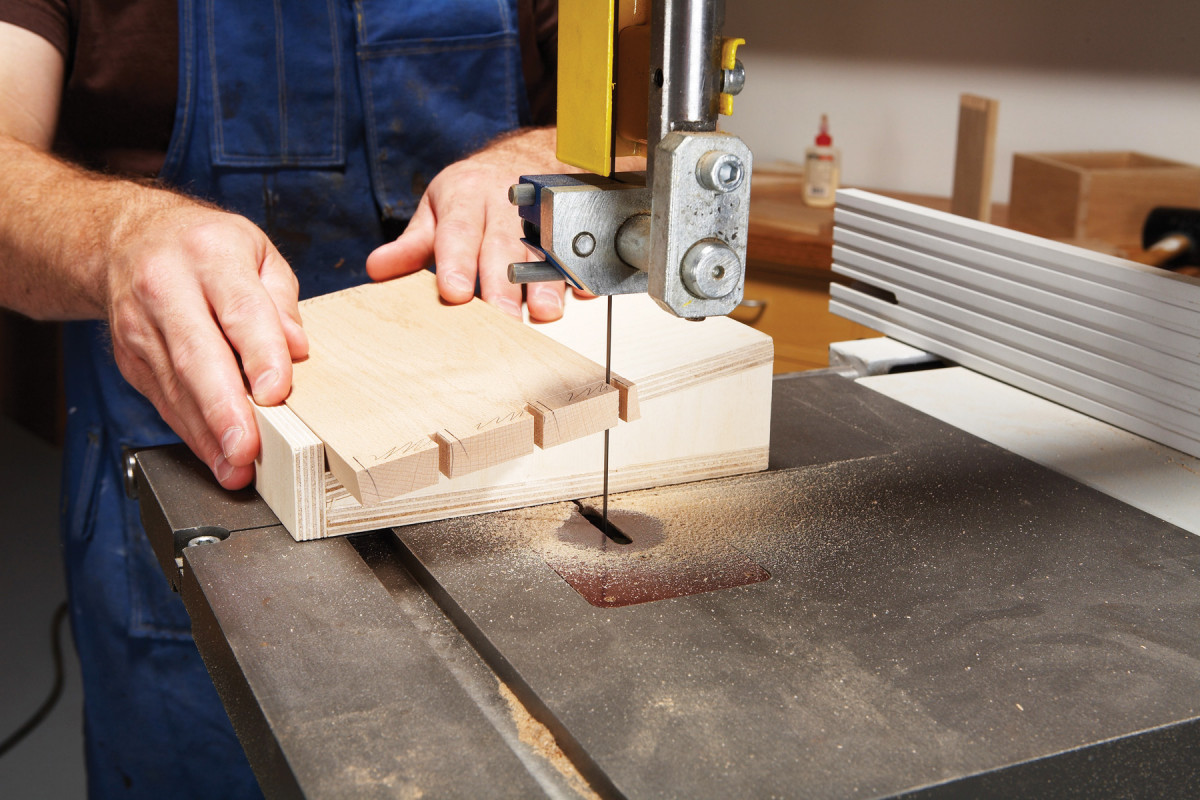
5. Widen each kerf by making multiple adjacent passes. Always stop the cut at the scribe line. This step makes it easier to cut the shoulders.
Go back and widen each saw kerf (Photo 5).
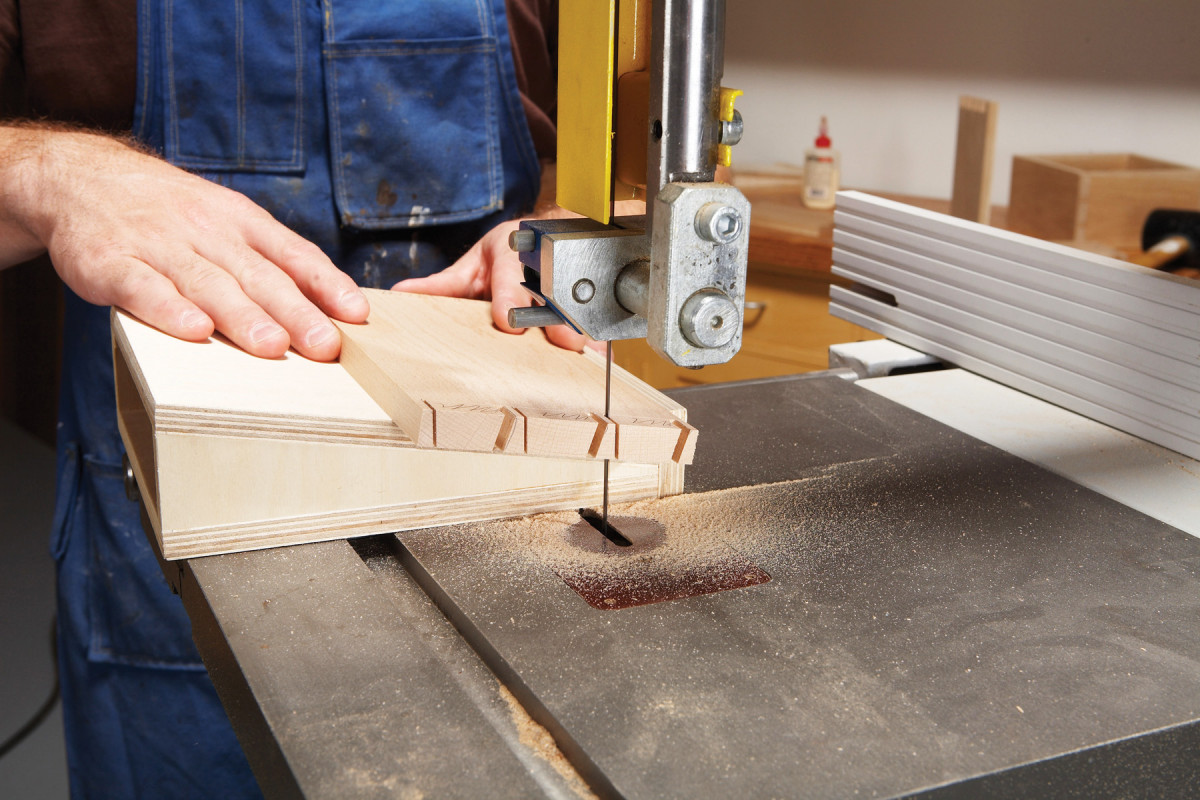
6. Rotate the sled, reposition the pin board and cut the other side of each pin. Again, always stop at the scribe line. Widen these cuts as well, by making adjacent cuts.
To cut the other side of the pins, keep the workpiece facing the same direction, but rotate your sled 180 degrees, so it slopes in the opposite direction (Photo 6).
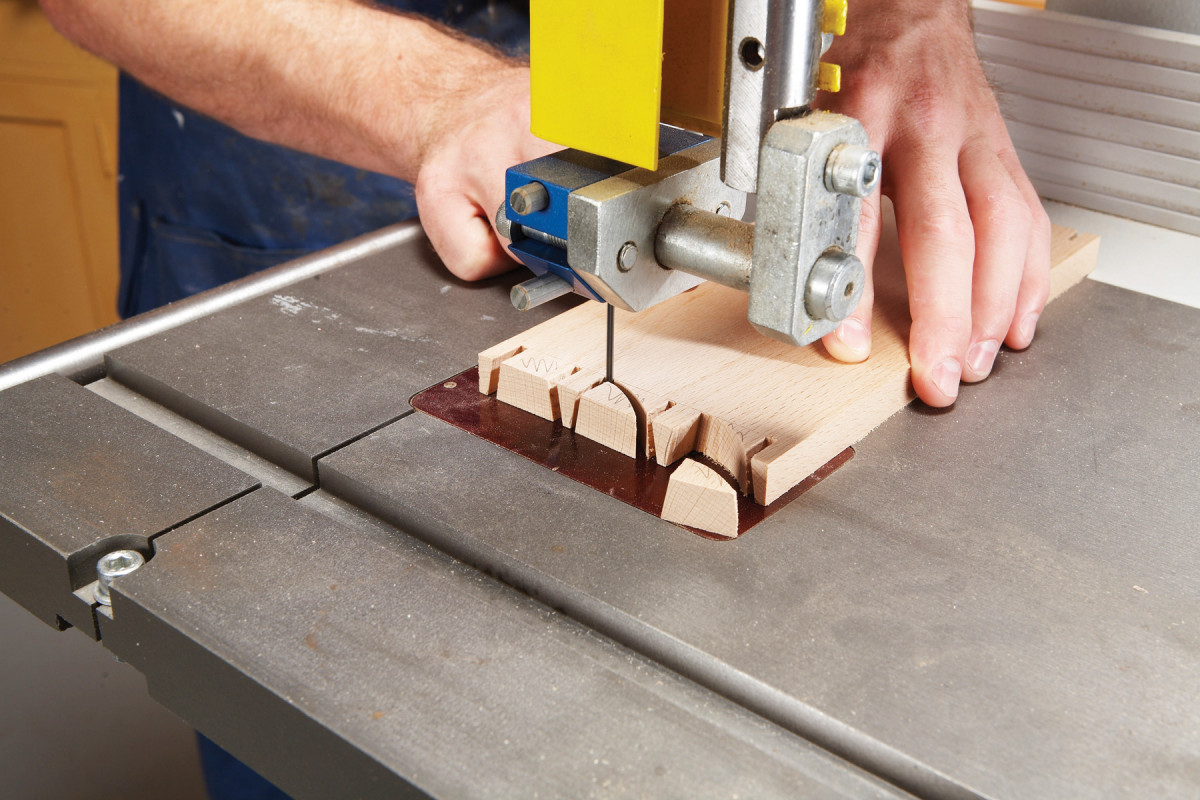
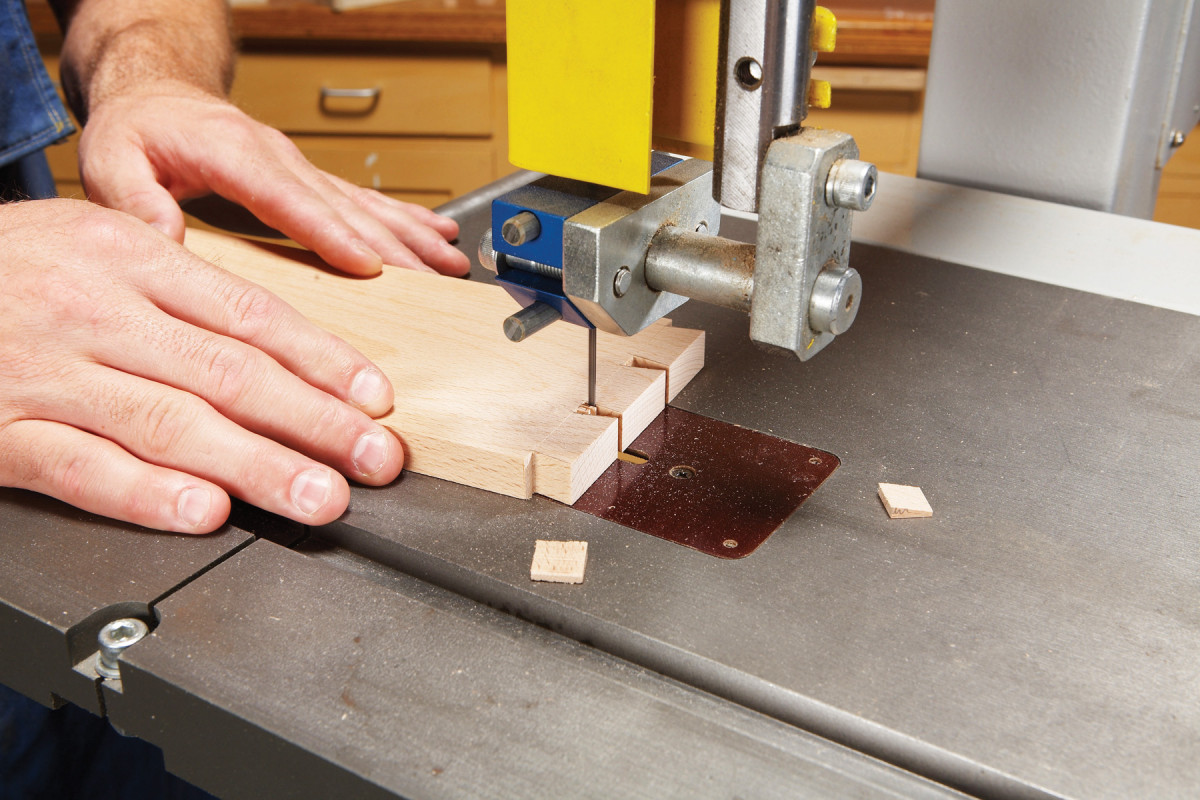
7. Flip the board over and lay it flat to remove waste from between the pins. Flipping the board allows cutting between the pins’ wide ends. Start by making a curved cut through the waste area to the back corner of each pin. End each cut precisely at the scribe line.
To clean out the waste and establish straight shoulders between the pins, remove the workpiece from the sled and flip it over. First, cut an arc to the scribe mark between each pin (Photo 7).
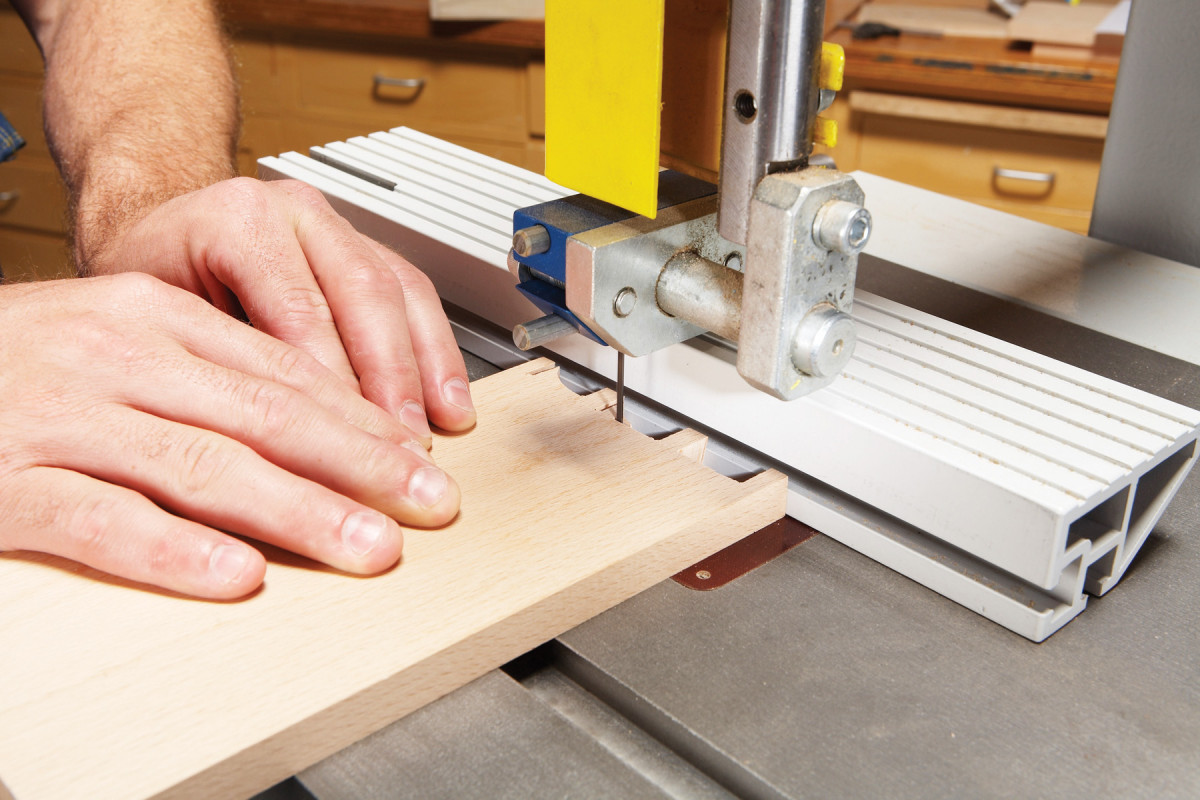
8. Rotate the pin board to cut the shoulders. Using the fence guarantees straight cuts, which are necessary for the joints to fit properly.
Do not cut beyond the scribe line. Rotate the board to cut the shoulder (Photo 8). Set the fence so the blade cuts precisely at the scribe line.
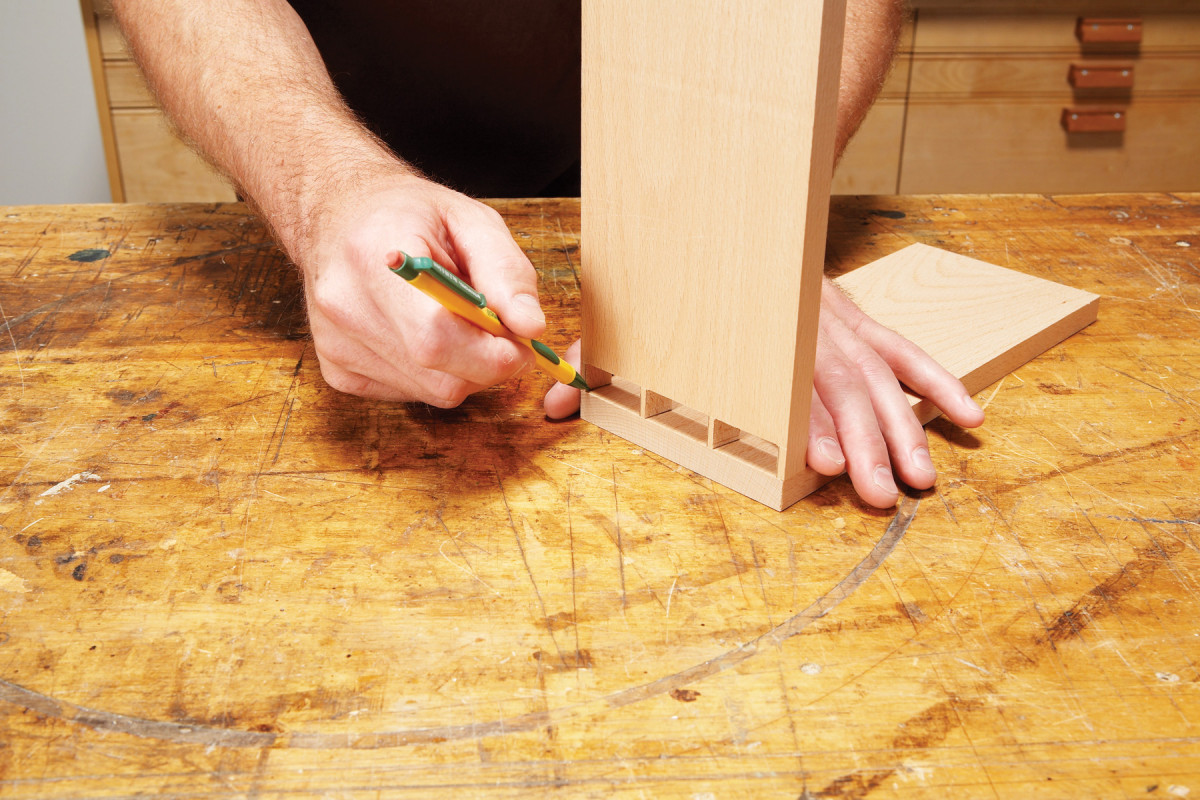
9. Transfer the pin locations to the tail boards. Hold the pin board flush with the edges and end of the tail board and mark with a fine lead pencil. Hold the lead tight against each pin, so your lines exactly outline the pins.
Check the shoulders you’ve just cut to make sure they’re straight and smooth. Use a chisel to pare any rough edges that remain from the straight-in cuts you made to widen the angled kerfs (Photo 5).
Cut The Tails and Test The Fit
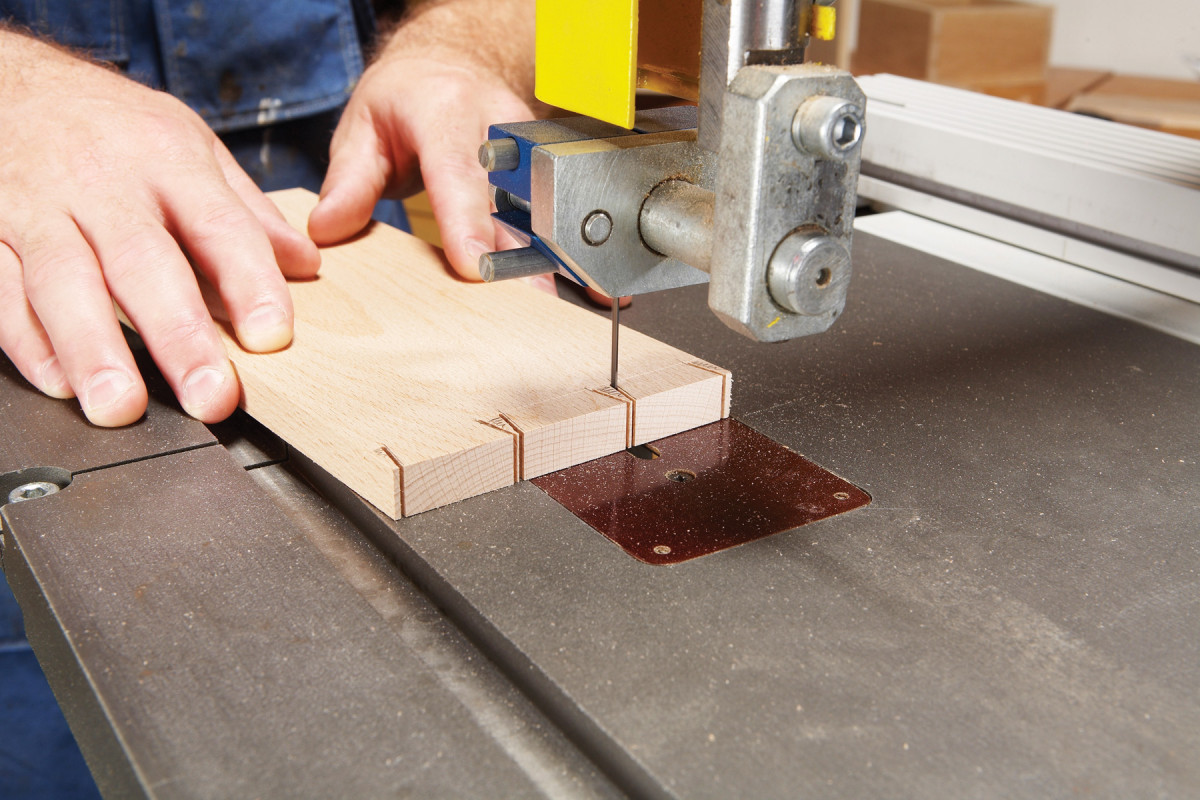
10. Cutting the pin sockets creates the tails. Define the sockets by cutting along the inside edges of the pencil lines. Be sure to leave the lines. Remember, they outline the pins.
When the pin boards are complete, transfer the pins to the tail board (Photo 9). Define the pin sockets by making angled cuts to the scribe line (Photo 10).
11. Complete the pin sockets by nibbling out the waste between the two angled cuts. Rotate the workpiece 90 degrees to cut the shoulders of the half-pins.
Once the sockets are defined, nibble out the waste and cut the half pin shoulders (Photo 11).
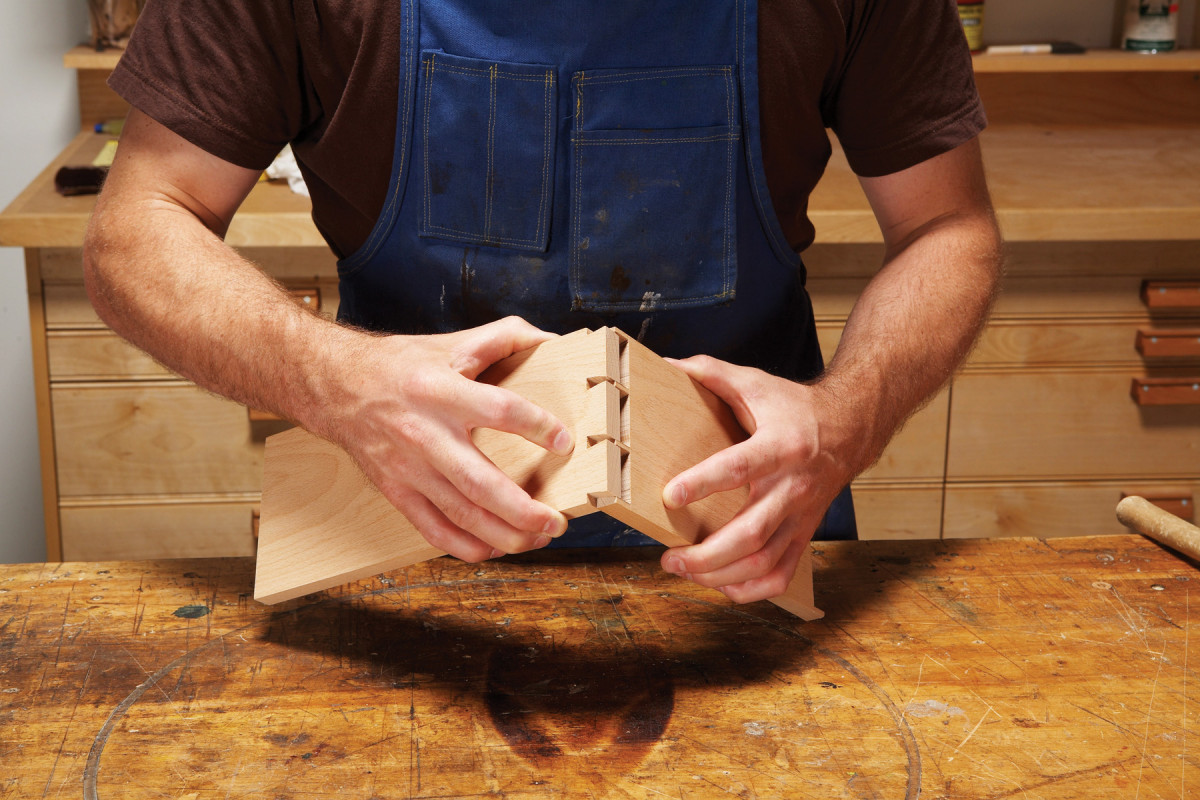
12. Test-fit the joint. The parts should slide together with light pressure. If they won’t go, locate the spots that bind and pare them to fit with a chisel.
Work slowly, being sure to never go over the line. Press the pieces together (Photo 12). Ideally, they’ll slip together with light pressure. If you have to use a mallet, they’re too tight: When you apply glue, they won’t go at all.
Here are some supplies and tools we find essential in our everyday work around the shop. We may receive a commission from sales referred by our links; however, we have carefully selected these products for their usefulness and quality.