<img height="1" width="1" style="display:none" src="https://www.facebook.com/tr?id=376816859356052&amp;ev=PageView&amp;noscript=1">
 In Projects, Shop Blog, Techniques

We may receive a commission when you use our affiliate links. However, this does not impact our recommendations.

Two-Part Bookcase

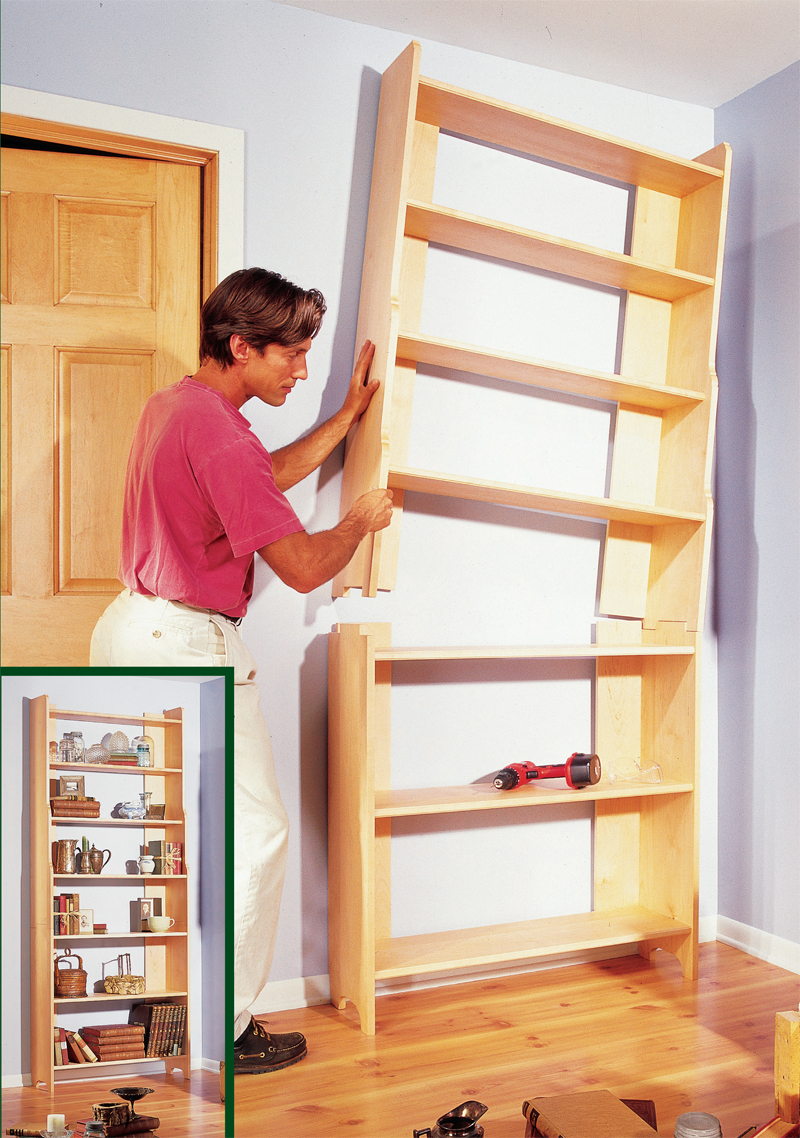
Here's a big bookcase that you can build in a small shop.

By Tom Caspar

Building a tall bookcase can stretch the limits of a small
shop. We all know that big boards can be a bear to
handle and glue up, so I’ve taken an old Scandinavian
design and sliced it up into bite-size pieces. My solution is to
break the bookcase into two interlocking sections that require
only short and narrow stuff. Not to mention, that’s the only
way I could get it out of my shop and up the basement stairs!

Biscuits join the shelves and sides. It’s a snap to put together
wide boards at right angles with a plate joiner. But biscuits
alone aren’t enough to make a stiff case, so I’ve added backboards
that lock the whole bookcase into a rigid unit.

You may also like…

Dovetailed Bookcase

Stickley Bookcase

Bow-Front Bookcase

Mission Bookstand

Cottage Bookcase

Contemporary Bookcase

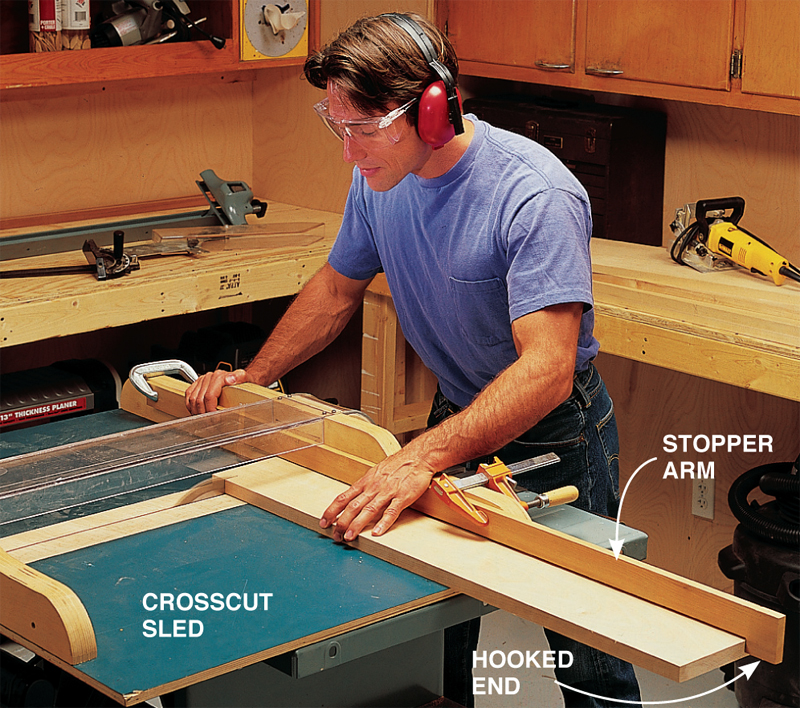
Trim long and wide boards on your tablesaw with a
crosscut sled. A sled is easier to use and more accurate than a
standard miter gauge. Clamp a hooked stick onto the fence to act
as a stopper arm. This ensures that all your boards come out the
same length.

Click any image to view a larger version.

Rip the stepped board (C) on the bandsaw. A simple
fence helps you make a straight cut. Stop the cut at the
top of the ogee curve and withdraw the board. Remove
the fence and cut out the ogee.

Glue the upper case sides from 1" thick rough
boards that are planed to 7/8" thick. This leaves some untouched
low spots, but that’s OK. Align the outside boards
so their bottoms are even.

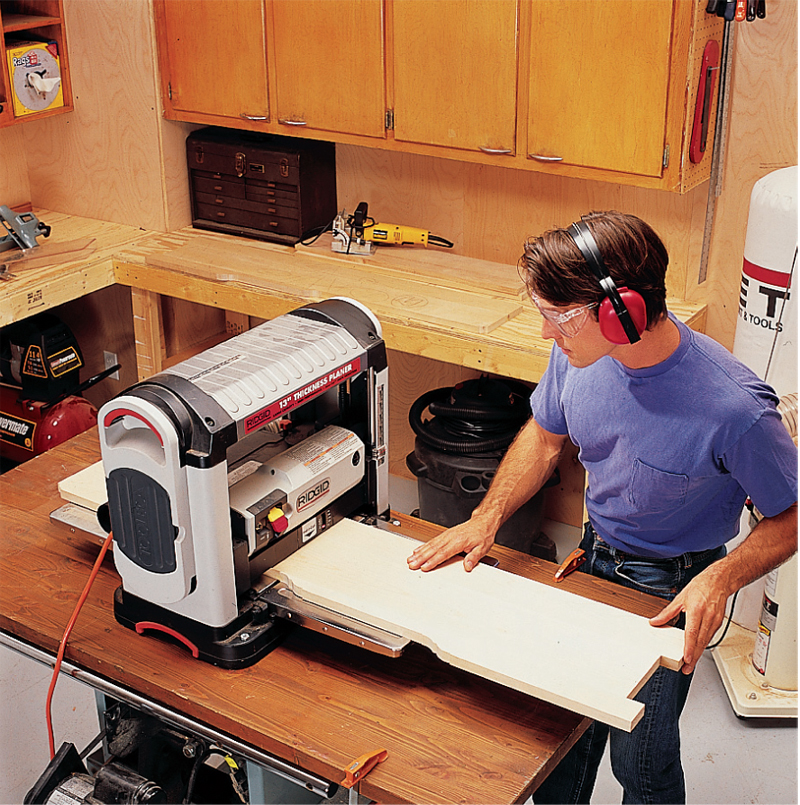
Plane the glued-up case sides until there are no
low spots left. All the parts of this bookcase should be
the same thickness, which can be anywhere from 3/4" to a
minimum of 5/8".

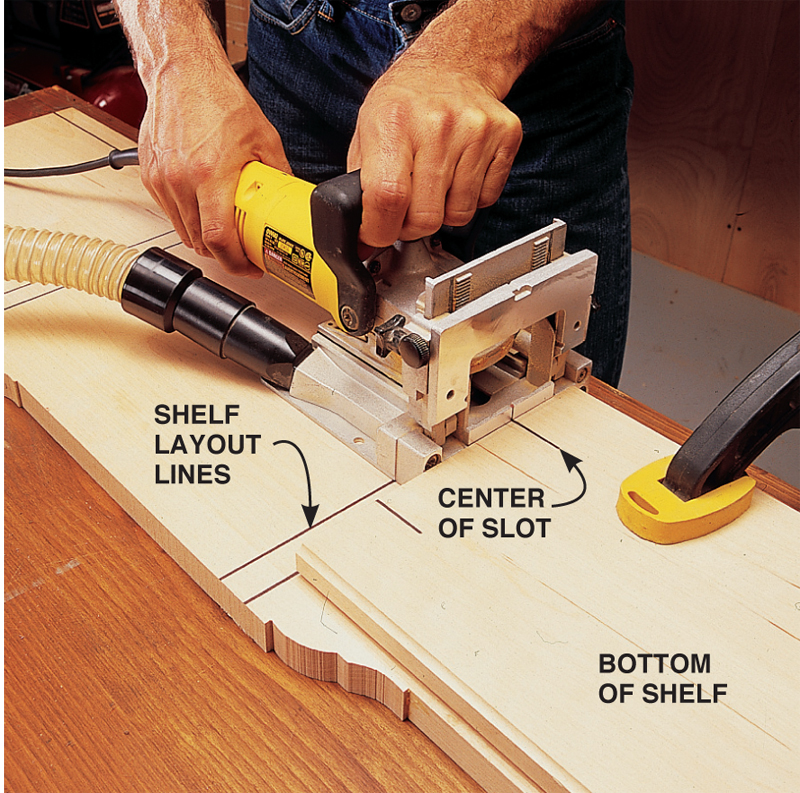
Cut biscuit slots in the ends of the shelves. You can’t
go wrong if you clamp each shelf in position, right above
the double lines. Set the shelf in from the back edge by the
thickness of one backboard.

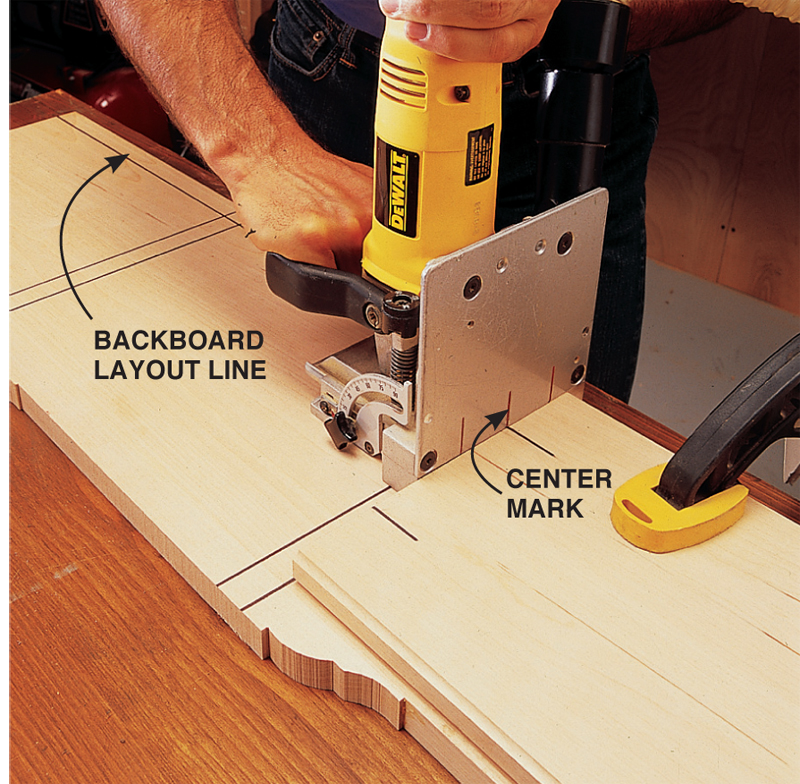
Cut more biscuit slots in the case side. Stand the plate
joiner up on end and butt it against the end of the shelf.
Align the center mark on the bottom of the machine with the
pencil mark on the bottom of the shelf.

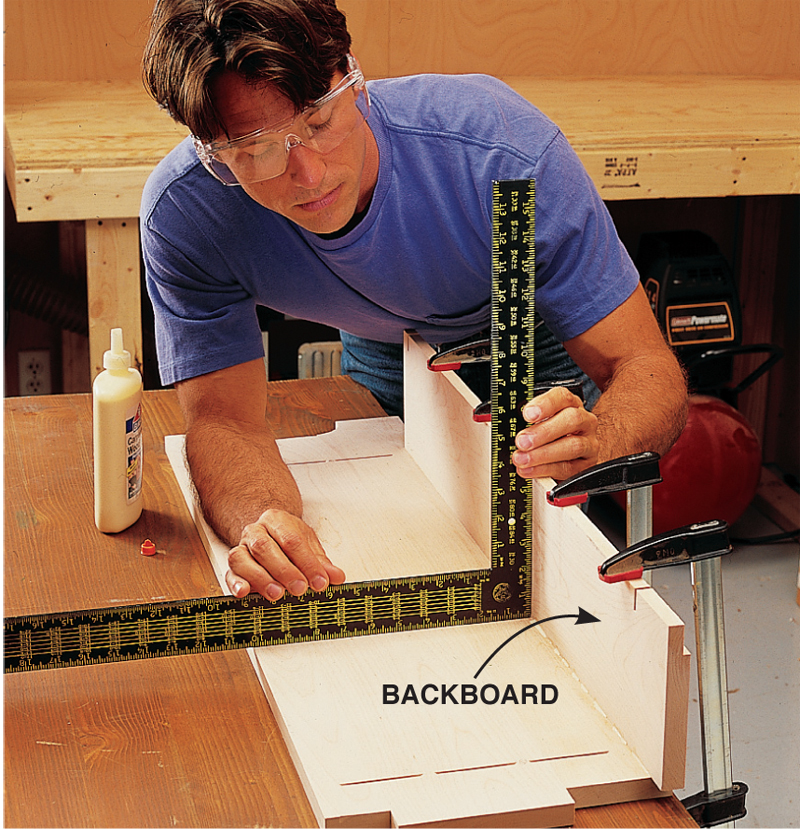
Glue the backboard onto the case side. Make sure it’s
square along the entire length. Check opposite each clamp
as you tighten it down. Shift the head of the clamp in or out
to change the angle of the backboard.

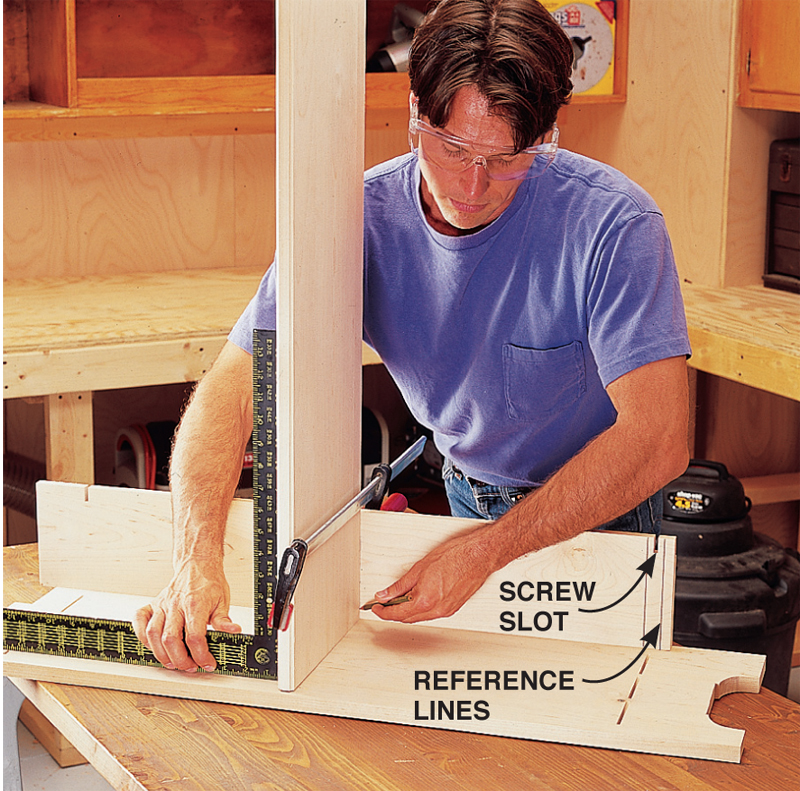
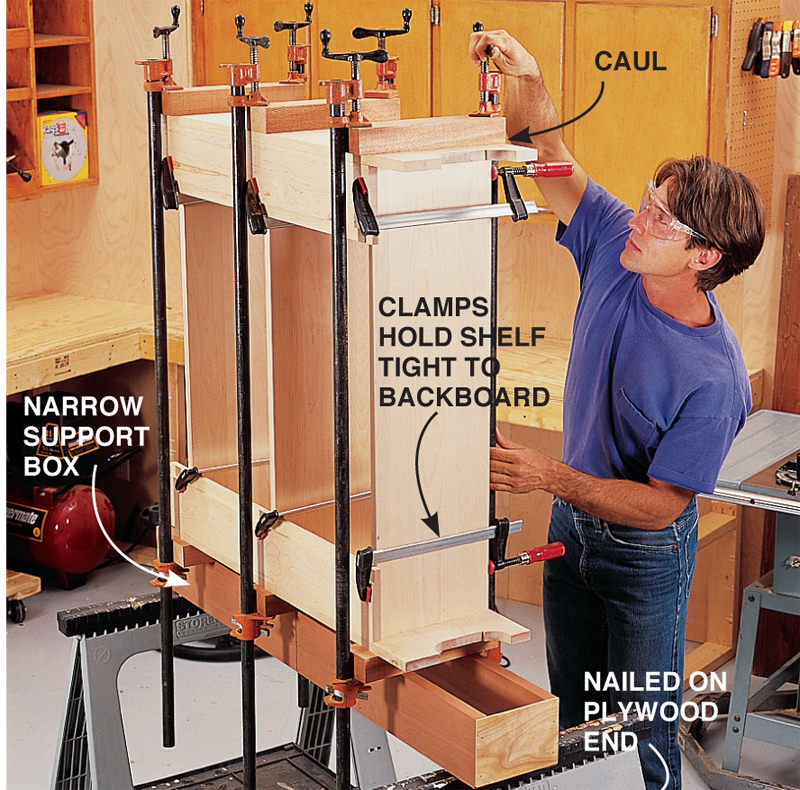
Mark the position of the shelves on the backboards
with light pencil lines. These reference lines help you glue
up the entire case square. Clamp each shelf in place, without
glue, and adjust it until it’s square to the case side.

Glue the lower unit together with cauls and pipe
clamps. The thick cauls distribute clamping pressure over
the entire width of the side. Use short clamps to pull the
shelves tight against the backboards. Align the shelves with
the reference lines. Then tighten the pipe clamps.

This story originally appeared in American Woodworker October 2000, issue #82.

October 2000, issue #82

Purchase this back issue.


Product Recommendations

Here are some supplies and tools we find essential in our everyday work around the shop. We may receive a commission from sales referred by our links; however, we have carefully selected these products for their usefulness and quality.

Recommended Posts

Start typing and press Enter to search