We may receive a commission when you use our affiliate links. However, this does not impact our recommendations.
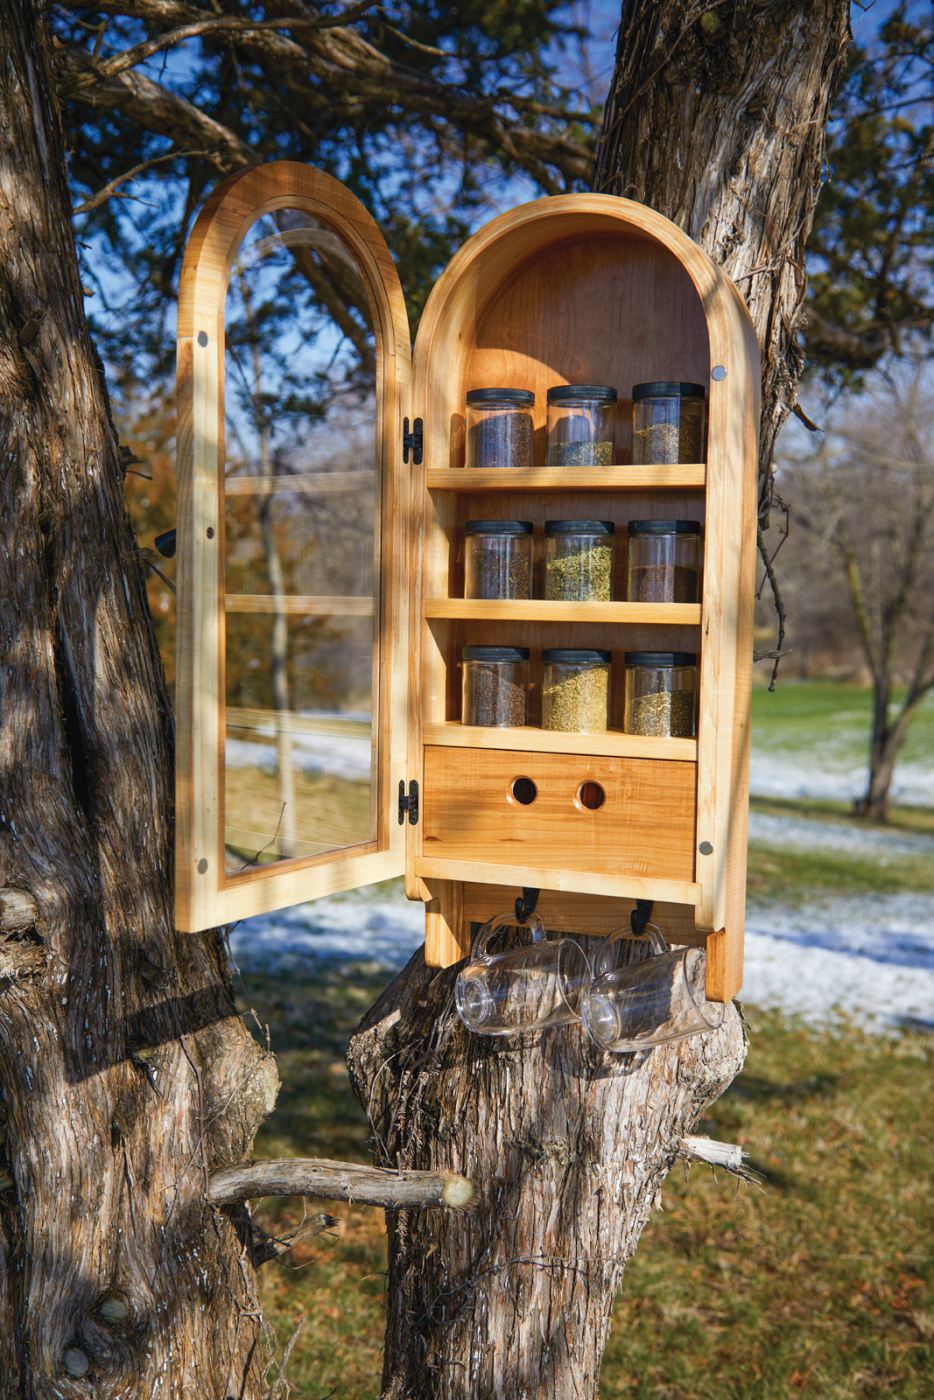
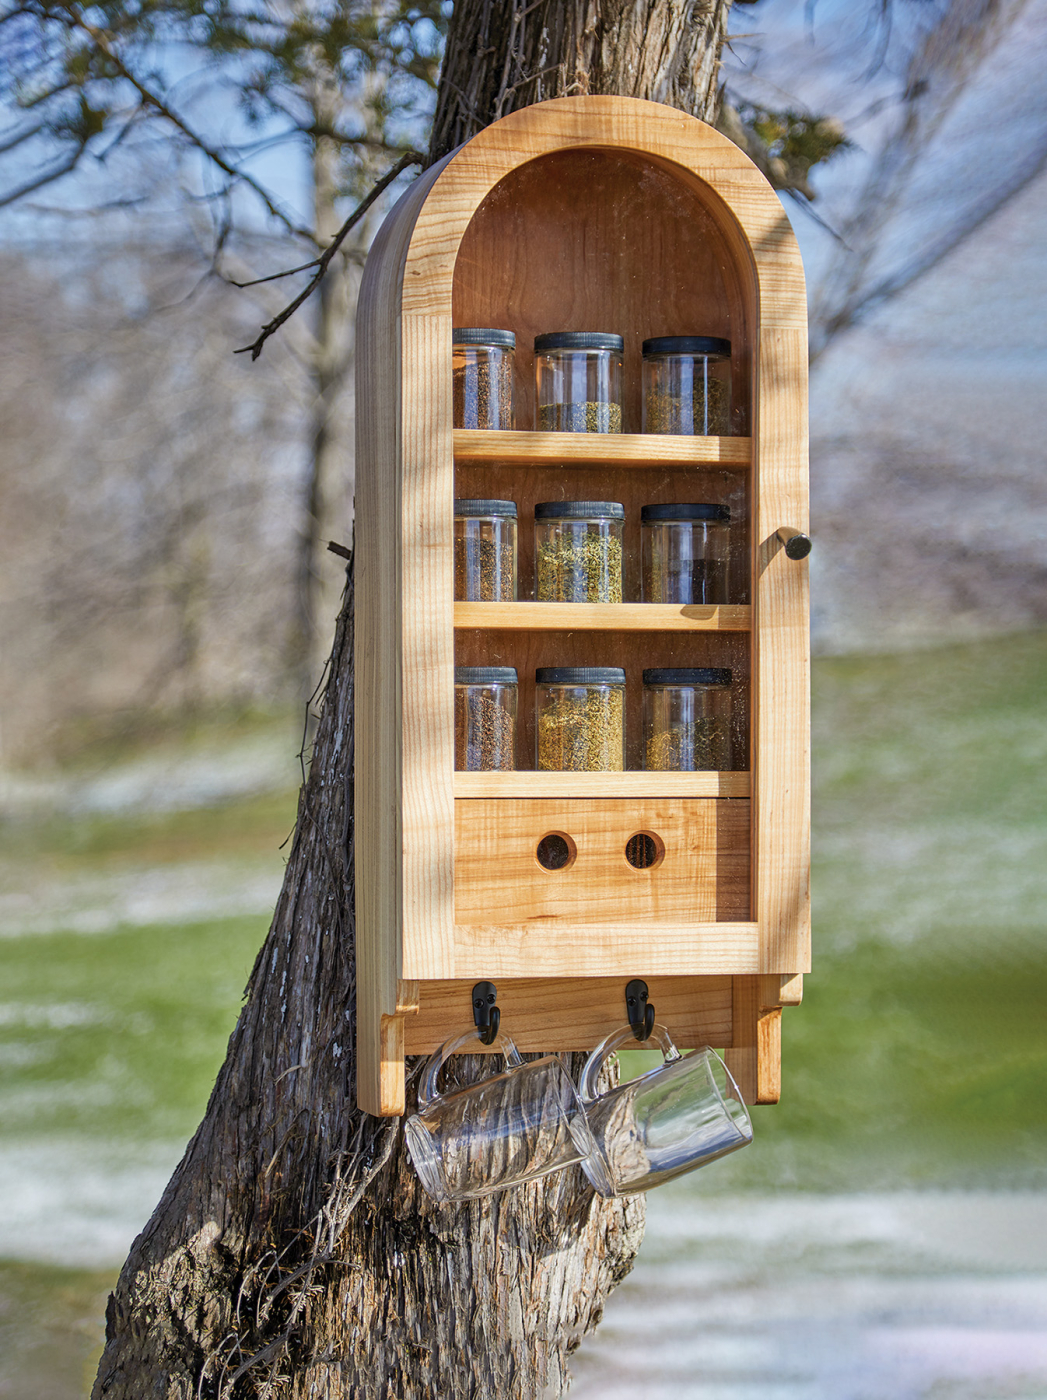
The elegant arched case of this tea cabinet is a great way to practice bent lamination and showcase some unique wood.
Project #2216 • Skill Level: Advanced • Time: 3 Days • Cost: $150
If you’re like me, it’s difficult to imagine beginning the day without a piping hot cup of a caffeinated beverage. For some, this beverage may be coffee, but for the rest of us it’s more than likely tea. Consumed only second to water, tea possesses a past that’s as long as it is complex. Dating back as far as the Han Dynasty (second century B.C.), lore has it that Emperor Shen Nung—while passing through the countryside—experienced a gust of wind that caused a leaf to split from a branch and land conveniently into his boiling cup of water. Regardless of whether you believe this legend to be true or not is irrelevant because what’s undeniable is tea’s omnipresence and global popularity. So, what better way to celebrate the ritual of waking up than by constructing a shrine to house your favorite beverage? Follow along step-by-step as I take you through the process of building a tea cabinet that’s as timeless as the tea itself.
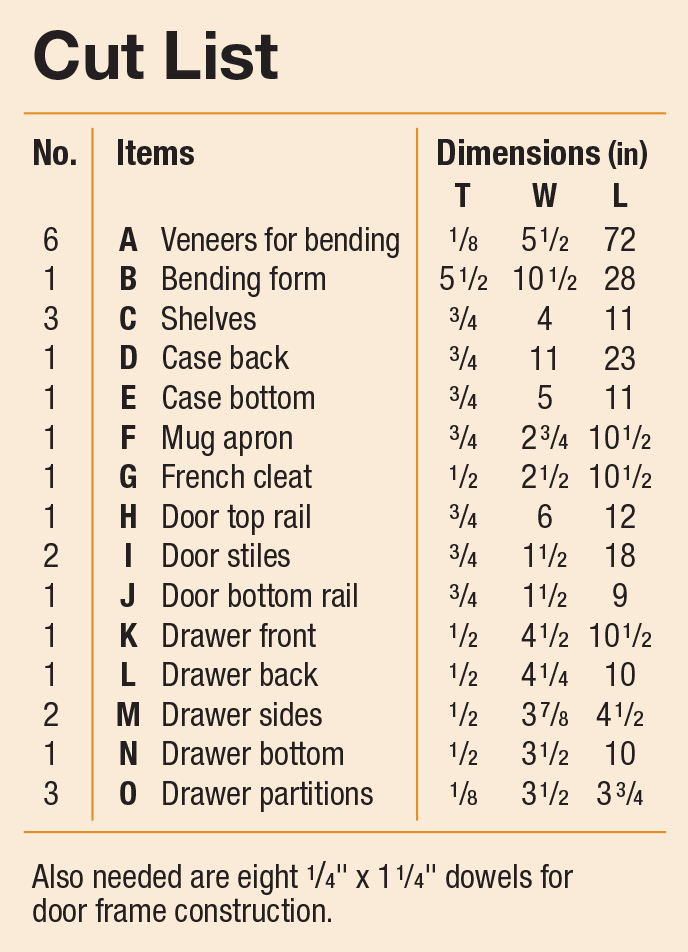
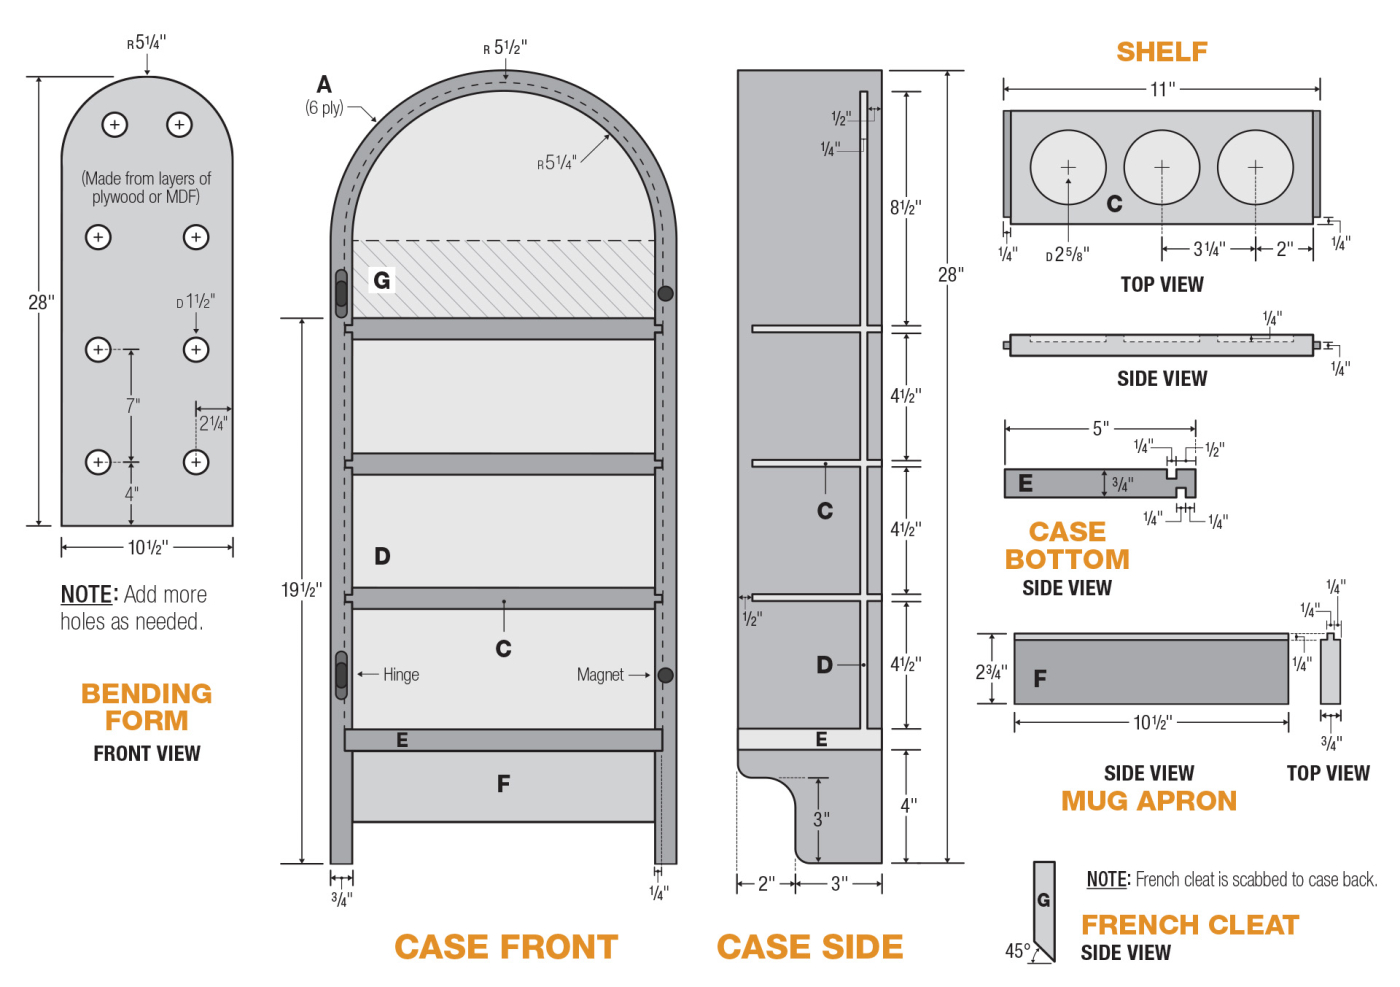
Cutlist & Diagram
 Creating the Form
Start by creating the bending form for the main carcass. I used 3/4” Baltic birch plywood, though any plywood can be used for this application. The radius of the form should match that of the interior of the finished cabinet. I chose to oversize the depth (i.e., thickness) of the form to account for refinement once the lamination has cured.
Once you have the bending form constructed, go ahead and drill a series of holes (1 1/2” in diameter) around the perimeter. There is no perfect formula; just create enough holes to provide sufficient clamping pressure around the lamination.

Locate or fashion a vessel that’s large enough to soak the veneers. You’ll want to soak the veneers for several hours in hot water until they’re pliable.
Resawing Veneers
The veneers for this project are 1/8” x 5 1/2” x 72″. You will notice that the width is oversized by 1/2“. This was done to help minimize the chance of gaps or voids caused by removing the raw or unfinished edges after the glue-up. Now, when it comes to bent laminations, I always recommend using air-dried stock. The reason for this is that when using kiln-dried wood, the lignin tends to have dried out and decreases its natural malleability. If you only have access to kiln-dried lumber (commercial availability is usually air/kiln dried), all is not lost. However, you may need to soak the boards in warm, distilled water for a few hours. For this procedure, a makeshift trough was built out of plywood and then lined with high-density painter’s plastic—no need to get fancy.

Bend the veneers around the form without glue. Clamp them in place, and as they dry, they’ll start to retain the shape.
Gluing Up the Main Case
Like any glue-up, start by doing a mock run to solidify your strategy. Any number of aids can be used to persuade the laminations around the form. I like to make curvilinear cauls that match the radius of the form along with some rectangular scrap pieces to help distribute the pressure. If your pieces are proving to be uncooperative, a ratchet strap wrapped around a fixed point (see photo) can help take some of the pressure off the task. Since this is a one-man operation, I like to use an adhesive with a longer open time. West Systems 105 resin with either the 205 or 206 hardener will more than suffice. Using a two-part system takes the stress out of the procedure while minimizing spring-back and ensuring a rock-solid bond. If you end up soaking your boards, allow laminations to fully dry on the form before gluing. Any remaining moisture may compromise the adhesion, ending in potential catastrophe — don’t ask me how I know.

Apply a layer of epoxy to each face of veneer. A knap roller works best here, as foam rollers seem to degrade after a few minutes of rolling the epoxy.

Apply clamps around the entire bending form. Additional cauls and ratchet straps help pull everything tight for good, clean glue lines.
Refining the Case
Once the form has cured, it will need a little love. Start by refining— preferably the front side—using a jack plane or a sanding block. With one side smooth, send the opposing side through the power planer until you have reached the desired depth. Now, this may go against the laws of grain direction, however, if you remove small amounts of material (1/32” or less) this can be done successfully without tear-out. Even so, this is being done on the backside of the cabinet where all blemishes and boo-boos will be conveniently concealed.

Use a shop-made t-jig to guide the router as you rout the stopped dadoes for the shelves.
Take A Router to the Piece
The joinery for the cabinet was created using a handheld router and a template. To help with alignment, I made a series of registration marks on both the case as well as the template. Start by clamping the case on the end to the workbench. Using the registration lines, align the template to each stopped groove and make your way down the side. Since the template is set up to create 1/4” grooves, the bottom through dado will be created in a few passes.

Clean up the bottom of the dadoes using a router plane.
Flip the case and repeat the same procedure until you have created all of the stopped grooves for the shelves and dadoes for the bottom. The last course of action to complete the case joinery is to create the groove for the back panel. This was done over at the router table with a 1/4” three-wing slot cutter. The depth of the groove is also 1/4“, so use the corresponding bearing to achieve the desired depth.

To form a groove for the back, use a wing cutter at the router table.
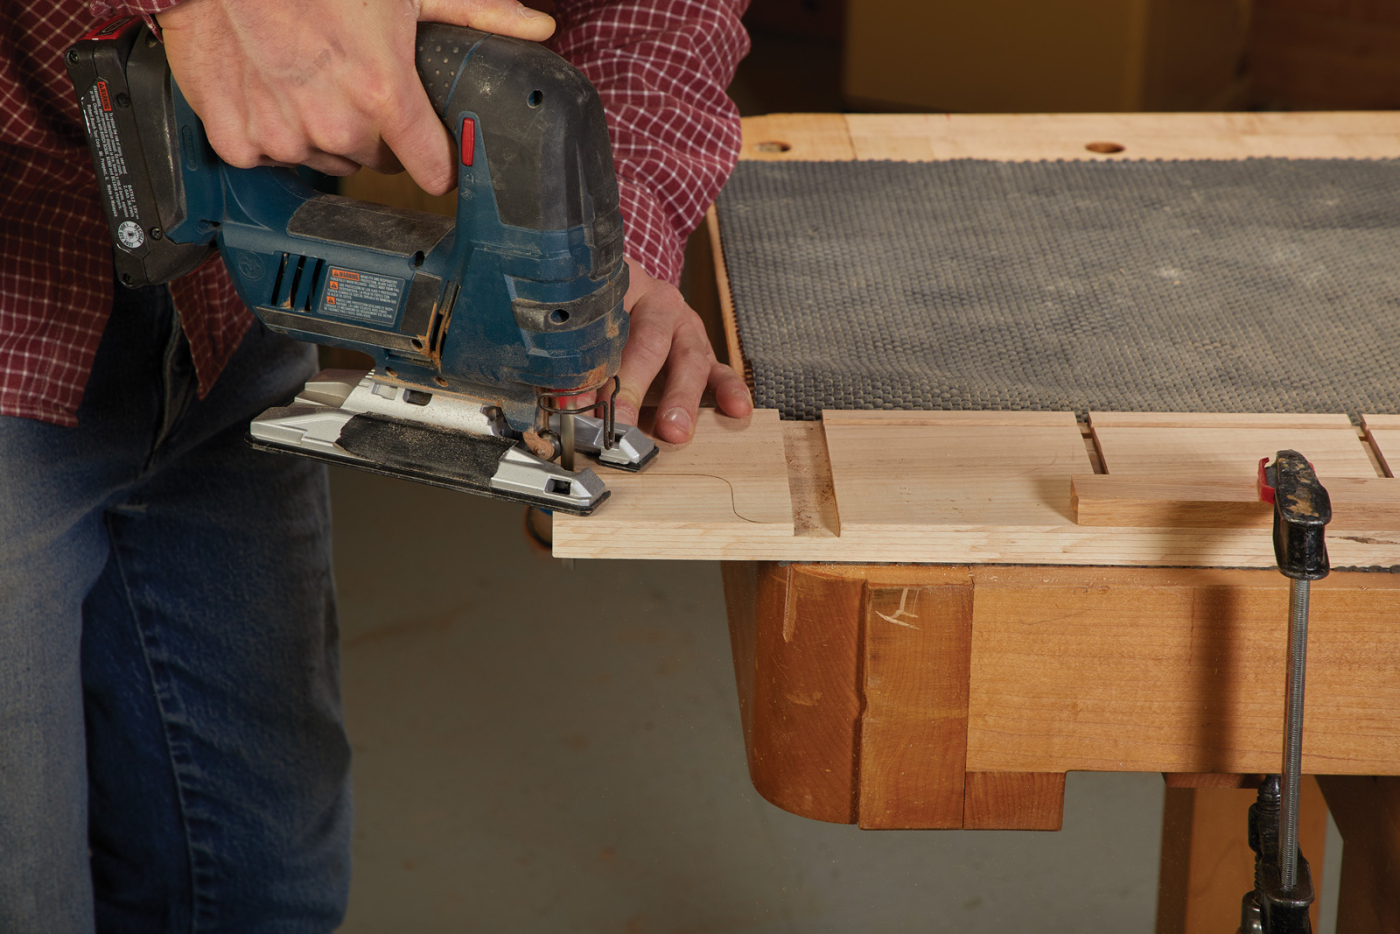
To cut the cabinet to length, use a crosscut sled at the table saw and then create the profile on both ends of the case. Using a template, trace the profile onto the piece and rough cut the shape with a Sabre saw. If you are a stickler for duplication, you can use the same template in conjunction with a pattern bit at the router to get a perfect pair of profiles.

Make the ends symmetrical by using a template to flush-trim the rough cut surface.
Shelves, Apron, Bottom and Back
All three shelves are identical. Begin by cutting the blanks to their final dimensions. Then, create the tenons on both sides of each shelf using a flat-kerf table saw blade. The three recesses on the shelves are made using a template and 1/2” pattern bit (bearing towards the shank). The recesses are about a 1/4” deep, so make them in a couple of passes to relieve the stress on the bit. Once this is complete, continue by creating the bottom along with the apron. The bottom has a 1/4” groove on the top to accept the back panel as well as one on the bottom to receive the apron. Lastly, create the tongue on the top side of the apron.

Use a template and rout the recesses for the containers.

At the table saw, form the tongues on the ends of the shelves

After forming the tongue on the ends of the shelves, stand them on edge and notch the front of the tongue.
It’s time to create a back to finish off the main case. This can be done using a 1/4” piece of plywood of your choosing. Cut the panel to size and create the radiused top using either a bandsaw or Sabre saw. Test-fit your results and prepare for the glue-up.

Cut the curve of the back at the bandsaw.

After inserting the back, slip the shelves and divider into place with glue and apply even clamping pressure.
Glue up the main case by installing the three shelves first. Next, push the back panel into its corresponding groove from the bottom. Once the back is in place, slide the case bottom into the dado. Check your shelf recess spacing and ensure the bottom is flush with the case sides. With all the pieces in place, go ahead and apply clamps. Polish off your assembly by installing the apron into the case bottom.

The door parts are held together with twin dowels. Drill these with a self-centering doweling jig.
Door and More
Don’t let the contour of the door discourage you. Its frame is constructed of four pieces and joined using dowels. Start by cutting the stiles and rails. Drill the joinery using a Dowel-It® jig with a 1/4” brad-point bit. Use 1 1/4” dowels to give each mortise a 5/8” depth. Dry fit your assembly and check its dimensions against the main case. Go ahead and glue up the door frame and begin to lay out the arch for the interior. To match the radius of the case, lay the door facedown onto the bench and trace the profile of the case onto the door. Cut both arched profiles using a Sabre saw. Then, clean up any blade marks using a spindle sander.

The top of the door starts as a wide piece and will be cut to shape.

Shape the outside of the
door first.

With a jigsaw and a new blade, cut the inside curve of the door.
With the frame refined, head over to the router table and create the rabbet you see on the backside using a 3/8” rabbeting bit.

A rabbet bit forms the rabbet for a custom-cut piece of acrylic.

Square up the rounded corners left by the rabbet bit.
Hinges and Hardware
The next step is to secure the door to the cabinet using SOSS® 101 concealed hinges. Admittedly, these can be a bit finicky to install, but spending a little extra time on a good template makes for quick, accurate mortises. A 1/4” piece of plywood for the routing plate with a 3/4“-thick plywood strip scabbed on as a spacing/reference guide will suffice. When creating the mortising template, make sure to account for the distance from the outside of the guide bushing to the cutting edge of the router bit. A trial run on a scrap piece will help prevent any extraneous emotional distress.

A plywood template guides the bit to form the mortises for the Soss hinges.
Once the mortises are complete, install the hinges and make sure the edges of the door are flush with the cabinet. Proceed by creating the recesses for the rare-earth magnets over at the drill press. Depending on the hardware of choice, you may find that you need to counterbore a hole to accept the attachment screw for the door pull. This step can be achieved while still at the drill press.

Use a Forstner bit to recess magnets in the door and case.
You will notice that there are two hooks attached to the apron. Layout their position (contingent on teacup size) and mark the attachment locations with an awl. With a functioning door and hardware locations established, it’s time to create the drawer.

The dadoes in the drawer dividers are formed at the table saw with a single kerf.
Creating Drawers
The recesses we created on the shelves in the beginning are to accommodate a variety of your favorite loose-leaf teas. However, there are some of us that still enjoy the convenience of pre-packaged tea—this is where the drawer earns its keep. Start by cutting the sides, front and back to their final dimensions. The rabbet joinery you see can all be created at the table saw using the same methodology applied to the shelves. Next, create the divider grooves across the grain with the same blade.

Define the bottom of the finger slots using a forstner bit.

At the bandsaw, finishing creating the finger slot.
Glue up the drawer, then size and fit the tea packet dividers. As you can see in the photos, the two holes that make up the pull for the drawer were drilled after the assembly. Normally this would be done prior. However, I had reservations about what appropriate hardware (if any) would be used, so this was done after the fact. Avoid my indecision-induced blunder and do as I say, not as I do. When the drawer is complete, check the fit and make any necessary alterations to ensure a smooth fit.

Glue up the drawer with the dividers in place. A pair of cauls on each joint apply even clamping pressure.

For a low-profile pull, simply drill a pair of holes in the front of the drawer, making sure to avoid the dividers.
Finish and Installation
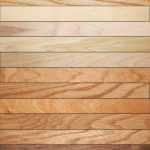
The ash used in this project was too handsome to alter or disguise, so I chose a clear lacquer finish to protect as well as accentuate some of its curly qualities. Once the finish has cured, reattach all of the hardware and begin to place all of your favorite loose-leaf blends in their respective containers. With your cabinet complete, all that’s left to do is heat up some water, pour a cup, and steep in your own success.
Supplies
- 35mm acro knob Lee Valley #00A7923
- 2 Pair of Adhesive-backed magnets 1/2” dia. Lee Valley #99K3465
- 2 Soss #101 concealed hinges, 3/8” x 11 1/16“, black finish Rockler #30664
- 2 Single robe hooks, flat black, Rockler #31710
- 9 Straight-sided glass jars (6oz), black plastic lid, Uline #S15847PBL
- 1 Clear, scratch and UV resistant Acrylic, McMaster Carr #8560K257
Related: Here’s a different way to make the arch for the door.
Here are some supplies and tools we find essential in our everyday work around the shop. We may receive a commission from sales referred by our links; however, we have carefully selected these products for their usefulness and quality.