We may receive a commission when you use our affiliate links. However, this does not impact our recommendations.
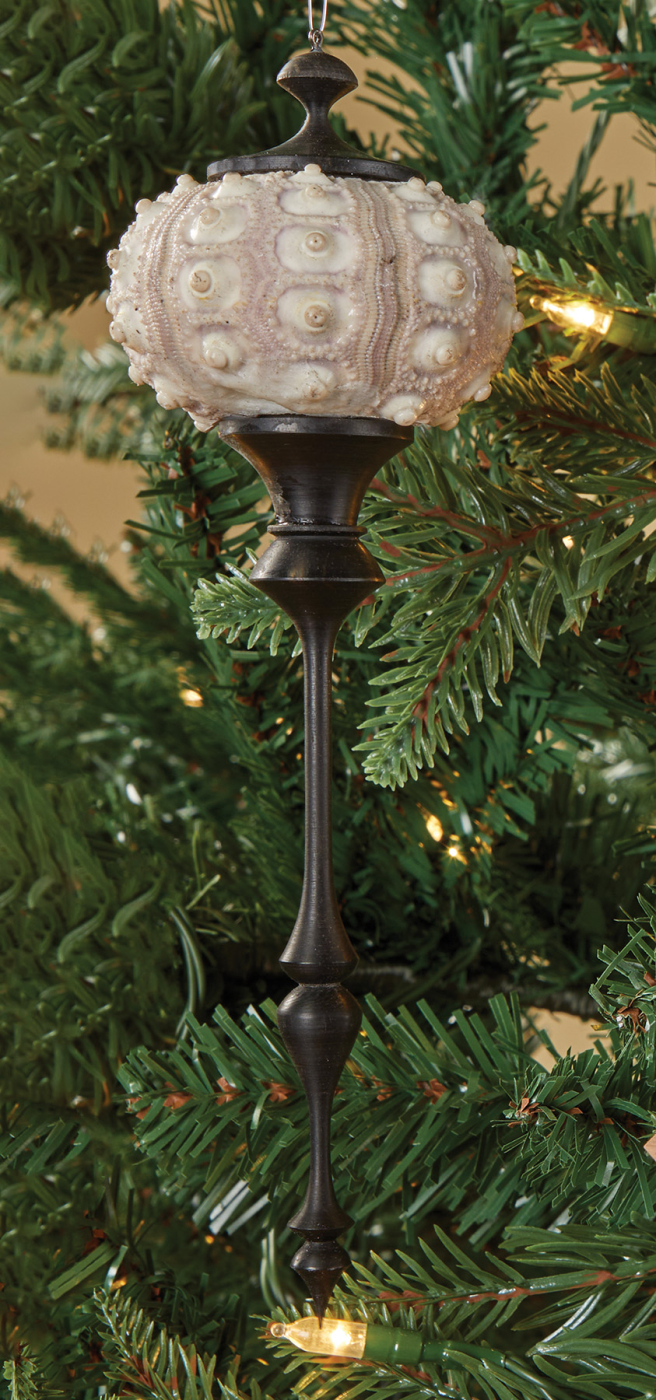
If you spend any time in the turning community, you’ve probably seen this style of ornament before. The hollow urchin shells are available online (and in various species—the smoother ones are thinner and more delicate).
The key to a good-looking urchin shell ornament is to make sure the finials are thin and delicate. Otherwise, the entire thing looks clunky instead of sleek and elegant.
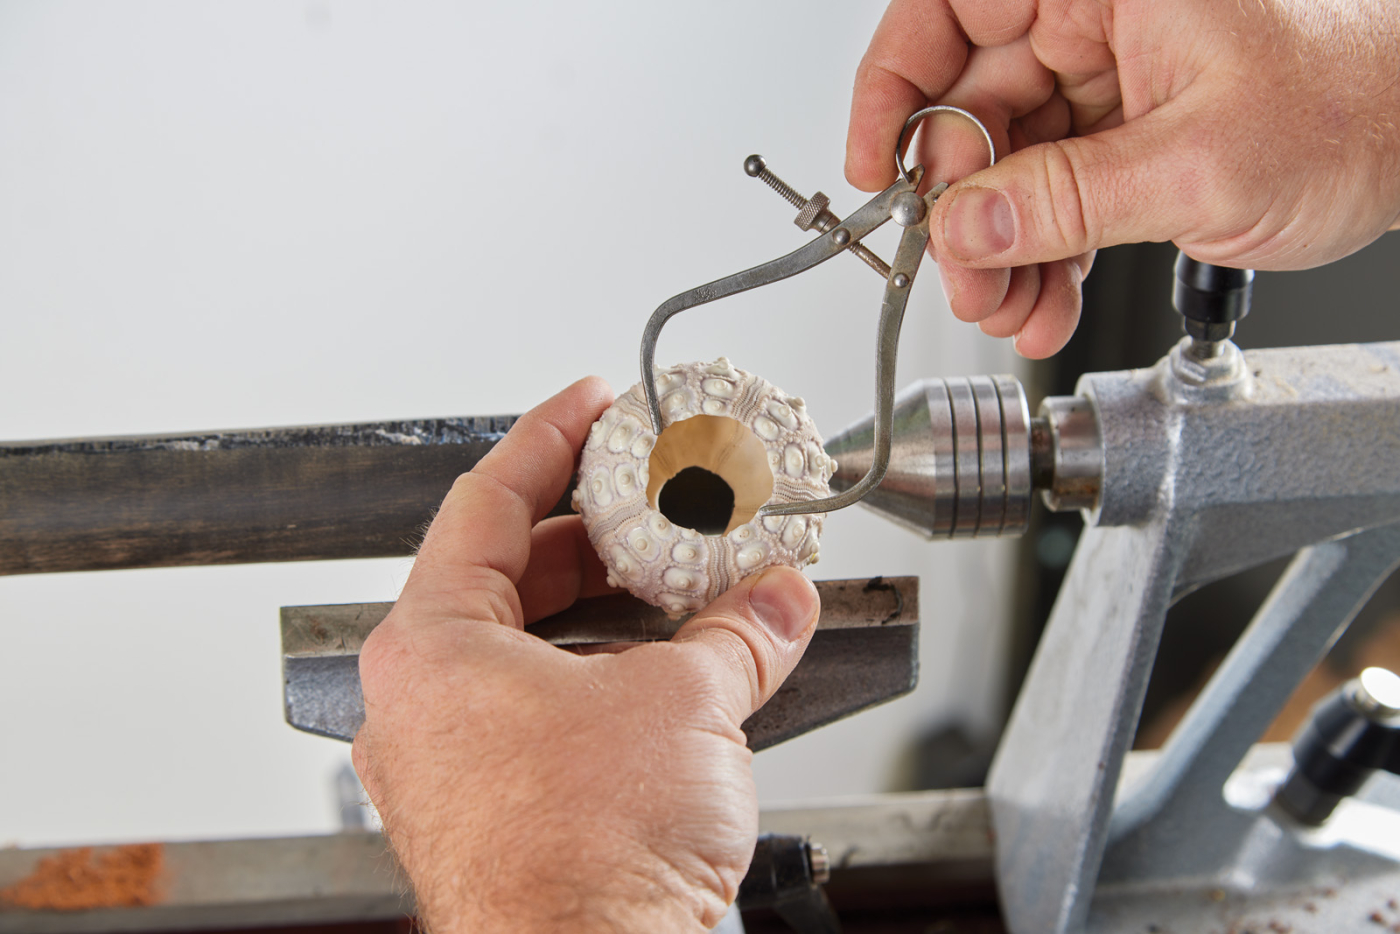
Measure both sides of the shell.
To ensure a striking-look, choose a tight grained, dense wood that won’t distract from the design. Here, I’m using ebony. Start by measuring both openings in the shell with calipers. On the top and bottom, you’ll be turning tenons that fits inside the opening. I put the larger opening to the bottom.
I turn the finials in three parts. In the photo below, you can see the top of the ornament. This is simply a piece with a tenon, sized for the hole in the shell and a sweeping cove cut, capping off in a dome. You can see this shape in the glueup photo (Photo 20). Before parting it off, I’ll put a Jacob’s chuck in the tailstock and drill a tiny (1/32“) hole for an eyelet made from a cut-off fishing hook.
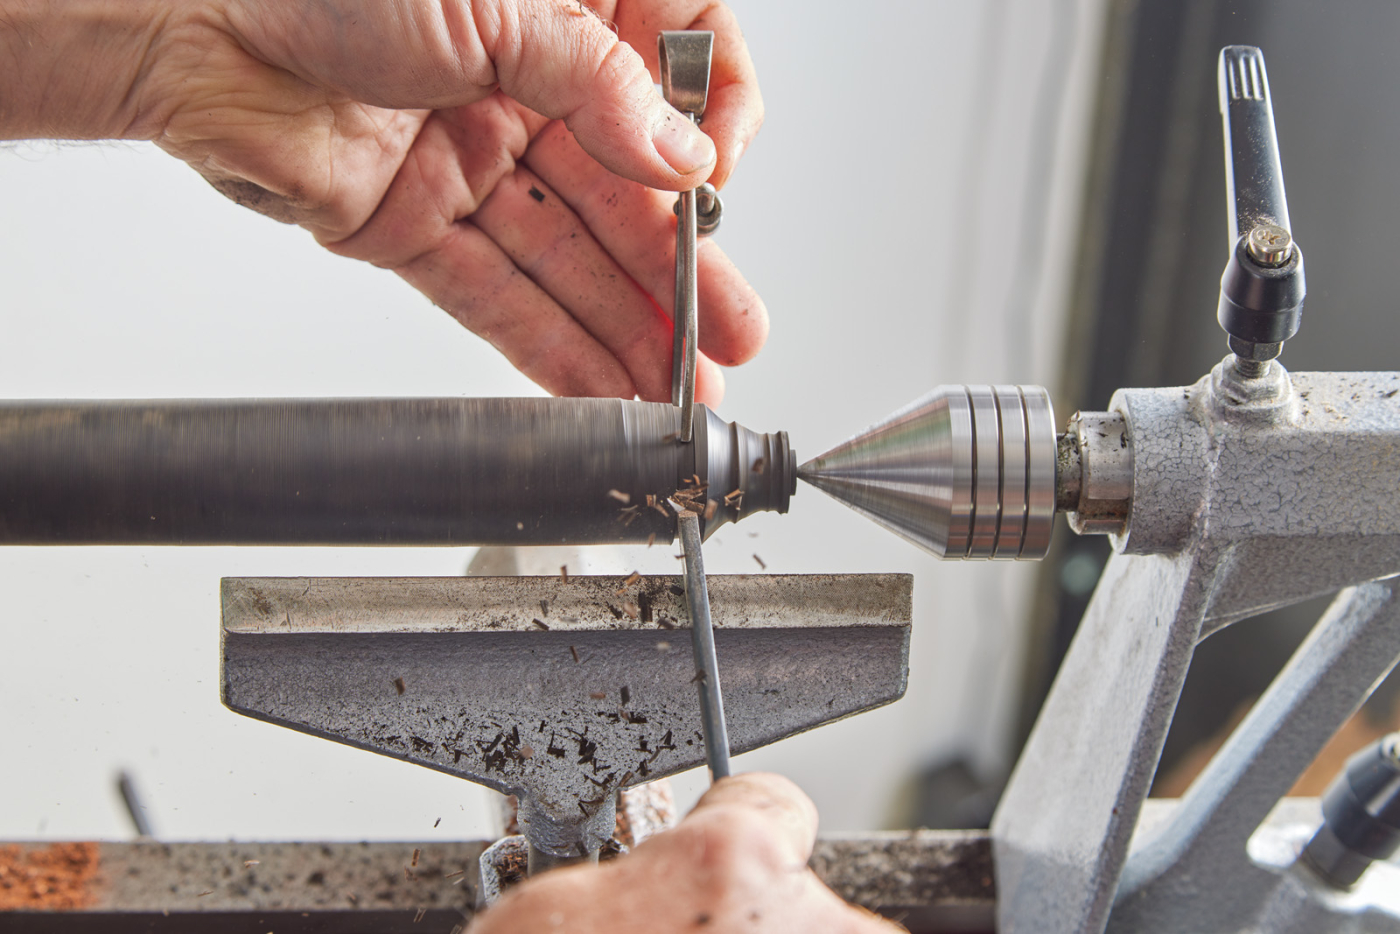
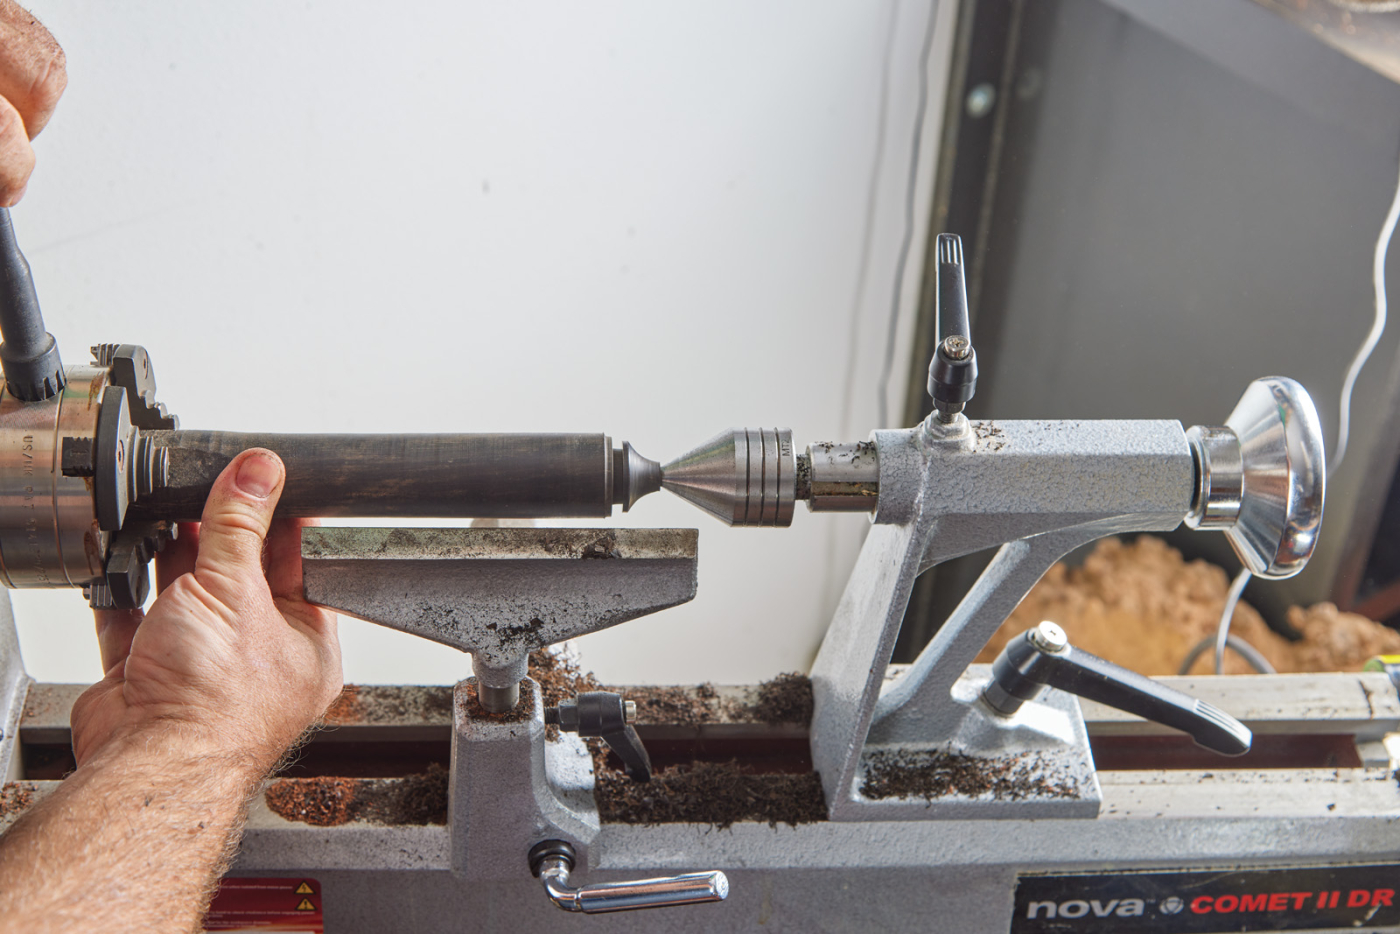
Create a tenon on the finials that match the shell’s respective opening.
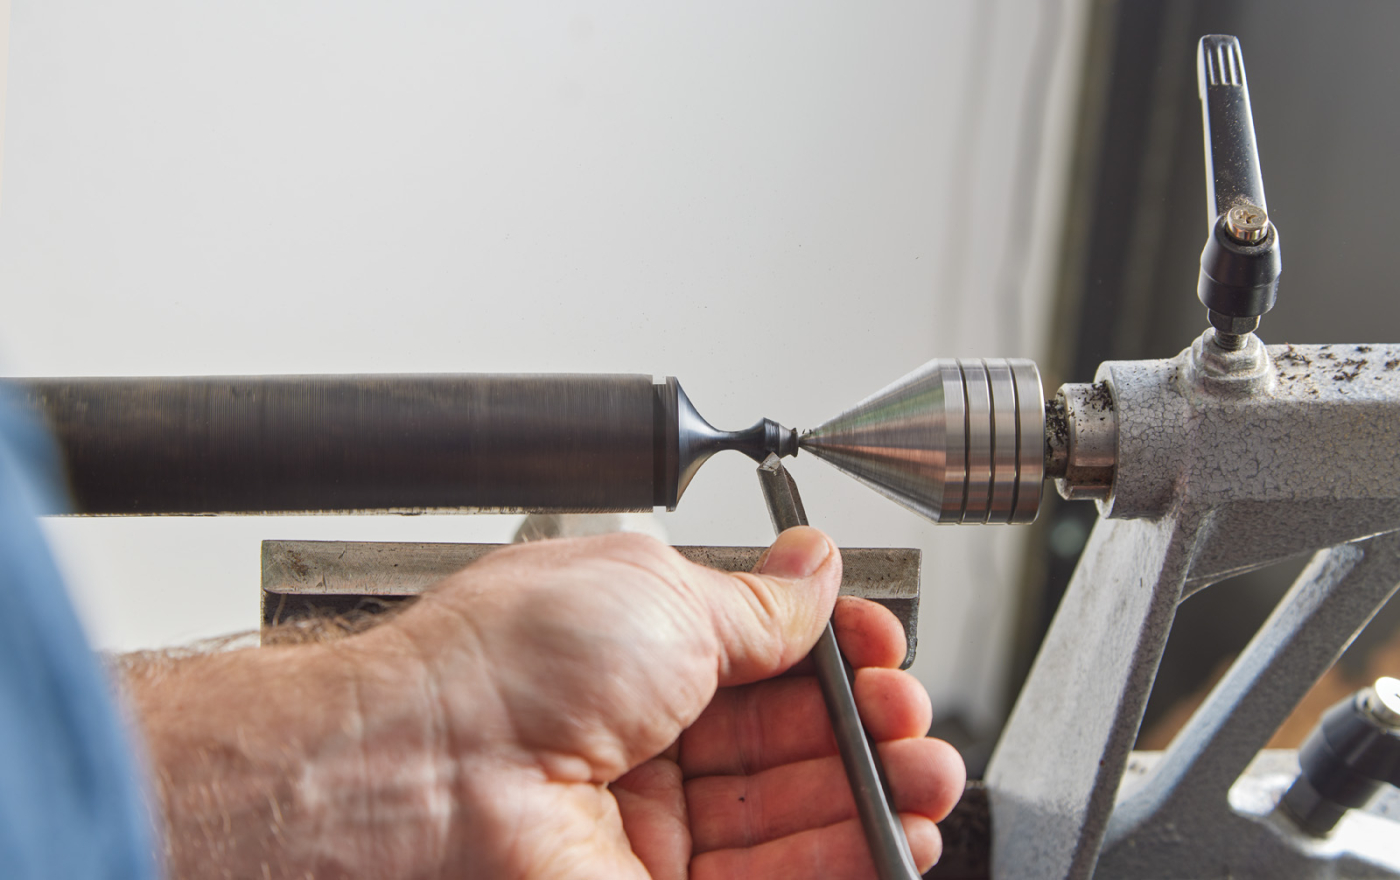
Turn the top of the ornament. This will get a hanger made from a fishing hook eye.
The next part of the ornament is a transition from the shell to the lower finial. I turn this out of thicker stock to keep the diameter large enough to cover the hole in the urchin shell. Doing this allows me to use a less expensive pen turning blank for the lower finial. As you see in the images, this transition has a tenon, a sweeping half-cove, and a hole drilled in the end. The hole will be for a tenon on the lower finial, which is up next.

The lower transition has a drilled hole and a sweeping cove.
This finial is the trickiest and most critical part of the ornament. You need a good shape here, or the entire thing will look off. There are a few tricks when working with thin finials. First, razor-sharp tools and light cuts are key. Work in small sections at a time to keep as much bulk as possible, for as long as possible. Support the blank at all times. Some people will wrap their hand around the tool rest and blank to help support it with their fingers during the cut. I have meat fists, so instead, I use a Rubber Chucky finial center for extra support—it’s the yellow cup you see holding the finial tip. The tip has a ball-bearing to spin with the finial.
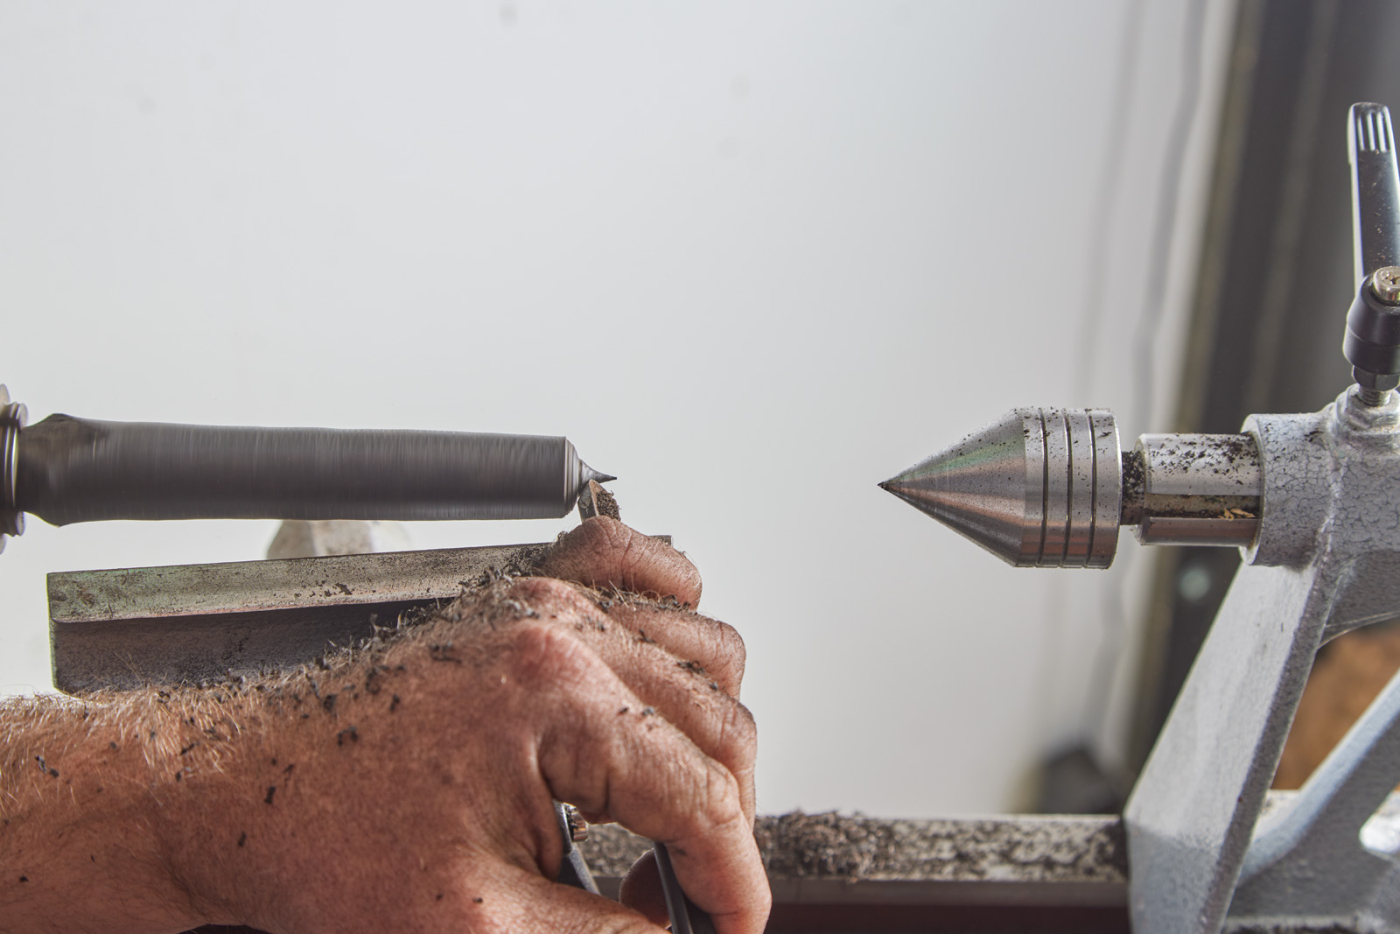
Start with the tip of the finial. Feather-light cuts will helps keep any vibration down. A specialized live center will help support the delicate tip.
Using my specialty ground finial gouge (a spindle gouge with swept-back wings), I start at the tip and work in small 1″ sections at a time. I aim for a good finish off the tool, but I will sand each section as I finish it. Sanding in sections avoids coming back at the very end and accidentally breaking the finial at the finish line. If you do, don’t worry… you’ll break plenty of finials if you turn enough.

Work in small sections at a time, getting each section “right” before moving to the next area.
After the finial is done, it can be glued into the transition piece and the entire ornament can be glued together. You may need to use a Dremel to flatten some of the nubs on the urchin shell for a good seam. When you’re happy with the fit on the top and bottom finials, glue them to the shell. I use the black CA glue from Starbond. It blends right in with the ebony, and if you get any seepage, it’s less noticeable.

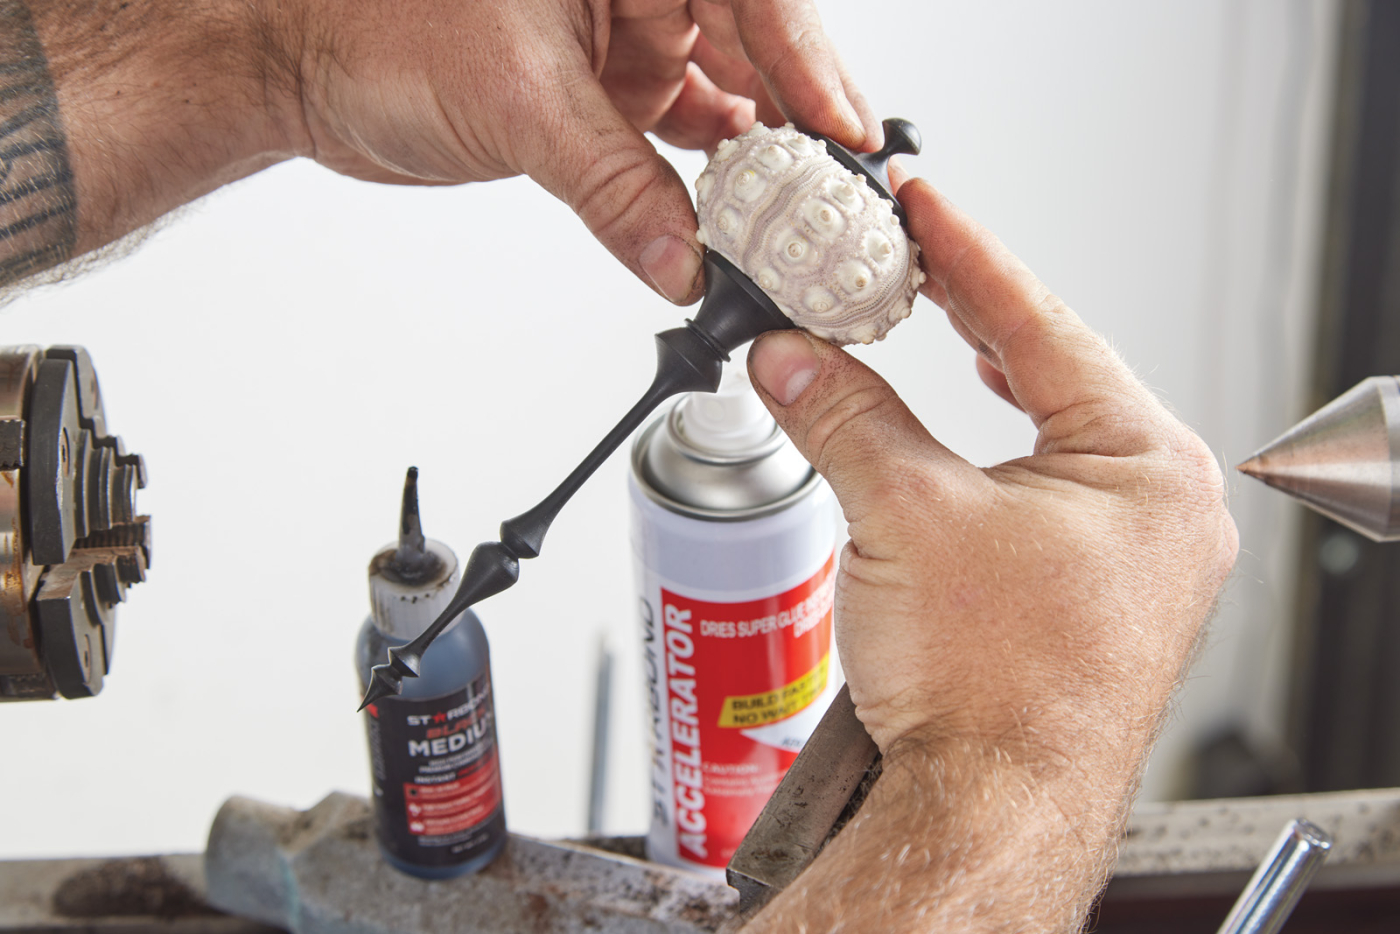
The lower finial’s tenon gets glued into the transition before assembly.
Here are some supplies and tools we find essential in our everyday work around the shop. We may receive a commission from sales referred by our links; however, we have carefully selected these products for their usefulness and quality.