We may receive a commission when you use our affiliate links. However, this does not impact our recommendations.
 Build classic from the Arts & Crafts era.
 Build classic from the Arts & Crafts era.
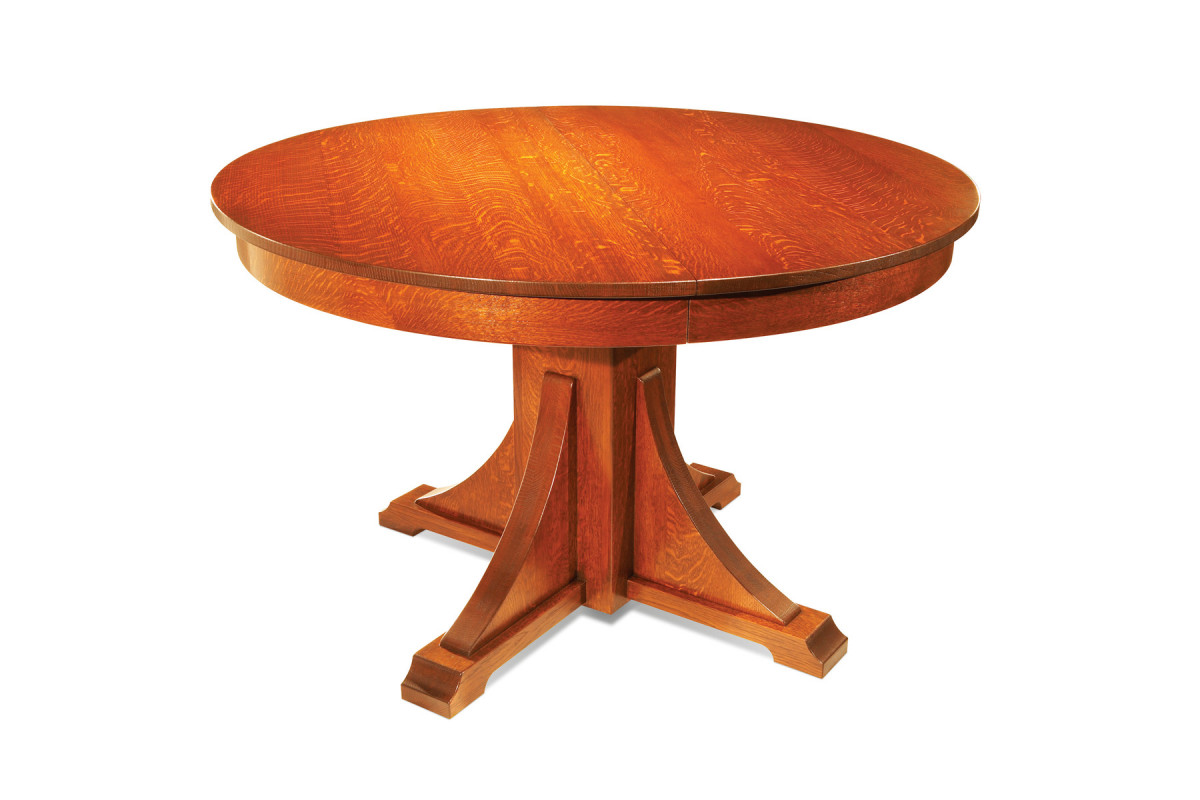
I jumped at the chance to examine an original Stickley Brothers dining table, because I love figuring out how to build antique furniture pieces that I admire. The original version of this table, model 2670, as shown in the 1914 Stickley Brothers Quaint Furniture catalog, was offered in 48” and 54” dia. sizes.
My version is nearly identical to the original, but only a woodworker would notice the differences: The original aprons were steam-bent; mine are bent-laminated. The original table stands on casters. I skipped the casters and slightly increased the pedestal’s height to compensate. Also, the extension hardware is slightly different (and, I daresay, better). Beyond those changes, all the dimensions match the original, I used the same lumber, quartersawn white oak, and all the joints are connected with very thin spines, as they are on the original table.
Building this table is a big endeavor, and it requires a well-equipped shop. You’ll need a jointer and planer, a tablesaw, a bandsaw, a router table and a router, a drill press, an oscillating spindle sander, lots of clamps and a large, flat work surface.
Like the original, my table is made of 13/16” thick boards, except for the feet. Unless you find extra-thick 4/4 rough lumber, plan to buy about 75 bd. ft. of 5/4 quartersawn lumber for the top, leaves, aprons, column and corbels and 30 bd ft. of 8/4 plainsawn lumber for the feet, apron laminations, mounting boards, and splines(the feet on the original table are not quartersawn). Interestingly, the leaves supplied with original Stickley Brothers tables were not always made of quartersawn lumber, and they didn’t have aprons attached. My leaves are quartersawn.
A Tiger and a Bear
Quartersawn white oak was favored by Stickley and other period builders because of its strength, durability and stability. Another timeless virtue is its appearance. Quartersawn white oak boards often show spectacular figure similar to a tiger’s stripes (in fact, it’s sometimes called “tiger oak”).
However, quartersawn white oak boards can also vary greatly in tone, color and figure from board to board—and even within the same board. The figure, especially, can vary from awesome to virtually non-existent! These traits make quartersawn white oak a bear to work with.
Take your time at the lumberyard to find boards with similar color and figure. This job is easier if the boards have been lightly planed (called “hit-and-miss”). If you purchase rough lumber, the first step is to lightly plane each board to reveal its color and figure. Just skin off the rough surfaces; remove as little thickness as possible.
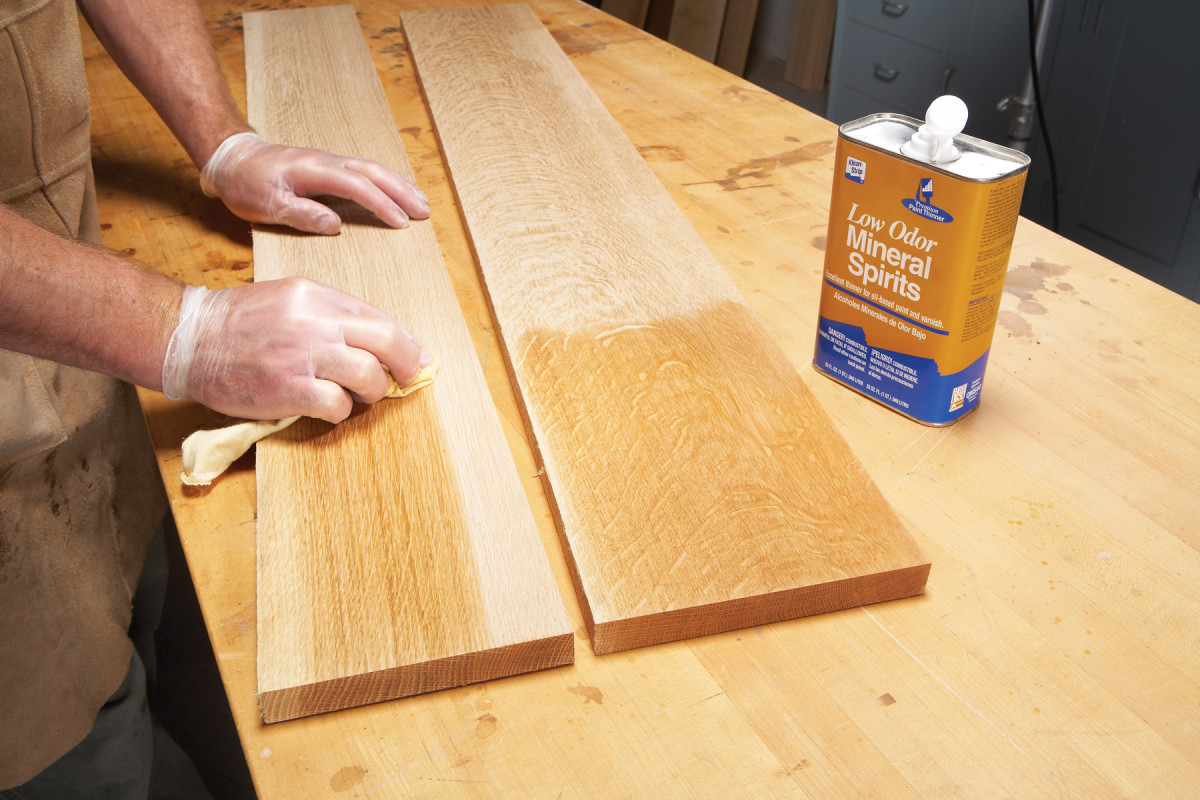
Photo 1. This table is built with quartersawn white oak. Dampen your pieces with mineral spirits to see how they’ll look when they’re finished. Set aside boards with the best match of color, tone and figure for the table’s top.
Now divide the boards according to their visibility as parts of the table (Fig. A and Cutting List): Choose boards for the top first—your best-looking and best-matching boards (Photo 1). You’ll also need good-looking pieces for the outside laminations on the aprons and corbels. Use your least attractive pieces for the pedestal column and for the inside apron and corbel laminations.
 Start with the pedestal corbels
Each corbel (A) consists of three 13/16″ thick laminations. Plan to glue up six 19″ by 13″ blanks—this size allows each blank to contain two corbel laminations. Use random width pieces for each blank, so the splines will be staggered when the laminations are glued together.
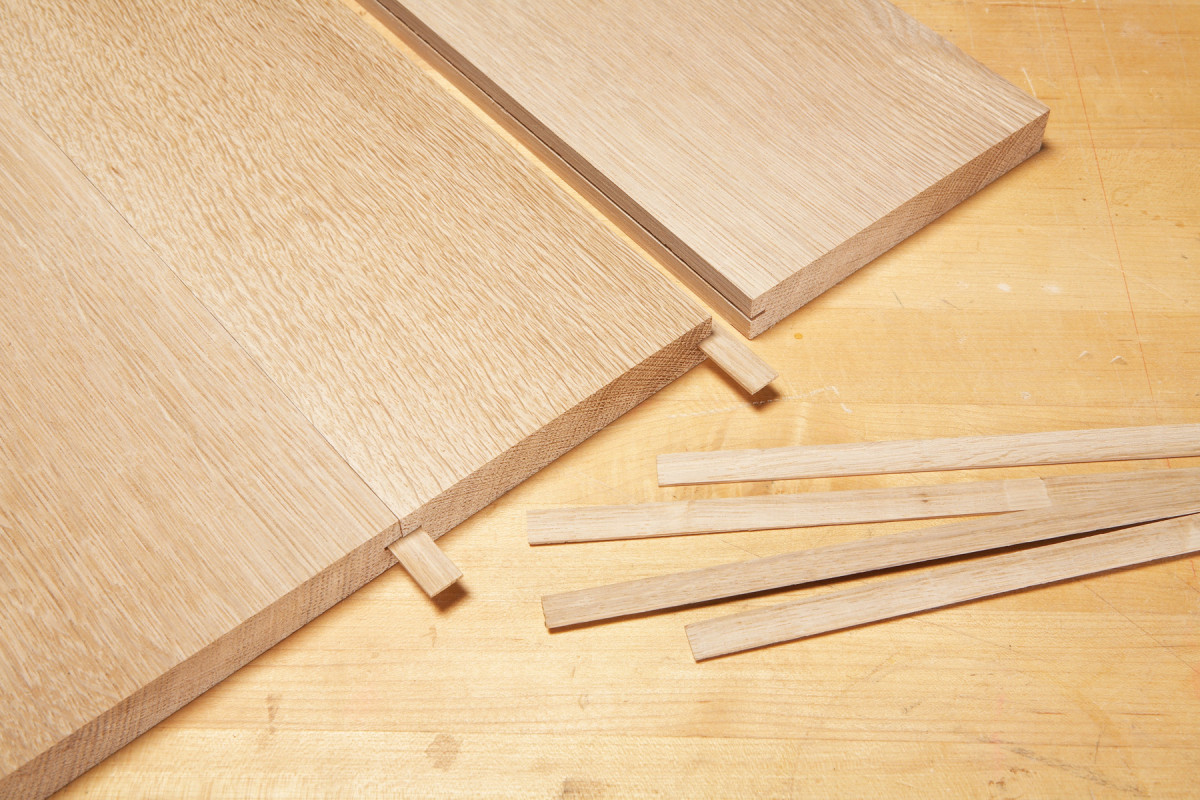
Photo 2. All the joints in this table feature thin splines, just like the original Stickley Brothers table.
On your router table, rout thin, shallow grooves on the edges of all the pieces (Photo 2). Set the fence to cut 1/4″ deep and install a 1/16″ slot cutting bit. Set the bit’s height to center the slots. Save this setup; splined joints are used throughout the table.
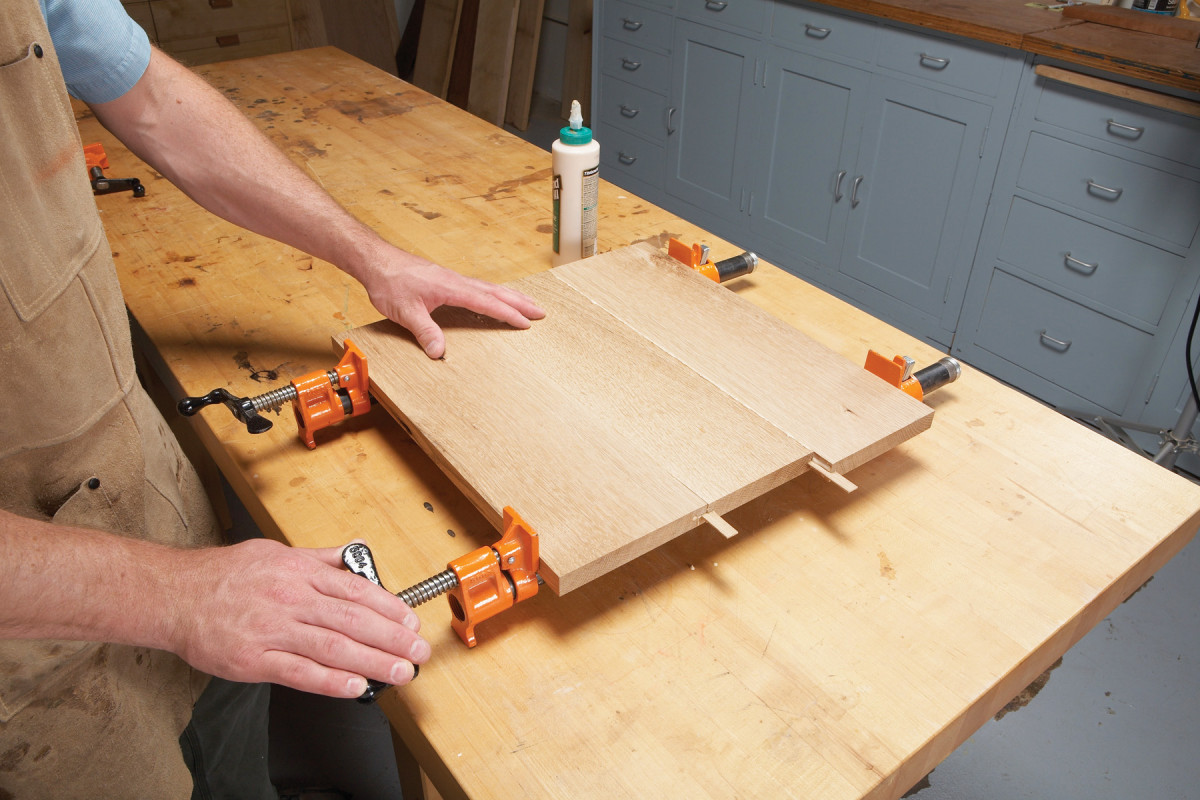
Photo 3. Start by gluing up laminations for the corbels. The corbels are the thick, curved pieces that connect the feet to the pedestal’s column. Each corbel contains three laminations.
Rip 1/16″ thick splines (B) from a 1/2″ thick by 50″ long white oak blank on your bandsaw or tablesaw. Install a zero-clearance throat plate insert and use a pushstick. Test-fit the splines. They should slip in the grooves with enough play for a piece of paper in both width and length. Once you’ve got the setup, make all the splines necessary to complete the table.
Glue up the lamination blanks. They must be absolutely flat. (Photo 3).
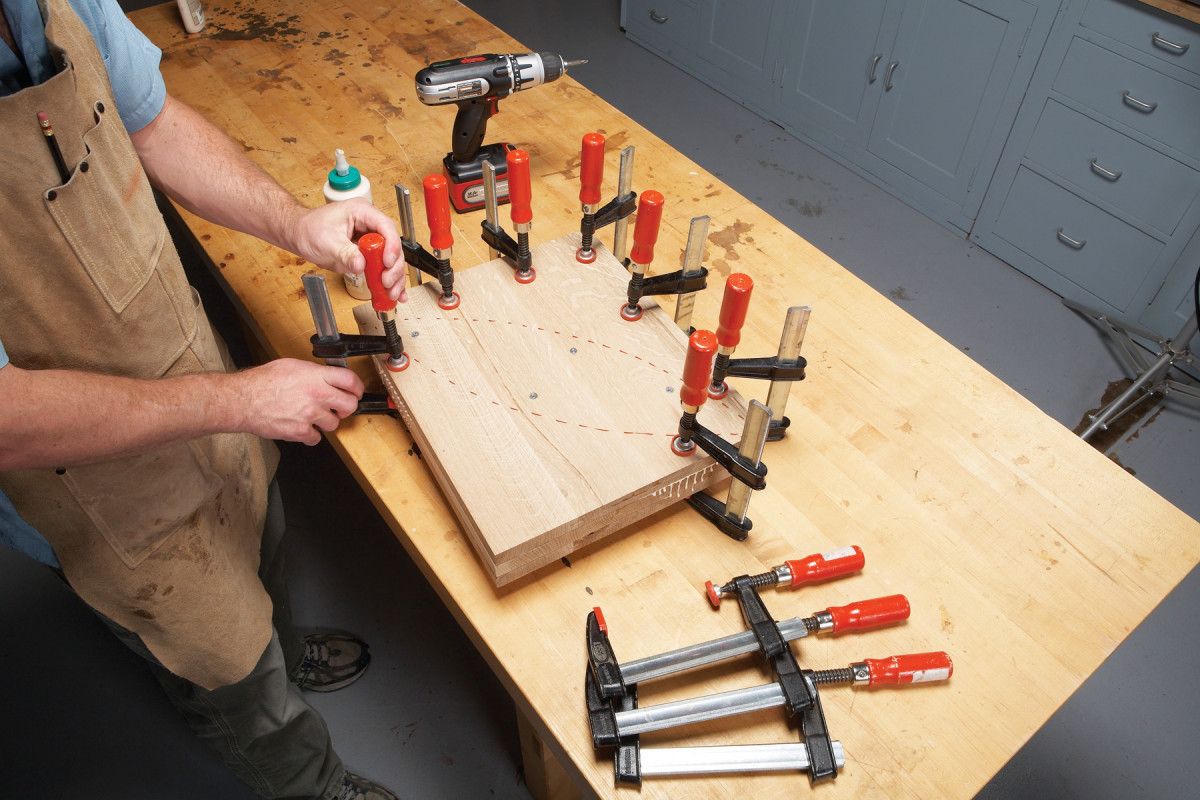
Photo 4. Gluing three laminations creates a blank that contains two corbels. Drive screws in the waste area between the two corbels to clamp the center. Then clamp the perimeter.
Glue three blanks together to make a “super blank” that will yield two corbels (Photo 4). Draw dotted lines to roughly define the corbels. Then drive screws to assure that the center of the super blank draws tight.
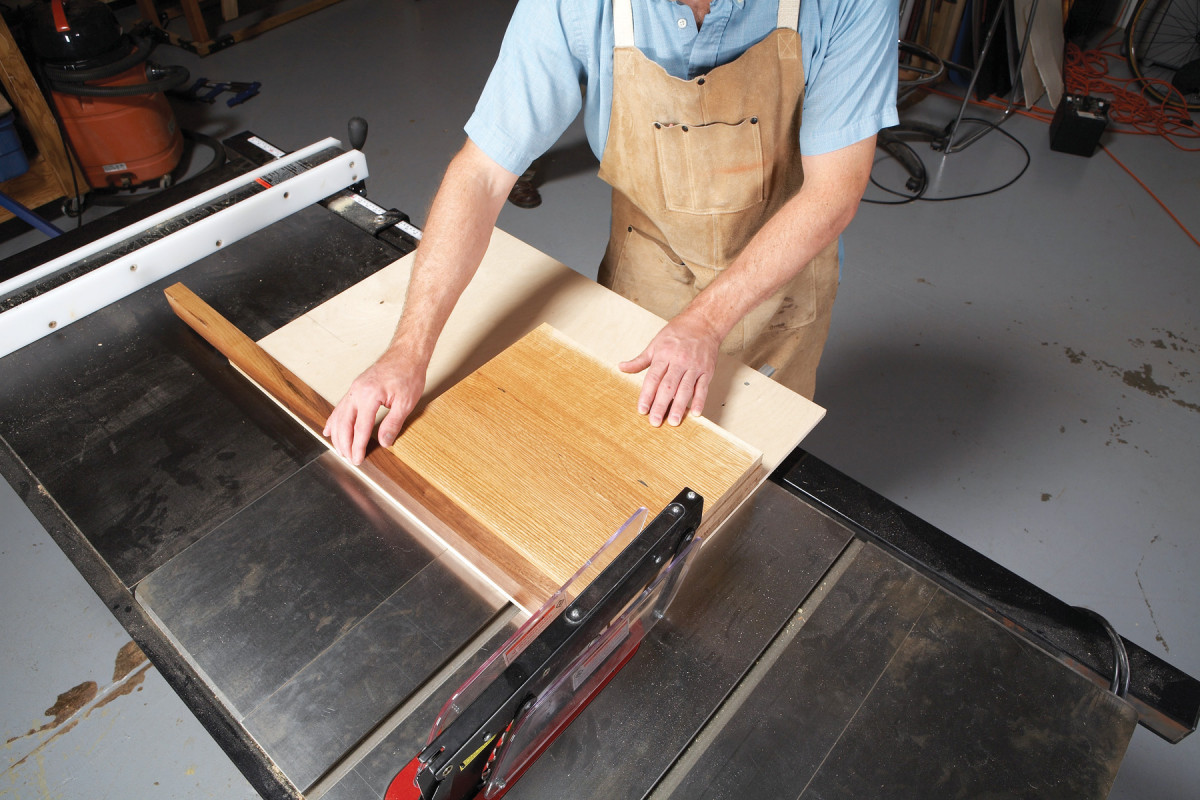
Photo 5. Square two opposite corners of each corbel blank. Crosscut the ends after you’ve jointed both long-grain edges. A sled makes the large blank easier to handle and cut accurately.
Square the blank. First, joint the long-grain edges. Then crosscut the ends square, using a shop-made sled (Photo 5).
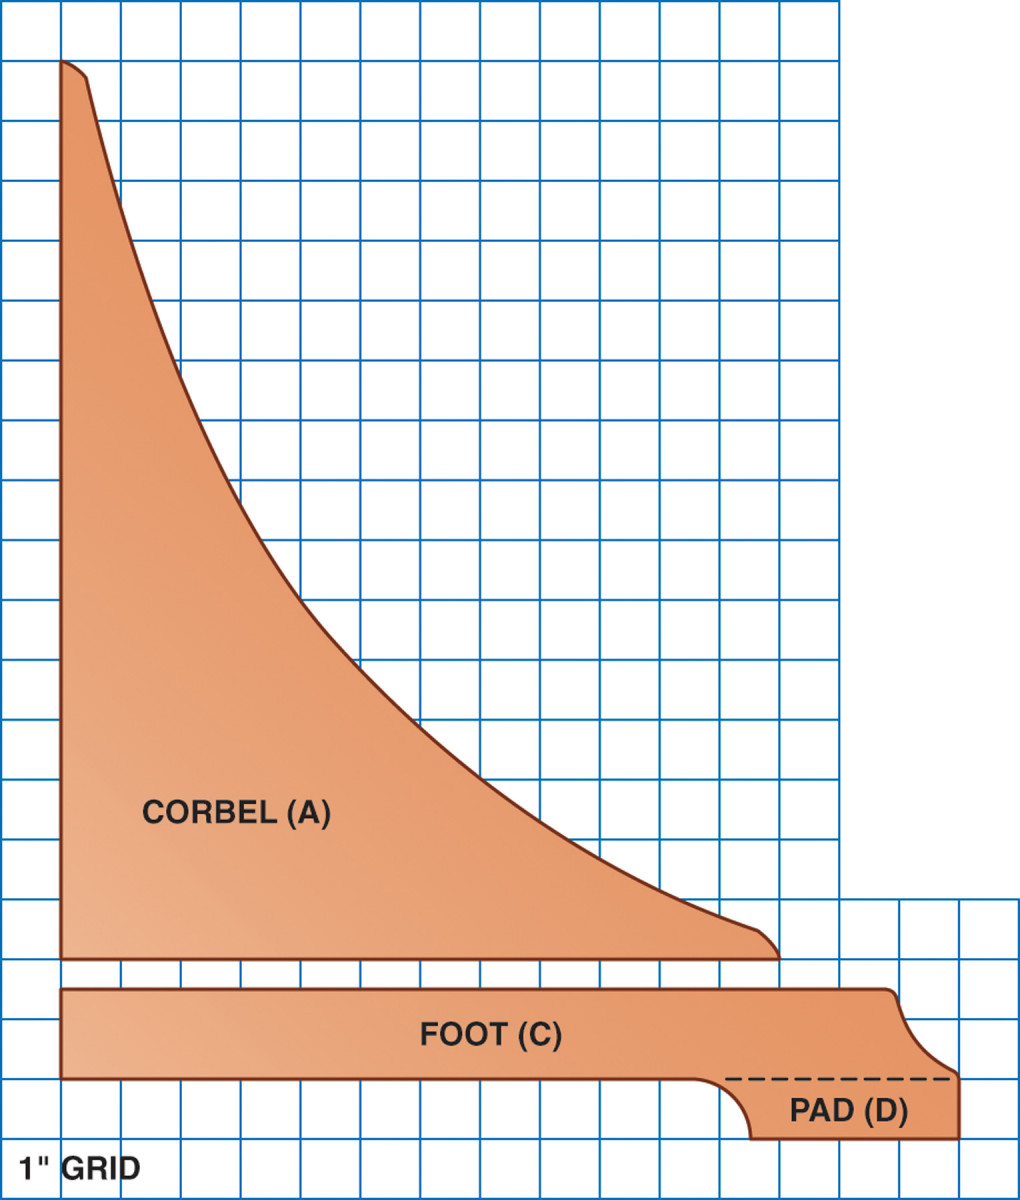
Fig. B)
Use a pattern (Fig. B) to trace the exact profile of two corbels on each blank.
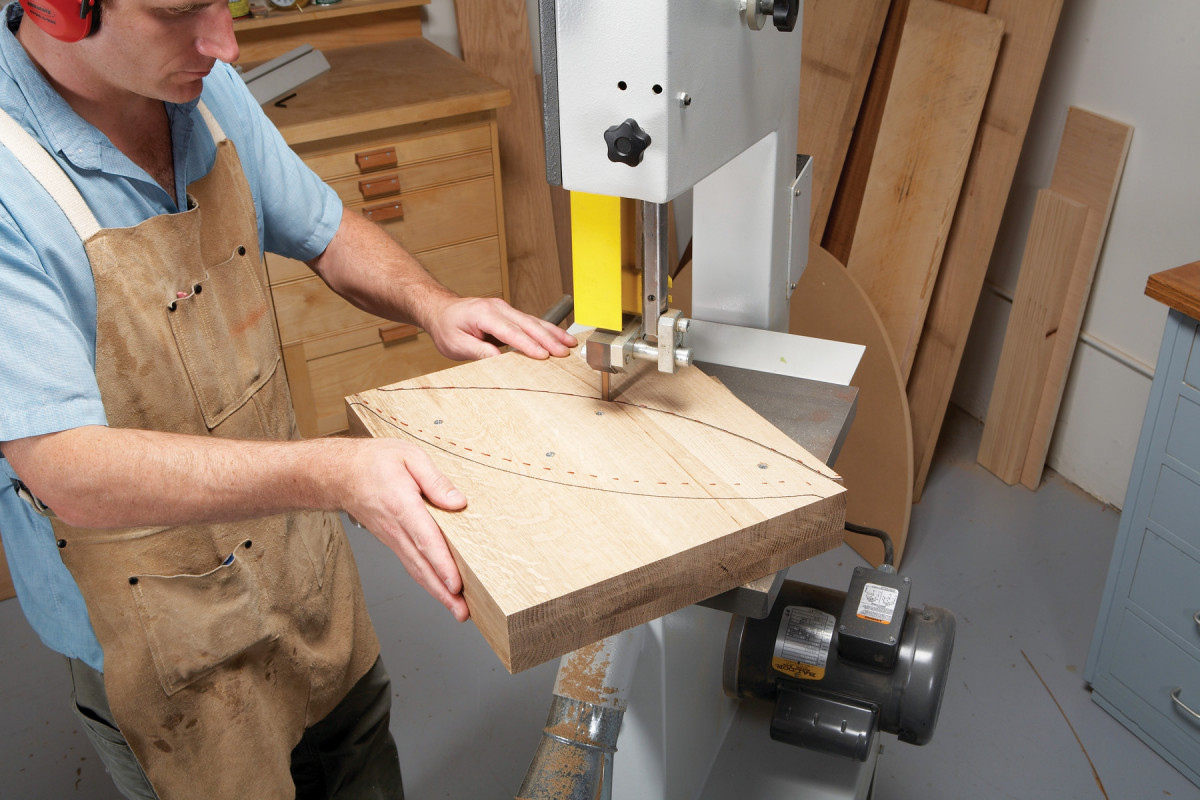
Photo 6. Saw out each corbel slightly oversize. Then sand to the line with an oscillating spindle sander or a sanding drum mounted in your drill press.
Band saw the corbels from the blank (Photo 6). Follow the line very closely, as the thick corbel makes for heavy sanding!
Smooth the curved section of the corbel on an oscillating sander.
Rout a 1/8″ radius roundover on the curved edges of each corbel and then sand each assembly smooth.
Attach the corbels to the feet
Cut blanks for the feet (C) from plainsawn 8/4 stock milled to 1-1/2″ thickness. Mill another piece to 1″ thickness for the pads (D). Glue a pad to each foot blank.
Use a pattern in Fig B to draw profile on the foot. Rough cut the profiles on the bandsaw. Then sand to the pattern lines. Sand the entire assembly smooth Rout a 1/8″ radius roundover on the outside edges. Then sand each foot smooth.
Fasten the feet to the corbels. To make sure their back edges are flush, lay each corbel long-grain edge down on your workbench and butt the foot against it. Clamp the corbel to the bench and the foot to the corbel, using a clamping block made from the curved corbel offcut. Pre-drill all of the screw holes. Remove the foot and elongate the four shank holes farthest from the column to allow for the corbel’s seasonal movement.
Starting at the column end of the foot, squeeze a 4″ long bead of glue down the center (don’t glue the corbel full-length). Re-clamp the foot to the corbel and drive the screws.
Assemble the pedestal
Cut the column sides and ends (E and F) to final dimensions. Then rout slots for the splines on the edges of the sides and on the faces of the ends.

Photo 7. Fasten each assembled leg before you glue the column together. A rabbeted gauge block correctly positions the upright. Use a custom clamping block to hold the assembly while you drill and install the screws.
Fasten the foot/corbel assemblies to the column pieces, using a 1″ thick gauge block with a 3/8″ deep rabbet for positioning (Photo 7 and (Fig. C). Clamp the pieces together, using the same curved clamping block you used earlier. Drill pilot holes for the screws. You don’t have to elongate any of the shank holes for this long-grain joint. Remove the clamps. Apply glue to the back edge of the corbel. Re-clamp the joint and drive the screws. Remove any glue that squeezes out.
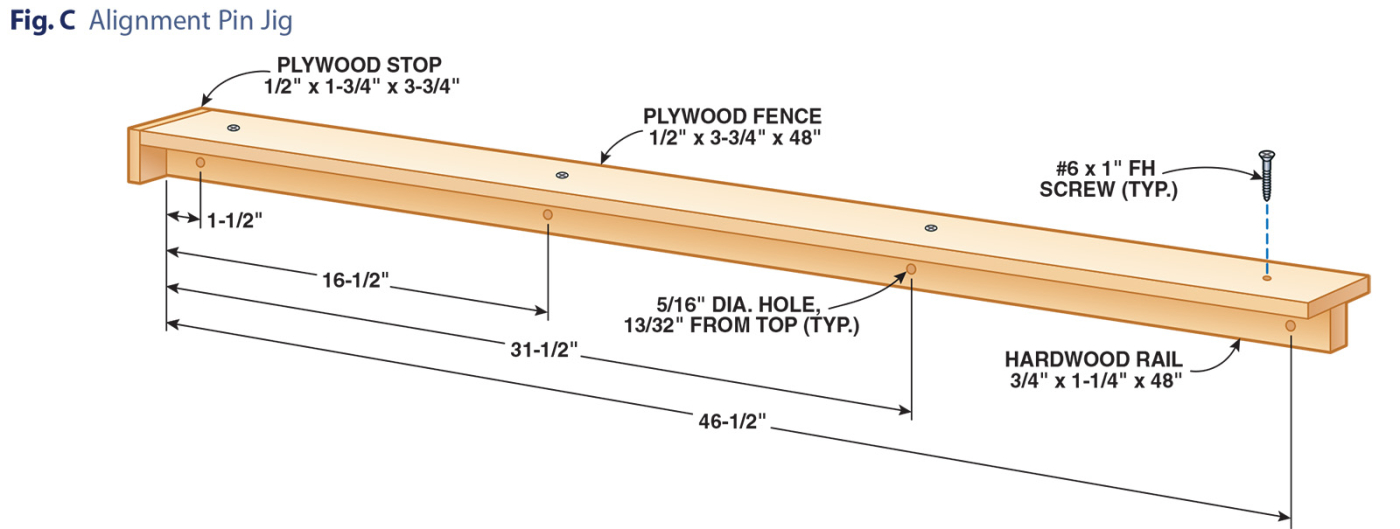
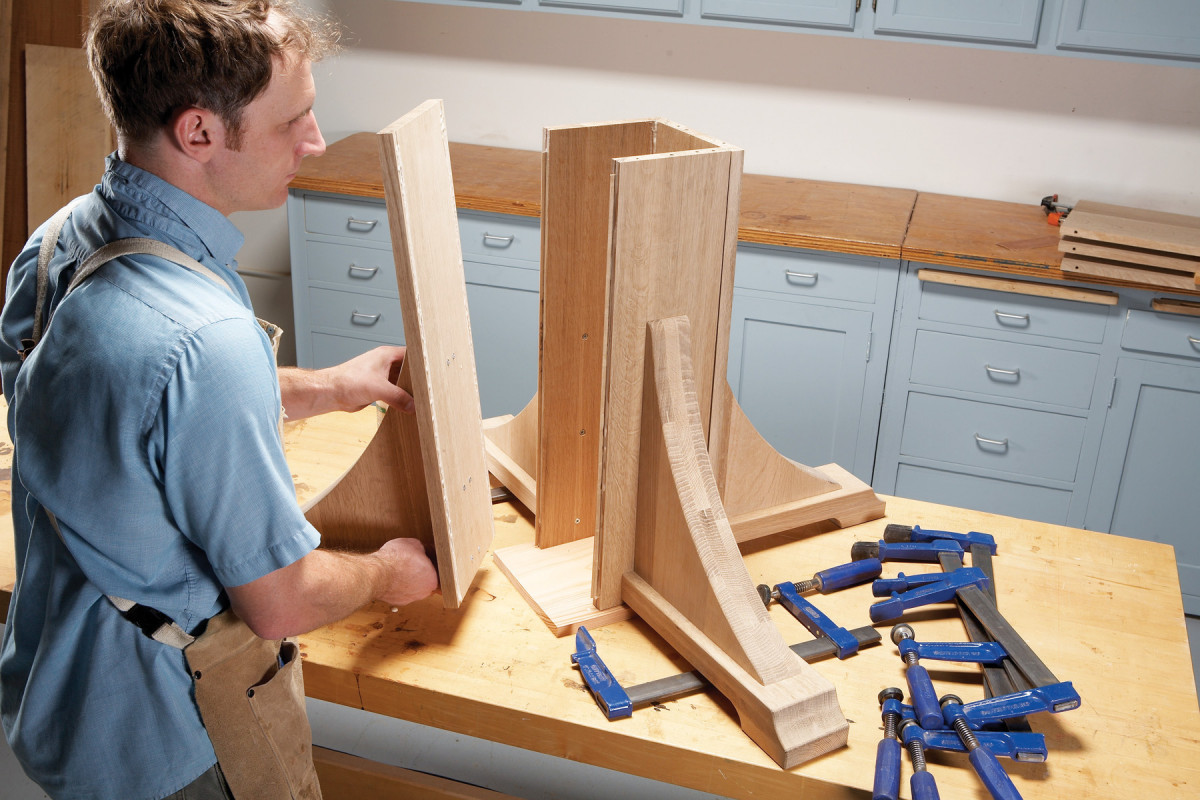
Photo 8. Glue the pedestal together on a level surface. A gauge block supports the column at the correct height and automatically aligns all four uprights.
Using a 1/2″ thick gauge block for support, glue the four foot/corbel/column assemblies together on a large flat surface (Photo 8). Use the top of your tablesaw if your bench is too small.
Round over any remaining sharp edges and finish-sand the pedestal.
Install the mounting boards. They run diagonally and are centered on the column.
Build the top in two half-round sections
Glue up two blanks, one for each half of the top. Assemble all of the joints with thin splines. Remove squeezed out glue.

Photo 9. Glue up two blanks to make the top, one for each half. Joint the inside edge of each blank.
Joint one edge of each half of the top (Photo 9). If the blank is too large to handle on your jointer, use a straightedge and a router equipped with a flush-trim bit.
Glue up apron blanks. Cut them to width and length and joint the edges.
Make a half-round 24″ radius (48″ dia.) template for shaping the top halves. Use the template to mark each blank and rough saw them slightly oversize. Screw the template to the bottom of one blank. Clamp the assembly so it overhangs the edge of your bench, with the template on top.
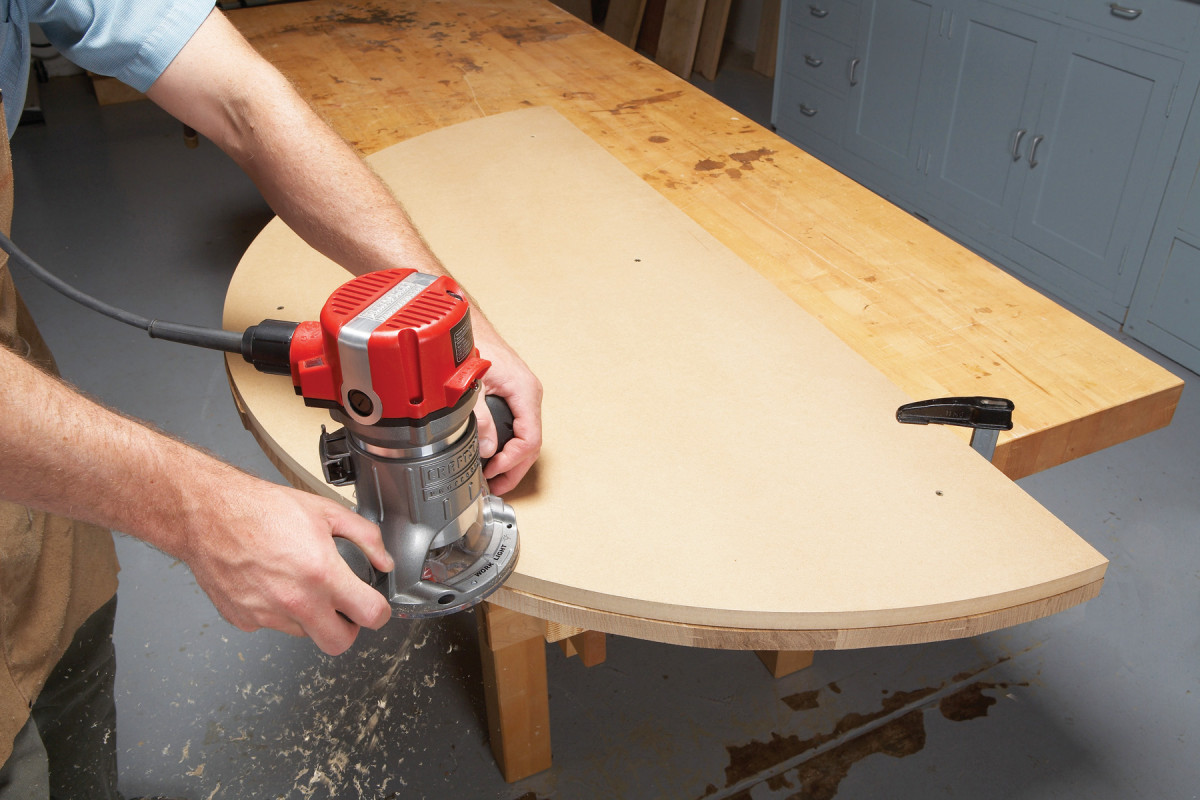
Photo 10. Rout each half-round shape using a flush trim bit with two bearings to avoid tearout. Start from the center and rout to the end, using the top bearing.
Shape the edge of the top in two passes, using a pattern bit with top- and bottom-mounted bearings. Set the bit’s top bearing to ride against the template. Start at the apex of the arc and rout to the end, following the grain (Photo 10).
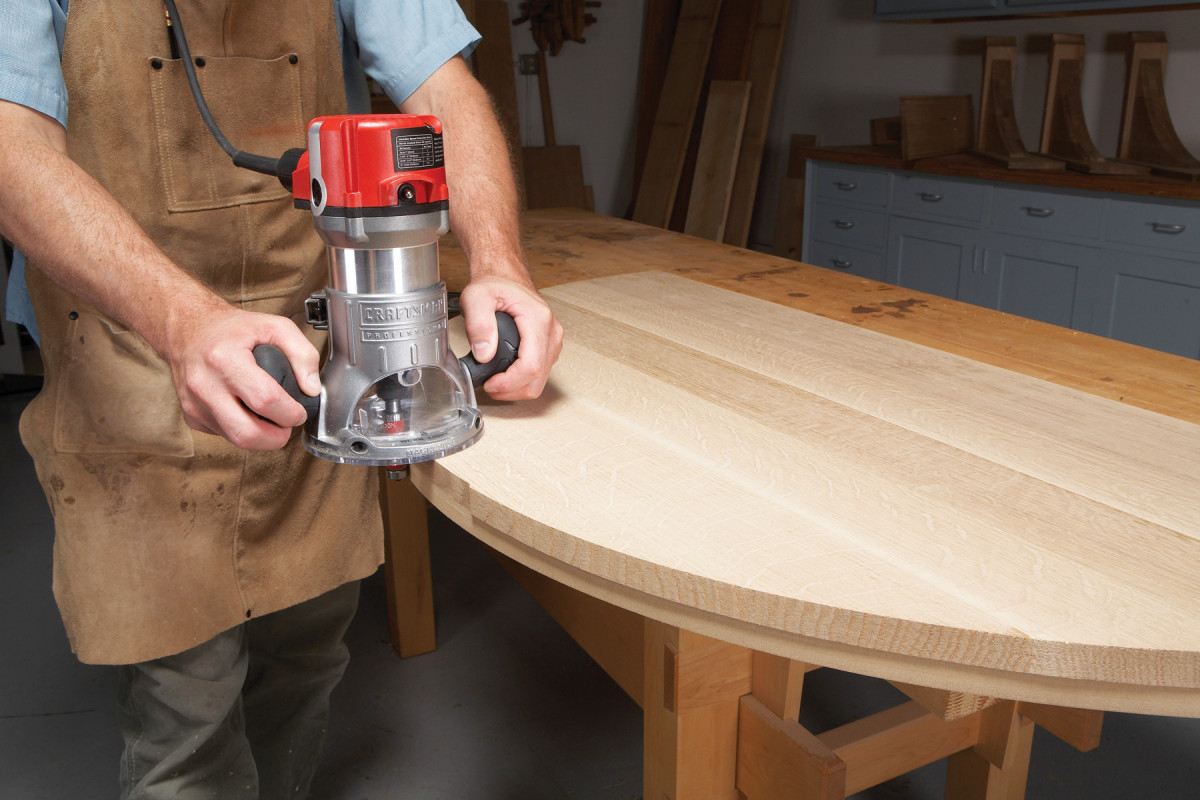
Photo 11. Flip the blank over so the template is on the bottom. Then use the bit’s bottom bearing to finish the job. As before, start from the center and rout to the end.
Un-clamp the top, flip it over and re-lamp it as before. Adjust your router bit so the bottom bearing rides on the template and rout the remainder of the curve, starting at the apex and following the grain (Photo 11). Follow the same procedure to shape the other half of the top.
Make the jig for drilling holes for the table’s alignment pins and grommets. The jig must allow drilling from both sides, so bore the holes in the jig’s rail on the drill press to assure they’re perpendicular.
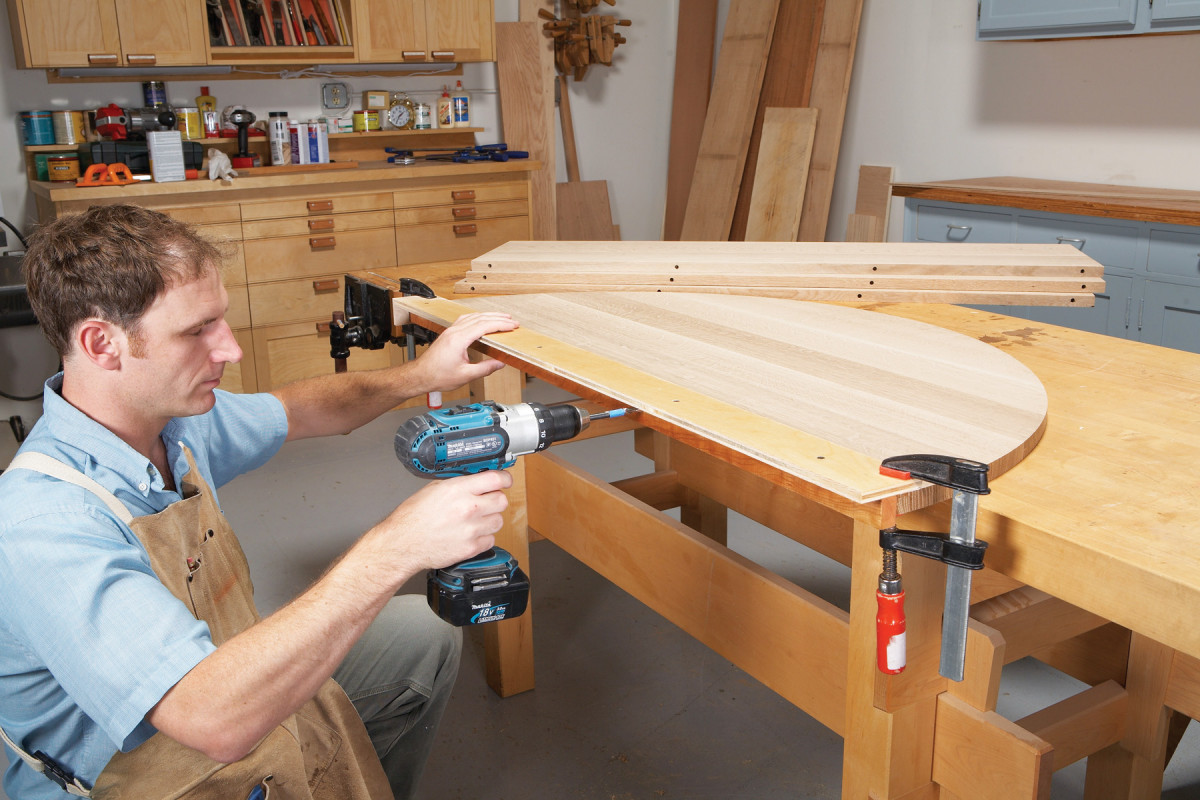
Photo 12. Drill holes for the table pins with a shop-made guide (see Fig. B). The guide assures that all the holes will be perfectly located.
Clamp the jig to the edge of each top half and bore the holes (Photo 12). Be sure to orient the jig from the same end of each half, so the holes align perfectly. Drill holes in the leaves, too.
Laminate the Apron Halves
Make bending and clamping cauls for the aprons by stacking and screwing four pieces of 3/4″ MDF. Cut the bending form to a half-round shape with a 22″ radius. Make five clamping cauls with 22-1/2″ inside radii. I prefer segmented cauls because they are easier to position and manipulate than a single form. Screw on rabbeted stays to keep the laminations from sliding upwards. Align the bending form and clamping cauls and bore holes for optimal clamp placement. Wrap the form and cauls in plastic so they don’t stick to the laminations. Wax your benchtop or cover it with waxed paper, for the same reason.
Re-saw 3-1/4″ wide boards to create the apron laminations (G). Make two laminations from your best quarter-sawn material to dress the outside of each apron. Plane or sand each lamination to 3/32″ to remove the saw marks.
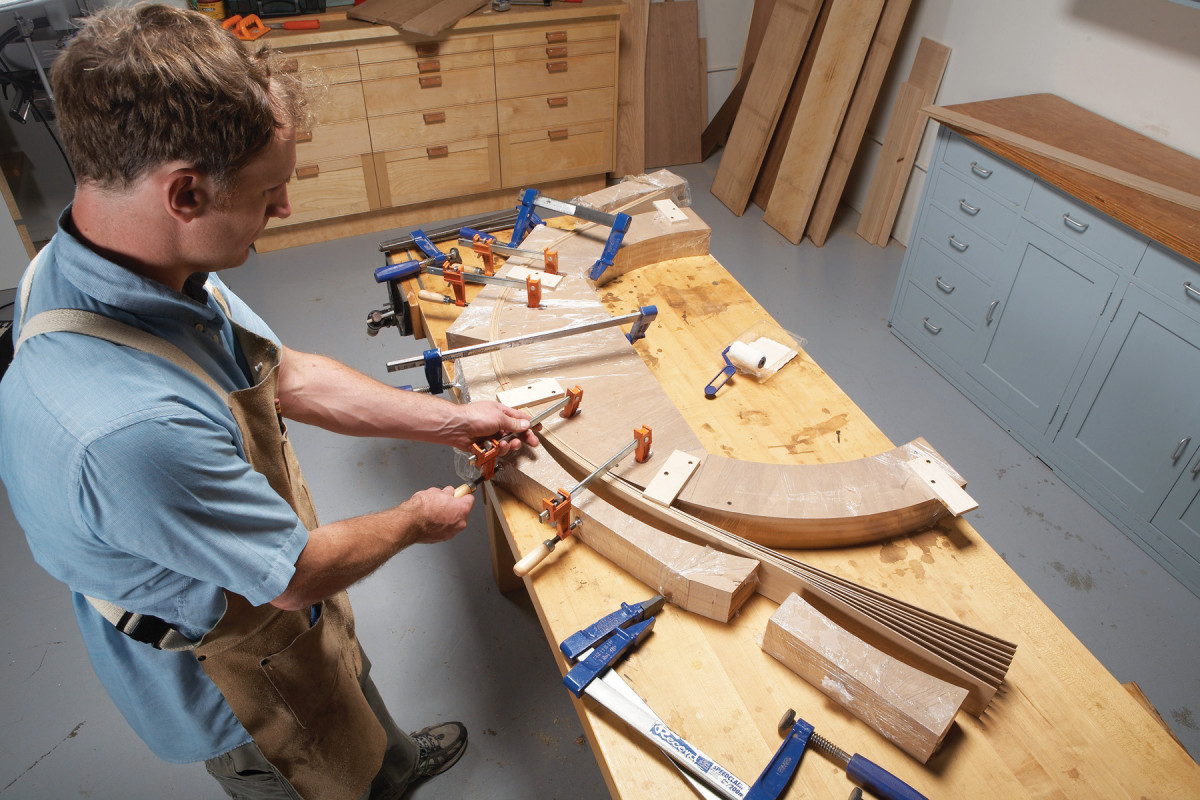
Photo 13. Laminate thin pieces around a form to create the half-round rails. Use a quarter-sawn piece as the outside lamination. Shaped clamping forms distribute pressure evenly. Threshold blocks keep the laminations aligned.
Dry clamp the laminations to get an idea of how long it might take and to identify the pitfalls that might occur during a glue-up. I recommend using Unibond 800 (a urea-formaldehyde glue) for bent lamination work, because of its long open time and hard set, which helps the lamination keep its shape. Mark the center of the dry laminations and the center of the form to assure a symmetrical glue-up (Photo 13).
Apply glue liberally with a small paint roller to each lamination, stack them and move them to the form. Clamp the center first, and then work your way to the ends. Make sure the laminations are tight—signaled by glue squeeze out—before you move to the next clamp.
After the laminations have tack-set, remove the stays so they don’t adhere. Let the glue cure for 24 hours.
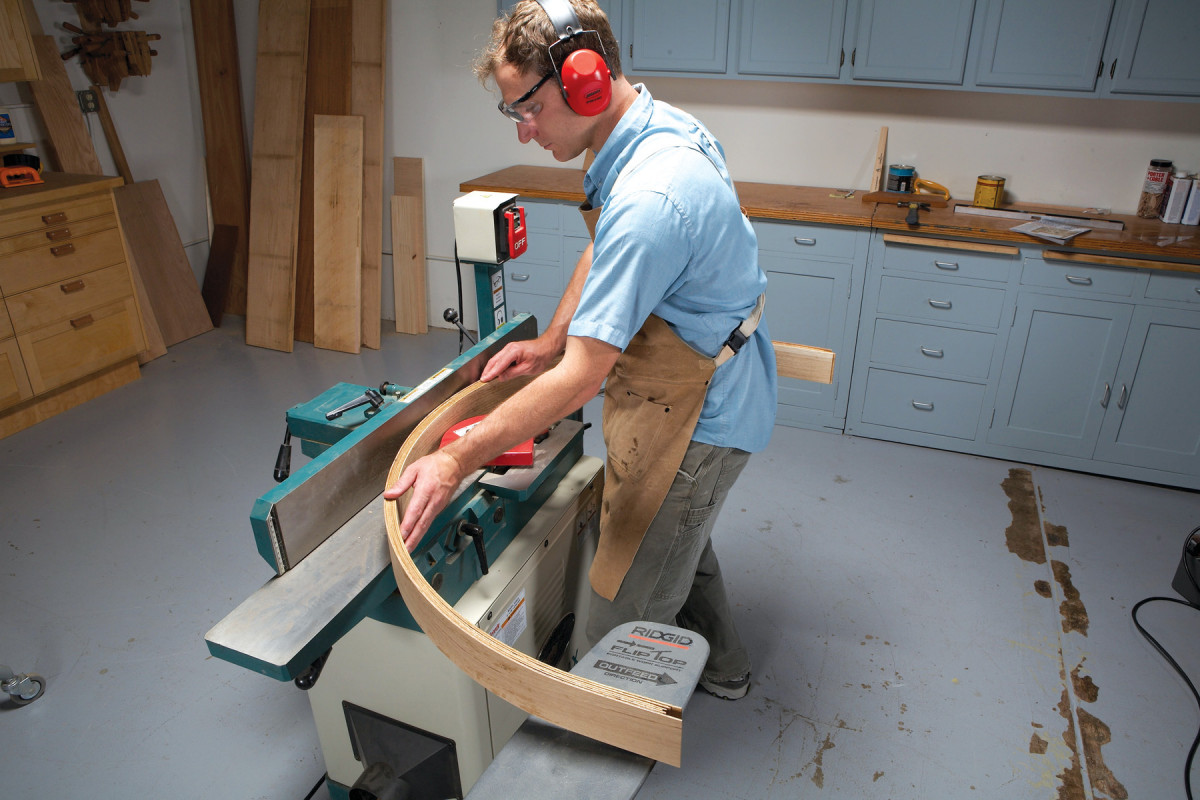
Photo 14. Joint one edge of each apron. Make sure the fence is square. Then hold the apron’s outside face flat against the fence as you make the cut. Use an outfeed stand for support.
Remove the laminated apron blank from the form and joint one edge (Photo 14).
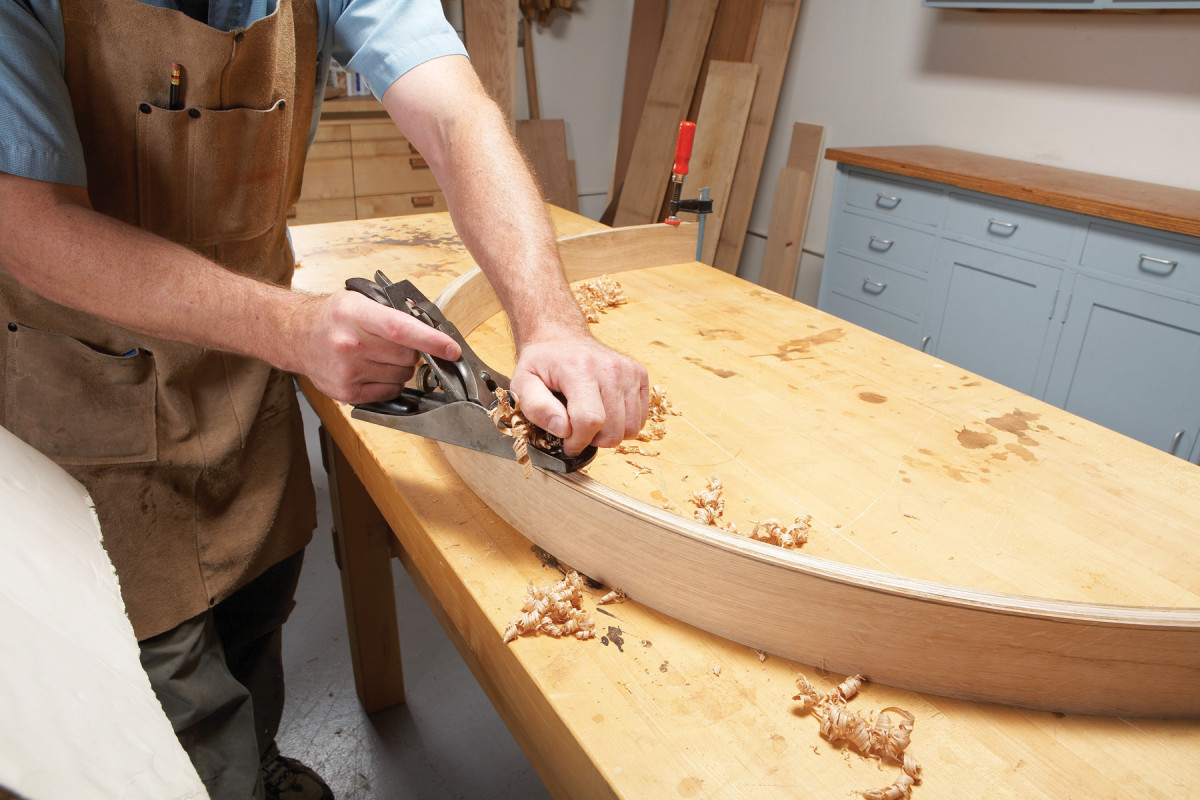
Photo 15. Plane the apron to final width. Scribe a line and clamp the apron to your workbench. Use a sharp blade and skew the plane for a clean cut.
Scribe a parallel line 3″ from the jointed edge and plane the apron to final width (Photo 15).
Round over the apron’s two bottom edges.
Attach the aprons
Thoroughly clean your bench (or pad it) and lay one top half on it, upside down. Scribe an arc 1-1/4″ from the outside edge to position the apron. Clamp the apron in five places. Then bore pocket holes, using a pocket jig. Fasten the apron to the top.

Photo 16. Cut the apron to length after fastening it to the top. Strike a line square to the top’s edge. Then saw the apron by hand.
Strike lines and saw the apron to length (Photo 16).
Attach the remaining apron to the other top half.
Mount the Extension Slides
Install alignment pins and grommets in the top halves and butt them together. Then mount the alignment locks. Lock the two halves together.
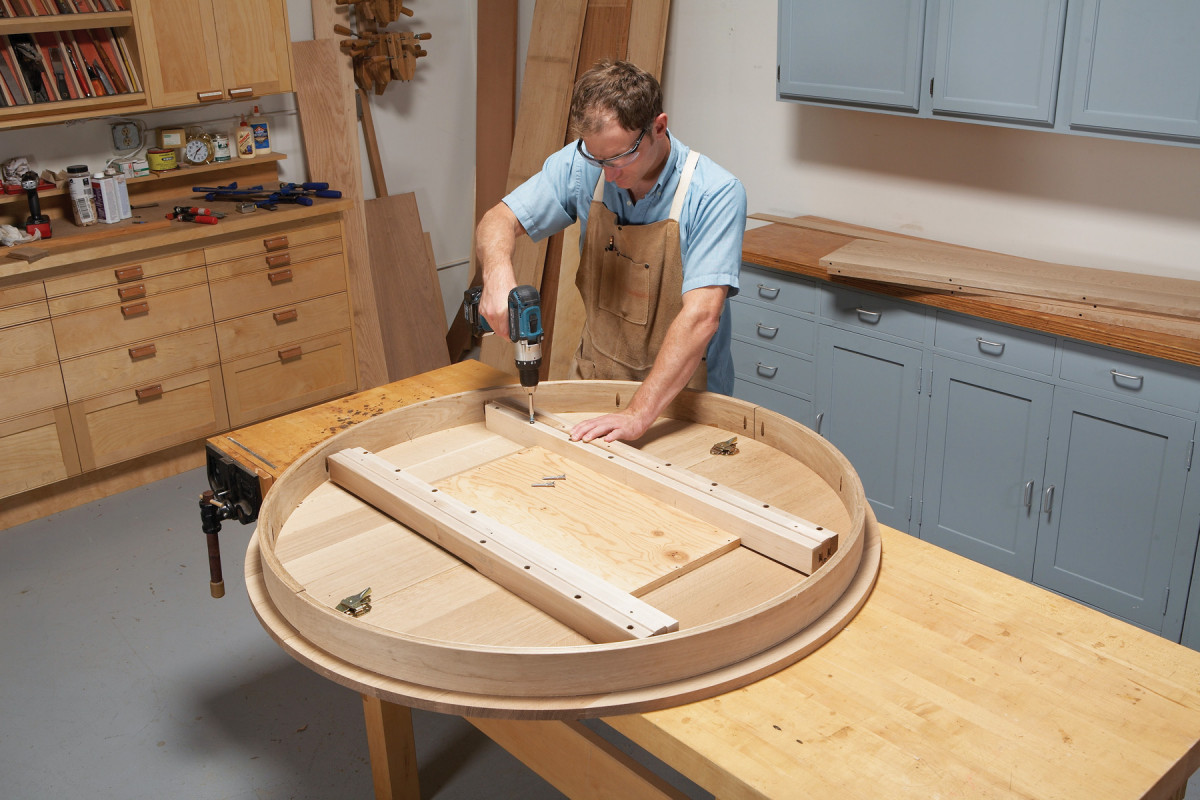
Photo 17. Install the expansion slides, using a spacer to keep them parallel. Lock the table halves together before you bore holes and install the screws.
Center a 13” wide spacer on the tabletop (Photo 17). The spacer assures that the slides will be parallel (a must for smooth operation) and properly spaced. Butt the slides against the spacer and center them on the joint (each set includes right and left hand slides). Use the factory holes to mark the top with an awl. Remove the slides and drill pilot holes—use a depth stop so you don’t drill through your beautiful top! Reposition the slides and install the screws.
Remove the spacer and install flush mount fasteners.
Fasten the top to the pedestal
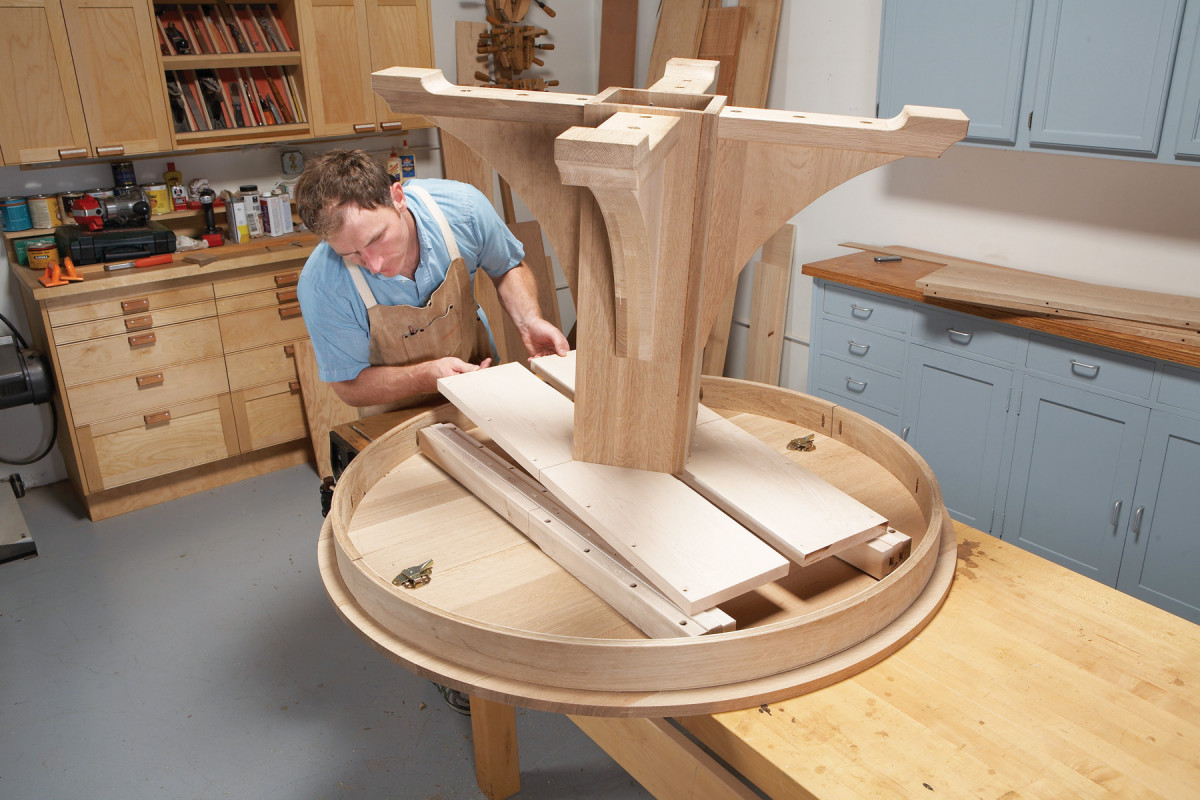
Photo 18. Fasten the pedestal to the top. Center the pedestal on the top and align its mounting boards with the center rails of the expansion slides. Then drill holes and install the screws.
Flip the base over and center the mounting boards on the slides, end-to-end. Align the outside edges of the mounting boards with the outside edges of the center section of each slide (Photo 18). You may want to enlist a friend for this step, as the base is very heavy!
Fasten the pedestal to the top: Pre-drill holes through the support boards into the center slides. Then install screws.
Flip the assembled table over (now you’ll really need help from a friend). Undo the alignment locks and open the table. Install the pins in the leaves (make sure they go in the correct end) and install the leaves.
The big finish
Round over any remaining sharp edges.
Finish-sand the top, apron and leaves.
Apply the finish of your choice. For authenticity, I chose the finish Kevin Southwick developed while restoring the original finish on the genuine Stickley Brothers table that I used to pattern this one.
Here are some supplies and tools we find essential in our everyday work around the shop. We may receive a commission from sales referred by our links; however, we have carefully selected these products for their usefulness and quality.