We may receive a commission when you use our affiliate links. However, this does not impact our recommendations.
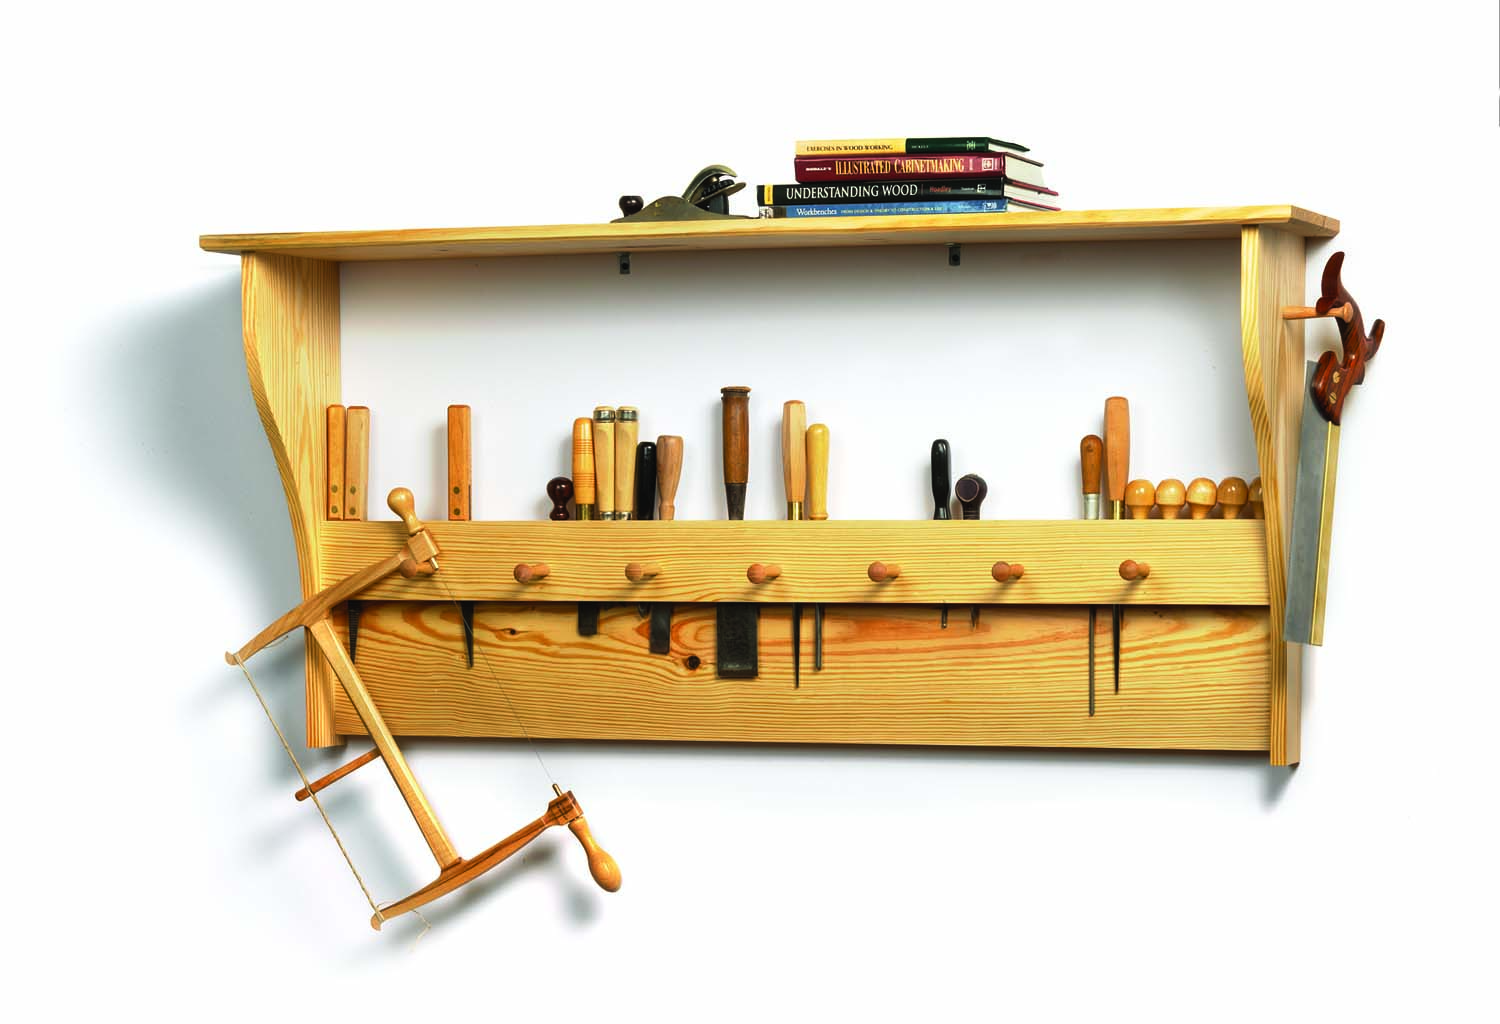
Hang one. A quick afternoon and a few boards are all that is needed to build this handy tool rack with a shelf above.
Swiped from a French engraving, this easy tool rack works in your shop or even in your kitchen.
It’s good to keep your tools protected (think: tool chest). But it’s also good to keep them handy (think: at arm’s reach). My favorite way to accomplish both goals is a stout tool rack. I’ve made many tool racks since I became a woodworker, most of them crude affairs that were cobbled together in a few minutes. I’ve always wanted a rack that both looks good and is easy to build. Then, while browsing a French book on vintage handplanes, I saw it.
In a 19th-century engraving of a French workshop, the back wall was covered with a rack very much like this one. Finding it and drawing it to scale were the hard parts. Building it took just a few hours.
You Know the Drill
The project is assembled using pocket screws, dimensional pine and some Shaker pegs I found at our home center (will wonders never cease?).
You are going to need at least 12′ of 1×12 and 4′ of 1×4 pine to build this rack. Once you have the wood in hand, the first step is to cut all the parts to length. Then rip the back and top pieces to width. Use a circular saw with an edge guide to make the rips, or use a jigsaw to make the rips then remove the saw blade marks with your block plane.
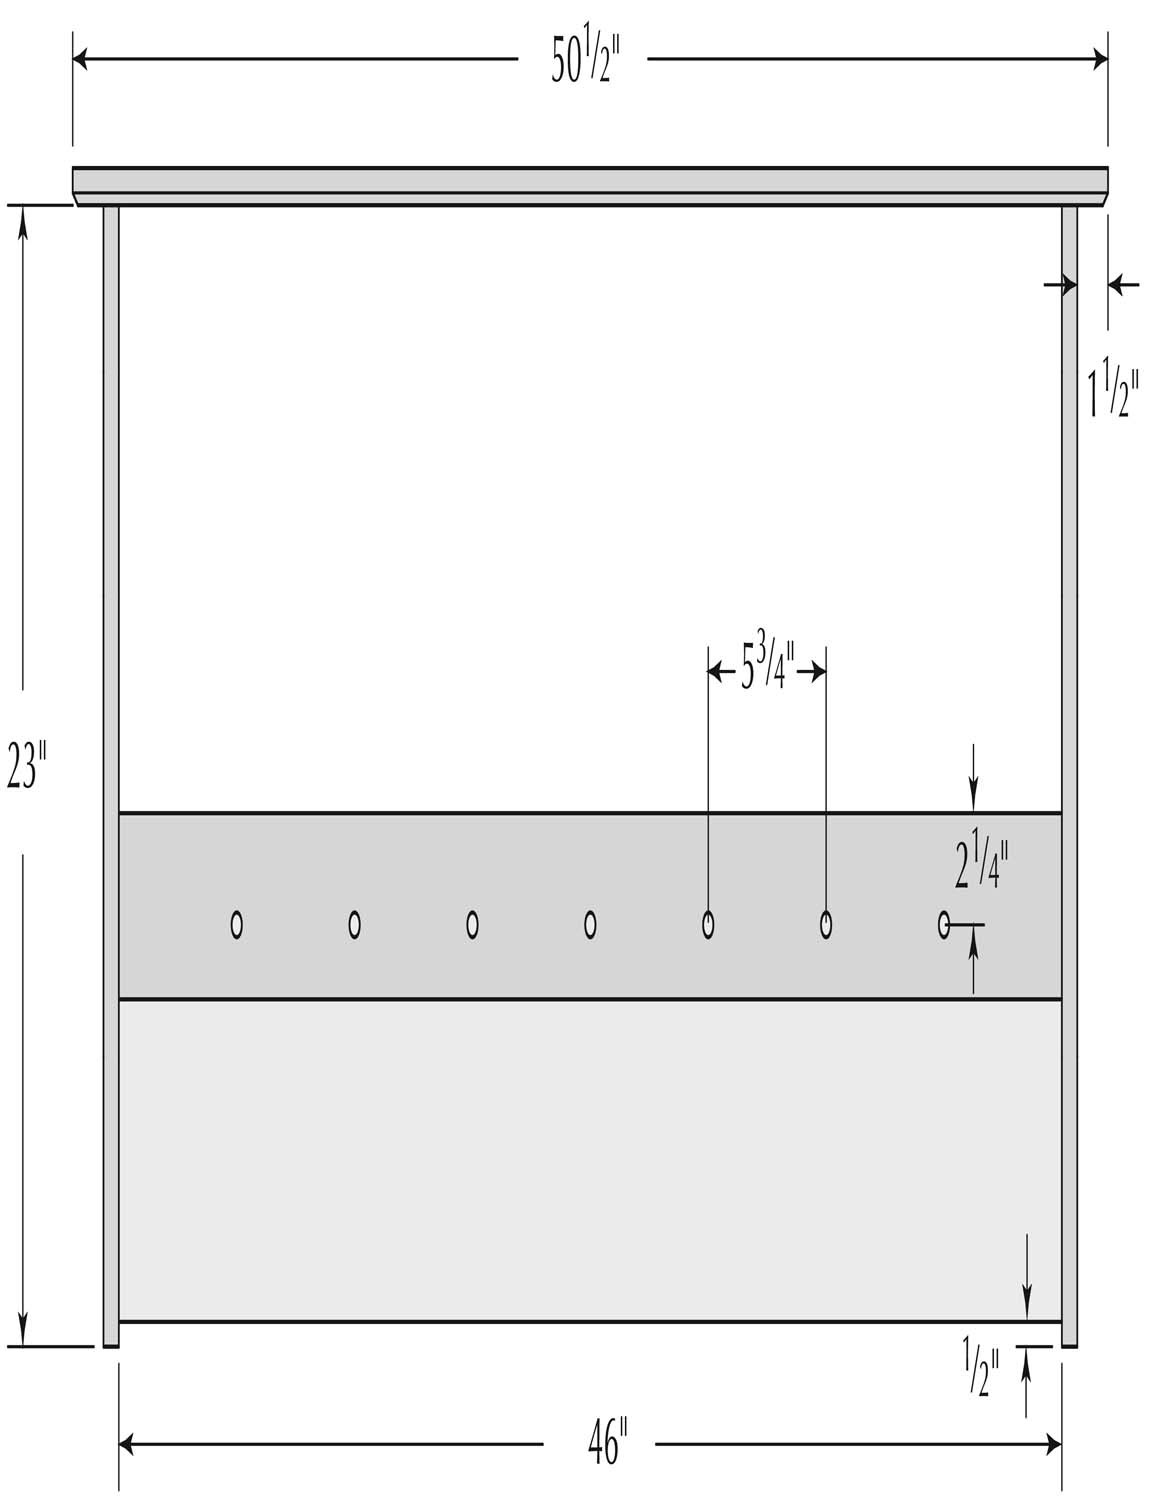
Elevation
Next work on the ends with their ogee shape. I used the SketchUp drawing (available for free on our web site) to create a full-size paper template. I stuck the paper to one of the end pieces using 3M spray adhesive. Then I cut the ogee shape using a jigsaw and cleaned up my curves with a rasp and sandpaper.
Then I used the finished end piece as a pattern to make the second end.
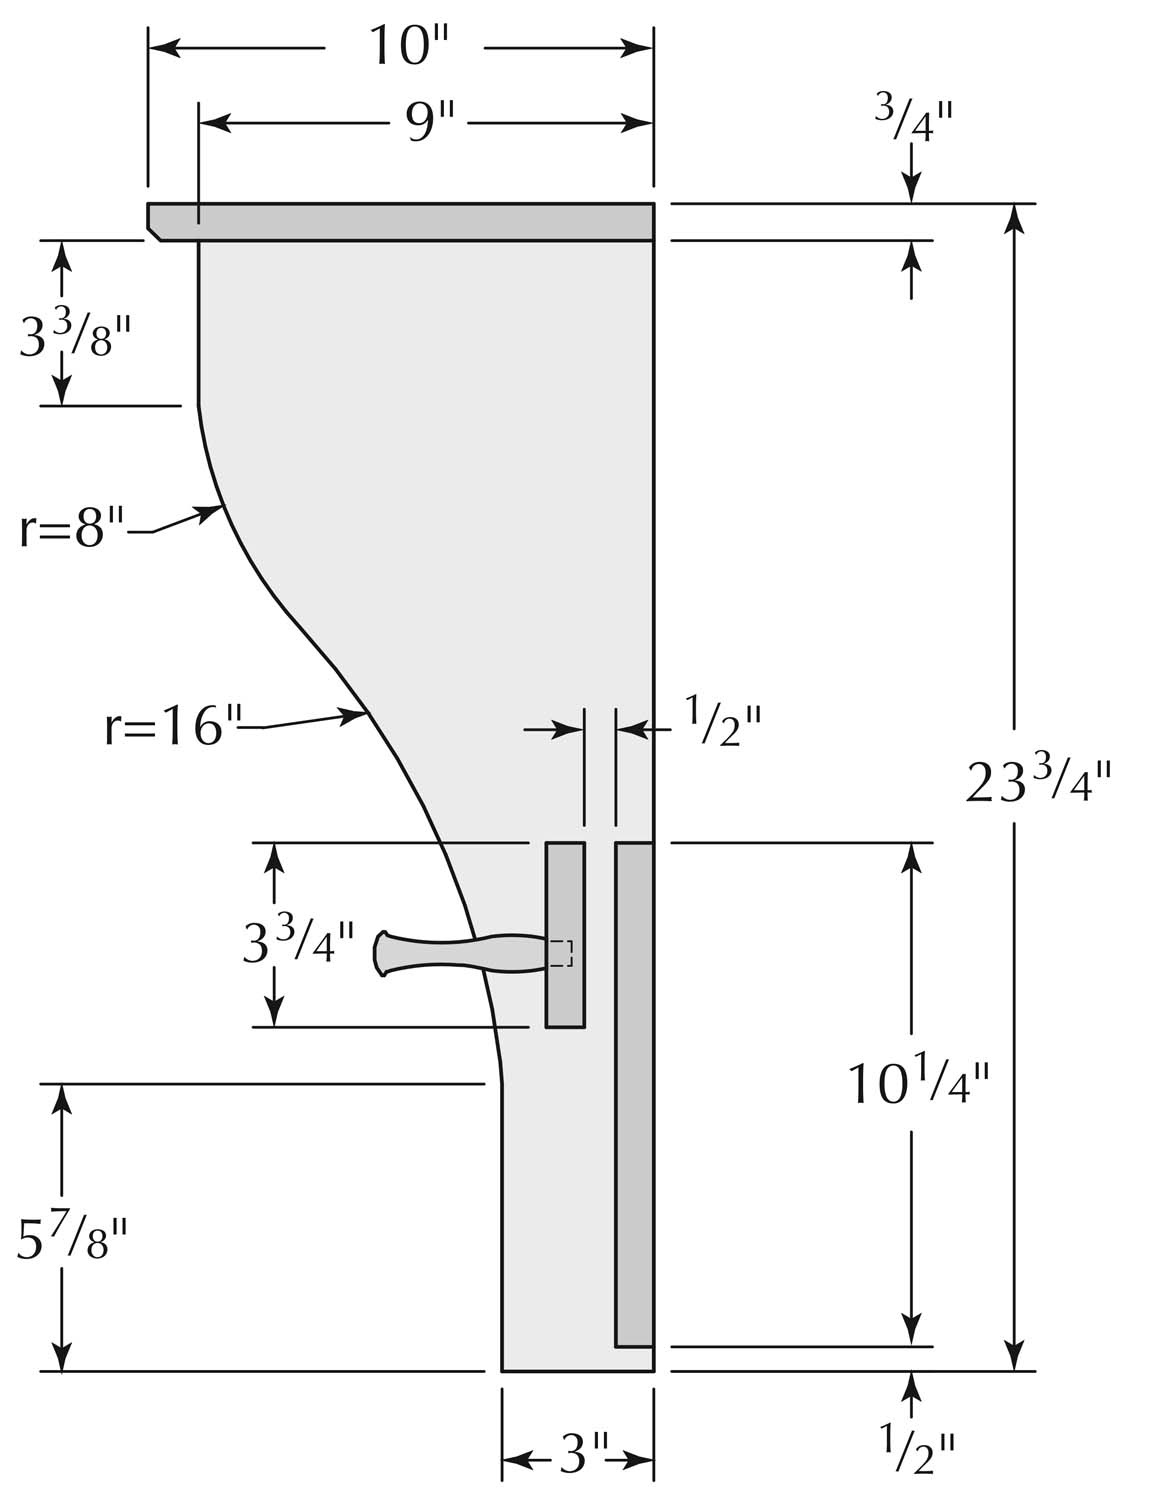
Profile
Everything is in Pocket
All the joinery for this rack is screws. Bore three pocket holes on each end of the 1×4, which is the front of the tool rack. Then drill five pocket holes on each end of the back piece of the rack.
You are just about ready to assemble the bulk of the rack, but first clean off all the tool marks using a block plane or sandpaper.
You have to assemble the rack’s parts in a certain way for everything to go together. The first job is to screw the front 1×4 to the end pieces.
The position of this part is critical because it will determine how much of a gap you will have between the front and the back of your rack. And this gap is what holds your tools. After much experimentation, I have found that a 1⁄2″ gap is ideal for handling about 99 percent of my tools. However, you should take a close look at the tools you are going to store on your rack before you imitate me.
Use my drawing (or your own modified drawing) to mark a line where this front piece will join the ends. Clamp the front piece in position and screw it down. Screw the other end in place using the same procedure.
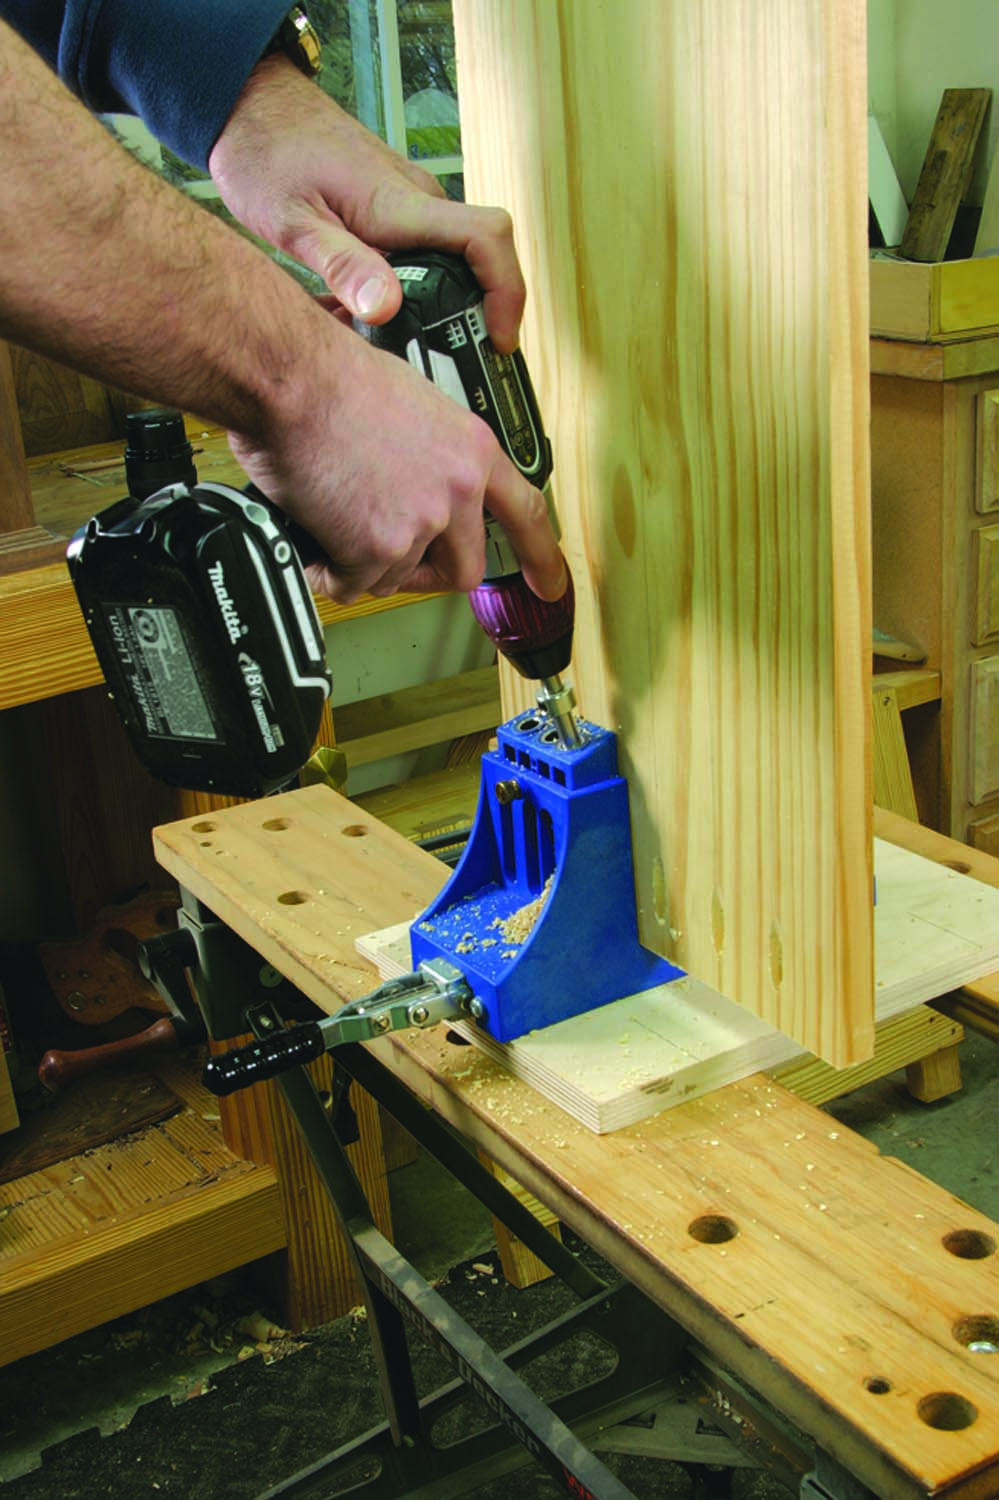
The entire project is assembled with pocket screws. Here I’m boring five pocket holes on one end of the back piece.
Now you can screw the back piece in place. You should be able to squeeze it between the two ends, tap it gently in place, then screw it tightly to the ends.
Now you can turn your attention to the top piece. I cut a 1⁄4″ x 1⁄4″ chamfer on the underside of the top using a block plane. This is easy to do freehand – just use your combination square to lay out the pencil lines for the chamfer and plane the corner down to them. A little irregularity is OK.
The top of the rack is screwed to the ends. It’s not done with pocket holes – just six simple countersunk No. 8 x 11⁄4″ wood screws.
I’ve Got You Pegged
The Shaker pegs on the front of the rack give you more places to hang your tools. The seven pegs are spaced every 53⁄4″ across the front of the rack. The center of each hole is 2 1⁄4″ down from the top edge of the front of the rack.
The pegs I bought needed 1⁄2″-diameter and 1⁄2″-deep holes. Drill the holes, dab in some glue and knock them home. I had an extra peg left over from the package from the home center and put it on one of the ends to hold my shop apron (our photographer hung a backsaw on it for the opening photo).
Finishing & Hanging
My first instinct was to paint this rack, but the pine I found was clear enough to use without paint. So the finish for this rack is the same I use for all my shop furniture. I thin down satin spar varnish with paint thinner at 3:1. I wipe on three coats, sanding between each coat with a #320-grit sanding sponge.
Hanging the rack is simple. Find the studs in your shop wall. Drive No. 8 x 3″ screws through the back of the rack and into your studs. Then purchase two simple L-brackets. Screw them to the underside of the top and into your studs. That should do the trick.
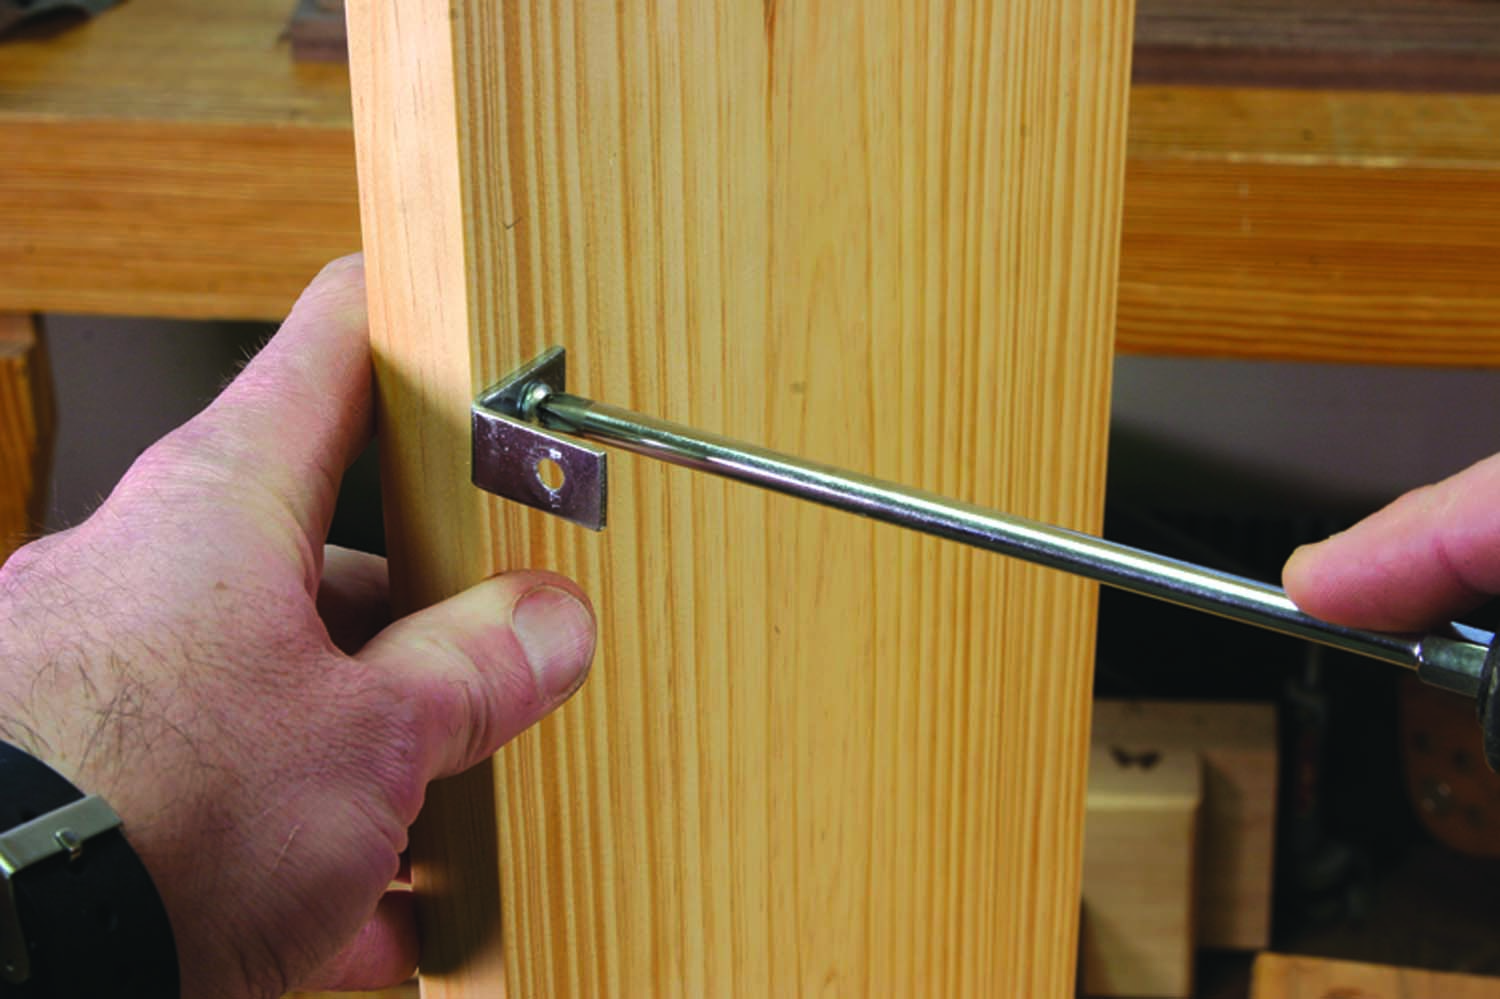
Screw two L-brackets to the underside of the top and into your studs to prevent sagging.
Though this rack is intended for the shop, several people who have seen it insist they are going to build one for the kitchen and put their knives in the rack, hang pots on the pegs and put cookbooks on the top shelf. As the French are both expert craftsmen and chefs, this is entirely appropriate.
I Can Do That: Easy Tool Rack Cutlist
| Item | T | W | L | Material |
| 2 Ends | 3⁄4″ | 9″ | 23″ | Pine |
| 1 Back | 3⁄4″ | 10 1⁄4″ | 46″ | Pine |
| 1 Front | 3⁄4″ | 3 3⁄4″ | 46″ | Pine |
| 1 Top | 3⁄4″ | 10″ | 50 1⁄2″ | Pine |
Here are some supplies and tools we find essential in our everyday work around the shop. We may receive a commission from sales referred by our links; however, we have carefully selected these products for their usefulness and quality.