We may receive a commission when you use our affiliate links. However, this does not impact our recommendations.
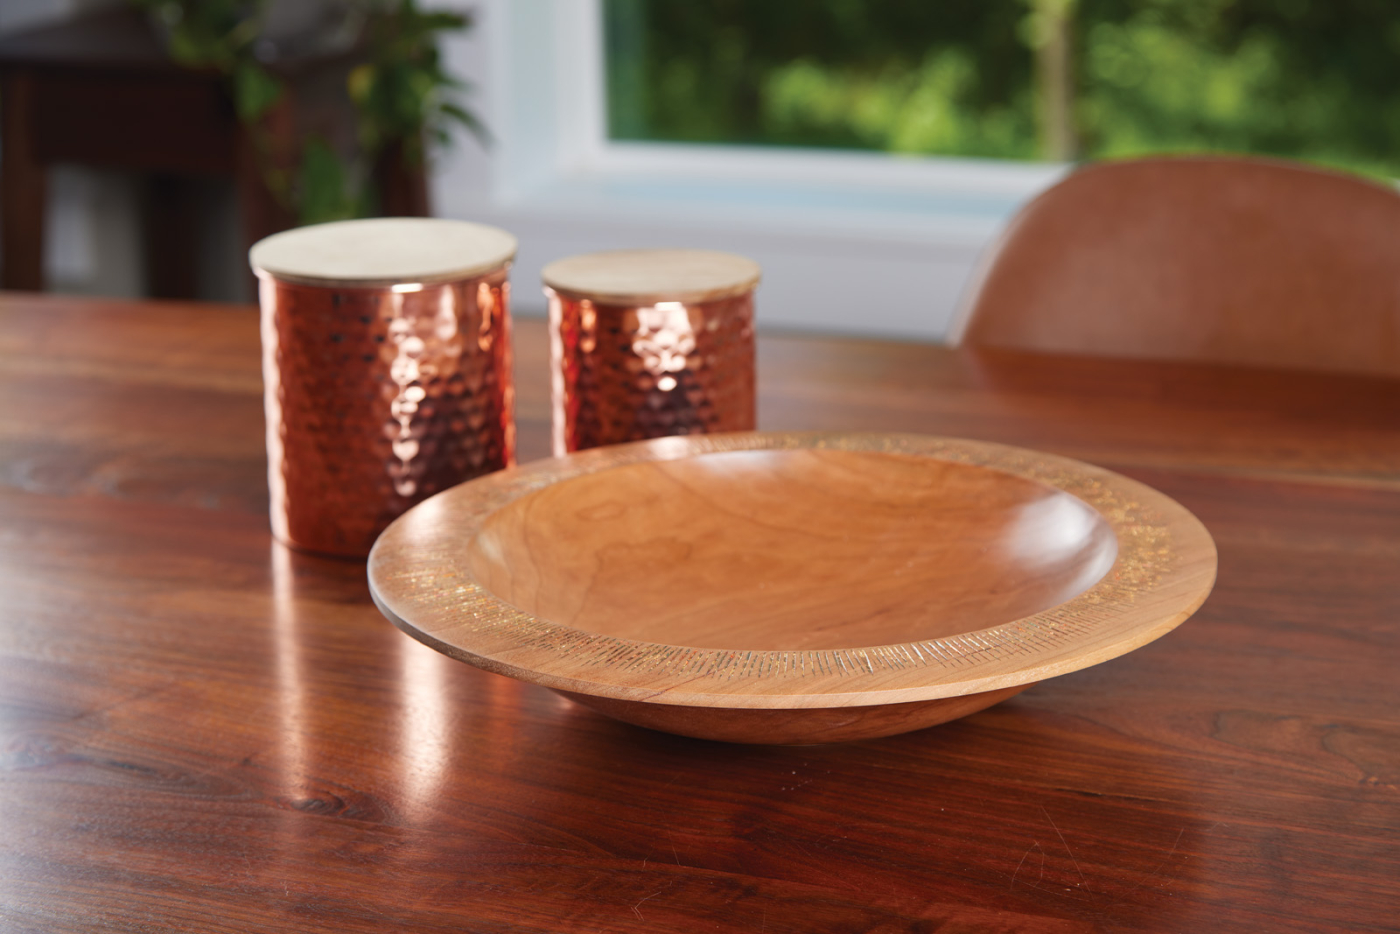 A little bit of carving and gilding on the rim of this bowl transforms it from a nice piece to an extraordinary one.
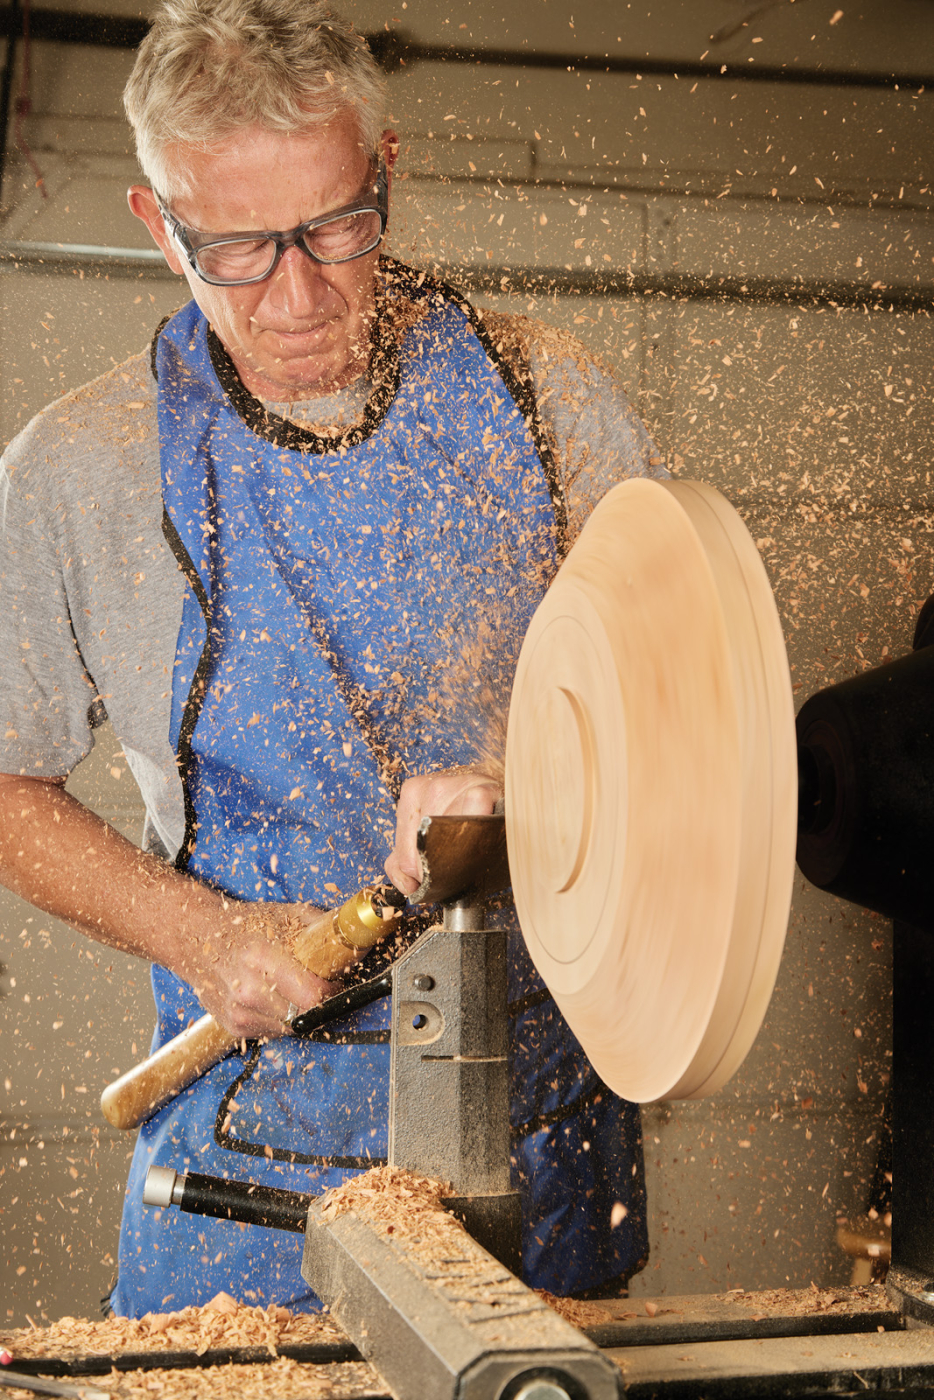
A step away from your ordinary bowl, this cherry bowl with a carved rim is subtle yet powerful. The simple ogee curve on the bottom of the bowl makes it lovely to hold, and the carved and gilded rim not only catches the light, but it also catches your eye. The best part of all, however, is that it’s a simple bowl to make.
 First, find a good piece of cherry for your blank that is approximately a 12“ diameter x 4“ thick square. Cherry is a good choice of wood for this project, as it is often favored by carvers throughout history for its closed, even grain. Kiln dried is the best here. After finding the center and using a compass to scribe a circle, move to the bandsaw to cut the circle out. This removes a lot of waste wood initially. I like to save the corner pieces which could be used to turn small projects like bottle stoppers.
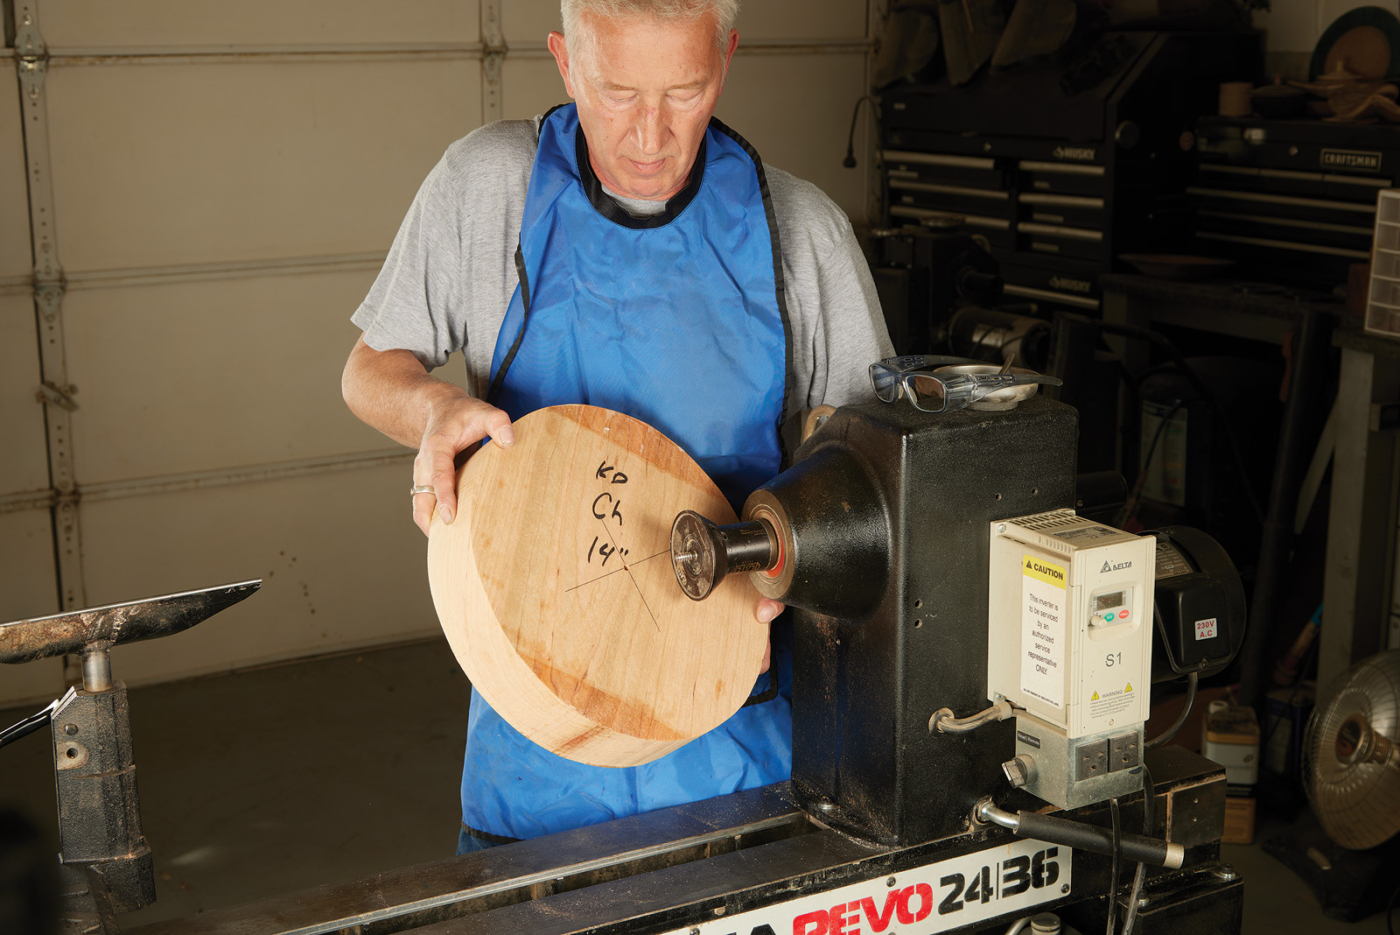
1. Start by mounting the kiln-dried blank on a screw chuck.
Prepare to Turn
To begin turning, mount the blank on a screw chuck or a faceplate if you prefer. When using a screw chuck, make sure that the chuck is tight against the face of the blank. If it’s not, you may experience some vibration in the blank, which would reflect in and give a less smooth quality of cut. Begin with a 1/2“ long grind bowl gouge to true up the outside of the blank. This will help to balance and true up the piece. If the surface is not smooth after the cut, the bevel is not “floating” behind the cutting edge and is not in contact with the wood. You would be effectively cutting with the point or tip of the tool, a common mistake that practice will improve!
2. Use a push cut to true up the outside edge of the blank. By floating the bevel along the cut, you’ll end up with a smooth surface.
After the outside of the blank has been trued up, we will now clean up the bottom of the blank using the long grind on the wing of your 1/2“ gouge to “draw” cut and clean up the base face. This is a really nice peeling cut with a lot of control as you are pulling or drawing the tool towards you just as you would with Japanese saws and planes.
3 Use a series of draw cuts to face off the blank. This removes any high spots and helps balance the blank better.
Turning the Foot
Once this surface is true, we can then mark out the diameter of the foot on which to hold the piece when it is reversed and ready to be hollowed. From a design point of view, I decided to turn a larger foot and therefore used a larger set of jaws which are available for most chucks along with the standard jaws provided. I use a Vicmarc 100 chuck with the 90mm jaws. The foot is, therefore, approximately a third of the diameter, which looks aesthetically proportionate, particularly for the ogee curve that I am going to turn for the outside shape of the bowl. To mark the foot, I use a set of dividers and scribe a line with the left leg of the dividers in a trailing fashion, making sure that the right leg matches the scribed line. If not, be sure to adjust it until it does. Be mindful not to let the right leg touch the wood as it could flick out of your grip!
4. Set your dividers to match the size jaws that you have for your scroll chuck, and mark the blank for a tenon.
5. Use a parting tool to define the outside edge of the tenon. A couple of plunges, side-by-side, give you room to work.
Then, using a 1/8“ standard parting tool, I make a cut 1/4“ deep to the left of the scribed line to define the foot. Going back to the long grind bowl gouge, I then use a push cut to slightly hollow out the foot. The reason for this is that even if the wood moves slightly after turning the bowl, it will still sit evenly on at least 3 points if undercut and not rock when placed on a flat surface. Again, using a draw cut as I did to true the base, I remove what is effectively waste wood from the foot to the outside edge. You should, at this stage, end up with a flat surface with the foot sitting 1/4“ proud. It would be easy and preferable now to cut the slight dovetail on the foot to match the dovetail on your chuck. I use a 1/8“ parting tool sharpened to the angle of the dovetail required. A skew would do the same thing as well.
6. Slightly hollow the tenon, as you’ll be using the tenon as a foot later.
7. Remove the outside waste with a series of draw cuts. You’re looking to level the surface outside of the tenon.
8. Now, form the dovetail on the outside of the tenon. I do this with a parting tool ground at a slight angle (to match the jaws of my chuck).
Onto the Ogee Curve
The ogee curve can be formed using simple geometry. To start, I divide it into thirds from the outside edge of the foot to the outside edge of the bowl. I then scribe a line approximately 3/8“ from the face of the bowl. This will not be the final thickness of the rim but allows a little extra wood in case you are slightly off with the next few cuts. Starting from the bottom corner edge of the blank, use a 1/2“ bowl gouge to draw cut a chamfer between the two marked lines.
9. Start laying out the ogee. First, divide the bottom into thirds, and make a mark.
10. Cut a large bevel, connecting your rim mark and the mark you made at the bottom of the bowl blank.
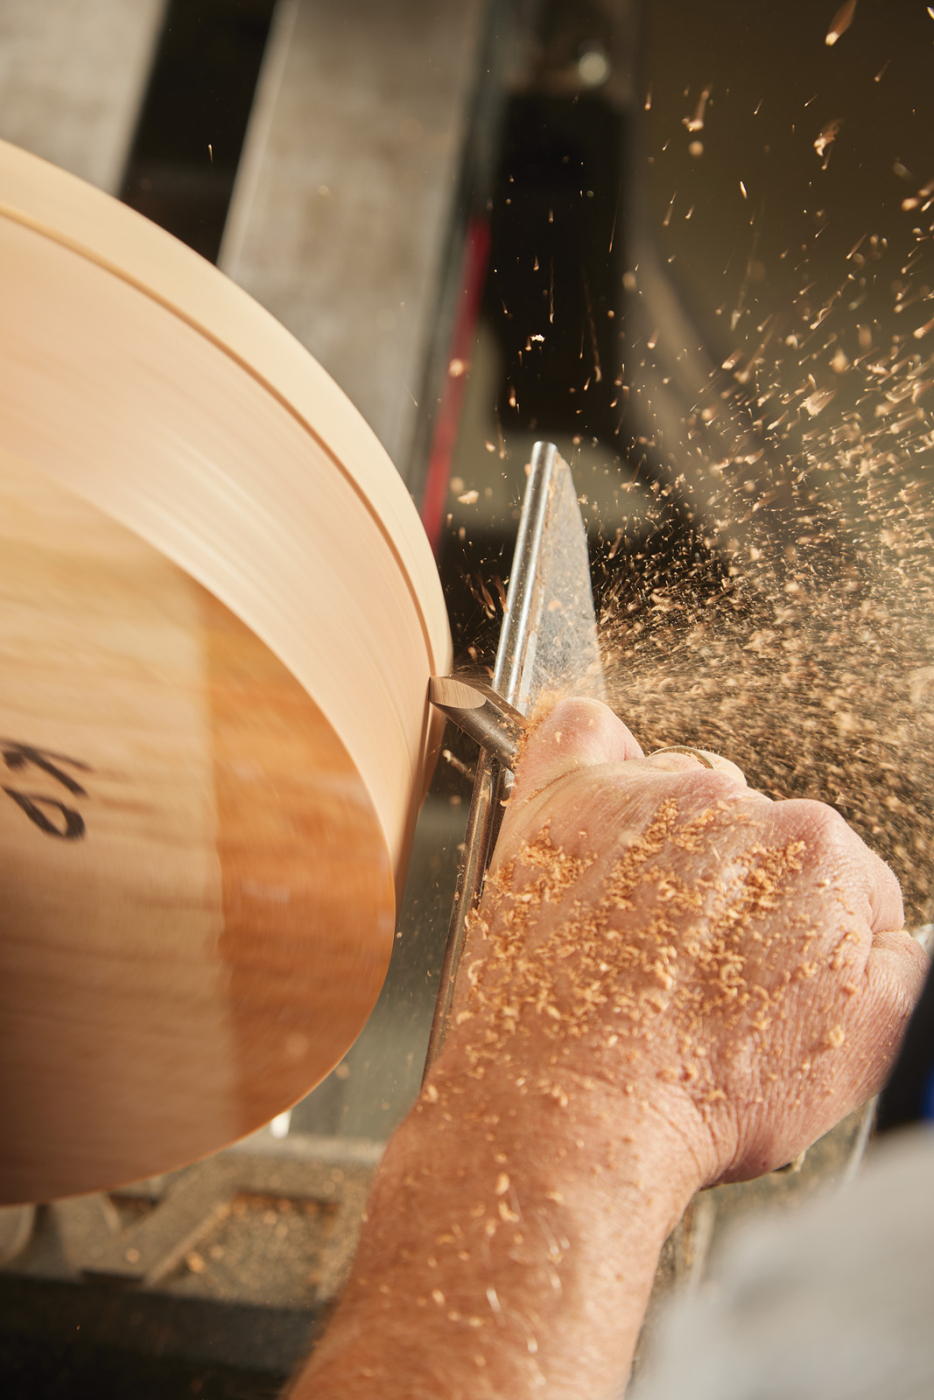
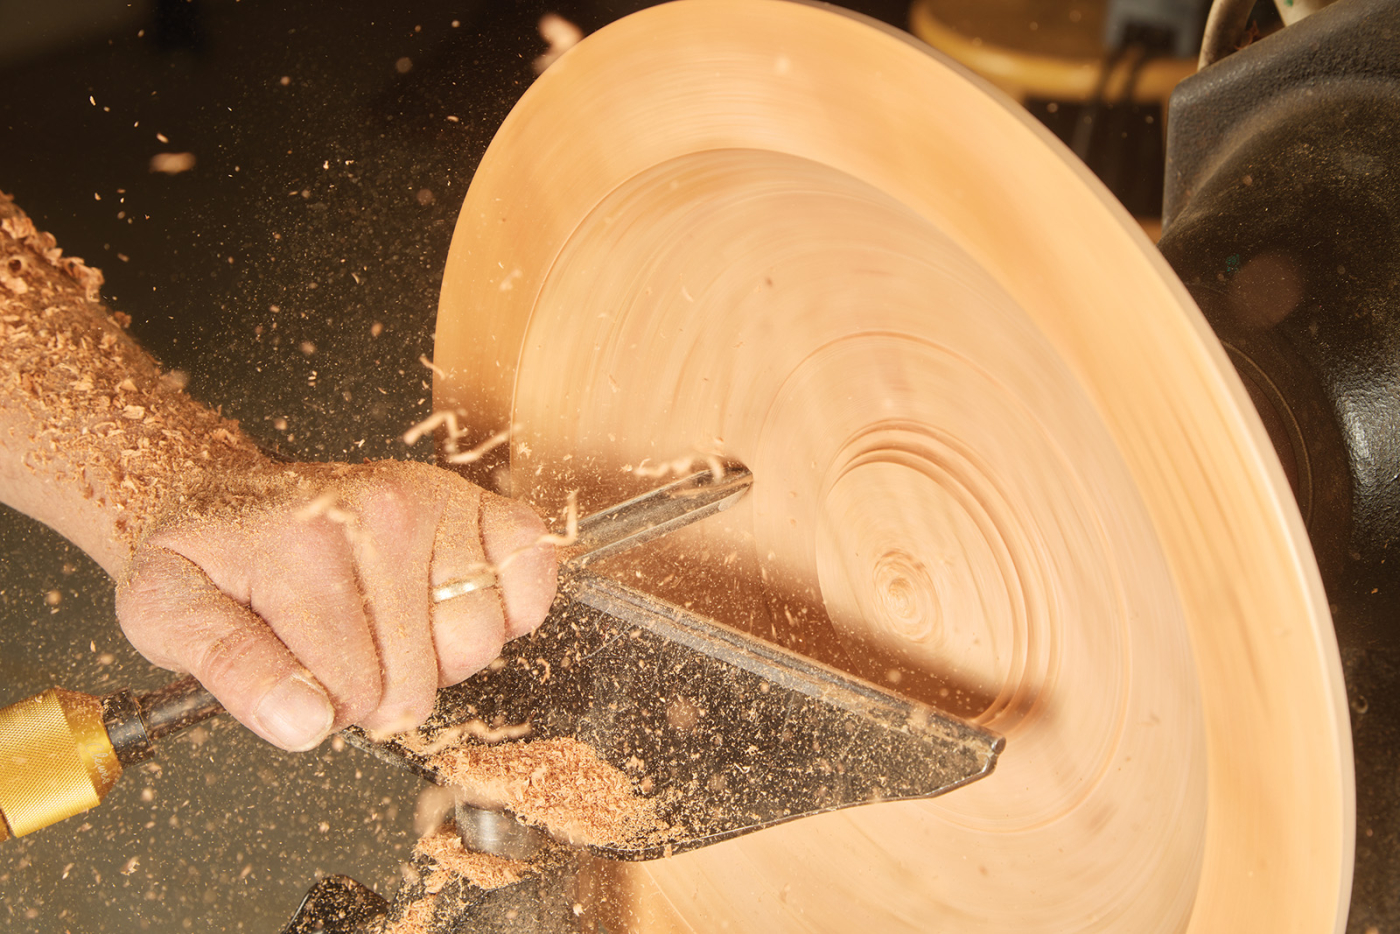
After producing the chamfer, I then cut the initial curve of the ogee between the same two scribed lines. This will be done using a push cut with the bevel “floating” behind the cut for the same control as I did when truing up the outside edge of the blank. You may notice that I am cutting against the grain as the grain on the bowl runs from the foot to the outside edge of the bowl. This may seem strange but creating the bevel in this way allows for a more accurate curve as I can look at the profile and see the curve as I am cutting. I will deal with any torn grain later when refining the finished ogee curve with a shear cut.
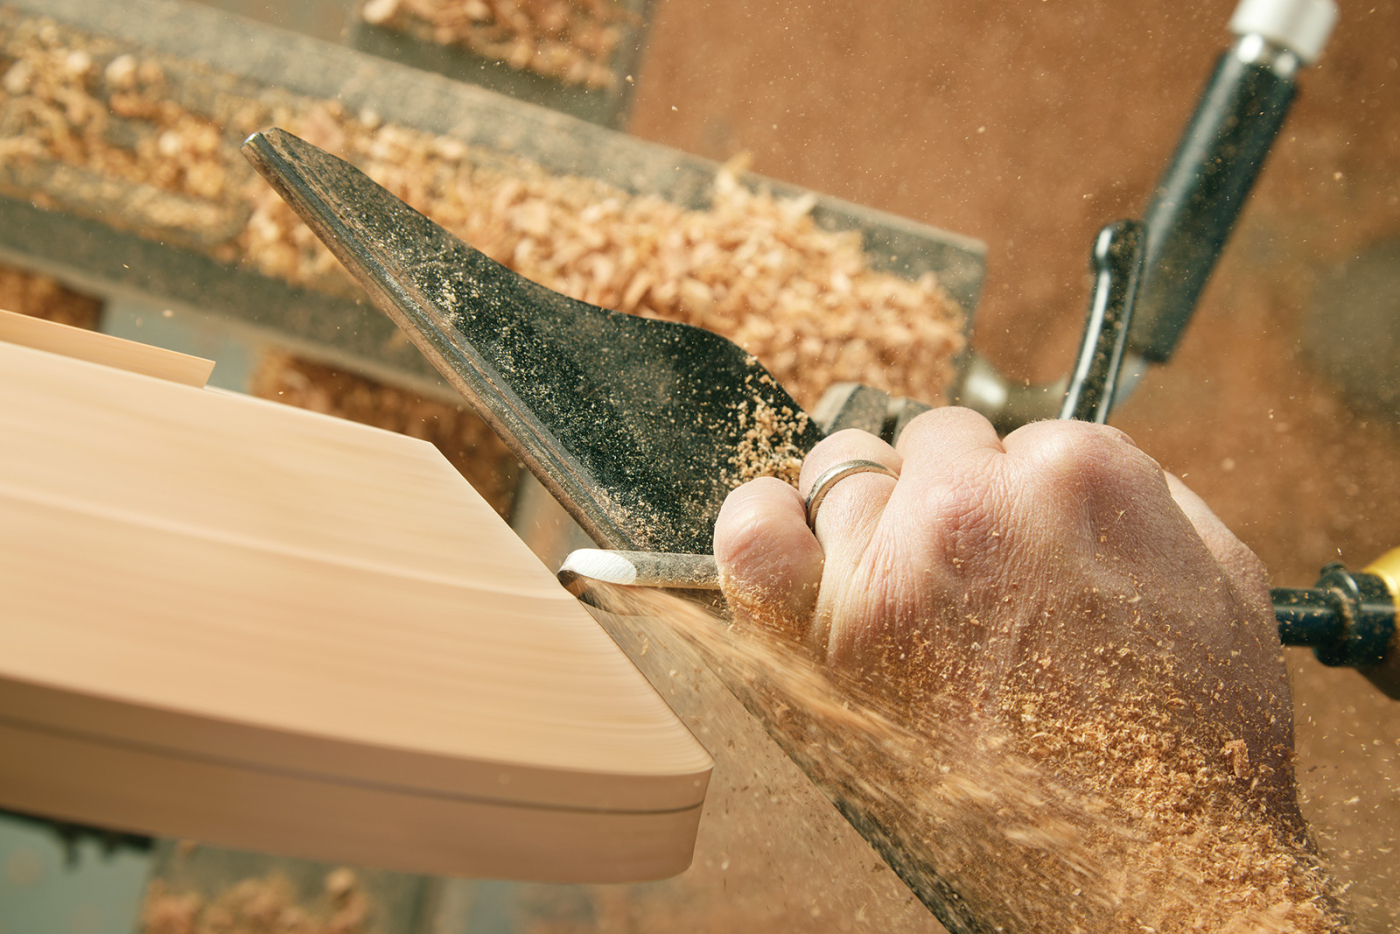
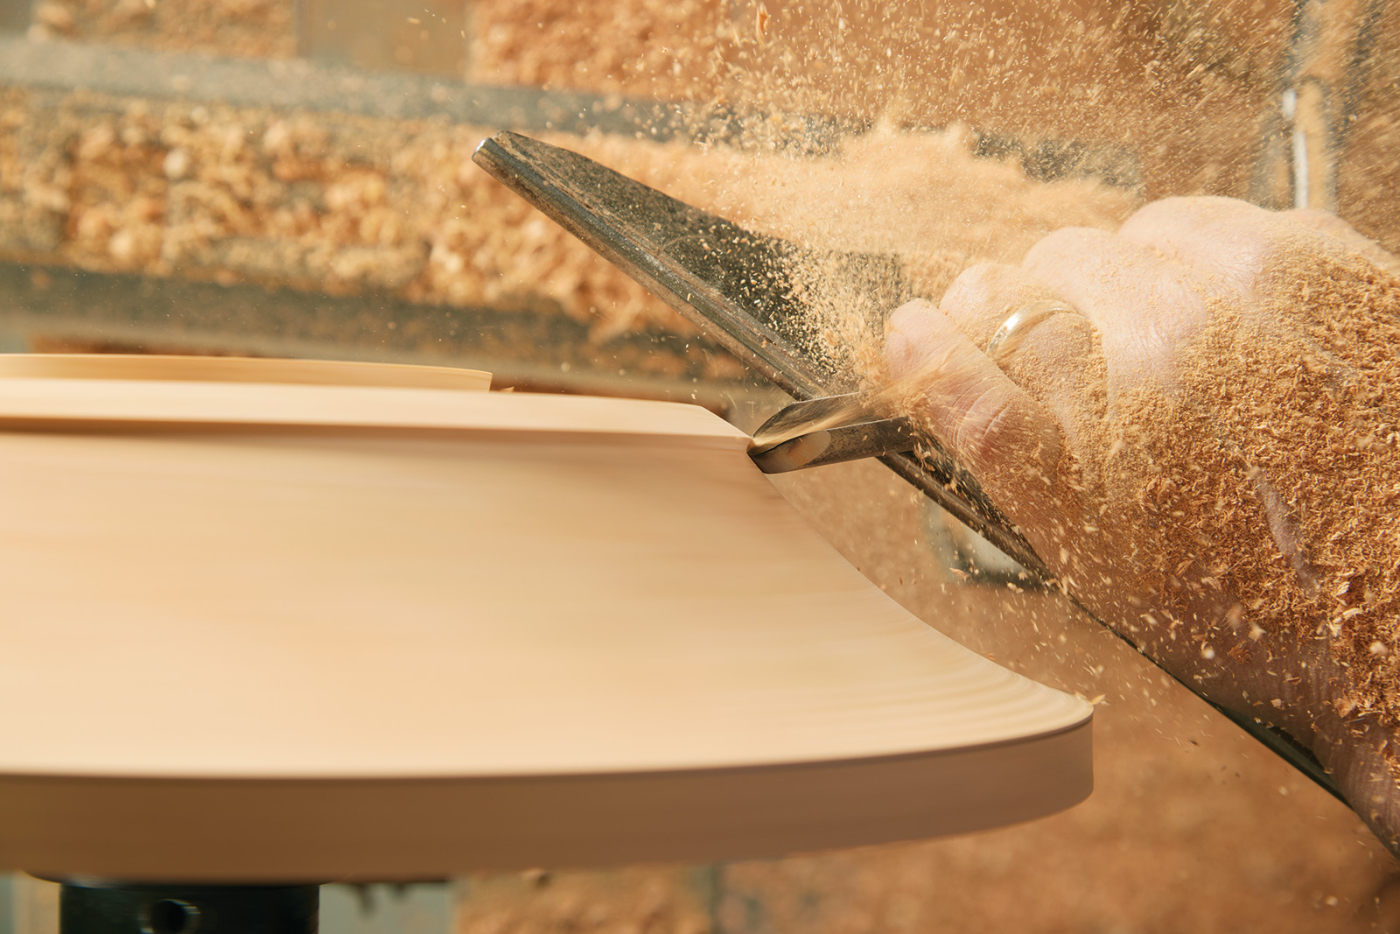
11-14. After connecting the rim and bottom mark to form a bevel, you can start to form a curve under the bowl. Push cuts, from the rim to the foot, are against the grain but actually allow you to watch the curve being formed, ensuring that it’s smooth and even.
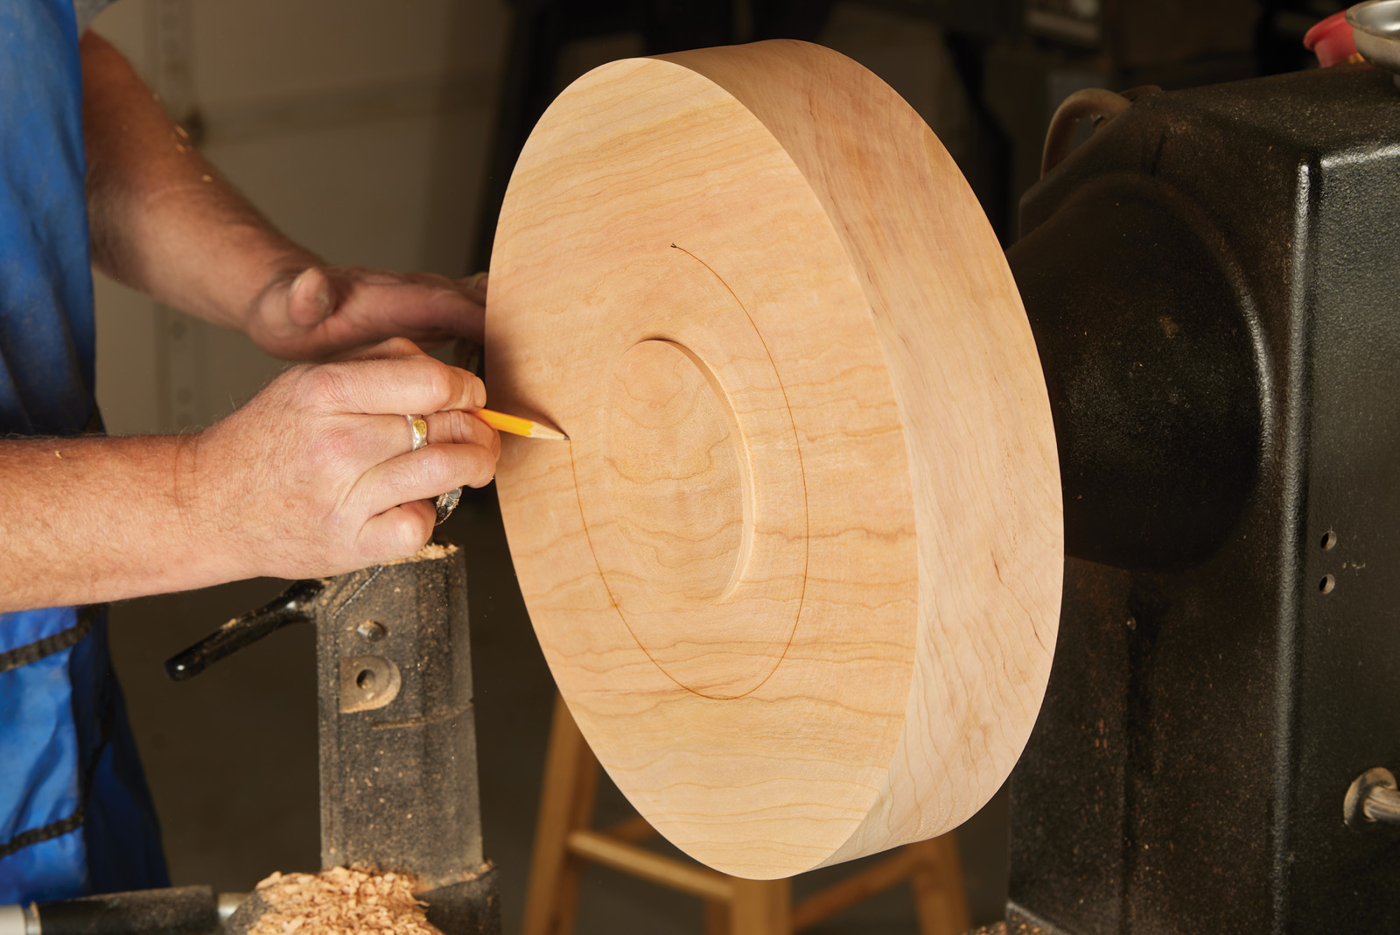
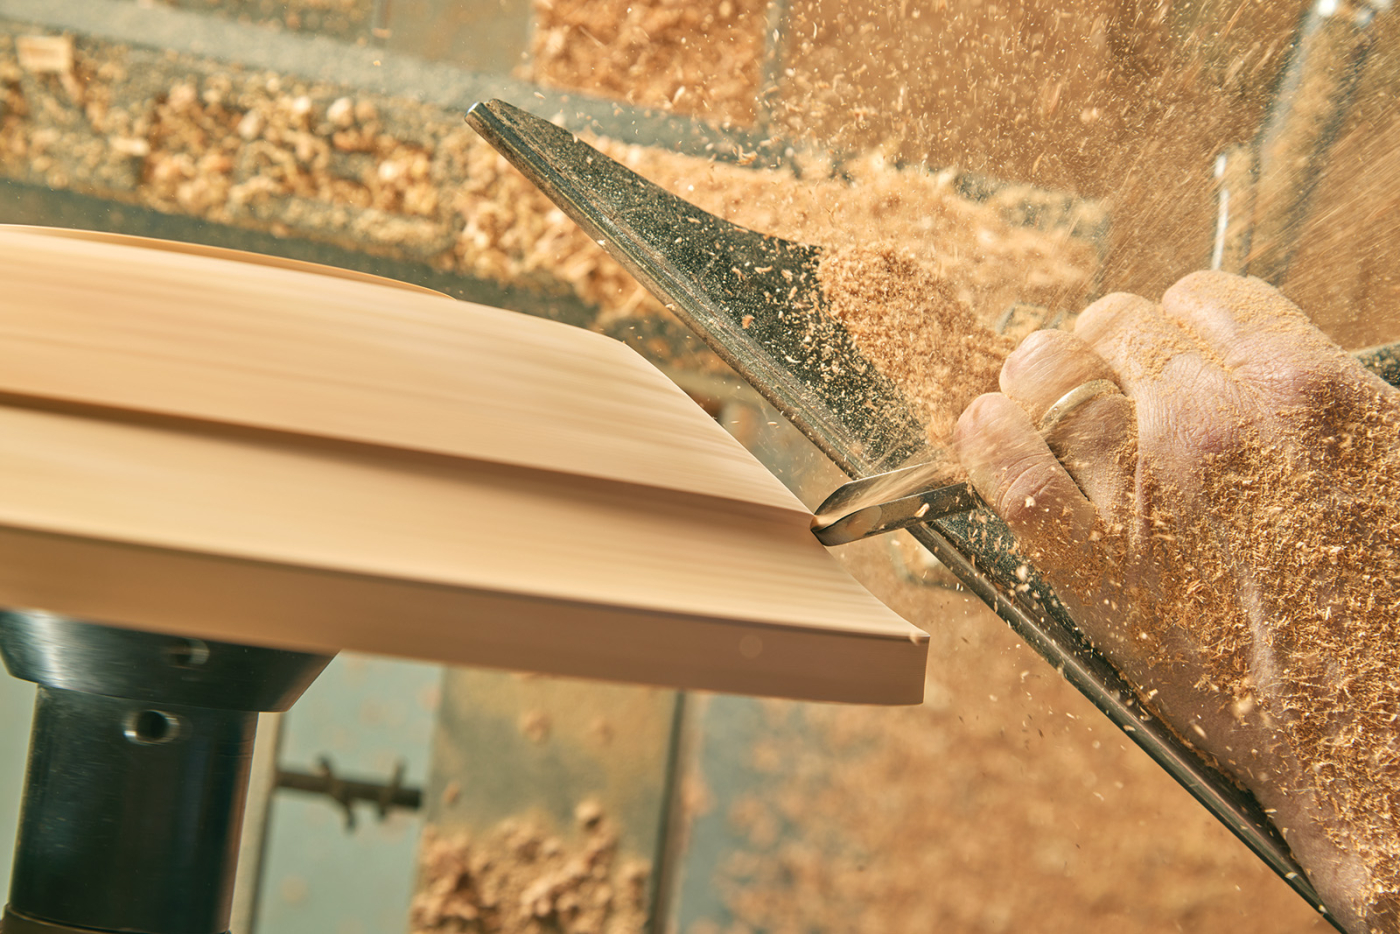
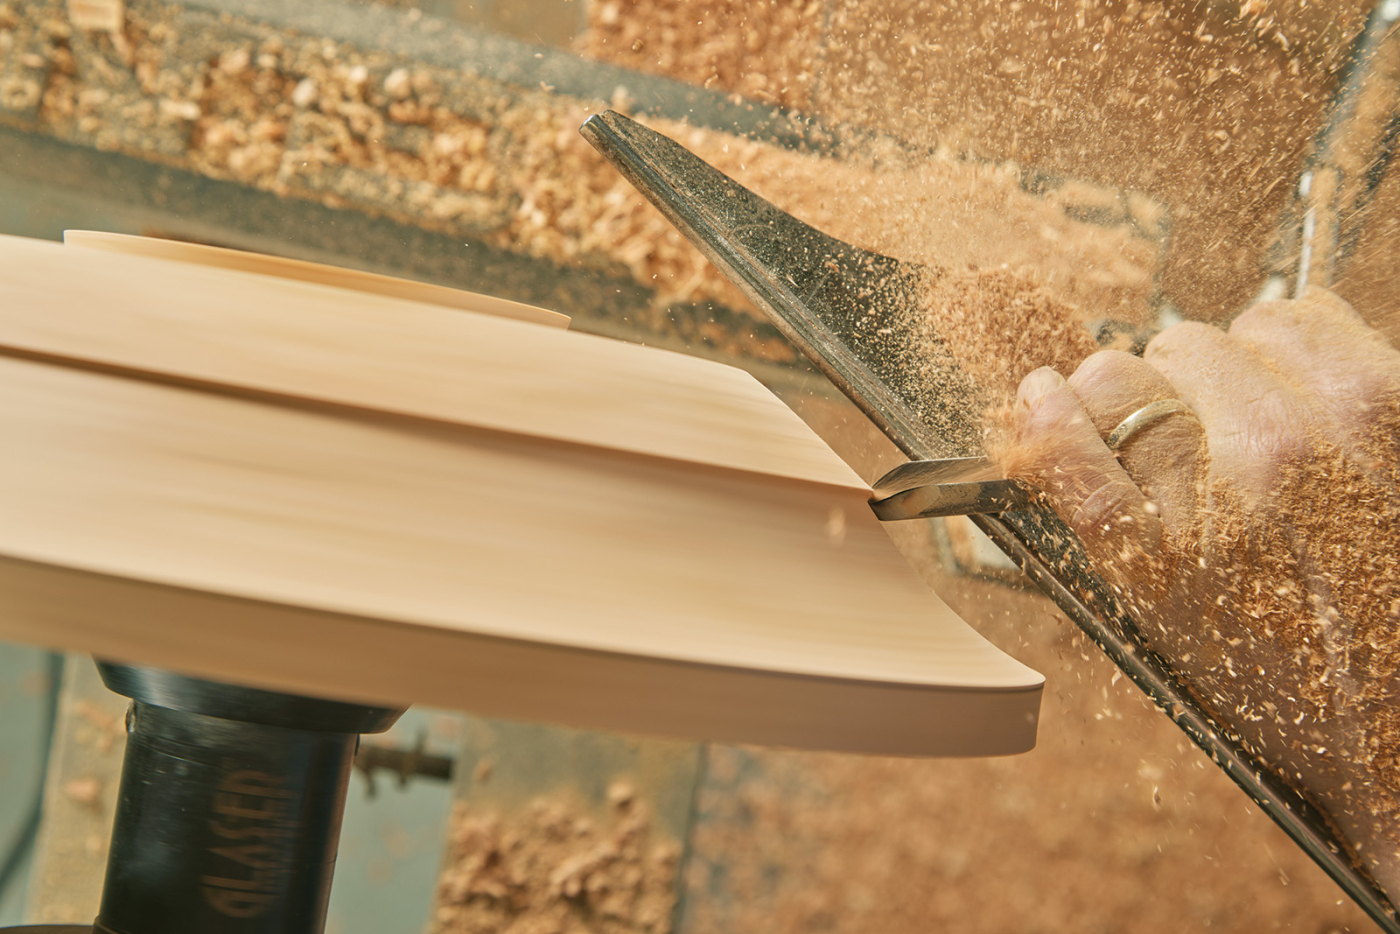
So now that I have a curve between the two reference lines, I can mark the halfway point between the left edge of the foot and the outside edge of the bowl. I then use a draw cut with the grain to complete the basic ogee curve. The ogee curve is basically a 50/50 curve where one curve should look the same as the other but only the opposite way. The two curves will blend at the inflection point, which is where the halfway mark is scribed. This is very similar to a sine wave.

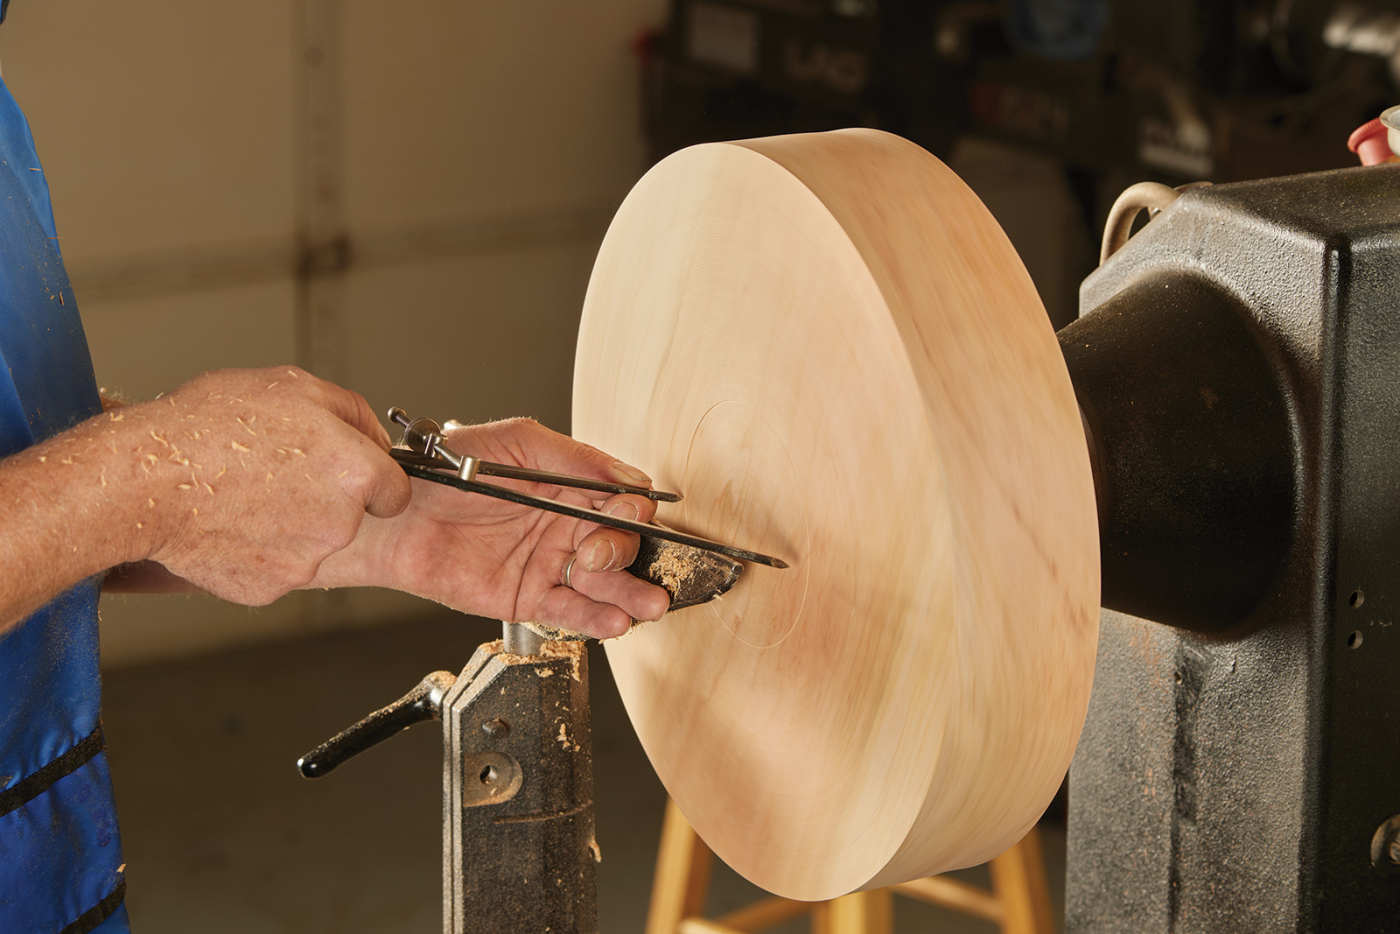
15. Divide the current diameter in half, and make another pencil mark.

16. Now, to form the ogee, blend the two curves together, meeting right where your pencil line was.
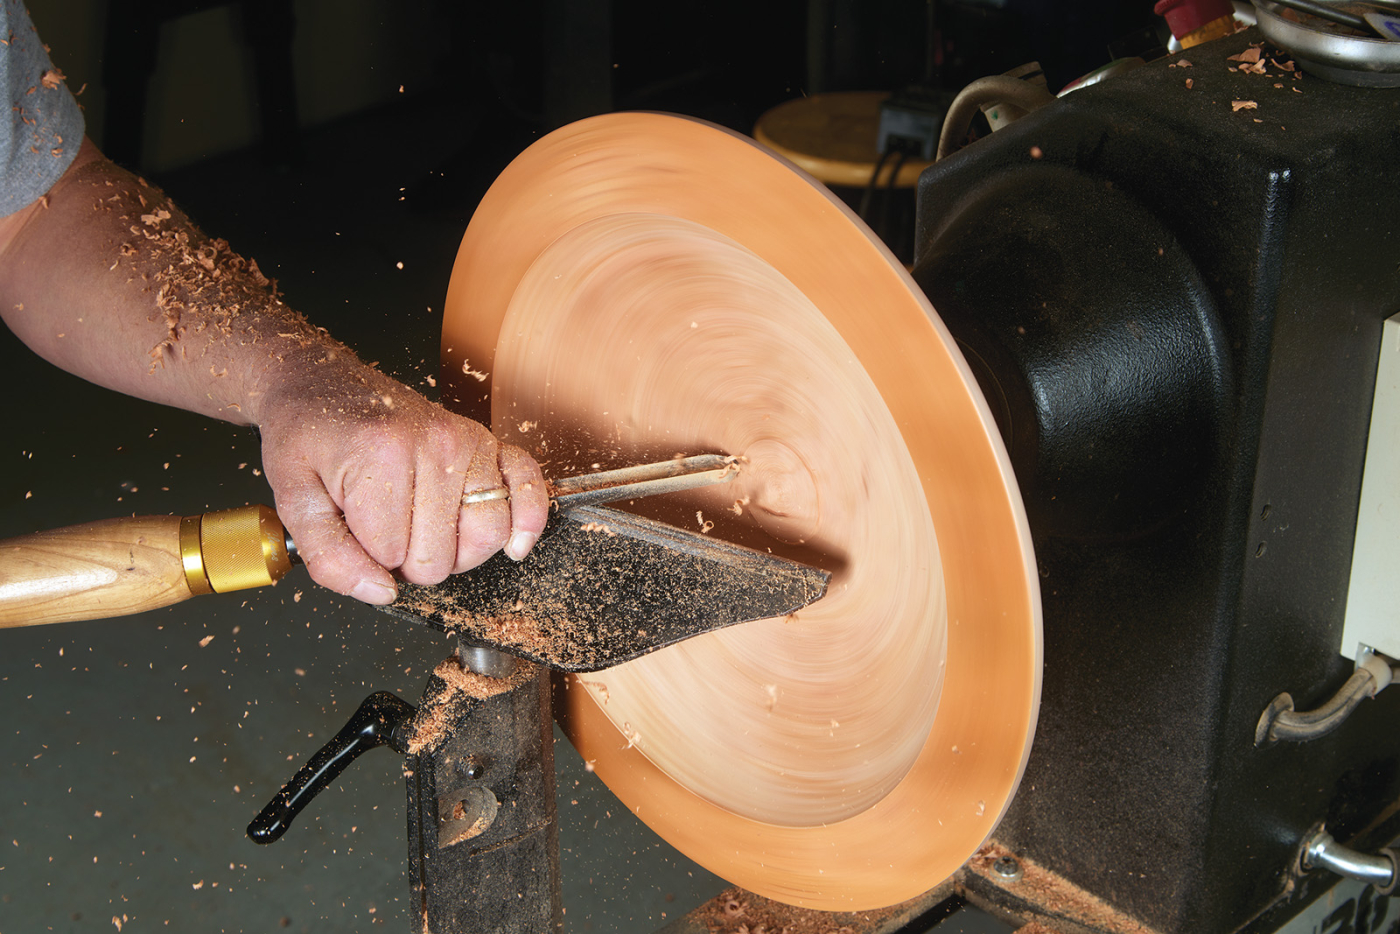
The next step is to deal with any torn grain from the initial first cut against the grain. I employ a shear cut with the wing of the bowl gouge and draw the tool towards me but at a much more shear angle. In the right position, this cut will produce “angel hair” fine shavings and leave a finish on the wood that is ready for sanding and no longer has torn grain.
 Sanding & Finishing
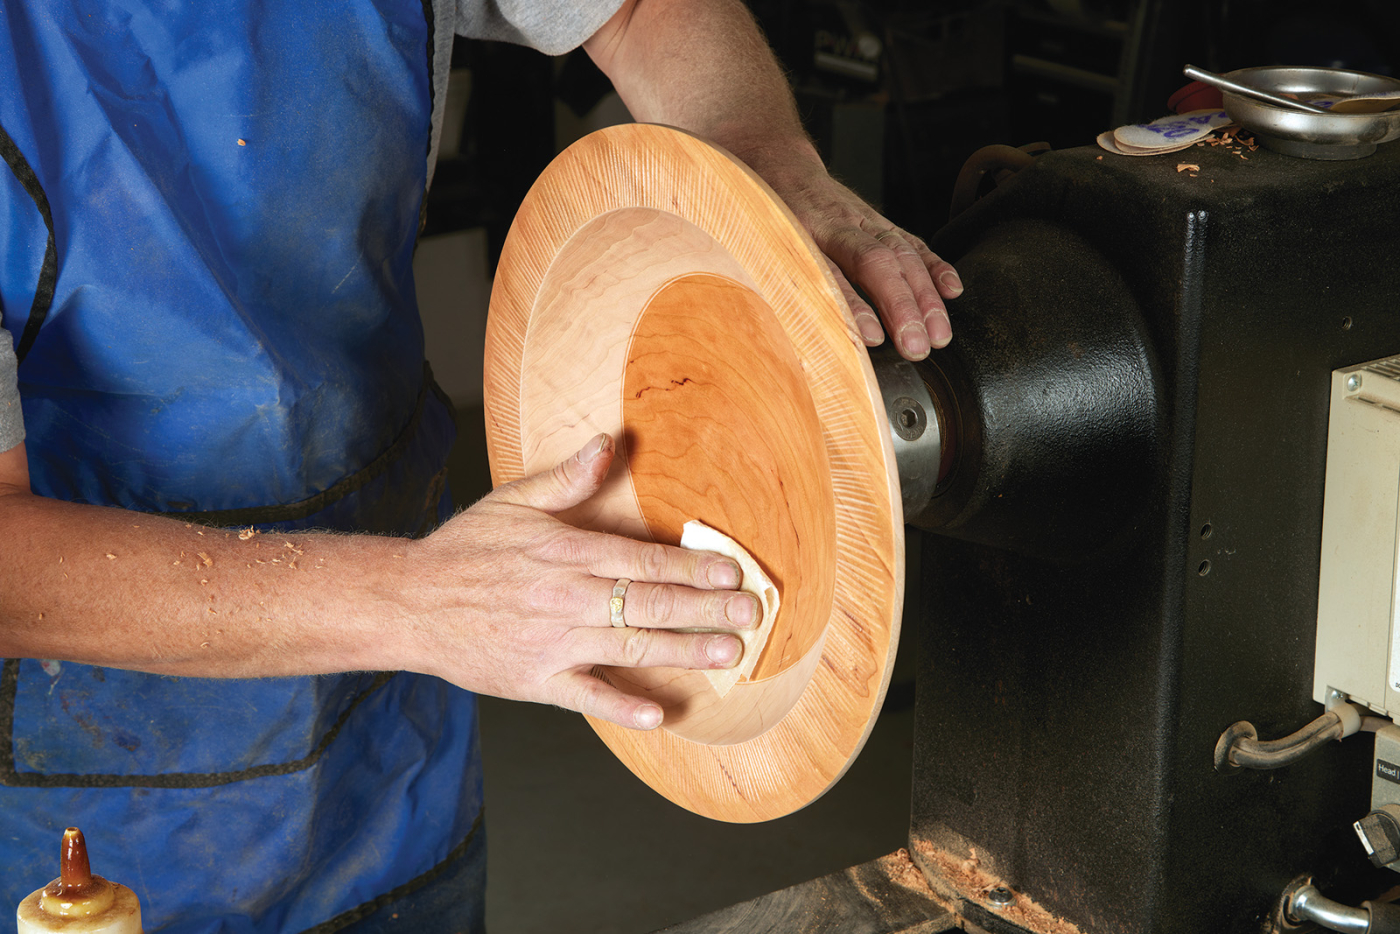
I like to sand and finish the outside of the bowl before I reverse chuck it and start work on the rim and hollow out the bowl. It makes sense to finish the bowl in order rather than having to go back and finish later. I prefer to use the 2“ Skilton brand of sanding pads, which are great quality and have just the right amount of firmness in the pad for efficient sanding. They are also tapered which helps when sanding an undercut rim as they will form a soft curve. The 2“ sanding discs I use are available from TurningWood.com. (Check out the Top-Notch Bowl Turning article in the August 2022 Popular Woodworking for more information on these pads.)
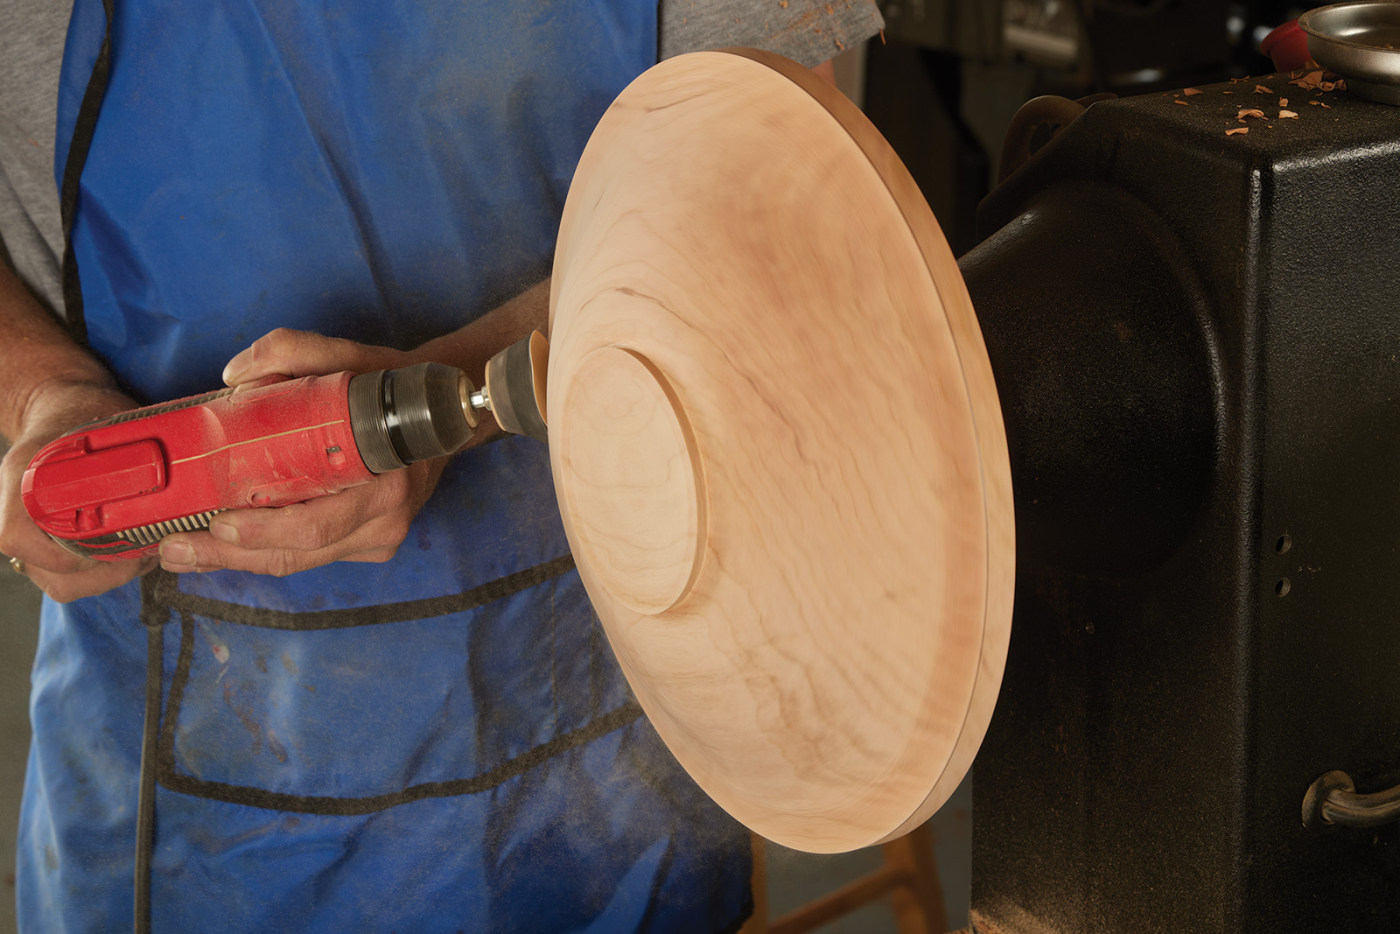
17. Sand the bottom of the bowl. Use a soft sanding pad, and sand clear up through 400-grit sandpaper.
When sanding, I like to start with a 180-grit and finish with a 400-grit disc on a power drill and go through the grits in order. Be sure to check that there is no torn or disturbed grain after the first grit. If there is, it will be on the area of the end grain on the bowl blank and will show up as lighter lines on the surface. After making sure there is no torn or disturbed grain on the surface, continue through the grits. With each grit, you are making the “scratches” smaller and smaller.
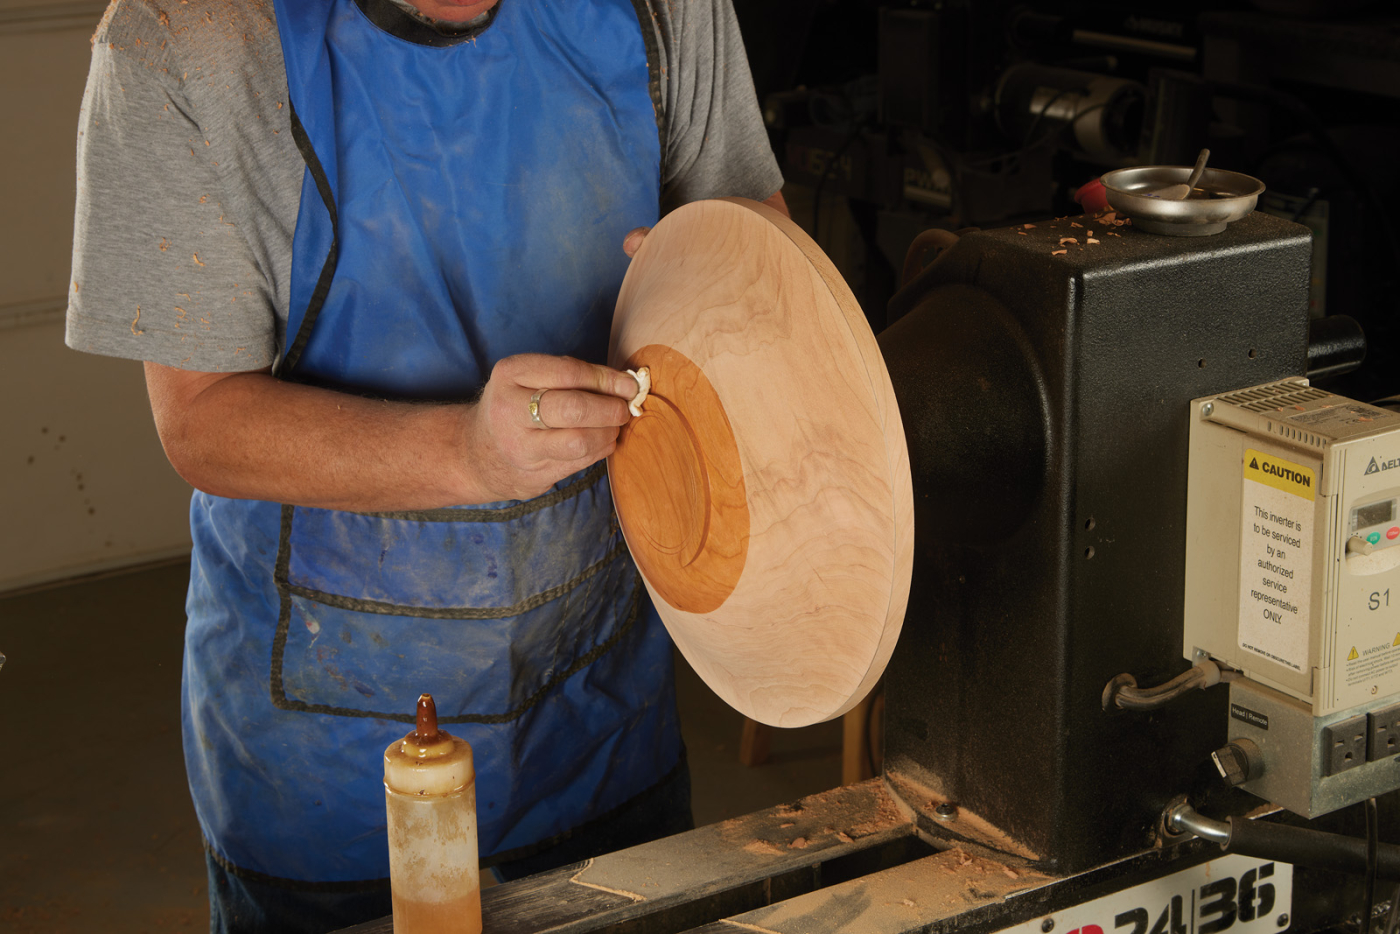
18-19. Seal the bottom of the bowl with sanding sealer (shellac), and then finish it with a coat of natural color Danish oil.
My preferred finish for most of my woodturnings is very simple. With the piece stationary, I seal the wood first using a thinned-down mixture of 75% Zinsser’s clear coat shellac and 25% denatured alcohol. This thinned-down mix will penetrate further into the wood, and any woodworker will tell you it’s better to apply several thin coats and built it up as opposed to a thick syrupy finish and need to sand it back! I pay particular attention to the end grain as the finish tends to soak in a little more than the long grain.
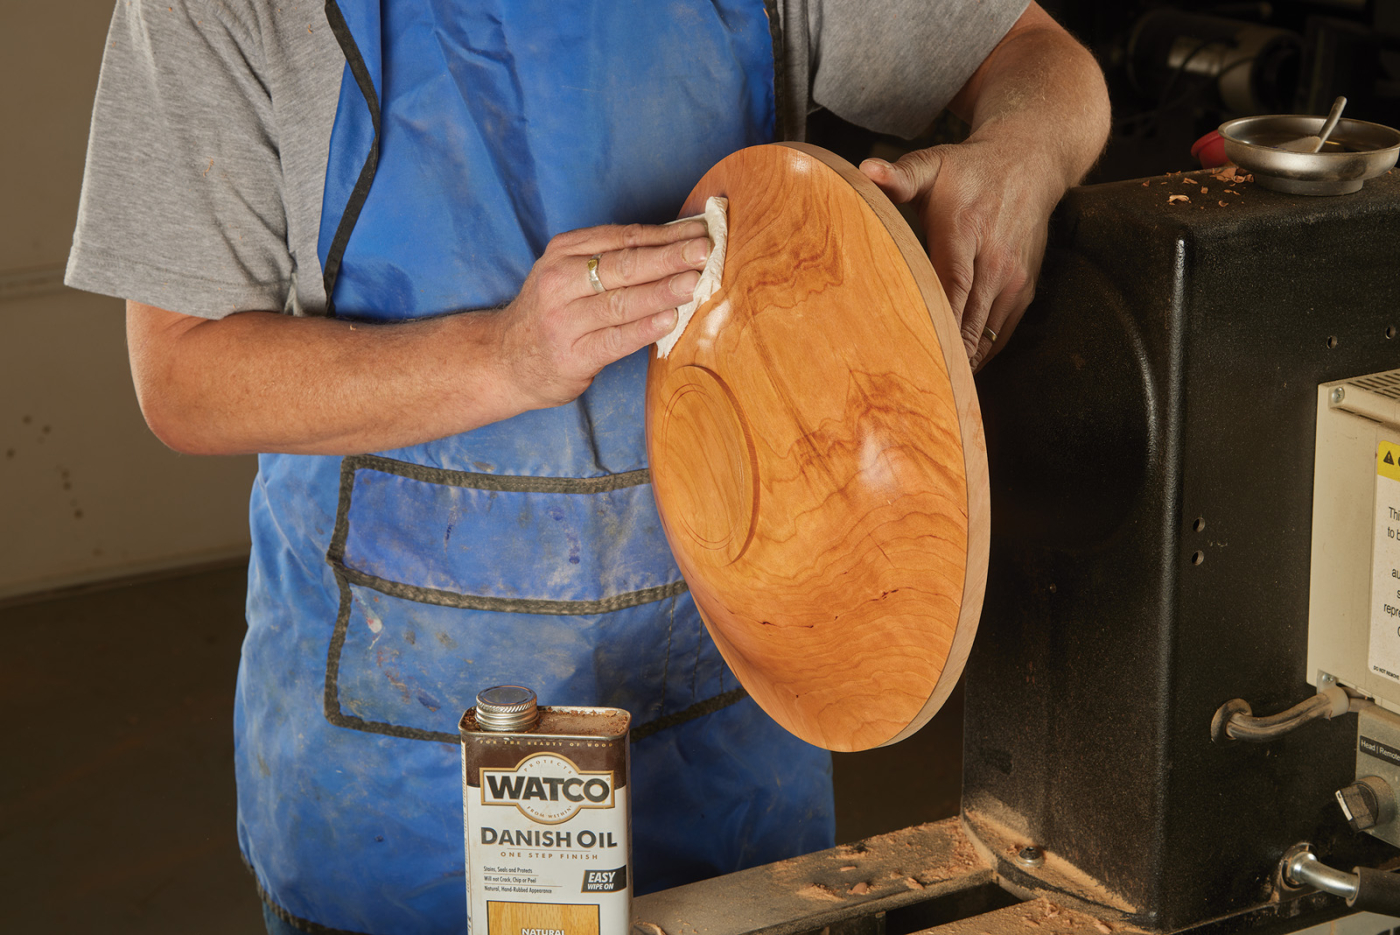
When the sealer is completely dry, I turn on the lathe and remove any slightly raised grain using a fine ScrotchBrite type of plastic abrasive pad. Then, I apply a light coat of Watco “Natural” Danish oil which will pop the grain and give the wood a beautiful luster. After allowing it to soak in for several minutes, come back and wipe off any excess oil with a clean piece of paper towel. Next, turn the lathe back on and apply a little pressure to help dry and burnish the oil on the surface.
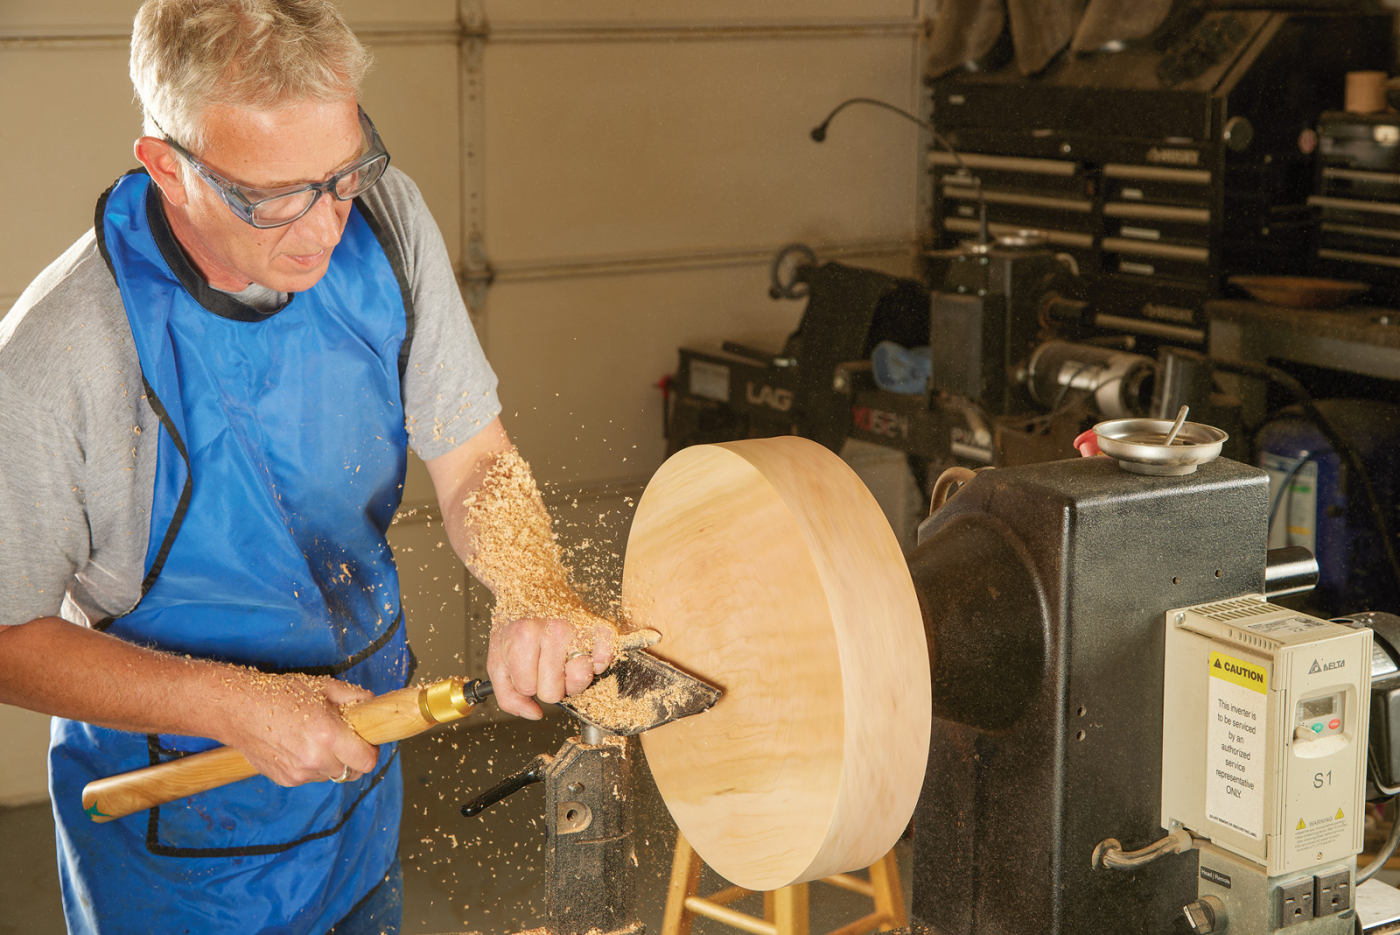
20. After turning the blank around, true up the surface with a series of draw cuts, to give you a clean starting surface.
Carved Rim
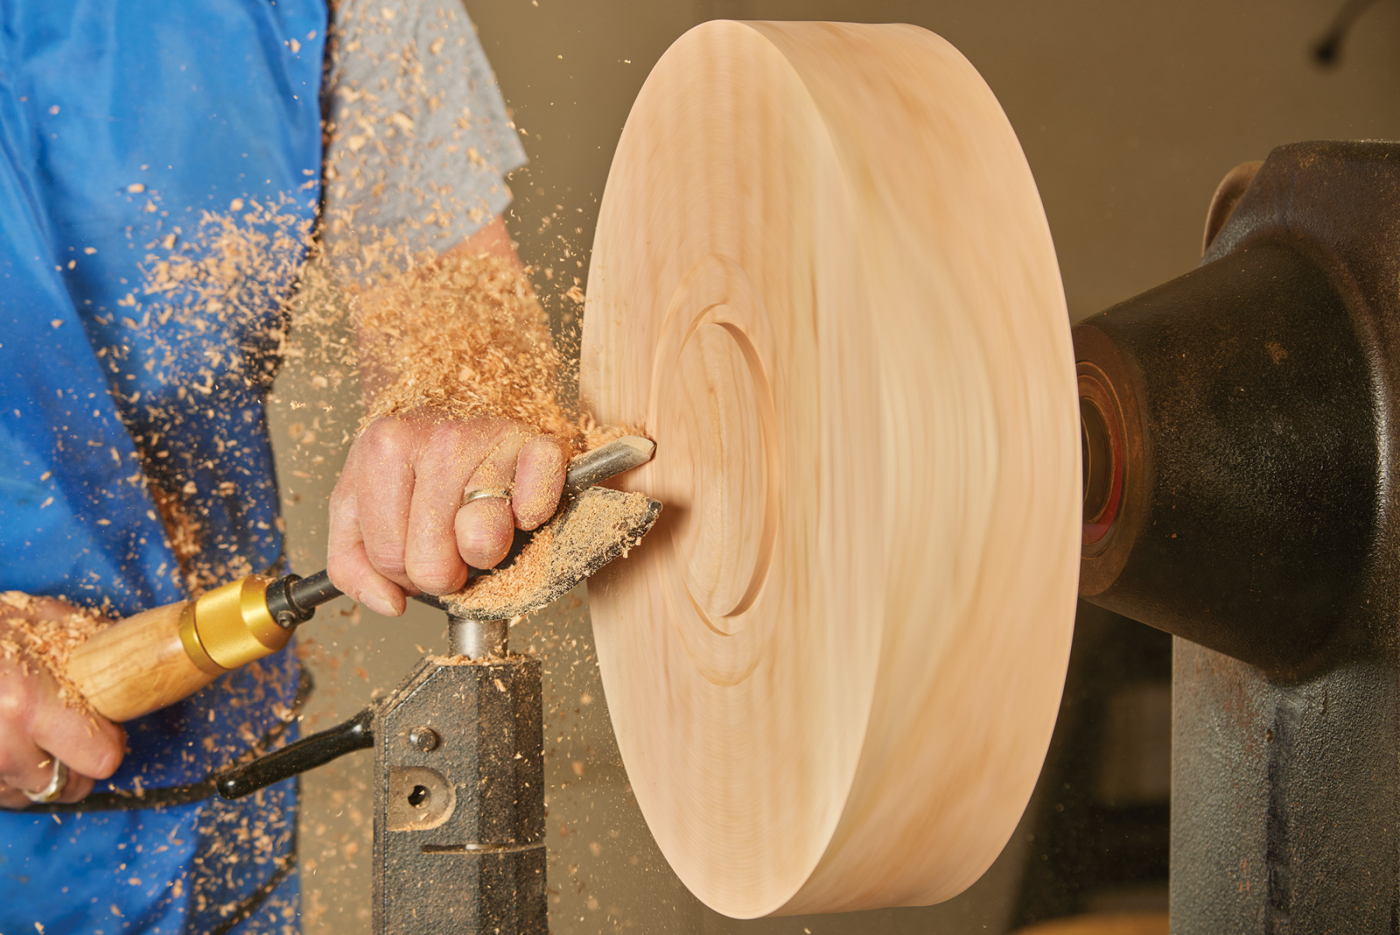
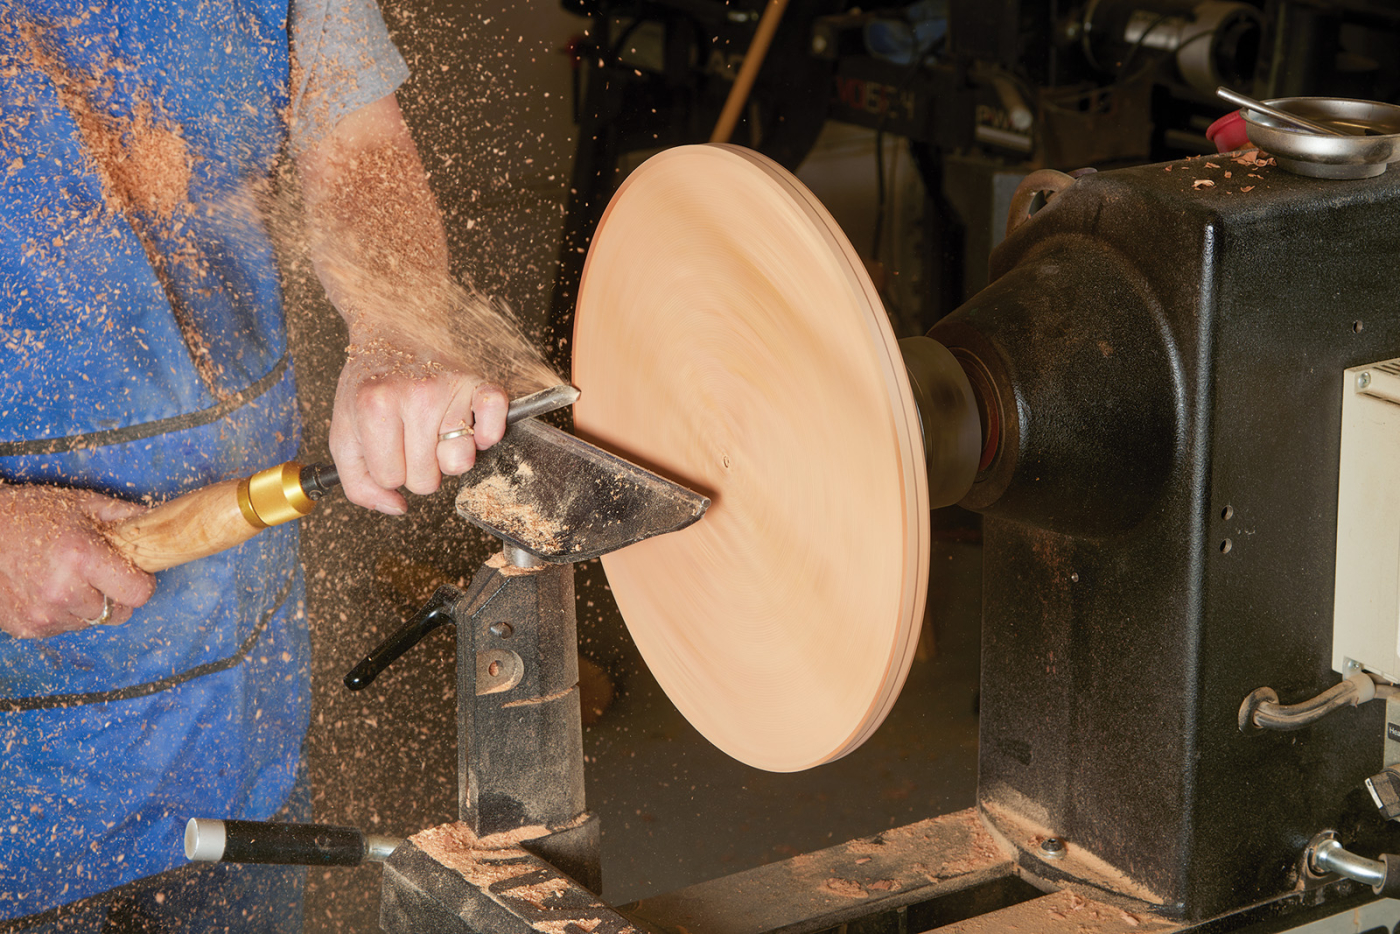
After removing the blank from the screw chuck, mount it in the scroll chuck and make sure that you tighten the chuck securely on the foot and that the piece is fully in the jaws. It is important that the foot or tenon is cut accurately to allow for this. If the piece is running out of true and you start to turn it, you would end up with a different rim and wall thickness throughout the bowl.
After the blank is mounted in the chuck and is running true, I use a draw or pull cut and clean up the face of the bowl until it runs true as well. I then turn the rim to about 3/16“ thick, which allows enough thickness to take into account the carving I will be doing. Using an aesthetic measurement, I scribed a pencil line to mark the width of the rim which is to be carved. I prefer to carve the rim first and then hollow out the bowl as this greatly reduces the risk of tear out on the inner edge of the bowl.
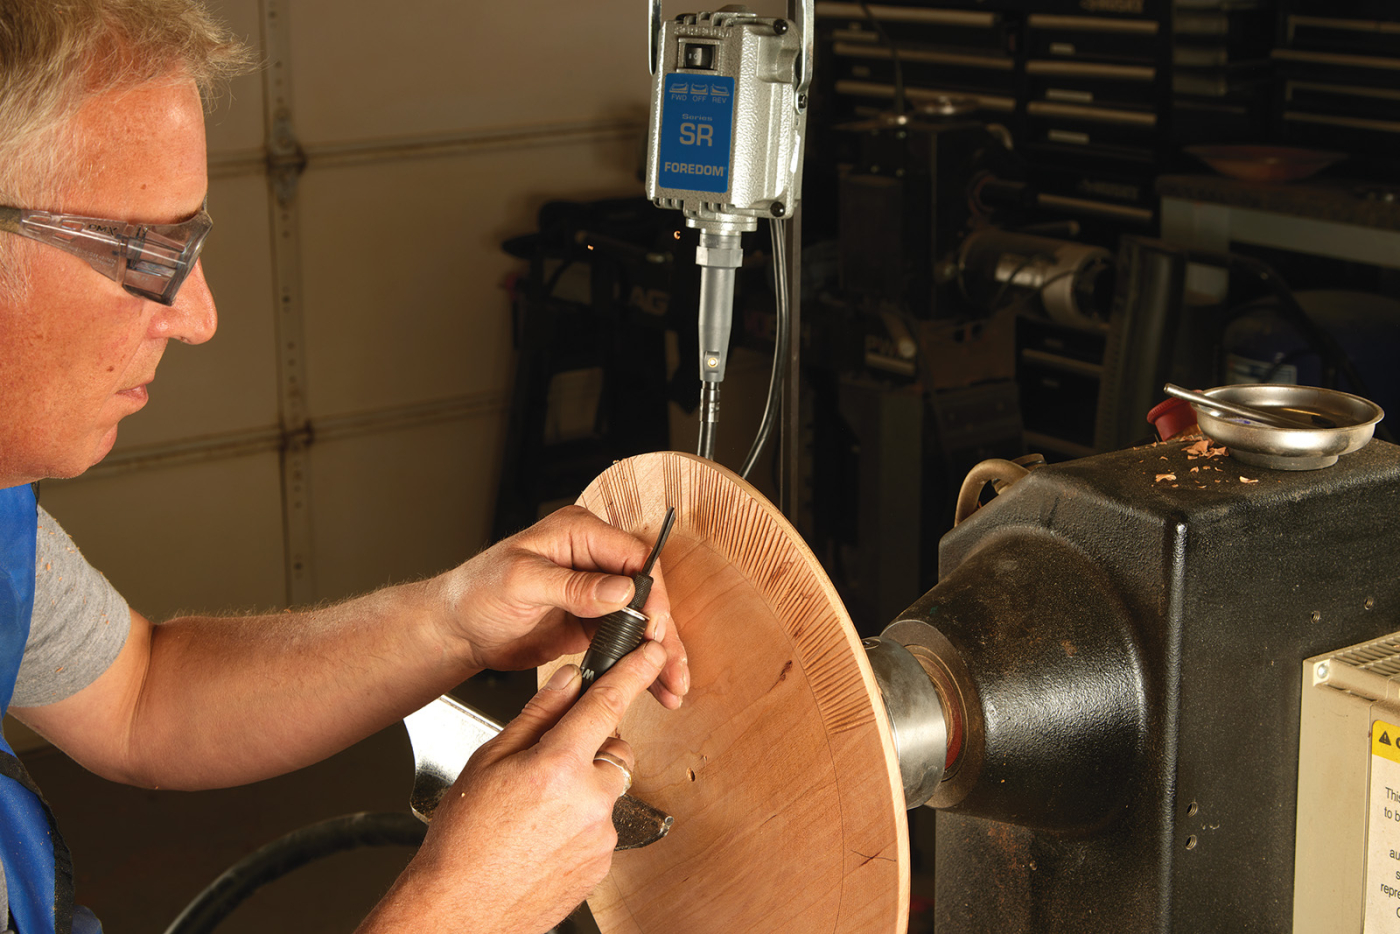
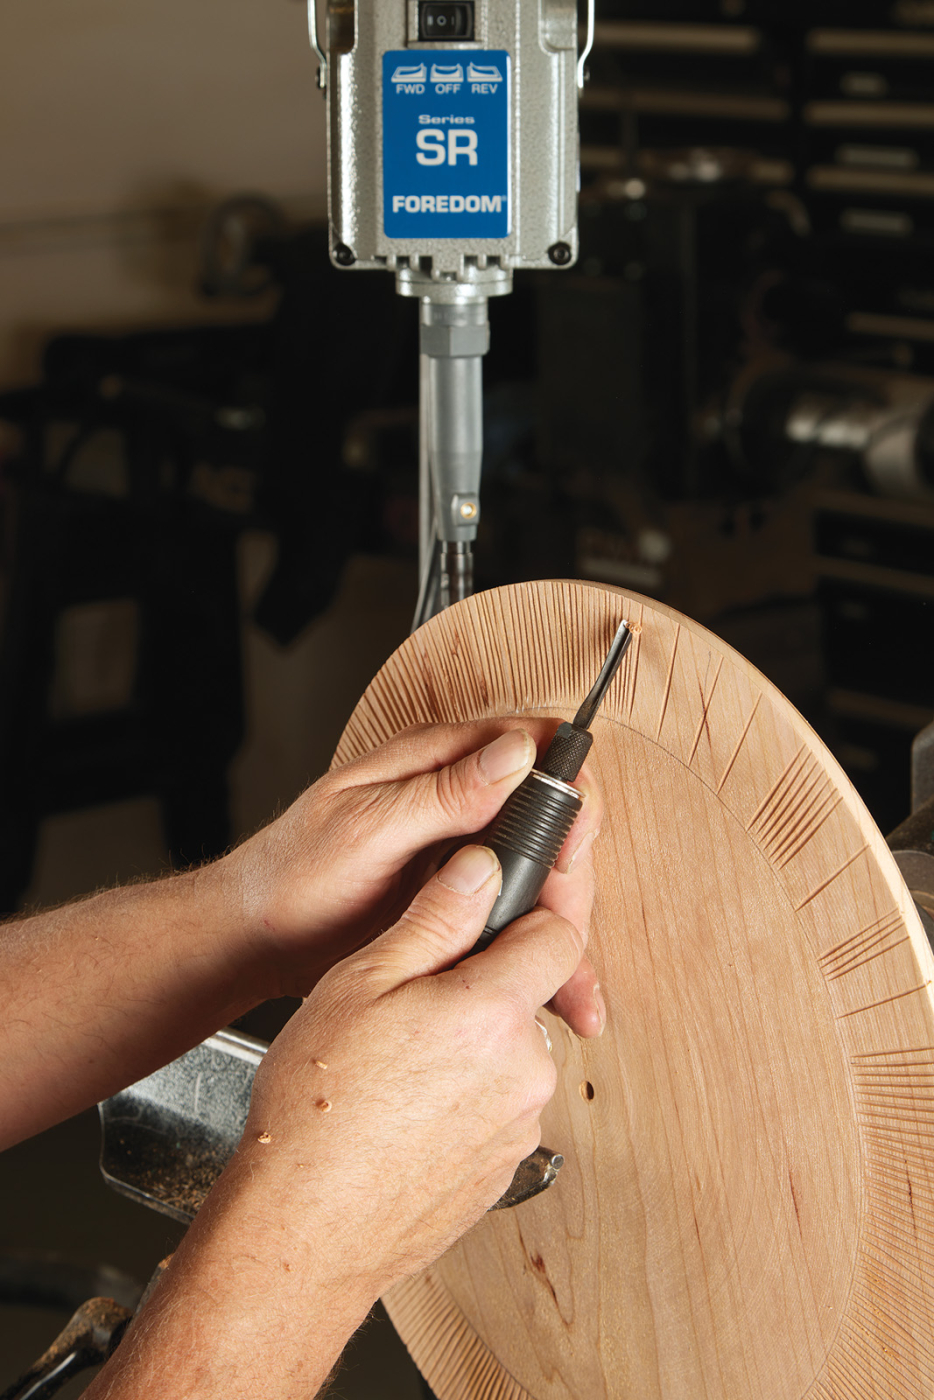
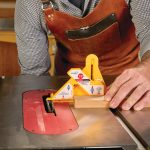
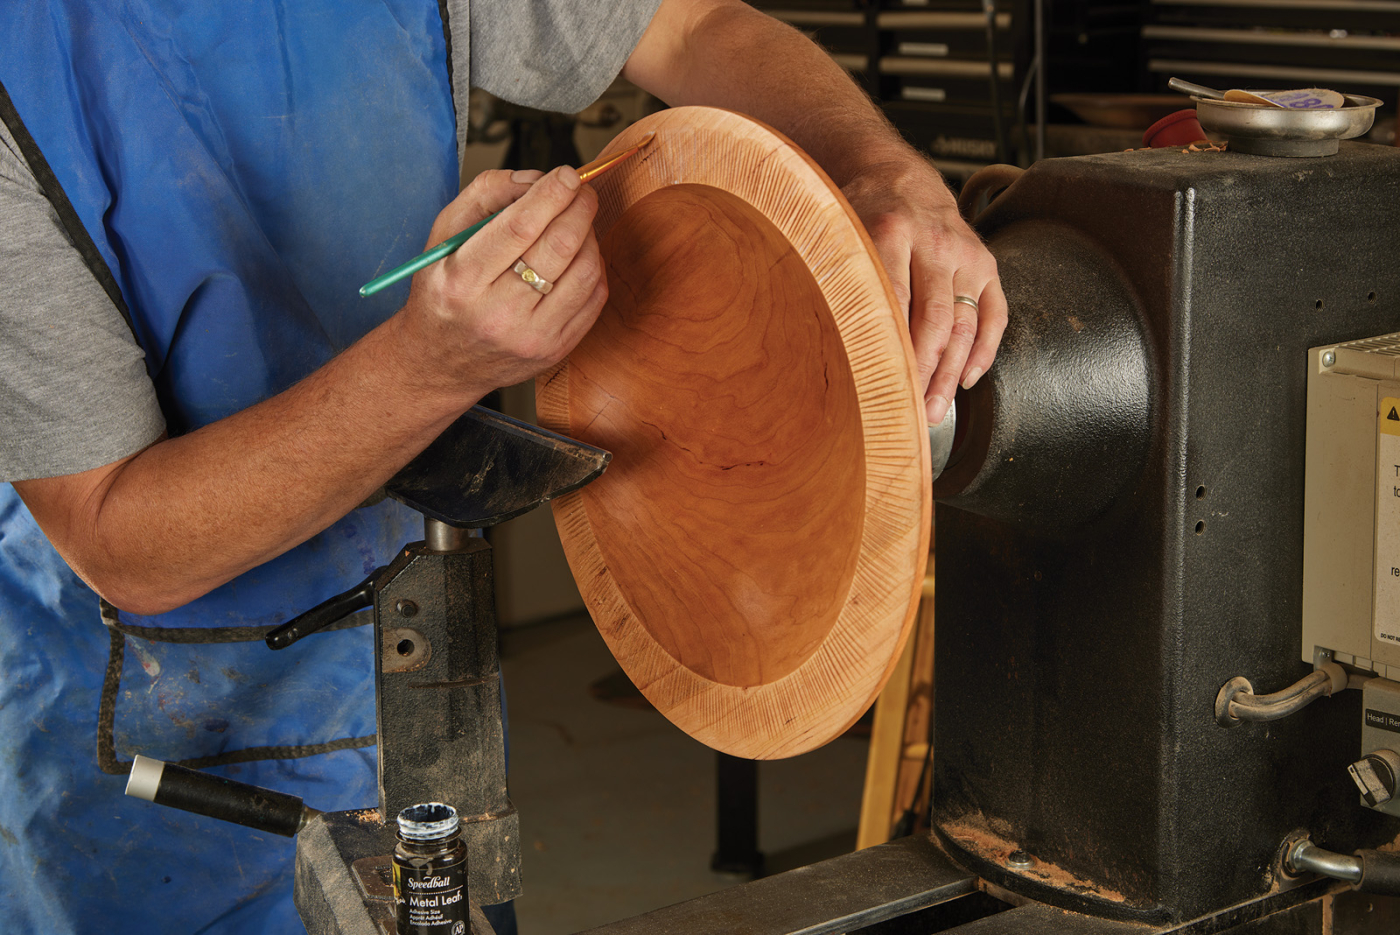
21-23. After locking the spindle, use a Foredom power carver to carve lines in the rim. A sharp chisel cuts clean, but any fuzz can be cleaned up with a sanding flap in the Foredom
It’s time to start carving. I use the Foredom range of power carving equipment. In my opinion, it’s top-notch, and it also has a reciprocal carving attachment in addition to the standard rotating head that I use for sanding and grinding … not to mention a host of other attachments. To carve the rim, I am using the reciprocal carving attachment with a Flexcut “V” shaped carving blade inserted. I then made a series of radial cuts from the inside to the outside of the rim of the bowl. A good tip is to divide the rim into four quarters so the cuts remain radial and won’t wander to one side, which would form a spiral. (You could use the spiral cuts as a different design in the future.) Remember, the cuts for this rim are randomly organized if that makes sense. If they are slightly different widths or cross over a little, it doesn’t matter as it will not affect the end visual result.
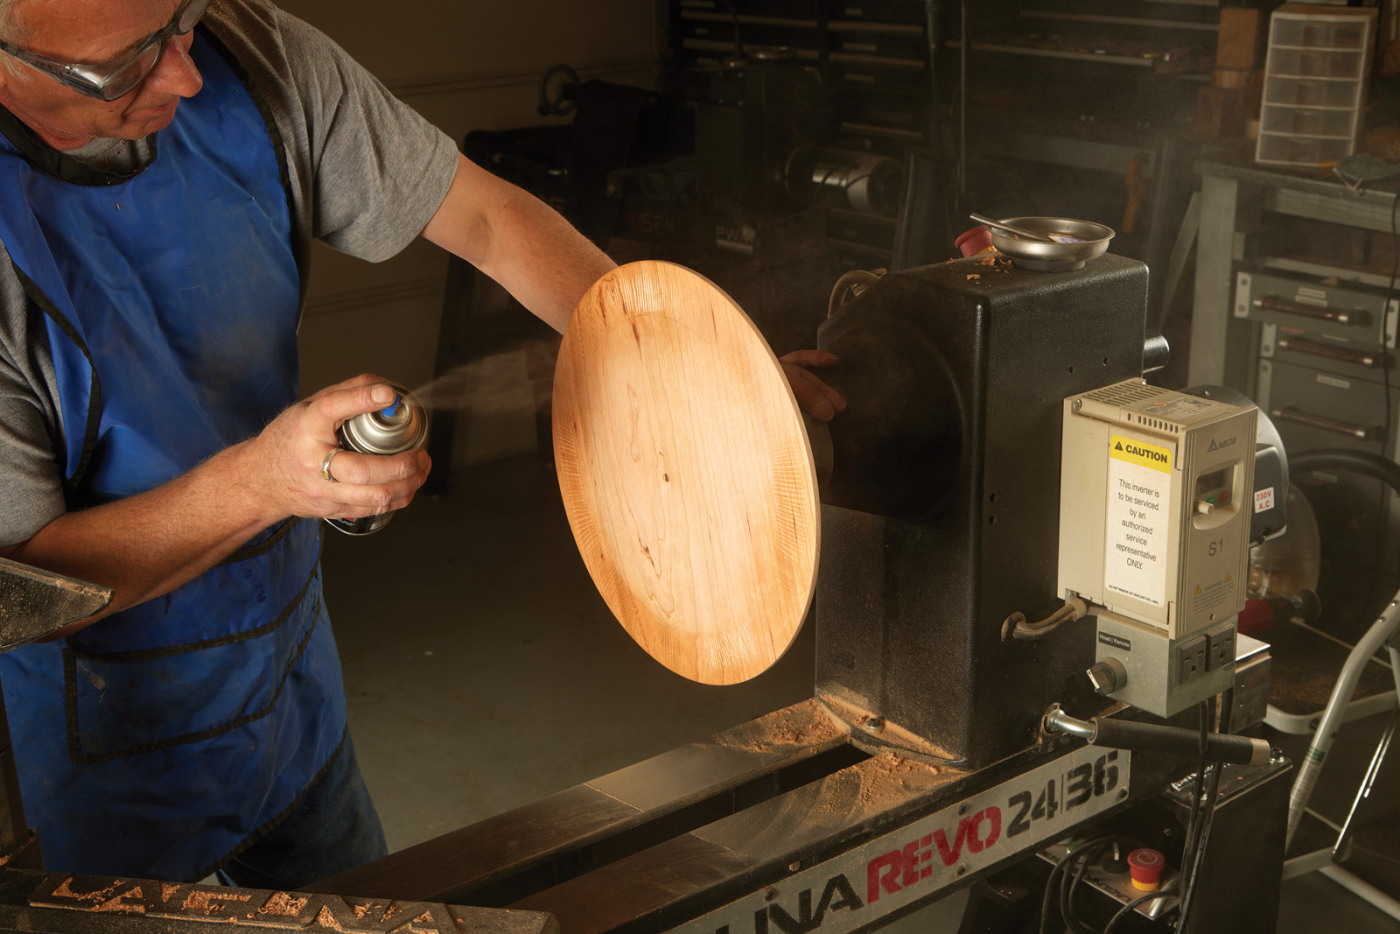
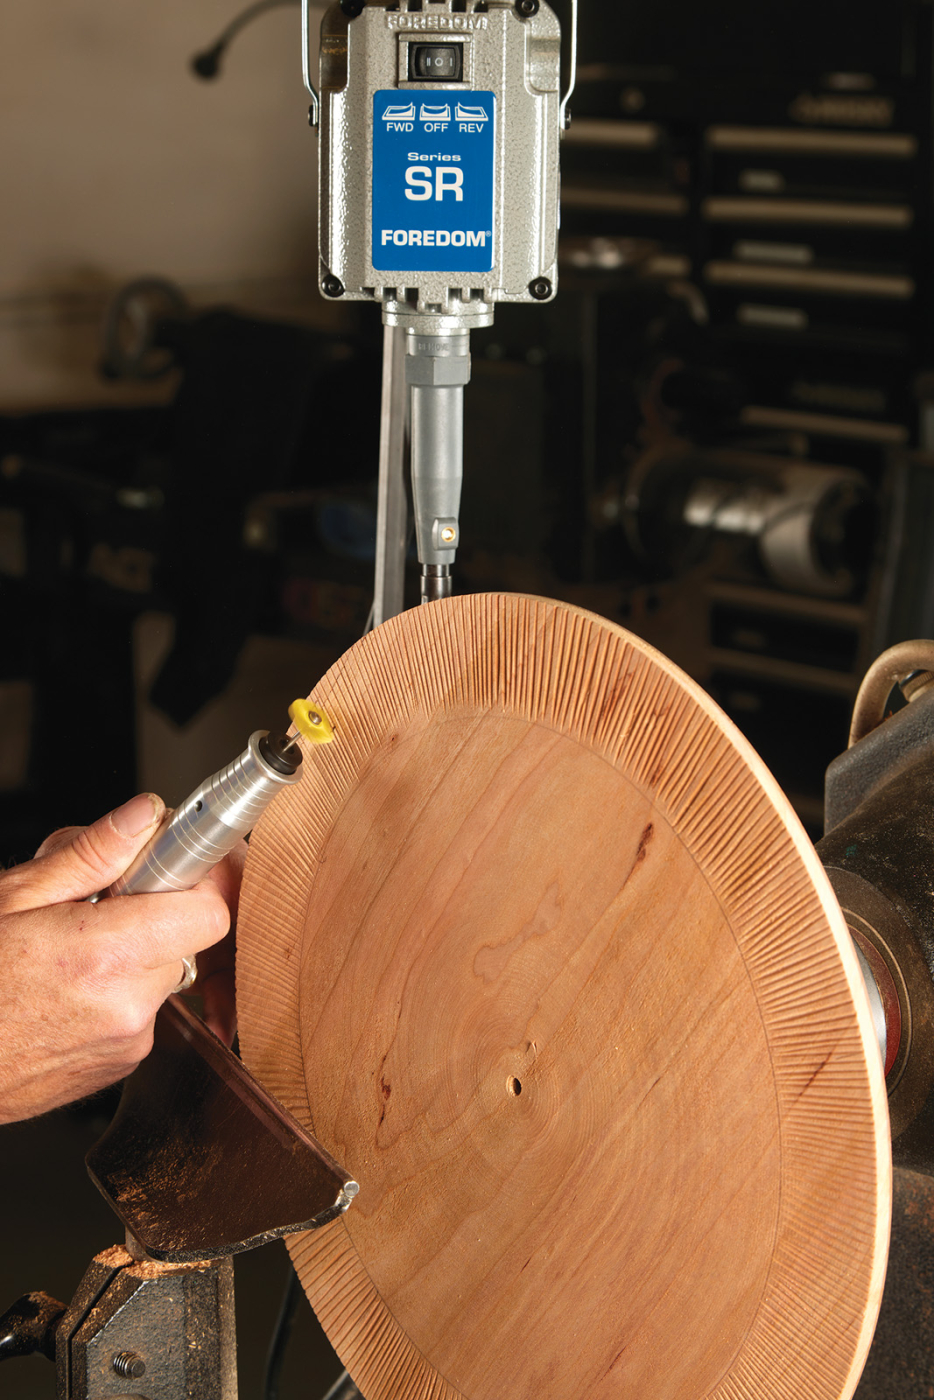
24. Seal the rim with a few coats of spray lacquer.
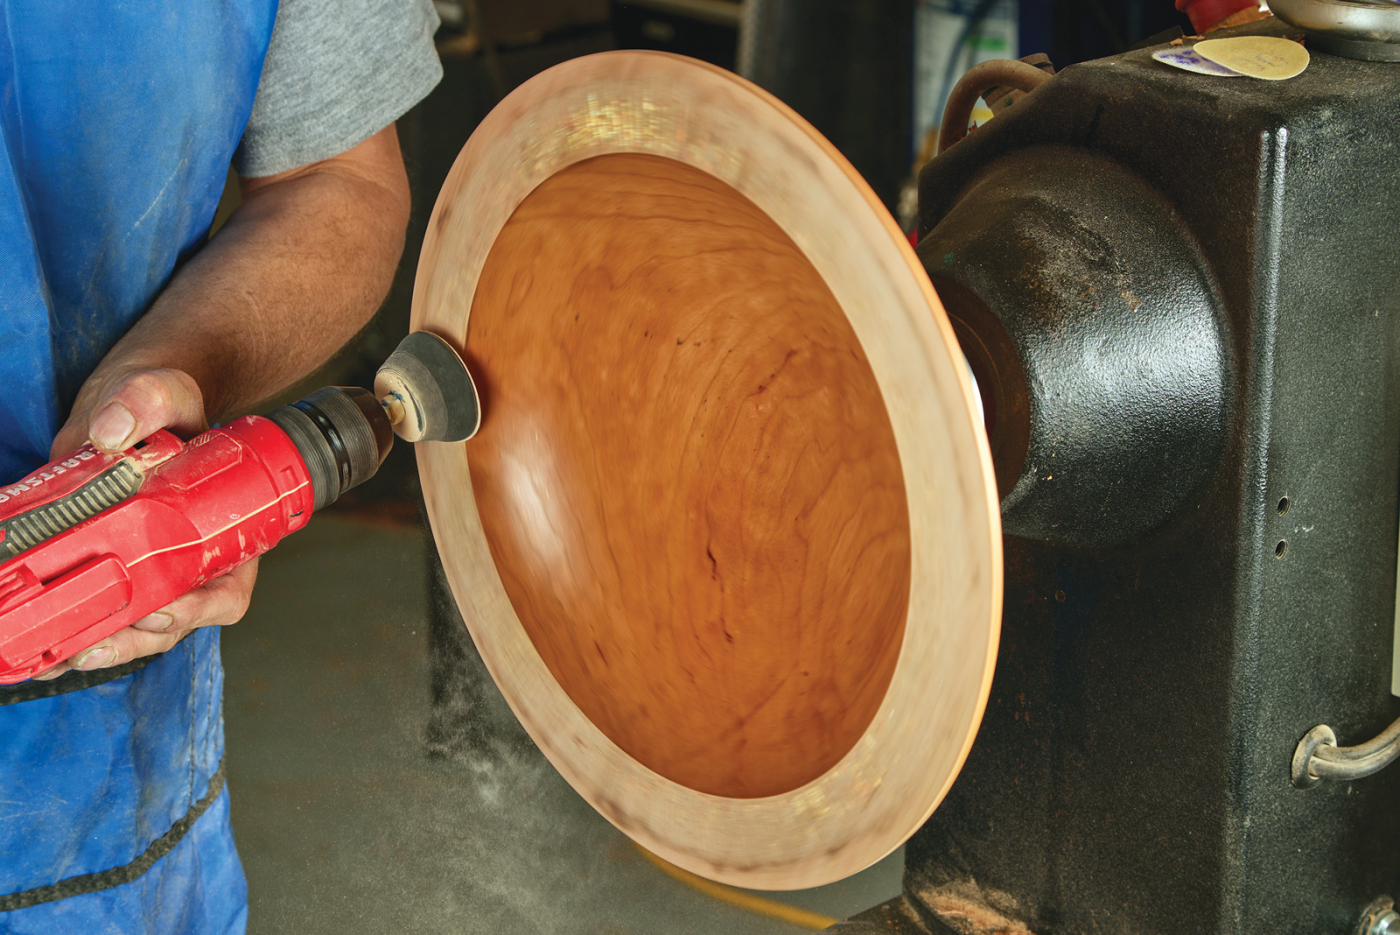
After carving, I use a rotary sanding disc to remove any torn grain, especially on the end grain. Again, choosing cherry for the bowl, which carves beautifully, greatly reduces this from happening. Next, you need to seal the carved area in order for the adhesive for the metal leaf to adhere. I use a can of stain spray lacquer to seal the surface. This will allow the adhesive to cure on the surface and not soak into the grain of the wood.
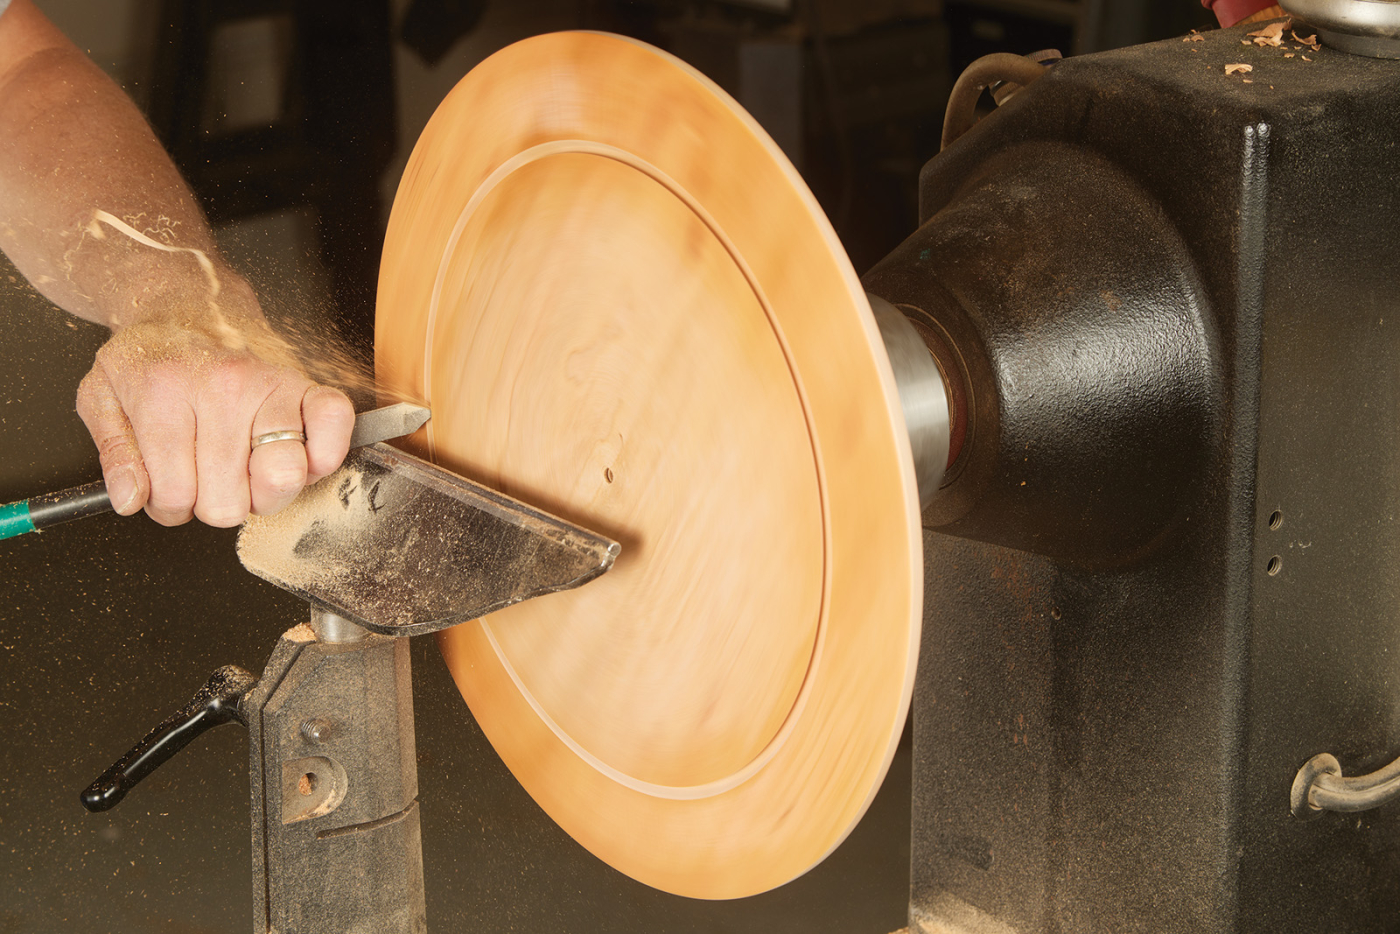
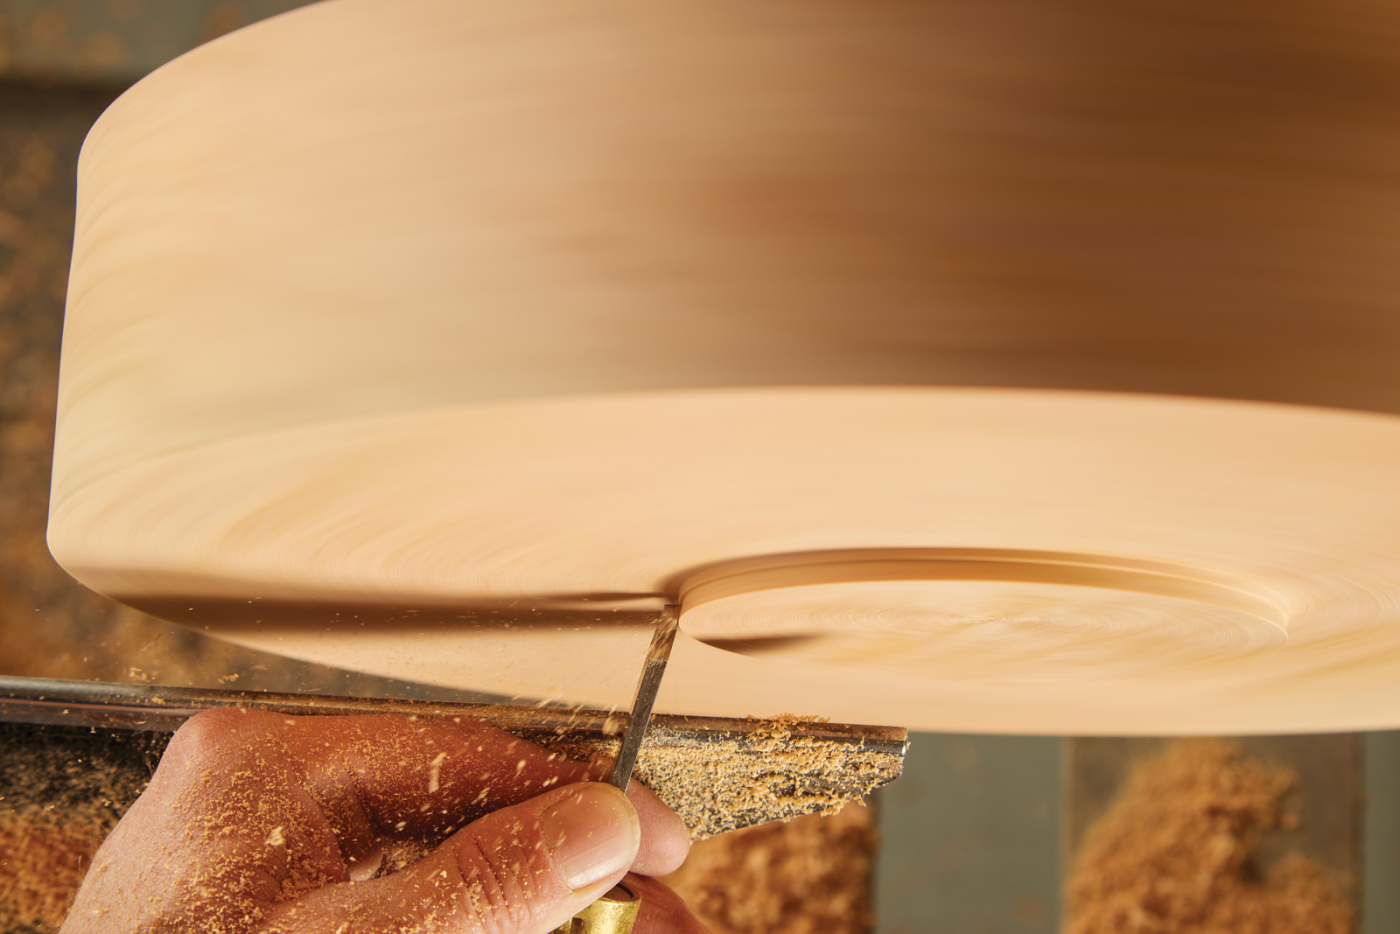
25. Define the rim of the bowl using a parting tool, cutting at a slight angle to match the inside curve.
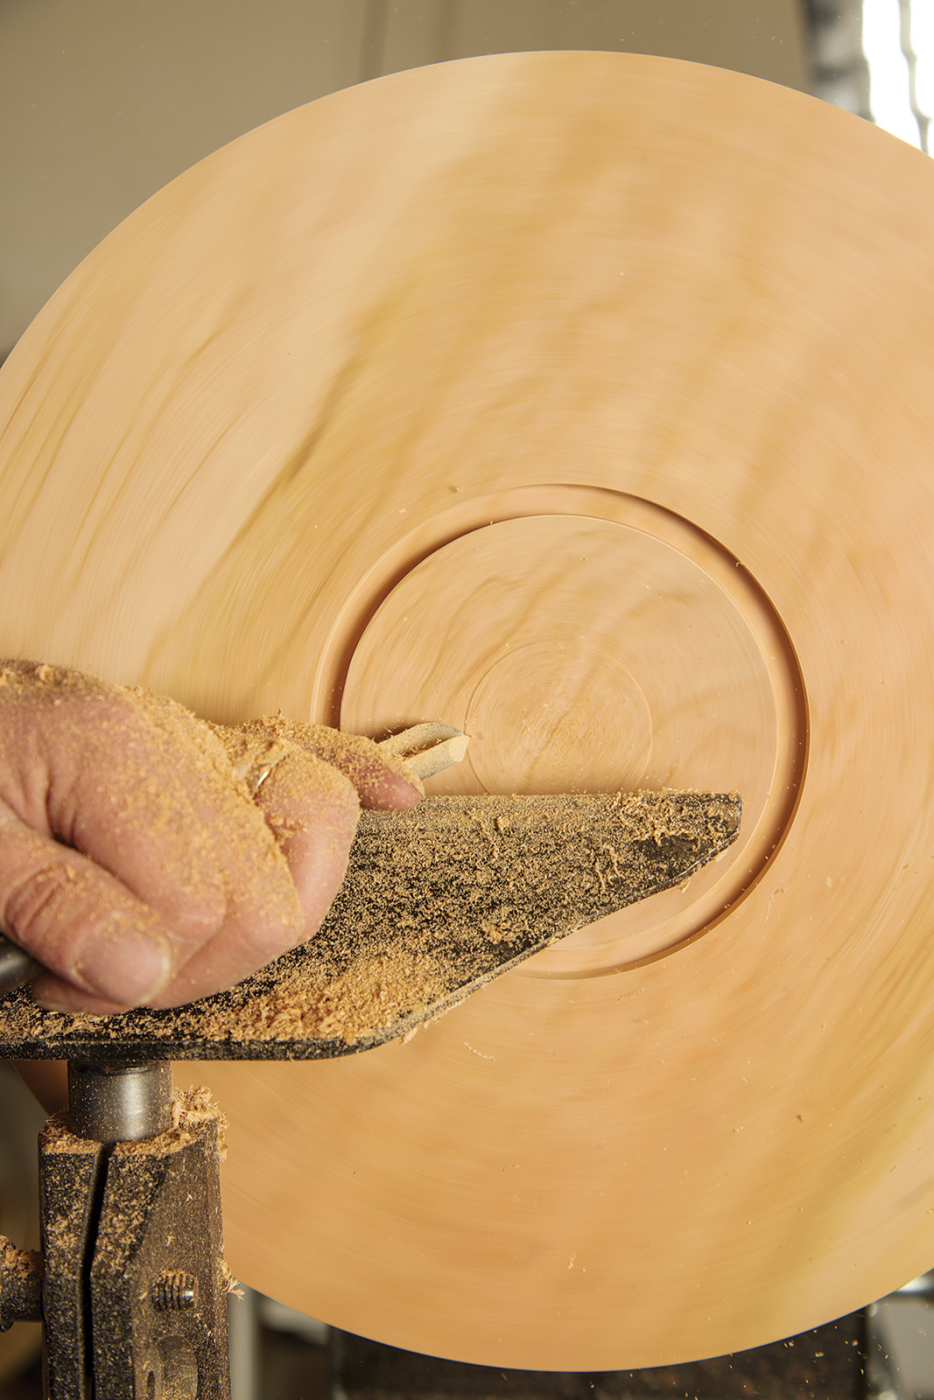
Hollowing the Bowl
After the carving of the rim is completed and sanded, if necessary, I then use a 1/8“ parting tool to make a cut about 1/4“ deep to define the rim of the bowl. This cut gives you a flat support to place the bevel for control when hollowing from the rim of the bowl into the center of the blank.
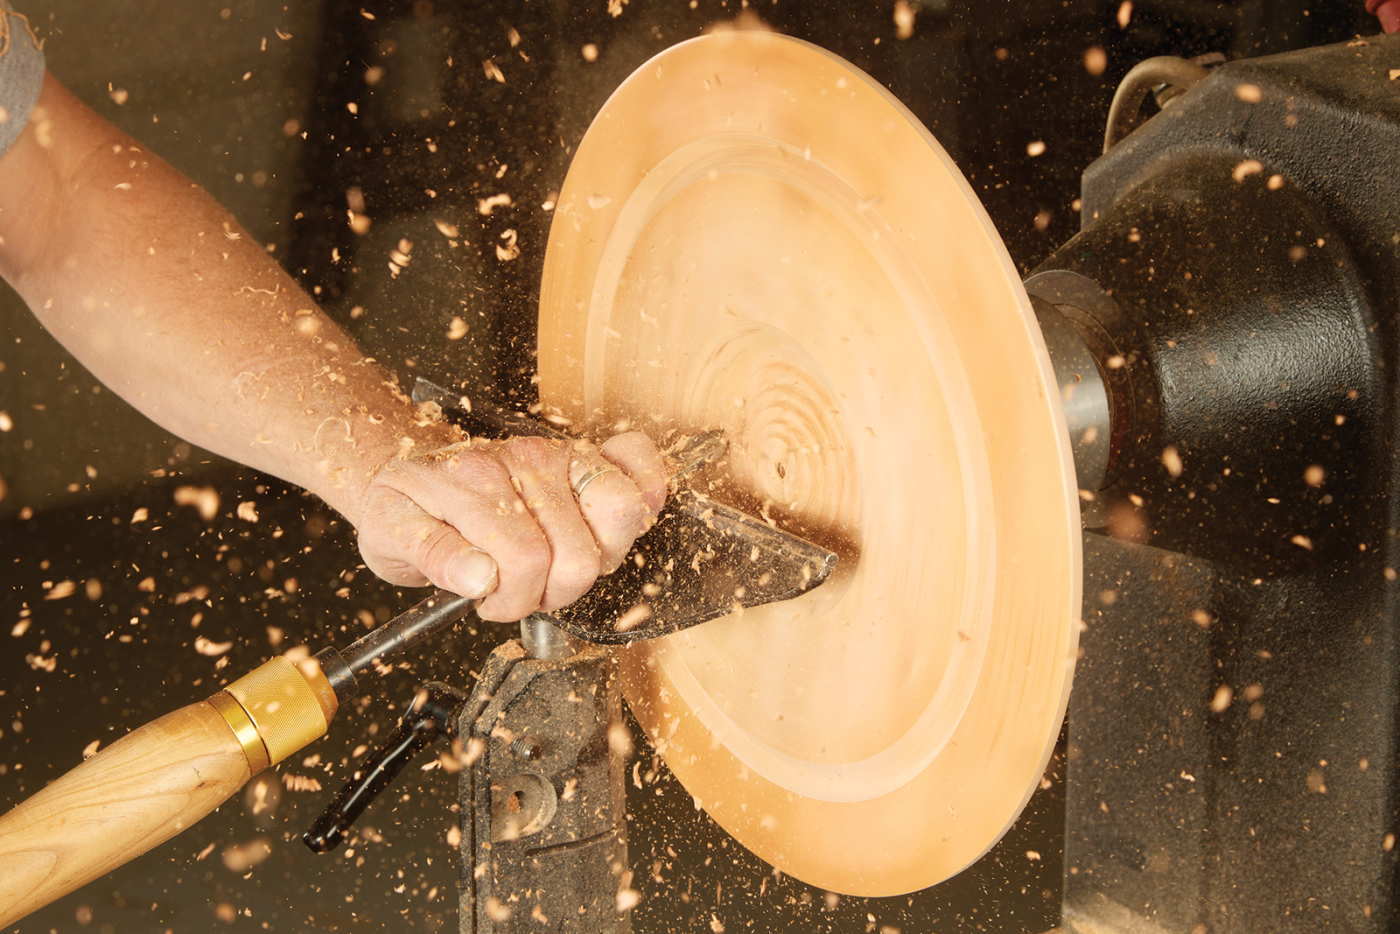
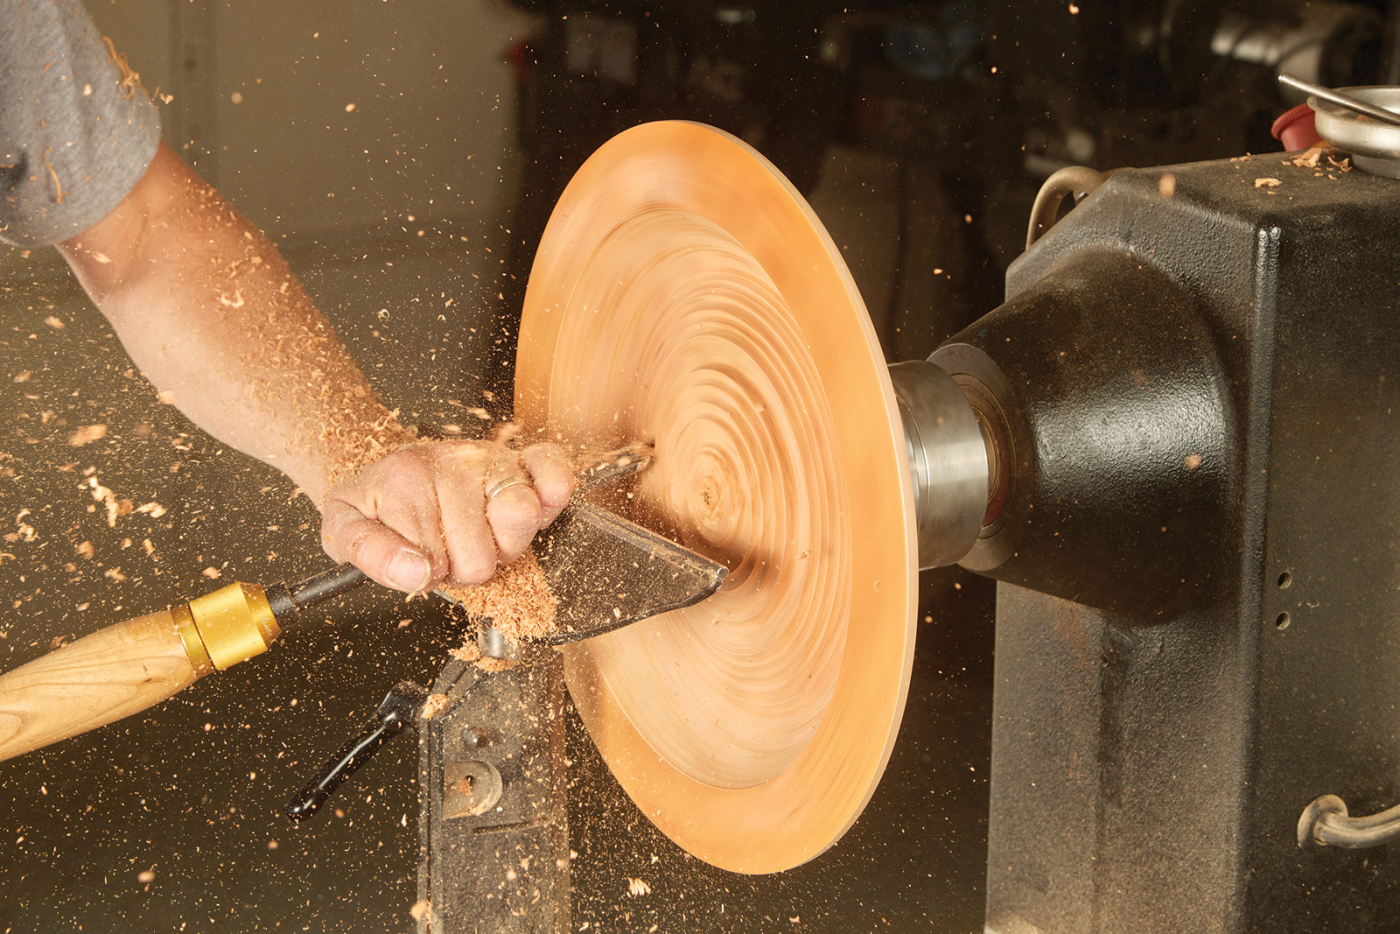
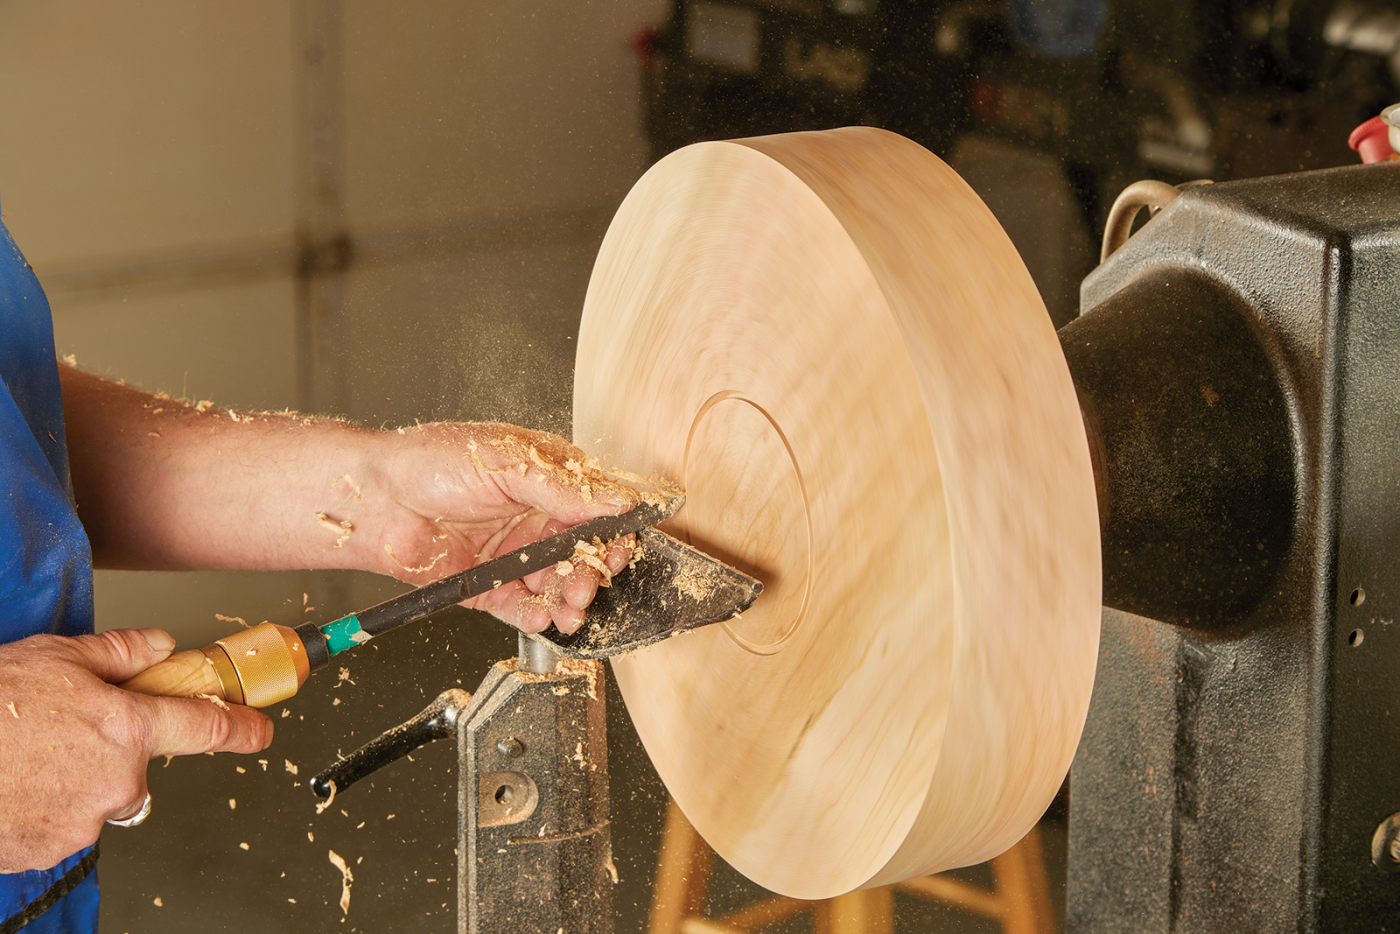
26-29. Hollow out the inside of the bowl with your tool of choice. A swept back grind on a bowl gouge works well here, but you can switch over to a traditional grind or a bottom bowl gouge to help get an even, consistent curve along the inside bottom of the bowl.
Using my 1/2“ bowl gouge and push cuts, I proceed to hollow from the center of the bowl to about half the depth and work towards the outside of the bowl. I prefer to turn a bowl in stages depending on how large it is, a deeper bowl may take 3 stages of hollowing, again because of the support. When you start to hollow a bowl, you are releasing tension and stress. If you take too much of the waste wood in one go, the wood can move, making it more difficult to pick up a finishing cut. That’s why I only hollowing to half the depth of the bowl is simply for more support.
30. After sanding back through 400 grit, apply the same finish you did on the outside —sanding sealer followed by a couple of coats of natural colored Danish oil. Try to not get any oil on the rim, as that will interfere with the next step.
I turn the first part of the inside curve to the correct thickness and then return to the middle and hollow to the final thickness, blending the outer curve of the bowl into the curve flowing to the bottom of the bowl. Watch out for a depression or a hump in the middle of the bowl, a common error. After hollowing the bowl, I sand and finish the inside of the bowl as I did on the outside minus the rim as this is where we will apply the adhesive and metal leaf into the carving.
31. With an artists brush, apply a thin coat of gilding size (glue) to the lines on the rim of the bowl.
Applying Metal Leaf
For the metal leaf, I am using the brand called “Cosmic shimmer,” which I purchased off Amazon. There are several color variations of flake available to choose from. I first applied the adhesive or size for the metal leaf using a soft bristle brush. When the adhesive is applied, it is milky white in color. When it turns clear, it is ready for the metal leaf to be applied. It only takes a few minutes to go from milky white to clear.
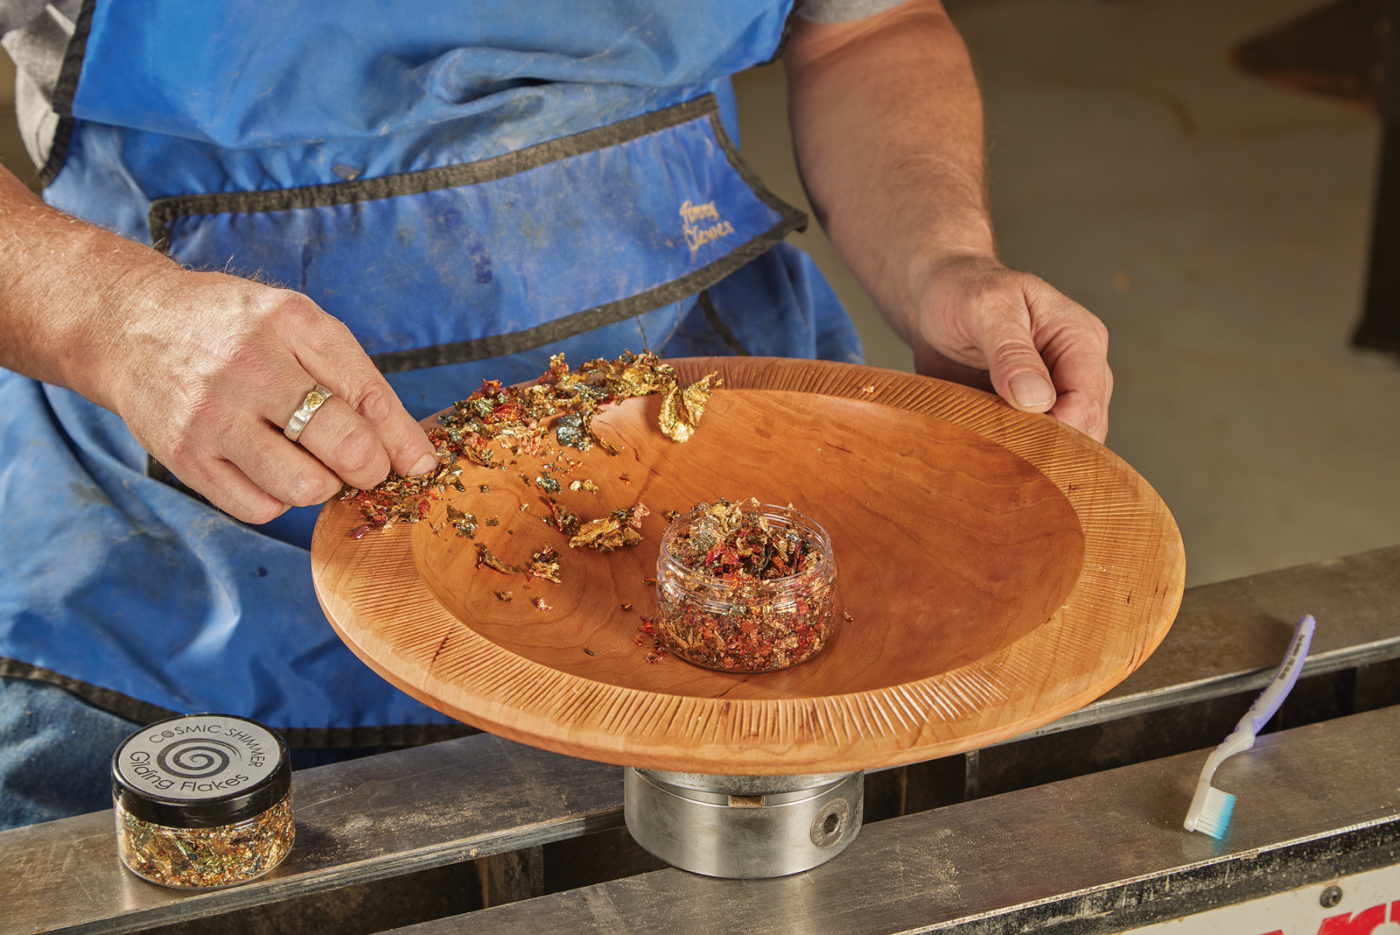
32. Set the chuck and bowl on the lathe bed, and crumble the leaf of your choice along the set-up size. Here, I’m using a variegated (multi-colored) leaf.
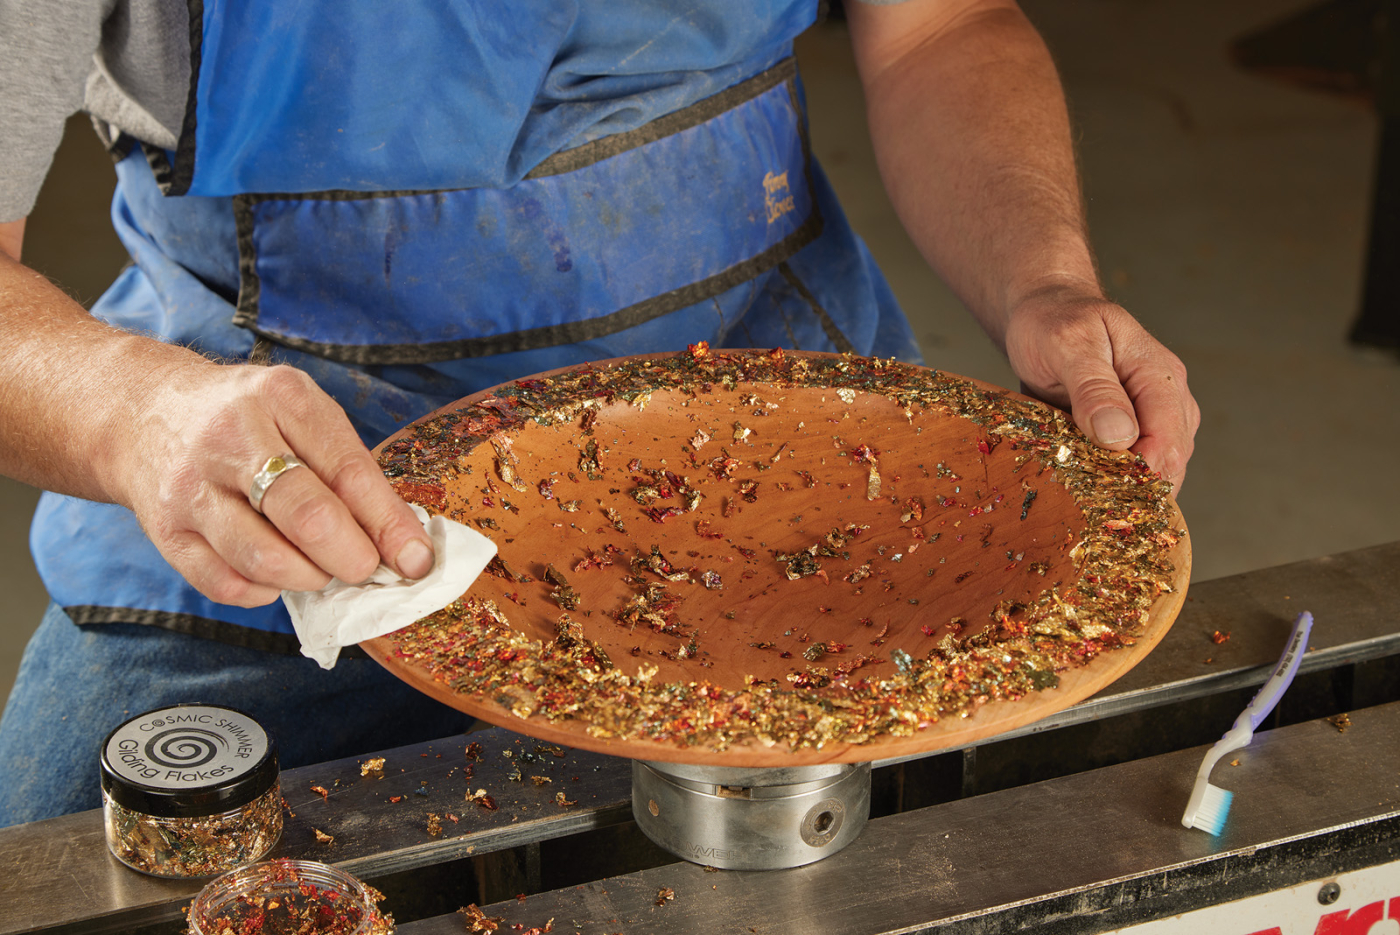
33. After the rim has been covered, use a soft tissue to push down the leaf into the size.
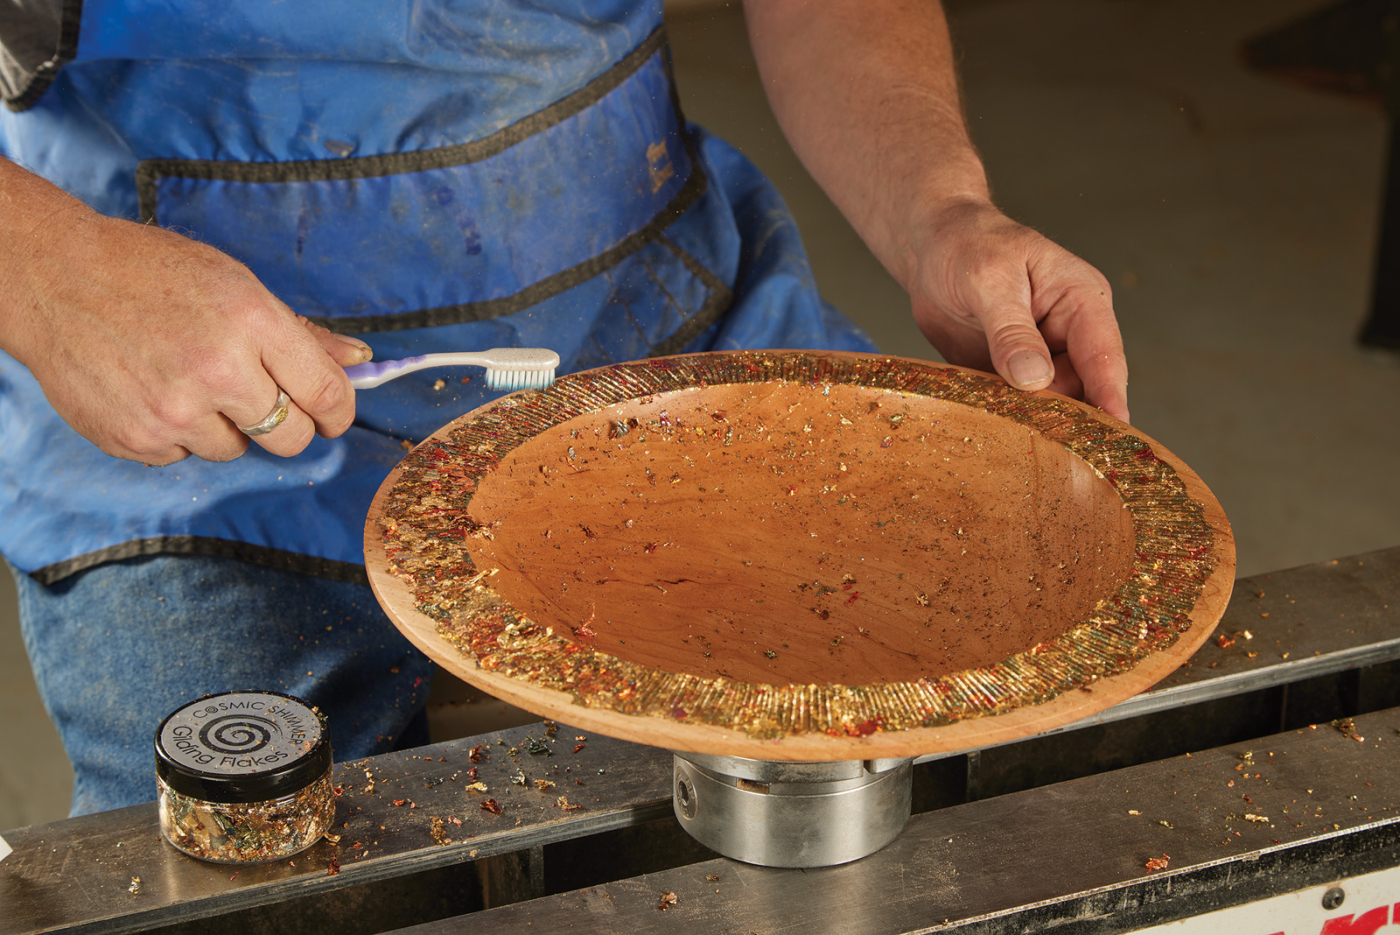
34. Grab an old toothbrush and flake away loose the leaf.
Applying the leaf is very simple, just take a pinch at a time and cover the carved area. Then using a soft paper tissue, push the leaf into the carving. Any excess leaf can then be removed using a soft bristle brush or a new toothbrush (don’t get caught using your significant others!). The excess leaf can be collected and used again in the future.
35. Give it a final once-over with the tissue to make sure everything’s stuck
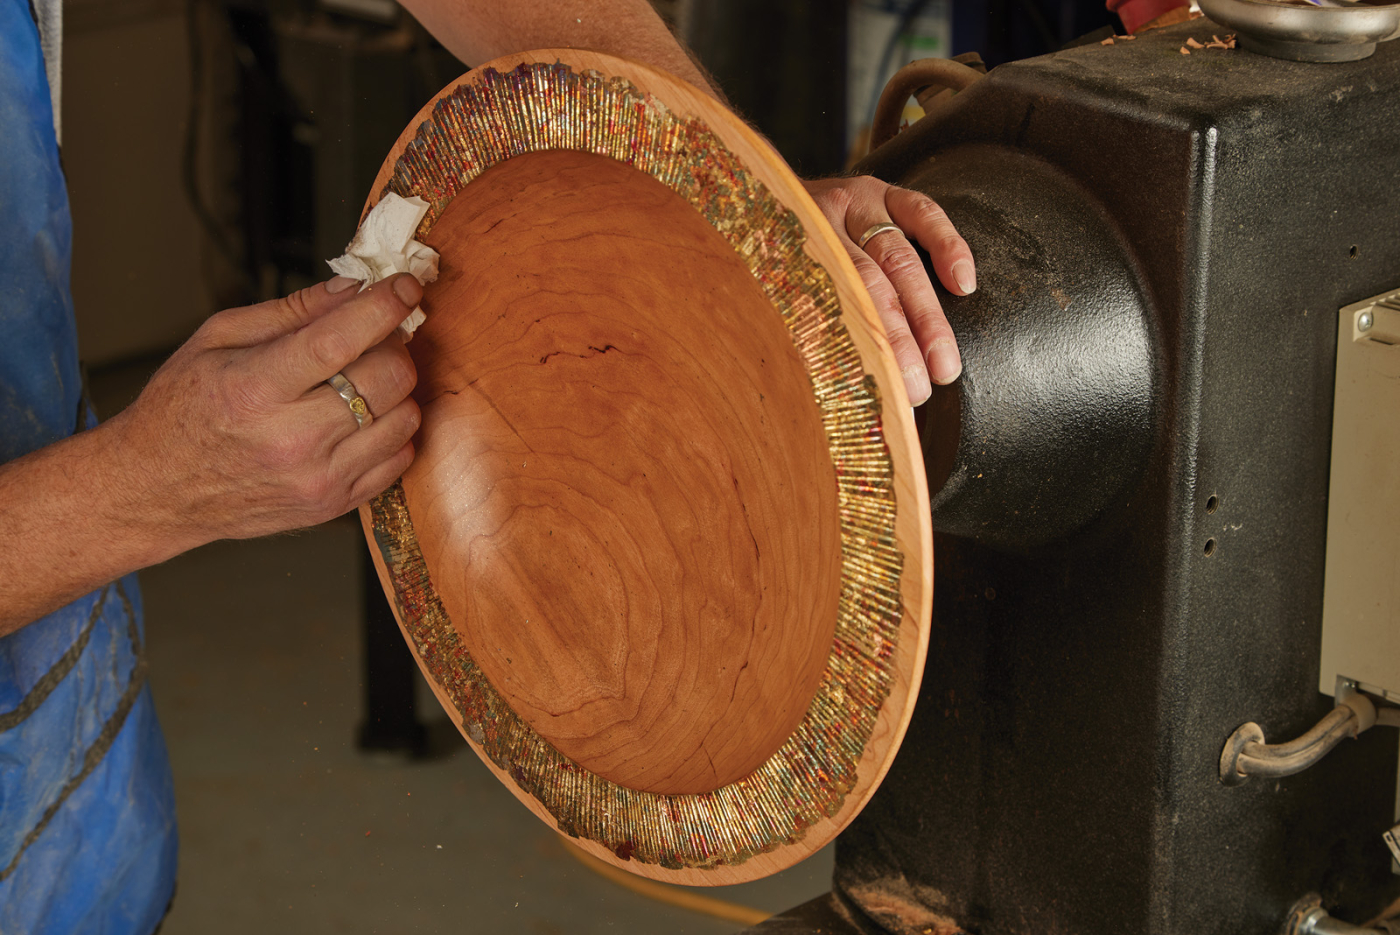
36. Gently sand away excess leaf and curve the rim, causing the carved cuts to feather out.
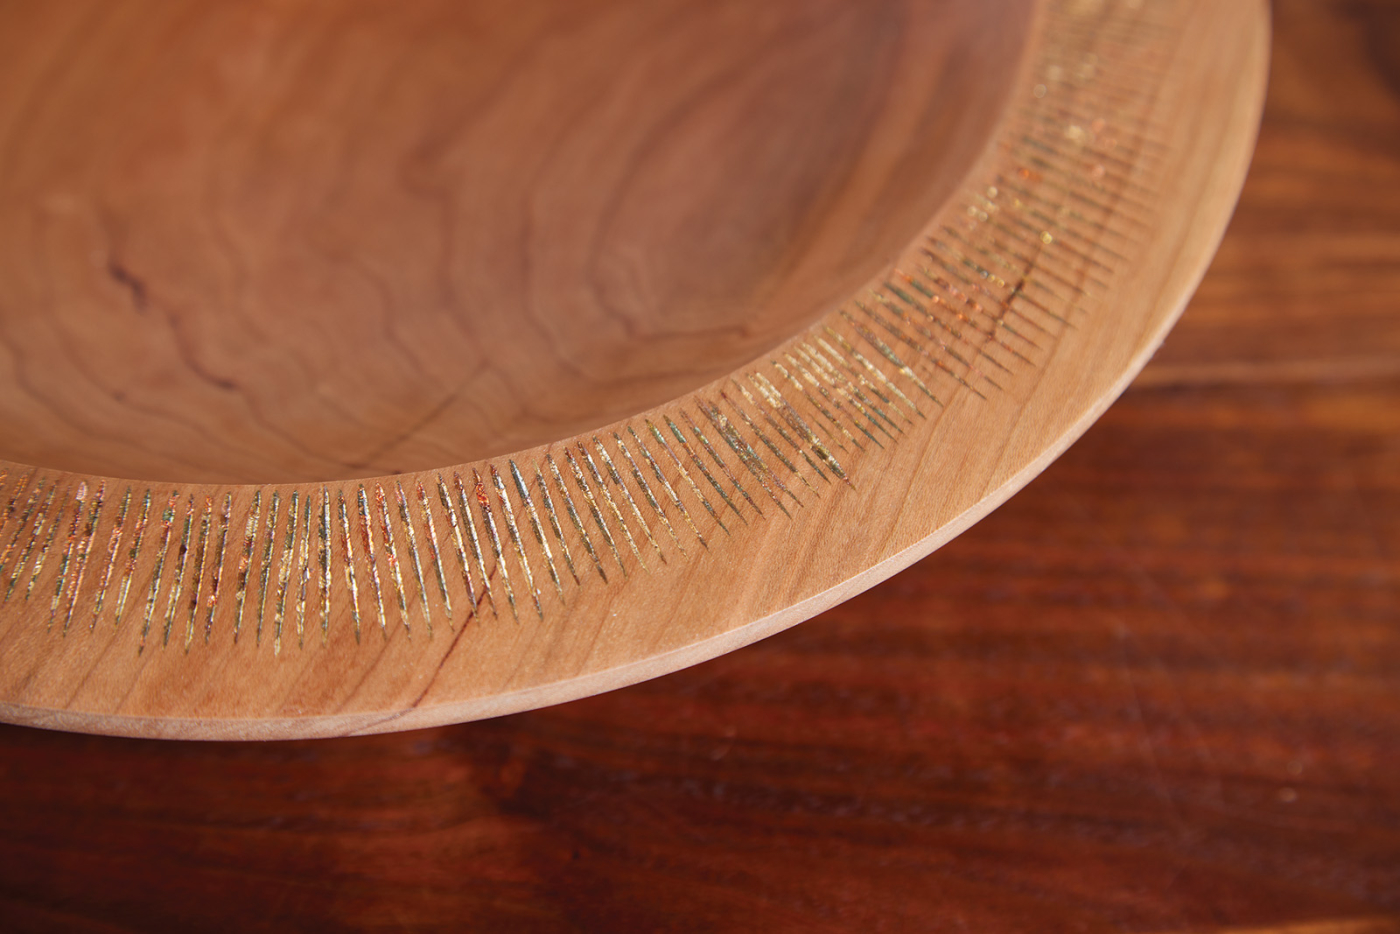
The effect I am looking for is to have the metal leaf just in the carved area, so in order to get that effect, I simply sand away the leaf on the surface with 400-grit sandpaper. Any dust that is on the surface of the metal leaf can be blown away using an air compressor or wiped away gently using a paper tissue. All that is left now is a great finish for the carved rim and leaf. I recommend a spray lacquer, whichever sheen you prefer.
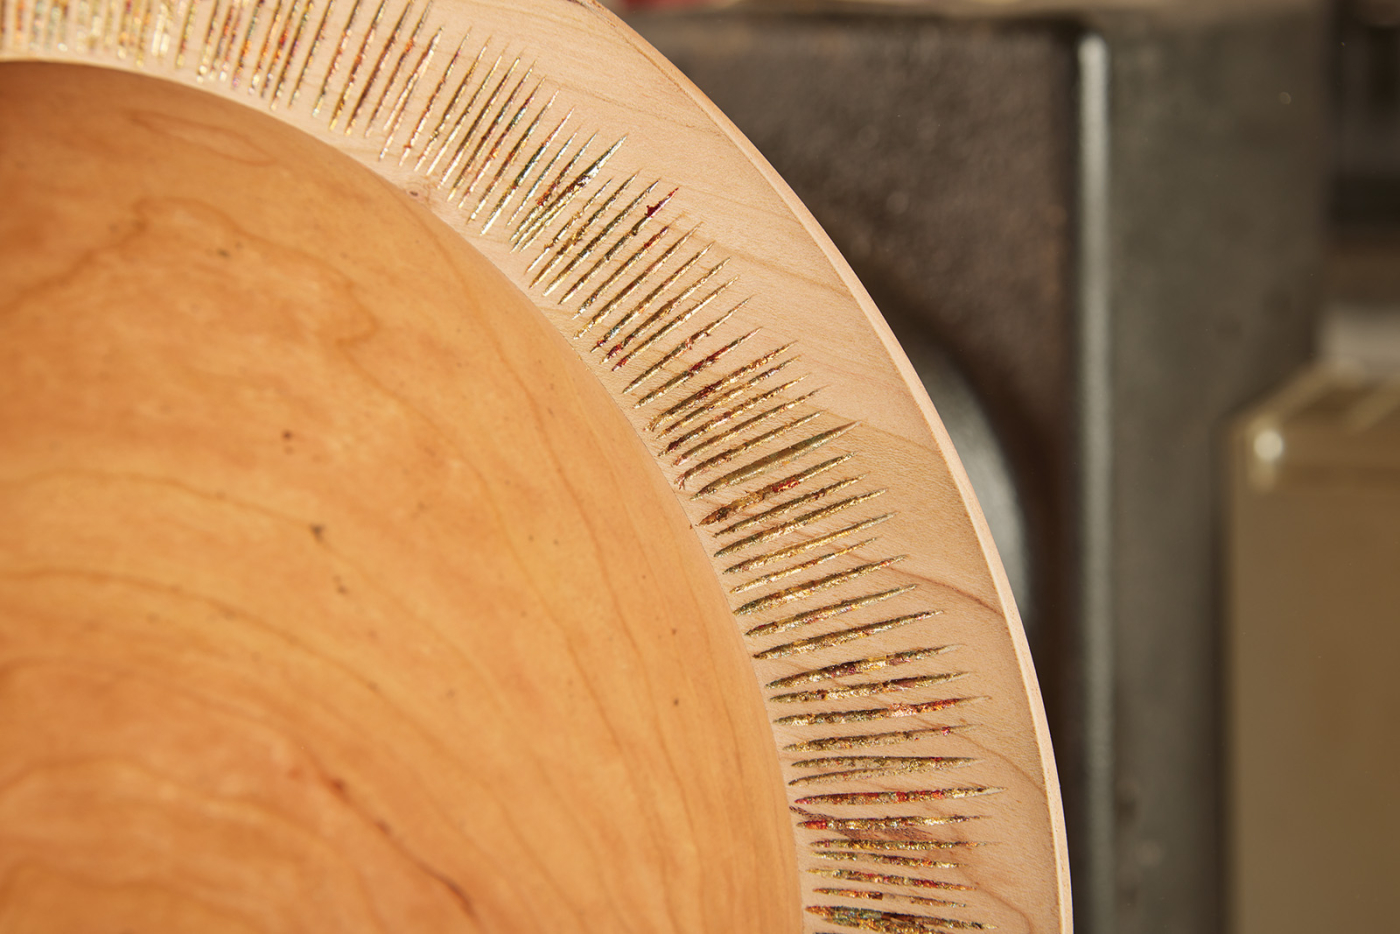
37. The look you’re going for is a feathered, leafed cut in the rim.
With this knowledge, you can use this relatively simple technique to embellish the rim of your bowls and make them just a little different from others. Also, with a little imagination, this technique can be applied to flat work also. Happy Turning.
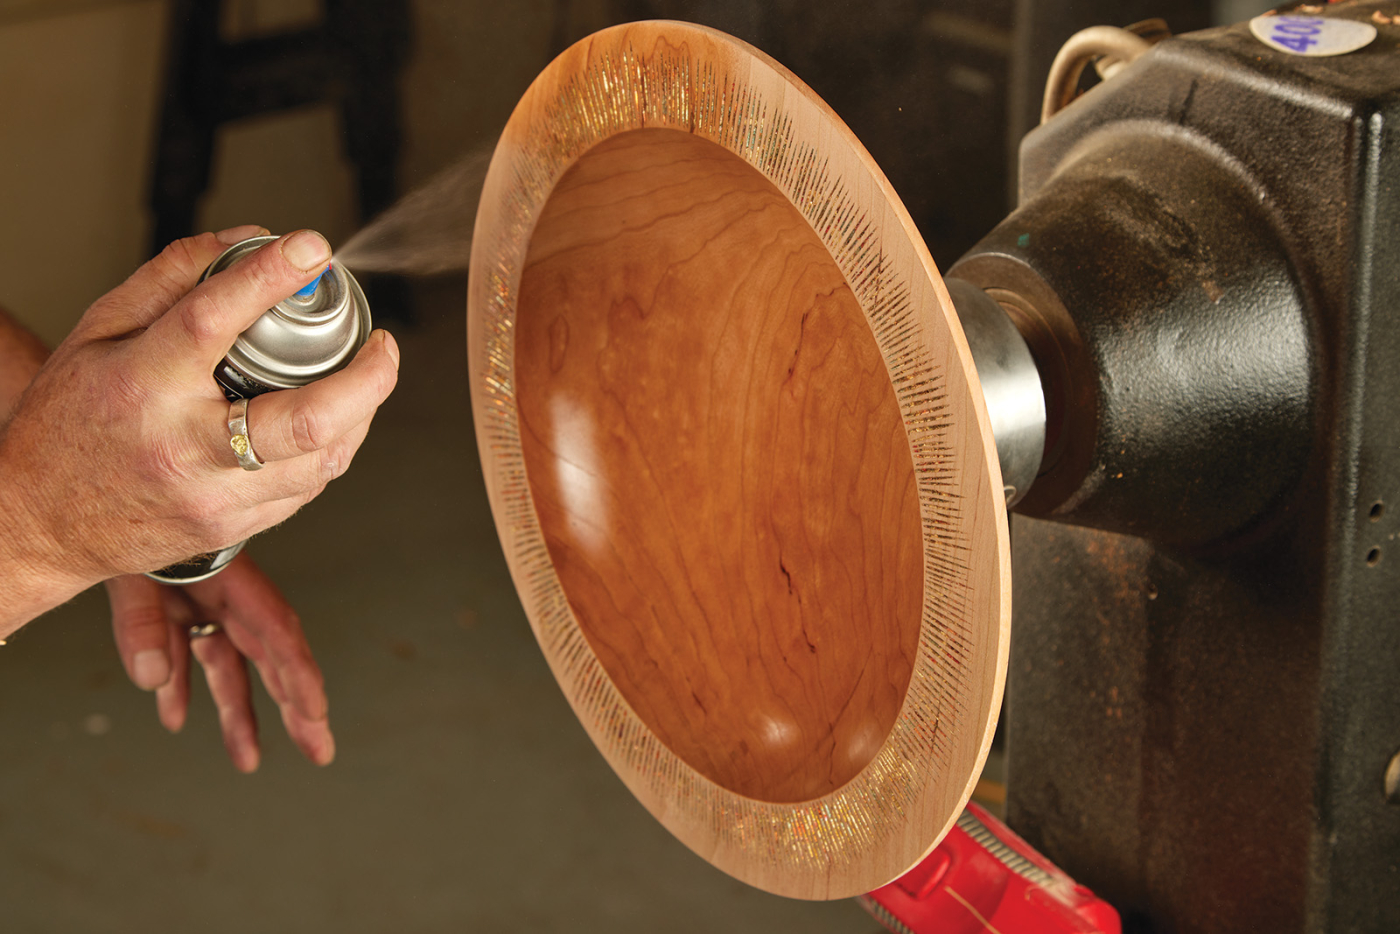
38. Seal the leaf and rim with spray lacquer.
Here are some supplies and tools we find essential in our everyday work around the shop. We may receive a commission from sales referred by our links; however, we have carefully selected these products for their usefulness and quality.