We may receive a commission when you use our affiliate links. However, this does not impact our recommendations.
Discover five cross-grain construction strategies to help keep your tabletops and chest lids flat.
Cross-grain construction tends to freak out most beginning woodworkers, but it’s a viable construction method in many cases. Wide tables and chest lids often employ breadboard ends to keep things flat, as well as cover end grain. If it’s done right, expansion and contraction problems can be nearly eliminated.
There are many methods to attach breadboard ends, but only a few actually accomplish the primary goal of keeping things flat. It takes a little understanding, sound joinery practices, proper planning and patience to avoid disaster.
Understanding
Before you jump into to making breadboard ends you need to understand what’s happening and why; that begins with a basic knowledge of wood movement.
Boards expand and contract at a greater rate across their width than they do along the length. How much they expand and contract is more a matter of species and final resting place than anything else.
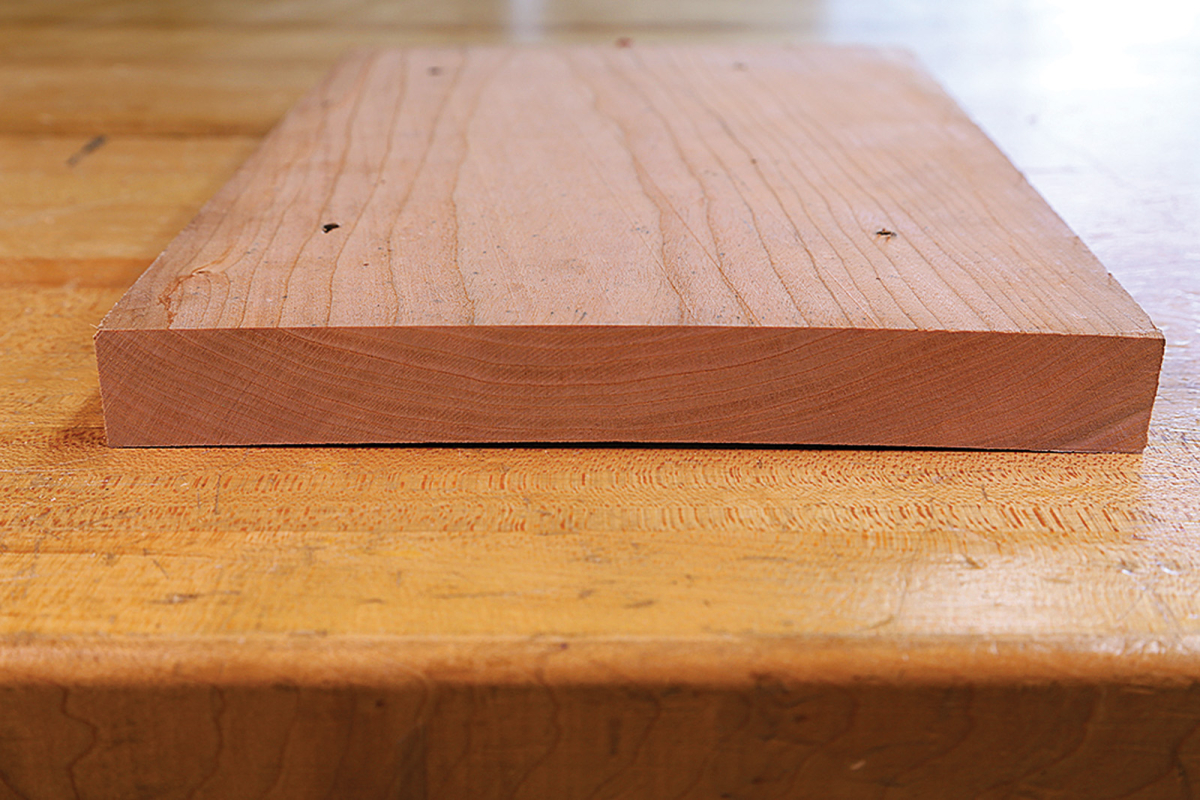
Cupping. Boards generally tend to cup, or bow, away from the center of the tree.
Also, wood tends to expand and contract more actively toward the bark side of the tree than toward the heart side. When you look at the growth rings on the ends of the board, the convex side of the rings is generally more active than the concave side. When one face moves more than the other, the board ends up bowed across its width – this is what we refer to as cupping.
Straight away you should know that, structurally, breadboard ends are strictly used to control cupping; they are not meant to stop shrinkage or expansion. There is no way to keep a board from changing dimensionally.
Breadboard ends are a mechanical means to overcome a board’s natural tendency for one side to expand or contract at a greater rate than the other. Whenever you try to overcome the nature of wood, you run the risk of cracking, splitting or breaking something.
Acceptable Joinery Practices
Though there are many joinery methods to attach breadboard ends, some work well while others do not – and for the same reasons they aren’t the best joinery choices for other projects.
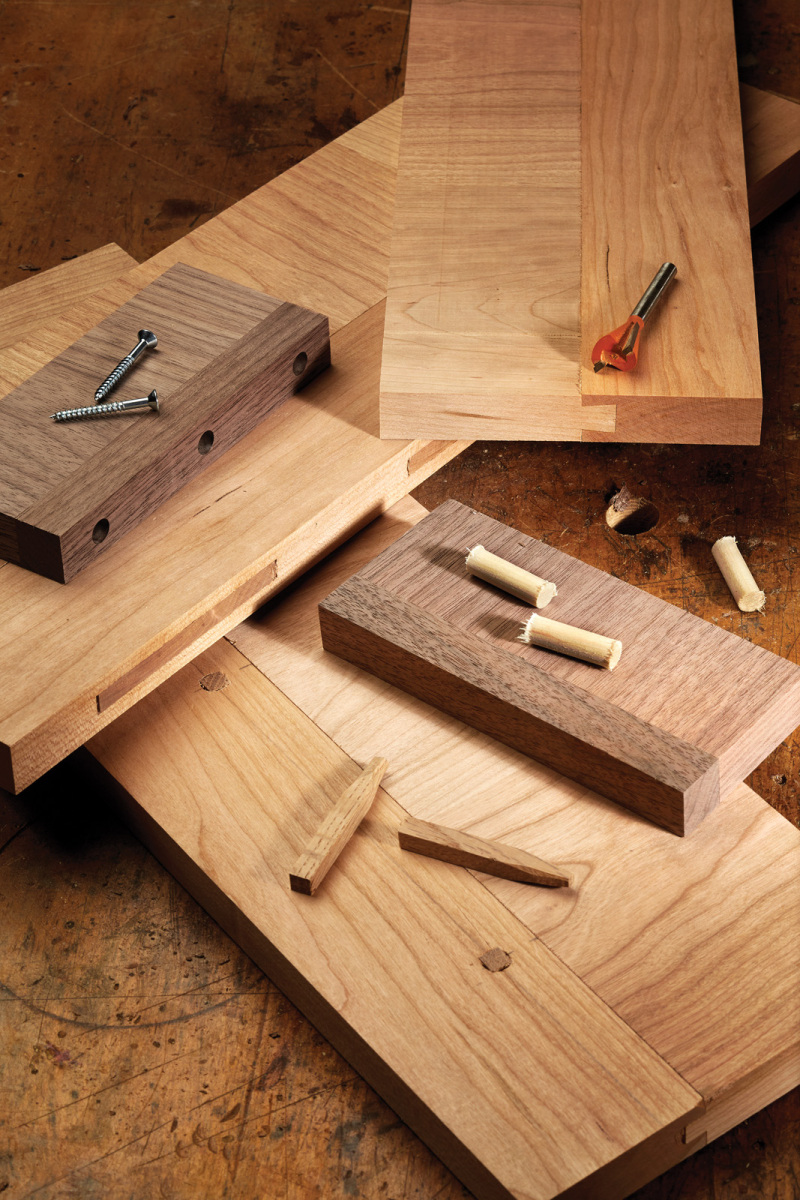
Fixed. Dowels don’t allow for any seasonal movement because the holes in which they are inserted have a tight fit in order for them to hold.
Dowels are acceptable, but they provide limited hold and completely restrict wood movement. The vast majority of the surface-to-surface contact when using dowels is a butt joint; the long grain of the breadboard end mates to the end grain of the primary board. Dowels are the mechanical fasteners that keep the joint intact.
While the surfaces of the dowel and the holes in the primary board are mostly side grain, there is considerably less side-grain-to-side-grain contact between the dowel and the breadboard end. The main purpose of any joint is to increase that contact – that is how you achieve the strongest bond, no matter what adhesive you use.
Regardless of the diameter, dowels occupy only a small portion of the total space available as you join the two boards. This means there will be large spaces between the dowels, particularly if the primary board is extremely wide. Where there is space, the joined boards can move and not remain flush on the top surface, or the primary board could cup. This negates the reason for the breadboard end.
Another problem with dowels is that they don’t allow for any seasonal expansion or contraction. If you drill a larger hole or elongate the proper size hole, you reduce the holding power of the dowel.
Does this mean there is no place in the universe for doweled breadboard ends? Certainly not. There are plenty of instances where doweling breadboard ends may be acceptable, such as in small tops. Just be aware that there are shortcomings with the joint.
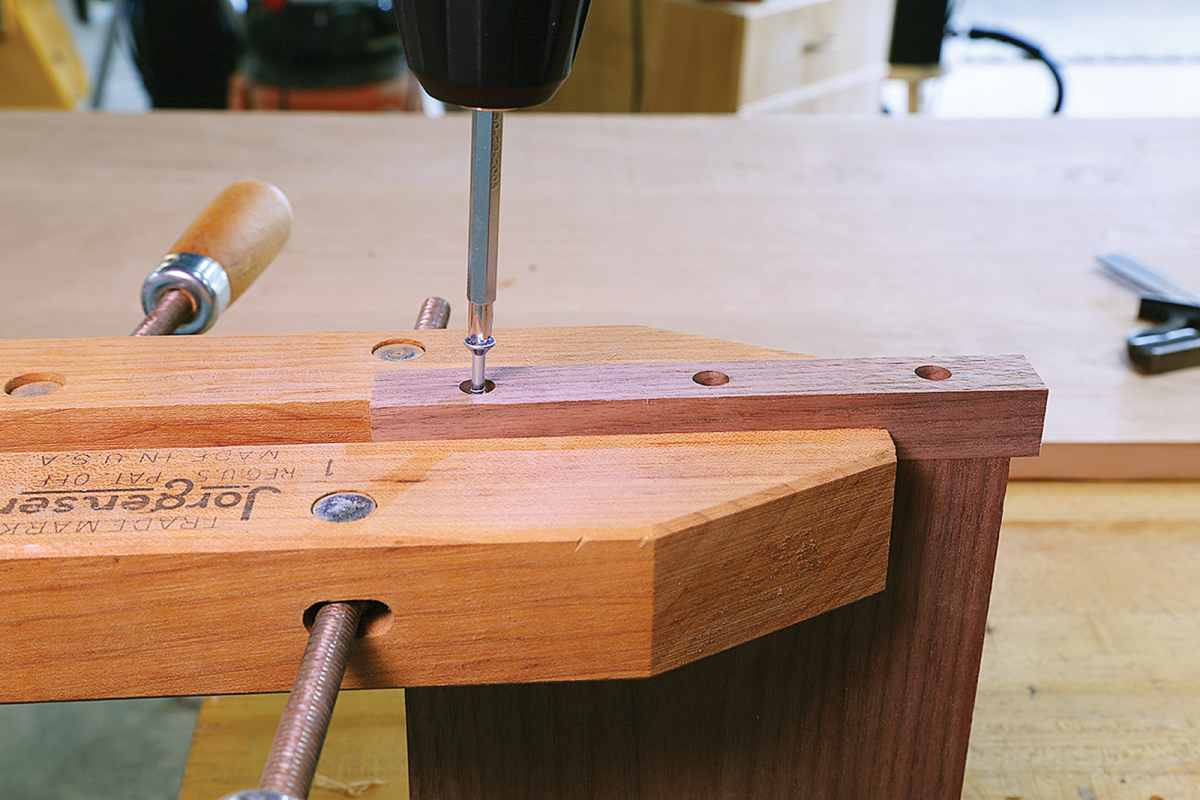
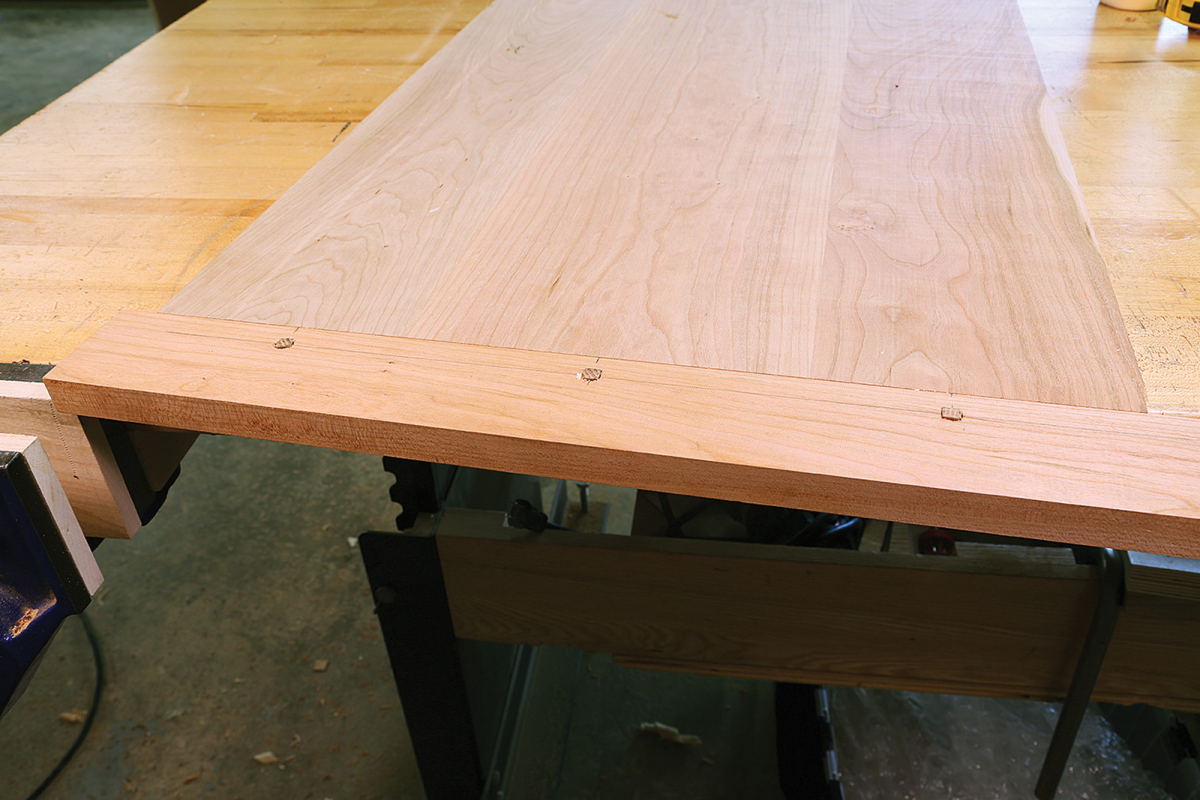
Perfect alignment. A trick to ensure your breadboard end is flush when driving screws is to use a handscrew clamp to line up the end and the main board. (The screw holes are plugged after the screws are in place.)
Screws or nails are also an option when attaching breadboard ends, but they’re only marginally better than dowels in most respects, and have the same drawback. Contact is concentrated in small areas, so that allow the primary board and the breadboard will not remain flush. Plus, these mechanical fasteners do not effectively control the cupping of the primary board.
Screws have the advantage of keeping the joint between the boards tight, while the use of slotted holes allow for expansion and contraction. Nails do not pull the joint closed, and they allow for some expansion and contraction because they are more flexible than screws.
Better Joinery Options
In the end, the best way to keep the primary board from cupping is to capture it in the breadboard end as much as possible. This narrows your joinery choices to sliding dovetails, tongue-and-groove joints, loose tenons or true mortise-and-tenons.
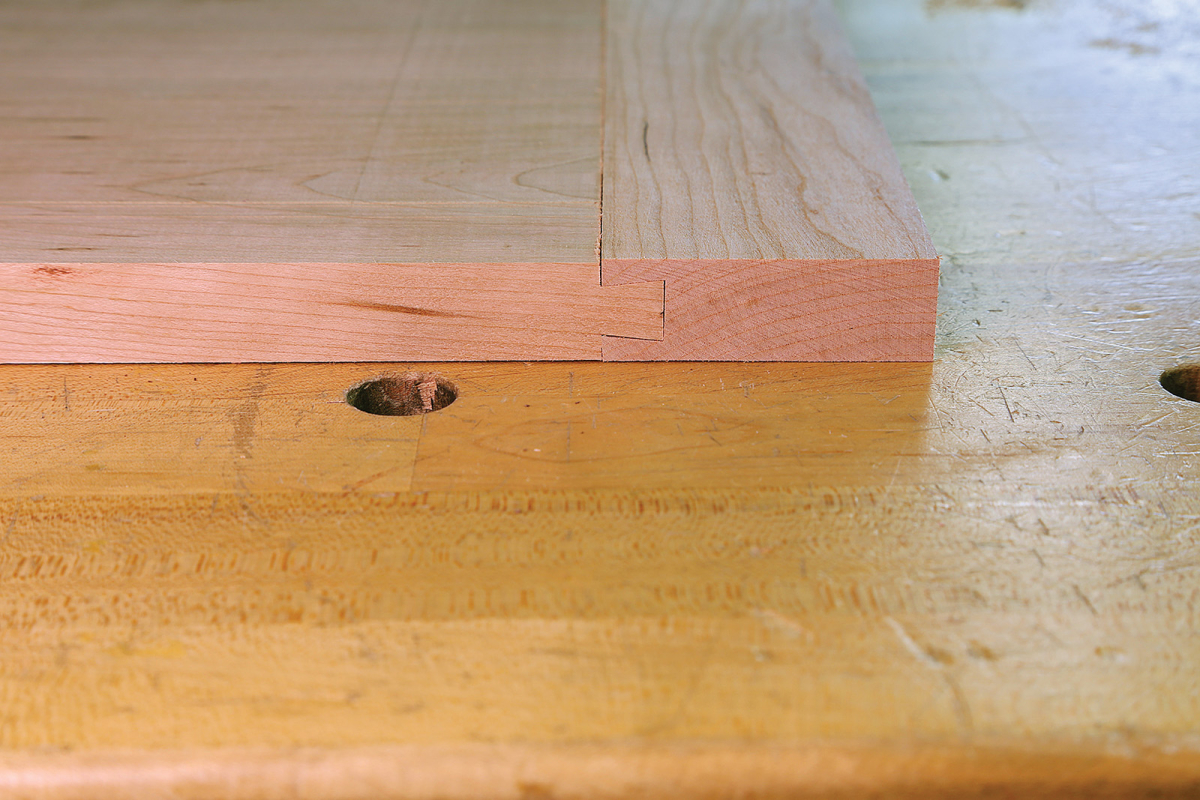
Built-in flexibility. A sliding dovetail holds the breadboard end tight to the main board while allowing for expansion and contraction.
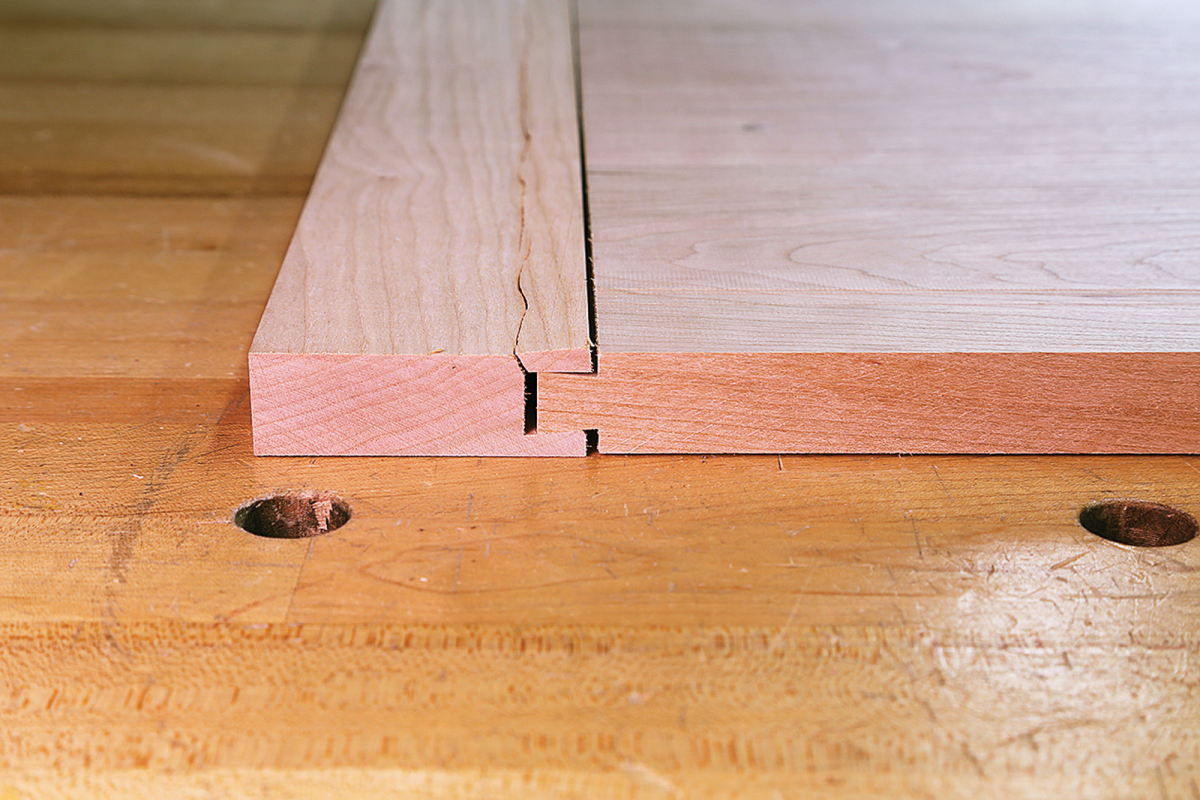
Flawed slide. Although the sliding dovetail appears to be the perfect breadboard-end joint, the primary flaw is the grain direction of the breadboard piece. Once it starts to split, it often runs its length.
Sliding dovetails sound like they might be the ultimate breadboard end joint – until you examine the flaws of using them in this manner. There’s a tremendous amount of the primary board captured in the breadboard, but grain direction is more problematic than with other options.
With the tail on the primary board and the socket in the breadboard, there just isn’t enough meat left on the socket side to hold everything together when working with thicknesses of wood common in furniture work. The remaining material is so thin (so there is less strength) that you could find your breadboard separated from the primary board if it starts to cup. If, however, your top is thick enough to negate this problem, a sliding dovetail might be the right choice.
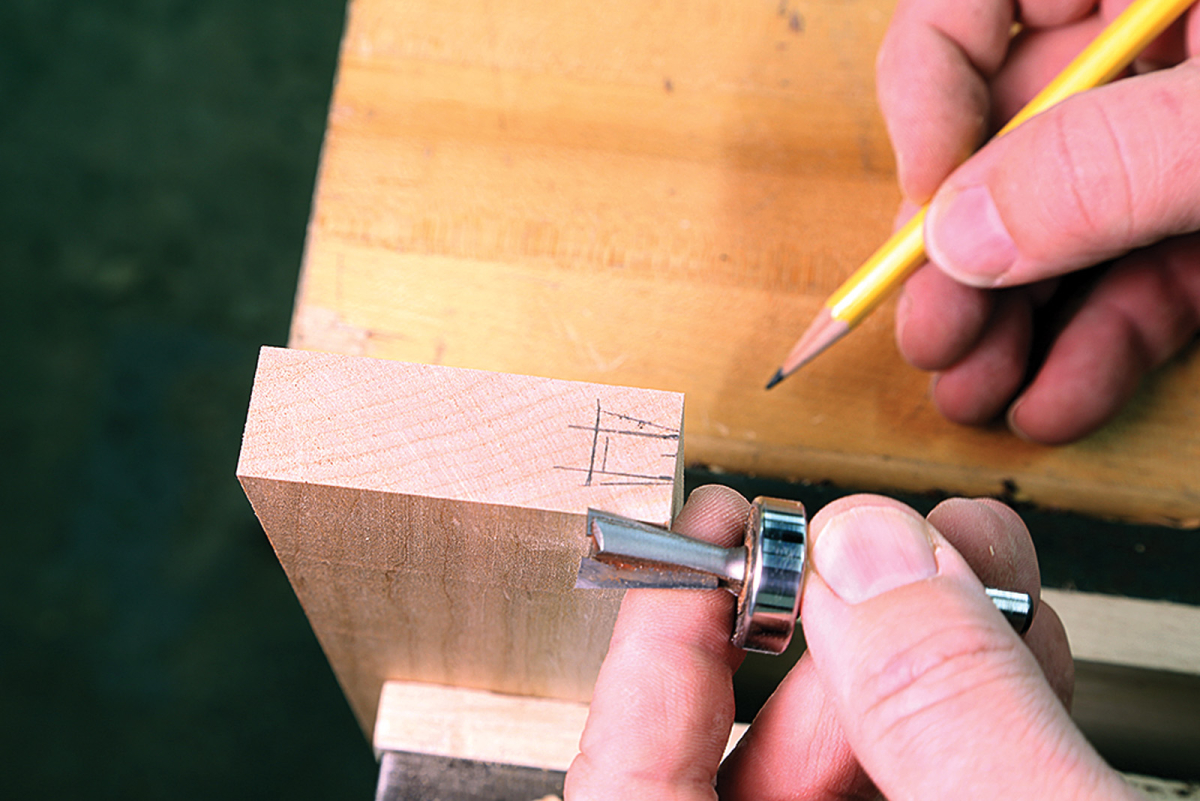
Stay centered. When laying out a sliding dovetail for a breadboard end, I first mark the dovetail location, then mark a relief groove.
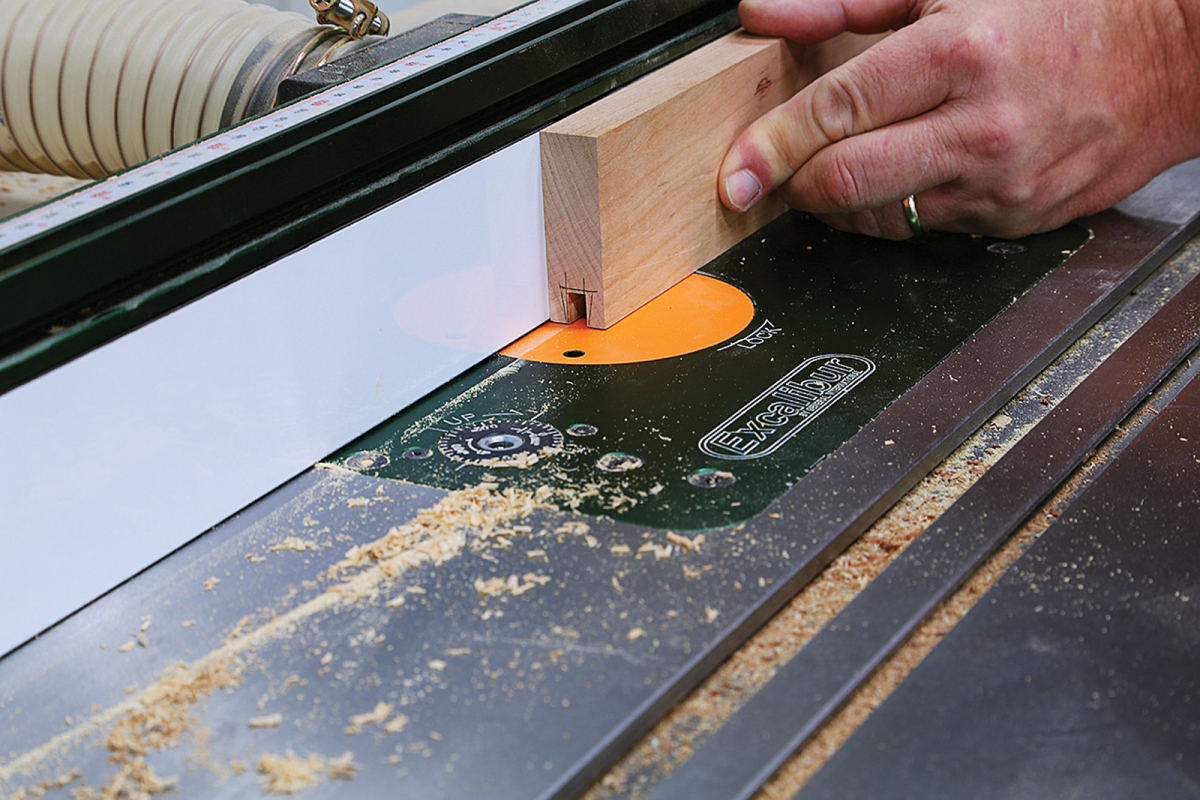
Relief cut. Install a straight bit in the router table and center it on the breadboard end. Make sure the diameter and the depth are set so that the cut happens inside the dovetail layout. Making this cut first relieves some stress on the dovetail bit.
The tongue-and-groove work is really basic stub-tenon-type joinery. In other words, a groove is cut, usually in the breadboard end, that passes the entire length the piece. On the mating board there’s a matching tongue (stub tenon) that runs its entire width.
This method works well on narrow boards made from extremely stable material because you’ll most likely end up gluing a significant portion of the joint to get any hold out of it. The more you glue, however, the more likely you’ll encounter cracks and twists with expansion and contraction.
Loose-tenon joinery has some of the same problems previously discussed, such as the spaces between the tenons. The upside is that you can make the tenons as wide as necessary to help keep the material between in check. You can also make the mortises a little wider to allow for expansion and contraction.
My Choice
If you decide to go with true mortise-and-tenon joinery, you have several options available. You can use pocketed mortises and tenons that are haunched (combining tongue-and-groove with a mortise-and-tenon joint) – or not. There’s also the possibility of using through-mortise-and-tenon joinery, also haunched – or not. The advantage to either version is that you get the hold you need to keep things aligned while having the flexibility to withstand expansion and contraction cycles.
Choosing to haunch the tenons or not directly affects whether your breadboard end and top remain flush. If you don’t haunch the tenons, you have the same problem with spacing between your tenons. In the end, a mortise-and-tenon joint gives you the most options and control, which is what you’re looking for in a breadboard end.
Proper Planning
In reality, if you’re not using mortise-and-tenon joinery, you’re merely attaching a material that covers the end grain of the primary board. If you plan properly, you can get the most out of whatever joinery method you choose.
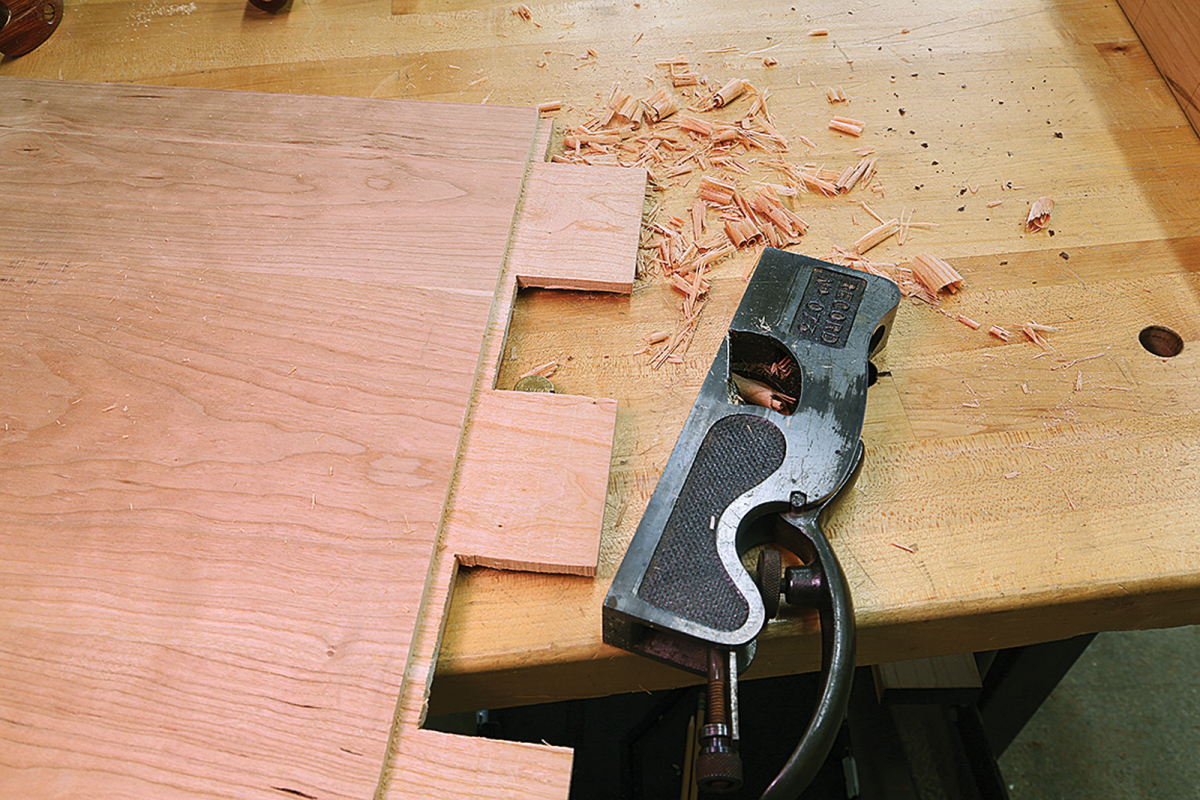
Touch up. No matter your method for making tenons, you’ll likely find the need to tune them up for a perfect fit in the mortises. I find a shoulder plane makes short work of the job.
Certain methods work better than others for specific situations. A slant-front desk lid, for example, that is 18″ wide, certainly benefits more from mortise-and-tenon joinery than would a 7″-wide jewelry box lid. In the case of the box lid, nails might actually be the better choice because you don’t have to remove material from a small board, thereby weakening it. In either case, some consideration for wood movement has to be taken into account. If the breadboarded piece is going to receive lots of hard use, I’d opt for a mortise-and-tenon joint.
Little wings. Whenever possible, I like to overhang my breadboard ends so they can be easily removed during the fitting process.
How much do you plan for movement? And how do you actually make the joints so they hold while allowing for dimensional changes? The answers are dependent upon how large the joined pieces are and their intended use.
A jewelry box lid is typically going to have less shrinkage than the top of a 42″-wide trestle table. Less consideration for shrinkage needs to be given to the lid than the table’s top.
Other things to consider are the type of wood (hard or soft) you’re using, and how stable the material is. Softwoods tend to have a more dramatic dimensional shift from season to season than do hardwoods. So, if you are making a pine table, you might want to allow a little more room for expansion and contraction than you would with a cherry table.
Whether your material is dry and stable also affects how much room you need to allow. The more stable your material, whether that centers on species or proper drying techniques, the tighter you can make the joints. All that said, on some wide tables I’ve left 1⁄4” or more of room for seasonal change. I always err on the side of more movement, rather than less.
Another thing to consider when planning your joinery is whether you intend to glue or not. For some methods, such as screws or nails, gluing the joint is probably not a good choice because you end up with a cross-grain glue joint.
With dowels, glue is a necessity but you may decide only to glue the center or one side of the joint to allow for some movement. The choice is going to be driven primarily by how the piece will be used. Opt for more glue under more extreme use.
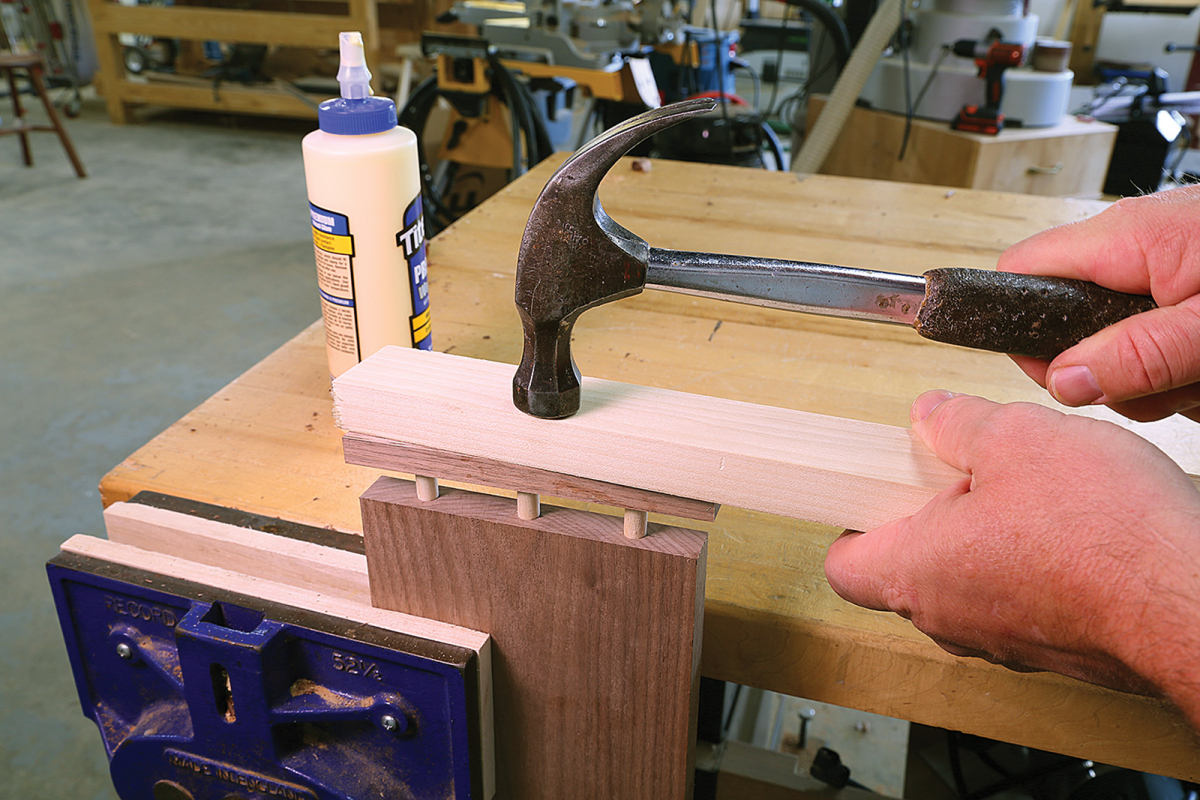
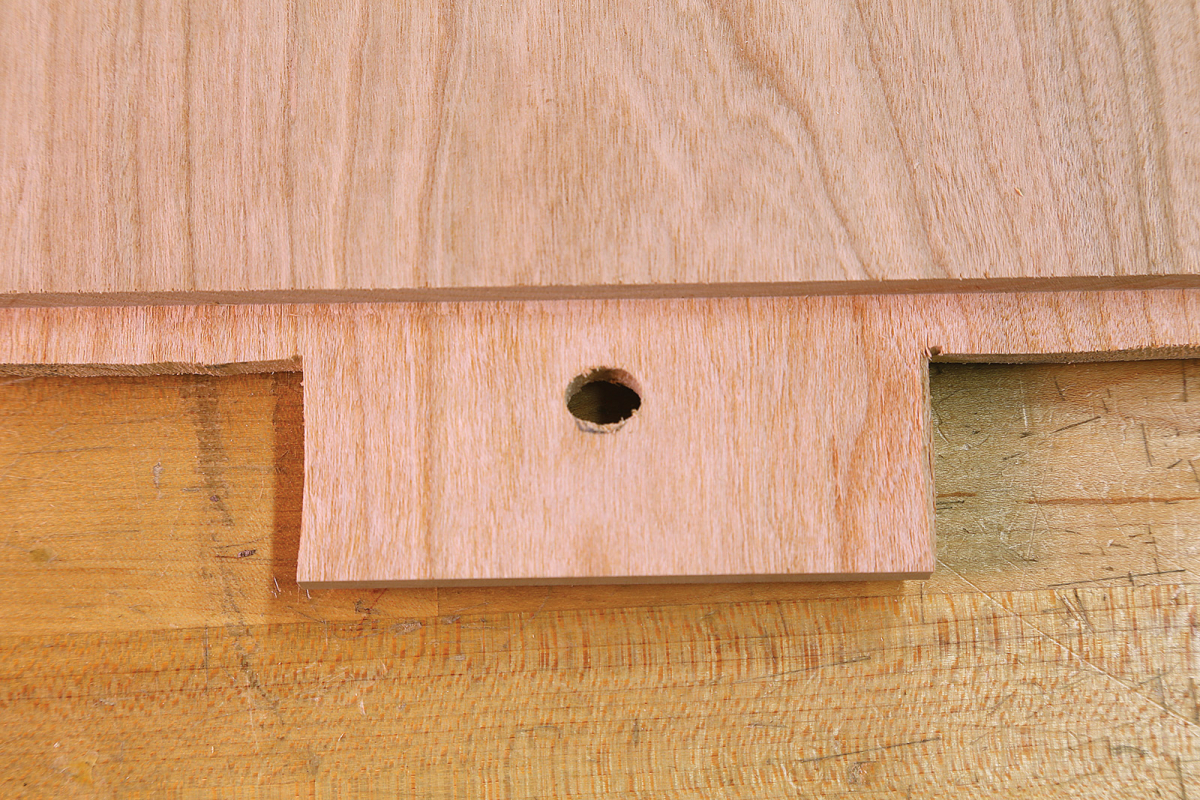
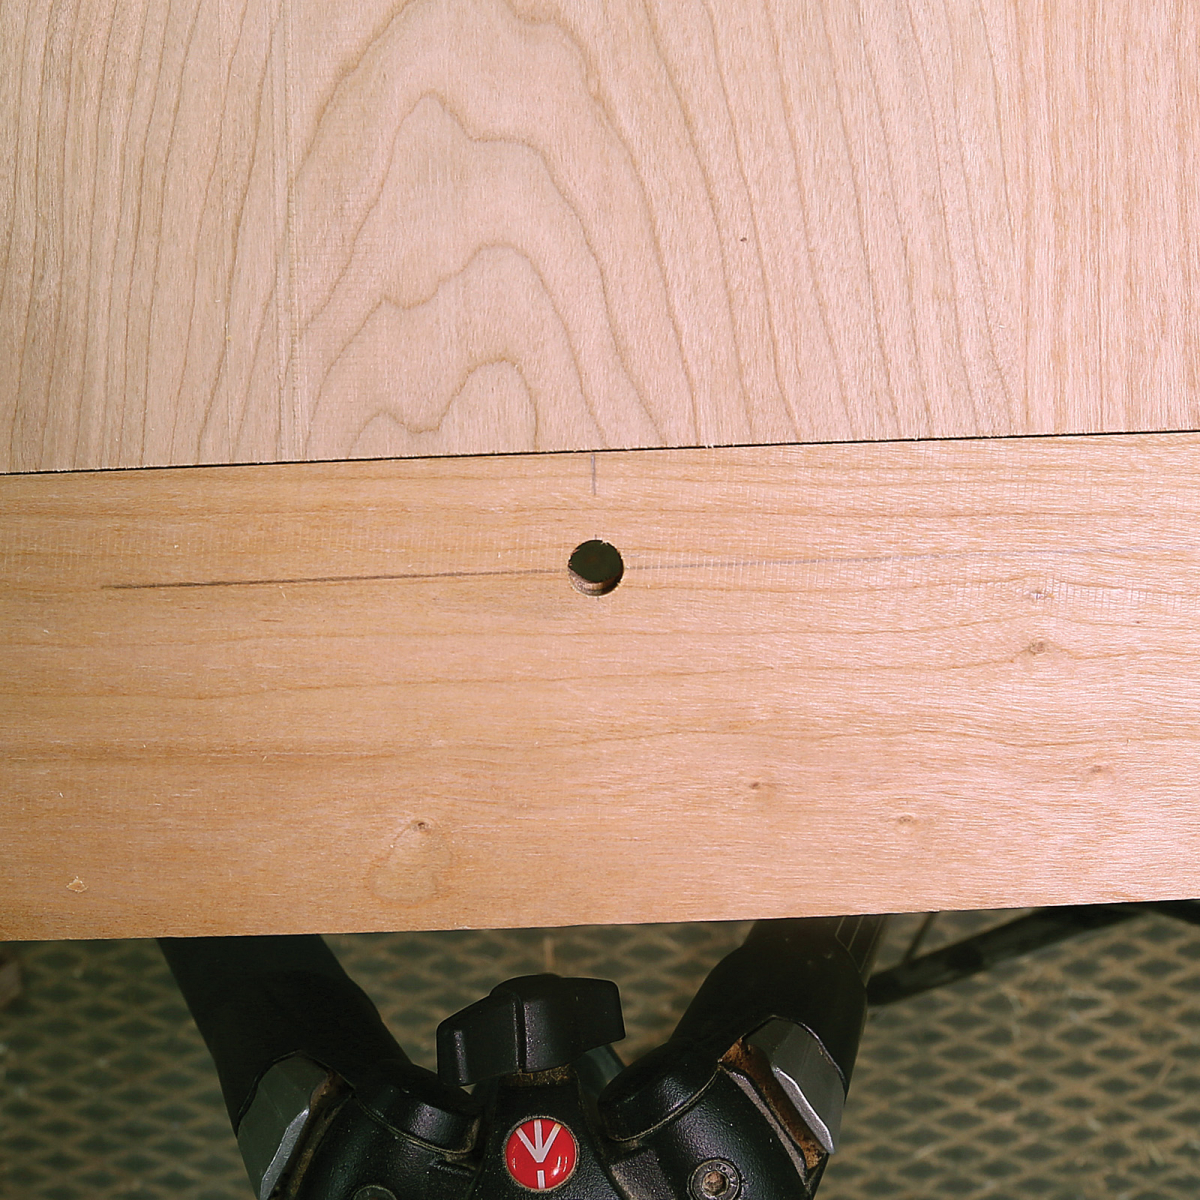
Size matters. On small boards, using dowels is an acceptable method of attaching breadboard ends. Once glued and driven home, they’ll keep the main board from cupping.
The same holds true for sliding dovetails and any type of mortise-and-tenon joint. Going back to the slant-front desk lid example: You would more likely glue the joint at the bottom of the lid to keep it from binding once it’s hinged to the desk. If you glue the top of the lid and force movement toward the hinges, as the center board dries and shrinks, your breadboard ends will render the hinges useless because they will bind on the case before the lid is fully open.
If you go with mortise-and-tenon joinery, you can drawbore the breadboard ends to the center board. By offsetting the holes through which the pegs are driven, you can pull the joint between the two boards tight. If you elongate the hole in the tenon, you can easily allow for expansion and contraction. The offset might even allow you to attach the breadboard with minimal, or no use of glue. Consider the intended use and the stress that the joint will be under before deciding whether to use glue or not, as well as how much and where.
Patience
Once you’ve got all the details considered, it’s time to jump into the joinery. Whether you’re working strictly by hand, by machine or using a combination of the two, there are a few tricks to help improve your results. Regardless of the methods you choose, take your time and work as accurately as possible – that’s where patience comes into play. You’ll be rewarded with tight joints and breadboard ends that work.
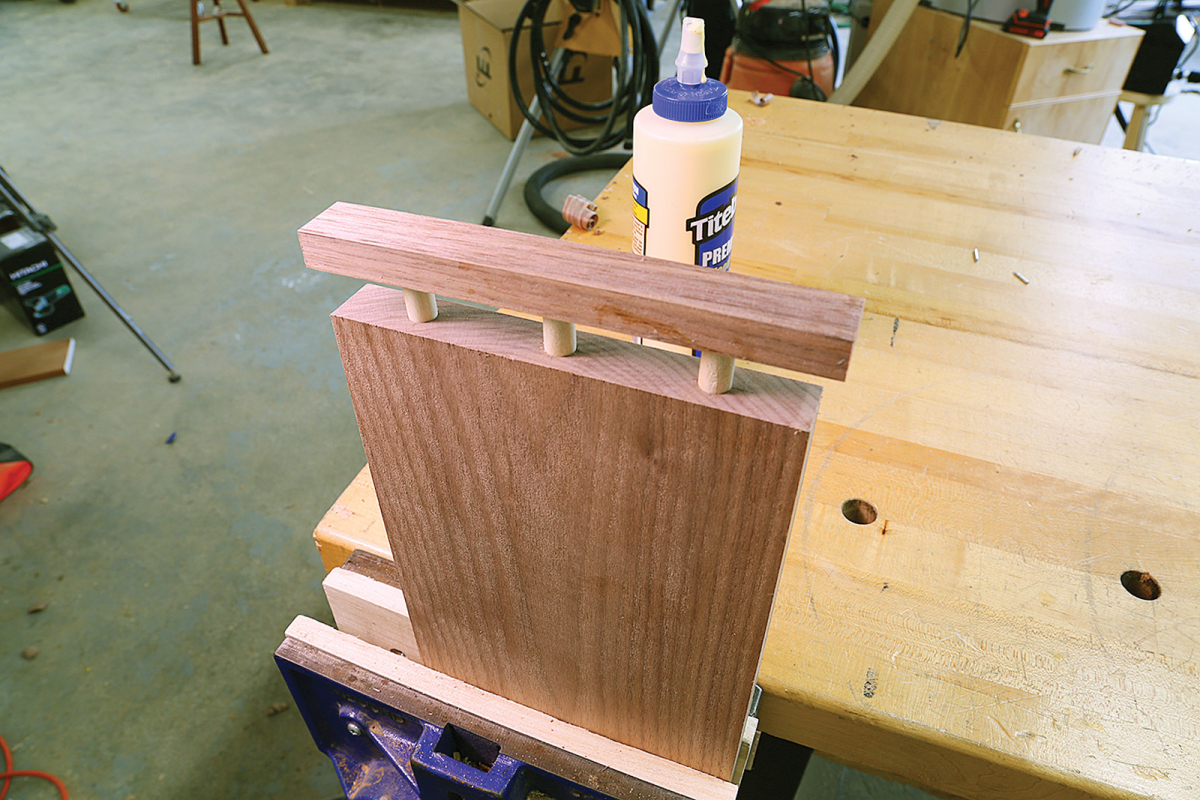
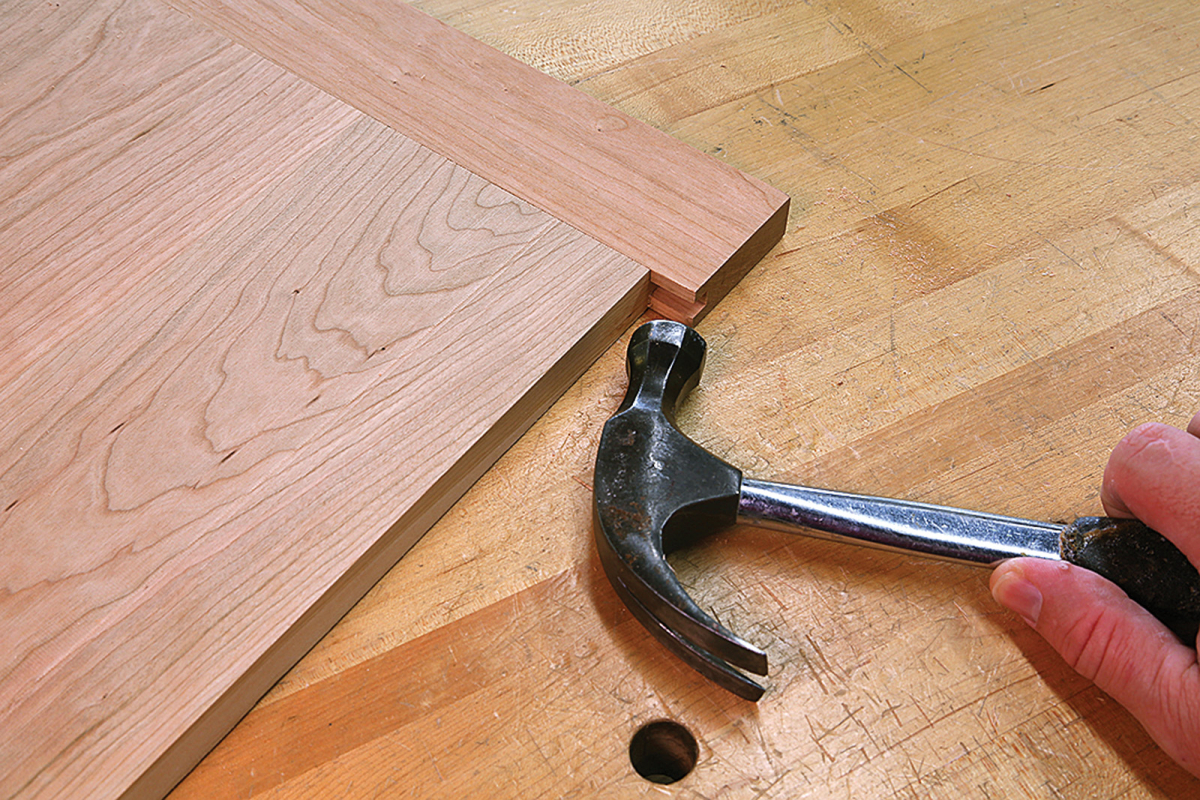
In order to use dowels, you need an accurate method of aligning the holes in the breadboard end with the center board. The easiest method I know is to use small finish nails.
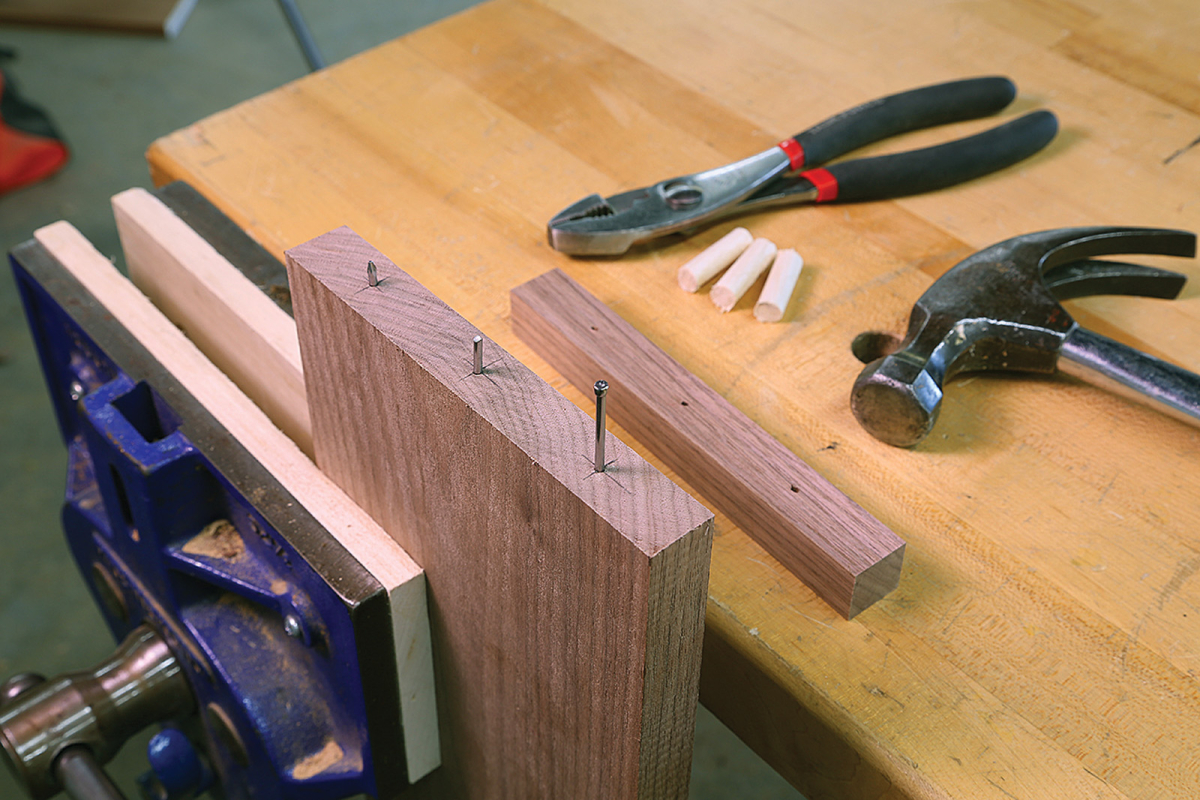
Pinpoint accuracy. A finish nail is turned into an accurate dowel jig by simply driving it partially into the main board, cutting off the end and flipping it in the hole. Push the breadboard end into place and you’ll have perfect transfer marks.
Locate the positions for the dowels on either piece. There is no need to lay out both sides of the joint – you’ll see why shortly. Using small finish nails, drive them in about halfway at your layout points. Clip the heads off the nails then pull them out of the piece, taking care not to bend them. Reverse the nails then gently tap them back into their original holes leaving between 1⁄8” and 1⁄4” protruding. (Why reverse them? Clipping them blunts the tips a bit – you want the sharp point facing out). Then line up the two parts and tap them together. Separate the two parts and drill the holes for the dowels using your newly created center points. (Don’t forget to remove the nails.)
Size matters. On small boards, using dowels is an acceptable method of attaching breadboard ends. Once glued and driven home, they’ll keep the main board from cupping.
Screws and nails are pretty straightforward. My only advice is to use them sparingly, and only on narrow pieces that receive light stress. When using screws, elongate the holes in the breadboard ends to allow for wood movement.
For the sliding dovetail and all mortise-and-tenon variants, you’re looking for a slip fit. Too tight, particularly on the sliding dovetail, and you’ll find yourself re-making breadboard ends. I’ve found that whether you make them by hand or machine, particularly on wide tops, you’ll end up having to do a fair amount of fitting – again, patience is your friend.

Scribe it. I drill my peg holes in breadboard ends then dry fit them on the tenons. Once they’re in place, I scribe the hole location directly onto the tenon.
Slotted offset. With the breadboard end removed, drill the hole in the tenon, making sure to offset it the appropriate amount. After it is drilled, use a rattail rasp to elongate the hole from left to right to allow for seasonal change without changing the drawbore offset.
Unless you are working with massive timbers, drawboring the mortise-and-tenon joints of a breadboard end should be done with a small offset, and always toward the shoulder. You want to provide enough pull to keep the joint tight, but not so much that you overcome your allowance for shrinkage. I usually offset my holes between 1⁄32” and 1⁄16” for hardwoods and a little more of softwoods.
Offset in place. After the holes are drilled and the tenons are fit, you should still clearly see the offset alignment of the holes in the ends and the main board.
Whether you are making a blanket chest, a slant-front desk or a new kitchen table, breadboard ends help you avoid cupping problems. To get the most benefit, you need to apply what you know about why and how wood moves before you decide on the best joinery method. Consider the type of wood you’re using, how well it’s seasoned and how it functions as part of the piece of furniture. If you plan properly, your breadboard ends will keep things on the level for years.
Pegged. If everything looks good on the final dry-fit, make some pegs then drive them home. I’ve found longer pegs make them easier to drive – just don’t get carried away.
Here are some supplies and tools we find essential in our everyday work around the shop. We may receive a commission from sales referred by our links; however, we have carefully selected these products for their usefulness and quality.