<img height="1" width="1" style="display:none" src="https://www.facebook.com/tr?id=376816859356052&amp;ev=PageView&amp;noscript=1">
 In Finishing, Projects, Shop Blog, Techniques

We may receive a commission when you use our affiliate links. However, this does not impact our recommendations.

Basic HVLP Spray Techniques

How to
succeed at
spraying a
waterborne
finish

Purchase the complete version of this woodworking technique story from AWBookstore.com.

When it comes to finishing,
we’re all looking
for easy answers that
give professional results.
Shooting waterborne finishes
with a high volume,
low pressure (HVLP) turbine
sprayer is quick and
safe and the results look
like a thousand bucks.

Spraying is a whole craft
in itself. This step-by-step
guide will help you avoid
the most common pitfalls.
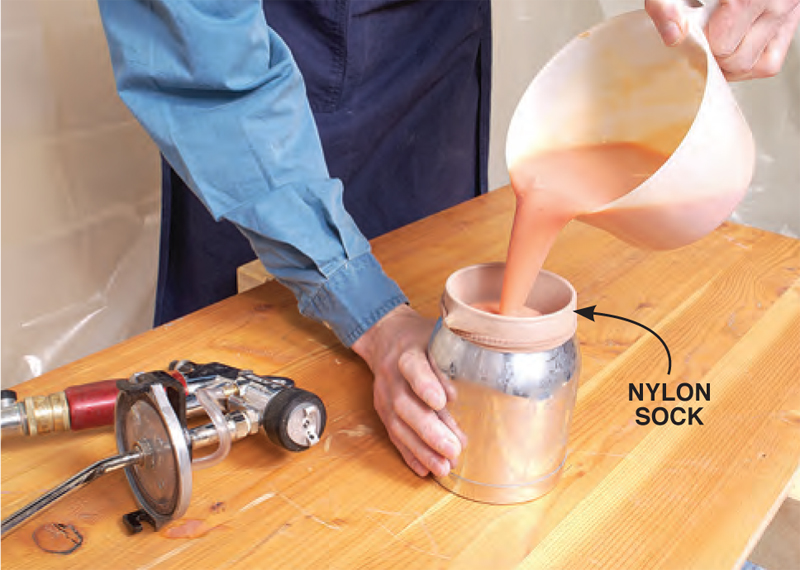
Strain the finish

When you pour finish into the sprayer’s cup, strain it
through a small nylon sock, cheesecloth or paper funnels
with mesh bottoms. The nylon sock can be rinsed with
water and used over and over.

Click any image to view a larger version.

Select the fan pattern

All air caps can be set to three different fan patterns: vertical,
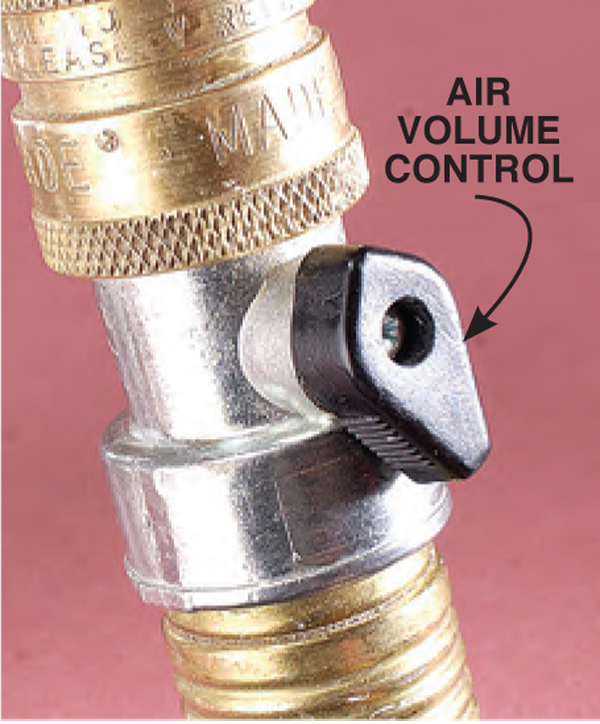
horizontal and round. A vertical fan is good for tops; a
horizontal fan is good for sides; a round fan is used to concentrate
the finish in a small area. You can switch between
vertical and horizontal settings without changing the air and
fluid volume settings. Switching to a round fan requires
readjusting these settings.

Adjust the air

Adjust the air volume: Regulate the air flow
from the turbine with the
air volume control knob.
Increasing the air flow creates
more atomization.
Thick finishes need more
air to atomize properly than
thin finishes.

Adjust the fluid

Adjust the fluid volume: Regulate the fluid volume
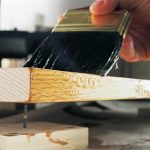
with the knurled knob at the
back of the gun. This knob
controls how far you can
pull the trigger. As you pull
the trigger, the volume of
finish increases and so does
the size of the fan pattern.
Your goal is to set the trigger
so it automatically stops
at a 6-in. wide fan.

Spraying face frames and small surfaces

Switch the air cap
to a horizontal fan
pattern. Reduce the
size of the fan pattern
to about 3-in.
across. You can
reduce the fan by reducing the air and fluid settings,
or by holding the gun slightly closer to the surface
and moving faster. Always test on paper before
spraying your cabinet.

For any exterior surface, start the spray before
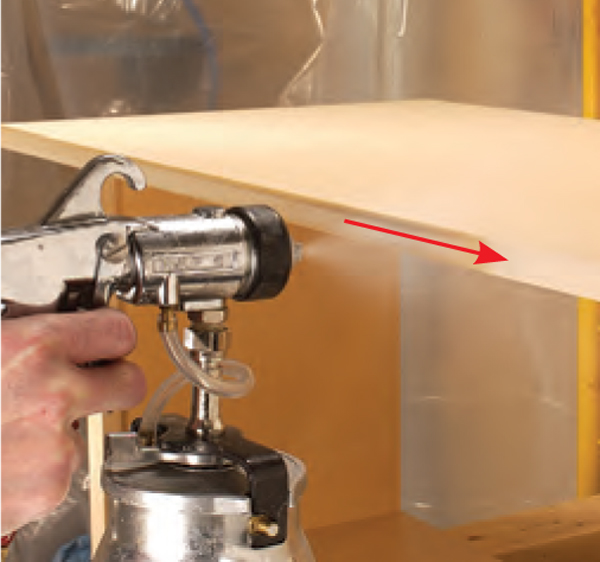
it contacts the piece and release the trigger when
you’re past the bottom. Do this in one fluid movement,
always holding the gun perpendicular to the
surface you are spraying.

Spraying tops

1. Spray all four
edges
, all the
way around the
top. Hold the gun at
90 degrees.

Spraying raised-panel doors

1. Spray all four
edges
with the
gun held about 6
in. away.

This story originally appeared in American Woodworker July 2003, issue #101.

July 2003, issue #101

Purchase this back issue.

Purchase the complete version of this woodworking technique story from AWBookstore.com.


Product Recommendations

Here are some supplies and tools we find essential in our everyday work around the shop. We may receive a commission from sales referred by our links; however, we have carefully selected these products for their usefulness and quality.

Recommended Posts

Start typing and press Enter to search