We may receive a commission when you use our affiliate links. However, this does not impact our recommendations.

10 Tips for Perfect Miter Joints
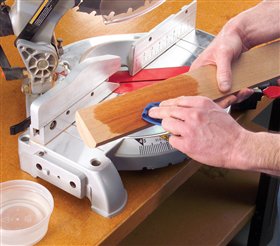
Make Micro Adjustments with a Disc Sander
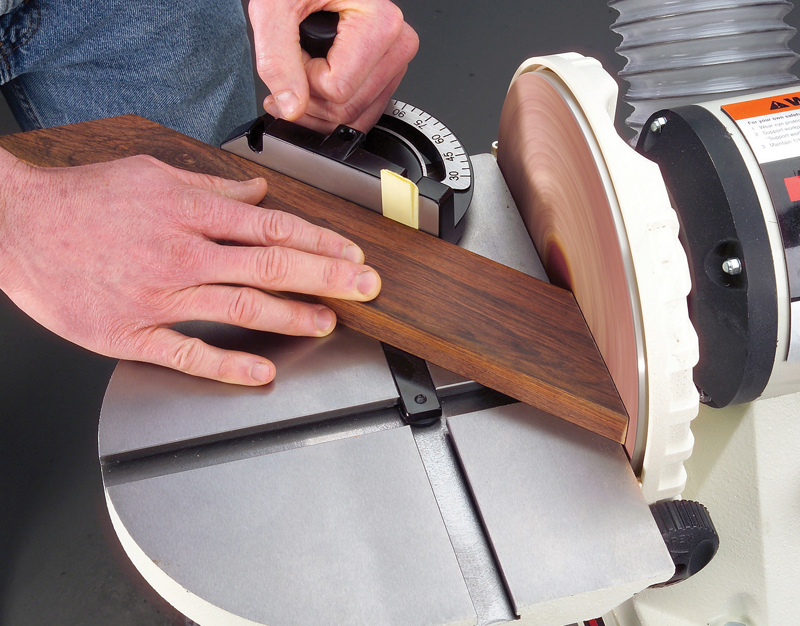
No tool can tweak a miter’s fit as easily as a disc sander can. You can
shorten the workpiece a hair with a quick touch of the disc. You can
also adjust the angle by a fraction of a degree. Instead of fussing with
the miter gauge, make tiny adjustments by sticking a paper shim between
the gauge and the workpiece. |
|
Click any image to view a larger version.

|
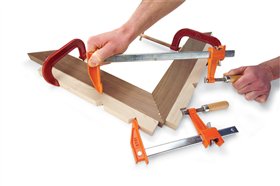
Knock-Off Blocks for Long Miters
Long miters are a nightmare to clamp, but adding temporary triangular
blocks makes it a snap. The key is to use paper from a grocery bag. Dab
some wood glue on both sides of the paper, stick the blocks wherever you
need them and let the glue set overnight. When you’re done clamping,
remove each block with a hammer blow. The paper creates a weak spot in
the glue bond, so the blocks break away without damage to the wood. Use
hot water to soften any paper or glue left on the wood, then scrape it
away and sand as usual. |
|
 |
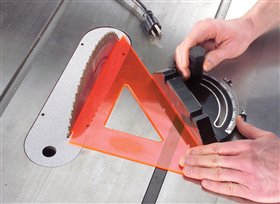
Customize a Drafting Square
Drafting squares are inexpensive, accurate and great for tool or jig
setup. Because they’re plastic, you can easily customize them to suit
the job. We filed notches in this square to keep the saw teeth from
interfering with setup. Drafting squares are available in various sizes
for $4 to $10 at art and office supply stores. |
|
 |
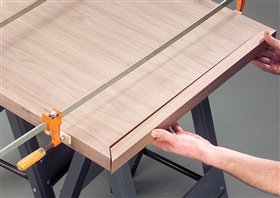
Guides for Perfect Edging
Mitered guides clamped in place let you perfect the length and angle of
mitered edging. Use the edging stock itself to guide the fit of each
piece. Clamp the guides precisely in place and work your way around the
tabletop, gluing each perfected piece in place as you go. After you glue
and clamp a section of banding, remove the adjoining guides immediately
so you don’t accidentally glue them in place. |
|
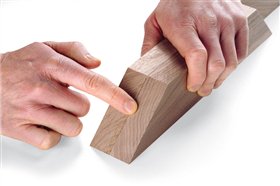 |
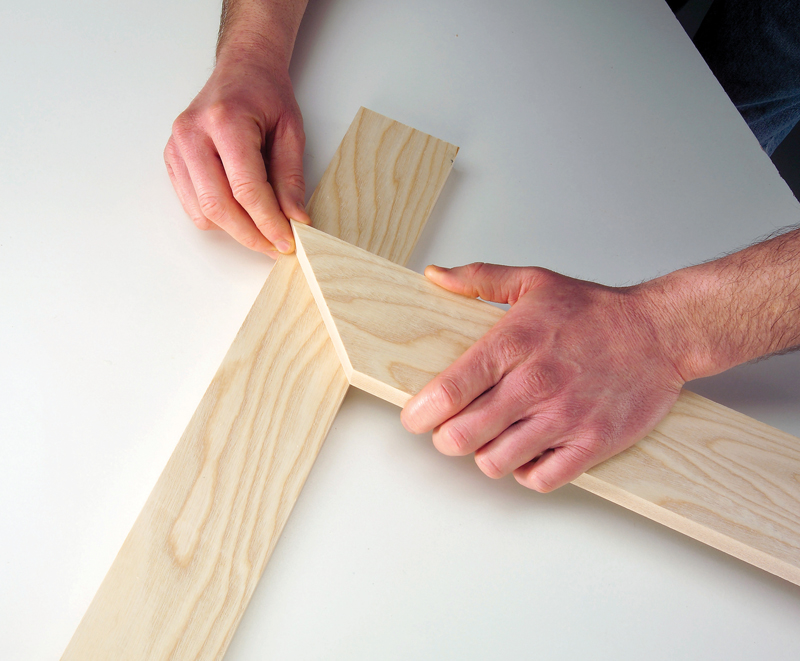
The Touch Test
When you’re building a box or frame, the opposite sides must be
precisely the same length. Otherwise, even the most perfect miters won’t
form a tight joint. To compare lengths, hold the parts together on a
flat surface and feel the ends. Your finger can detect differences your
eyes can’t. |
|
 |
Stop Cutting Creep
When you’re cutting miters on a miter saw, the spinning blade tends to
push or pull the workpiece along the fence. A hold-down clamp will stop
the creeping, but molded stock can be hard to clamp. In that case,
dampen the back side of the wood. Moistened wood is less slippery and
easier to hold in place. |
|
 |
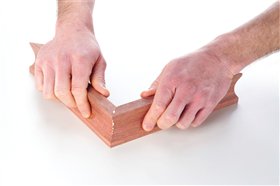
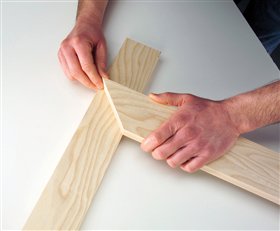
The 60-Second Squeeze
When you’re dealing with small or hard-to-clamp parts, the best
clamping tools might be your hands. Simply apply glue to the parts; then
rub them together to distribute and tack-set the glue. Hold the parts
together on a flat surface for 30 to 60 seconds (although it may seem
like 5 minutes). Watch the joint as you release pressure; if anything
moves, squeeze and hold for a few more seconds. Let the assembly sit
undisturbed for a half-hour before you handle it again.
|
|
 |
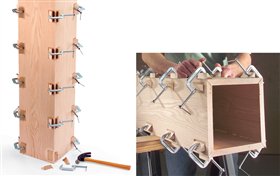
Notched Blocks for No-Rush Glue-Up
Getting all four corners of a box or frame aligned and clamped before
the glue sets can be a frantic rush. Four notched blocks lower the
frustration level by letting you tackle glue-up in manageable steps.
Start by joining two corners to form the two halves of the box or frame.
Allow those first two glue joints to cure for 30 minutes or so. Then
rotate the notched blocks and complete the assembly by gluing the two
halves together. |
|
 |
Grain Match Matters
It takes more than a precision fit to make a miter joint look good; the
wood’s grain and color should match, too. Using a single board to band a
tabletop or build a picture frame makes color matching easier.
Straight-grained boards are easier to match than those with wavy
patterns. When matching wavy grain, try this: Miter one piece and then
use it to find a matching area on the piece that will adjoin it. |
|
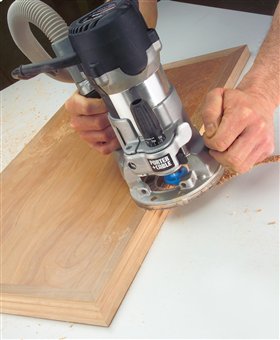 |
Join Miters First, Rout Later
Flat, square stock is easier to miter, align and clamp than shaped
parts, so you’ll often get better results by routing edges after
assembly. To avoid splintering at corners, make a few light passes
instead of one full-depth cut. Most importantly, start each pass on a
side, not at a corner. |
|
 |
Product Recommendations
Here are some supplies and tools we find essential in our everyday work around the shop. We may receive a commission from sales referred by our links; however, we have carefully selected these products for their usefulness and quality.