


We may receive a commission when you use our affiliate links. However, this does not impact our recommendations.
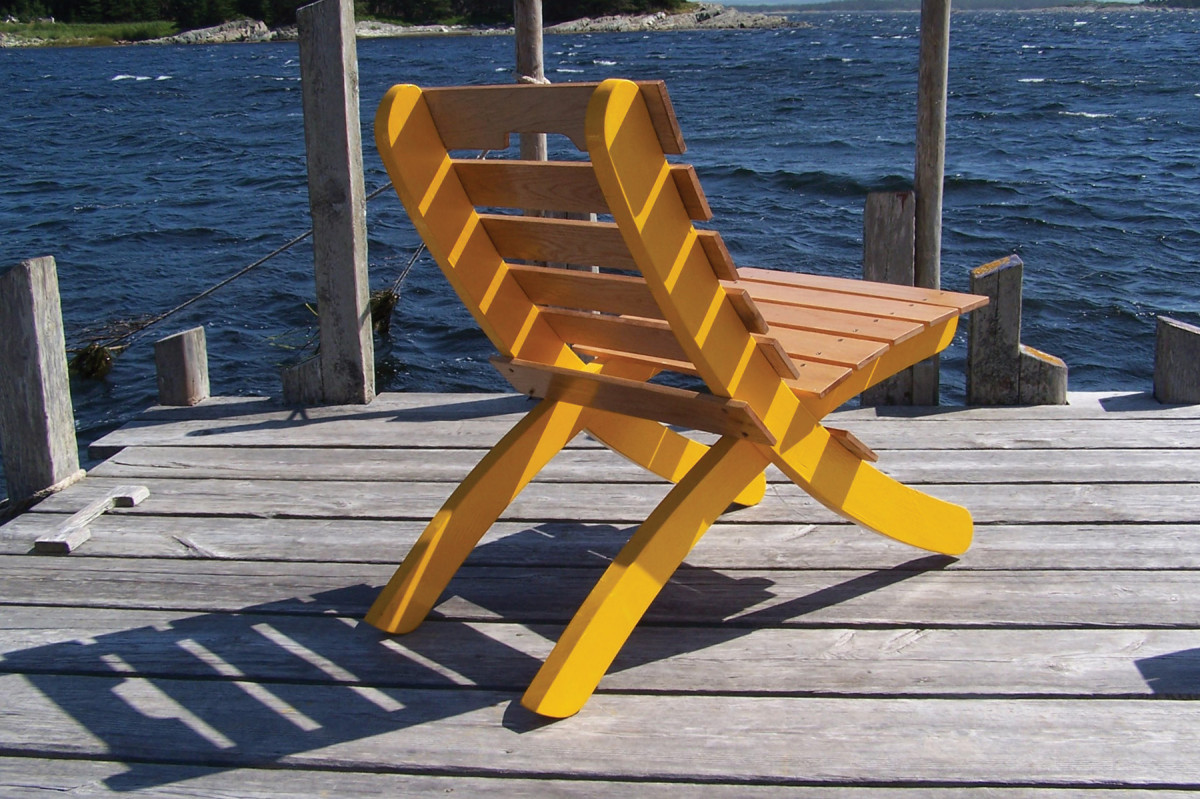
Lightweight, folding and portable, this chair is so simple to make you’ll want a pair – or more.
I’ve always disliked the Adirondack chair and have never understood its popularity. I find it uncomfortable because the human frame does not bend at right angles and also, because it neither folds nor stacks, it’s an awkward item to move and difficult to store.
When my daughter Rebecca showed me a wooden folding chair she had found in the attic of an old house in Nova Scotia, I was immediately struck by the ingenuity of the design, which combines comfort and convenience. Anyone familiar with Mies Van der Rohe’s Barcelona chair will sense echoes of that famous and widely imitated design.
What I like to call my “dock chair” requires no special hardware and can be made with practically any wood, or combination of woods, in just a few hours. Anyone reasonably handy can make a pair of them in a weekend.
I made the first version using native pine and red oak slats fastened with bronze screws. I painted it signal yellow because the Nova Scotian fogs are notorious, and I didn’t want to get run down by some errant vessel.
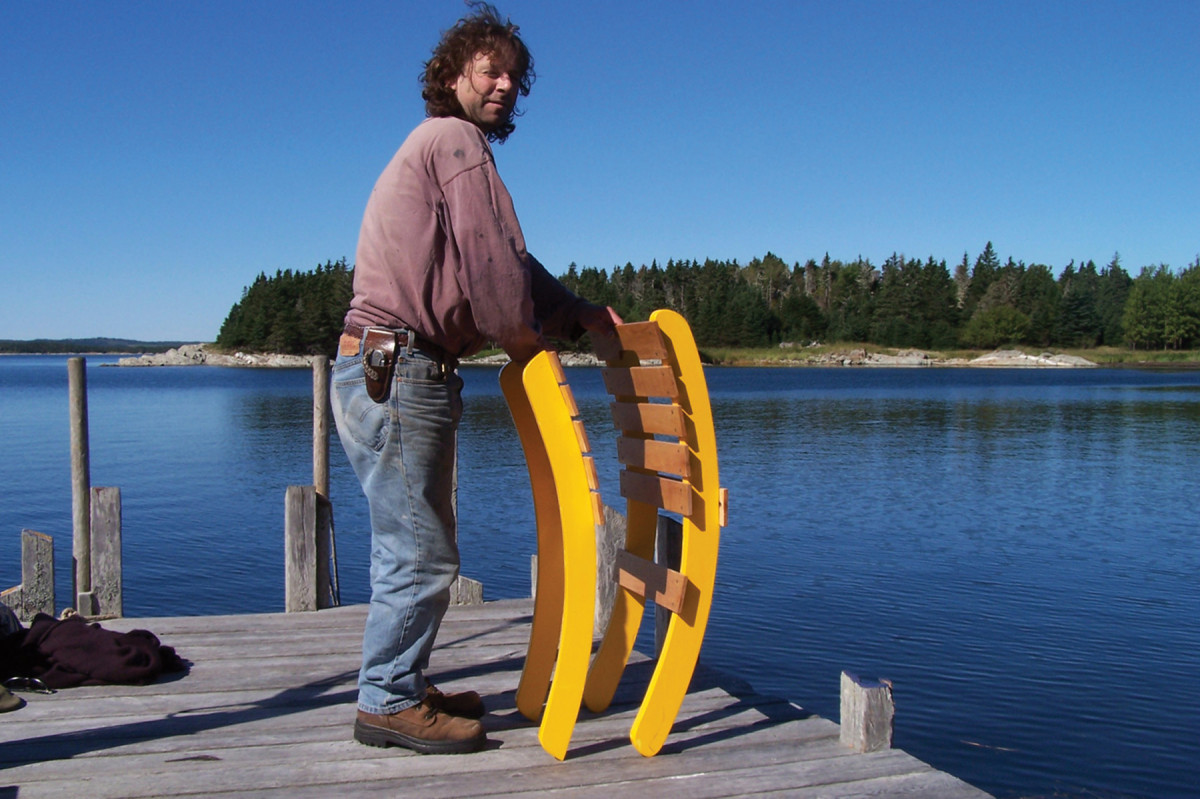
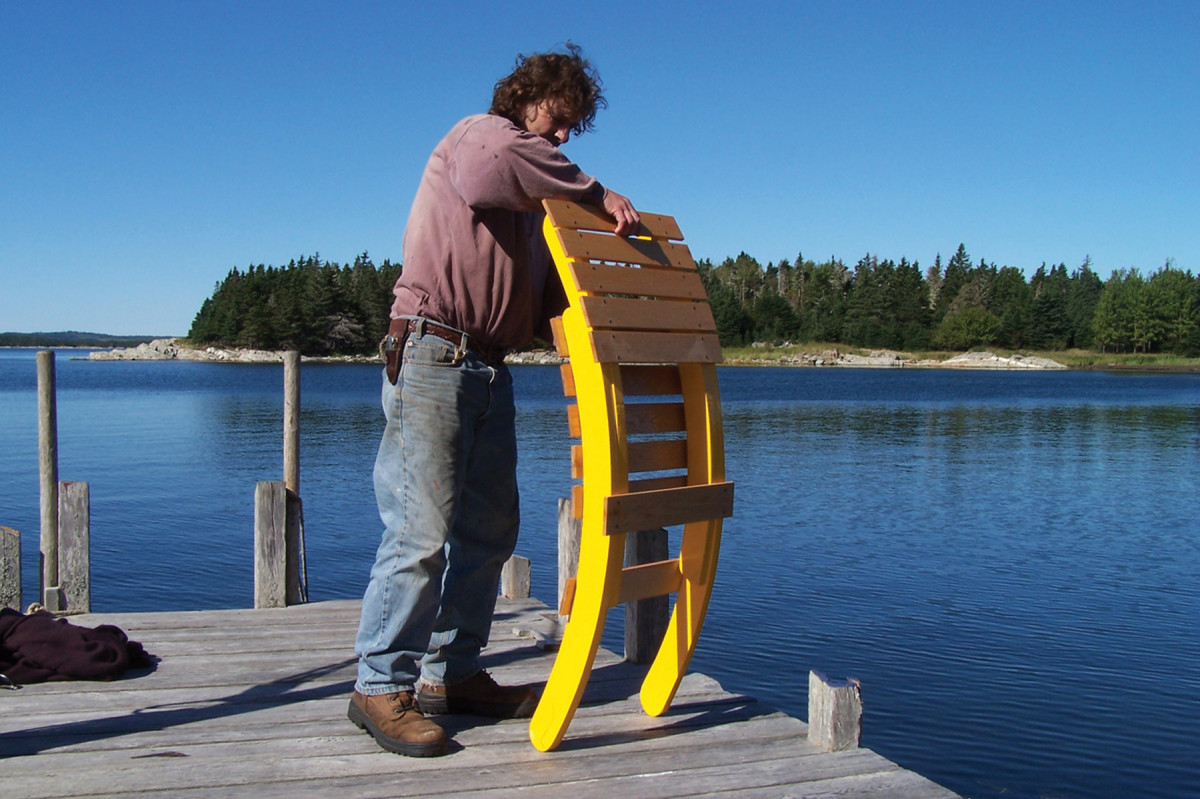
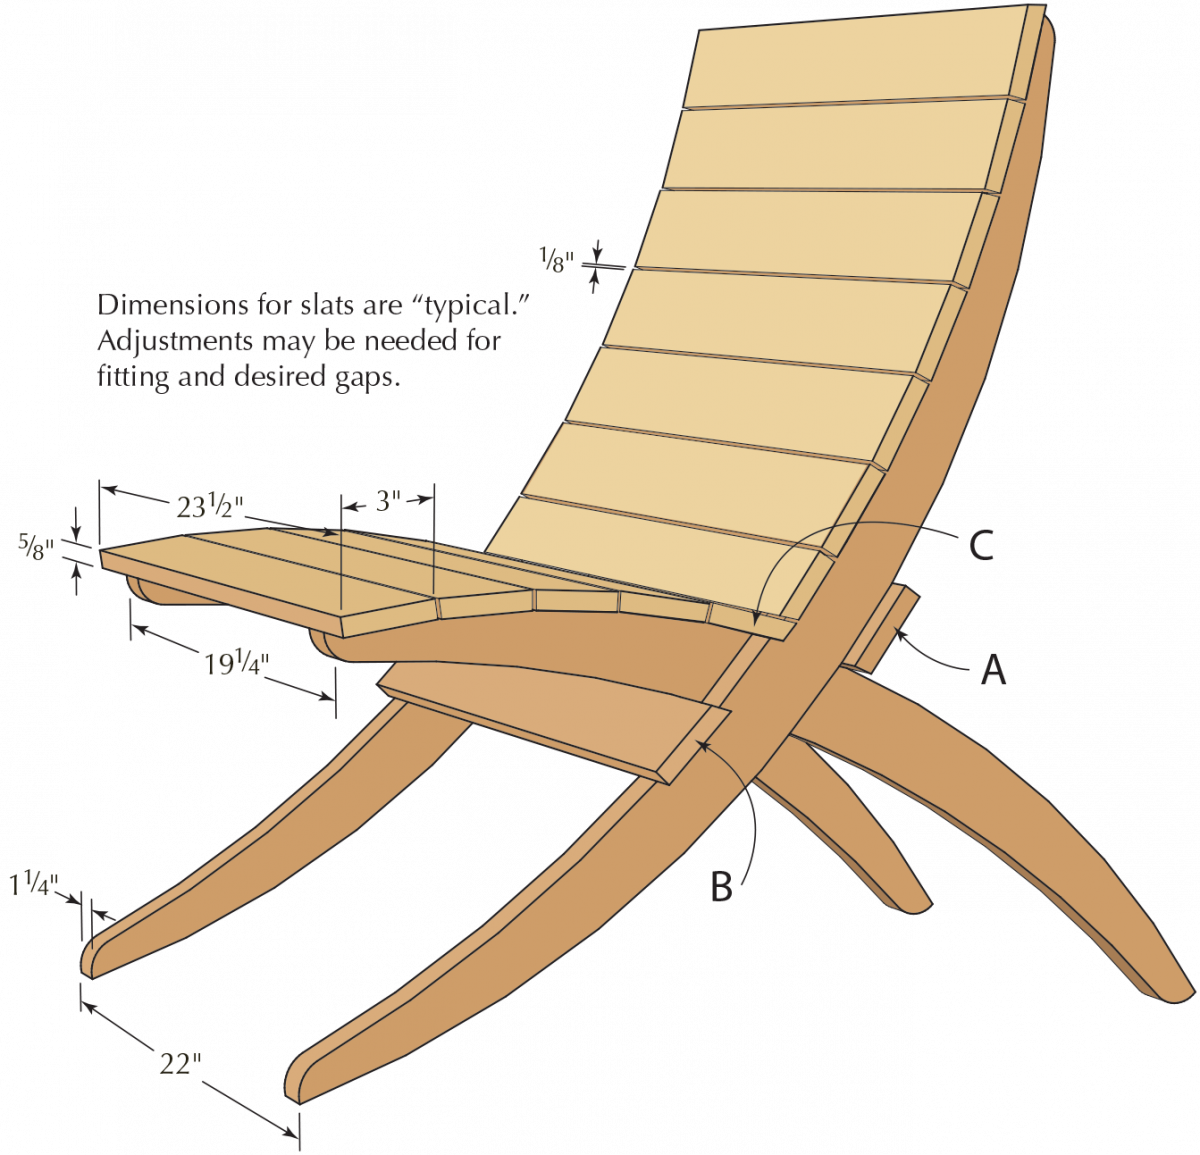
You’ll see from the drawing at below that one frame fits inside the other with a clearance of 1⁄8“. This is so one frame can slide into the other for storage or moving, as demonstrated below by our colorful local boatbuilder Kevin Wambach.
I modified the original curves to make it lighter and more elegant and this version is shown in the drawing. I used Port Orford cedar for my newer version, so the chair needs no finish and can be left out in the weather – rain or shine – and it will just turn an agreeable shade of grey. I didn’t bother to make cushions for this chair but it would be no great matter to do so. I would use canvas – natural or synthetic – for the cover and stuff it with kapok. It would then double as a life raft if I fell off the dock.
Making the Dock Chair
Slip fit. The two curved frames slide together. When assembled as a seat, the three slats at the intersection keep it in position without any special hardware.
About all you need for this project is a band saw (or jigsaw), a low-angle block plane, a drill and a spokeshave. For materials you won’t do better than spruce for the frame because it combines light weight with flexible strength. Spruce does not weather well so the wood must be sealed with several coats of marine varnish or, for a really low-maintenance finish, paint. You could also make the chair in teak or mahogany. Either would weather well, but it would be much more expensive and less portable because of the additional weight.
Easy to stow. The frames also slide together to allow for easy carrying and storage at the end of the season.
The slats are screwed to the frame with stainless steel or bronze screws. Leave the heads exposed or plug the holes with wooden bungs.
Making Patterns
 I’ve drawn the shapes of the crossed legs on a square grid. Each of the squares is 2″. Rather than re-drawing, I recommend using a copying machine to enlarge the drawing, or you can download a PDF file of this drawing at the bottom of this article (link is fixed).
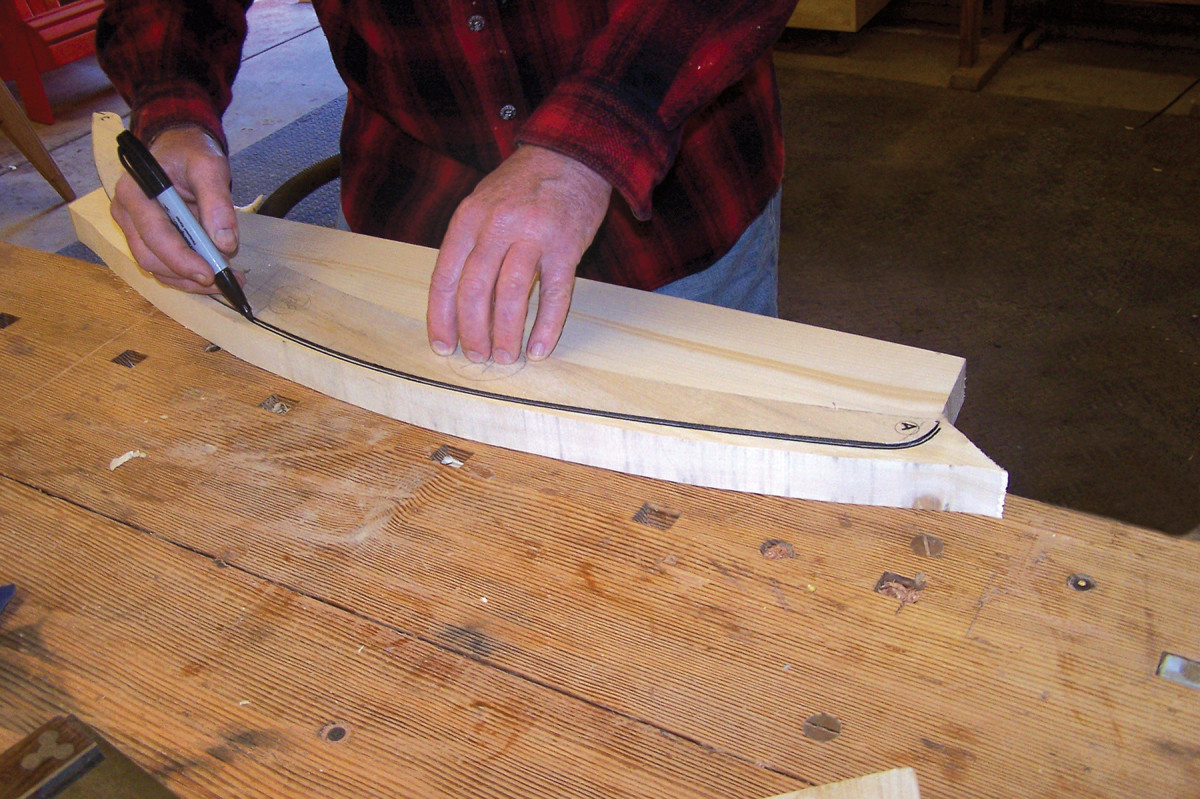
 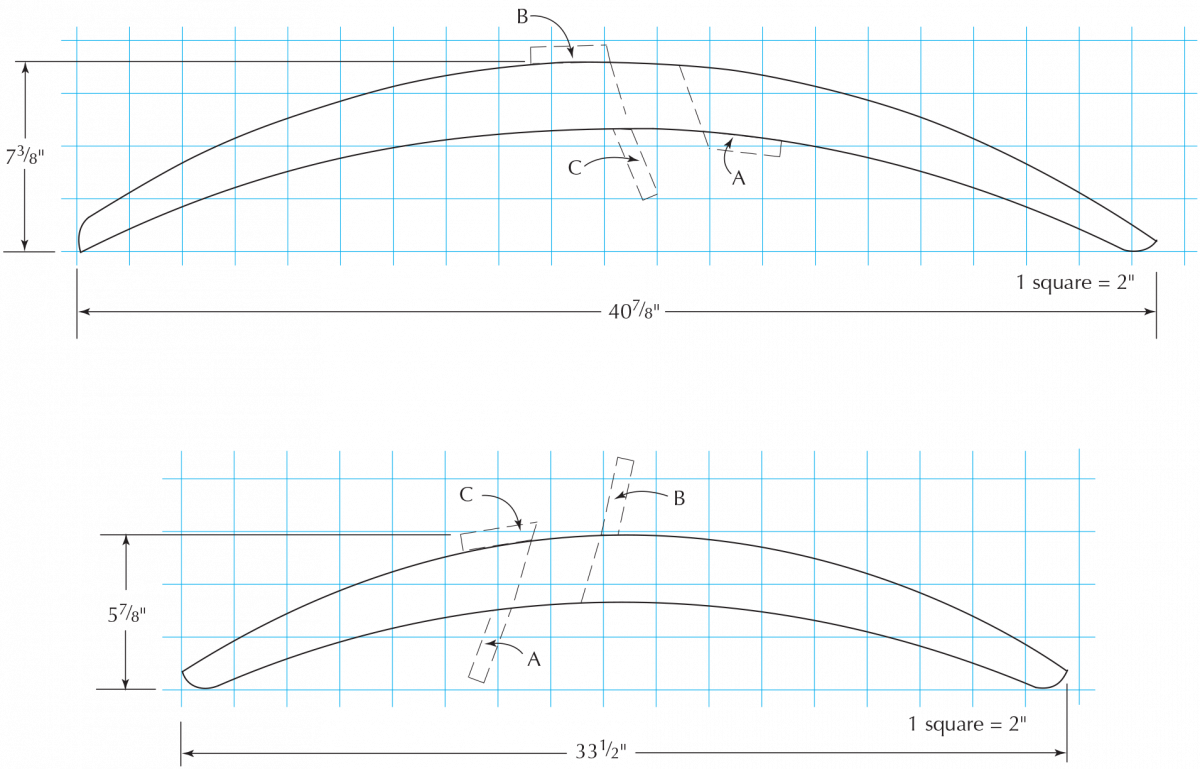 You will have to tape several pieces of paper together to get the full-size image and may find some minor discontinuities – flat spots and abrupt changes in curvature. Rather than build these into your chair, take a flexible batten, spring it into the right shape and redraw the curves with a felt-tipped pen. This is often done by boat builders to generate fair curves.
 Use these full-size templates to mark out the frames on your stock, nesting them if possible, and taking advantage of any natural curvature or “sweep” in the grain. If the stock is not wide enough, glue up two or more pieces until you have the width needed.
One of the clever features of this design is that the grain lines are almost straight at the point where the frames cross and the maximum bending stress occurs.
I have no band saw in my Nova Scotia workshop so I cut out each frame with a jigsaw then dressed the inside and outside curves with a spokeshave. This is a good time to do all the sanding and finishing, being sure to take the sharp edge off any corner with a sanding block. Give the frames a coat of primer (or varnish if using a clear finish), set them aside, and cut out the seat and back slats.
Marking multiples. A template ensures that both frames match, and it speeds the process if you are making several chairs.
If using a hardwood such as oak or ash, you can safely plane the slats down to 3⁄8“. With softwood – pine or spruce – they should be at least 1⁄2” thick or even 5⁄8“. The drawings and cutlist have them at 5⁄8“.
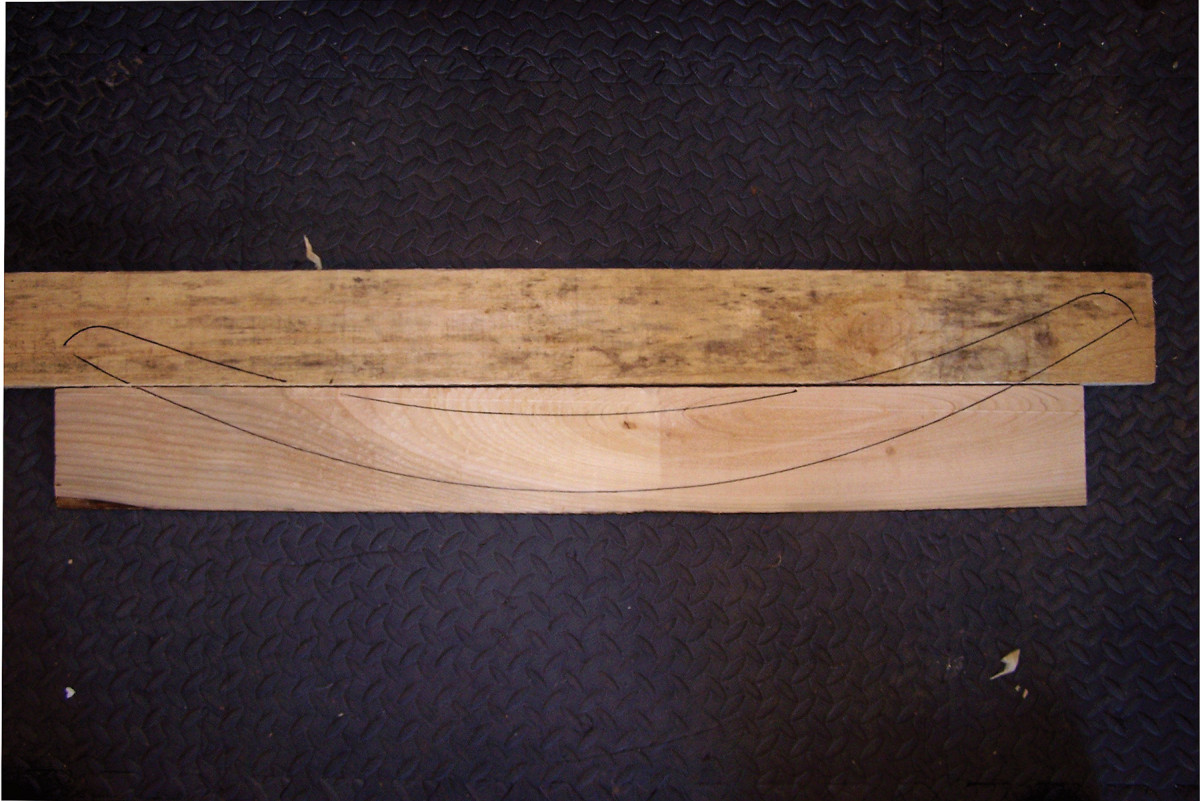
Adding to the curve. To maintain straight grain at the intersection, you may have to add width to your frame stock.
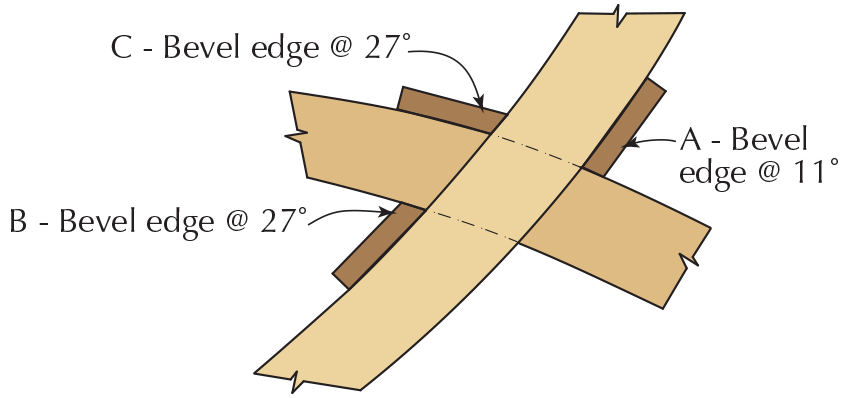
Now use the template again to mark the exact position of each slat on both frames. Be precise in placing the locking slats, marked A, B and C in the drawing at left. These establish the angle one frame makes to the other and hence the comfort (or discomfort) of the completed chair.
It’s well worth the extra trouble to plane a small flat on the convex side of the frame where a slat lands. You can also plane a very slight round on the inside of each slat before fastening it to the concave side of the frames. Otherwise you are likely to see unsightly gaps when looking at the chair from the side. Finish-sand the slats and seal them with paint or varnish as before.
The opening photo shows a hand hold so the frame can be easily carried. Include this feature if you wish – you can add one to the seat too as well.
Fitting and Fastening the Slats
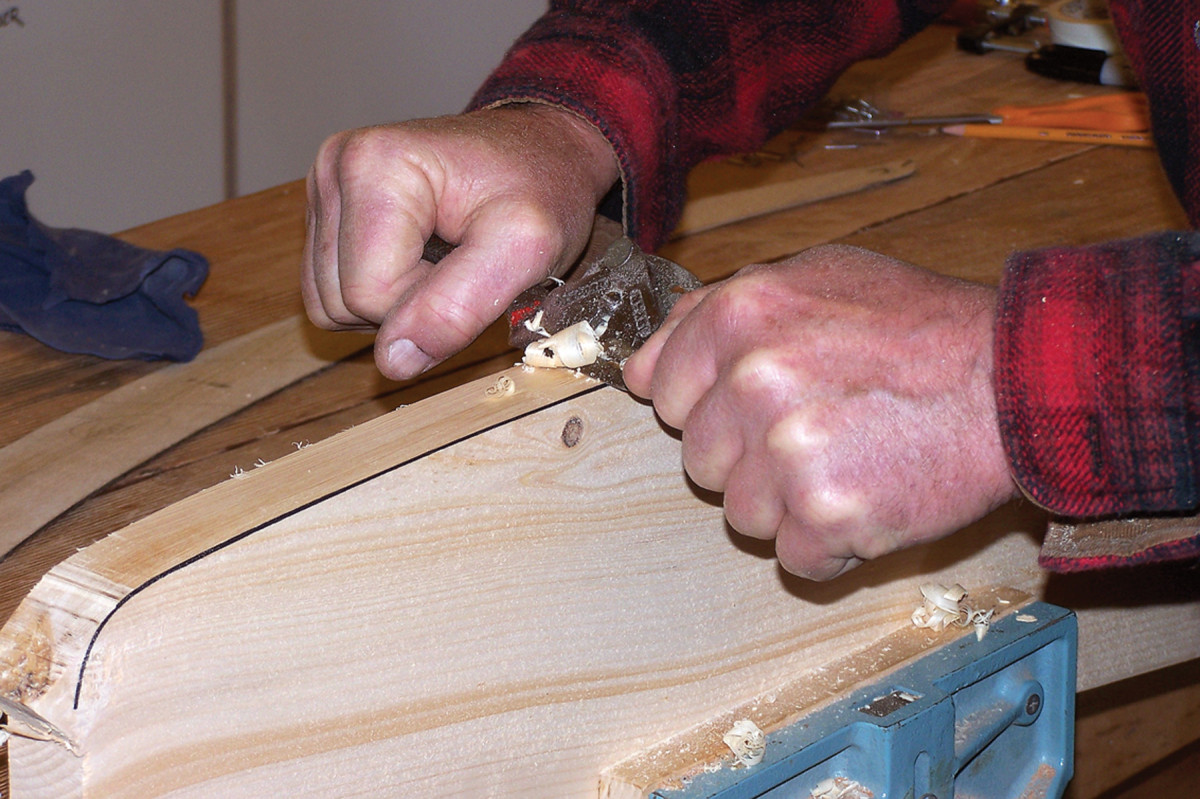
All is fair. The spokeshave is ideal for removing saw marks and refining the curves. I find it easier to shape the outside before cutting the inside curve.
If you plan to leave your chair out in the weather, leave at least a 1⁄4” gap between slats so water can drain. Otherwise, 1⁄8” is sufficient. Make up some 1⁄4” or 1⁄8” spacers to position the slats so the gaps are consistent for both seat and back, from top to bottom.
Start with material 3″ wide for the slats. Depending on the gap between slats, and how much material you removed when shaping the frames, you may need to make individual slats slightly smaller. The top slat on the back is flush with the end of the frame.
Plane a bevel on the edge to meet the curved frame end at an attractive angle. Judge this angle by eye based on the drawing and photos. Some of the other slats may benefit from an angled edge to maintain a consistent gap between them.
Start at the top and fit and mark each slat before attaching any of them. The last slat above the seat will be about 1⁄2” narrower than the others. Start fitting the seat slats with the locking slat C in the drawing and work toward the end. The last slat can overhang the edge 1⁄4” to 1⁄2“, and the chair will be more comfortable if the edge is planed to a radius.
Fastening the Slats
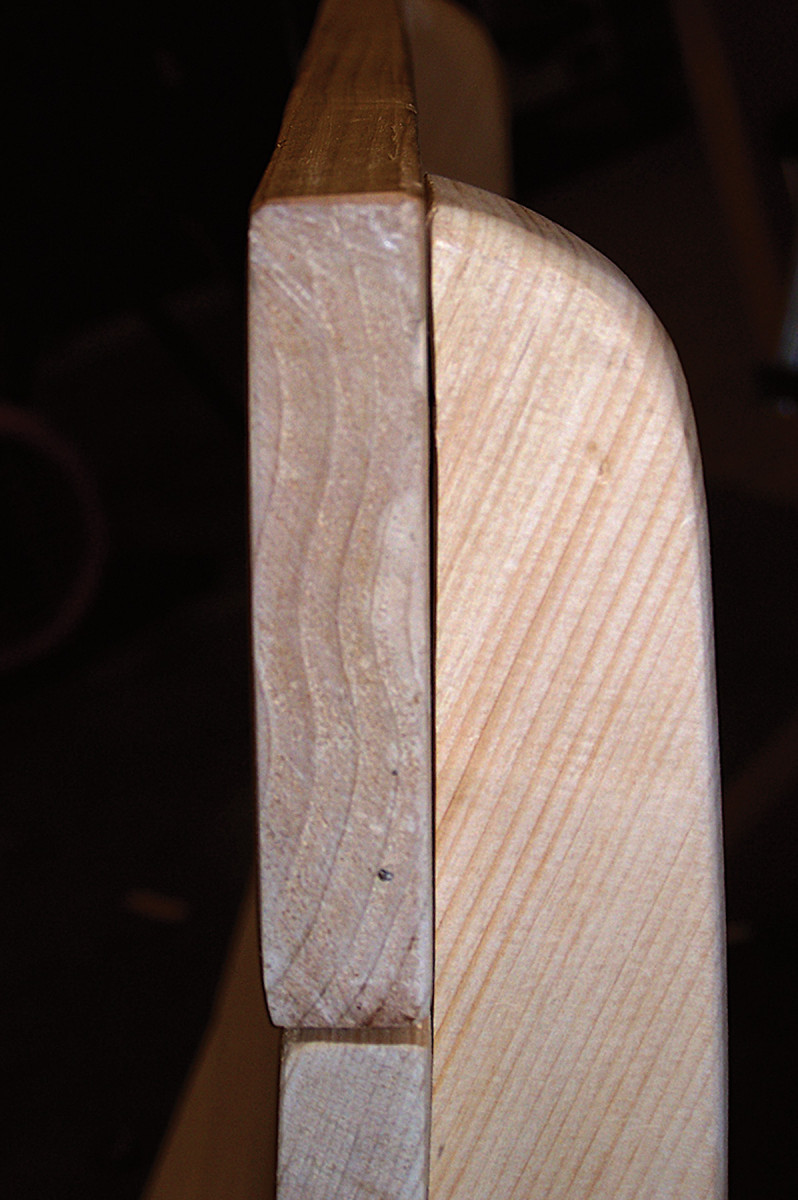
Plane speaking. Subtle angles and curves add detail to the chair. Work the long edges with a block plane, judging the angles by eye. When it looks good, it is the correct angle.
Screwing is more durable than nailing, especially when using softwood frames, and is better able to bear the weight of a heavy person. Be sure to either countersink the screw heads (I use oval-headed bronze screws when I can get them) so they are a fraction below the surface, or counterbore and plug the holes.
Always set wooden bungs with paint or varnish, not glue, so they can be removed to refasten the chair if that ever becomes necessary. If you are planning to use a clear finish be sure to put a drop of sealer (or marine bedding compound) in the pilot hole before driving the screw. Otherwise you are likely to get an unsightly ring around the fastener if the chair is left out in the weather.
Making the Cushions
You don’t need a sail maker for this job but a local tent and awning maker will be able to handle lightweight canvas. I would simply have two rectangular cushions made, each one 16″ x 24″ and not more than 2″ thick. They should have ties to secure them to the chair, or be connected with fabric hinges, so they don’t blow away.
Instead of conventional sailcloth, I prefer a new product called Oceanus that looks and handles like canvas, and is available in solid colors. It won’t mildew and resists degradation by sunlight.
I like this chair so much that I decided to make another version in aluminum with slats of teak. Holes drilled in the frames lightens the weight, and gives the frame the feel of an aircraft girder – in fact, I’m calling it the “flight deck chair.”
Simon Watts is a woodworker, boatbuilder and author who spends his summers in Middle Island, Nova Scotia. When the cold weather blows in, he heads to San Francisco.
Dock Chair Cut List
No. item dimensions (inches) comments
T W L
❏ 2 Front leg frame 1 1⁄4 x 7 3⁄8 x 40 7⁄8 Shape to pattern
❏ 2 Rear leg frame 1 1⁄4 x 5 7⁄8 x 33 1⁄2 Shape to pattern
❏ 14 Slats 5⁄8 x 3 x 23 1⁄2 Fit width and edges
To download full size patterns of the Deck/Dock Chair leg profiles in PDF format, click here.
Here are some supplies and tools we find essential in our everyday work around the shop. We may receive a commission from sales referred by our links; however, we have carefully selected these products for their usefulness and quality.


