We may receive a commission when you use our affiliate links. However, this does not impact our recommendations.
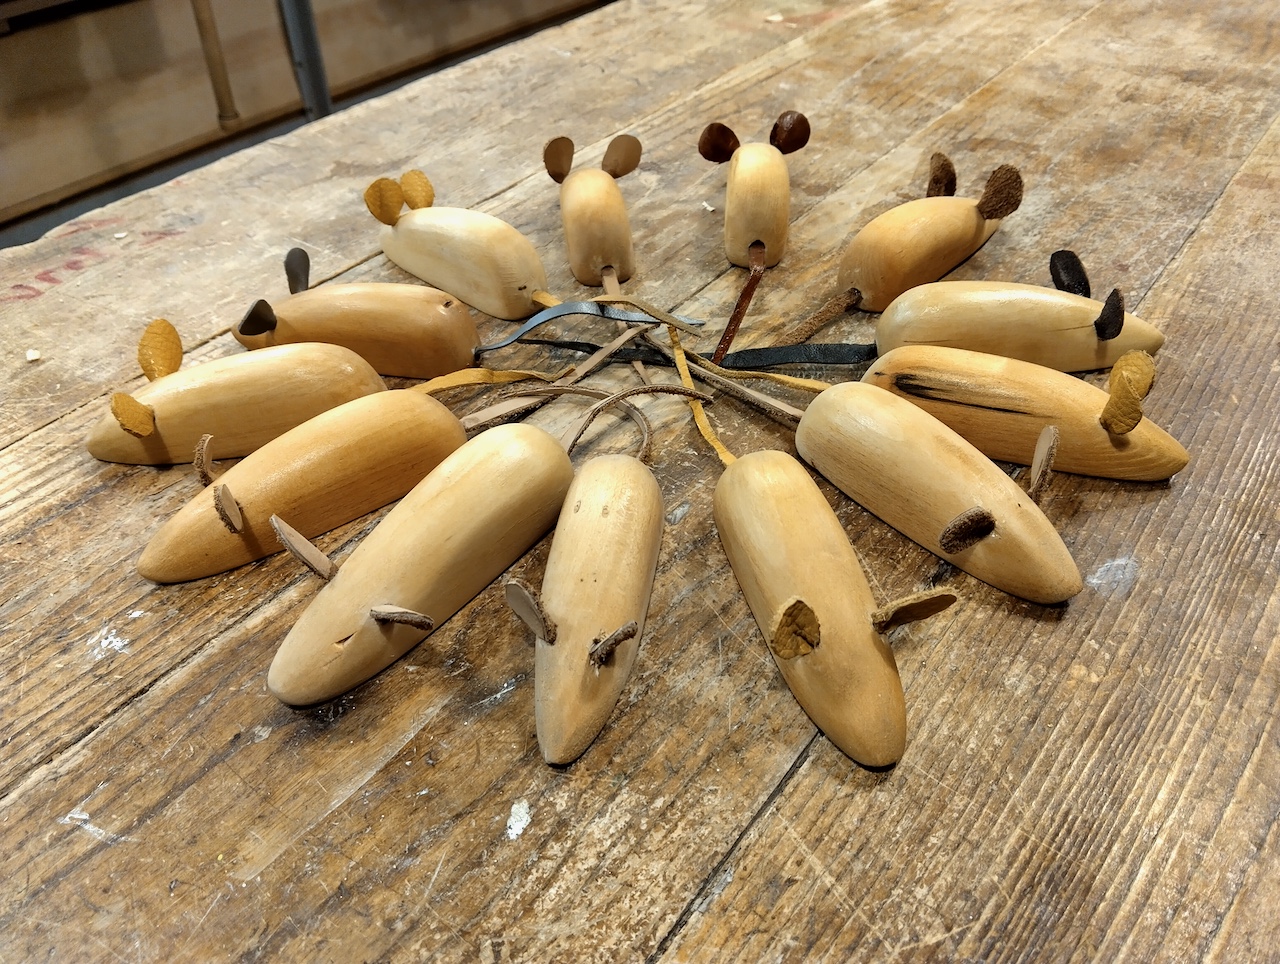
This is a group of recently completed shellac-finished basswood mice. This 4th-grade project is the first project I teach students in my woodworking program.
As I mentioned in the last article, I’ve experimented with a wide variety of finishes over the years as an educator and woodworker. This has helped me figure out what kinds of finish are ideal for working with kids. I’m hoping the knowledge I’ve picked up will help you, whether you’re a professional teacher or are just teaching children in your family. Today I’ll be discussing shellac and how I use it in the classroom.
Before I get into that, let’s not forget the key considerations when choosing a finish for kids or students:
- Safe and easy application
- Addressing finishing spills and cleanups
- Fast cure time
Shellac is an indispensable element in finishing our classroom woodworking projects, complementing the qualities of flaxseed oil that we discussed previously. Its unique properties enable us to easily finish various items such as boxes, stools, and intricately carved pieces by providing robust top coats that are stronger than flaxseed oil.
In my classroom, achieving high-quality finishes efficiently is essential for keeping up with our project timelines and ensuring students can promptly take their completed projects home. Shellac is pivotal in this process, offering a versatile, user-friendly solution for achieving durable and aesthetically pleasing results.

To prepare our shellac solution, we adhere to a mixing ratio of two volumes of denatured alcohol to one volume of shellac, commonly referred to as a “2-pound cut,” which has proven to yield optimal results for our projects.
Shellac originates from the protective secretion produced by the lac beetle in India to safeguard its egg clusters. Extracted, refined into flakes, and dissolved in alcohol, this secretion forms the basis of the fluid finish we use in our projects. Once applied, the alcohol quickly evaporates, leaving behind a durable protective layer on the wood surface.
Acting as an evaporative finish, the alcohol in the shellac-alcohol solution, typically denatured alcohol, will rapidly evaporate after application, usually within minutes. This remarkable feature allows us to lightly buff the surface and apply another layer within a short span of 15 to 30 minutes, facilitating the achievement of a lustrous finish over raw wood within a single class session.

This is a 9th-grade box project finished with blonde shellac. We employ long, overlapping brush strokes when applying shellac. Each layer is allowed to dry thoroughly before being lightly buffed with a 400-grit (or higher) sandpaper/sanding pad, followed by the successive application of additional layers.


While shellac is commonly associated with larger projects such as boxes and stools, it is equally suitable for smaller-scale endeavors such as whittled animals and decorative pieces.
Shellac presents a significant advantage in its ease of use. Unlike many other finishes that demand meticulous cleaning or rinsing of applicators post-use, shellac simplifies this task. Other finishes may risk damaging brushes if not promptly cleaned with paint thinner or soap and water. However, shellac’s reversible nature distinguishes it. Brushes can be left untreated after application, only to be revitalized by soaking the bristles in alcohol to dissolve any buildup just before the next use.

Synthetic bristle brushes (the brush with the orange bristles in this image) are our preferred choice for applying shellac due to their performance and durability.

In our classroom, I’ve implemented a practical solution to optimize this process: a dedicated jar filled with alcohol serves as an after-use rinser. It also acts as a quick brush initiator-softener before subsequent use. This alcohol rinse effectively eliminates most of the shellac solids, ensuring our brushes are promptly ready for action whenever needed. Dealing with brush cleanup and finish spills is a great concern in a busy classroom environment filled with children, so a finish that doesn’t require me to supervise the treatment of our applicators after use constantly has substantial advantages.

To cater to the diverse preferences of our students, we offer a selection of shellac options, including Blonde, Super Blonde, and Garnet finishes, allowing them to tailor the appearance of their projects according to their aesthetic preferences.

In our classroom, some 8th-grade stools were adorned with Blonde shellac finishes, while others received darker Garnet coats. This showcases the versatility of shellac in achieving varied aesthetic effects. The ash legs of the stool in the far right corner received a light blonde coat, while the stool next to it was finished with darker shellac.

An alternative application method for shellac entails using cotton pads. We create a pouch by enclosing a few cotton balls inside a piece of cloth from an old T-shirt and securing it with a pipe cleaner wire. Once assembled, we saturate the pad with shellac and apply the finish to the flat surfaces of boxes and furniture. However, I wouldn’t recommend the padding technique for intricate projects such as wood carving. While the shellac pad technique dispenses the finish in thinner layers and demands more time, it allows for precise and controlled application, offering yet another avenue to achieve desired finishes.
Learn more about shellac, and how it is harvested and processed in this video:
Next time, I will discuss two more friendly finishes I sometimes use with students.
Here are some supplies and tools we find essential in our everyday work around the shop. We may receive a commission from sales referred by our links; however, we have carefully selected these products for their usefulness and quality.