We may receive a commission when you use our affiliate links. However, this does not impact our recommendations.
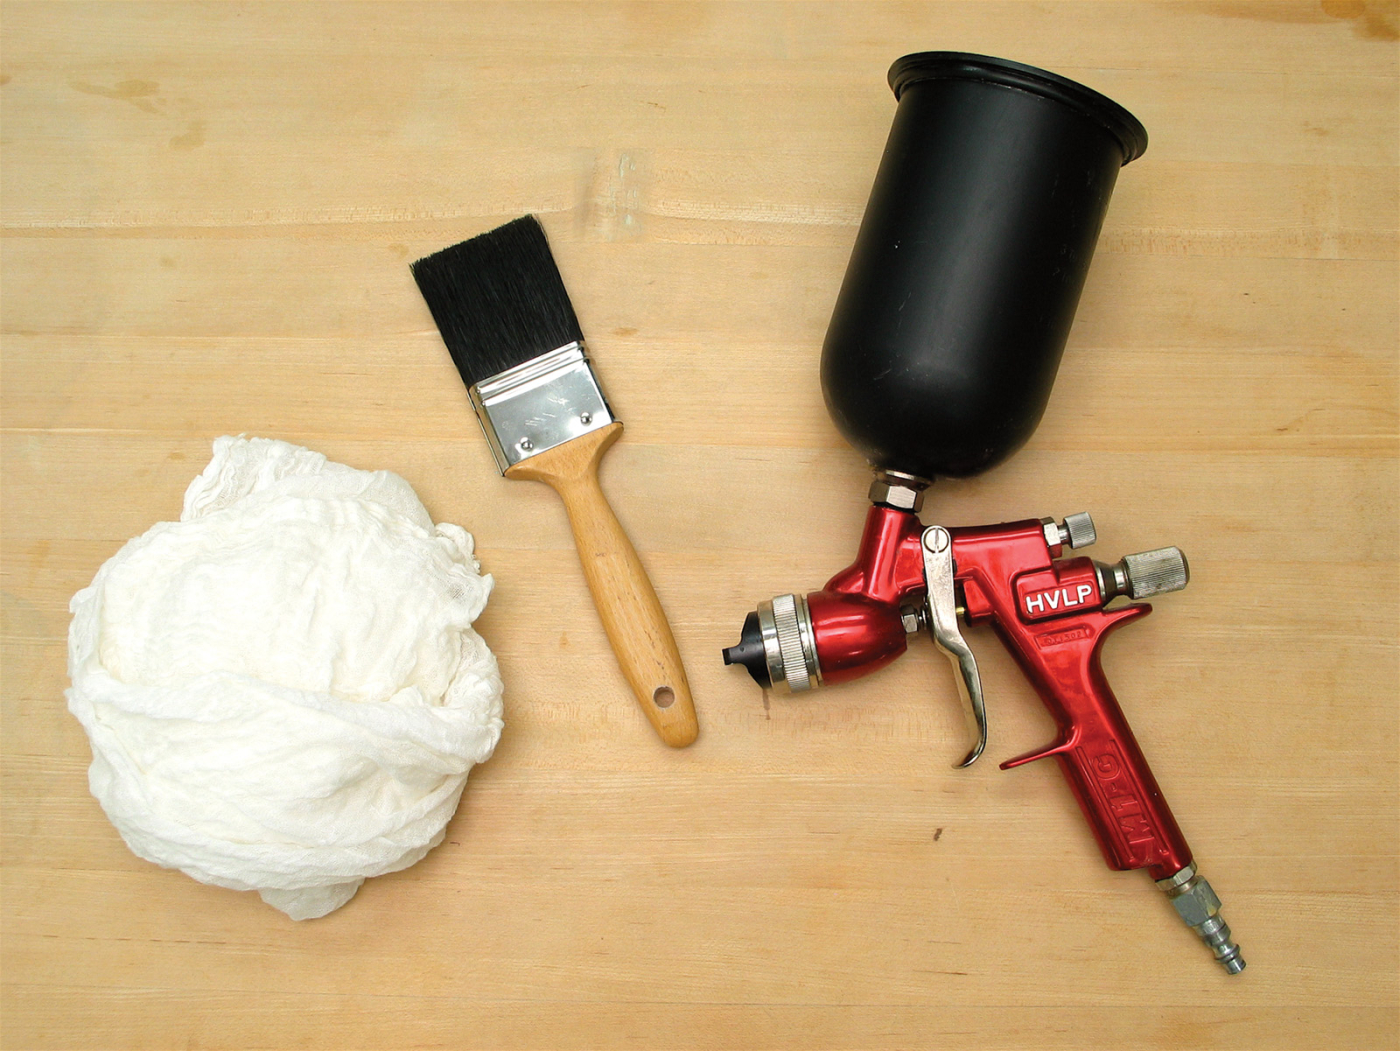
Three tools. Compared to the complexities of woodworking, finishing is easy. Most importantly, there are only three categories of application tools: rag, brush and spray gun.
They explain so much.
It’s often possible to sum up a lot of situations with a rule, a principle that applies in almost all cases. When I teach seminars on finishing, I often find myself citing a rule I’ve created to explain a procedure or to answer a question. These rules can be very helpful for understanding finishing.
Here are my five favorites, the ones I repeat most often.
Rule #1

Sanding. The most efficient sandpaper grits to use vary with the situation. It’s inefficient, for example, to begin sanding with# 80 or #100 grit on this pre-sanded veneered plywood. The #120-grit sandpaper I’m using here is coarse enough to be efficient and doesn’t create more work.
Choose a grit sandpaper that removes the problem efficiently without creating larger-than-necessary scratches that then have to be sanded out.
This rule answers the question, “What grit sandpaper should I use?” It varies for different situations.
For example, you would choose a coarser-grit sandpaper (#80 or #100) to remove severe washboarding caused by a jointer or planer but a finer grit (#120 or #150) on pre-sanded, veneered plywood or MDF. And you would begin sanding with an even finer grit (#180 or #220) if you were just checking to make sure your stripper had removed all the old finish from a refinishing project.
Likewise, you would choose a coarser-grit sandpaper (#220 or #320) to sand out brush marks in a finish but a finer-grit (#400 or #600) to remove fine dust or orange peel.
It’s most efficient if the grit you begin with isn’t any coarser than necessary so you don’t have to sand out the deeper scratches.
How do you determine which grit is appropriate? Experience is the best teacher. In the meantime begin with a grit you think is about right, or even a little finer than necessary and then “cut back” to coarser grits until you find the one that removes the problems efficiently. Woodworkers will disagree here because everyone sands differently. But keeping this principle in mind will help you reduce the amount of work.
In all cases, remove coarser-grit scratches with finer grits until you reach the grit you want to end with. Skipping a grit will require you to sand more to remove previous grit scratches than progressing through each successive grit, but either way is legitimate.
Rule #2
There are only three common tools used to apply finishes: a rag, a brush and a spray gun (including aerosols).
Finish application is therefore far less complicated than woodworking, with its dozens of tools. Each of the three finish tools transfers liquid – finish, paint, stain, whatever – from a can to the wood and is simple to use. Even a spray gun is no more difficult than a router.
On large surfaces, fast-drying finishes are harder to apply with a rag or brush because you can’t move fast enough to keep a “wet edge.” But there’s less problem if the surface is small – for example, a turning. All finishes, no matter how fast or slow they dry, are easy to spray onto any surface.
The real differences in the tools are cost, speed and the degree to which they produce a level film.
Rags are cheap and efficient for applying any stain or finish you intend to wipe off, but they leave pronounced ridges in finishes when you’re trying to build a film.
Brushes are also cheap and are the least wasteful of finish material, but they’re very inefficient because they transfer the liquid so slowly, and they leave ridges (brush marks) in the film.
Spray guns transfer the liquid very rapidly and leave the most level film. But they, and the added compressors or turbines needed for operation, are expensive. And because of the finish that misses or bounces off the surface, spray guns are wasteful of finish material and require an exhaust system, which increases the expense.
Rule #3

Blotching. Some woods, such as the pine shown here, blotch when stained. Blotching is the only situation in finishing that can’t be fixed fairly easily, with stripping and starting over being the worst-case scenario.
The only thing you can do in finishing that can’t be fixed fairly easily is to blotch the wood with a stain.
The purpose of this rule is to encourage you to relax about finishing; you can’t “ruin” your project unless you’re staining a blotchy wood, such as pine, cherry or birch. All problems other than blotching can be fixed, with the worst case being you have to strip off the finish and begin again. Professional finishers know from sad experience that having to strip and start over is not that uncommon. It’s equivalent to the woodworker’s distress over having to make a new part because of cutting a board too short.
To fix blotching, you have to sand, scrape or plane the wood to below the depth the stain has penetrated.
To avoid blotching, the stain has to be kept from penetrating. Do this using a gel stain or by partially sealing the wood with a thinned finish called a “washcoat.” An example is wood conditioner, which is varnish thinned with two parts mineral spirits. Be sure to let whichever washcoat you use dry thoroughly (six or eight hours for wood conditioner) or it won’t eliminate the blotching.
Rule #4

Sealing. Sanding sealers contain a soap-like lubricant that causes the finish to powder so it doesn’t clog the sandpaper. But sanding sealers don’t seal the wood any better than the finish itself and, in fact, weaken water resistance and the bond of the finish.
The first coat of any finish seals the wood; all additional coats are topcoats.
This rule is important for understanding that products labeled or promoted as “sealers” don’t seal the wood any better than the finish itself. They are used to solve a problem.
Sanding sealers contain a soap-like lubricant that reduces sandpaper clogging, making the sanding of varnishes and lacquers easier and faster. Sanding sealers are great for production situations but offer little advantage for most home or small-shop projects, especially when you can get similar easy sanding by thinning the first coat by half with the appropriate thinner. In fact, sanding sealers weaken water resistance (because of the soap) and the bonding of the topcoat, so it’s better not to use them unless you have a big project.
Shellac is effective as a barrier against silicone and odors (refinishing problems), and pine resin and the oil in oily woods such as teak and rosewood. These substances can interfere with the flow and drying of finishes. But there’s no reason to use shellac as the first coat if the wood you’re finishing doesn’t have one of these problems.
Of course, shellac is an excellent finish in its own right and can be used effectively for all the coats.
Rule #5

Staining. As long as you wipe off excess stain, the coloring will always be even unless the wood is naturally blotchy or, as with this oak, the grain is highlighted.
Apply a wet coat of stain and wipe off the excess before it dries.
This is the basic instruction for applying all stains. As long as the wood is not naturally blotchy, and as long as it has been prepared well (all the milling marks and other flaws are sanded out), this method of stain application will produce an even coloring.
Confusion has been introduced by the Minwax ad on television, which shows brushing thick coats of stain and not wiping off the excess. This procedure cannot produce an even coloring.
To get a darker coloring, you can leave a stain on the wood for a while to allow some of the thinner to evaporate, essentially increasing the colorant-to-binder ratio. Then wipe off the excess. You can also leave a little of the excess, called a “dirty wipe,” or apply a second coat of stain after the first has dried.
But in all cases, unless you’re spraying the stain, you have to wipe off most or all the excess to get an even coloring.
Here are some supplies and tools we find essential in our everyday work around the shop. We may receive a commission from sales referred by our links; however, we have carefully selected these products for their usefulness and quality.