


We may receive a commission when you use our affiliate links. However, this does not impact our recommendations.
Throughout the years I’ve been here at Popular Woodworking Magazine, there are only two woodworking questions that find their way into my inbox on a regular basis. The number of times I’ve answered the question about the router bit I used to plunge-cut workbench holes into my Shaker Workbench from December 2007 (#166) is astounding, and I’m not the only one in the office that has answered that question. (Dig around the editors’ blog and our videos if you need this information – it is there if you search, or you can drop me an e-mail and I’ll happily provide the answer.)
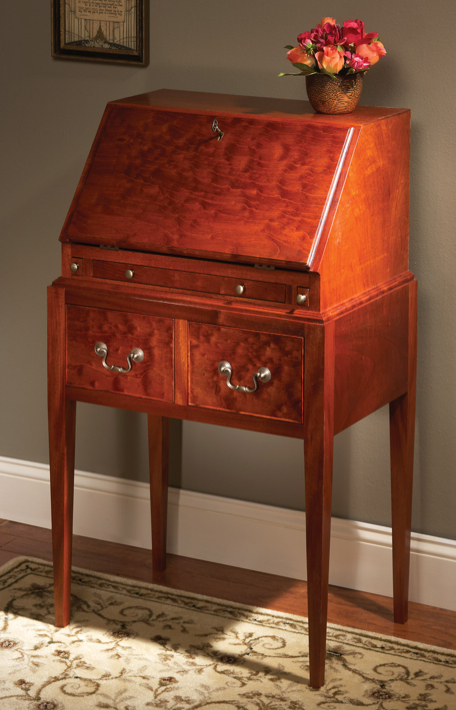 Another question that I get quite often is reflected in the letter below that I recently received. While this time it’s concerning a project from the book on furniture from the Museum of Early Southern Decorative Arts, the Lady’s Desk published in the November 2011 issue (#193) of Popular Woodworking Magazine, in the past it has come in about my Classic Huntboard from the June 2009 issue (#176). I also answered this question when the Queen Anne Dressing Table was published in the June 2010 issue (#183).
Hi Glen,
I am in the progress of building your Southern lady’s desk. My wife is anxiously waiting for this desk to be finished. I am putting together the bottom unit (base) and I am wondering if I read correctly (in your article in Popular Woodworking Magazine from November 2011) that the tenons on the 8”-wide base unit sides and back are to be glued. Should I make some arrangement to minimize the potential movement of the cherry to keep it from splitting? I can glue the top tenon and allow the bottom tenon to float. I am using flat-sawn cherry.
I have tweaked the design a little (wider and deeper) to make the drawer under the writing surface sized to fit a portable computer. I plan to add under-mount drawer slides to allow the drawer to come out 100%.
First of all, I give an “attaboy” to the writer because he is adapting the design and plan to fit his needs. (There is no need to copy anything exactly as it was published; put your own spin on it, and make it work for you.) In a reply to his letter, I sent him a link to my blog post from June 2009. (The link is below.) I must caution you, however, that if you read the post, please read all the comments as well.
This is still my answer. And it’s how I work when I build furniture.
Here are some supplies and tools we find essential in our everyday work around the shop. We may receive a commission from sales referred by our links; however, we have carefully selected these products for their usefulness and quality.


Glenn,hope things are going well for you .
A question for you. I am building a bench seat and the question is: The seat will be made up of several boards and I want to put cheats across the depth of the seat, so what do I do about wood movement?
Sent from my iPad. Elmer
Glen, I love your projects, I really do. But I have two problems with your articles. First, a lot of times you leave us guessing on the molding details. At least in the past, you neglected (or they edited it out) to provide the specific router bits needed to produce molding profiles. Or, sometimes you might say, “use xxxx type of bit”, but you don’t explain exactly how to get a certain profile from a complicated bit. Issue two is finishing. You don’t always tell us which dye you used. We need to know that you mixed 50% walnut brown with 50% osage yellow. We need to know that the exact brand of dye you used, and if you can tell us where to buy it, we’d like to know that as well. We need to know if you used garnet shellac, and if you used a topcoat. If you don’t like to get “frequently asked questions” then tell us what we need to know in the first place. Thanks for your otherwise excellent project articles, please keep them coming!
Glen, you, you, you, rabble rouser, he says shaking his pointy fanger at Glen, and that Bender feller too 🙂
Glen you explained it very well, Chuck just nailed it to the wall, but I`m not sure if either of you spelled it out completely. At least to the point that those who read, and seldom do understand. Kiss method says………
Smaller widths = smaller overall expansion. You can make do with glue, and as Chuck so eloquently noted not gluing could easily net you some serious problems, but by merely expanding the width of the mortise, allowing the tenon to slightly creep allows enough room for the scant movement you will likely see.
Wider widths, such as table tops = wider overall expansion, good time to glue and pin. Glue center where movement is just starting, and therefore less, because we know it goes from the middle to the outside. Pin the outsides with elongated holes to allow for that movement that we know can/will happen, especially with a change of RH.
Either that or type SLOWER