


We may receive a commission when you use our affiliate links. However, this does not impact our recommendations.
 I moved to Kentucky/Cincinnati on July 1st, and by the 15th of the month, I was already starting out on building the furniture for my new house here. Josselyn (my partner) and I had committed to leaving behind the cheap, second-hand furniture we had bought since leaving college years ago, and in doing so, arrived without a dining table, dining chairs, coffee table or a proper bedroom set. So, for the past few months, I’ve been getting to work building our new furniture.
I’ve posted already about the kitchen table I built from Christopher Schwarz’s “The Anarchist’s Design Book” staked worktable plans, and I used similar “staked” techniques to build my “Low Stakes” madrone coffee table. These two projects got my feet wet in the world of pre-industrial vernacular furniture – not high-boys and Chippendale, but the more commonplace designs borne out of expedience and the desire for durable, unadorned furniture. The “staked” style is distilled into a basic joint and principle – that a stick mortised into a slab of wood is a straightforward and long-lasting means of making a table, chair, stool, bench, etc.
In building these other table projects, what I was really doing was preparing myself for the bigger project waiting in the wings – a set of two staked chairs. I’ve been following Chris’s work for years, and when I first read his writing about this style/genre of furniture (which he originally called “furniture of necessity” out of distaste for the term “vernacular”) I was captured by its straightforward aesthetic. I was building one of Tage Frid’s three-legged stools when I first read about Chris’s staked chair design, and while I still love the aesthetic of that stool, I was frustrated by its joinery. The Frid stool has cylindrical tenons and shoulders, and I ended up pinning the tenons to the seat from beneath after finishing the piece, as one of the tenons had shaken loose its glue bond. I used it as my shop stool for a while, but I still worry about being too hard on it (and I tend to be a good stress test on delicate chair joints, in a mass-times-gravity sense).
So when I moved out here and started hanging out with Chris in his shop in Covington (which is around the corner from our apartment) I was thrilled to start planning out a staked chair build. In the end, I came away with some solid lessons from the build that I’d like to share – I think everyone should delve into the staked technique, but at the very least, I want to share the things I learned from my process for those who might be curious about staked furniture or chairmaking in general. Some of these certainly won’t be revelations to seasoned chairmakers, but for flat-workers like me (who have spent most of their time making casework and rectilinear builds) they helped me get a foot in the door on chairmaking.
I’ll also mention at the outset that Chris filmed a great video on making this style of chair – you can find it in our store, and I used the video and his book constantly as references during this build.
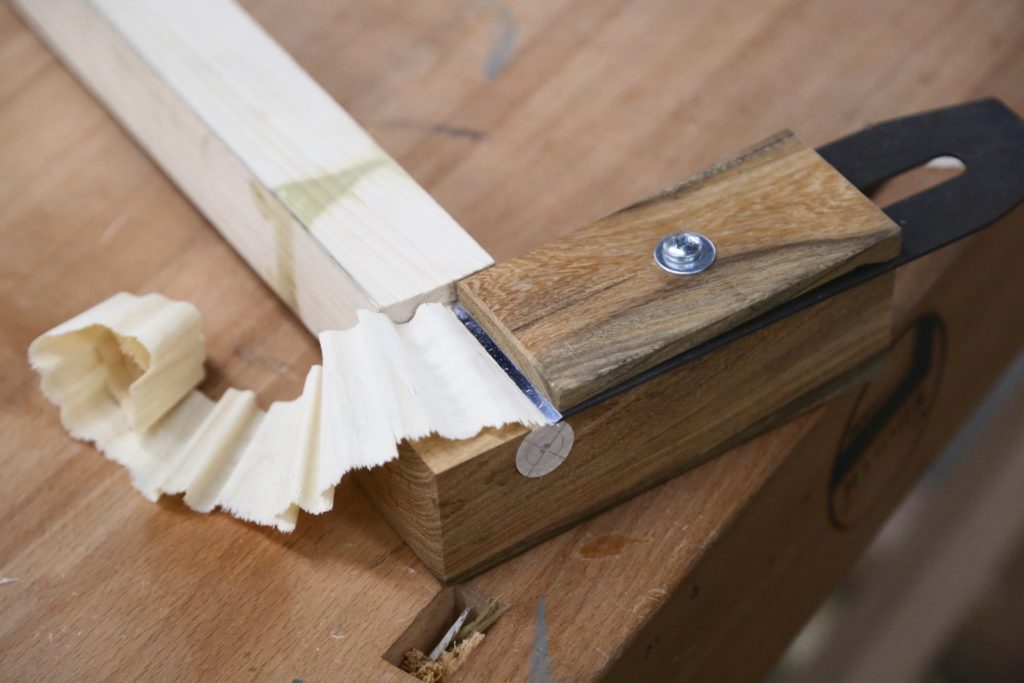
A tapered tenon cutter, paired with a tapered reamer, makes rock solid joinery a breeze.
1. Conical tenons for a solid fit. The geometry of joinery is centered around two things – getting valuable face-grain real estate for glue, and getting a tight fit. Cylindrical tenons depend on a very precise thickness to fit correctly. On the other hand, conical tenons rely on a precise geometry, but a varying thickness will only impact how deep the tenon sits in the mortise, not how well it fits. This is something every Windsor chairmaker knows, but it hadn’t yet clicked for me until I actually executed it on this build. A reamer (I use one of Tim Manney’s beautiful chairmaker’s reamers at a 6º angle) and a tenon cutter (you can build one easily for yourself) will make solid, repeatable joinery that will outlast you.
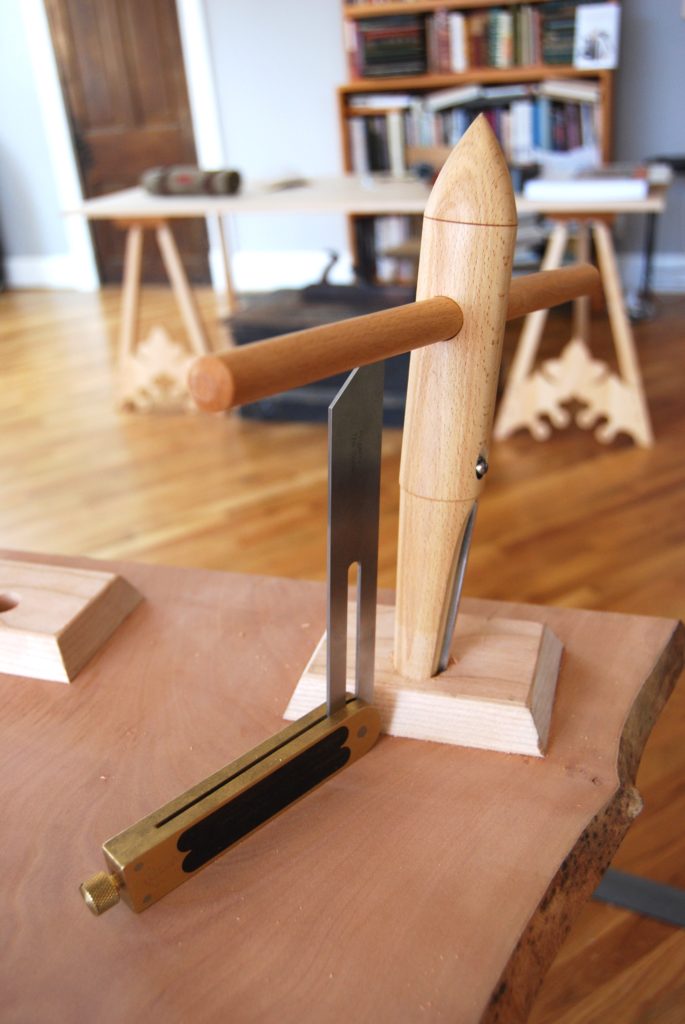
Compound angles, involving rake and splay, can be difficult to get your mind around – but Chris has simplified this math into a straightforward, single measurement process.
2. Boiled down geometries. Chris wrote about this technique years ago in the magazine, but until I built this set of staked furniture, it didn’t hit me just how much simpler it is. Chair legs are typically described by their rake and splay angles – how much they kick back or forwards and how much they kick out to the sides, respectively. For a flat-worker like myself, this is an intimidating moment in making a chair. However, there’s a great way of combining these two angles into a single “resultant” angle, which leaves only one oblique angle and a square as guides for drilling and reaming. I like that – one of my pauses in chairmaking was the loss of references, and the general “up in the air” (not simply reference off of a solid face or edge) geometries that I have seen professional chairmakers master over years. This simple approach soothed my worries, and demystified some of the art of chairmaking for me.
These chairs aren’t just an introduction to staked legs – they bring a full plate of introductions to the table.
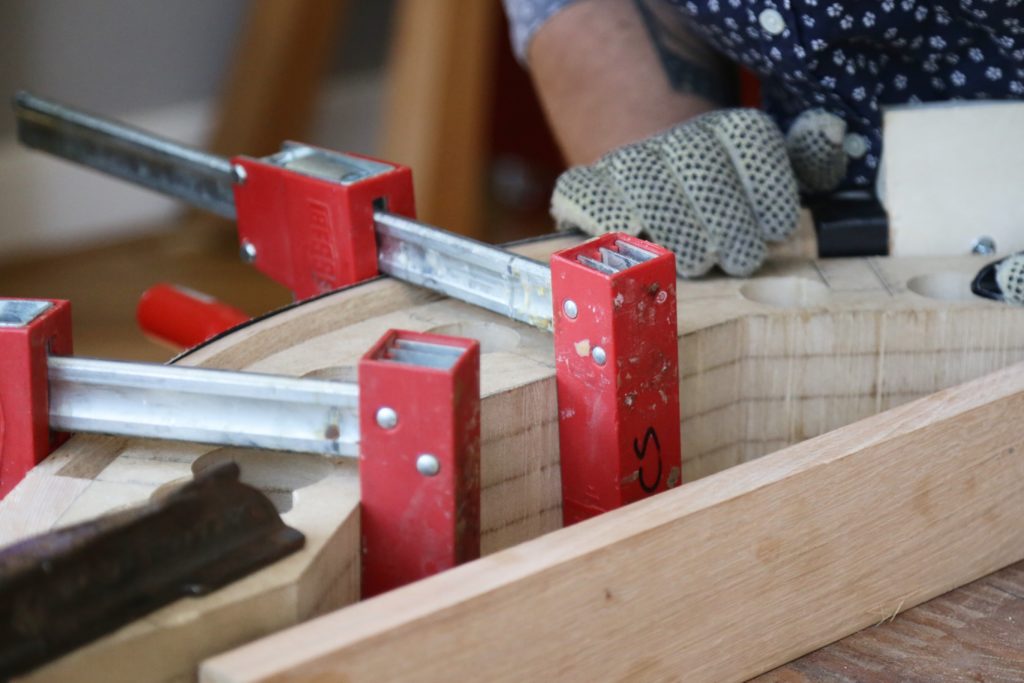
3. Introductions all around. The staked chair isn’t just an introduction to sticks as legs – it introduces a range of techniques practiced by chairmakers. I’ve only ever fooled around with steam bending, leg turning, riving green wood, saddling seats and a number of other processes I used in the course of this build. After building these chairs, I’ve now got at least an introductory handle on a number of the techniques used in much more complicated and involved chairs. I also got to use a whole series of tools I’ve only had tentative experiences with, like scorps and travishers.
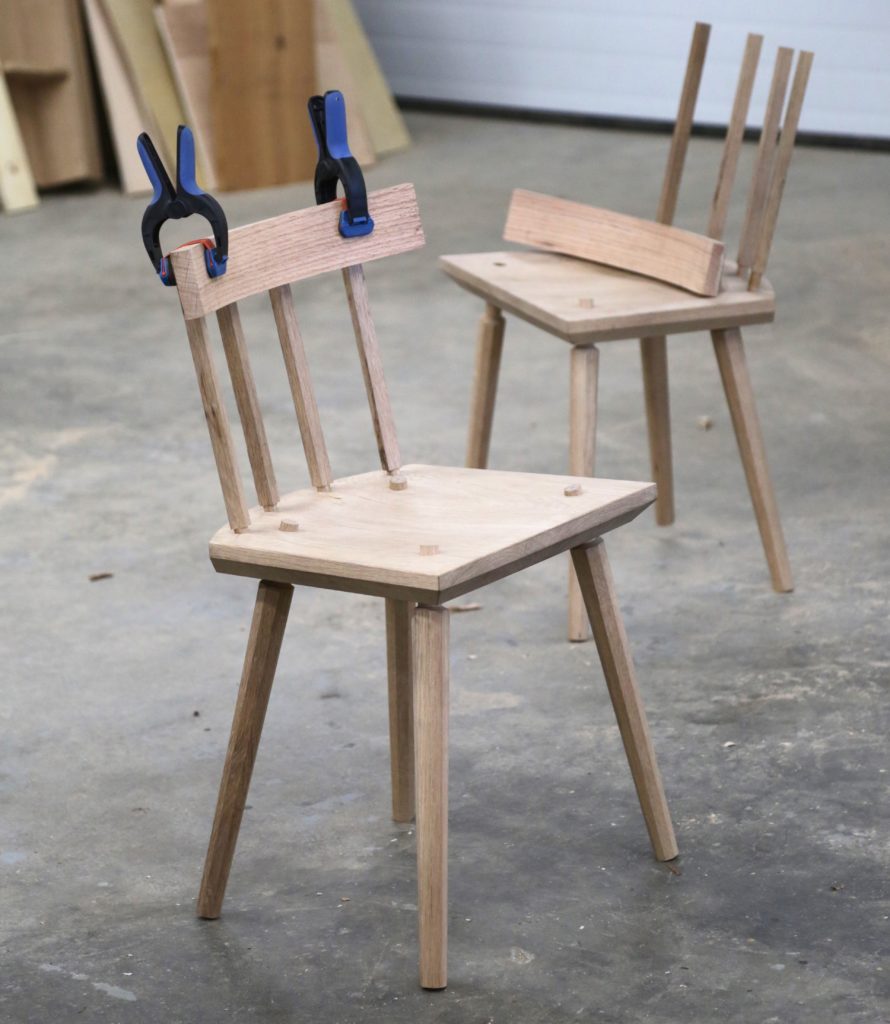
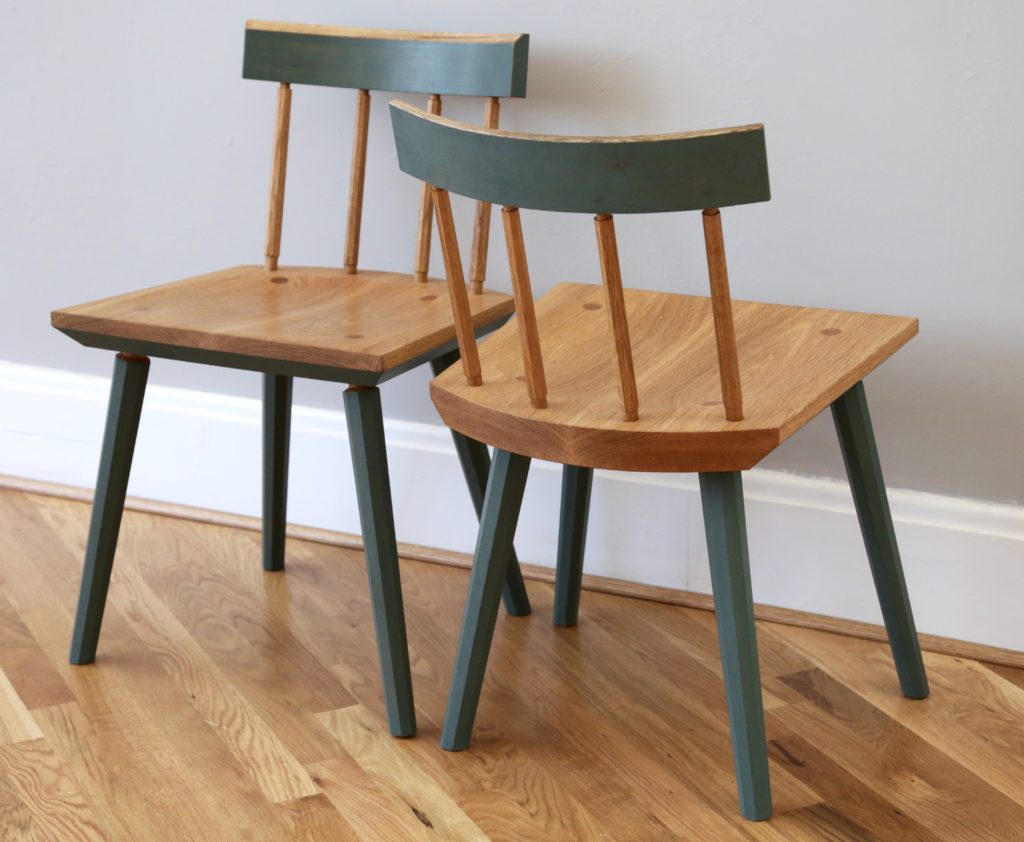
The staked chair is a great starting place for learning the ergonomics of chairmaking. The height of the crest, the pitch of the seat, and the height from the floor are all easy to play with.
4. Ergonomic playground. The simplicity of this chair form affords something I’ve been seeking – a platform with which to play with the various essential ergonomic elements of chair design. While I was at The Krenov School, I remember listening to Laura Mays discuss the various angles that determined a seat comfort and usage – the angle to the floor, the height from the floor, the lumbar support, the back angle, and so on. I’d figured that when I built a chair, I would just stick with the dimensions and angles provided, and hope that they would suit me well. I was happy, however, to find that this chair design makes it easy to modify any one of those dimensions. The lack of stretchers and simplicity of the crest joinery meant that I could play with these geometries – and in the end, I found that I liked a lower crest and slightly higher seat, but I stuck with Chris’s pitch of the seat from front to back (but not without trying others). I can see why it’s easy to get obsessed with these angles – chairs are arguably the most “intimate” furniture, used so frequently and fit so particularly to the human body that any adjustment in ergonomics can make the chair feel completely different to the target keister.
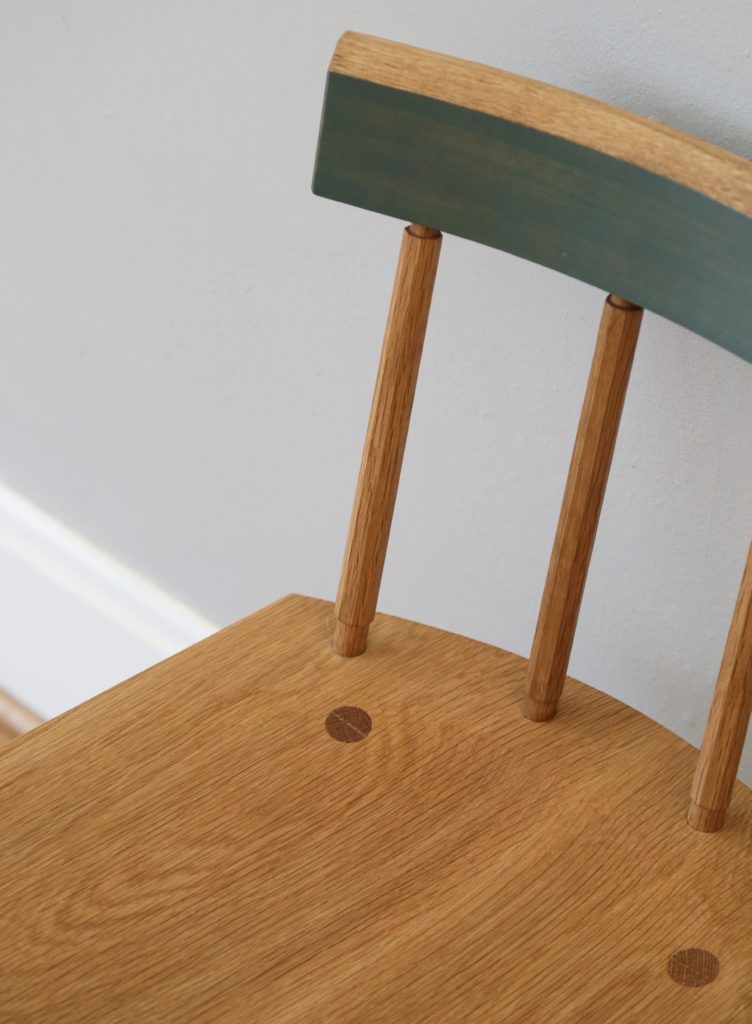
I would’ve stalled at the idea of painting my furniture in the past – now I’m excited to have a new design element to play with.
5. A blank canvas. Most chairs find their aesthetic strength in their form, and do not lend themselves to showy woods or surface treatments. While I did not find the form lacking in these chairs, the minimal amount of ornament and adornment makes them a great place to try out small design choices in finish and grain composition. The large slab seat gives a nice show surface for beautiful grain – I chose some beautiful flat-sawn white oak for the seat, which also responded well to the carved saddling of the seat, exposing concentric growth rings. I also did something new for me, at least in furniture – I painted them! While I understood the draw to paint Windsor chairs, made of multiple wood species chosen for their working and strength properties over their appearance, I’ve generally been one of those “it’s a shame to paint it” furniture makers. These pieces really lend themselves to playing with color and faceted surfaces – it was a nice kick in the seat to paint something and love the end product.
In the end, the staked chair hits several sweet spots for me for a build. It exposed me to a range of new techniques and lessons, it’s relatively straightforward in execution, and the end result is a durable, attractive piece. It also lends itself to modification and experimentation, it can be built with a wide range of tools or abilities (by hand and machine, etc.) and, at the end of the build, I’m only more excited about building something like it again. I am usually “done with” (i.e. sick of) a piece of furniture by the time I’m putting finish on it. I bounce between cabinets, picture frames, tables, beds, etc., wearing myself out with each form and getting excited to try something different each time. At the end of this project, I’m only more excited about digging into this form and process further – and while we don’t need any more chairs in our house, I’m sure I’ll be back building another staked piece sometime soon – after all, a plank and a stick are easy to come by, and if I’ve learned anything, they make for a rock-solid foundation.
Here are some supplies and tools we find essential in our everyday work around the shop. We may receive a commission from sales referred by our links; however, we have carefully selected these products for their usefulness and quality.


What a fantastic post not only inspirational but a interesting progress of your chair making journey. Looking forward to seeing more of your work.