We may receive a commission when you use our affiliate links. However, this does not impact our recommendations.

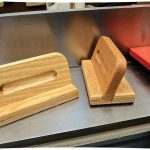
Make these French moulding planes that are essential for every hand-tool kit.
Hollows and rounds are making a strong comeback in the hand tool woodworking world. However, many woodworkers are scared off from jumping in by either a limited tool budget or the limited availability of antique ones in good condition. Don’t let that hold you back any longer. You don’t need a whole set to get started anyway. The three sizes in this article – Nos. 4, 6 and 8 – are the ones I most often reach for. (A No. 4 cuts a 1⁄4” profile, a No. 6 cuts 3⁄8” and a No. 8 cuts 1⁄2“.) After you make a pair or two, you may find you never need another size to suit your working needs.
I’ll teach you how to make your own planes – just like early craftsmen did. They were woodworkers, not professional planemakers, so they made planes with tools that were readily available in their tool chests. In other words, tools you likely already have.
André-Jacob Roubo shows and describe these planes in his 18th-century masterwork “l’Art du menuisier.” What I’ll show you reflects Roubo’s plane construction coupled with British/American styling and proportions. That way, your new planes will fit nicely in your British-style tool chest, and likely match many of the planes you already have.
Choose Wisely
Saw Guide – Side View. Measurement determined by angles; must overhang body enough to trim to match.
While you can make a plane out of just about any hardwood, some woods are clearly the better choice. Traditionally, Western planes were made mostly in beech. Other historically choices include yellow birch, and fruitwoods such as apple and even pear. If you plan to work hardwoods with your planes, choose a diffuse-porous wood such as the ones mentioned.
A non-traditional wood that is worth considering is hard maple.
Avoid ring-porous hardwoods such as oak because the soft early growth ring layers can suffer undesirable effects once they begin to wear with use.
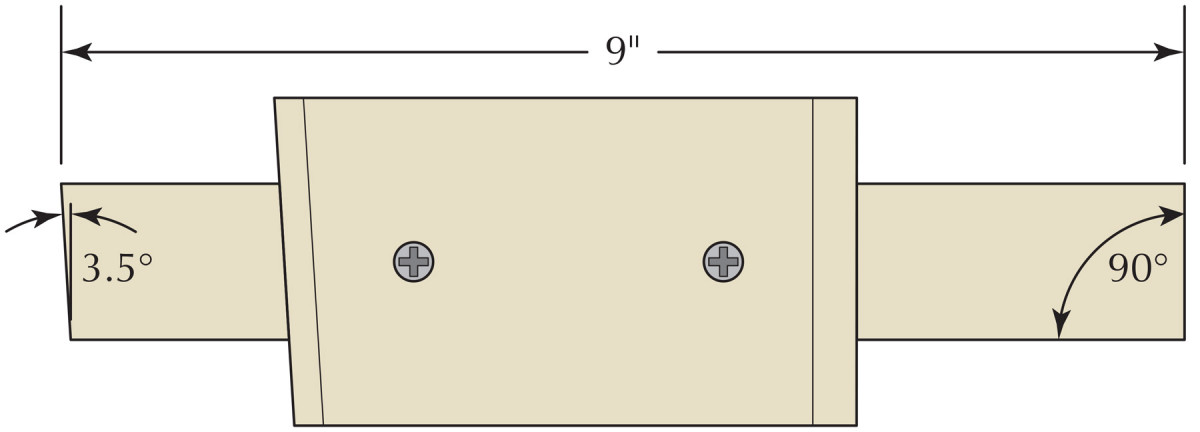
Saw Guide – Bottom view.
No matter what you choose, select quartersawn stock for seasonal stability.
Because many diffuse-porous woods are often hard to find quartersawn, you might find 16/4 material that is plain-sawn that you can cut into quartersawn billets. Sometimes you can find wide plain-sawn boards that have been cut close to the quartersawn orientation on the outer edges of the board.

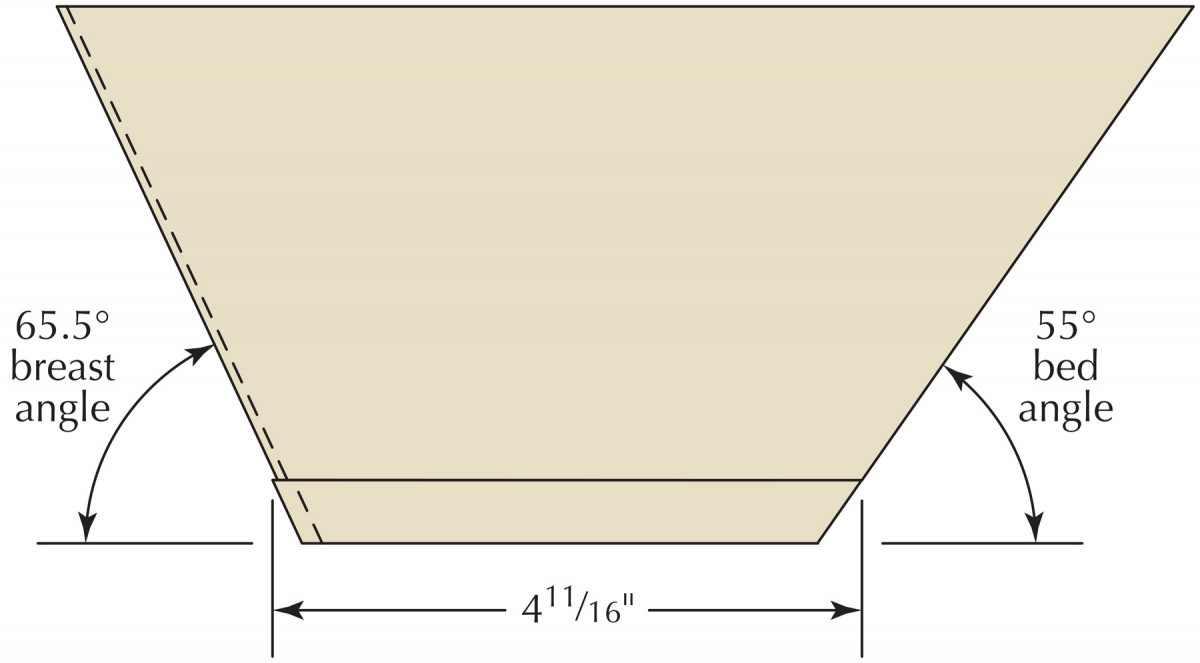
Saw Guide – front view.
Once you’ve selected the stock, prepare two blanks for the bodies for each plane size – one for the hollow and one for the round. The blanks are all 31⁄2” wide x 91⁄2” long. The thicknesses will vary: 3⁄4” for the No. 4s; 15⁄16” for the No. 6s; and 11⁄8” for the No. 8s.
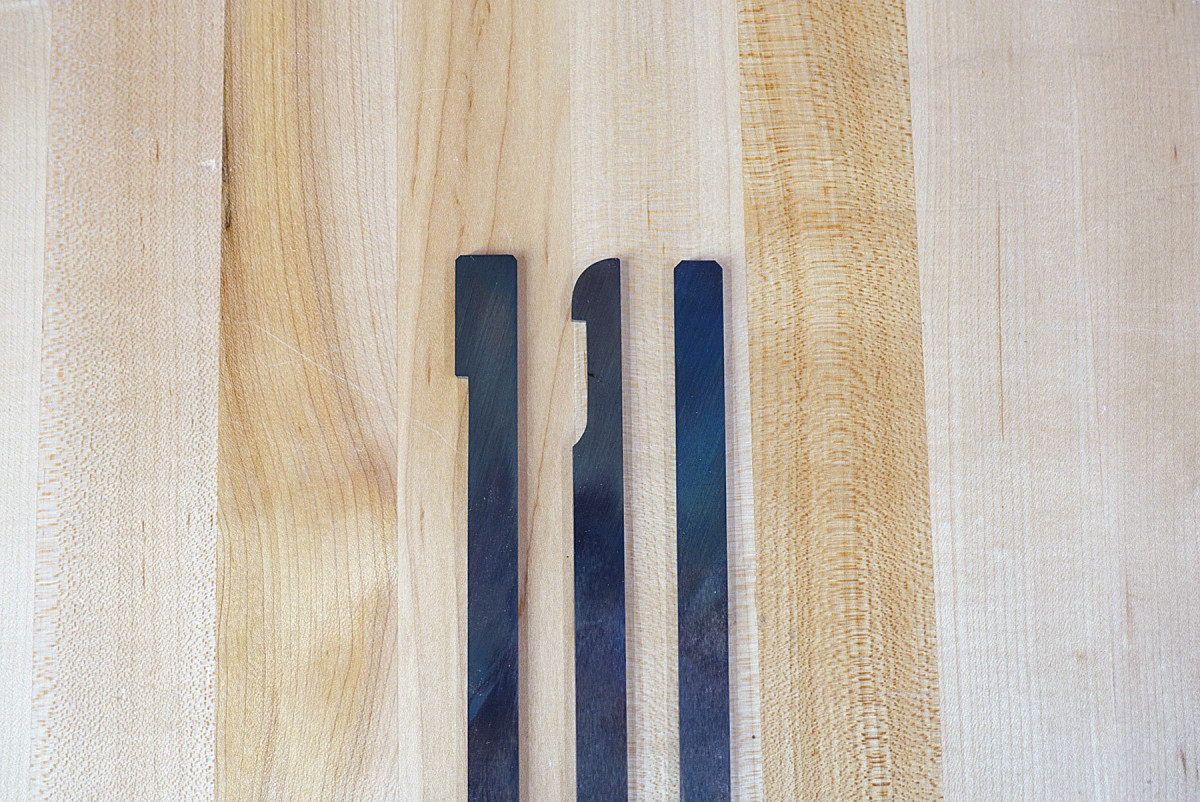
You’ll also need 1⁄8“-thick O1 tool steel blade blanks (surface ground on both faces) to match the size of the profile (two each per set). Tool steel is available in short lengths at a number of online suppliers, including McMaster-Carr (mcmaster.com) and Online Metals (onlinemetals.com).
The final length of the blades shown here is 8″ (7 3⁄8” works for the Roubo-style planes, too).
Time Well Spent
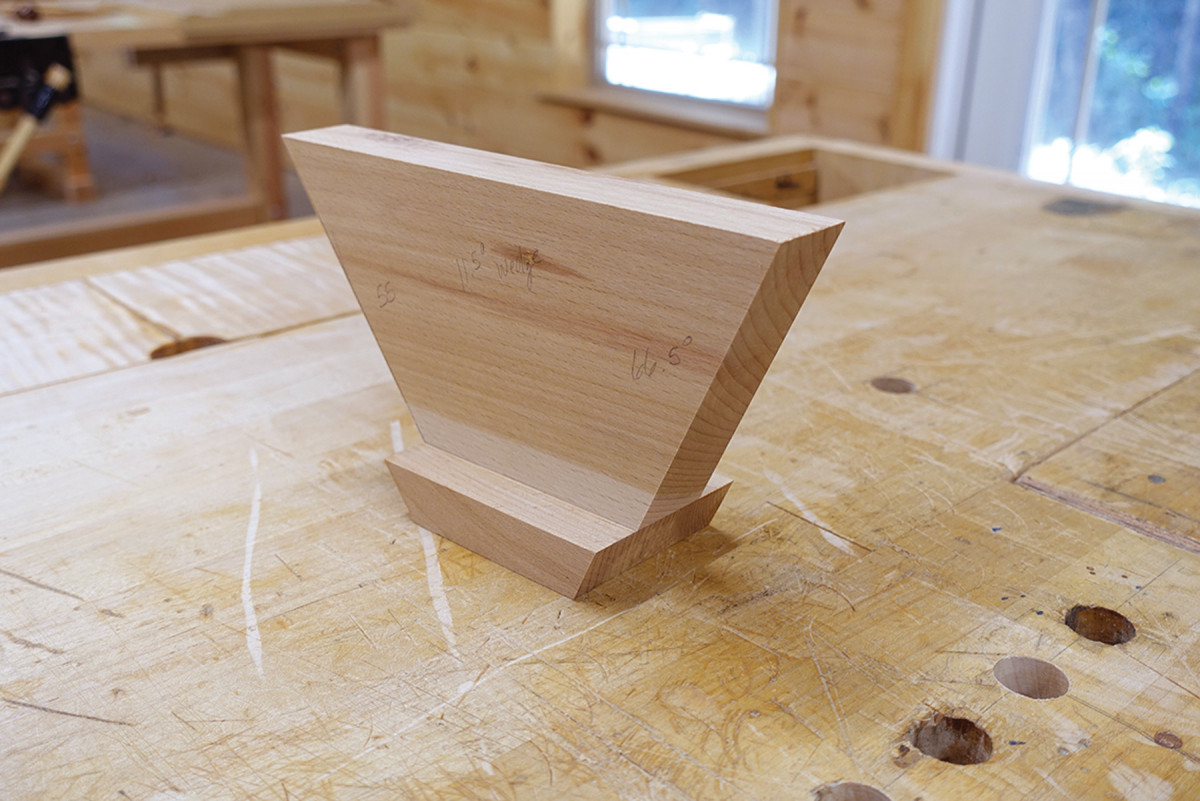
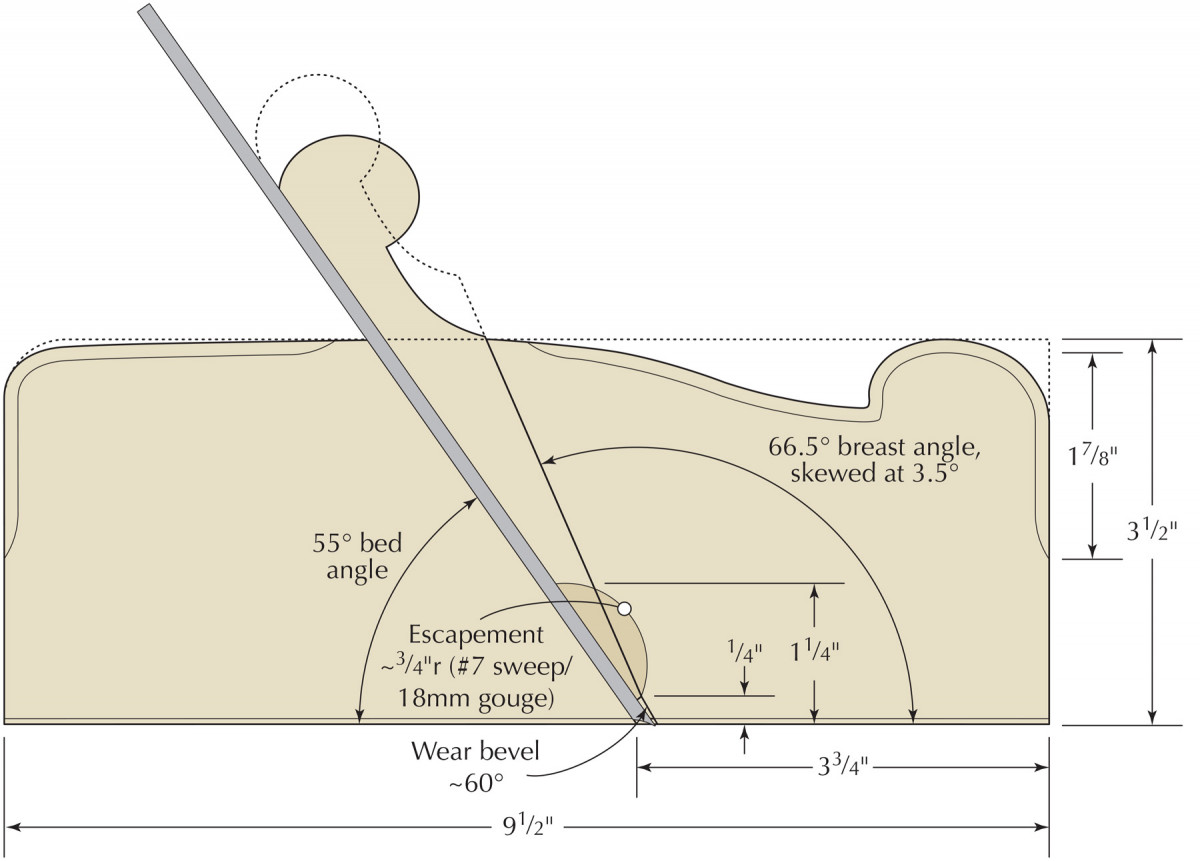
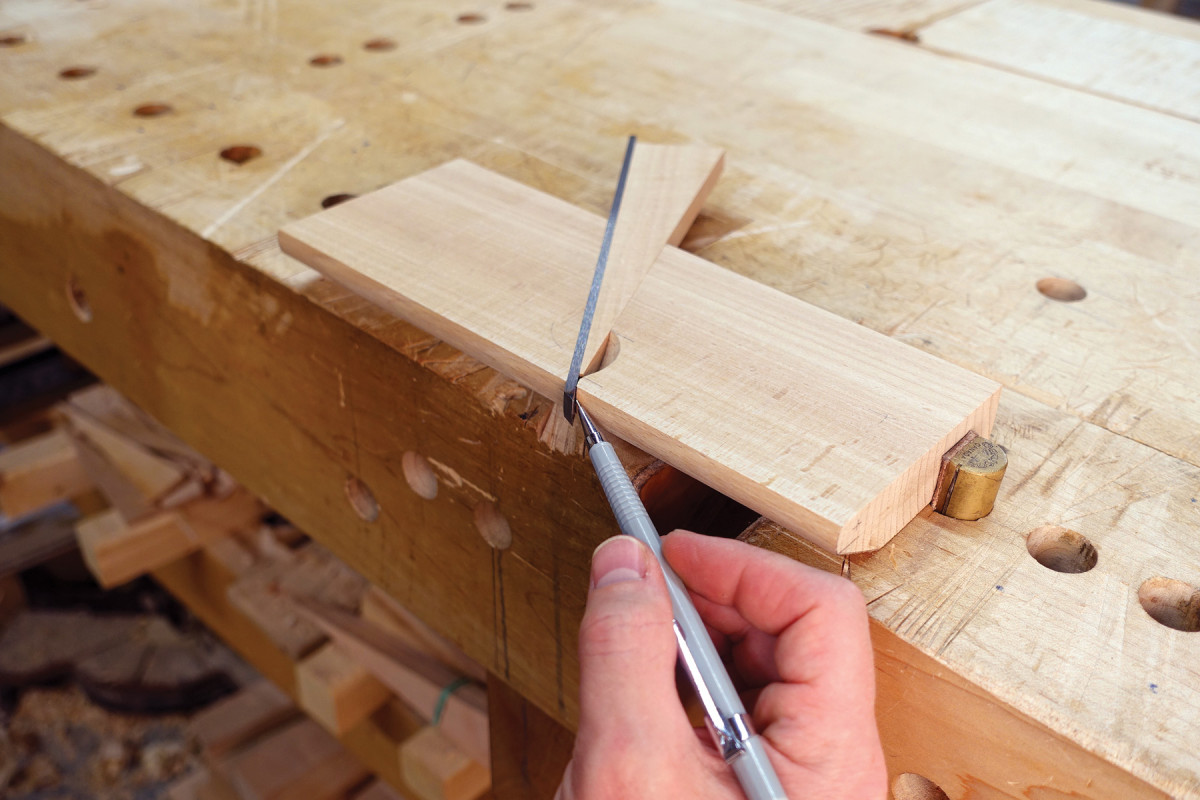
Planemaker’s helper. A guide that registers your cuts for the bed and breast angles is worth your time to make.
Making a jig is not how I like to spend shop time, but this saw guide is worth the investment. Consistent bed and breast angles are at the heart of efficient planemaking and this jig will help you achieve that.
Any stock that didn’t quite make the cut as plane material should work fine. Lay out the angles according to the drawing below, then cut freehand with a backsaw. Don’t fret if your angles aren’t perfect; any variation will be worked out later in the process of fitting the wedge. Just try to make the 55° side of the guide 90° to its face as best you can. This will simplify fitting the wedge later, as you will see.
Now true up these cut surfaces with a handplane. For the fence, choose some material that will overhang the bottom in all directions. Screw this to the bottom. Use the angled surfaces of the jig’s body to guide your saw in trimming the fence to match their respective angles. True up these surfaces with a handplane.
Dado – Triangle Style
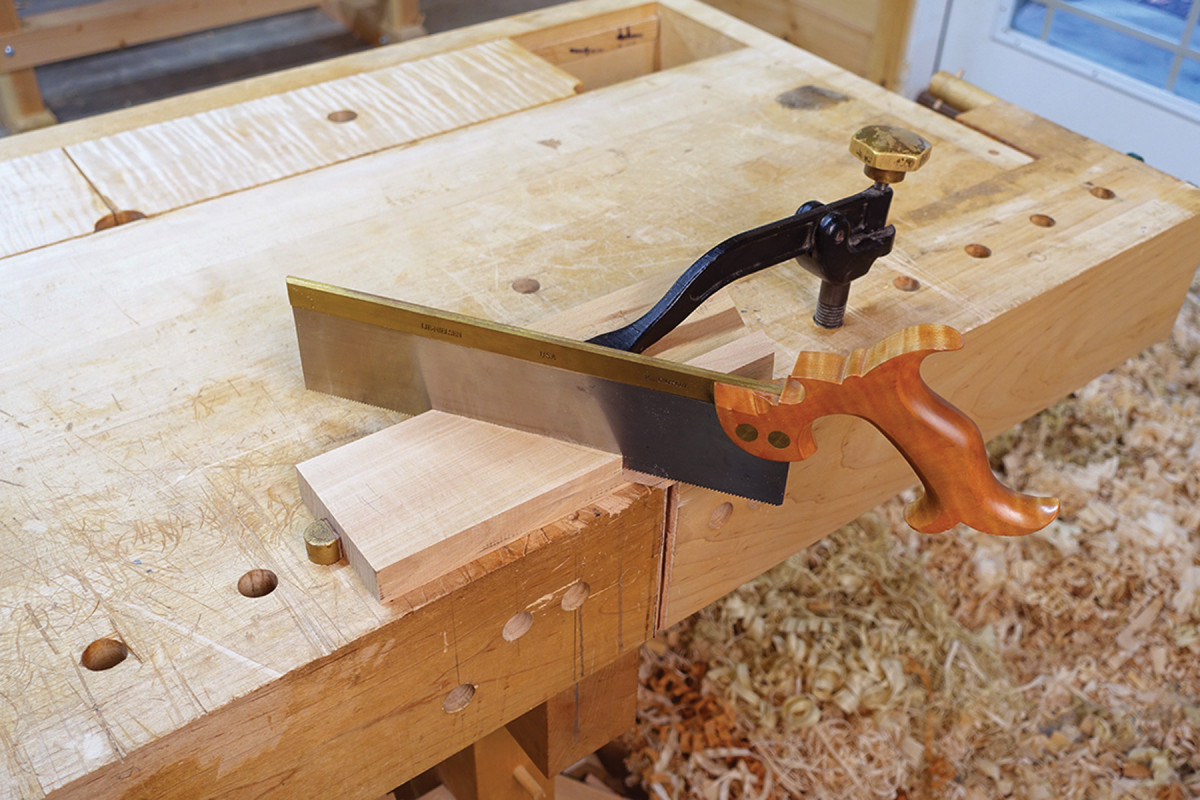
Bed cut. Secure your saw guide in place with a holdfast and cut down as deep as your plane blade is wide.
Creating the heart and soul of this plane is not much harder than making a dado…only it’s a triangular dado.
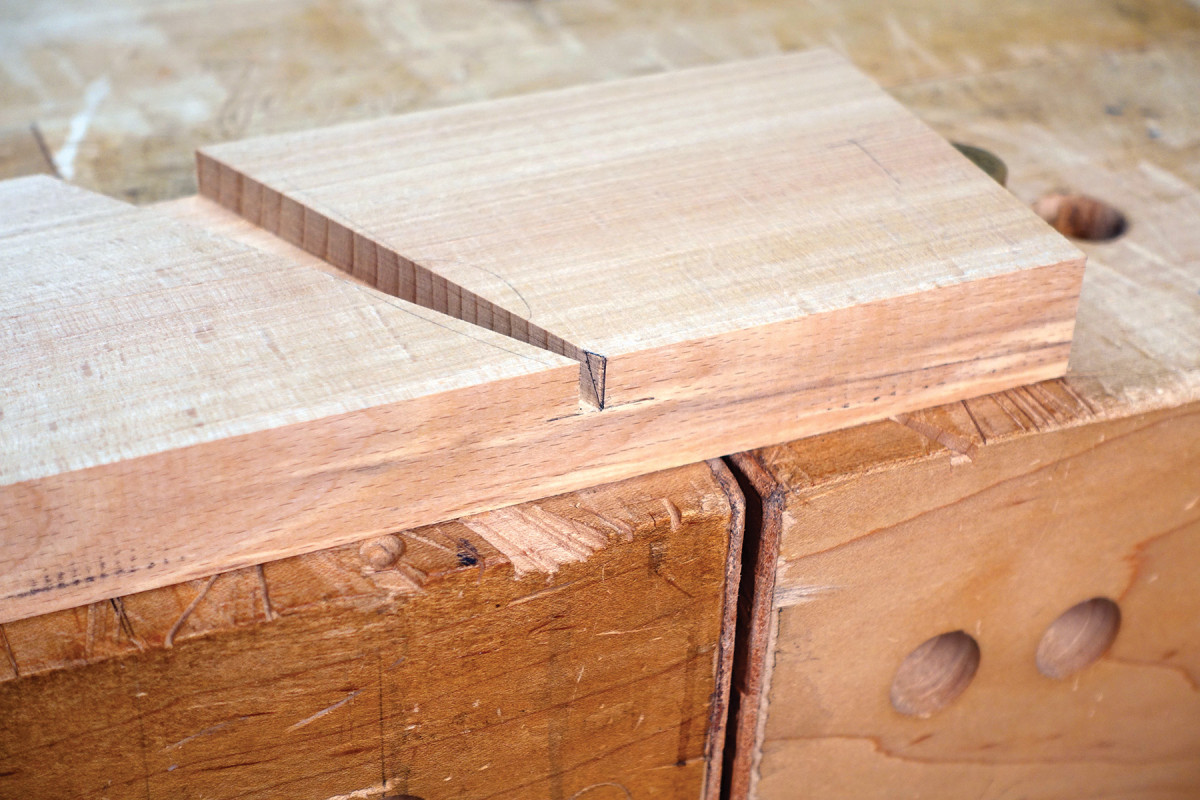
Orient the plane body so that the grain runs downhill from toe to heel. Lay out the width of your plane blade (1⁄4“, 3⁄8” or 1⁄2“, depending on the size plane you’re making) on the top and bottom of the plane body from the escapement side.
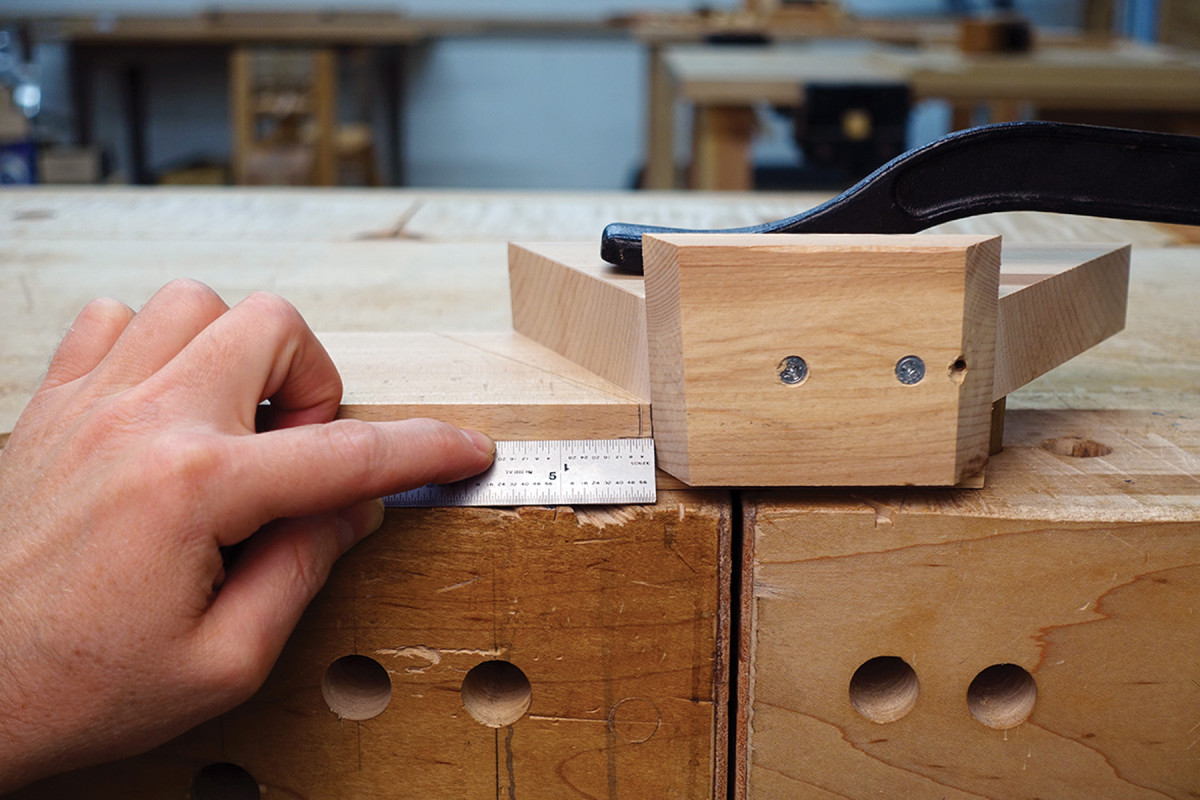
Breast cut. For the breast angle, align your saw guide forward 5⁄32″ at the depth or your previous saw line.
Secure the body between bench dogs, with the escapement side up and the sole toward you. Place your saw guide on the body so that the bed-angle side (55˚) is facing left and the fence is pressed against the sole.
Position your saw guide 33⁄4” back from the toe then subtract the thickness of your sawplate. Secure the guide in place with a holdfast, then register your crosscut backsaw against the guide and cut down the layout line for the plane blade.
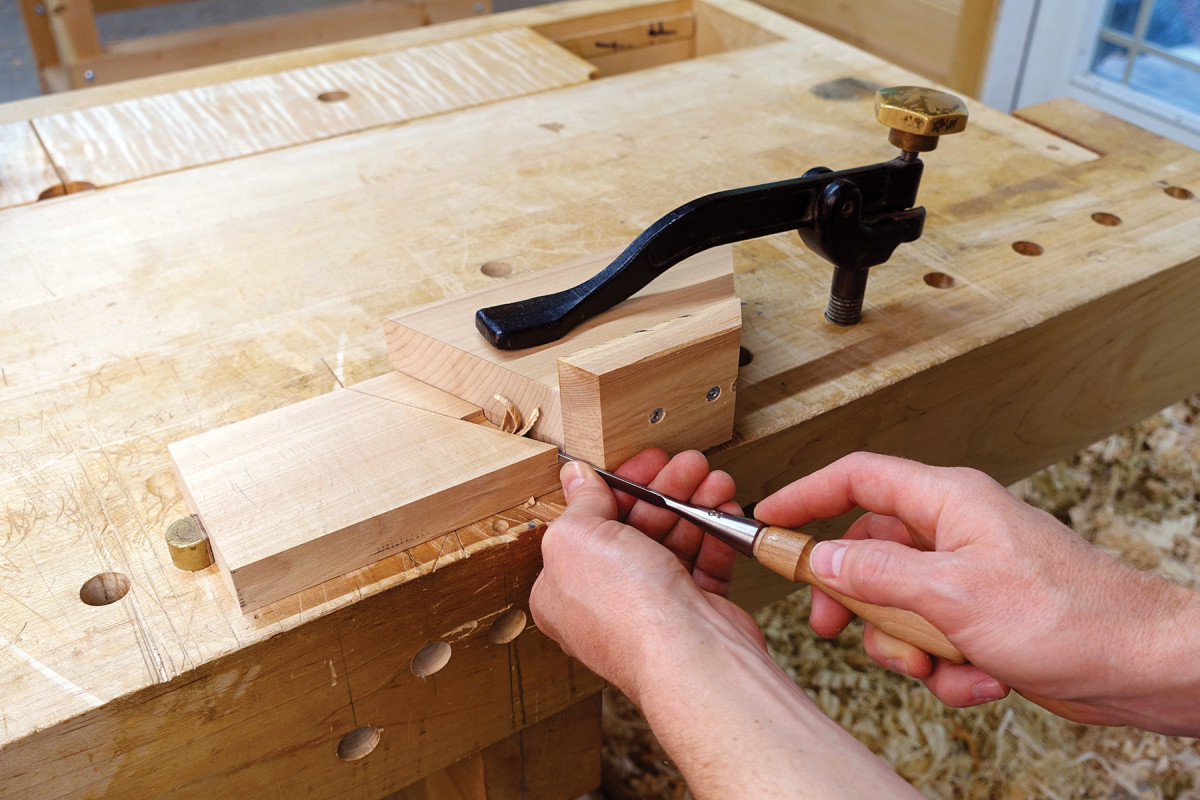
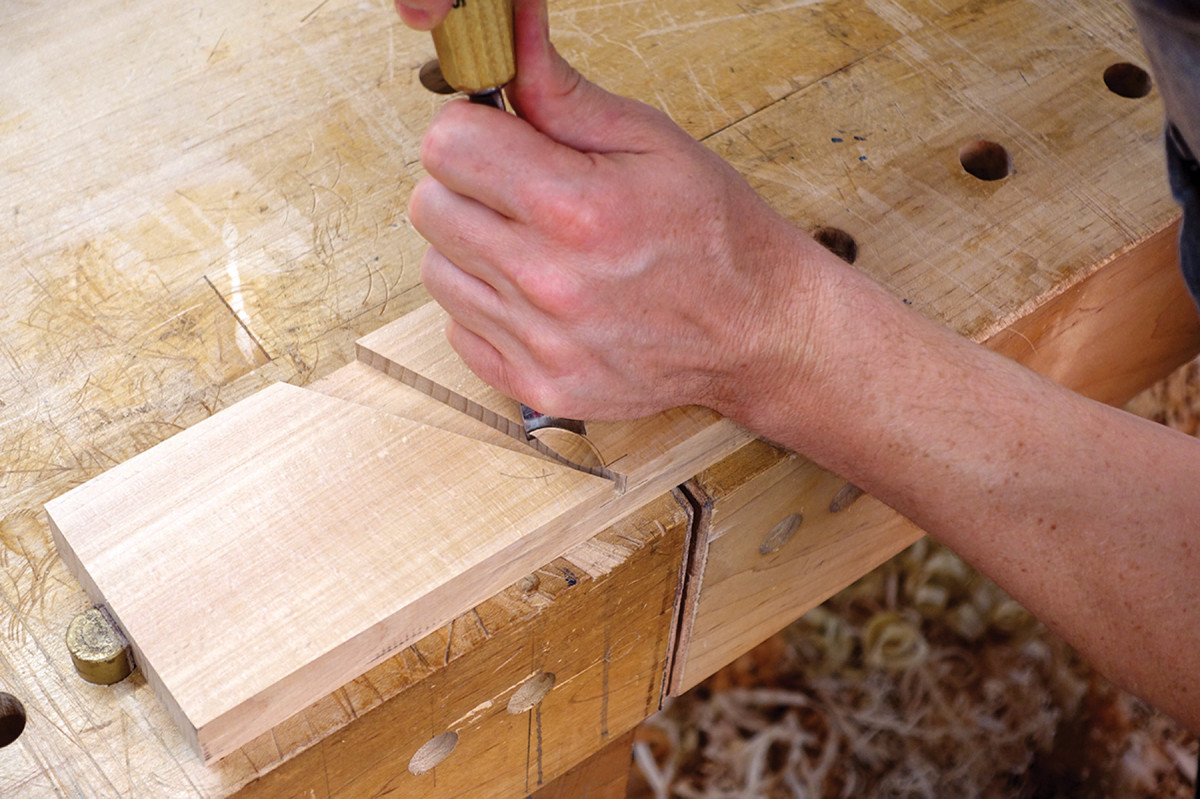
Controlled excavation. Use the saw guide as a reference to help remove the material without damaging the mouth. Work from the opposite side to remove the bulk of the waste.
Flip the guide from left to right so that the breast-angle side (65.5°) is now facing left. Place the guide forward of your bed-angle kerf on the sole by 5⁄32“. Because the breast cut is not at 90˚ – it’s skewed approximately 3.5˚ – it will not create a consistent-width opening. Therefore, measure forward 5⁄32” at the depth of the previous saw cut. Thus, 5⁄32” will be the maximum width of the opening at the sole.
Now excavate the material between the two kerfs down to the blade-depth line. You can use a 1⁄8” chisel or, better yet, a specialty 1⁄10” mortise chisel (Lie-Nielsen carries a nice one) to pass through the sole opening. Follow up with a narrow blade in your router plane to achieve a consistent depth. If you don’t have a router plane, simply undercut the dado slightly so that the blade and wedge will seat snuggly at the top and bottom.
Don’t Open Wide
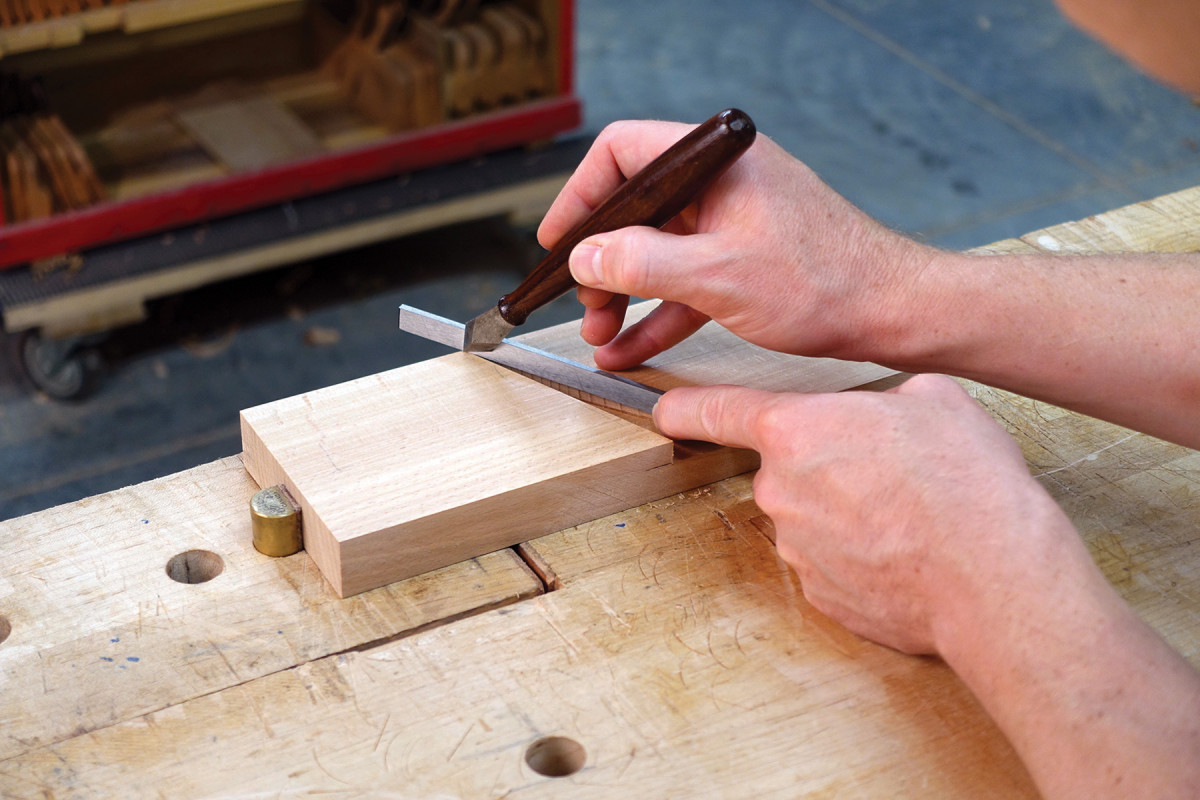
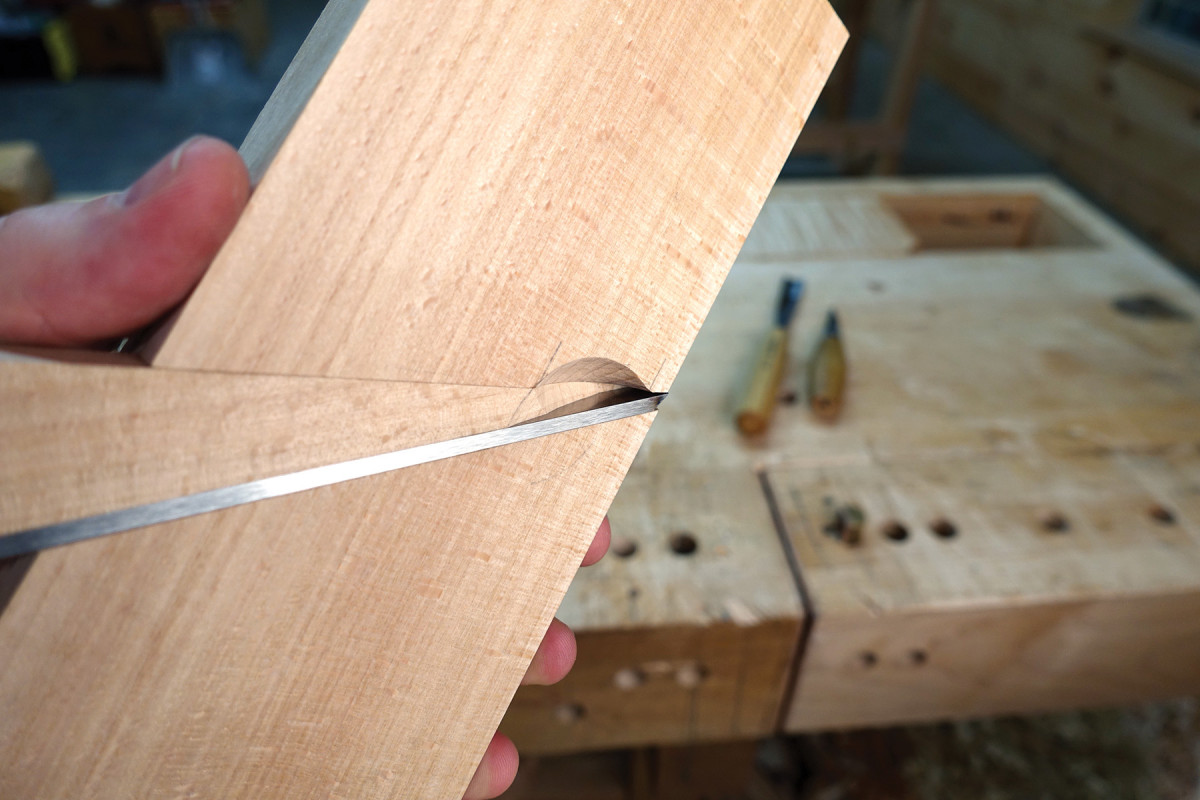
Sole material. Use the thickness of your blade to mark off how much material needs to be removed so the blade can pass through the sole.
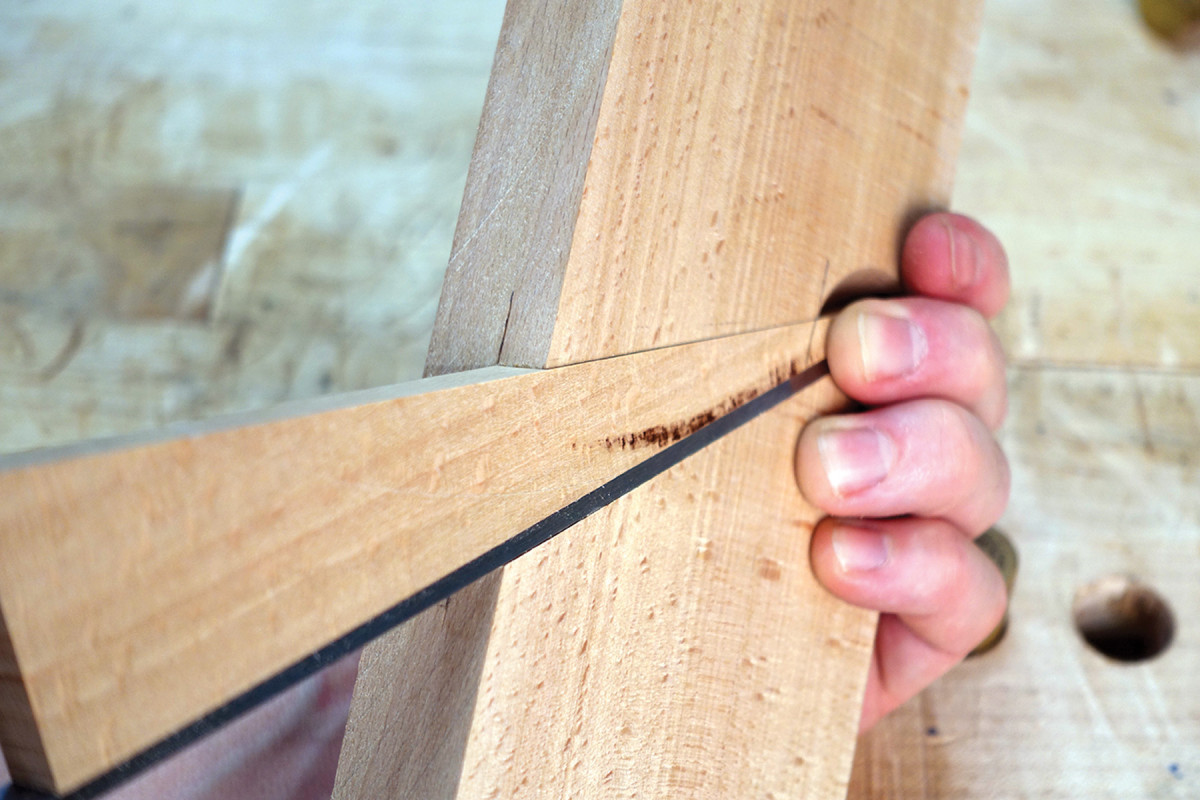
Because the breast is skewed, you will need to remove some additional material so that the blade can pass through the sole.
Use your plane blade as a guide to mark out how much material needs to be removed. Position the blade along the bed angle and let it overhang the sole. With your striking knife, mark along the front of the blade across the portion of the breast that blocks the blade’s passage through the sole. Transfer this line down and square across the sole. Use a chisel, working down from the side and up from the sole, to clear this material. Be careful not to remove too much. You will refine the opening later.
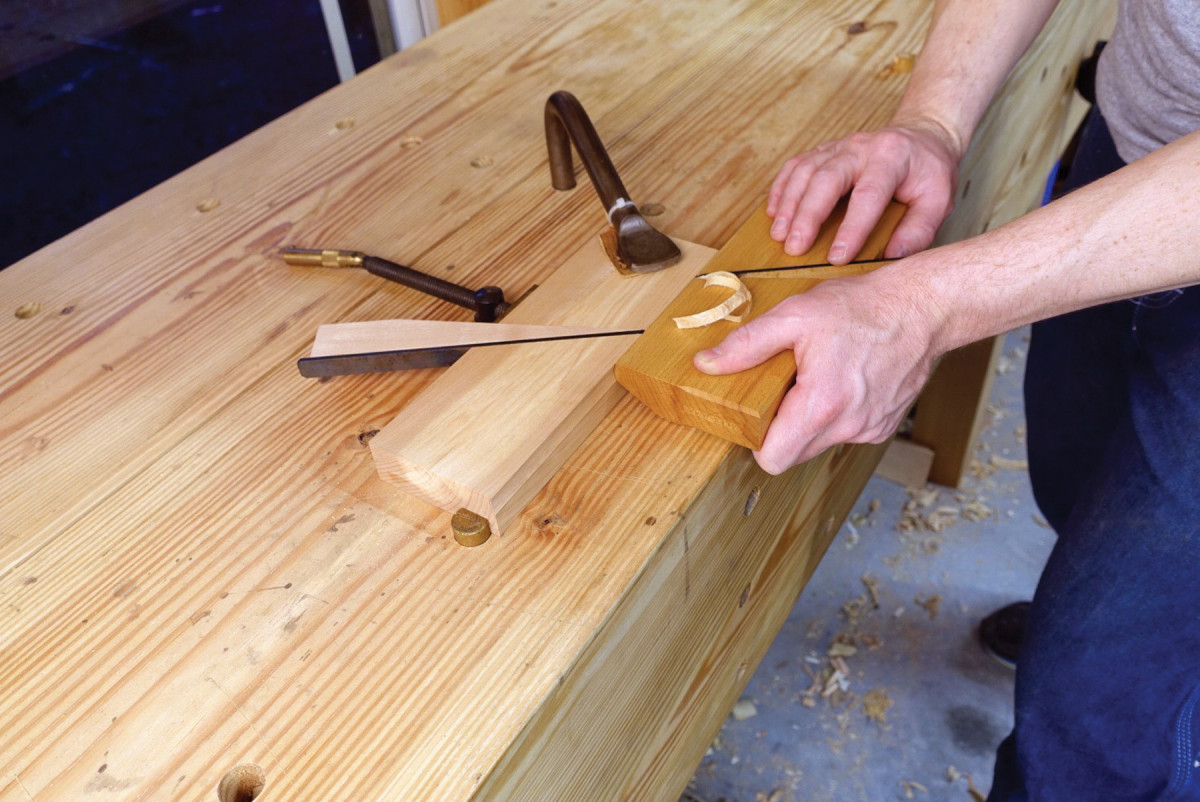
Skewed for removal. The skewed breast will leave a triangular bit of material that will need to be removed.
The lower and upper limit of the escapement should be about 1⁄4” and 1 1⁄4“, respectively, from the sole. I find that an 18mm, No. 7 gouge works well for carving it. You want the shape to look almond-like, with the wider part toward the sole. Don’t carve clear down to the full depth of the breast wall; allow a narrow area between the bottom of the escapement and the breast wall for the tip of the wedge to taper smoothly toward the mouth opening.
Wedge Work
Leave a little. Don’t carve clear down to the bottom of the breast wall. The wedge needs to have support against the breast wall all the way to its tip.
Make a wedge using quartersawn material; you want the sides of the rays to be exposed on the sides of the wedge, just as they are on the plane body.
Tight tip. The wedge should fit tight at the tip rather than at the upper portion of the wedge. (There’s a hairline gap at the top, but none at the bottom.)
Dimension your wedge stock 71⁄4” long (or longer) by 1 1⁄4” thick, by the width of your blade, plus about 1⁄64“. (This extra width will be smoothed flush to the side of the plane later.)
Mark out an 11.5˚ taper along the length of the workpiece, and a 3.5˚ skew across its width to match the breast skew angle. Place the piece in your vise and rip the wedge free. If your stock was long enough, save your offcut for making a second wedge.
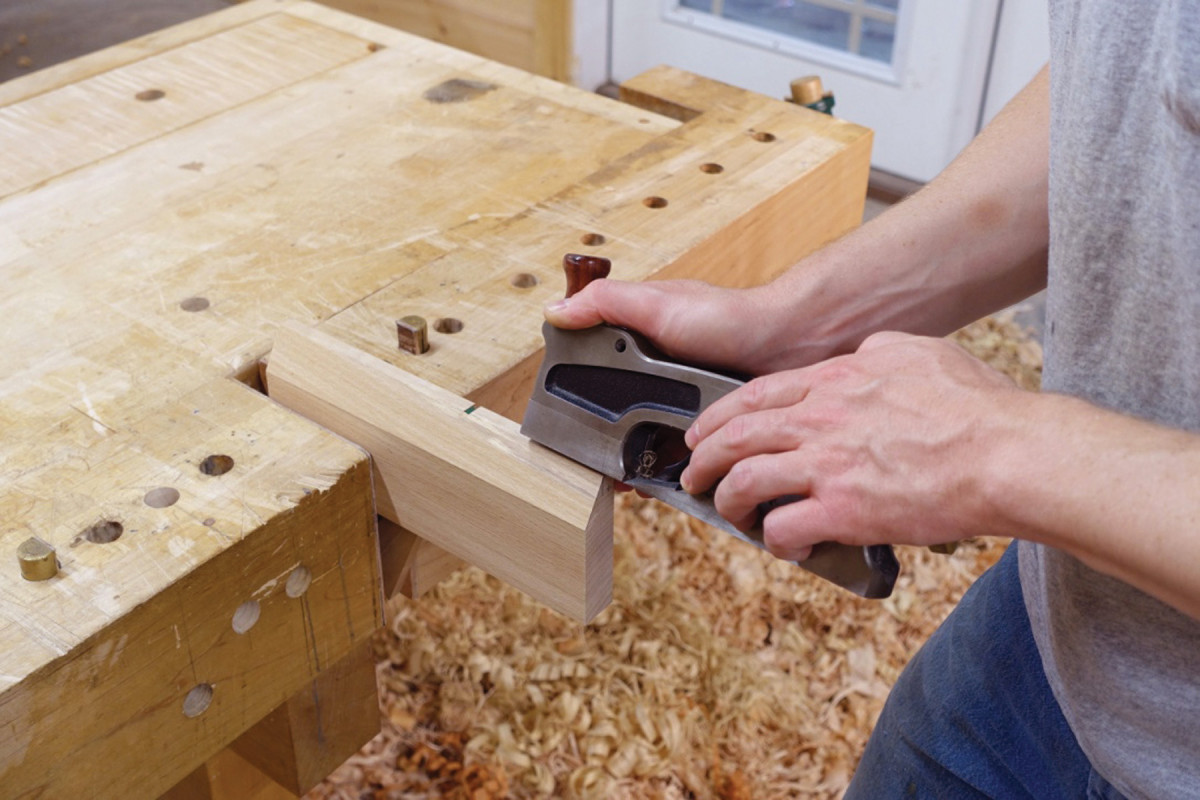
Make sure the bench is flat. Placing both the wedge and the shoulder plane flat on the benchtop will keep the edge of the wedge square while making adjustments to its fit.
True up the edges of the wedge with a small shoulder plane and check to ensure that the angles are correct (90˚ for the bed side of the wedge, and make sure the breast side corresponds to the breast skew angle in the body). Small adjustments can be made to the skew angle of the wedge by pivoting the iron in the shoulder plane body so that it takes a slightly deeper cut on the side that needs more material removed.
Straight as an Arrow
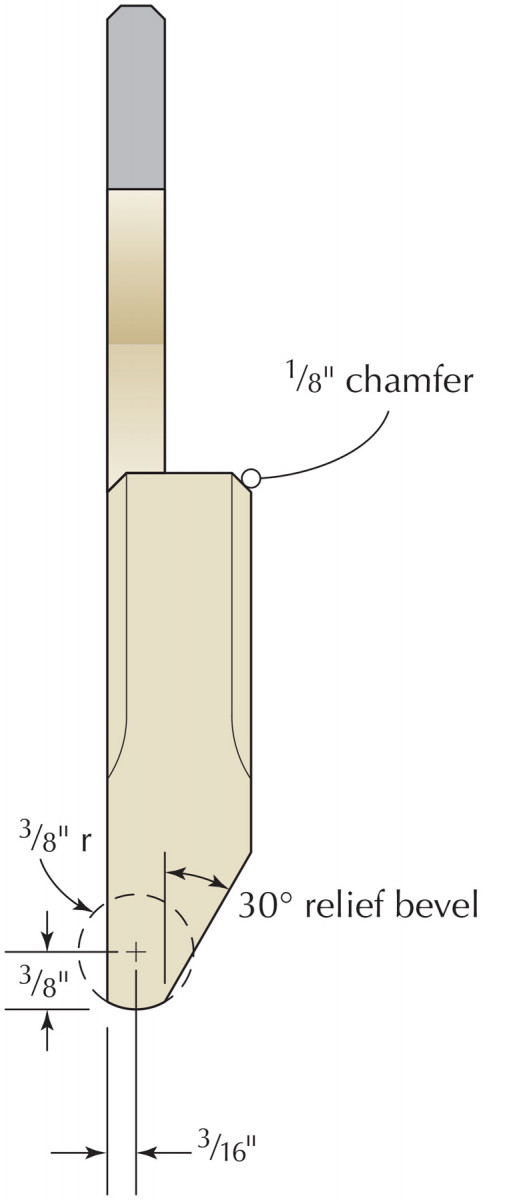
Profile
Now you’re ready to get started on preparing and shaping the iron. Flatten the lower 21⁄2” or so of the blade on front and back. Do this by rubbing it back and forth on a 3″-wide strip of #120-grit aluminum-oxide sandpaper adhered with spray adhesive to a flat surface. (A granite surface plate or even the bottom of jointer plane sole makes a great flat surface.)

No. 6 Plan – bottom view.
Use enough pressure to let the paper do its work, but don’t press too hard or you’ll round the edges excessively. You’re done when you achieve a consistent scratch pattern on both faces.
No. 6 Plan – bottom view.
Your blade is now ready for test-fitting the wedge.
Snug Fit in All the Right Places

Round layout. Lay out the profile on both ends. Use a compass to accurately mark the arch.
This is where the rubber meets the road. A well-fitted wedge and iron is half the battle in making a great-functioning plane. The key is to get the wedge to have a tight fit at its tip and to progressively diminish its tight fit as it moves away from the tip.
So in essence, the wedge will have a slightly more acute angle than the bed and breast angles. If the bed and breast have an 11.5˚ angle, then the wedge would be slightly less than 11.5˚. This will ensure that the blade is always securely fixed where it needs it most: nearest to where the cutting action will take place.
Don’t wander. Try to take passes straight in line from one end of the profile to the other to get consistent results.
A good clue that the wedge has a slightly more acute angle is that when you place it in the plane with hand pressure, at the top of the plane there will be a small gap between the wedge and the breast angle. If the gap closes up once the wedge is tapped with a plane hammer, then you are just about perfect. A hairline gap at the top of a wedge and a tight fit at the bottom is preferred.
To achieve this, ensure that the bed and breast areas are clear of any stray fibers in the corners. Place the blade in the body and test-fit the wedge. Determine if the angle of the wedge needs to increase or decrease.
Make adjustments to the wedge by laying the wedge flat on the benchtop and grip it with one hand. Use a sharp shoulder plane to take tapering cuts along the length of the non-skewed side of the wedge to either increase or decrease its angle.
If the fit is too tight at the top, for example, take overlapping cuts starting with short passes at the heel of the wedge, and make the passes progressively longer until you take a full-length pass all the way to the tip.
Making the Rounds
Scribe & grind. I use a shop-made scribe to carefully transfer the sole shape onto the blade. Then I grind to the line.
Now you’re ready to shape the sole. You’ll make the round first, because you’ll use it later to shape the hollow profile. Lay out the “round” profile on the toe and the heel as shown in “Elevation” (page 25) and the photo above.
Note that the drawing shows center points for using a compass to lay out a 3⁄8“-radius arch (which corresponds to the No. 6). A compass is the most accurate way to do this and keep both ends of the plane profile coplanar. It’s important that the profile not twist or your plane won’t function correctly.
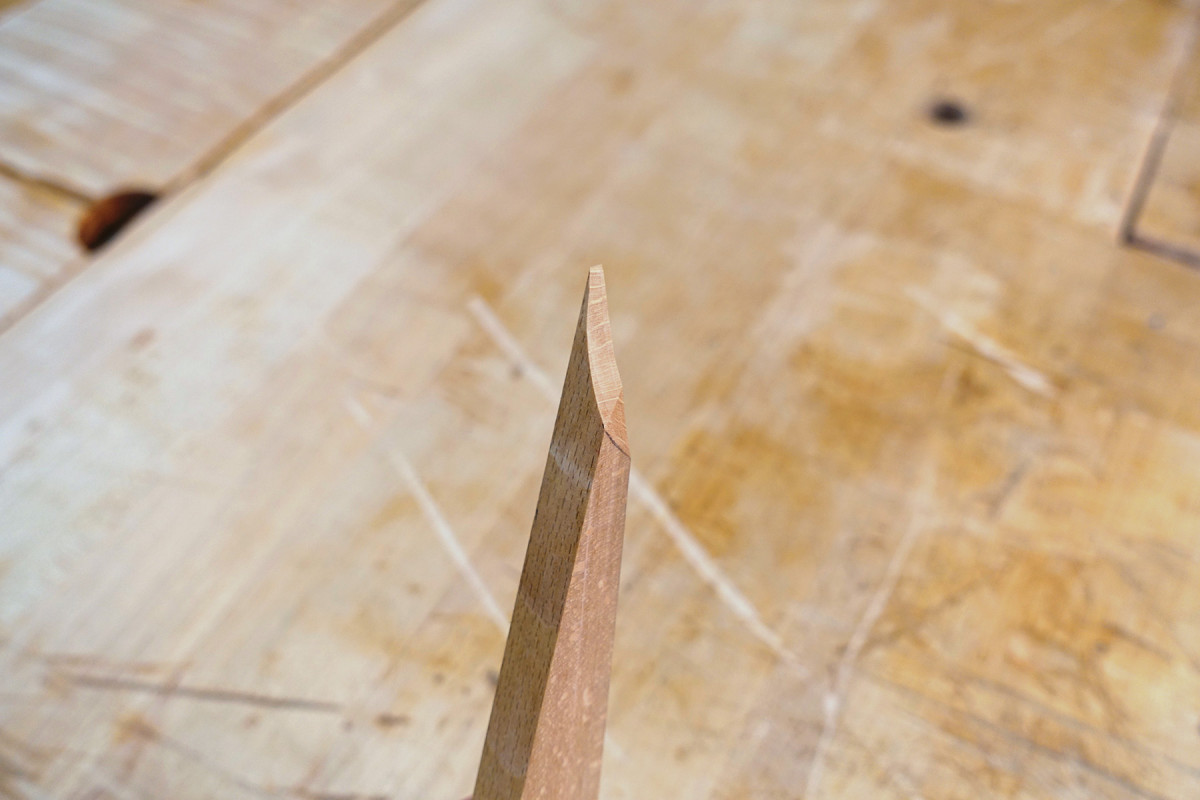
Take it or leave it. Make a sneck for easier adjustments or leave the iron as is. It’s a preference thing.
Now give the profile some clearance along the blind side (the side without the escapement) of the plane body by striking a 30˚ angle up and away from the corner of the profile. Go ahead and remove about 90 percent of this bevel with a plane so that cutting the round portion is easier.
Because you don’t have a curved profile plane to match your radius (otherwise you wouldn’t be making this, right?) you can use any flat-soled plane to cut the profile. You’ll end up with a faceted surface that can be smoothed round with a few light passes of #220- or #320-grit sandpaper. Remove just the tips of the facets and no more.
Before you plane the profile, insert the blade, pull it back slightly from the mouth (so that you don’t nick it), and insert the wedge. This will introduce any stresses to the plane from the wedging action before you cut the profile.
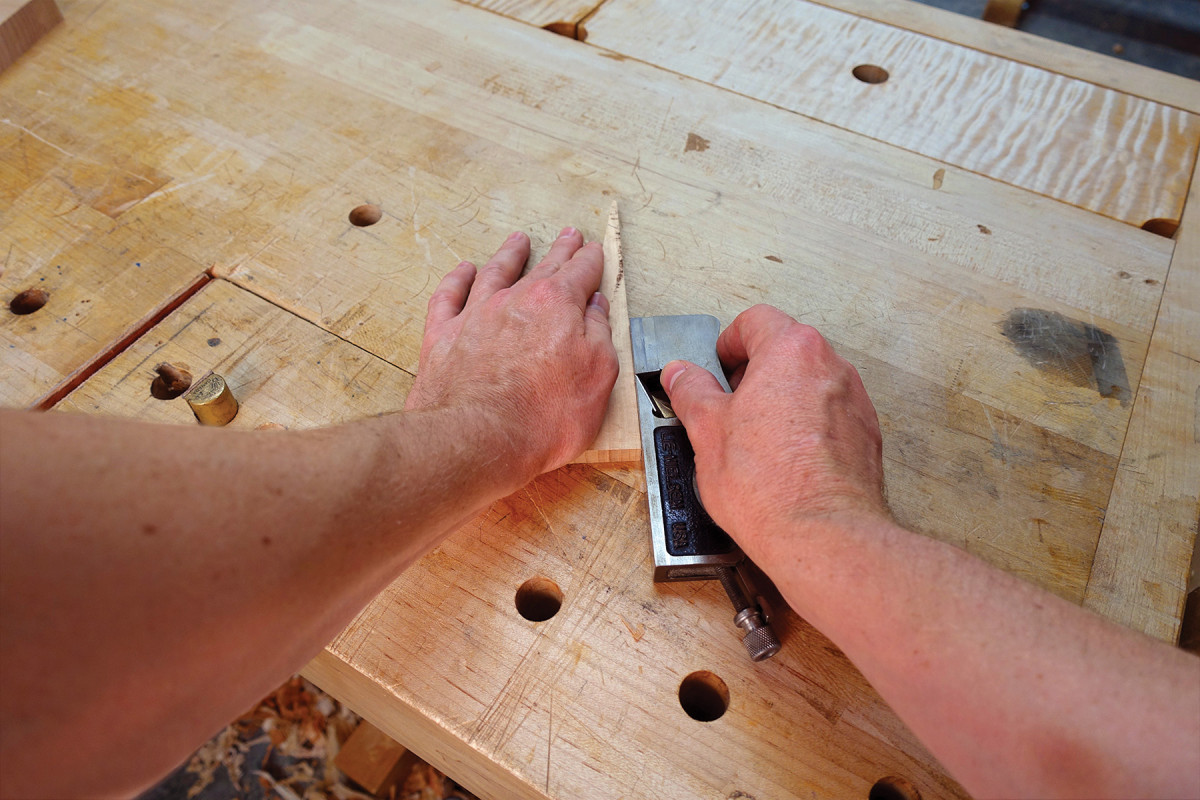
Now secure the body in your vise with the sole facing up and toe toward you – but secure it only by part of the heel section to avoid distorting the plane along its length (which could throw off the profile once you remove it from the vise). I find the opening of my tail vise works perfectly. Plane the profile from toe to heel working with the grain.
Finish up the profile by removing the remainder of the side bevel with a handplane. Secure it on the benchtop between two bench dogs as before, and plane down to the profile width. Take care to not remove the side of the mouth right up to a knife’s edge; that would weaken this point and cause shavings to jam in this area and be a constant problem, so leave it a bit heavy.
Metal Work
A little mouthy. A mechanical pencil makes an offset line that is consistent and easy to see.
Put machinist layout fluid on the lower edge of your blade. Wedge the blade in the plane and place it in your tail vise with the sole up. Use a scribe to trace the sole’s profile onto the blade. Grind the profile, then grind a detail of your choice (or not; it’s optional) on the heel of the blade.
Roubo shows a sneck on his irons – a small flag-shaped bit of material at the heel that allows the iron to be retracted or removed with a light hammer strike upward. (The alternative method to remove the iron is to strike the top of the grip at the toe with the non-metal side of a plane-adjusting hammer.)
A sneck can be made as easily as notching out a bit of the steel on the side of the iron near the heel. Or, you can replicate Roubo’s sneck style by selecting a piece of steel that is at least 1⁄8” wider than the required blade width. Grind the lower portion down to the required blade width while leaving the last 11⁄8” or so of the heel portion the full width.
To grind the hollow profile, I use a narrow metal-working cut-off wheel mounted on my grinder.
Heat Treating
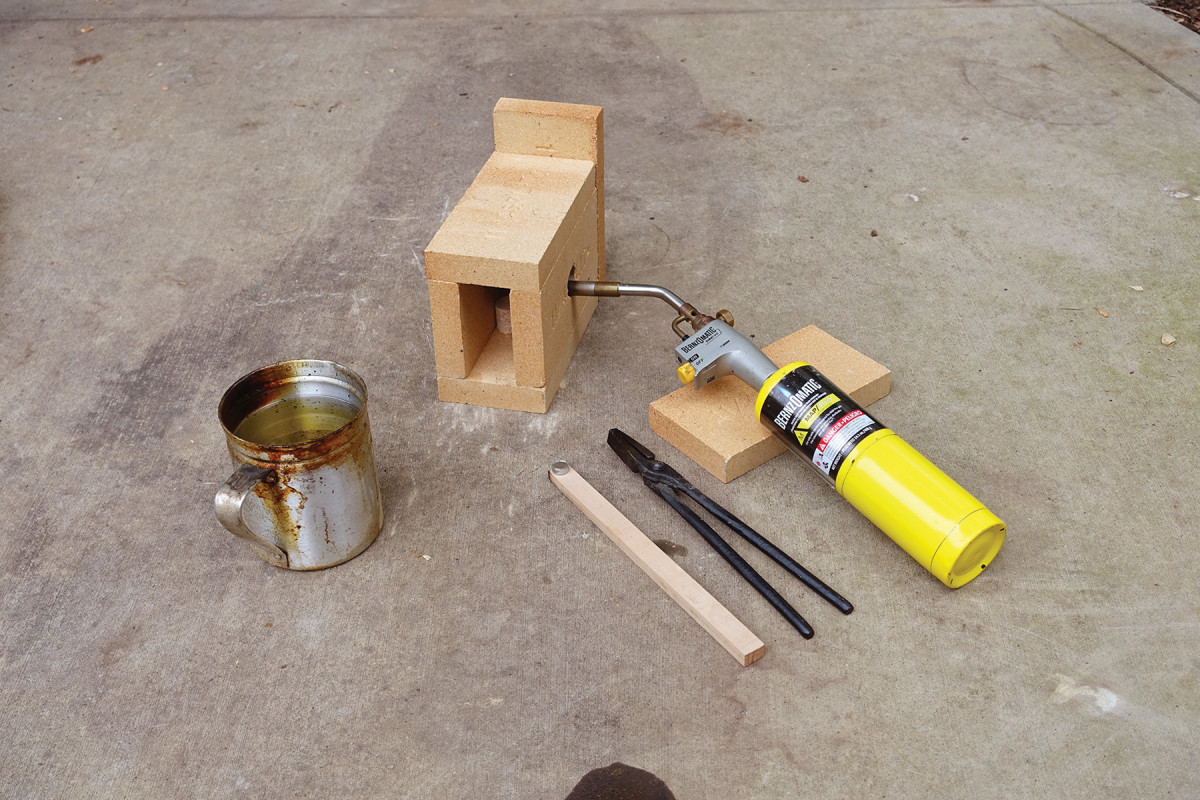
Even heat. A firebrick enclosure helps evenly distribute heat on the tool steel.
Heat treating O1 tool steel is simple. In short, bring it to critical temperature, quench it in vegetable oil, then temper it in an toaster oven or regular kitchen oven for one hour at 400˚.
Hardening steel is the easy part; minimizing warpage is another. The road to success is to evenly heat the metal. Creating an enclosure with something such as fire brick will help you achieve this.
Heat the steel slowly using a simple MAPP gas torch. Heat it more slowly than you think you should. If one side is hotter than the other when you quench it in the oil it will warp. So heat slowly.
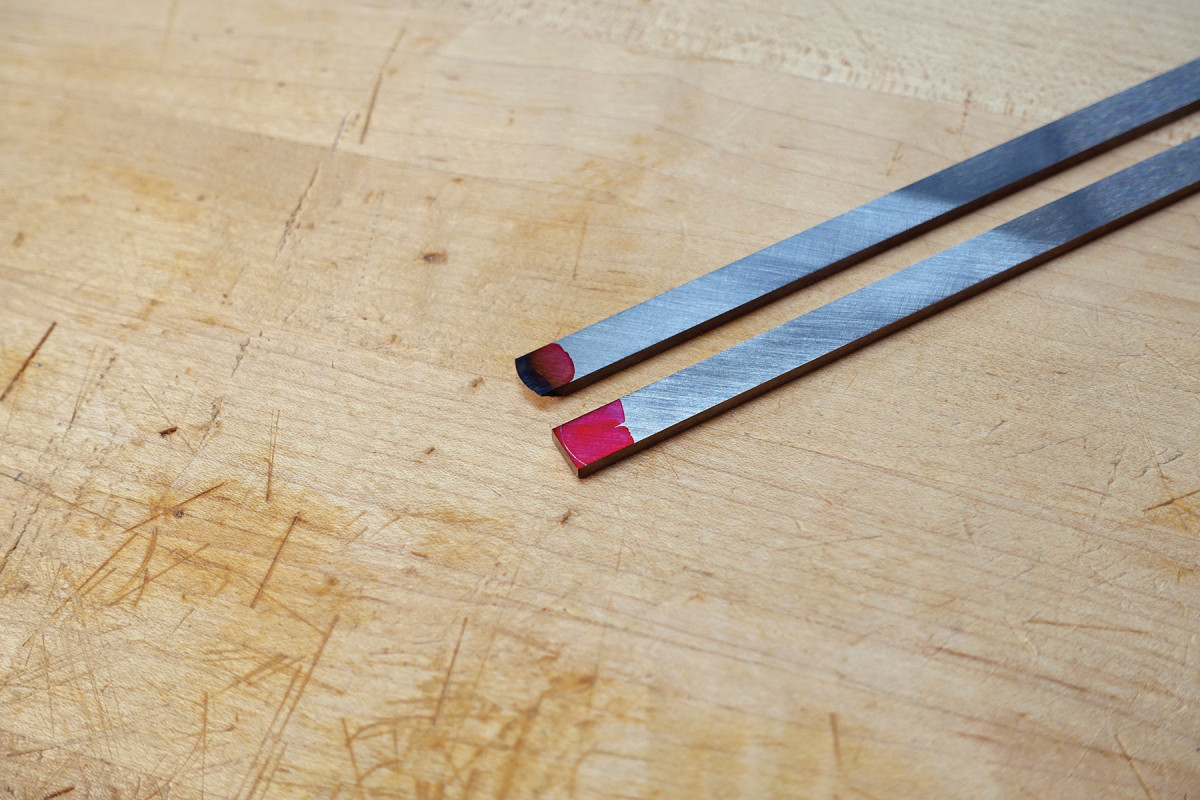
There are a few methods to determine when you have reached critical temperature. Avoid relying on color because ambient light will affect the color you see. Just like a flashlight appears brighter at night than in daylight, so too color alone in changing light conditions can be deceptive. The simplest way to check that you have reached critical temperature is to use a magnet, because O1 tool steel loses its magnetism at approximately this temperature. The stick of maple shown below has a rare-earth magnet glued to the end; it’s a simple tool for safely checking the steel as it reaches critical temperature. Just periodically remove the steel briefly from the flame and check it with the magnet.
Another option is to watch the surface quality of the steel. It will change when the critical temperature is reached because the carbon begins to flow within the steel and some decarburization takes place at the surface, thus changing how it looks. It can be described as the steel “sweating” or having a “flushed” appearance. Accompanying this change will be a noticeable uptick in the “brilliance” of the steel. In other words, rather than seeing a particular color change you would simply see the color become more radiant.
Once critical temperature is reached, quench the steel in oil by plunging the blade straight down vertically, not leaning to one side or the other. Now immediately move to your oven to temper for one hour at 400˚.
Boxy or Curvy?
One for show. The wedge tip curve is actually two cuts. One makes the “eye” shape while the other visually continues the circular shape of the escapement around.
While the blade is tempering in the oven take this time to round the heel of the grip on the body. A carving gouge is the perfect tool for this. Simply place the body on its side and pare straight down across the heel. Cut the toe profile if desired or it leave square, then chamfer the top edges and refine the surfaces.
Sharpen
No catch. The wedge tip must fit tight on all three sides or shavings will catch.
After your blade is tempered and cooled, flatten it again to remove any distortion from the heat.
Start with #120 grit as before, then follow with #180- through #320-grit sandpaper on the cutting face, then jump to a #1,000-grit stone.
Stop there and put layout fluid on the face of the blade and scribe the profile on the blade end as before. Now final-grind and hone the edge.
To sharpen the blade for the hollow, I prefer to use a ceramic slipstone.
Clear Your Throat
Line ’em up. Use the finished round to shape the matching hollow profile.
It’s time to refine the mouth opening and, at the same time, cut the wear bevel angle.
Again wedge the blade in place, but leave it extended beyond the sole a short distance. Using a mechanical pencil, strike a mouth line on the sole by resting it against the blade as a reference while drawing that mouth opening line.
Using the mouth-opening line as a reference, mark your wear bevel angle (see the “Profile” on page 25). It will lie approximately midway between the bed and breast angle. Now, cut the wear bevel with a chisel, using a combination of cuts from the side and bottom.
Using the same gouge as before (18mm, No. 7 sweep), shape the wedge tip to match the curve of the escapement. I find a spoon-carving knife is a great tool for refining the shape.
Tune-up
Take a few test cuts (of course working with the grain). Ensure that the sole is straight and that the blade profile matches the sole as closely as possible.
If you find shavings keep getting jammed in the mouth, it is likely due to one (or more) of the following: a dull blade; a blade profile that doesn’t match well or extends out too far at the blind side; a mouth that is too small for the depth of cut; a wedge tip that extends into the wear bevel; or a wedge tip that is not tight-fitting, which creates a gap in which shavings catch.
You might need to adjust the wedge angle slightly to compensate for slight thinning of the blade edge during flattening and sharpening.
Now bring the thickness of the wedge flush with the sides.
All that’s left to do is cut the wedge’s finial profile with your coping saw. The 18mm, No. 7 carving gouge will work well for cleaning up some of the shapes.
To make the matching hollow, follow all the steps above up until shaping the sole. For that, you’ll use your new round plane to cut the hollow profile. If you were careful to make both bodies the exact same thickness, then you can align the profiles for cutting by laying both planes on their sides and sliding the round to plane the hollow.
Finish
I finish my planes with a coat of Tru-Oil Gun Stock finish. Let the finish thoroughly cure unassembled to avoid having your parts seize together. Put a light coat of jojoba oil on the blade for rust resistance and ease of adjustment.
Here are some supplies and tools we find essential in our everyday work around the shop. We may receive a commission from sales referred by our links; however, we have carefully selected these products for their usefulness and quality.